Loading ...
Loading ...
Loading ...
P9
5. WIPER BLADE - OPTIONAL
STEP 1:
Turn the cleaner over to
access the nozzle.
STEP 2:
Grip the wiper blade and
locate into the slot on the
oor nozzle.
STEP 3:
Slide the wiper blade into
the slot until fully located.
The front wiper blade supplied in the instruction manual package is not necessary for normal
cleaning. Fitting the wiper blade will improve the energy eciency of the product, but will make the
product more dicult to push and manoeuvre.
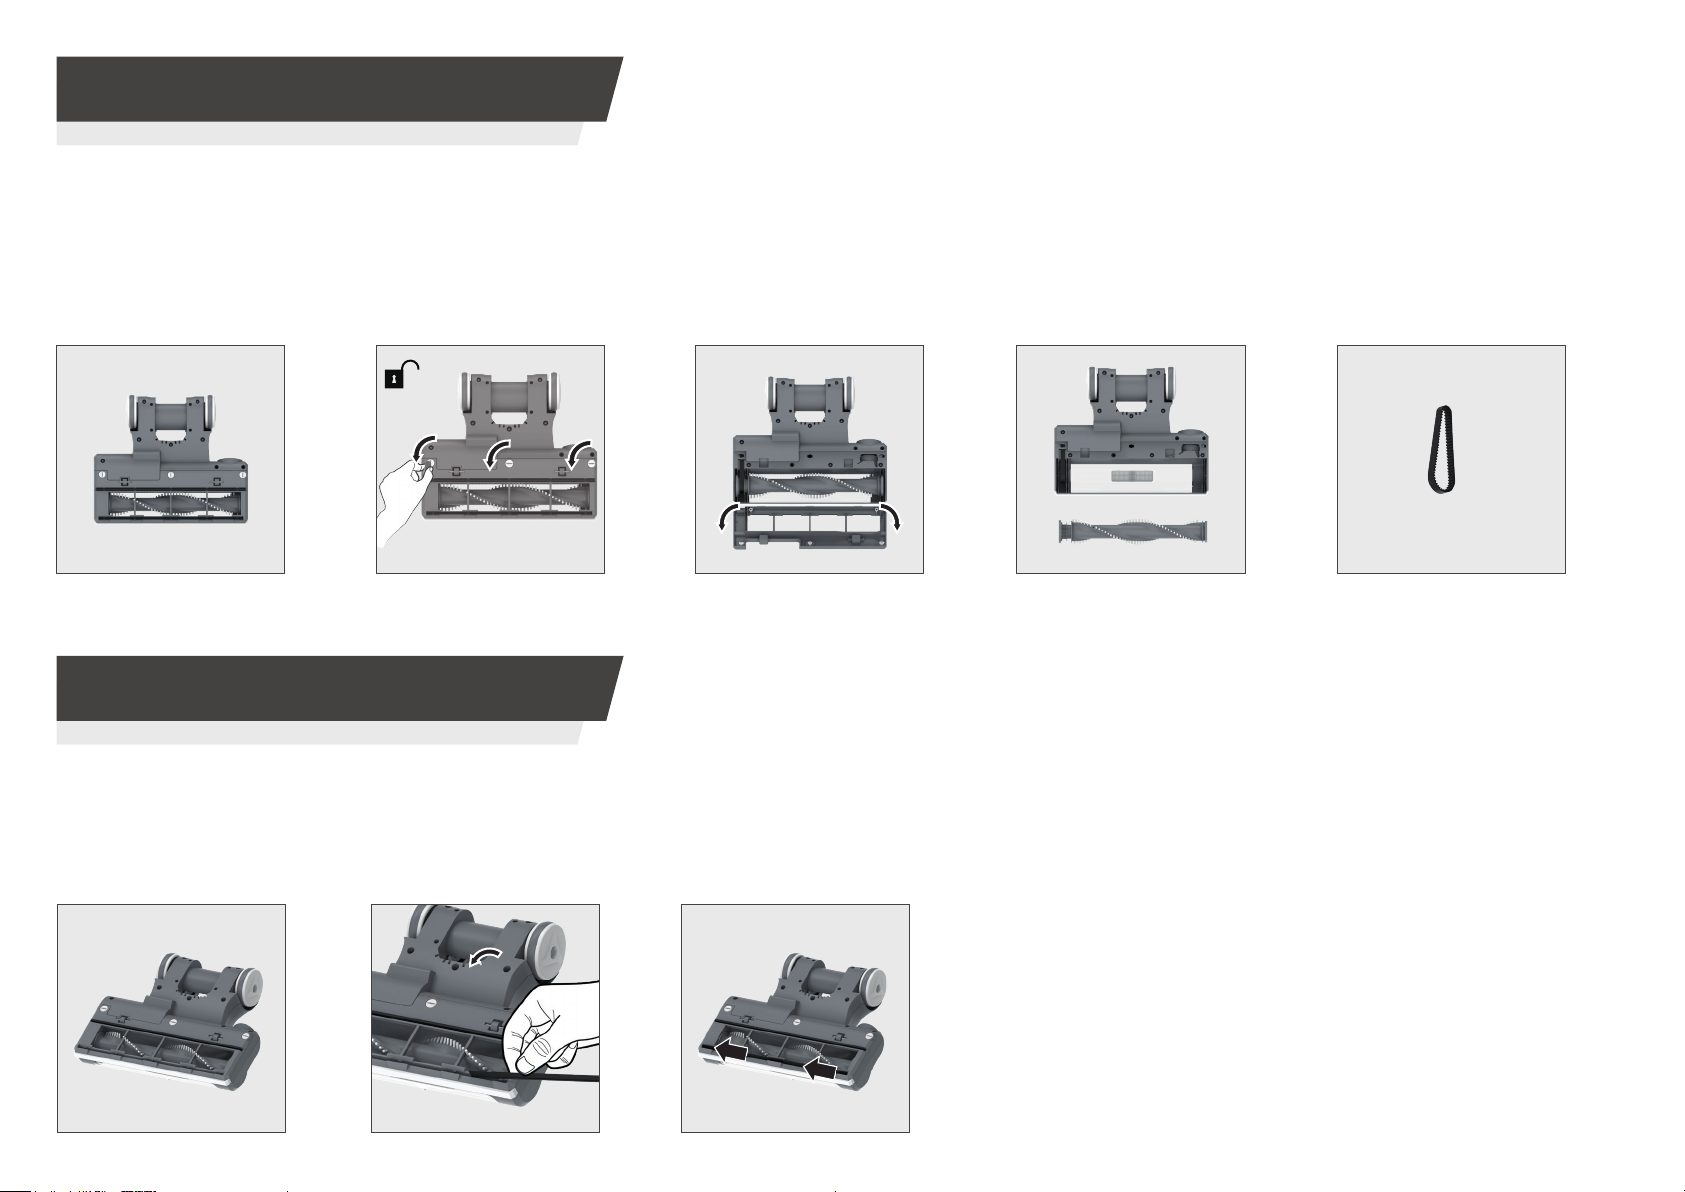
STEP 3:
Remove the brushbar
guard.
STEP 1:
Turn the cleaner over to access
the nozzle.
STEP 2:
Using a coin or screwdriver,
rotate 3 x locking clips 90°to
unlock the brush guard.
STEP 4:
Remove the brushbar
from the nozzle.
STEP 5:
Remove the belt, check
if worn and replace if
required.
IMPORTANT: Before performing any maintenance task, always ensure your product is
switched o and unplugged from the electricity supply.
If your cleaner is still not picking up eciently after cleaning the lters, brush bar & clearing blockages, the belt may be worn and need replacing.
Please ensure to carry out lter cleaning and check for blockages rst.
To ret the belt and brushbar to your cleaner, follow the above instructions in reverse.
4. CLEANER MAINTENANCE
4.4 BELT CHANGE
Loading ...
Loading ...