Loading ...
Loading ...
Loading ...
P7
4. CLEANER MAINTENANCE
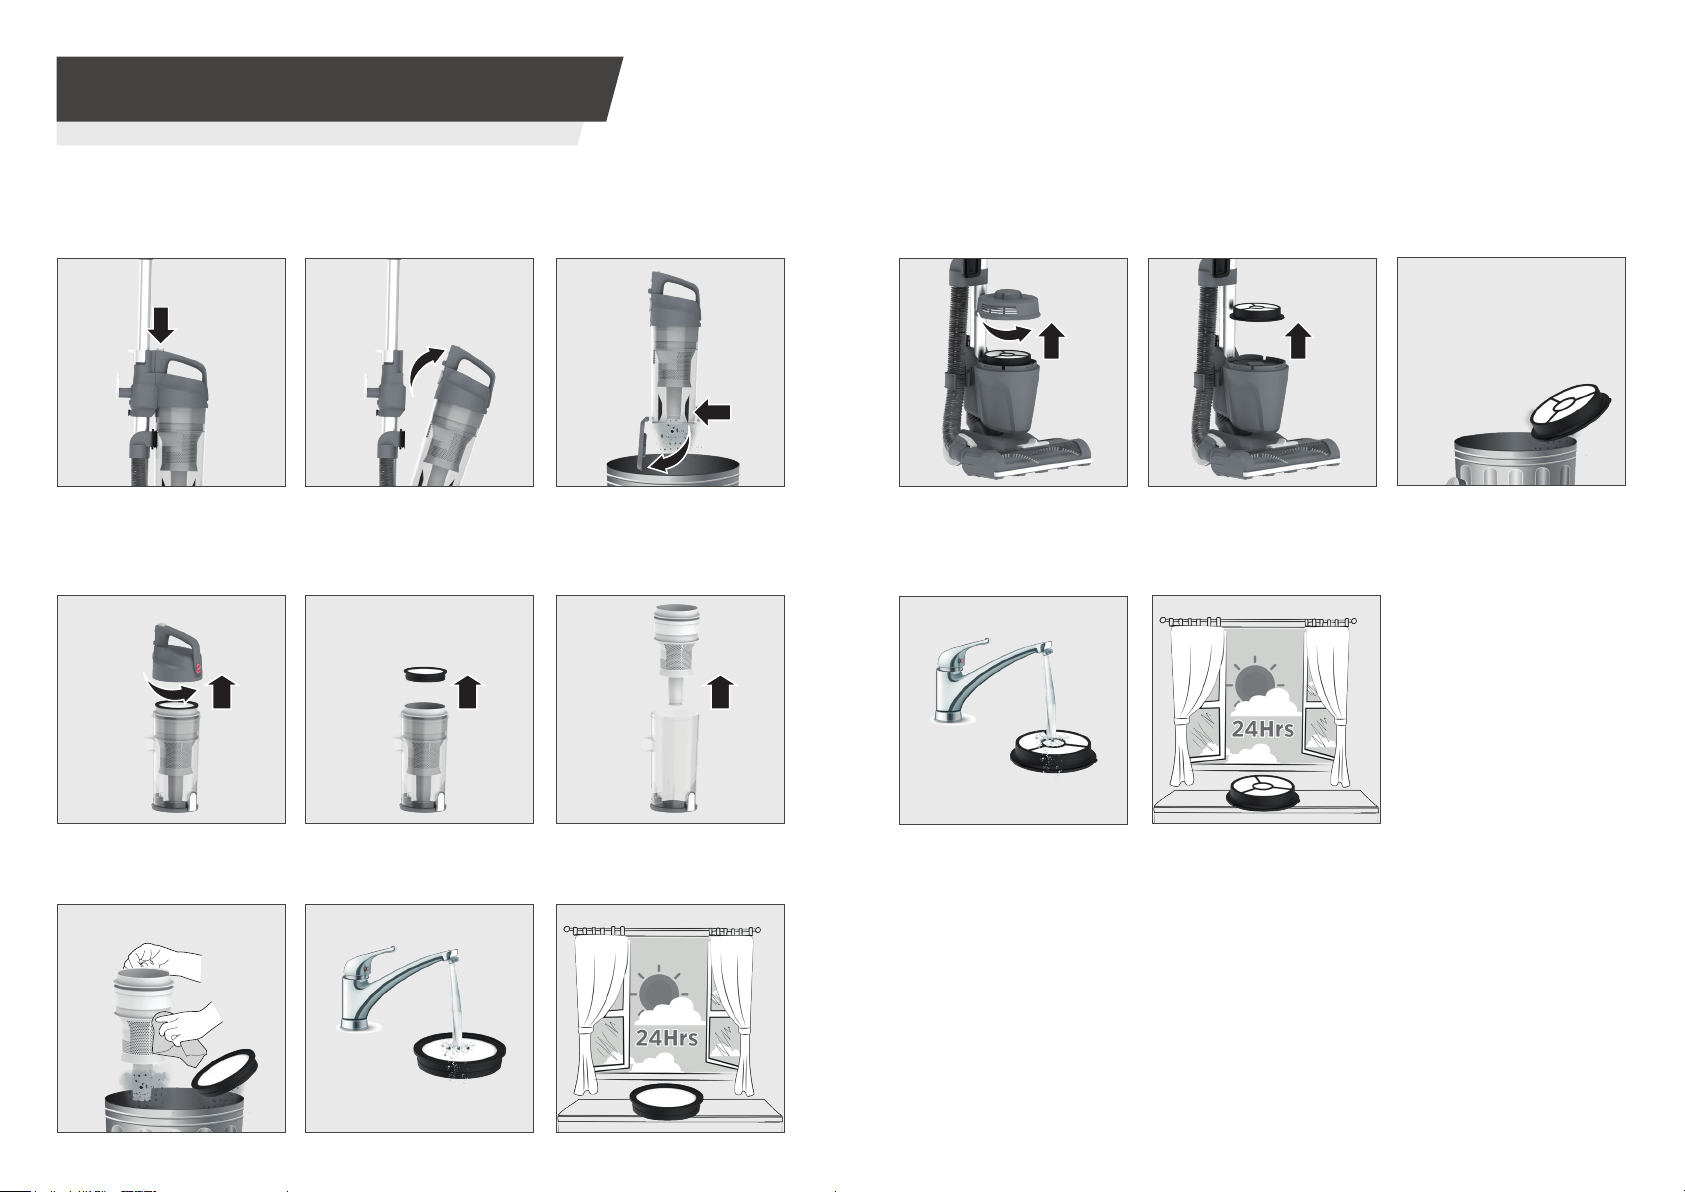
4.1 DUST BIN & FILTERS
EMPTYING THE DUST BIN CLEANING THE EXHAUST FILTER
CLEANING THE PRE-MOTOR FILTER
STEP 2: Remove the
exhaust lter from your
cleaner.
STEP 6:
Leave the lter
to dry for 24Hrs before
re-tting.
STEP 5:
Clean the lter
using lukewarm water.
STEP 4:
Remove any
excess debris from the
separation unit and lter.
STEP 3:
Remove any excess
debris from the lter.
STEP 4:
Clean the lter
using lukewarm water.
STEP 5:
Leave the lter
to dry for 24Hrs before
re-tting.
IMPORTANT: Do not ret the lters until they are completely dry.
To ret the lters and dust bin to your cleaner, follow the above
intructions in reverse.
STEP 2:
Remove the
pre-motor lter from the
separation unit.
STEP 3:
Remove the
separation unit from the
dust bin.
STEP 1:
Rotate the dust
bin top anti-clockwise and
remove from the dust bin.
STEP 2:
Remove the
dust bin assembly from
your cleaner.
STEP 3:
Press the dust
bin empty button over a
rubbish bin to empty.
STEP 1:
Press and hold
the dust bin release
button.
STEP 1:
Rotate the exhaust
filter cover anti-clockwise and
remove from the cleaner.
IMPORTANT: Before performing any maintenance task, always ensure your product is
switched o and unplugged from the electricity supply.
IMPORTANT: To maintain optimum performance is recommended to
empty the bin when full, clear any blockages and to wash lters on a
regular basis or at least once a month.
Loading ...
Loading ...
Loading ...