Loading ...
Loading ...
Loading ...
www.BISSELL.ca
6
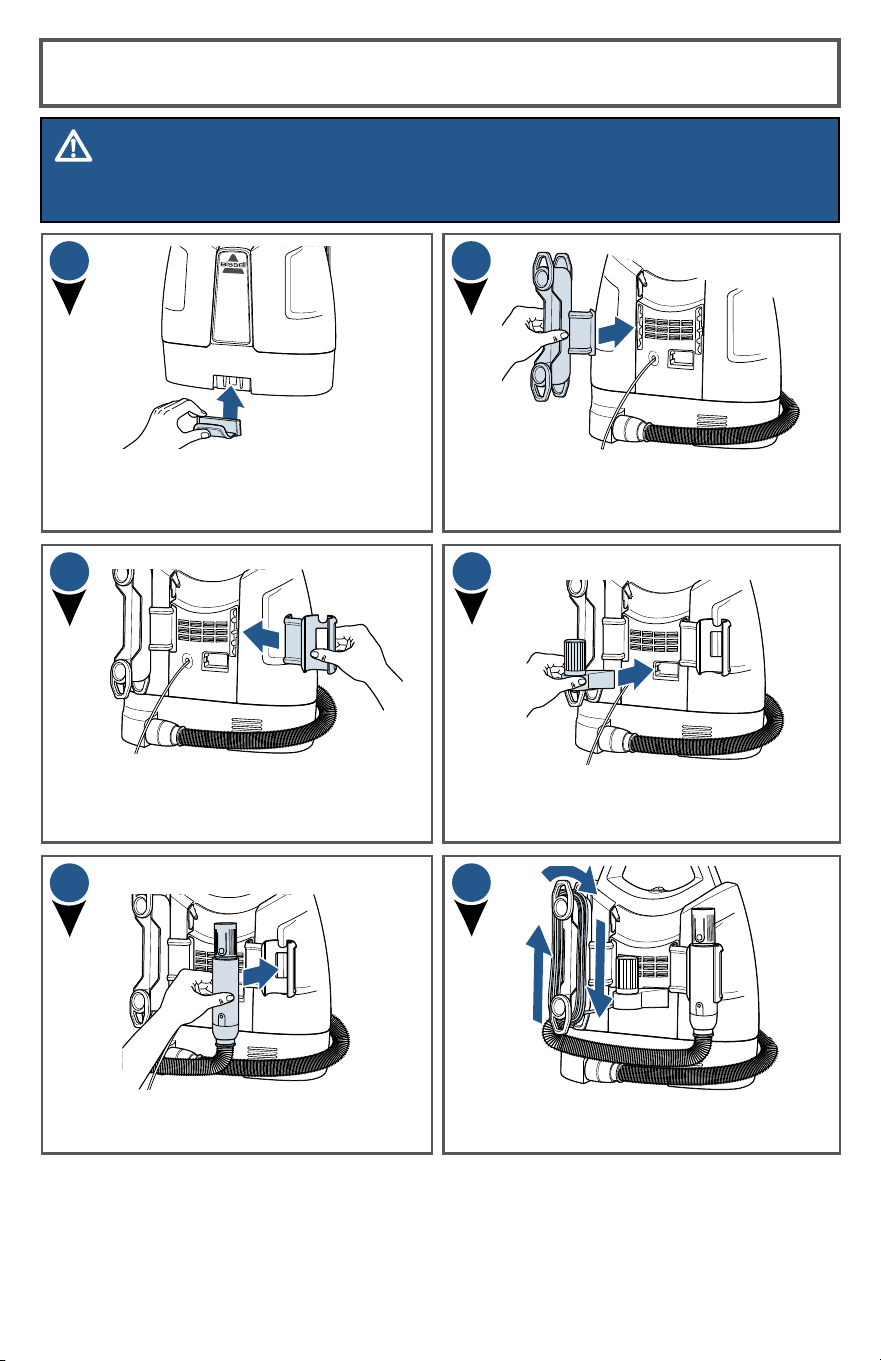
Assembly
Slide the flex hose clip into opening on
the front of the machine. You will hear
a “snap” when it is locked into place.
1
2
3
4
Wrap the power cord around the
cord wrap.
Attach cord wrap by snapping it into place
on the collection tank side of the machine.
5
6
Snap the second tool storage (select
models) into the back between the cord
wrap and hose grip bracket.
Snap the hose grip bracket into the back
of the machine on the clean tank side.
WARNING
Do not plug in your cleaner until you are familiar with all instructions and operating
procedures.
Then wrap the flex hose around the unit
and snap hose grip into bracket.
www.BISSELL.ca
6
Assemblage
Insérez la pince pour tuyau souple dans
l’ouverture située à l’avant de l’appareil. Vous
entendrez un déclic quand elle s’enclenchera
dans la bonne position.
1
2
3
4
Enroulez le cordon d’alimentation autour du
rembobineur de cordon.
Fixez le rembobineur de cordon en l’enclenchant
du côté du réservoir d’eau sale de l’appareil.
5
6
Enclenchez le second rangement pour
accessoires (modèles sélectionnés) à l’arrière de
l’appareil, entre le rembobineur de cordon et le
support pour poignée du tuyau.
Enclenchez le support pour poignée du tuyau à
l’arrière de l’appareil, du côté du réservoir d’eau
propre.
AVERTISSEMENT
Ne branchez pas l’appareil de nettoyage avant d’avoir bien suivi toutes les instructions et de
connaître le mode d’emploi qui s’y rattachent.
Enroulez ensuite le tuyau souple autour de
l’unité, puis installez la poignée du tuyau dans le
support.
Loading ...
Loading ...
Loading ...