Loading ...
Loading ...
Loading ...
9
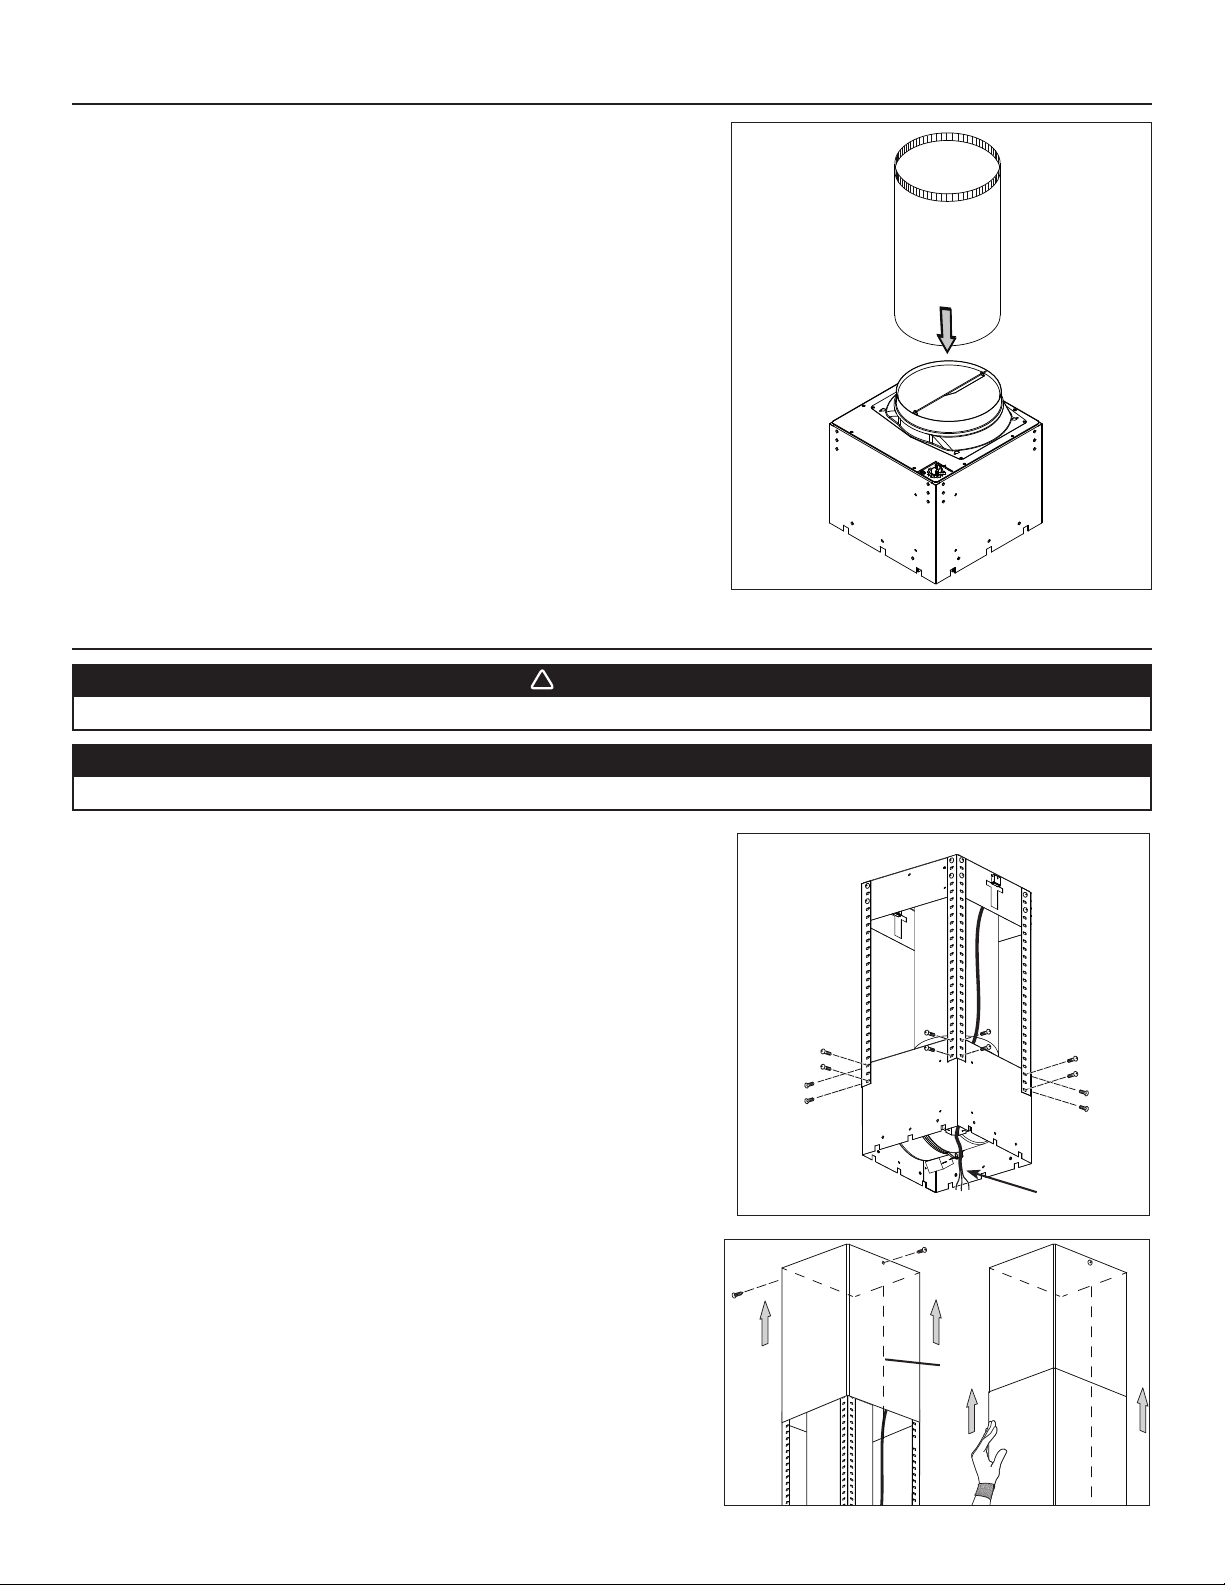
8. PREPARE HOOD (ALL MODELS) (CONT’D)
HJ0067
6. Measure the required length of 8" round metal duct from the adapter/damper
to the ductwork rough-in in the ceiling. Connect this section of duct to the
adapter/damper and seal joint with metal foil duct tape.
9. INSTALL HOOD
WARNING
!
BE CAREFUL when installing the decorative flue and hood, they may have sharp edges.
CAUTION
DO NOT REMOVE the protective plastic film covering the decorative flue (upper and lower) and the hood yet.
HD0424
FRONT
HOUSE WIRING
1. Attach blower box assembly to lower angle brackets using 16 no. 10-32 x 1/2"
quadrex screws (4 per angle brackets). Connect hood duct to ceiling duct and
seal joint with metal foil duct tape.
NOTE: Ensure electrical channel is facing where the front of the hood will be
positioned.
2. Run house wiring through wire clamp into blower box electrical channel. Tighten
wire clamp to secure house wiring cable to blower box.
NOTE: The length between the top of the blower box and the bottom of the hood
is 12 3⁄16".
HD0565
12
SEAM
3. Slide the upper flue up to the ceiling and secure it to the mounting plate using 2
no. 8 x 1/2" quadrex screws for stainless steel model or 2 no. 8 x 1/2” quadrex
black screws for black stainless steel model (1).
NOTE: Ensure flue seam is on the opposite side of the hood controls.
Carefully slide the lower flue over the upper flue up to the ceiling and have the
second person hold it to the ceiling (2) while performing step 4, or secure it up
using appropriate tape.
Loading ...
Loading ...
Loading ...