Loading ...
Loading ...
Loading ...
5
4. INSTALL MOUNTING BRACKET
WARNING
!
When building framework, always follow all applicable construction codes and standards.
10¼"
10¼"
9
3
⁄8"
9
3
⁄8"10
3
⁄8"
10
3
⁄8"
HK0062A
MAX. 9¾"
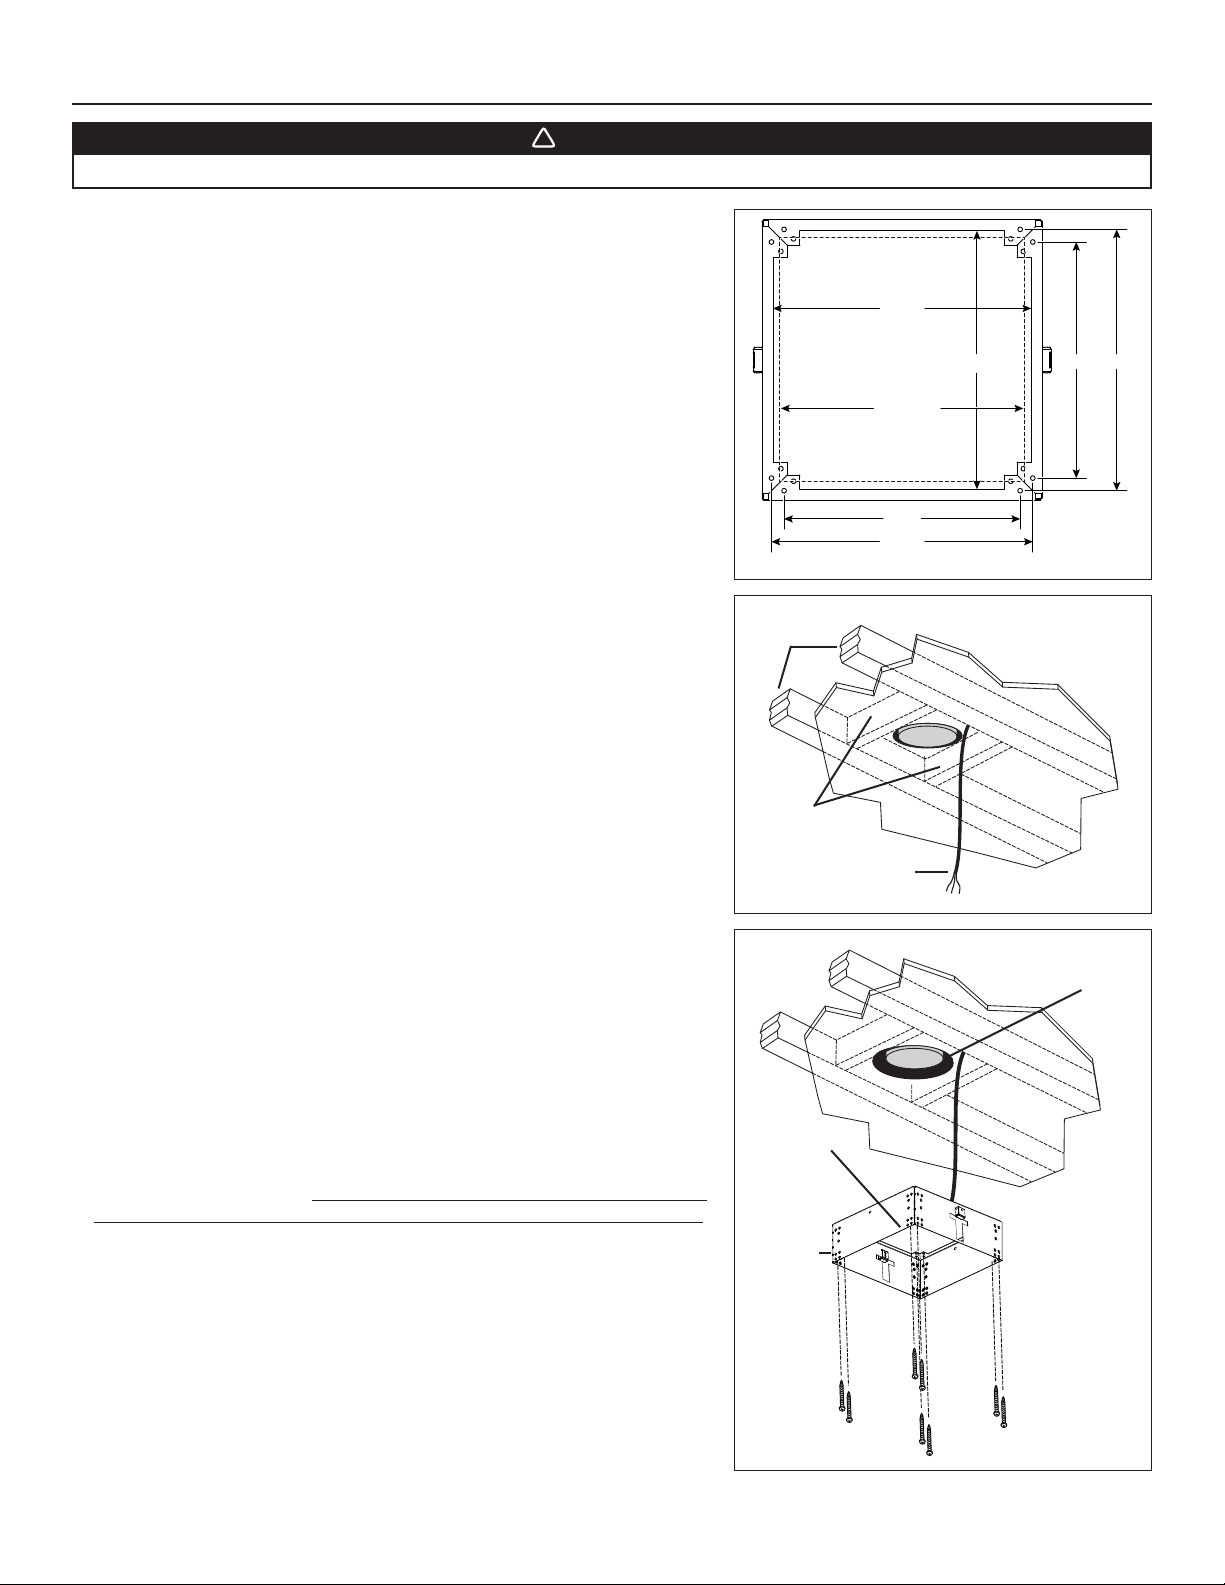
1. Modify ceiling structure over hood location. Install 2" x 4" cross framing between
ceiling joists using ceiling mounting bracket dimensions shown at right. The
framework must be sized to support the total weight of the hood and should not
be larger than 9¾" x 9¾".
2. Finish ceiling surface, making sure the ceiling is level in all direction. Be sure
to mark the location of the ceiling joists and cross framing. Bring house wiring
through finished ceiling.
C
EILING
JOISTS
HD0432
CROSS
FRAMING
HOUSE
WIRING
3. Remove both screws retaining the ceiling mounting bracket to the top of
the hood. Discard screws. Position the mounting bracket in such a way
that one of the sides without a “T” will be facing the front of the hood.
Secure mounting bracket to the ceiling using 8 no. 10 x 1½" wood screws
(2 on each corner). Make sure screws are driven into the center of the framing for
maximum strength.
HD0442
8” ROUND
DUCTWORK
FRONT OF HOOD
CEILING
MOUNTING
BRACKET
Loading ...
Loading ...
Loading ...