Quick Start Guide
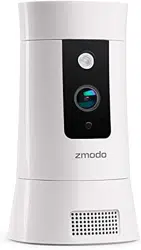
Pivot
Door/Window Sensors
Removable Cover
Button for Configuration
Replaceable Battery
①
②
③
1
1
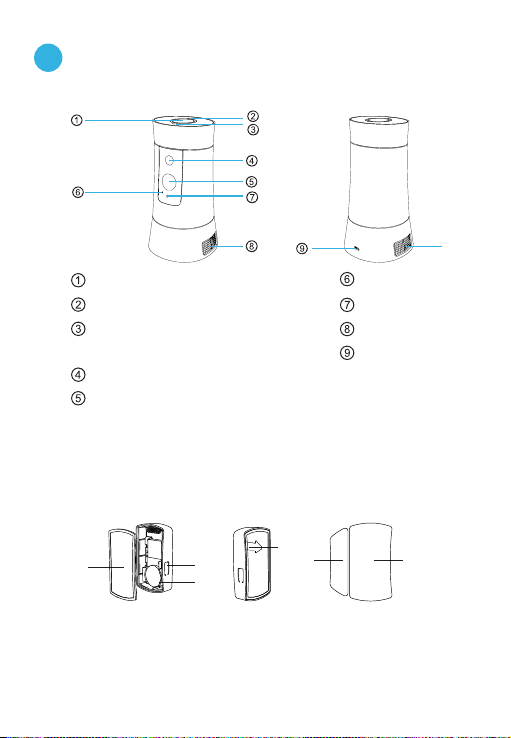
Getting to know your Pivot
Using the Touch Pad:
To reset the Pivot, touch and hold for 10 seconds. To enable Bluetooth
pairing, double-tap rapidly until you hear “Pairing”.
Touch Pad
Status Ring
Temperature
& Humidity Sensor
IR (Infrared) LED
HD Camera
Microphone
Light Sensor
Speaker
Power Port
Speaker
⑩
⑩
①
②
③
④
⑤
⑥
Pivot:
⑤
Plastic Tab - remove to
initiate
Magnetic Portion
Main Portion
④
⑥
2
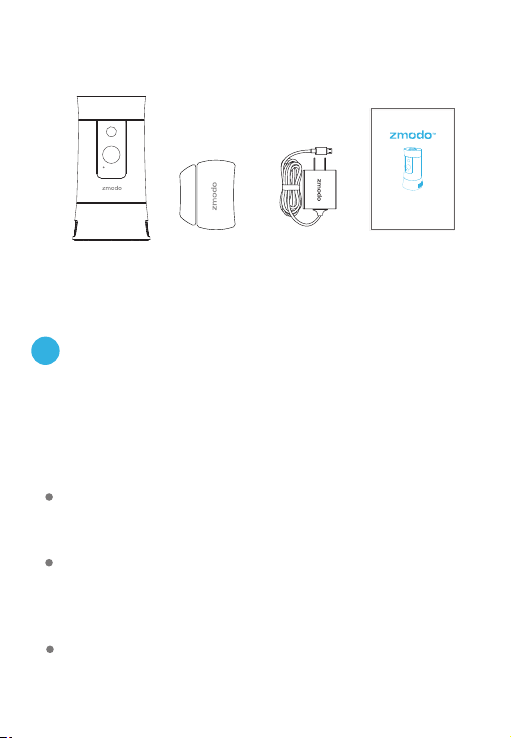
Power
Adapter
Pivot
What’s in the box:
Door/Window
Sensors(4)
Quick Start Guide
Piv ot
Quick Start
Guide
Make sure that you have a strong WiFi connection at the
location of your Pivot. Visit www.zmodo.com/support
for advice on improving your WiFi signal range.
2
This quick start guide will help you configure your Pivot
for initial use. For detailed instructions and
troubleshooting, please visit:
www.zmodo.com/support
Before you begin:
Mobile Setup
Make sure you know the SSID (WiFi network name) and
password of the 2.4GHz WPA/WPA2 WiFi network that
you want your Pivot to connect to. Your network cannot be
hidden.
Make sure your network has at least 2Mbps upload speed
to view and 4Mbps upload speed when using the Zmodo
Cloud Service for each Pivot.
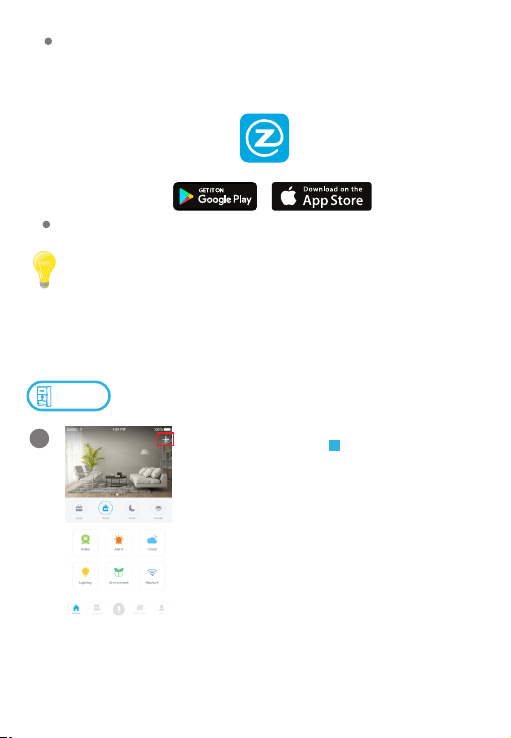
3
Download and install the “Zmodo” app from Google
TM TM ®
Play or the App Store (compatibility: iOS 7.0+ or
TM
Android 4.0+). Launch the app and sign up for a free
Zmodo account. All of your devices will be bound to this
account.
We are constantly working to improve our product and app. Please visit
www.zmodo.com/support for updated instructions, manuals, and more.
Power on your Pivot with the supplied power adapter.
Zmodo
Log in and press in the upper
right corner. Select "Add Device".
This device can be set up with a Zmodo Beam. If you own a
Beam, please follow the instructions in your Beam quick guide to
connect your device instead.
Connect with
Beam
+
1

4
Select the “Zink” connection method
to connect your Pivot. Your Pivot will
be added to your Zmodo account.
2
3
Tap to proceed (If you’re setting
up multiple Pivots at once, tap to
add additional units).
√
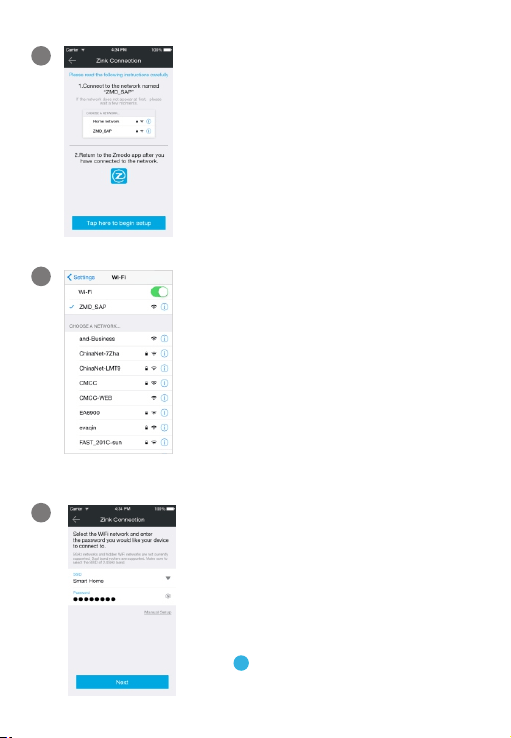
5
Select the network named “ZMD_SAP”
and connect to it.
Note: If you see a "No Internet Connection" error
message, please ignore it and connect anyway.
Follow the on-screen instructions and
select “Tap here to begin setup” to go
to the WiFi settings page on your
smartphone.
4
5
Return to the Zmodo app page and
select or enter the SSID and password
of the WiFi network that you want your
Pivot to connect to.
Note: The WiFi name and password are case-
sensitive.
Tap to proceed.
√
6
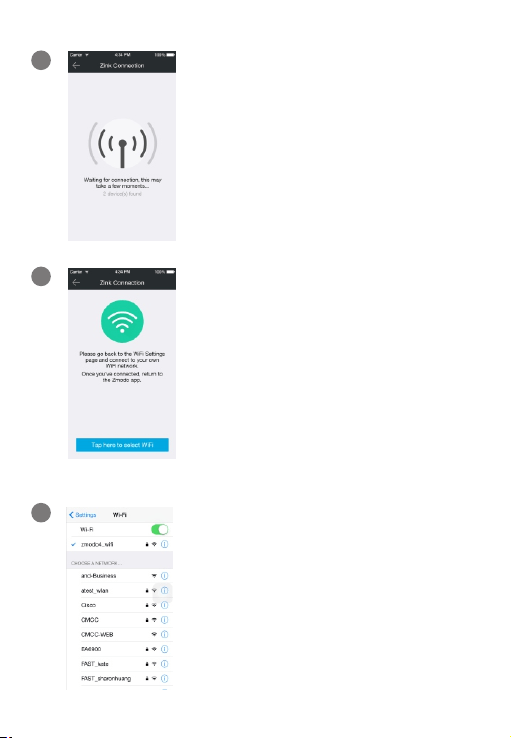
6
7
If you see this screen, the app will
connect your Pivot to your WiFi
network. This may take a few minutes.
Once it’s completed, please skip to
step 11.
If you do not see this screen, please
proceed to step 8.
Note: If you are connecting multiple devices, you
will need to wait for the app to find and connect all
devices.
8
If this app interface appears, please
press “Tap here to select WiFi”.
9
Select the WiFi network that your Pivot
will connect to, and connect to it.
Return to the Zmodo app once your
mobile device is connected to the WiFi
network.

7
10
The app will automatically search for
your Pivot and connect it to the WiFi
network. This may take a few
minutes.
Note: If you are connecting multiple devices, you
will need to wait for the app to find and connect
all devices.
11
Name your Pivot and set a password
for it. Tap to proceed.
√
Note: The password provides an additional layer
of security for your devices. You will not need to
use this password when accessing your devices
from the Zmodo app. It is not required, but it is
highly recommended.
Your Pivot has been successfully
configured! You can now share or
view your Pivot.
12
8
3
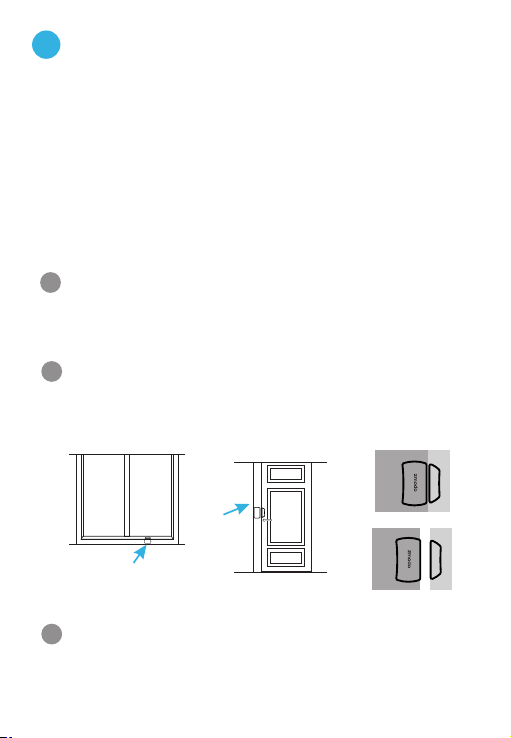
Connect your door / window sensors
Access your Pivot's Device Settings and select the
"Accessories" option. Select the icon to add an +
accessory. Remove the plastic tab from your sensor,
and follow the in-app instructions to complete pairing.
Remove the film to expose the adhesive on the bracket,
and install sensors as shown below. Please make sure
that the two portions of the sensor are no more than
2cm apart when closed.
1
2
Window Sensor
Position
Door Sensor
Position
Make the Preset Settings
When the door / window sensor has been successfully
added, access Pivot's Device Settings, select the
"Preset Setting" page and press the option. +
1
Monitor your doors and windows
When a door or window is opened, Pivot can
automatically turn to see what happened. Set up the
included sensors by removing the plastic tab and
configuring the sensors in the device settings menu.
When Pivot detects an opened window or door, it will
rotate to a preset location set in the “Preset Setting”
menu and capture a short video clip.
9
4
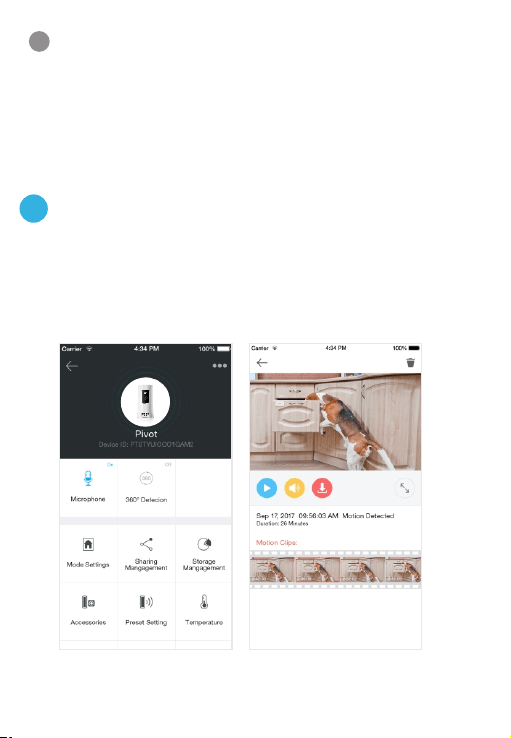
Pivot will detect motion in its field-of-view, and when
motion is detected, Pivot will automatically record a
short video and send an alert to your phone.
Smarter motion detection
Select the door / window sensor that you want to
configure. Using the preview image, rotate the camera
to the desired position, and complete the rest of the
steps. Name the preset, and press "Save" to save the
settings.
2
Pivot
10
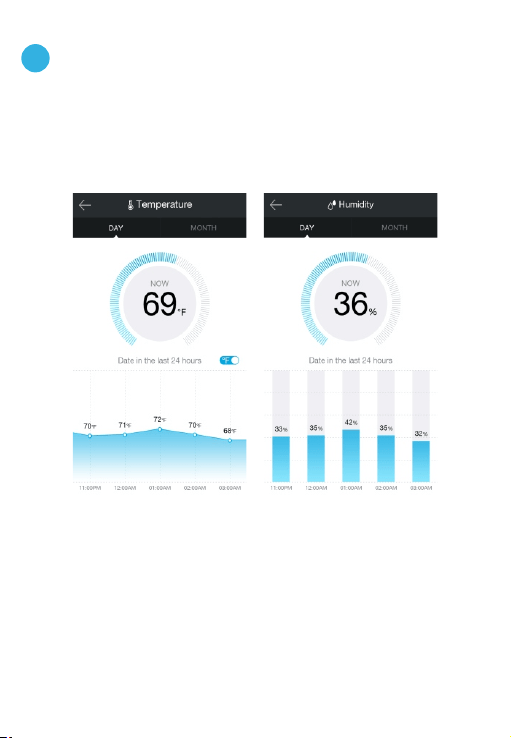
Pivot tracks your home's temperature and humidity with its
built-in sensors to give you the whole picture of your home.
Keep track of your home's health
5
11
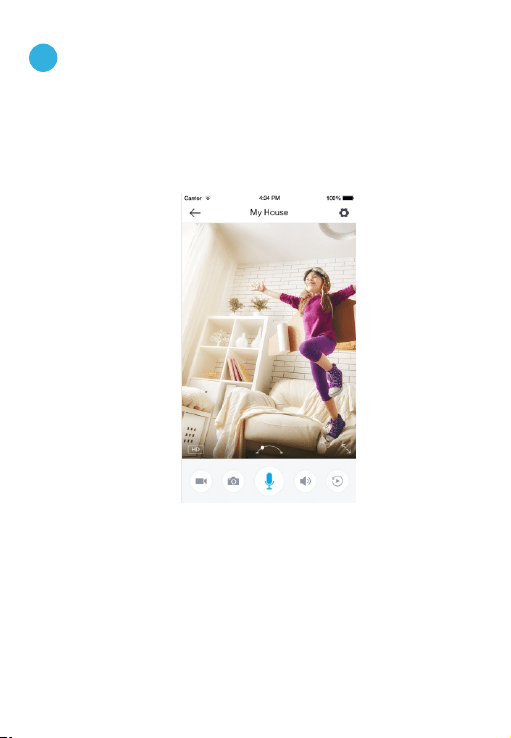
Simultaneous two-way audio allows you to talk to and
hear your loved ones at the same time.
Simultaneous two-way audio
6
12
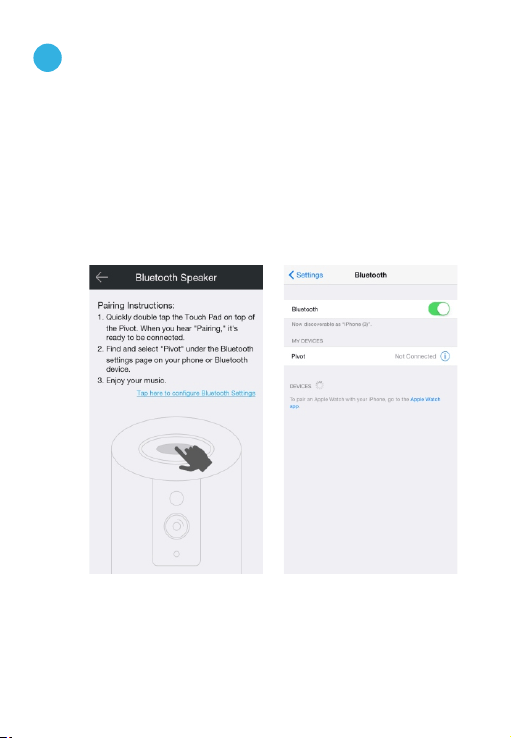
Need some mood music? Pivot has a built-in Bluetooth
speaker for that. Enable the Bluetooth function on your
media device and quickly double-tap the touch pad on
the top of your Pivot until you hear “Pairing”. Then select
“Pivot” from the list of Bluetooth devices on your media
device, and play your favorite songs.
Now let's party!
7

13
8
Recording and viewing options
This device is compatible with the upcoming cloud
services. Please visit for release www.zmodo.com/support
information and more updates. The cloud service will allow
you to:
Recording Options
Record continuously and store the footage on our secure
cloud servers.
Create and save video clips from your recordings.
Access your footage and clips at any time from any
location.
Enjoy more smart features in the future.
All of your Zmodo devices will be bound to your Zmodo
user account. You can access your camera and other
TM
devices by using the Zmodo app with any Android or
®
iOS device. Just download the Zmodo app from Google
TM TM
Play or the App Store .
You can also access your devices from any web browser
with our web app. Visit and log in with user.zmodo.com
your Zmodo user account information.
Viewing Options

14
9
Status light definitions
Solid green
Your Pivot is powering on.
Solid blue
Your Pivot has successfully connected to the WiFi
network.
Blinking green
Your Pivot is ready for setup.
Blinking blue
Your Pivot is connecting to the WiFi network. Please
do NOT turn off or unplug your Pivot at this time.
Please make sure that you entered the network name and
password correctly. Note: Both are case-sensitive.
You may need to improve your WiFi strength. Visit
www.zmodo.com/support for suggestions.
Try resetting your Pivot by pressing and holding the Touch
Pad on the top for 10 seconds until the Status Ring turns off.
Retry the setup process when the Status Ring is blinking
green.
If you were unable to connect your Pivot successfully:
Make sure that you are connecting to a 2.4GHz
WPA/WPA2 WiFi network, and that your network is not
hidden.

15
REV-A01
Android is a trademark of Google Inc. Google Play is a trademark of Google
Inc. Apple, the Apple logo, and iPhone are trademarks of Apple Inc.,
registered in the U.S. and other countries. Apple Store is a service mark of
Apple Inc.
Having difficulty?
Follow us on Twitter @Zmodo
Scan the QR-code below!
Like us on Facebook.com/Zmodo
Scan the QR-code below!
www.zmodo.com/support
You can use the Live Chat function in Zmodo app if you
have any technical problems.
Please follow the steps below:
Access the “Me” page in the bottom right corner of the
Zmodo app and select “Zmodo Support”.
For more instructions, troubleshooting, support, and other
resources, please visit:
10
Support