User Manual
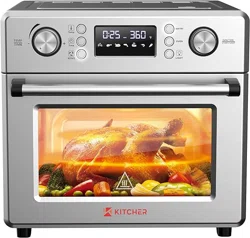
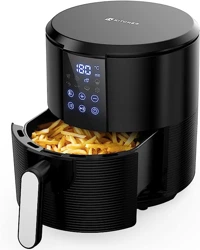
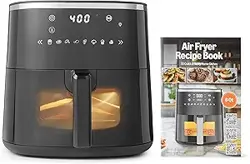
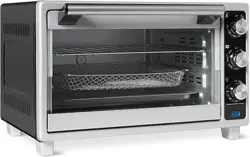
KNOW YOUR AIR FRYER
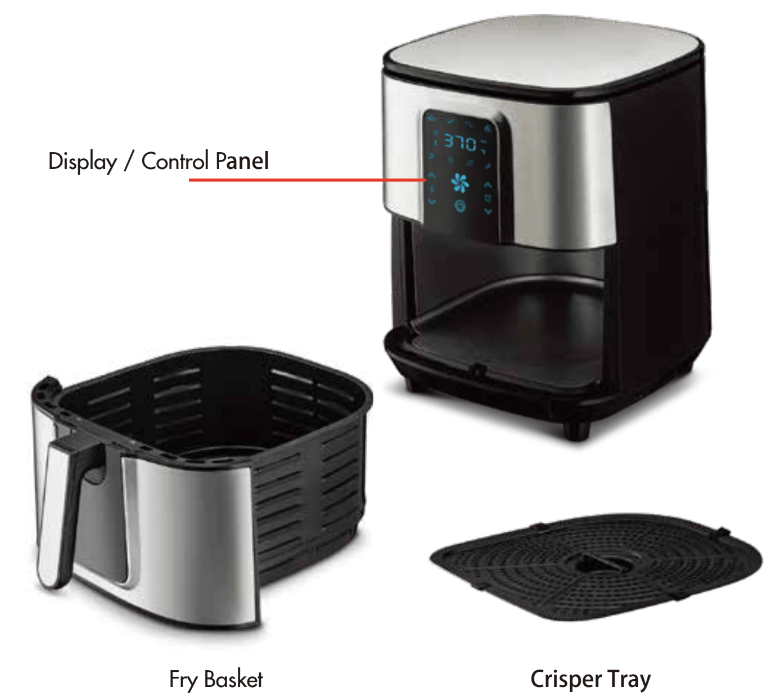
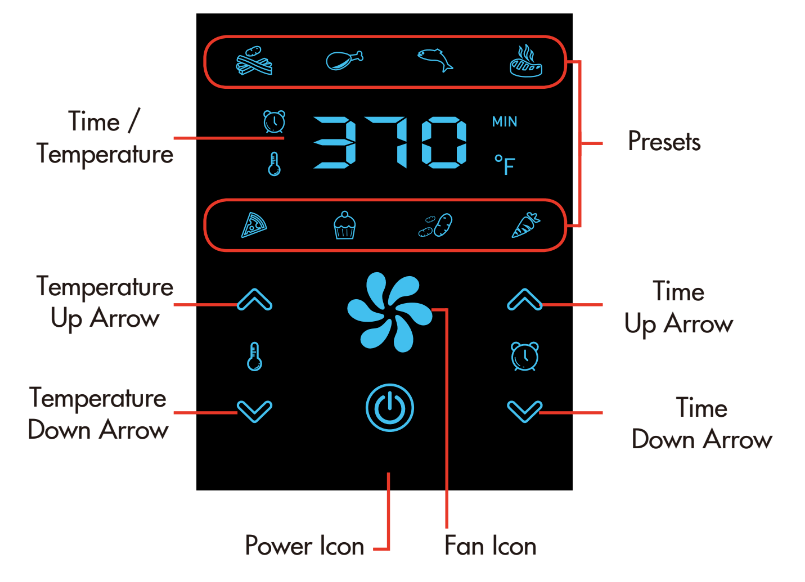
DISPLAY AND CONTROL PANEL
USING YOUR AIR FRYER
BEFORE USING FOR THE FIRST TIME
- Remove all packaging stickers, and labels from the Air Fryer, including the tape securing the Pan to the unit.
- To pull out the Pan for cleaning, remove the tape securing it into place. Secure the unit with one hand and pull the handle straight back with the other hand.
- Thoroughly clean the Pan and Crisper Tray with hot water, some dishwashing liquid, and a non-abrasive sponge.
- Wipe the inside and outside of the Air Fryer with a moist cloth.
Note: During the first few uses, there might be a “hot plastic” smell. This is perfectly normal in new Air Fryers as the material is heated for the first time. It will go away after the first few uses.
This is an Air Fryer that works using hot air.
- Do not fill the pan with oil, frying fat, or any other liquid.
- Do not put anything on top of the Air Fryer.
Note: Do not place the Air Fryer against a wall or against other appliances. It is important to leave at least 4 inches of free space on the back and sides, and 4 inches of free space above the Air Fryer to allow for proper ventilation.
1. Place the Air Fryer on a stable, horizontal, heat-resistant, and level surface.
2. Place the Crisper Tray into the Pan. Place the ingredients in the Pan - do not overload. Spray with cooking oil for a crispier finish. Slide the Pan into the Air Fryer.
3. Plug the Air Fryer into an outlet.
Note: For best results, preheat the Air Fryer for 3 minutes to the desired temperature. When cooking multiple batches, only preheat before first batch.
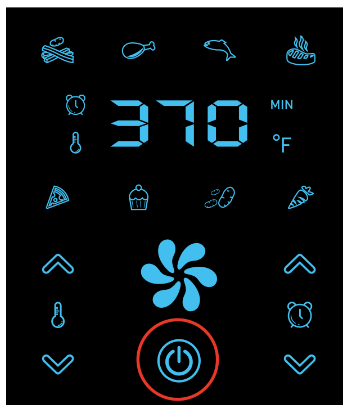
4. Tap the Power Icon to turn on.
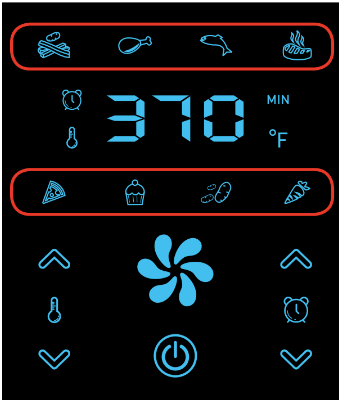
5. Tap the desired Preset. The default time and temperature will appear on the display.
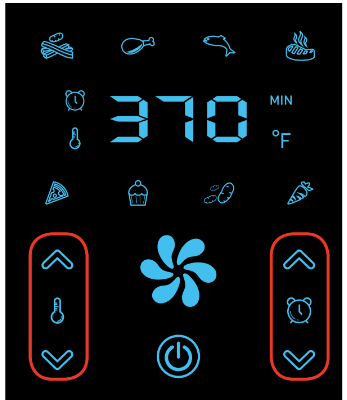
6. Tap the time and temperature Arrows to adjust.
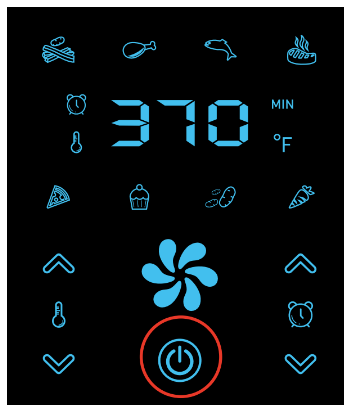
7. Tap the Power Icon again to begin air frying.
8. Some recipes or ingredients call for shaking the ingredients halfway through the preparation time (see ‘Settings Chart’ on page 18-19). To shake the ingredients, pull the Pan out of the Air Fryer by the handle and shake it. Slide the Pan back into the Air Fryer to resume cooking.
Note: After sliding the Pan out of the Air Fryer, the display will go into sleep mode. When you return the Pan to the Air Fryer, your time and temperature settings will automatically resume. There is no need to reset your settings or press the Power Icon.
9. When your selected cook time has elapsed, the timer bell will ring. Pull the Pan out of the Air Fryer and place it on a heat-resistant surface. If you would like to cook longer, simply slide the Pan back into the Air Fryer and set the timer for a few extra minutes.
10. Remove food from the Pan using tongs. The food and Pan will be hot.
Notes:
- Do not turn the Pan upside down, as any excess oil that has collected on the bottom of the Pan will leak onto the food.
- To avoid scratching the nonstick surface, do not use sharp or metal utensils.
- When done cooking, the Air Fryer is instantly ready for preparing another batch. No preheating is neccesary.
- To turn off the Air Fryer,press the Power Icon.the Air Fryer will cool down for 20 seconds before shuting off.
CAUTION: After air frying, the Pan and the ingredients are hot - avoid touching. Depending on the type of the ingredients in the Air Fryer, steam may escape from the Pan.
TROUBLESHOOTING
The AirFryer does not work.
- The AirFryeris not plugged in.
- Plug the main plug in to a grounded wall socket.
- You have not set the timer.
- Tap the timer icon to set the required cook time to turn on the AirFryer.
The ingredients did not cook.
- The amount of ingredients in the pan are too much.
- Put smaller batches of ingredients in the pan. Smaller batches are fried more evenly.
- The set temperature is too low.
- Tap the temperature icon to set there quired temperature setting.
- See ‘Settings Chart’ on page18-19)
- The cook time is too short.
- Tap the timer icon to set the required cook time.
- See ‘Settings Chart’ on page18-19)
The ingredients are fried unevenlyin the AirFryer.
- Certain types of ingredients need to be shaken halfway through the cook time.
- Ingredients that lie on top of or a cross each other (e.g.fries) need to be shaken halfway through the preparation time. (See ‘Settings Chart’ on page18-19)
Fried snacks are not crispy when they come out of the AirFryer.
- You used a type of snack meant to be cooked in a traditional deep fryer.
- Use oven snacks or lightly brush some oil on to the snacks for a crispier result.
I cannot slide the pan into the Air Fryer properly.
- The pan is over filed
- Do not fill the pan beyond max line (see "Setting 's Chart" on page 18 - 19)
White smoke comes out of the AirFryer.
- You are preparing greasy ingredients.
- When you fry greasy ingredients in the AirFryer, a large amount of oil will leak into the pan. The oil produces white smoke and the pan may heat
- The pan still contains grease residue from previous use.
- White smoke is caused by grease heating up in the pan. Make sure you clean the pan properly after each use.
Fresh fries are fried unevenly in the AirFryer.
- Quality potatoes will give an even cook.
- Use fresh potatoes and make sure they stay firm during frying.
- Potatoes are too starchy.
- Rinse the potato sticks properly and dry to remove starch from the out side of the sticks.
Fresh fries are not crispy when they come out of the AirFryer.
- The crisp in essof the fries depends on the amount of oil and water in the fries.
- Make sure you dry the potato sticks properly before you add the oil. Cut the potato sticks smaller for a crispier result. Add slightly more oil for a crispier result.
AIR FRYING TIPS
- Smaller ingredients usually require a slightly shorter cook time than larger ingredients.
- Shaking smaller ingredients halfway through the cook time optimizes the end result and can help prevent unevenly fried ingredients.
- Add 1 tablespoon of oil to fresh potatoes for a crispy result. Fry your ingredients in the Air Fryer within a few minutes after you add the oil.
- Do not prepare extremely greasy ingredients such as sausages in the Air Fryer.
- Snacks that can be prepared in an oven can also be prepared in the Air Fryer.
- Use pre-made dough to prepare filled snacks quickly and easily. Pre-made dough also requires a shorter preparation time than home-made dough.
- Place a baking tin or oven dish in the Air Fryer Pan if you want to bake a cake or quiche, or if you want to fry fragile or filled ingredients.
USING THE TIMER
Option 1:
Timer can be set to ring when it’s time to shake ingredients by setting the the timer to half of the total cook time. However, you will have to set the timer again for the remaining cook time after pan is replaced into the Air Fryer. (See ‘Settings Chart’ on page 18-19.)
Option 2:
If the timer is set for the entire cook time, there will be no timer notifying you halfway through to shake ingredients. You can pull out the Pan at anytime to check the food. The power will automatically shut off and will resume after the pan is replaced into the Air Fryer.
CLEANING & MAINTENANCE
- Clean the Air Fryer after every use.
- Make sure the Air Fiyer is completely cooled off before cleaning.
- Do not use metal kitchen utensils or abrasive cleaning material to clean the pan and crisper, as this may damage the non-stick coating.
- Remove the main plug from the wall outlet and let the Air Fryer cool down. Tip: Remove the Pan from the Air Fryer to help the Air Fryer cool down quicker.
- Wipe the outside of the Air Fryer with a moist cloth.
- Clean the Pan, and Crisper with hot water, some dishwashing soap, and a non-abrasive sponge. Tip: If residue is stuck to the bottom of the Pan, fill the Pan with hot water and some dishwashing soap and let the Pan soak for approximately 10 minutes.
- Clean the inside of the Air Fryer with hot water and a cleaning brush to remove any food residue.
STORAGE
- Unplug the appliance and let it cool down.
- Make sure all parts are clean and dry.
- Store the appliance in a clean and dry place.
ENVIRONMENT
Do not throw away the appliance with the normal household waste at the end of its life,but hand it in an official collection point for recycling.By doing this,you help to preserve the environment.
GUARANTEE AND SERVICE
If you need service or information or if you have a problem, please visit our website or contact your distributor.