Instruction Book
GO DC 36 T
Condenser Tumble Dryer
®
English
Deutsch
40005291Eng.qxd 20/09/2007 15:30 Page 1
English . . . . . . . . . . . . . . . . . . . . . . . . . . . . . . . . . . . . . . . . . . . . 2
Deutsch . . . . . . . . . . . . . . . . . . . . . . . . . . . . . . . . . . . . . . . . . . . 20
Introduction . . . . . . . . . . . . . . . . . . . . . . . . . . . . . . . . . . . . . . . . . . . . . . . 3
Delivery information . . . . . . . . . . . . . . . . . . . . . . . . . . . . . . . . . . . . . . . . . . . . . 3
Unpacking the Product . . . . . . . . . . . . . . . . . . . . . . . . . . . . . . . . . . . 3
Safety reminders. . . . . . . . . . . . . . . . . . . . . . . . . . . . . . . . . . . . . . . . . . 4
Installation . . . . . . . . . . . . . . . . . . . . . . . . . . . . . . . . . . . . . . . . . . . . . . . . . . . . . 4
Use . . . . . . . . . . . . . . . . . . . . . . . . . . . . . . . . . . . . . . . . . . . . . . . . . . . . . . . . . . . 4
The Laundry . . . . . . . . . . . . . . . . . . . . . . . . . . . . . . . . . . . . . . . . . . . . . . . . . . . . 4
Environmental Issues . . . . . . . . . . . . . . . . . . . . . . . . . . . . . . . . . . . . . . . . . . . . . 5
GIAS Service . . . . . . . . . . . . . . . . . . . . . . . . . . . . . . . . . . . . . . . . . . . . . . . . . . . . 5
Installation. . . . . . . . . . . . . . . . . . . . . . . . . . . . . . . . . . . . . . . . . . . . . . . . . 6
Electrical requirements . . . . . . . . . . . . . . . . . . . . . . . . . . . . . . . . . . . . . . . . . . . 6
Adjusting the feet . . . . . . . . . . . . . . . . . . . . . . . . . . . . . . . . . . . . . . . . . . . . . . . 6
Ventilation . . . . . . . . . . . . . . . . . . . . . . . . . . . . . . . . . . . . . . . . . . . . . . . . . 7
Preparing the load . . . . . . . . . . . . . . . . . . . . . . . . . . . . . . . . . . . . . . . . 8
Clothes preparation . . . . . . . . . . . . . . . . . . . . . . . . . . . . . . . . . . . . . . . . . . . . . . 8
Sorting the load. . . . . . . . . . . . . . . . . . . . . . . . . . . . . . . . . . . . . . . . . . . . . . . . . 9
Drying advice. . . . . . . . . . . . . . . . . . . . . . . . . . . . . . . . . . . . . . . . . . . . . 10
Do not tumble dry . . . . . . . . . . . . . . . . . . . . . . . . . . . . . . . . . . . . . . . . . . . . . . 10
Energy saving. . . . . . . . . . . . . . . . . . . . . . . . . . . . . . . . . . . . . . . . . . . . . . . . . . 10
Controls and indicators . . . . . . . . . . . . . . . . . . . . . . . . . . . . . . . . . 11
Door and Filter . . . . . . . . . . . . . . . . . . . . . . . . . . . . . . . . . . . . . . . . . . . 12
Opening the door . . . . . . . . . . . . . . . . . . . . . . . . . . . . . . . . . . . . . . . . . . . . . . 12
Filter. . . . . . . . . . . . . . . . . . . . . . . . . . . . . . . . . . . . . . . . . . . . . . . . . . . . . . . . . 12
Filter care indicator . . . . . . . . . . . . . . . . . . . . . . . . . . . . . . . . . . . . . . . . . . . . . 12
Water container. . . . . . . . . . . . . . . . . . . . . . . . . . . . . . . . . . . . . . . . . . 13
To remove the container . . . . . . . . . . . . . . . . . . . . . . . . . . . . . . . . . . . . . . . . . 13
Condenser . . . . . . . . . . . . . . . . . . . . . . . . . . . . . . . . . . . . . . . . . . . . . . . . 14
To remove the condenser . . . . . . . . . . . . . . . . . . . . . . . . . . . . . . . . . . . . . . . . 14
Selecting the Programme . . . . . . . . . . . . . . . . . . . . . . . . . . . . . . . 14
Operation . . . . . . . . . . . . . . . . . . . . . . . . . . . . . . . . . . . . . . . . . . . . . . . . . 16
Cancelling and resetting the programme . . . . . . . . . . . . . . . . . . . . . . . . . . . . 16
Start Delay . . . . . . . . . . . . . . . . . . . . . . . . . . . . . . . . . . . . . . . . . . . . . . . . . . . . 16
Cleaning and Routine Maintenance. . . . . . . . . . . . . . . . . . . . 17
Cleaning the dryer . . . . . . . . . . . . . . . . . . . . . . . . . . . . . . . . . . . . . . . . . . . . . . 17
Technical specifications . . . . . . . . . . . . . . . . . . . . . . . . . . . . . . . . . . . . . . . . . . 17
Troubleshooting. . . . . . . . . . . . . . . . . . . . . . . . . . . . . . . . . . . . . . . . . . 18
Customer Service. . . . . . . . . . . . . . . . . . . . . . . . . . . . . . . . . . . . . . . . . 19
Spares. . . . . . . . . . . . . . . . . . . . . . . . . . . . . . . . . . . . . . . . . . . . . . . . . . . . . . . . 19
GIAS Service . . . . . . . . . . . . . . . . . . . . . . . . . . . . . . . . . . . . . . . . . . . . . . . . . . . 19
2
40005291Eng.qxd 20/09/2007 15:30 Page 2
Introduction
Please read and follow these instructions
carefully and operate the machine accordingly.
This booklet provides important guidelines for
safe use, installation, maintenance and some
useful advice for best results when using your
machine.
Keep all documentation in a safe place for future
reference or for any future owners
Delivery information
Please check that the following items are
delivered with the appliance:
● Instruction manual
● Guarantee card
● Energy label
● Discharge hose kit
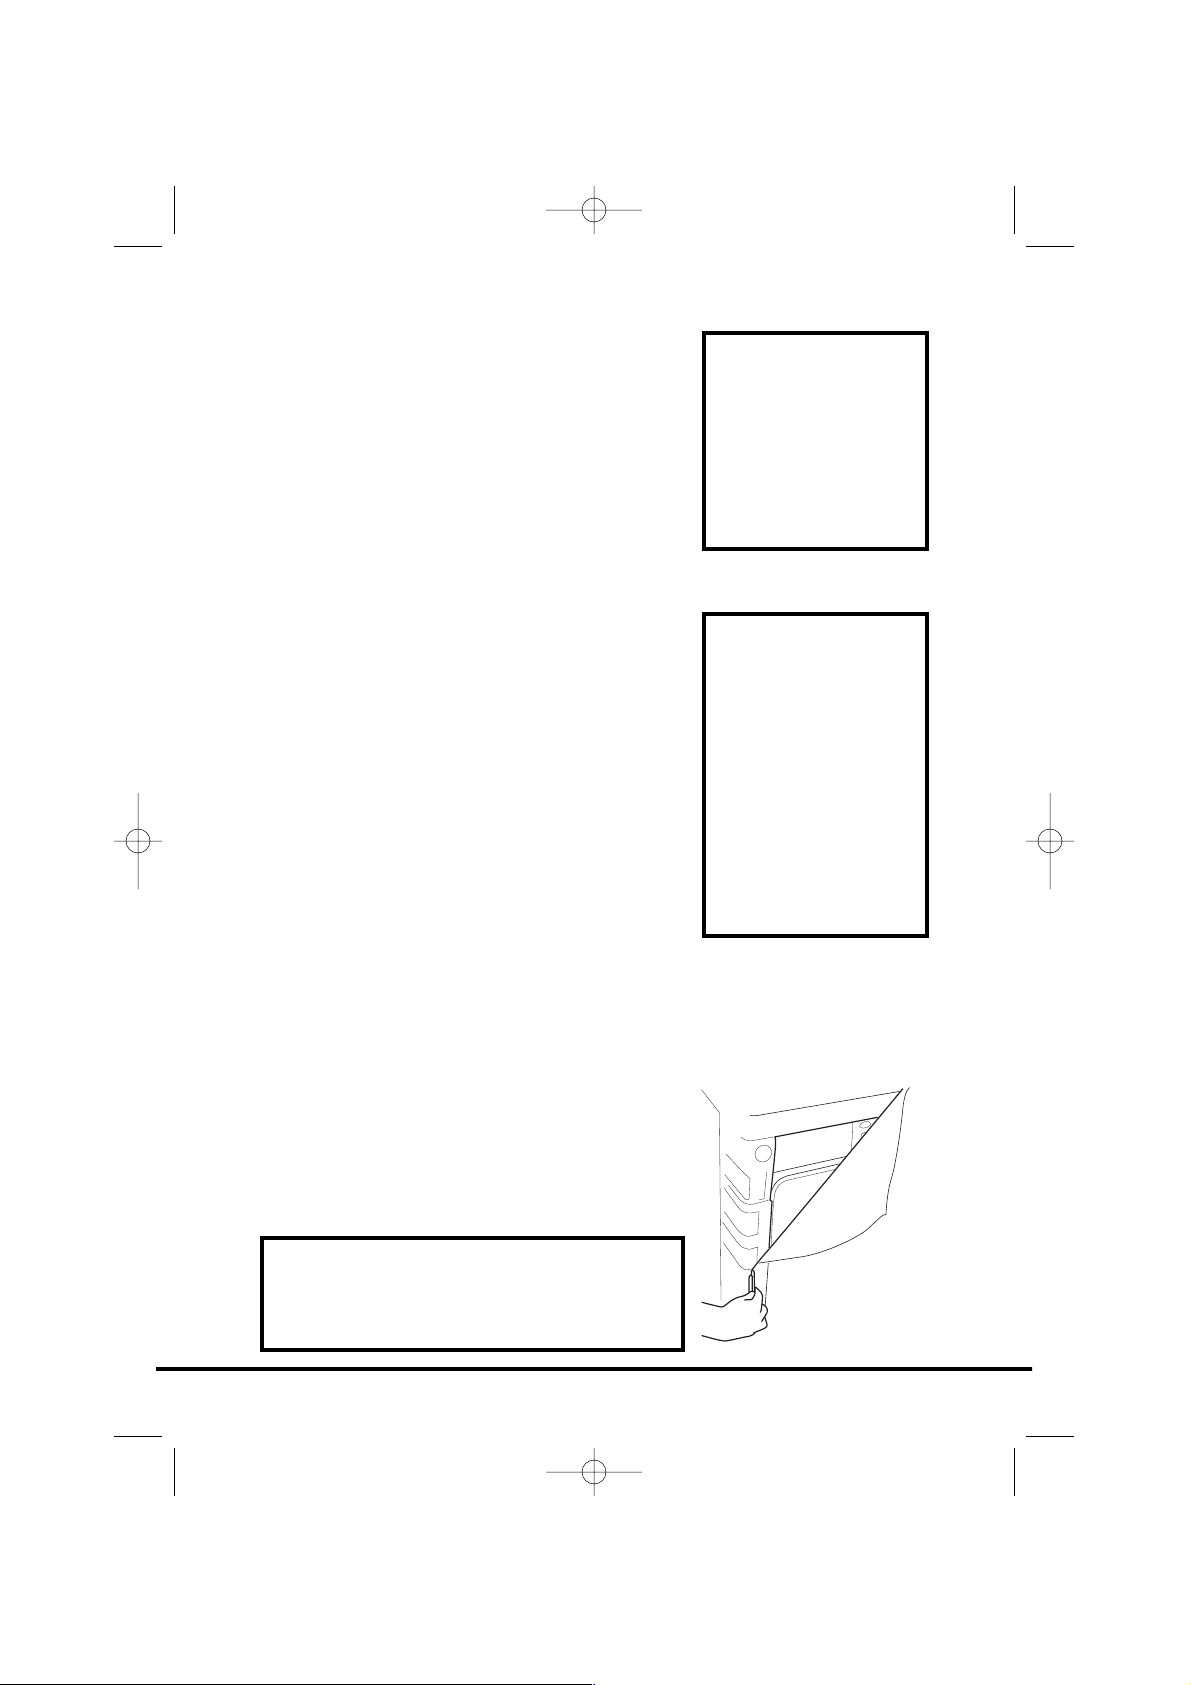
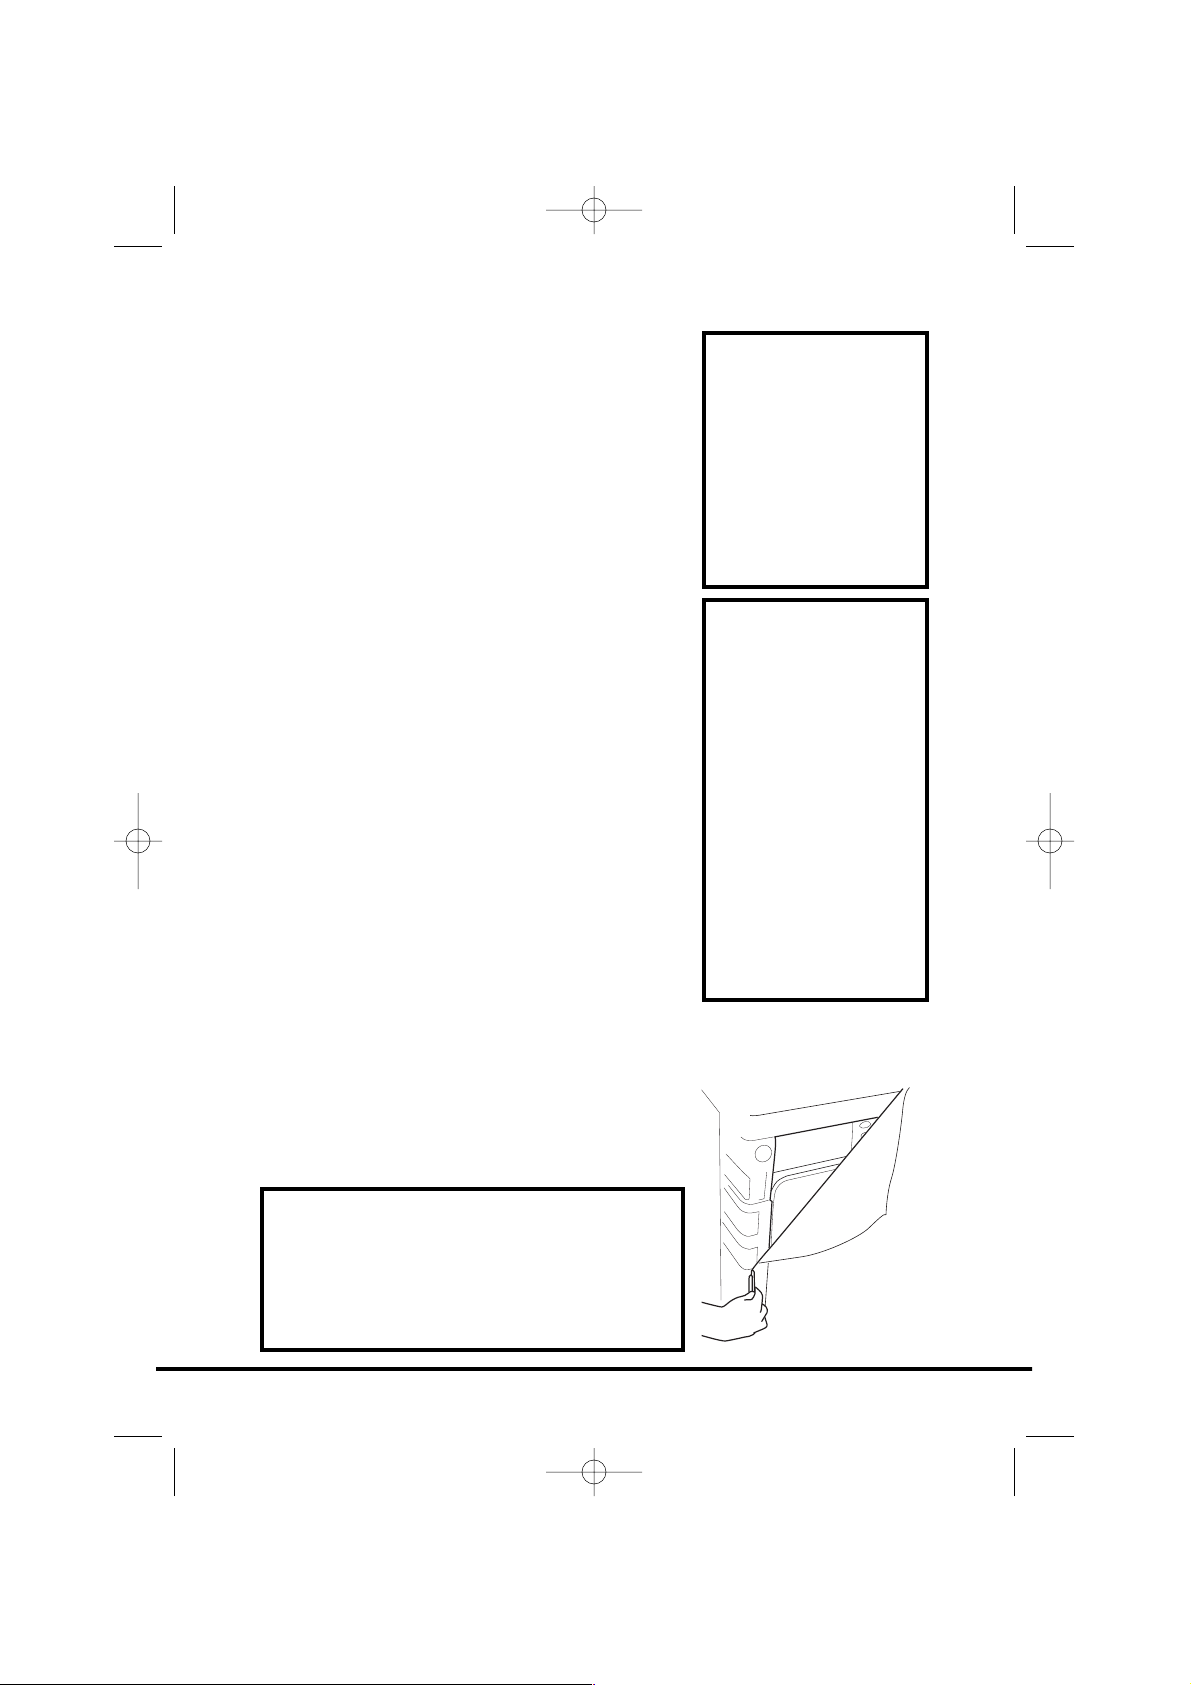
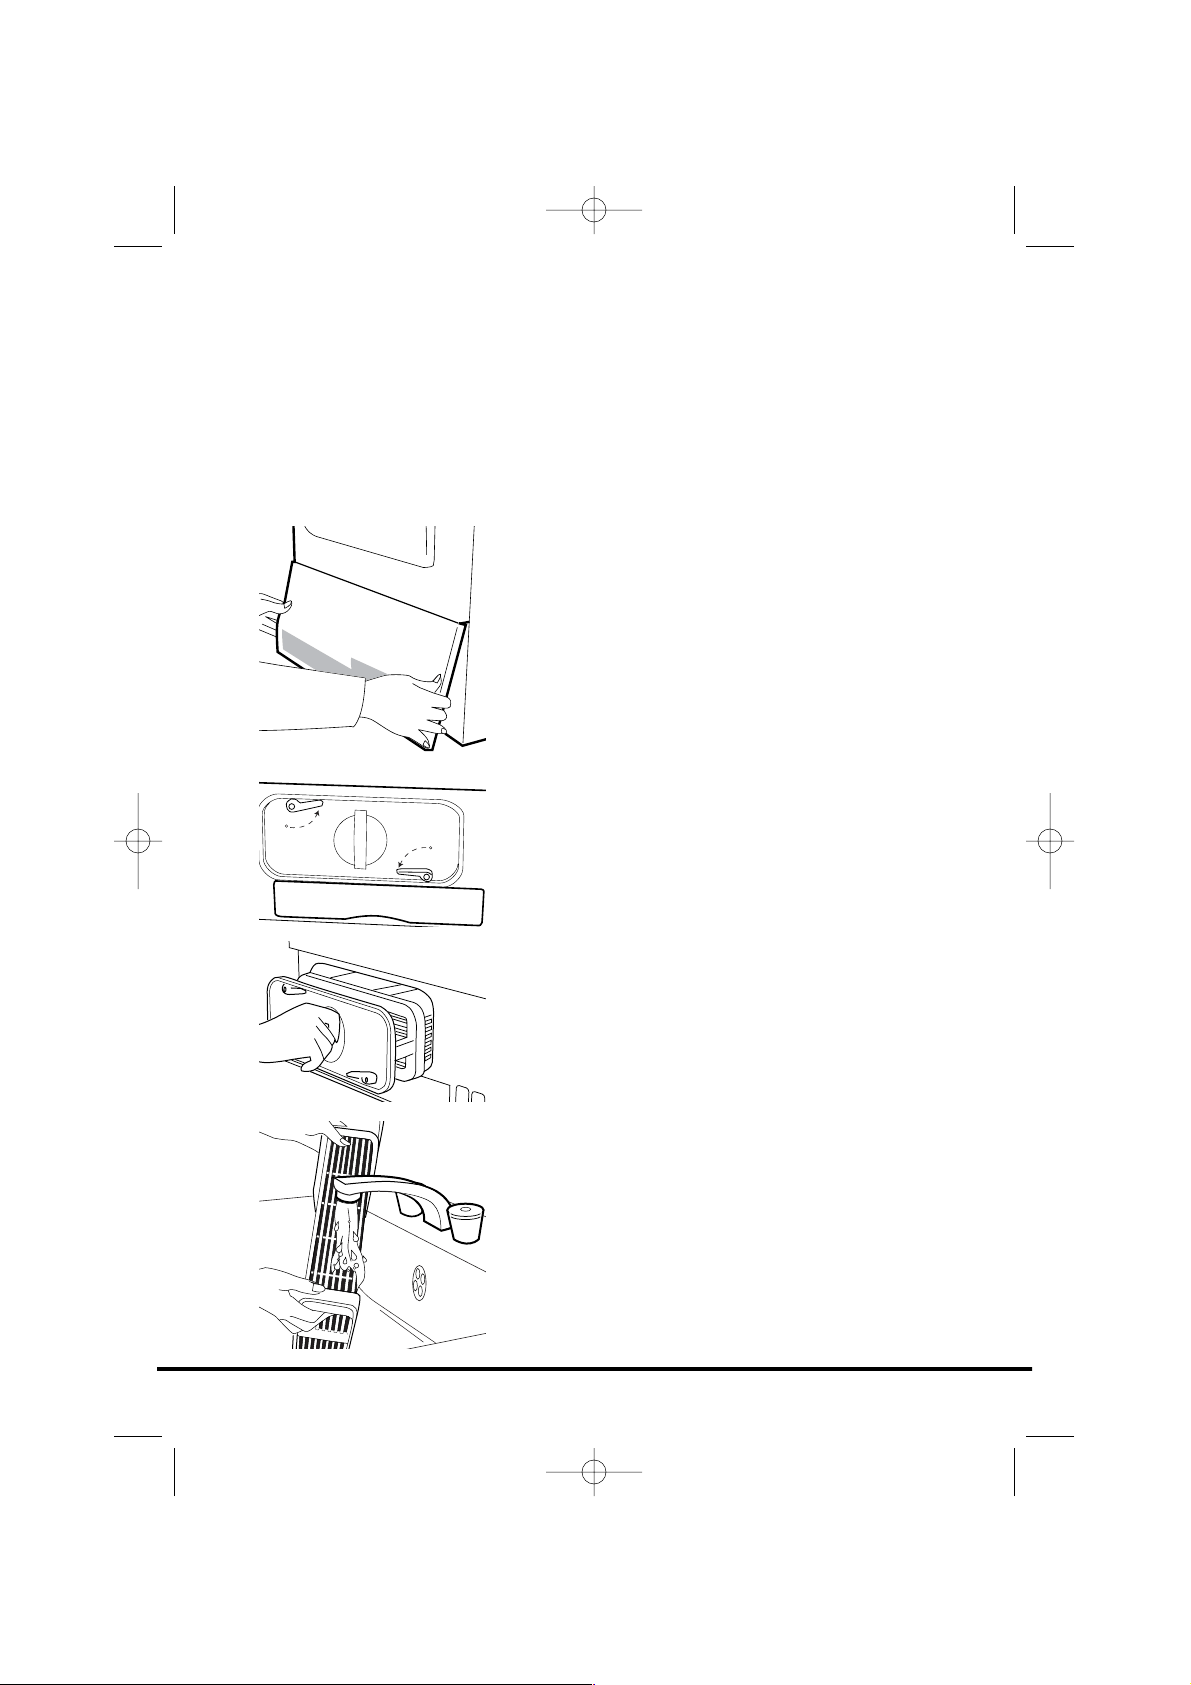
Remove the machine from its packaging close to
the final location of the machine.
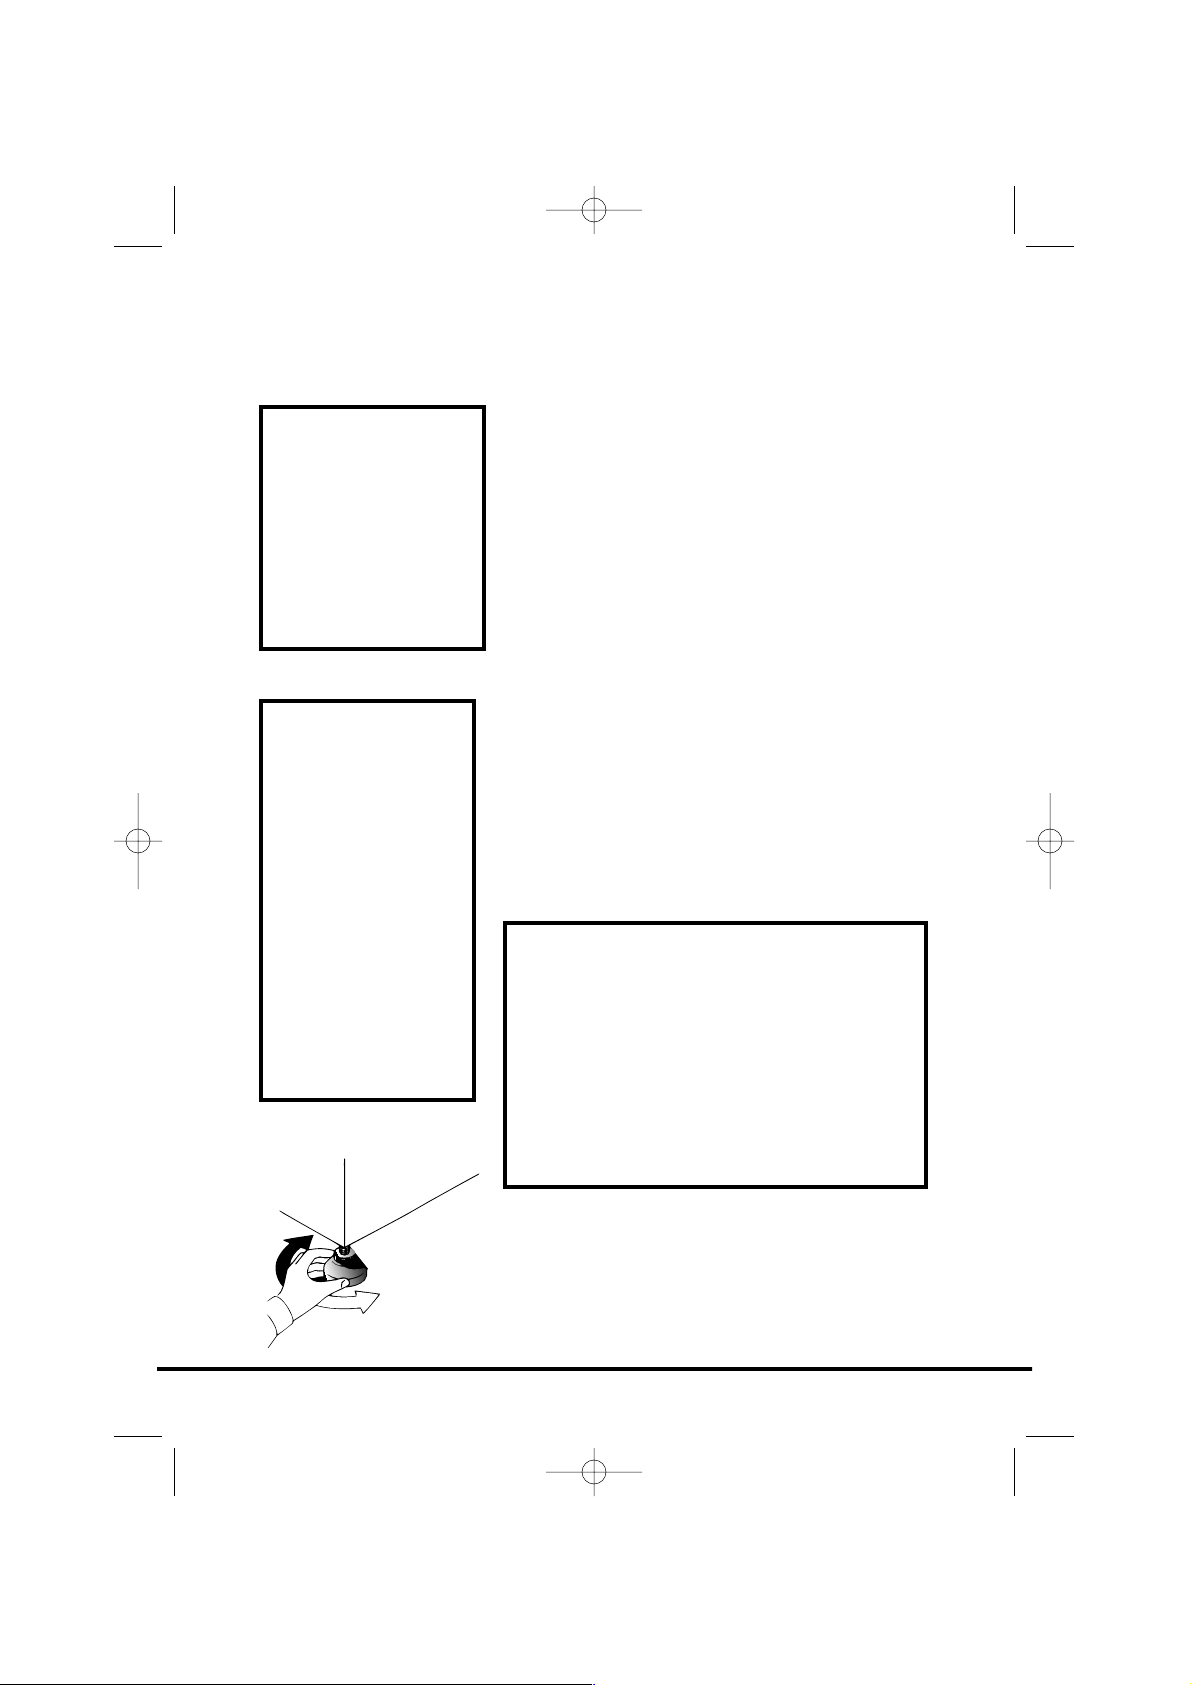
1. Cut carefully around the base of the
packaging and up one corner.
2. Remove the polythene sleeve and lift the
dryer off the polystyrene base.
3
Check that no
damage has
occurred to the
machine during
transit. If it has,
call for service by
GIAS.
Failure to comply
with the above
can compromise
the safety of the
appliance. You
may be charged
for a service call
if a problem with
your machine is
caused by
misuse.
Unpacking the product
Dispose of the packaging safely. Make
sure it is out of the reach of children,
it is a potential source of danger.
40005291Eng.qxd 20/09/2007 15:30 Page 3
Safety reminders
Installation
● Check that the product has no visible signs of damage before use. If damaged do
not use and please call GIAS Service.
● Do not use adapters, multiple connectors and/or extensions.
● Never install the dryer against curtains and be sure to prevent items from falling
or collecting behind the dryer.
● The appliance must not be installed behind a lockable door, a sliding door or a
door with a hinge on the opposite side to that of the tumble dryer.
Use
● This appliance is not intended for use by persons (including children) with
reduced physical, sensory or mental capabilities, or lack of experience and
knowledge, unless they have been given supervision or instruction concerning
use of the appliance by a person responsible for their safety.
● Children should be supervised to ensure that they do not play with the appliance.
● WARNING Misuse of a tumble dryer may create a fire hazard.
● This machine is solely for domestic use, i.e. to dry household textiles and garments.
● This machine should only be used for its intended purpose as described in this
manual. Ensure that the instructions for installation and use are fully understood
before operating the appliance.
● Do not touch the appliance when hands or feet are damp or wet.
● Do not lean on the door when loading the machine or use the door to lift or
move the machine.
● Do not allow children to play with the machine or its controls.
● WARNING Do not use the product if the fluff filter is not in position or is
damaged; fluff could be ignited.
● WARNING Where the hot surface symbol is located the temperature rise
during operation of the tumble dryer may be in excess of 60 degrees C.
● Remove the plug from the electricity supply. Always remove the plug before
cleaning the appliance.
● Do not continue to use this machine if it appears to be faulty.
● Lint and fluff must not be allowed to collect on the floor around the outside of
the machine.
● The drum inside may be very hot. Always allow the dryer to complete the cool
down period before removing the laundry.
The Laundry
● Do not dry unwashed items in the tumble dryer.
● WARNING Do not tumble dry fabrics treated with dry cleaning fluids.
● WARNING Foam rubber materials can, under certain circumstances, when heated
become ignited by spontaneous combustion. Items such as foam rubber (latex
foam), shower caps, waterproof textiles, rubber backed articles and clothes or
pillows fitted with foam rubber pads MUST NOT be dried in the tumble dryer.
● Always refer to the laundry care labels for directions on suitability for drying.
4
40005291Eng.qxd 20/09/2007 15:30 Page 4

● Clothes should be spin dried or thoroughly wrung before they are put into the
tumble dryer. Clothes that are dripping wet should NOT be put into the dryer.
● Lighters and matches must not be left in pockets and NEVER use flammable
liquids near the machine.
● Glass fibre curtains should NEVER be put in this machine. Skin irritation may
occur if other garments are contaminated with the glass fibres.
● Items that have been soiled with substances such as cooking oil, acetone, alcohol,
petrol, kerosene, spot removers, turpentine, waxes and wax removers should be
washed in hot water with an extra amount of detergent before being dried in
the tumble dryer.
● Fabric softeners, or similar products, should be used as specified by the fabric
softener instructions.
Environmental Issues
● All packaging materials used are environmentally-friendly and recyclable. Please
help dispose of the packaging via environmentally-friendly means. Your local
council will be able to give you details of current means of disposal.
● To ensure safety when disposing of an old tumble dryer disconnect the mains
plug from the socket, cut the mains power cable and destroy this together with
the plug. To prevent children shutting themselves in the machine break the door
hinges or the door lock.
GIAS Service
●
To ensure the continued safe and efficient operation of this appliance we
recommend that any servicing or repairs are only carried out by an authorised
GIAS service engineer.
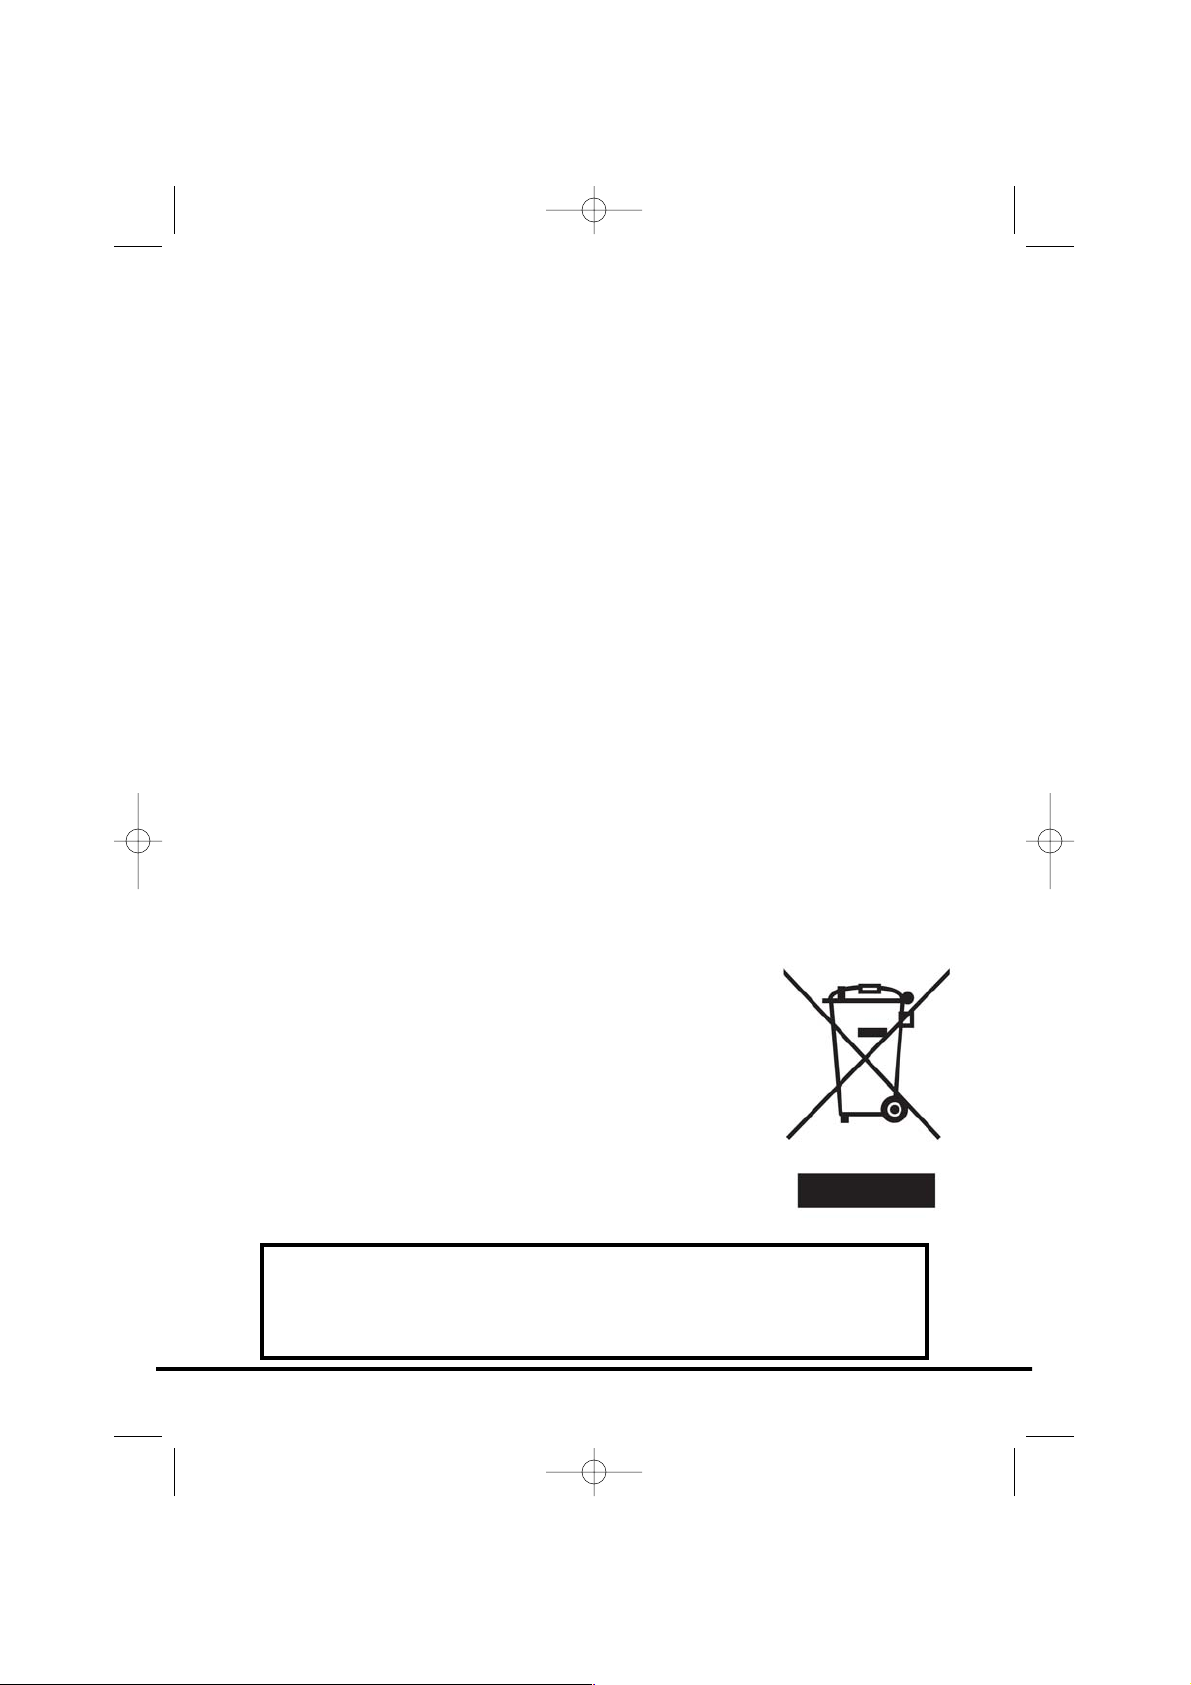
European directive 2002/96/EC
This appliance is marked according to the European directive 2002/96/EC on Waste
Electrical and Electronic Equipment (WEEE).
By ensuring this product is disposed of correctly, you will help
prevent potential negative consequences for the environment
and human health, which could otherwise be caused by
inappropriate waste handling of this product.
The symbol on the product indicates that this product may not
be treated as household waste. Instead it shall be handed over
to the applicable collection point for the recycling of electrical
and electronic equipment.
Disposal must be carried out in accordance with local
environmental regulations for waste disposal.
For more detailed information about treatment, recovery and
recycling of this product, please contact your local city office,
your household waste disposal service or the shop where you
purchased the product.
5
If the appliance is not running properly or breaks down,
switch it off and disconnect the plug from the socket.
Consult GIAS Service for possible repair.
40005291Eng.qxd 20/09/2007 15:31 Page 5
Electrical requirements
Tumble dryers are supplied to operate at a
voltage of 230V, 50 Hz single phase. Check that
the supply circuit is rated to at least 10A.
Electricity can be extremely dangerous.
This appliance must be earthed.
The socket outlet and the plug on the appliance
must be of the same type.
Do not use multiple adapters and/or extension
leads.
The plug should be accessible for disconnection
after the appliance has been installed.
The wires in the mains lead are coloured in
accordance with the following codes:
Blue NEUTRAL
Brown LIVE
Green and Yellow EARTH
CE Appliance complies with European Directive
89/336/EEC, 73/23/EEC and subsequent amendments.
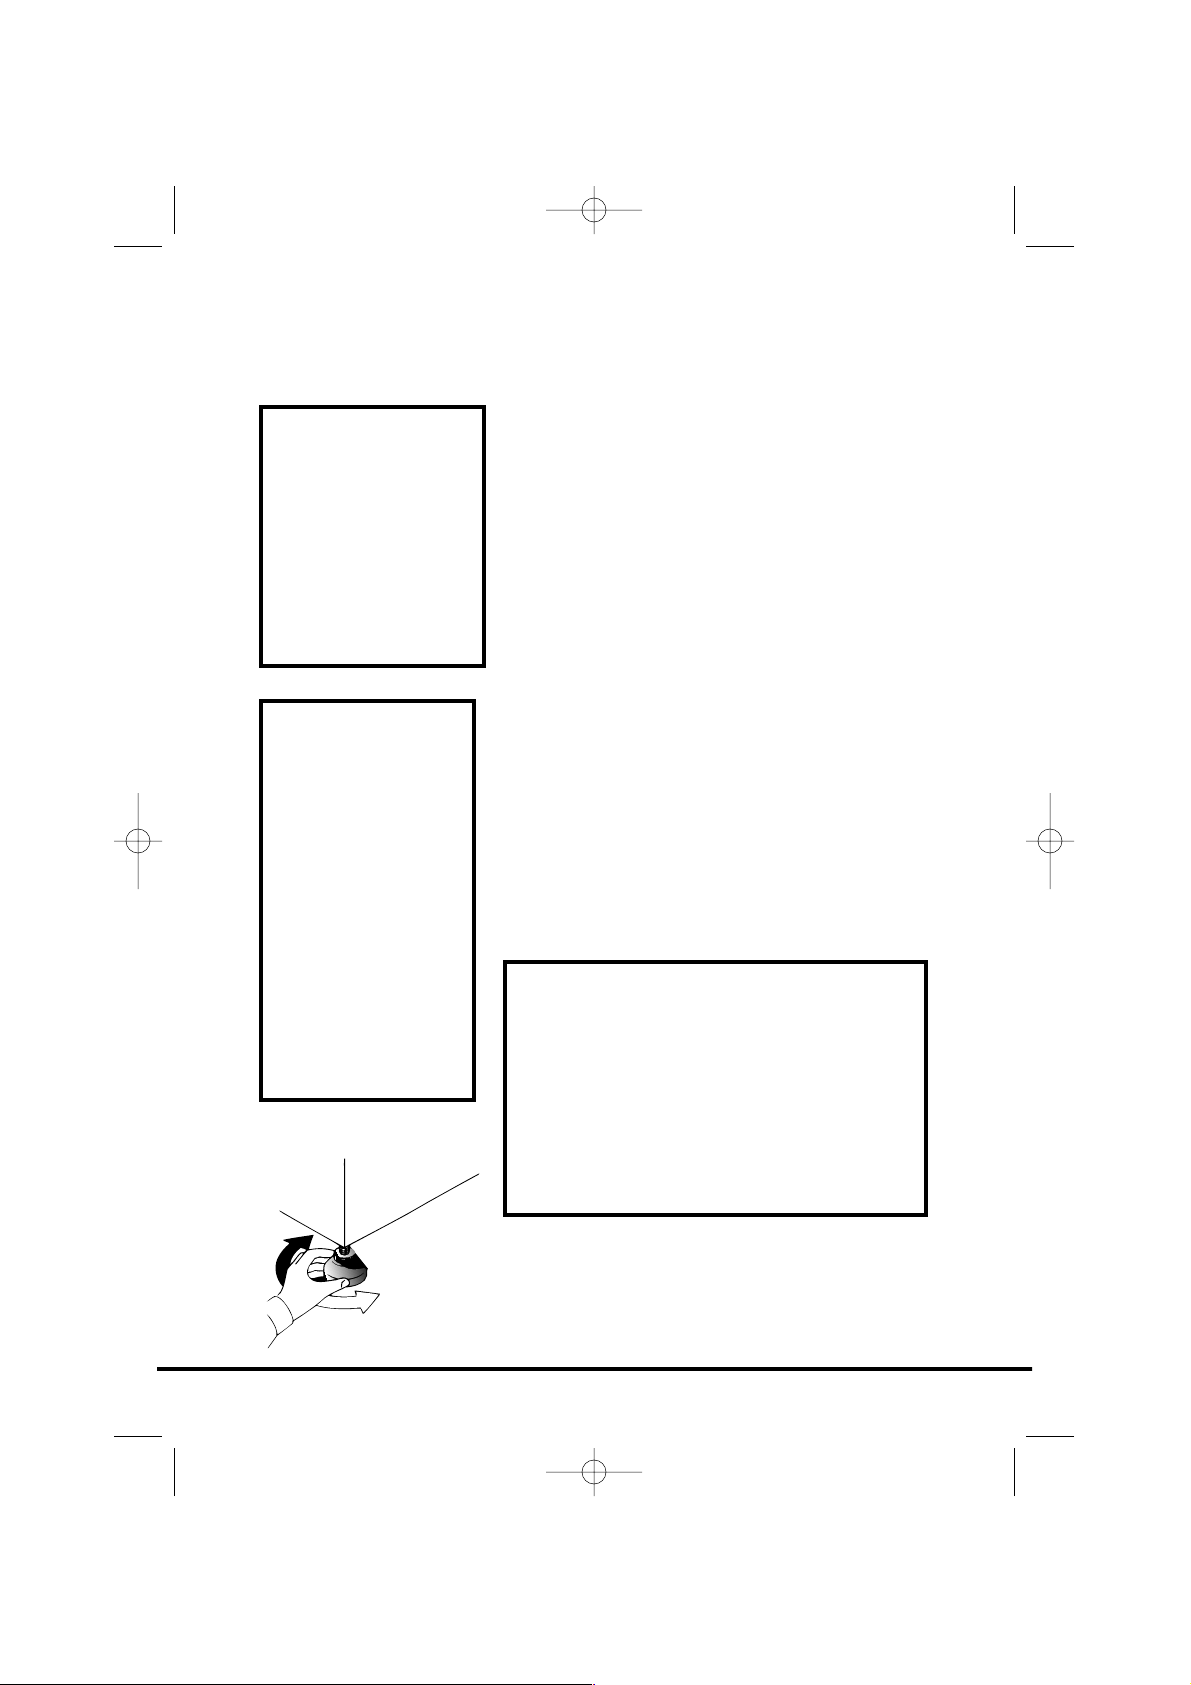
Adjusting the feet
Once the machine is in place the feet should be
adjusted to ensure that the machine is level.
6
You may be
charged for a
service call if a
problem with
your machine is
caused by
incorrect
installation.
If the mains cord
on this
appliance is
damaged, it
must be
replaced by a
special cord
which is ONLY
obtainable from
the spares
service. It must
be installed by a
competent
person.
Installation
Do not plug the machine in and
switch it on at the mains until the
installation is completed.
For your safety, this dryer must be
correctly installed.
If there is any doubt about
installation, call GIAS Service for
advice.
40005291Eng.qxd 20/09/2007 15:31 Page 6
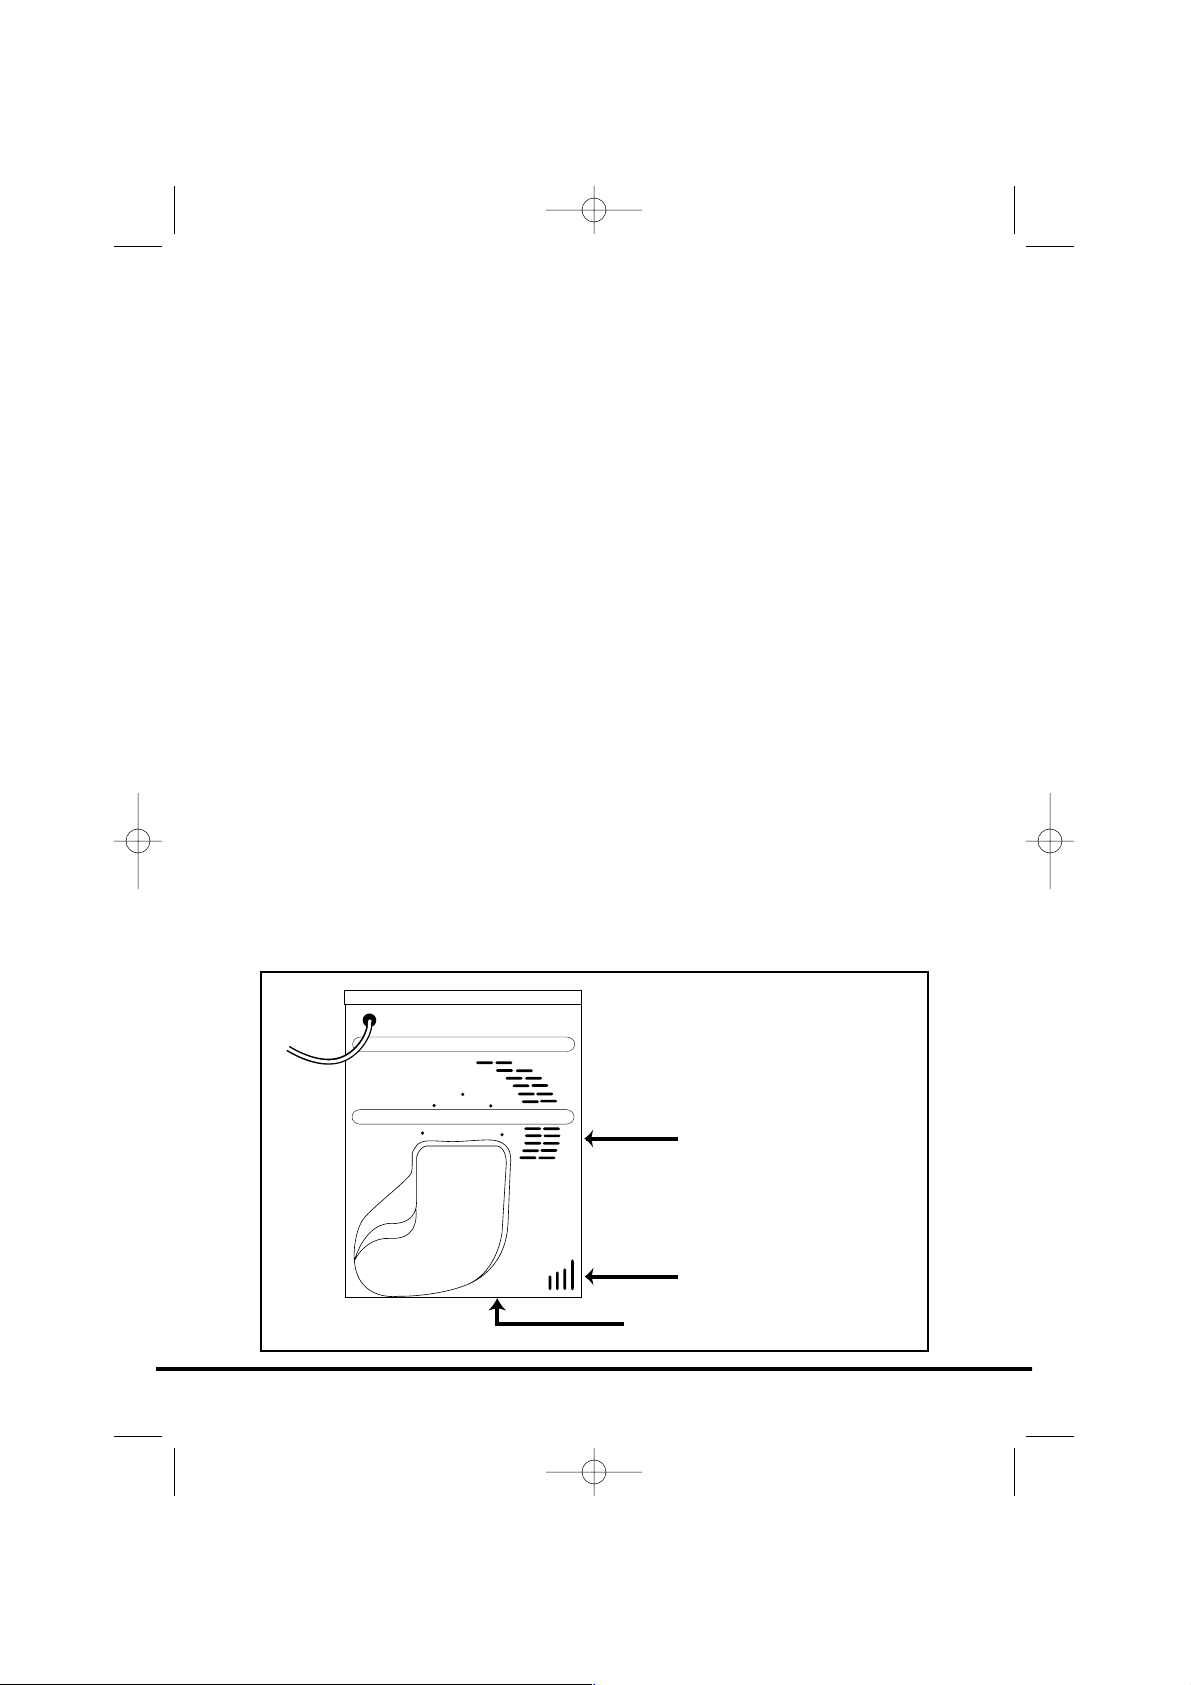
Adequate ventilation must be provided in the
room where the tumble dryer is located to
prevent gases from appliances burning other
fuels, including open fires, being drawn into the
room during operation of the tumble dryer.
● Exhaust air must not be discharged into a
flue which is used for exhausting fumes
from appliances burning gas or other fuels.
● Check regularly that the air flowing through
the dryer is not restricted.
● Check the fluff filter after use, and clean, if
necessary.
● The inlet and outlets should be kept free
from obstructions. To ensure adequate
ventilation the space between the bottom
of the machine and the floor must not be
obstructed. There should be a gap of at
least 12mm between the machine and any
obstructions.
● Prevent items from falling or collecting
behind the dryer as these may obstruct the
air inlet and outlet.
● NEVER install the dryer up against curtains.
7
Ventilation
AIR OUTLETS
AIR OUTLETS IN THE BASE
AIR INLET VENTS
40005291Eng.qxd 20/09/2007 15:31 Page 7

Before using the tumble dryer for the first time:
● Please read this instruction book thoroughly.
● Remove all items packed inside drum.
● Wipe the inside of the drum and door with
a damp cloth to remove any dust which may
have settled in transit.
Clothes preparation
Make sure that the laundry you are going to dry
is suitable for drying in a tumble dryer, as shown
by the care symbols on each item.
Check that all fastenings are closed and that
pockets are empty. Turn the articles inside out.
Place clothes loosely in the drum to make sure
that they don't get tangled.
Maximum drying weight
● Cottons Max. 6 kg
● Synthetics Max. 3 kg
8
Preparing the load
Do not overload
the drum, large
items when wet
can exceed the
maximum
admissible
clothes load
(for example:
sleeping bags,
duvets).
40005291Eng.qxd 20/09/2007 15:31 Page 8
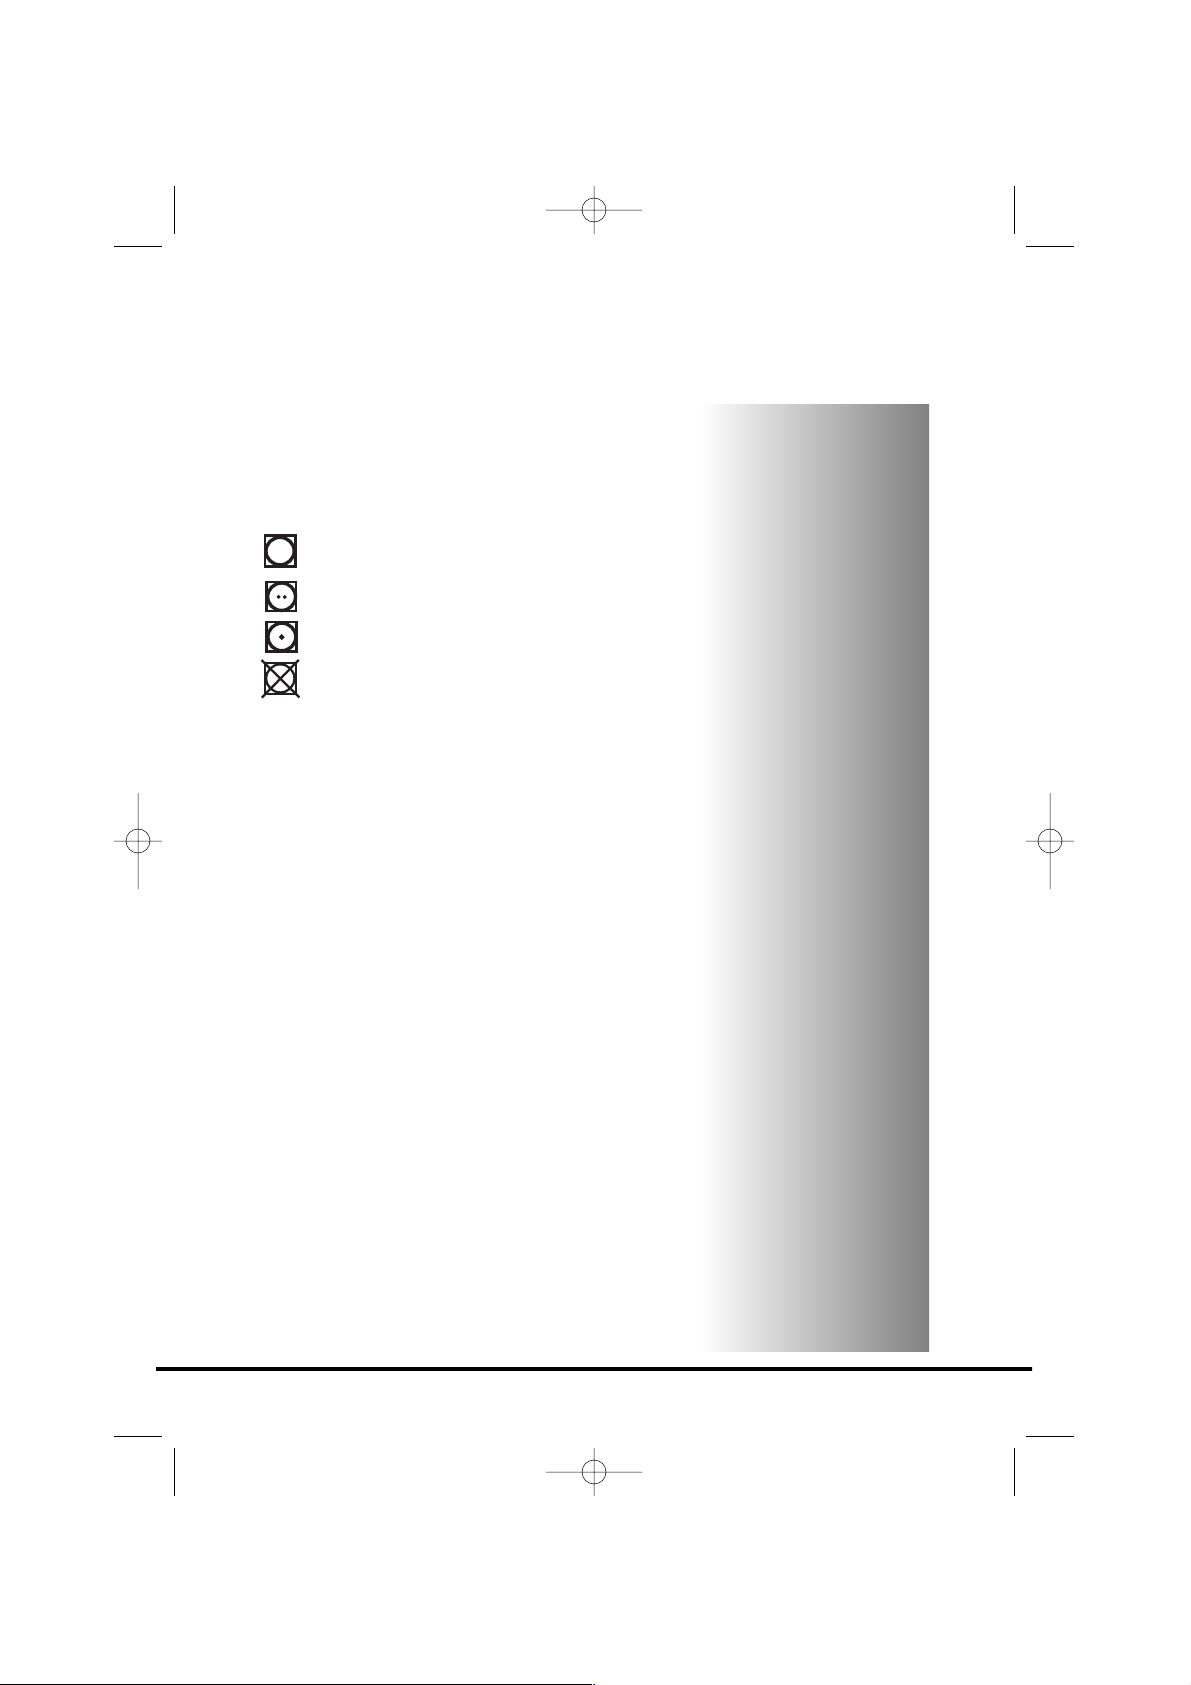
Sort the load as follows:
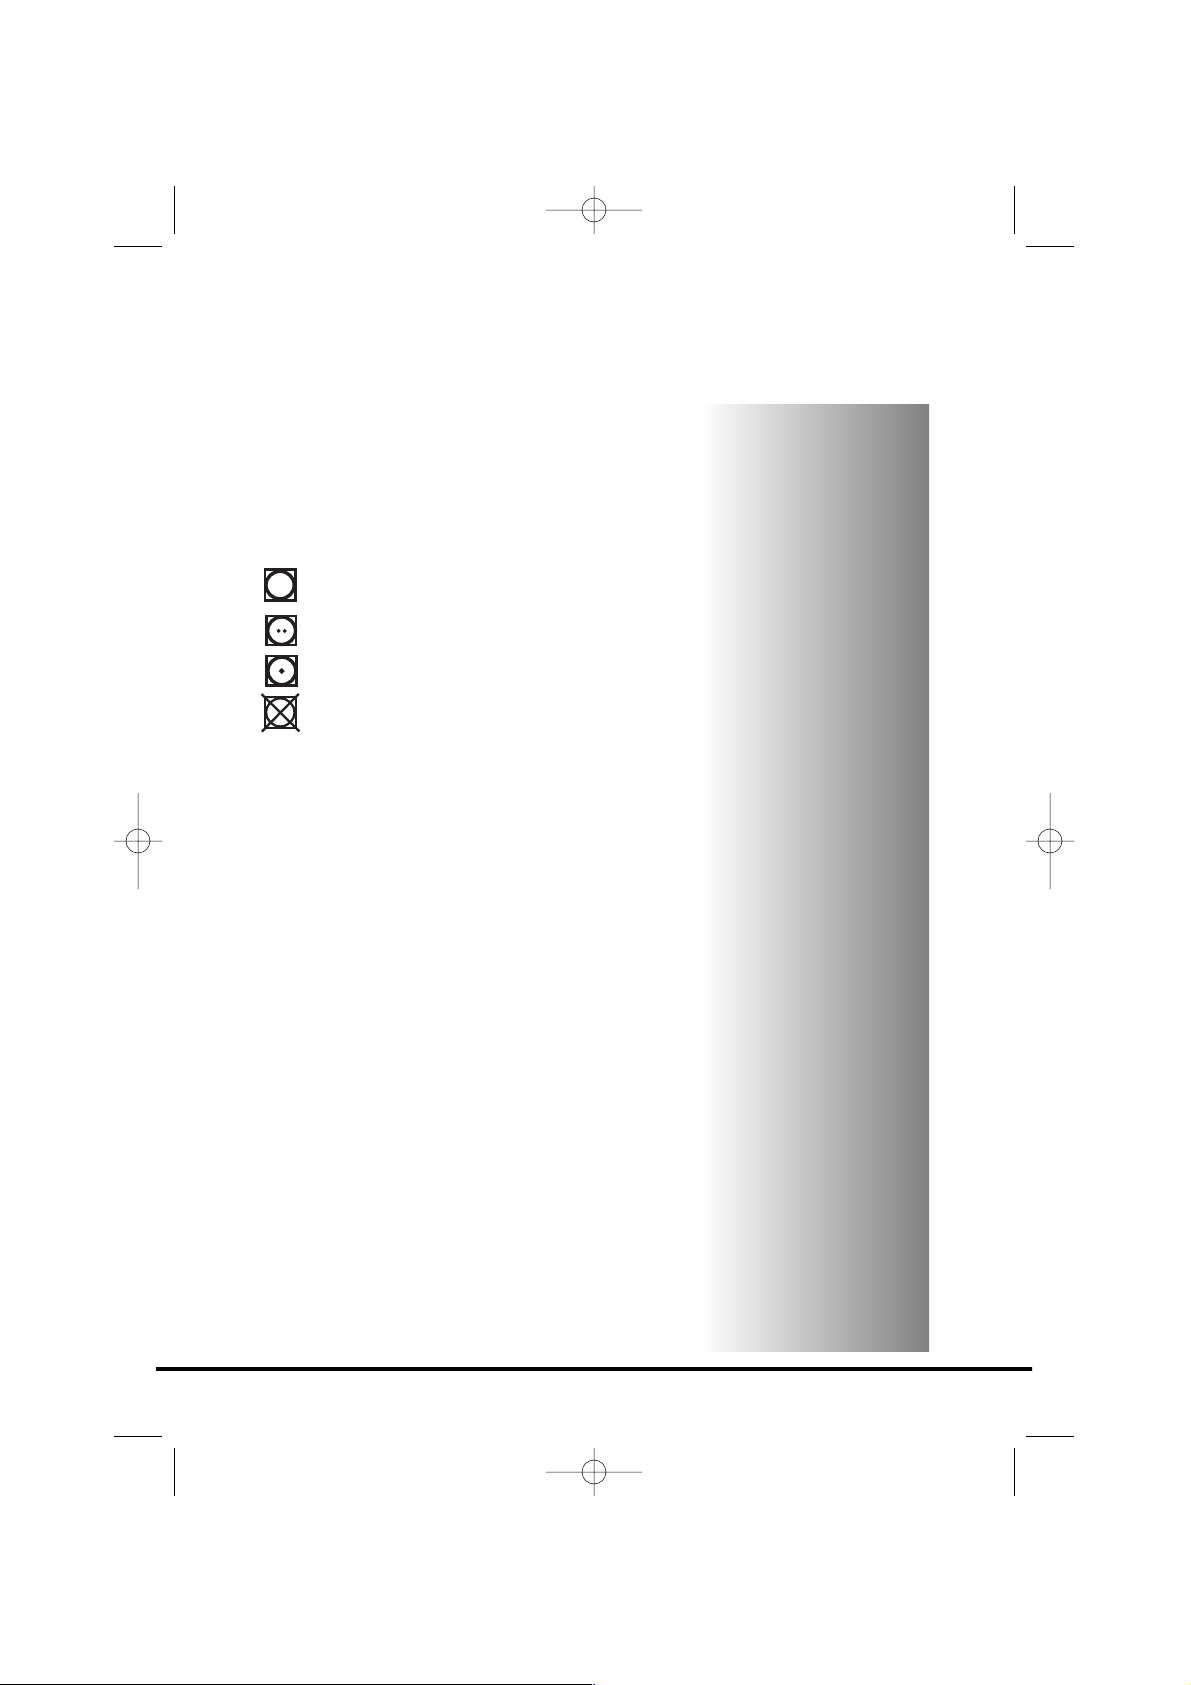
● By care symbols
These can be found on the collar or inside
seam:
Suitable for tumble drying.
Tumble drying at high temperature.
Tumble drying at low temperature only.
Do not tumble dry.
If the item does not have a care label it
must be assumed that it is not suitable
for tumble drying.
● By amount and thickness
Whenever the load is bigger than the dryer
capacity, separate clothes according to
thickness (e.g. towels from thin underwear).
● By type of fabric
Cottons/linen: Towels, cotton jersey, bed and
table linen.
Synthetics: Blouses, shirts, overalls, etc.
made of polyester or polyamid, as well as
for cotton/synthetic mixes.
● By drying level
Sort into: iron dry, cupboard dry, etc. For
delicate articles press the ‘Schontrocknung’
button to select low drying temperature.
9
40005291Eng.qxd 20/09/2007 15:31 Page 9
Do not tumble dry:
Woollens, silk, delicate fabrics, nylon stockings,
delicate embroidery, fabrics with metallic
decorations, garments with PVC or leather
trimmings, training shoes, bulky items such as
sleeping bags, etc.
Energy saving
Only put into the tumble dryer laundry which has
been thoroughly wrung or spin-dried. The drier
the laundry the shorter the drying time thus
saving electricity.
ALWAYS
● Try to dry the maximum weight of laundry,
this will save time and electricity.
● Check that the filter is clean before every
drying cycle.
NEVER
● Exceed the maximum weight, this will waste
time and electricity.
● Put dripping wet items into the tumble
dryer, this may damage the appliance.
10
Drying advice
IMPORTANT: Do
not dry articles
which have been
treated with a
dry cleaning fluid
or rubber clothes
(danger of fire or
explosion).
During the last
15 minutes the
load is always
tumbled in cool
air.
40005291Eng.qxd 20/09/2007 15:31 Page 10
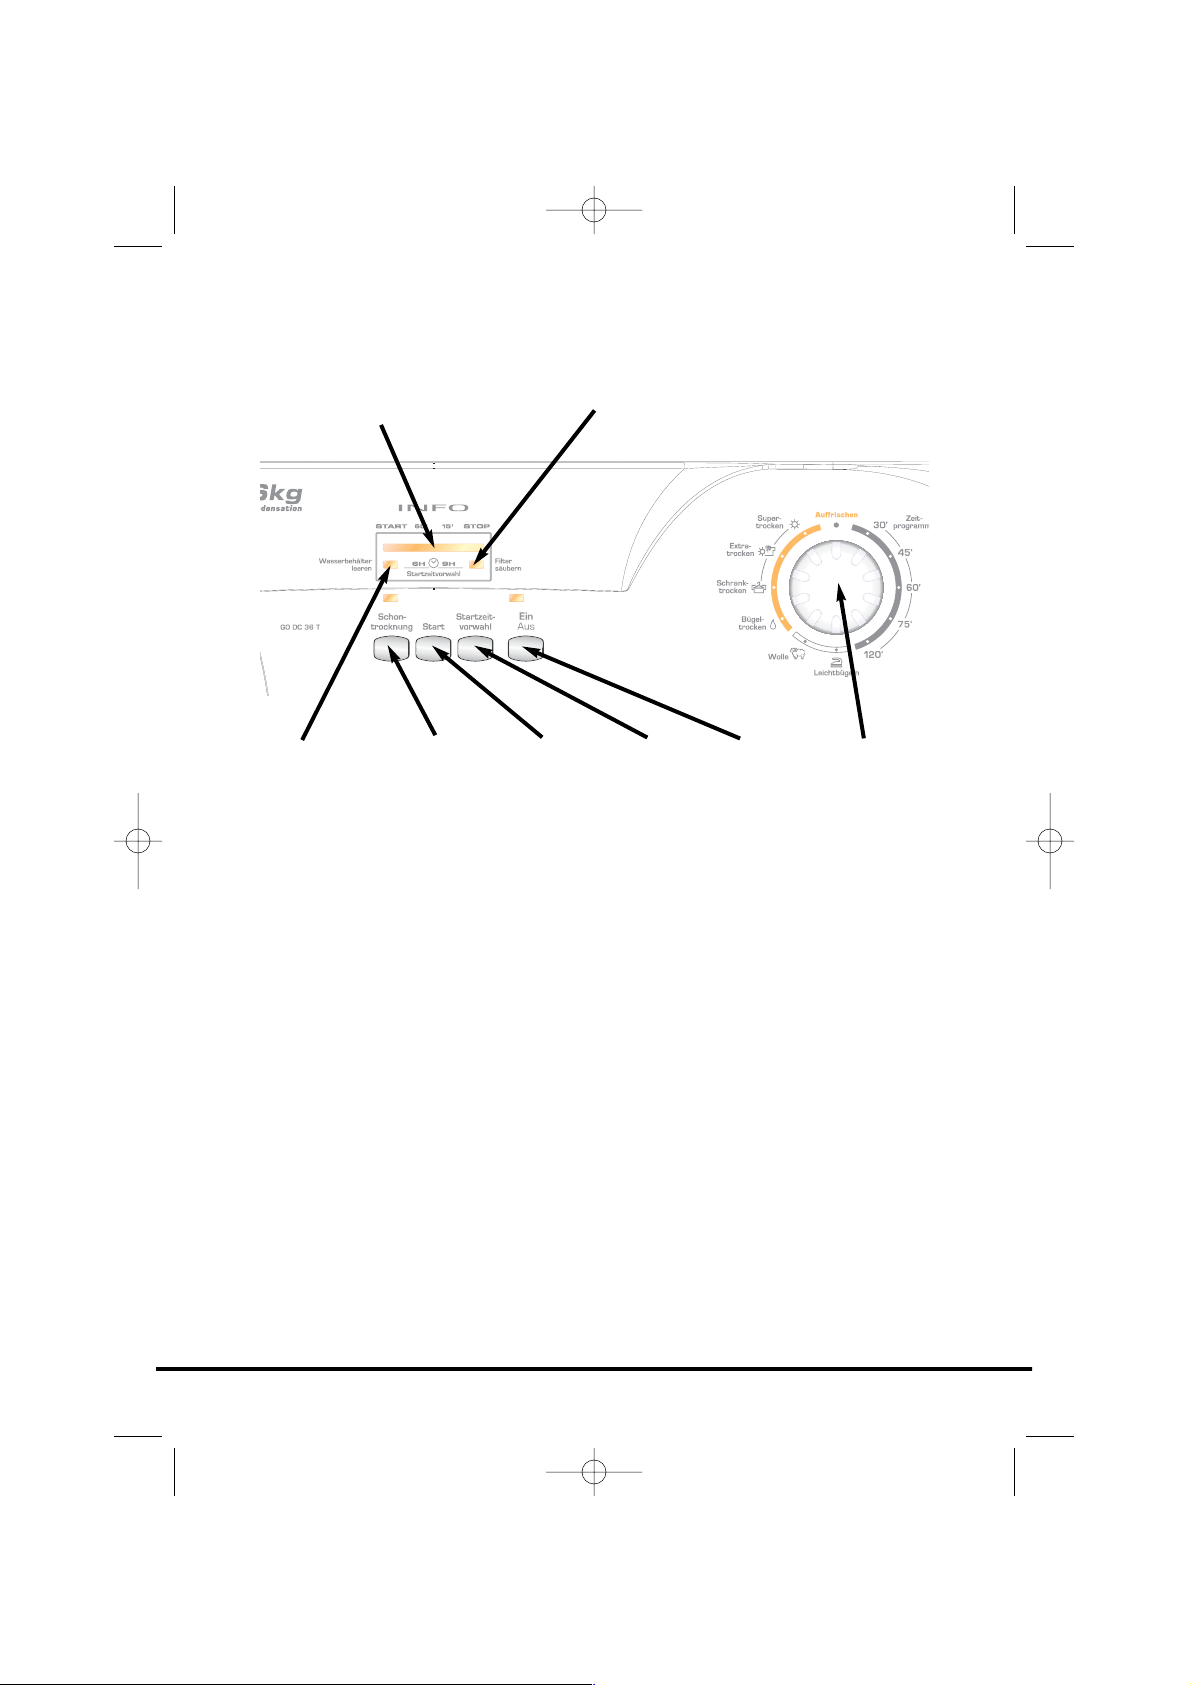
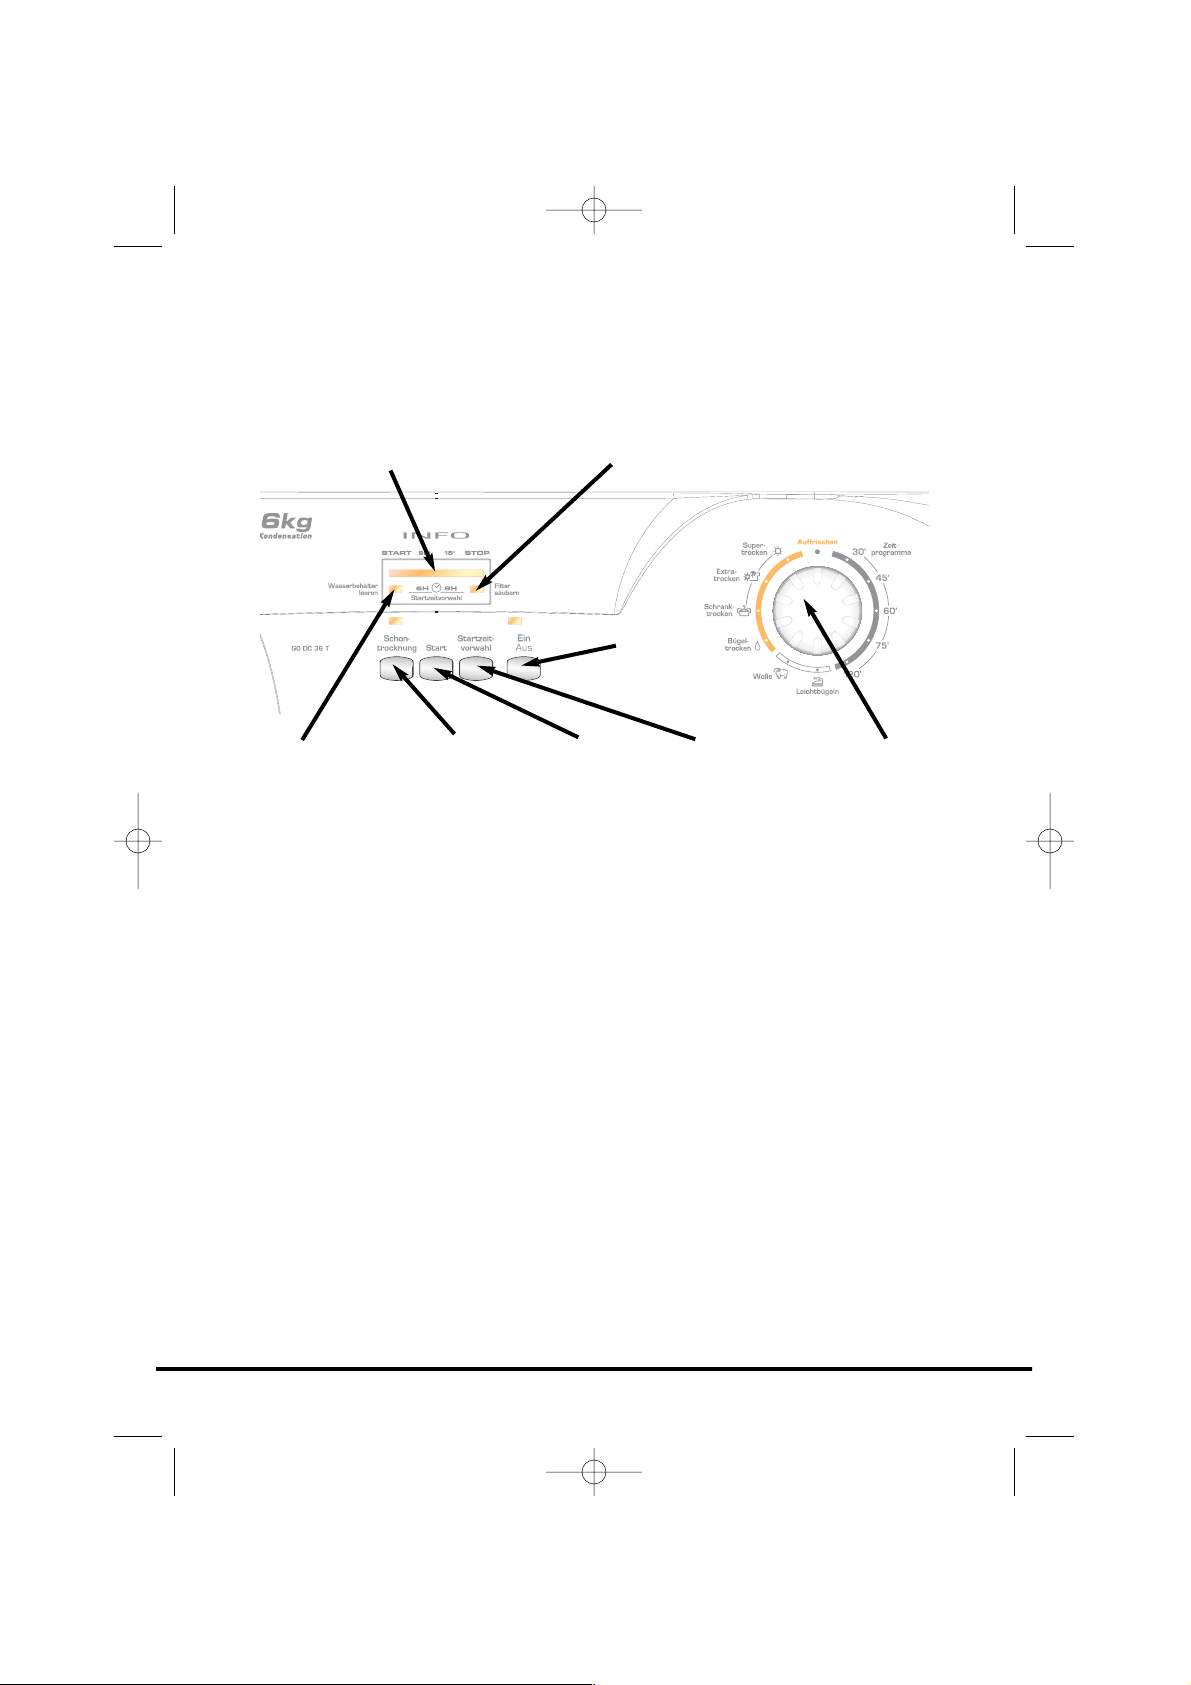
Control panel and indicator lights
Programme Selector – Select the required programme
On/Off button and indicator (Ein/Aus) – Press to switch on, the indicator will light
Start Delay button (Startzeitvorwahl) – Allows the user to delay the start of the drying
cycle (see details of operation page 16)
Start – Press Start to commence the selected drying programme
Acrylics/Synthetics button (Schontrocknung) – Press to reduce the heat level for delicate
items, the indicator above the button will light up. To change the heat setting the
programme must be reset
Low Heat – Indicator light ON High Heat – Indicator light OFF
Empty Water indicator (Wasserbehälter leeren) – lights when the water container is full
Filter Care indicator (Filter säubern) – lights when the filter needs cleaning
Display
START – When the dryer is switched On the START indicator will flash, when the
programme starts the START indicator will light up
60' – Indicator lights when there is less than 60 minutes left until completion of the
programme
15' - Indicator lights when there is less than 15 minutes left until completion of the
programme. At this stage of the drying cycle the machine enters the Cool Down phase
STOP - Indicator lights when the programme is finished
6h - 6 hour start delay (light flashes when in operation)
9h - 9 hour start delay (light flashes when in operation)
11
Controls and indicators
ACRYLICS/
SYNTHETICS
BUTTON
ON/OFF
BUTTON
FILTER CARE
INDICATOR
EMPTY
WATER
INDICATOR
PROGRAMME
SELECTOR
START
BUTTON
START
DELAY
BUTTON
COUNTDOWN DISPLAY
40005291Eng.qxd 20/09/2007 15:31 Page 11

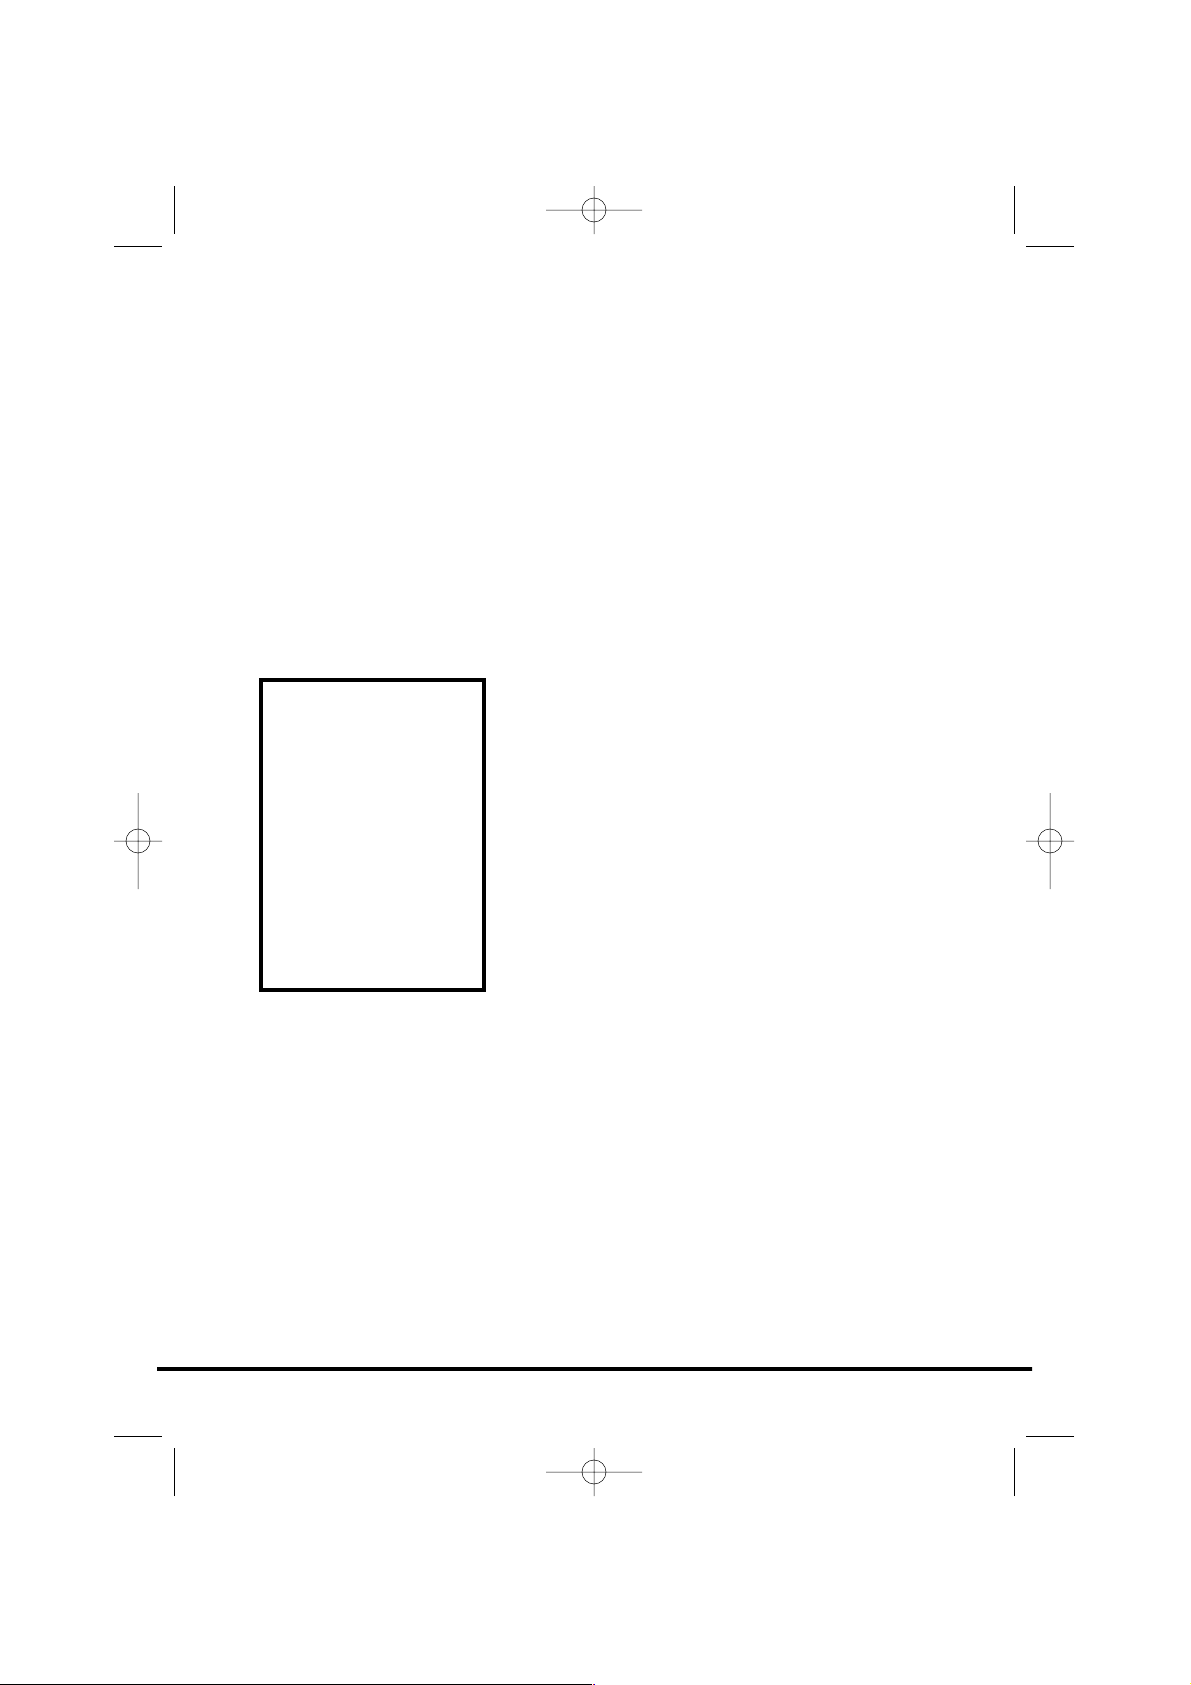
Opening the door
Pull on handle to open the door.
To restart the dryer, close the door and press
Start.
Filter
IMPORTANT: To maintain the efficiency of the
dryer check that the fluff filter is clean before
each drying cycle.
1. Pull the filter upwards.
2. Open filter as shown.
3. Gently remove lint using a soft brush or
your fingertips.
4. Snap the filter together and push back into
place.
Filter Care Indicator
‘Filter säubern’ lights when the filter needs
cleaning.
If the laundry is not drying check that the filter is
not clogged.
12
Door and Filter
WARNING!
When the tumble dryer is in use the
drum and door may be VERY HOT.
Never stop a tumble dryer before
the end of the drying cycle unless
all items are quickly removed and
spread out so that the heat is
dissipated.
40005291Eng.qxd 20/09/2007 15:31 Page 12

The water removed from the laundry during the
drying cycle is collected in a container at the
bottom of the dryer.
When the container is full the ‘Wasserbehälter
leeren’ indicator on the control panel will light,
and the container MUST be emptied. However,
we recommend that the container is emptied
after each drying cycle.
NOTE: Very little water will collect during the
first few cycles of a new machine as an internal
reservoir is filled first.
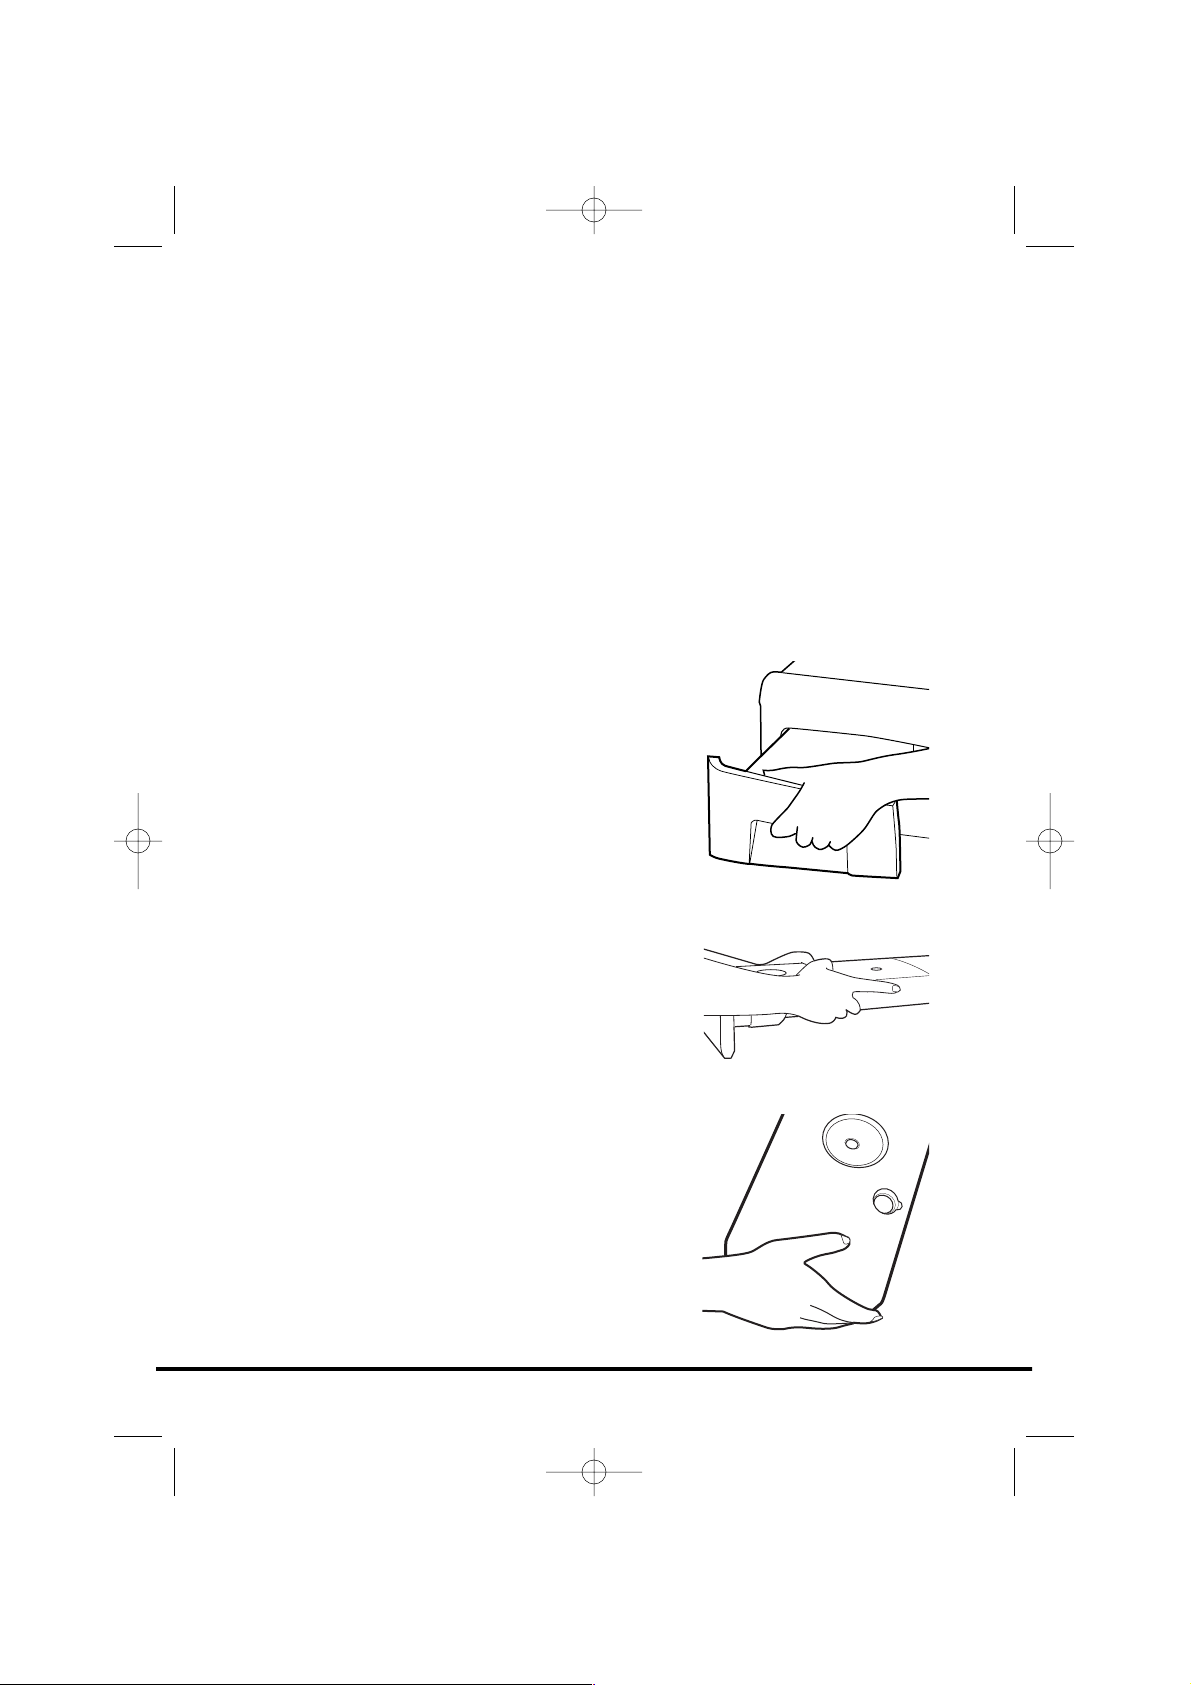
To remove the container
1. Gently pull out the tray until it is completely
removed. Support the tray with both hands.
When it is full the water container will
weigh about 4kg.
2. Tilt the water container to empty the water
out through the rear hole. When empty
slide the water container back into position.
PUSH FIRMLY INTO PLACE.
NOTE: If you have the option of drainage near
the dryer it is possible to use the discharge kit to
provide a permanent drain for the water
collected by the dryer. This will remove the need
to empty the water tray. All the information for
assembly of the kit is contained in the kit
envelope.
13
Water Container
40005291Eng.qxd 20/09/2007 15:31 Page 13

Important: Always switch off and remove the plug
from the electricity supply before cleaning the
condenser.
To maintain the efficiency of the dryer regularly
check that the condenser is clean.
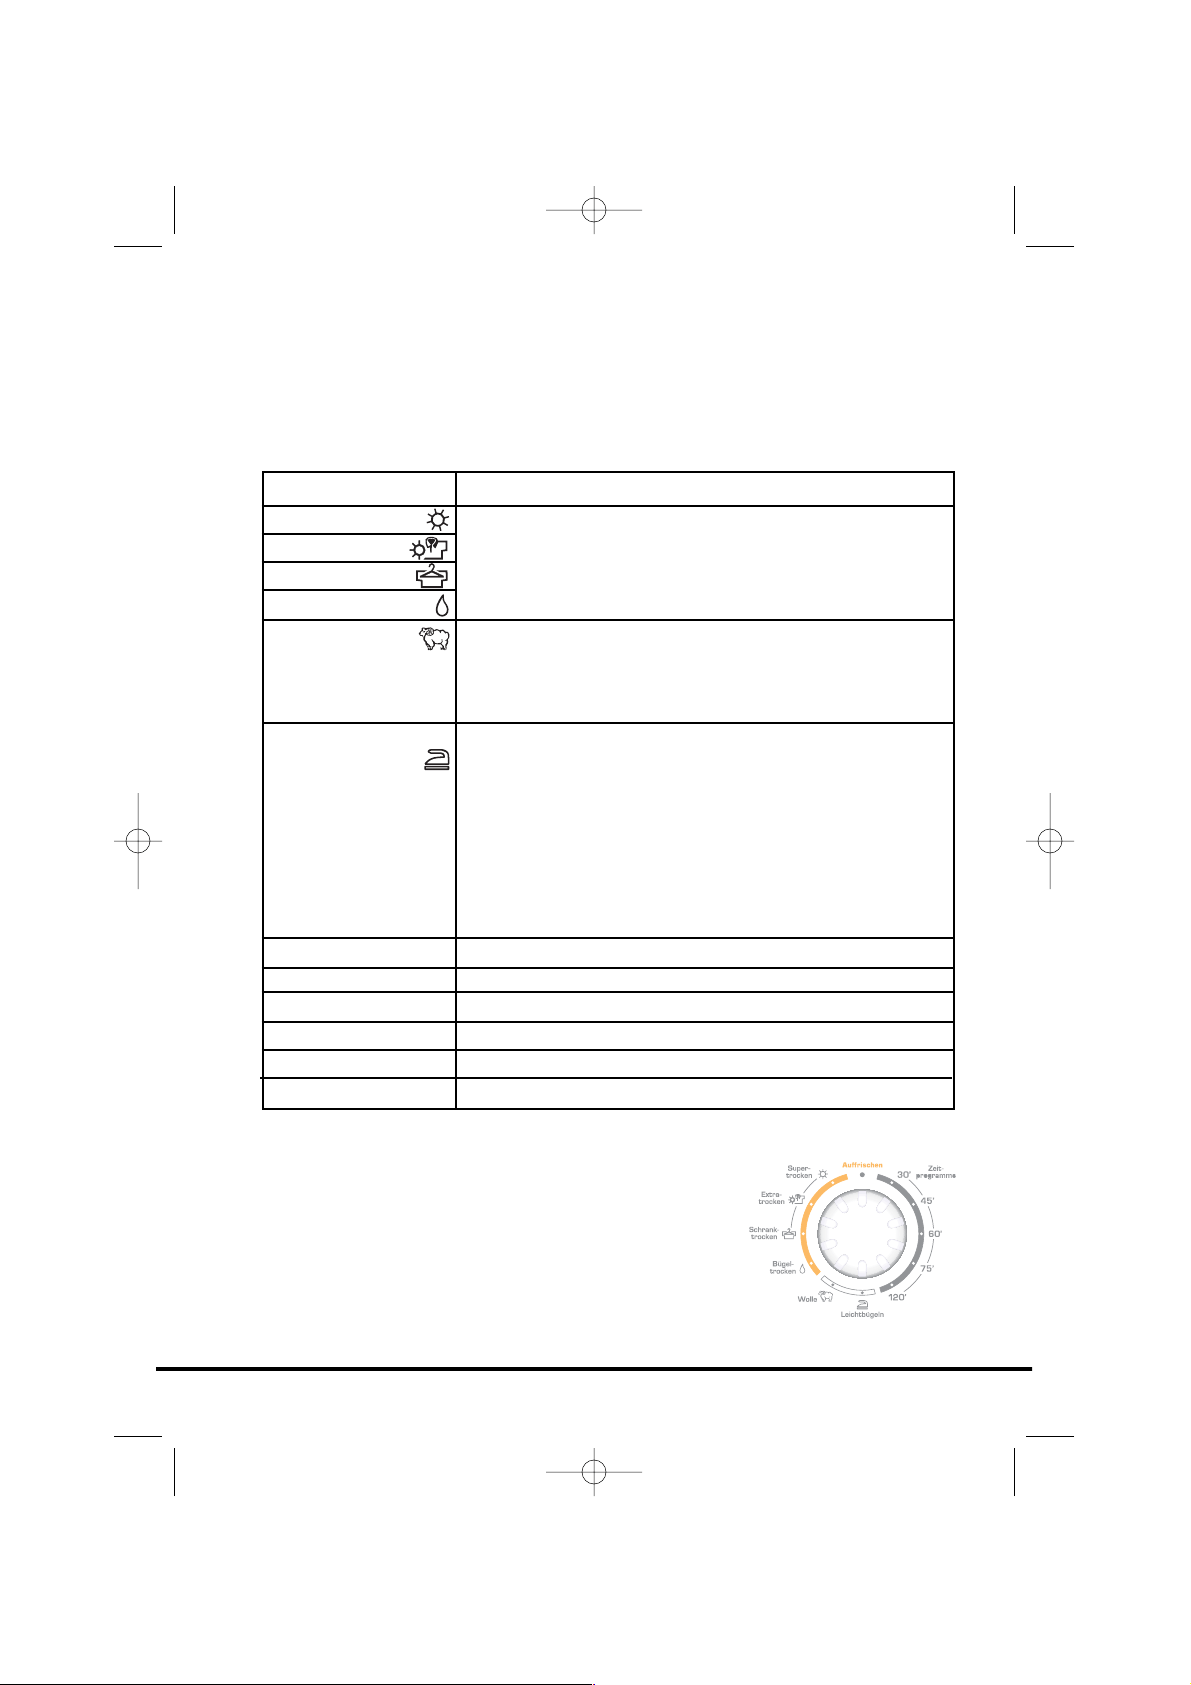
To remove the condenser
1. Gently pull the bottom of the kickplate so
that it unclips from the dryer. The top section
can then be unhinged allowing the kickplate
to be completely removed.
2. Turn the two locking levers anti-clockwise
and pull out the condenser.
3. Pull out the condenser unit.
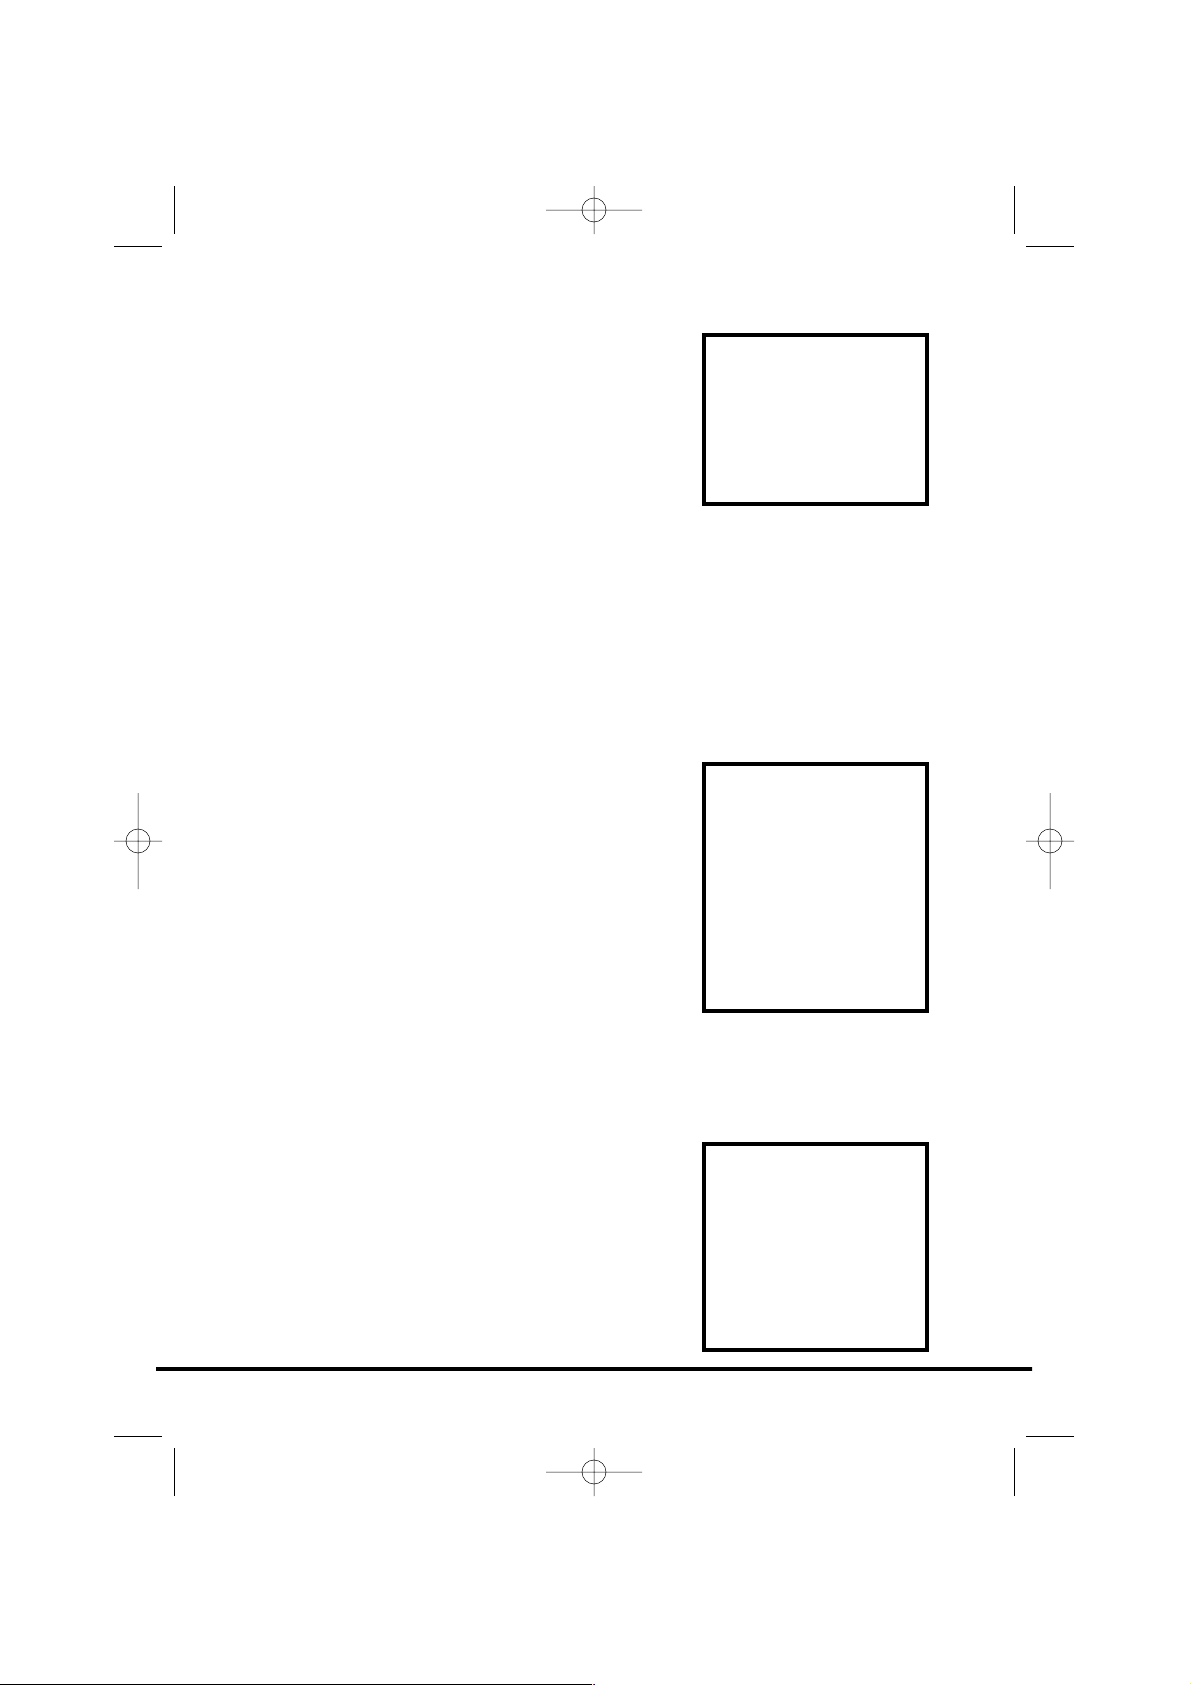
4. Gently remove any dust or fluff with a cloth,
then wash the unit by holding it under a
running tap turning it so that water flows
between the plates, to remove any dust or
fluff.
5. Refit the condenser ensuring it is in the
correct way (as indicated by the arrow) and
pushed firmly into place. Lock the two levers
by turning them clockwise.
6. Refit the kickplate.
14
Condenser
40005291Eng.qxd 20/09/2007 15:31 Page 14
Note: The sensor may not detect a small load of small
articles. For small loads and separate items or pre-dried
fabrics with low moisture content, use the timed
programmes. Set the programme between 30 and 75
minutes depending on the load size and dryness
required, and select high or low heat depending upon
the fabric type.
If the sensor does not detect the item the dryer will only
operate for 10 minutes before going into cooldown.
If the load is too large or too wet to tumble dry the
dryer will automatically go into cooldown after 185
minutes.
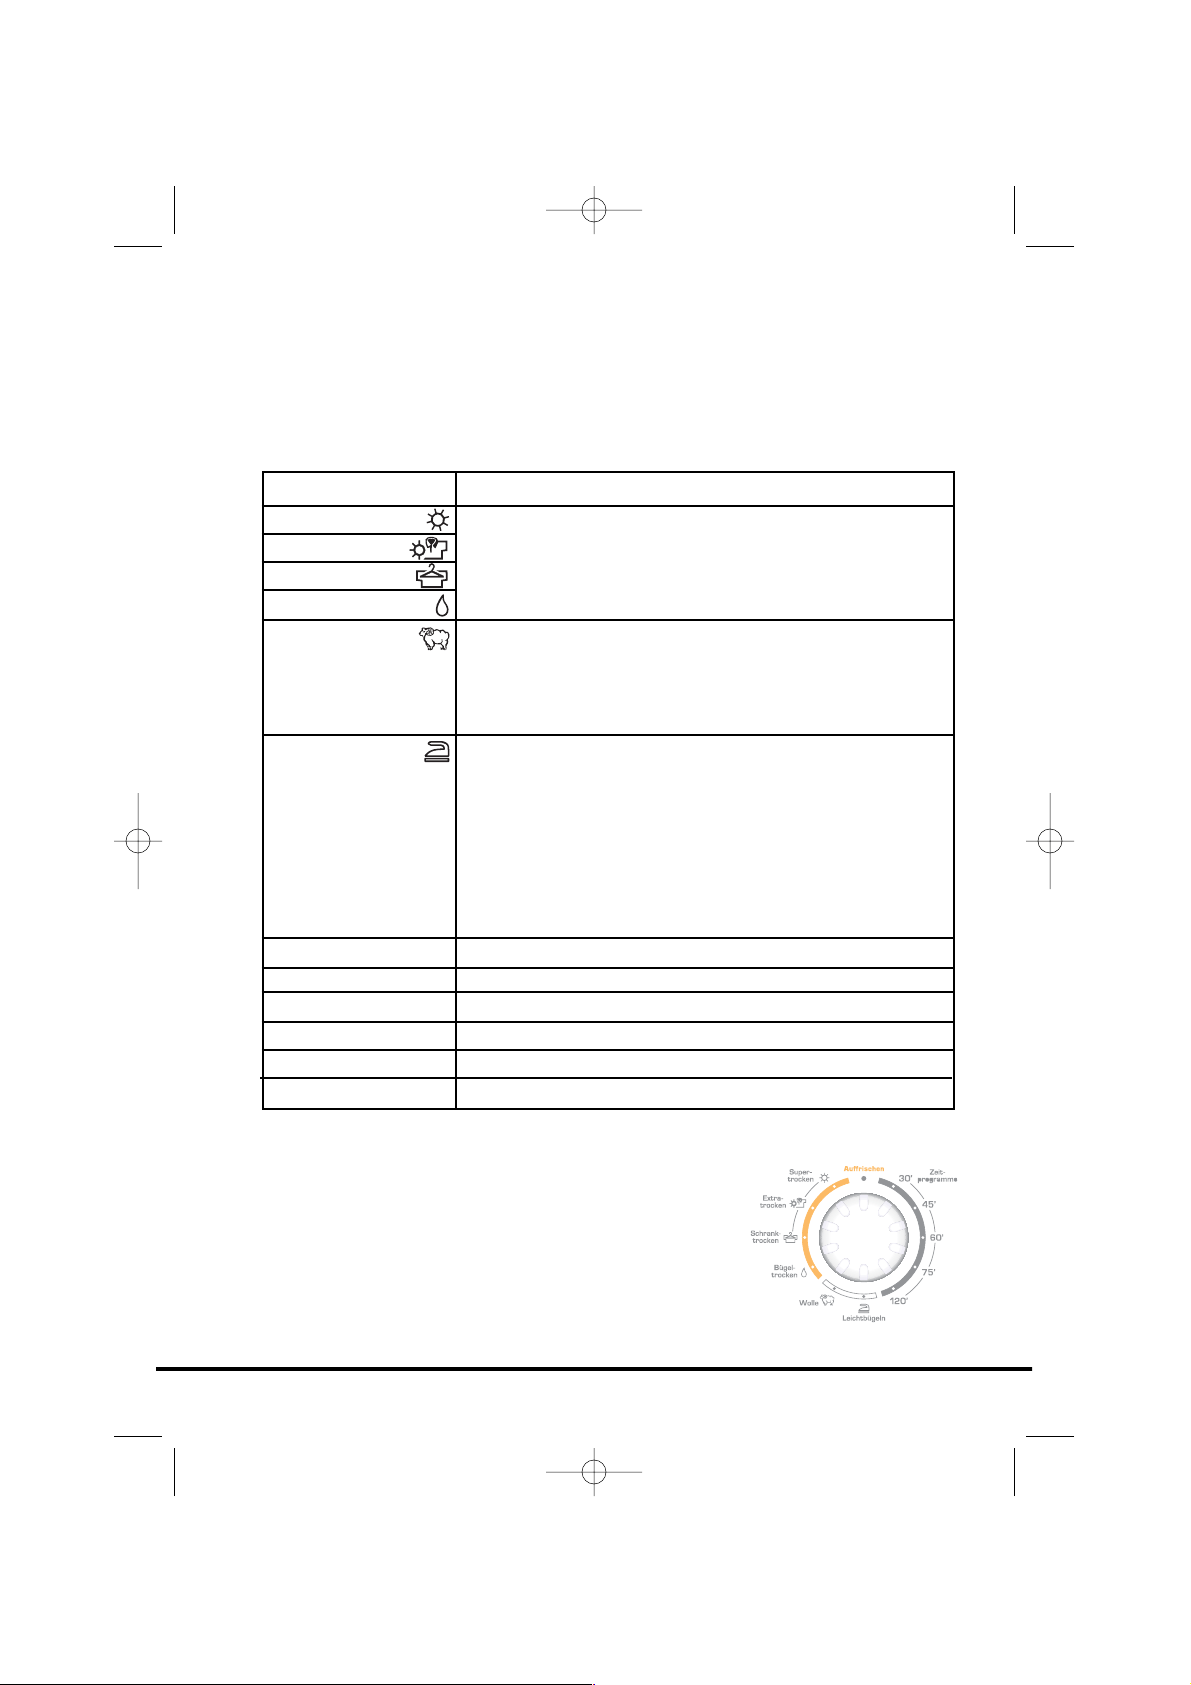
The Sensor Dry machine gives many options for drying the laundry to suit all
circumstances.
The table below lists the programmes and the function of each programme.
15
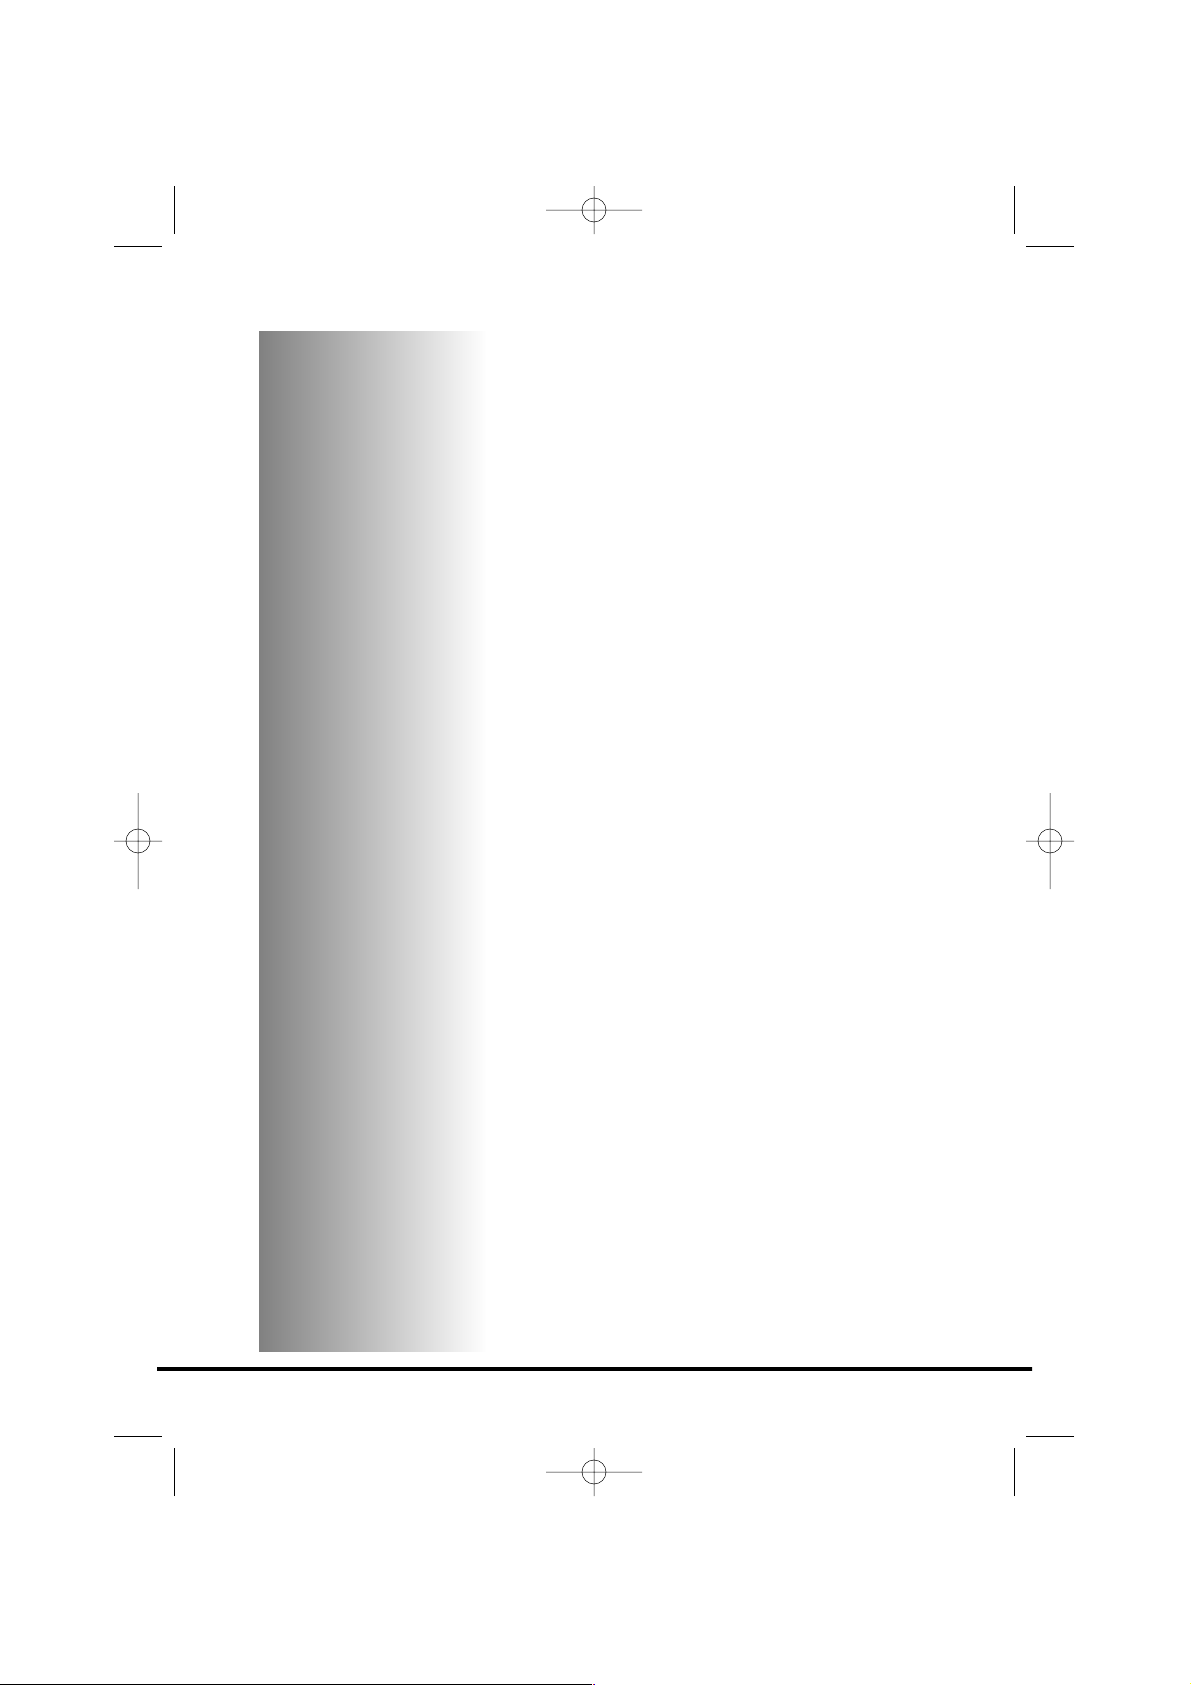
Selecting the Programme
Programme
Supertrocken
Extratrocken
Schranktrocken
Bügeltrocken
Wolle
Leichtbügeln
120'
75'
60'
45'
30'
Auffrischen
Description
Select the degree of dryness that you require.
This ranges from ‘Supertrocken’ for bath towels and
bathrobes, through ‘Schranktrocken’ for items that will
be put away without ironing, to the programme that
leaves the laundry suitable for ironing.
A gentle programme specially created to get woollens
softer after air-drying.
This delicate warm air cycle, lasting 12 minutes, can also
be used to get woollens 'refreshed' after being stored in
the wardrobe.
The Fast Iron programme provides a conditioning and
anticrease function. The dryer will heat the load for
9 minutes followed by a 3 minute cool down period and
is especially good for garments which may have been left
for some time prior to ironing, in a linen basket for
example. Garments may also become stiffened when
dried outside on a washing line or inside on radiators.
The Fast Iron process relaxes the creases in the fabric
making ironing quicker and easier.
120 minutes of drying
75 minutes of drying
60 minutes of drying
45 minutes of drying
30 minutes of drying
Tumbling of laundry in cool air for 30 minutes
40005291Eng.qxd 20/09/2007 15:31 Page 15

1. Open the door and load the drum with laundry. Ensure that garments do
not hinder closure of the door.
2. Gently close the door pushing it slowly until you hear the door 'click'
shut.
3. Press the ‘Ein Aus’ button to switch on the dryer. The indicator will light
up and the START indicator will flash.
4. Turn the Programme Selector dial to select the required drying
programme (see Programme Guide).
5. If drying synthetics, acrylics or delicate items, press the ‘Schontrocknung’
button to reduce the heat level.
The light above the push button will light up when the machine is in low
heat setting. To deselect this status when the drying cycle has started it is
necessary to reset the machine.
6. Press the Start button. The dryer will start automatically and the START
indicator will be continuously lit.
7. The display will show the drying progress in terms of time remaining.
8. If the door is opened during the programme to check the laundry, it is
necessary to press Start to recommence drying after the door has been
closed.
9. When the 15' indicator is lit the machine will enter the cool down phase,
the clothes will be tumbled in cool air allowing the load to cool down.
10. When the programme is complete the STOP indicator will light.
Cancelling and resetting the
programme
To cancel a programme switch the machine off and on again. The machine will
indicate that it has been reset by the START indicator flashing.
Start Delay
The Delay Start Function (Startzeitvorwahl) allows the user to delay the start
of the drying cycle by 6 or 9 hours.
When the function is first selected the display will show a delay of 6 hours, a
subsequent press of the button will increase the delay to 9 hours.
16
Operation
40005291Eng.qxd 20/09/2007 15:31 Page 16
To commence the programme press Start and the
appliance will complete the drying cycle at the
end of this time. The 6 or 9 hour indicator light
will flash to indicate that the start delay is in
progress.
Cleaning the dryer
● Clean the filter and empty the water
container after every drying cycle.
● Regularly clean the condenser.
● After each period of use, wipe the inside of
the drum and leave the door open for a
while to allow circulation of air to dry it.
● Wipe the outside of the machine and the
door with a soft cloth.
● DO NOT use abrasive pads or cleaning
agents.
● To prevent the door sticking or the build up
of fluff periodically clean the inner door and
gasket with a damp cloth.
Technical specifications
Drum capacity 115 litres
Maximum load 6 kg
Height 85cm
Width 60cm
Depth 60cm
Energy Label Band C
17
IMPORTANT
Always switch
off and remove
the plug from
the electricity
supply before
cleaning this
appliance.
For electrical data
refer to the
rating label on
the front of the
dryer cabinet
(with the door
open).
Cleaning and Routine
Maintenance
WARNING!
The drum, door
and load may be
very hot.
40005291Eng.qxd 20/09/2007 15:31 Page 17

What might be the cause of...
Defects you can remedy yourself
Before calling GIAS Service for technical advice please run through the
following checklist. A charge will be made if the machine is found to be
working or has been installed incorrectly or used incorrectly. If the problem
persists after completing the recommended checks, please call GIAS Service,
they may be able to assist you over the telephone.
Drying time is too long/clothes are not dry enough…
● Have you selected the correct drying time/programme?
● Were the clothes too wet? Were the clothes thoroughly wrung or spin-
dried?
● Does the filter need cleaning?
● Does the condenser need cleaning?
● Is the dryer overloaded?
● Are the inlets, outlets and base of the dryer free from obstructions?
● Has the ‘Schontrocknung’ option been selected from a previous cycle?
The dryer does not operate…
● Is there a working electricity supply to the dryer? Check using another
appliance such as a table lamp.
● Is the plug properly connected to the mains supply?
● Is there a power failure?
● Has the fuse blown?
● Is the door fully closed?
● Is the dryer switched on, both at the mains supply and at the machine?
● Has the drying time or the programme been selected?
● Has the machine been switched on again after opening the door?
● Has the dryer stopped operating because the water tray is full and needs
emptying?
The dryer is noisy…
● Switch off the dryer and contact GIAS Service for advice.
The Filter Care Indicator (Filter säubern) is on…
● Does the filter need cleaning?
● Does the condenser need cleaning?
Empty Water Indicator (Wasserbehälter leeren) is on…
● Does the water container need emptying?
18
Troubleshooting
40005291Eng.qxd 20/09/2007 15:31 Page 18
Should there still be a problem with your dryer
after completing all the recommended checks,
please call GIAS Service for advice. They may be
able to assist you over the telephone or arrange
for a suitable appointment for an engineer to call
under the terms of your guarantee. However, a
charge may be made if any of the following
applies to your machine:
● Is found to be in working order.
● Has not been installed in accordance with
the installation instructions.
● Has been used incorrectly.
Spares
Always use genuine spares, available direct from
GIAS Service.
GIAS Service
For service and repairs call your local GIAS
Service engineer.
The manufacturer declines all responsibility in the
event of any printing mistakes in this booklet.
The manufacturer also reserves the right to make
appropriate modifications to its products without
changing the essential characteristics.
19
Customer Service
40005291Eng.qxd 20/09/2007 15:31 Page 19

Einführung. . . . . . . . . . . . . . . . . . . . . . . . . . . . . . . . . . . . . . . . . . . . . . . . 21
Lieferinformationen. . . . . . . . . . . . . . . . . . . . . . . . . . . . . . . . . . . . . . . . . . . . . 21
Auspacken des Produkts . . . . . . . . . . . . . . . . . . . . . . . . . . . . . . . . 21
Sicherheitshinweise. . . . . . . . . . . . . . . . . . . . . . . . . . . . . . . . . . . . . . 22
Installation . . . . . . . . . . . . . . . . . . . . . . . . . . . . . . . . . . . . . . . . . . . . . . . . . . . . 22
Gebrauch . . . . . . . . . . . . . . . . . . . . . . . . . . . . . . . . . . . . . . . . . . . . . . . . . . . . . 22
Die Wäsche . . . . . . . . . . . . . . . . . . . . . . . . . . . . . . . . . . . . . . . . . . . . . . . . . . . 22
Umweltschutz . . . . . . . . . . . . . . . . . . . . . . . . . . . . . . . . . . . . . . . . . . . . . . . . . 23
GIAS-Service . . . . . . . . . . . . . . . . . . . . . . . . . . . . . . . . . . . . . . . . . . . . . . . . . . . 23
Installation. . . . . . . . . . . . . . . . . . . . . . . . . . . . . . . . . . . . . . . . . . . . . . . . 24
Elektro-Anschluss . . . . . . . . . . . . . . . . . . . . . . . . . . . . . . . . . . . . . . . . . . . . . . . 24
Einstellen der Füße . . . . . . . . . . . . . . . . . . . . . . . . . . . . . . . . . . . . . . . . . . . . . 24
Entlüftung . . . . . . . . . . . . . . . . . . . . . . . . . . . . . . . . . . . . . . . . . . . . . . . . 25
Vorbereitung der Füllung . . . . . . . . . . . . . . . . . . . . . . . . . . . . . . . 26
Vorbereitung der Textilien . . . . . . . . . . . . . . . . . . . . . . . . . . . . . . . . . . . . . . . 26
Sortierung der Füllung . . . . . . . . . . . . . . . . . . . . . . . . . . . . . . . . . . . . . . . . . . 27
Tipps zum Trocknen. . . . . . . . . . . . . . . . . . . . . . . . . . . . . . . . . . . . . . 28
Nicht für den Trockner geeignet . . . . . . . . . . . . . . . . . . . . . . . . . . . . . . . . . . 28
Energiesparen . . . . . . . . . . . . . . . . . . . . . . . . . . . . . . . . . . . . . . . . . . . . . . . . . 28
Schalterblende und Anzeigen . . . . . . . . . . . . . . . . . . . . . . . . . . 29
Tür und Sieb . . . . . . . . . . . . . . . . . . . . . . . . . . . . . . . . . . . . . . . . . . . . . . 30
Öffnen der Tür. . . . . . . . . . . . . . . . . . . . . . . . . . . . . . . . . . . . . . . . . . . . . . . . . 30
Sieb . . . . . . . . . . . . . . . . . . . . . . . . . . . . . . . . . . . . . . . . . . . . . . . . . . . . . . . . . 30
Flusensieb-Anzeige . . . . . . . . . . . . . . . . . . . . . . . . . . . . . . . . . . . . . . . . . . . . . 30
Kondenswasser-Behälter. . . . . . . . . . . . . . . . . . . . . . . . . . . . . . . . 31
Um den Behälter herauszunehmen . . . . . . . . . . . . . . . . . . . . . . . . . . . . . . . . . 31
Kondensator. . . . . . . . . . . . . . . . . . . . . . . . . . . . . . . . . . . . . . . . . . . . . . 32
Entfernen des Kondensators . . . . . . . . . . . . . . . . . . . . . . . . . . . . . . . . . . . . . . 32
Auswählen des Programms . . . . . . . . . . . . . . . . . . . . . . . . . . . . . 33
Betrieb . . . . . . . . . . . . . . . . . . . . . . . . . . . . . . . . . . . . . . . . . . . . . . . . . . . . 34
Abbrechen und Zurücksetzen des Programms . . . . . . . . . . . . . . . . . . . . . . . . 34
Startverzögerung . . . . . . . . . . . . . . . . . . . . . . . . . . . . . . . . . . . . . . . . . . . . . . . 34
Reinigung und Routinewartungen . . . . . . . . . . . . . . . . . . . . . 35
Reinigung des Trockners . . . . . . . . . . . . . . . . . . . . . . . . . . . . . . . . . . . . . . . . . 35
Technische Daten . . . . . . . . . . . . . . . . . . . . . . . . . . . . . . . . . . . . . . . . . . . . . . . 35
Fehlersuche . . . . . . . . . . . . . . . . . . . . . . . . . . . . . . . . . . . . . . . . . . . . . . . 36
Kundendienst. . . . . . . . . . . . . . . . . . . . . . . . . . . . . . . . . . . . . . . . . . . . . 37
Ersatzteile . . . . . . . . . . . . . . . . . . . . . . . . . . . . . . . . . . . . . . . . . . . . . . . . . . . . 37
GIAS-Service . . . . . . . . . . . . . . . . . . . . . . . . . . . . . . . . . . . . . . . . . . . . . . . . . . . 37
20
40005291Ger.qxd 20/09/2007 15:37 Page 20
Einführung
Bitte lesen Sie diese Anleitung sorgfältig durch und
richten Sie sich bei der Bedienung der Waschmaschine
an die Anleitung. Dieses Handbuch enthält wichtige
Hinweise für die sichere Installation, Anwendung und
Wartung sowie einige nützliche Hinweise für optimale
Ergebnisse beim Gebrauch Ihrer Maschine.
Heben Sie diese Dokumentation an einem sicheren Ort
auf, um jederzeit wieder darauf zurückgreifen zu
können bzw. um sie an zukünftige Besitzer weitergeben
zu können
Lieferinformationen
Zum Lieferumfang Ihrer Waschmaschine gehören
folgende Dokumentation und Zusatzteile:
● Bedienungsanleitung
● Garantieschein
● Energieeffizienzklasse
● Ablaufschlauchbausatz
Entfernen Sie die Verpackung der Maschine dicht an
dem Platz, wo sie aufgestellt werden soll.
1. Schneiden Sie sie sorgfältig rund um den Boden
der Verpackung und an einer Ecke nach oben auf.
2. Entfernen Sie die Polyethylenhülle und heben Sie
den Trockner von der Polystyrenplatte.
21
Kontrollieren Sie,
ob die Maschine
durch den
Transport
beschädigt wurde.
Falls dies der Fall
ist, wenden Sie sich
an den GIAS-
Service.
Die Sicherheit des
Geräts kann
beeinträchtigt
werden, wenn Sie
sich nicht an diese
Sicherheitshinweise
halten. Falls ein
Problem mit Ihrer
Maschine durch
Zweckentfremdung
verursacht wird,
müssen Sie
Reparaturarbeiten
möglicherweise
selbst bezahlen.
Auspacken des
Produkts
Entsorgen Sie die Verpackung
ordnungsgemäß. Achten Sie darauf, dass
sie nicht in die Hände von Kindern
gelangt, da sie eine potentielle
Gefahrenquelle darstellt.
40005291Ger.qxd 20/09/2007 15:37 Page 21

Sicherheitshinweise
Installation
● Überprüfen Sie vor dem Gebrauch, ob das Produkt sichtbare Schäden aufweist. Verwenden
Sie es nicht, wenn es beschädigt ist, und wenden Sie sich an den GIAS-Service.
● Verwenden Sie keine Adapter, Mehrfachsteckdosen und/oder Verlängerungskabel.
● Stellen Sie den Trockner nie in der Nähe von Vorhängen auf. Achten Sie darauf, dass keine
Gegenstände hinter den Trockner fallen oder sich dort ansammeln können.
● Das Gerät darf nicht hinter einer verschließbaren Tür, einer Schiebetür oder einer Tür mit
Scharnier an der dem Trockner entgegengesetzten Seite installiert werden.
Gebrauch
● Dieses Gerät ist nicht für den Gebrauch durch Personen mit eingeschränkten körperlichen,
sensorischen oder mentalen Fähigkeiten oder mangelnder Erfahrung und Wissen
(beispielsweise Kindern) gedacht, außer diese werden beaufsichtigt oder wurden über die
Verwendung des Geräts von einer Person unterrichtet, die für ihre Sicherheit verantwortlich
ist.
● Kinder sollten beaufsichtigt werden, um sicherzustellen, dass sie nicht mit dem Gerät spielen.
● WARNUNG Zweckentfremdung des Trockners kann zu Brandgefahr führen
● Diese Maschine dient als Haushaltsgerät ausschließlich zum Trocknen von Haushaltstextilien
und Kleidungsstücken.
● Verwenden Sie dieses Gerät nur für die vorgesehenen Zwecke gemäß der Anleitung. Lesen
Sie die Gebrauchsanleitung sorgfältig durch, bevor Sie das Gerät in Betrieb nehmen.
● Berühren Sie das Gerät nicht mit feuchten oder nassen Händen oder Füßen.
● Lehnen Sie sich nicht gegen die Tür, wenn Sie die Maschine beladen, und fassen Sie die
Maschine nicht an der Tür, wenn Sie sie hochheben oder verschieben.
● Lassen Sie Kinder nicht mit der Maschine oder den Schaltern spielen.
● WARNUNG Verwenden Sie das Produkt nicht, wenn das Flusensieb nicht richtig eingebaut
oder beschädigt ist; Flusen könnten Feuer fangen.
● WARNUNG An der Stelle, an der sich das Symbol für heiße Flächen befindet , kann die
Temperatur während des Trocknerbetriebs auf über 60°C steigen.
● Ziehen Sie den Stecker aus der Steckdose! Ziehen Sie vor dem Reinigen des Geräts immer den
Stecker heraus!
● Verwenden Sie die Maschine bei vermuteten Störungen nicht weiter.
● Fusseln und Flusen dürfen sich nicht auf dem Fußboden im Bereich um die Maschine
ansammeln.
● Die Trommel in dem Gerät kann sehr heiß werden. Lassen Sie den Trockner stets vollständig
bis zum Ende der Abkühlphase laufen, bevor Sie die Wäsche herausnehmen.
Die Wäsche
● Trocknen Sie keine ungewaschenen Gegenstände im Trockner.
● WARNUNG AUF KEINEN FALL Stoffe in der Maschine trocknen, die mit chemischen
Reinigungsmitteln behandelt wurden.
● WARNUNG Wenn Schaumgummimaterialien heiß werden, können sie sich unter bestimmten
Bedingungen plötzlich entzünden. Gegenstände wie Schaumgummi (Latexschaumstoff),
Duschhauben, wasserabweisende Textilien, mit Gummi verstärkte Produkte sowie
Kleidungsstücke oder Kissen mit Schaumstoffpolster sind für den Wäschetrockner NICHT
GEEIGNET.
● Sehen Sie immer auf den Pflegeetiketten nach, ob das Material für das Trocknen geeignet ist.
22
40005291Ger.qxd 20/09/2007 15:37 Page 22
● Textilien vor dem Einfüllen in den Trockner erst schleudern oder gründlich auswringen.
Füllen Sie KEINE tropfnassen Textilien in den Trockner.
● Feuerzeuge und Streichhölzer unbedingt aus den Taschen entfernen und AUF KEINEN FALL
mit feuergefährlichen Flüssigkeiten in der Nähe der Maschine hantieren.
● KEINE Vorhänge aus Glasfasermaterial in die Maschine füllen. Kommen andere Textilien mit
Glasfasern in Berührung, so kann dies zu Hautreizungen führen.
● Gegenstände, die mit Substanzen wie Speiseöl, Azeton, Alkohol, Benzin, Kerosin,
Fleckenentferner, Terpentin, Wachsen und Wachsentferner getränkt sind, sollten mit einer
zusätzlichen Menge Waschpulver in heißem Wasser gewaschen werden, bevor sie im
Trockner getrocknet werden.
● Weichspüler oder ähnliche Produkte sollten wie in der Gebrauchanleitung des Weichspülers
angegeben verwendet werden.
Umweltschutz
● Das gesamte Verpackungsmaterial besteht aus umweltfreundlichen, wiederverwertbaren
Materialien. Bitte helfen Sie mit, diese umweltfreundlich zu entsorgen. Ihre
Stadtverwaltung kann Sie über Entsorgungsmöglichkeiten informieren.
● Ziehen Sie den Stecker aus der Steckdose, zerschneiden Sie das Netzkabel und werfen Sie
Netzkabel und Netzstecker getrennt in den Müll, bevor Sie Ihren alten Trockner entsorgen.
Zerstören Sie Scharniere und die Türverriegelung, damit sich Kinder nicht versehentlich in
der Waschmaschine einsperren können.
GIAS-Service
●
Um einen sicheren und einwandfreien Betrieb dieses Geräts zu gewährleisten, empfehlen
wir, alle Wartungs- und Reparaturarbeiten nur von einem zugelassenen GIAS-
Kundendiensttechniker durchführen zu lassen.
Europäische Vorschrift 2002/96/EC
Dieses Elektrohaushaltsgerät ist entsprechend der EU-Richtlinie 2002/96/CE über Elektro- und
Elektronik-Altgeräte (WEEE) gekennzeichnet.
Bitte sorgen Sie dafür, dass das Gerät ordnungsgemäß entsorgt wird,
damit mögliche negative Auswirkungen auf Umwelt und Gesundheit
vermieden werden, die bei einer unsachgemäßen Entsorgung des
Altgerätes entstehen könnten.
Das Symbol auf dem Produkt bedeutet, dass dieses Gerät nicht in den
normalen Hausmüll gehört, sondern den jeweiligen kommunalen
Rücknahmesystemen für Elektro- und Elektronik-Altgeräte übergeben
werden muss.
Die Entsorgung muss im Einklang mit den geltenden Umweltrichtlinien
für die Abfallentsorgung erfolgen.
Für nähere Informationen über Entsorgung und Recycling dieses
Produktes wenden Sie sich bitte an Ihre kommunalen Einrichtungen
(Umweltamt) oder an die Abfallentsorgungsgesellschaft Ihrer Stadt bzw.
an Ihren Händler.
23
Falls das Gerät nicht richtig funktioniert oder ausfällt, schalten Sie
es aus und ziehen Sie den Stecker aus der Steckdose. Wenden Sie
sich an den GIAS-Service.
40005291Ger.qxd 20/09/2007 15:39 Page 23
Elektro-Anschluss
Dieser Trockner ist für eine Netzspannung von 230 V
und 50 Hz (Einphasenstrom) ausgelegt. Stellen Sie
sicher, dass der Stromkreis eine Nennleistung von 10 A
hat.
Strom kann lebensgefährlich sein.
Dieses Gerät muss an eine geerdete Steckdose mit
Schutzkontakt angeschlossen werden.
Die Steckdose und der Stecker am Gerät müssen vom
selben Typ sein.
Verwenden Sie keine Mehrfachstecker und/oder
Verlängerungskabel.
Der Stecker sollte so angebracht werden, dass er nach
der Installation des Geräts leicht aus der Steckdose zu
ziehen ist.
Die Drähte im Netzanschlusskabel sind farblich gemäß
folgender Codes unterschieden:
Blau NEUTRAL
Braun STROMFÜHREND
Grün und Gelb ERDE
Das Gerät stimmt mit den Bestimmungen der
Europäischen Vorschrift 89/336/EEC, 73/23/EEC sowie
deren Nachfolgebestimmungen überein.
Einstellen der Füße
Sobald sich die Maschine am endgültigen Ort befindet,
sollten die Füße so eingestellt werden, dass die
Maschine eben steht.
24
Falls ein Problem
mit Ihrer Maschine
durch falsche
Installation
verursacht wird,
müssen Sie
Reparaturarbeiten
möglicherweise
selbst bezahlen.
Sollte das
Netzanschlusskab
el an diesem
Gerät beschädigt
sein, muss es
durch ein
spezielles Kabel
ersetzt werden,
das NUR beim
Ersatzteilservice
erhältlich ist. Es
muss von einer
fachkundigen
Person installiert
werden.
Installation
Schließen Sie die Maschine erst an und
drücken Sie die Einschalttaste erst,
wenn die Installation abgeschlossen ist.
Zu Ihrer eigenen Sicherheit muss der
Trockner richtig installiert werden.
Sollten Sie bezüglich der Installation
Fragen haben, wenden Sie sich an den
GIAS-Service.
40005291Ger.qxd 20/09/2007 15:39 Page 24

In dem Raum, in dem sich der Trockner befindet, muss
eine ausreichende Entlüftung vorhanden sein, um zu
verhindern, dass Gase aus der Verbrennung anderer
Brennstoffe, zum Beispiel offene Feuer, während des
Trocknerbetriebs in den Raum gesogen werden.
● Die Abluft darf nicht in einen Kaminschacht
geleitet werden, der für das Ableiten von Rauch
aus der Verbrennung von Gas oder anderen
Brennstoffen verwendet wird.
● Prüfen Sie regelmäßig die reibungslose
Luftzirkulation im Trockner.
● Überprüfen Sie nach Gebrauch das Flusensieb und
reinigen Sie es, wenn es erforderlich ist!
● Die Ansaug- und Abluftanschlüsse dürfen nicht
zugestellt werden. Um eine richtige Abluft zu
gewährleisten, muss die Fläche zwischen dem
Boden der Maschine und dem Fußboden frei
bleiben. Zwischen der Maschine und anderen
Gegenständen sollte ein Abstand von mindestens
12 mm eingehalten werden.
● Achten Sie darauf, dass keine Gegenstände
zwischen beiden Seitenteilen und der Rückseite
des Trockners herunterfallen und sich dort
ansammeln, da hierdurch die Ansaug- und
Abluftanschlüsse blockiert werden können.
● Der Trockner darf AUF KEINEN FALL in der
unmittelbaren Nähe von Vorhängen aufgestellt
werden.
25
Entlüftung
ABLUFTANSCHLÜSSE
ABLUFTANSCHLÜSSE IM SOCKEL
LUFTANSAUGÖFFNUNG
40005291Ger.qxd 20/09/2007 15:39 Page 25
Bevor Sie den Trockner das erste Mal benutzen:
● Lesen Sie die Gebrauchsanleitung bitte sorgfältig
durch!
● Entfernen Sie alle in der Trommel befindlichen
Gegenstände!
● Wischen Sie die Innenseiten der Trommel und Tür
mit einem feuchten Tuch aus, um den beim
Transport eventuell dort angesammelten Staub zu
entfernen.
Vorbereitung der
Textilien
Vergewissern Sie sich anhand der
Pflegeanleitungssymbole in jedem Wäschestück, dass
die Wäsche, die Sie trocknen wollen, für eine Trocknung
im Trockner geeignet ist.
Überprüfen Sie, ob alle Verschlüsse zu und die Taschen
entleert sind. Wenden Sie die Innenseiten der Textilien
nach außen. Füllen Sie die Kleidungsstücke locker in die
Trommel, so dass diese sich nicht verheddern.
Maximales
Fassungsvermögen
(Trockengewicht)
● Baumwolle max. 6 kg
● Synthetische Stoffe max. 3 kg
26
Vorbereitung der Füllung
Überladen Sie die
Trommel nicht,
große Teile
können, wenn sie
nass sind, die
maximal zulässige
Wäscheladung
überschreiten
(zum Beispiel
Schlafsäcke,
Bettdecken).
40005291Ger.qxd 20/09/2007 15:39 Page 26
Sortieren Sie die Füllung
folgendermaßen:
● Anhand der Pflegeanleitungssymbole
Diese finden Sie am Kragen oder der
Sauminnenseite:
Für Trockner geeignet.
Im Trockner bei hoher Temperatur.
Im Trockner nur bei geringer Temperatur.
Nicht für den Trockner geeignet.
Falls ein Wäschestück keine Pflegeanleitung
hat, muss angenommen werden, dass es nicht
für das Trocknen im Trockner geeignet ist.
● Nach Menge und Volumen
Ist die Füllmenge größer als das
Fassungsvermögen des Trockners, sortieren Sie die
Wäsche nach Stoffdicke (trennen Sie z.B.
Handtücher von dünner Unterwäsche).
● Nach Stoffart
Baumwolle/Leinen: Handtücher, Baumwolljersey,
Bett- und Tischwäsche.
Textilien aus Kunstfaser: Blusen, Hemden,
Overalls, usw. aus Polyester oder Polyamid und
auch Baumwoll/Synthetikgemische.
● Nach Trocknungsgrad
Sortieren Sie nach: Bügelfeucht, Schranktrocken,
usw. Für empfindliche Textilien drücken Sie zur
Wahl einer niedrigeren Trocknungstemperatur die
Taste ‘Schontrocknung’.
27
40005291Ger.qxd 20/09/2007 15:39 Page 27
Nicht für den Trockner
geeignet:
Wollsachen, Seide, empfindliche Stoffe, Nylonstrümpfe,
gewirkte Textilien, Stoffe mit Metall-Dekor,
Kleidungsstücke mit PVC- oder Lederbesatz,
Trainingsschuhe, voluminöse Wäschestücke wie
Schlafsäcke usw.
Energiesparen
Füllen Sie nur gründlich ausgewrungene oder
geschleuderte Wäsche in den Trockner. Je trockener die
Wäsche, desto kürzer ist die Trocknungszeit, was sich
energiesparend auswirkt.
IMMER
● Es ist wirtschaftlicher, IMMER die maximale
Füllmenge zu trocknen.
● Kontrollieren Sie IMMER vor jedem
Trocknungsvorgang, ob das Sieb sauber ist.
NIE
● Überschreiten Sie NIE die maximale Füllmenge,
denn dies ist zeitaufwendig und
Energieverschwendung.
● Füllen Sie AUF KEINEN FALL tropfnasse
Kleidungsstücke in den Wäschetrockner; dies kann
zu Schäden am Gerät führen.
28
Tipps zum Trocknen
WICHTIG:
Kleidungsstücke,
die mit einem
chemischen
Reinigungsmittel
behandelt worden
sind, oder
Gummibekleidung
dürfen nicht im
Wäschetrockner
getrocknet werden
(Brand- oder
Explosionsgefahr).
Während der
letzten 15 Minuten
des Programms
wird die Wäsche
im kalten
Luftstrom
abgekühlt.
40005291Ger.qxd 20/09/2007 15:39 Page 28
Schalterblende: Kontroll- und Lichtanzeige
Programmwähler – Für die Wahl des gewünschten Programms
Taste Ein/Aus – Zum Anstellen drücken, die Anzeige leuchtet auf
Startzeitvorwahl-Taste – Taste zur Verzögerung des Beginns des Trocknungsvorgangs (siehe
Abschnitt ‘Betrieb’ auf Seite 34)
Start-Taste – Drücken Sie Start, um das ausgewählte Trocknerprogramm zu starten
Taste Acryl/Synthetikwäsche (Schontrocknung) – Drücken Sie die Taste, um eine niedrigere
Temperatur für empfindliche Textilien einzustellen. Die Anzeige über der Taste leuchtet auf. Um die
Temperaturstufe zu ändern, muss das Programm zurückgesetzt werden
Niedrige Temperatur – Anzeigelampe EIN Hohe Temperatur – Anzeigelampe AUS
Wasserbehälter leeren-Anzeige – leuchtet auf, wenn der Kondenswasser-Behälter voll ist
Filter säubern-Anzeige – leuchtet auf, wenn das Sieb gesäubert werden muss
Display
START – Wenn der Trockner angestellt wird, blinkt die START-Anzeige. Wenn das Programm
beginnt, leuchtet die START-Anzeige auf
60' – Die Anzeige leuchtet auf, wenn bis zum Ende des Programms weniger als 60 Minuten sind
15' – Die Anzeige leuchtet auf, wenn bis zum Ende des Programms weniger als 15 Minuten sind. In
diesem Stadium des Trocknungsvorgangs geht das Gerät in die Abkühlphase
STOP – Die Anzeige leuchtet auf, wenn das Programm beendet ist
6h – 6 Stunden Startverzögerung (Lampe blinkt während des Betriebs)
9h – 9 Stunden Startverzögerung (Lampe blinkt während des Betriebs)
29
Schalterblende und
Anzeigen
TASTE
ACRYL/SYNTHETIK-
WÄSCHE
TASTE
EIN/AUS
FILTER SÄUBERN-
ANZEIGE
WASSERBEHÄLTER
LEEREN-ANZEIGE
PROGRAMM-
WÄHLER
START-
TASTE
STARTZEITVORWAHL-
TASTE
ZEITANZEIGE
40005291Ger.qxd 20/09/2007 15:39 Page 29

Öffnen der Tür
Ziehen Sie am Griff, um die Tür zu öffnen.
Um den Trocknungsvorgang wieder in Gang zu setzen,
schließen Sie die Tür und drücken Start.
Sieb
WICHTIG: Damit der Wäschetrockner immer optimale
Leistung erbringen kann, überprüfen Sie vor jedem
Trocknungsvorgang, ob das Flusensieb sauber ist.
1. Ziehen Sie das Sieb nach oben.
2. Öffnen Sie das Sieb wie auf der Abbildung.
3. Entfernen Sie die Flusen sanft mit einer weichen
Bürste oder den Fingerspitzen.
4. Klappen Sie das Sieb zusammen und setzen Sie es
wieder an seinen Platz ein.
Flusensieb-Anzeige
‘Filter säubern’ leuchtet auf, wenn das Sieb gesäubert
werden muss.
Wenn die Wäsche nicht trocknet, kontrollieren Sie, ob
das Sieb verstopft ist.
30
Tür und Sieb
WARNUNG!
Während des Trocknungsvorgangs
können Trommel und Tür SEHR HEISS
werden. Stoppen Sie den Trockner nie
vor Ende des Trocknungsvorgangs,
außer alle Gegenstände werden schnell
herausgenommen und ausgebreitet, so
dass die Wärme abgeleitet wird.
40005291Ger.qxd 20/09/2007 15:39 Page 30
Das während des Trocknungsvorgangs aus der Wäsche
entzogene Wasser wird in einem Behälter unten im
Trockner gesammelt.
Wenn der Behälter voll ist, leuchtet die Anzeige
‘Wasserbehälter leeren’ auf der Bedienfläche auf. Dann
MUSS der Behälter geleert werden. Wir empfehlen
jedoch, den Behälter nach jedem Trockengang zu
leeren.
HINWEIS: Während der ersten wenigen
Trocknungszyklen eines neuen Trockners sammelt sich
sehr wenig Wasser an, da zunächst ein in der Maschine
befindliches Reservoir gefüllt wird.
Um den Behälter
herauszunehmen
1. Ziehen Sie den Behälter vorsichtig heraus, bis er
vollständig entfernt ist. Halten Sie den Behälter
mit beiden Händen. Im gefüllten Zustand wiegt
der Kondenswasser-Behälter rund 4 kg.
2. Kippen Sie den Wasserbehälter, um das Wasser
aus dem hinteren Loch zu entleeren. Wenn der
Wasserbehälter leer ist, schieben Sie ihn wieder
zurück in seine Position. SCHIEBEN SIE IN FEST AN
SEINEN PLATZ.
HINWEIS: Wenn Sie einen Ablauf in der Nähe des
Trockners haben, können Sie den Ablaufbausatz
verwenden, um einen ständigen Ablauf für das vom
Trockner gesammelte Wasser einzurichten. Sie müssen
dann den Wasserbehälter nicht mehr ausleeren. Alle
Informationen für das Zusammenbauen des Bausatzes
sind im dazugehörigen Umschlag enthalten.
31
Kondenswasser-Behälter
40005291Ger.qxd 20/09/2007 15:39 Page 31
Wichtig: Immer das Gerät ausschalten und den Stecker
aus der Steckdose ziehen, bevor der Kondensator
gereinigt wird.
Damit der Trockner immer optimale Leistung erbringen
kann, überprüfen Sie regelmäßig, ob der Kondensator
sauber ist.
Entfernen des
Kondensators
1. Ziehen Sie vorsichtig am Boden der
Wartungsklappe, bis diese sich aus der
Schnappvorrichtung des Trockners herauslöst. Der
obere Teil kann dann herausgehängt und die
Wartungsklappe vollständig entfernt werden.
2. Drehen Sie die zwei Verschlusshebel gegen den
Uhrzeigersinn und ziehen Sie den Kondensator
heraus
3. Ziehen Sie das Kondensator-Teil heraus.
4. Entfernen Sie etwaigen Staub oder Flusen
vorsichtig mit einem Tuch, reinigen Sie das Teil
danach unter laufendem Wasser, wobei Sie es so
drehen, dass das Wasser zur Entfernung von Staub
und Flusen zwischen die Platten laufen kann.
5. Passen Sie den Kondensator wieder richtig ein (wie
durch den Pfeil angegeben) und stellen Sie sicher,
dass er fest an seinen Platz gedrückt wird.
Schließen Sie die zwei Verschlusshebel durch eine
Drehung im Uhrzeigersinn.
6. Setzen Sie die Wartungsklappe wieder ein.
32
Kondensator
40005291Ger.qxd 20/09/2007 15:39 Page 32
Hinweis: Es kann sein, dass der Sensor eine kleine
Wäschemenge nicht erfassen kann. Benutzen Sie für kleine
Wäschemengen, Einzelteile oder speziell vorbehandelte
Textilien mit einem geringen Feuchtigkeitsgehalt die
Zeitprogramme. Stellen Sie je nach Wäschemenge und
gewünschtem Trockenheitsgrad das Programm zwischen 30 und
75 Minuten ein, und wählen Sie je nach Art der Textilien eine
hohe oder eine geringe Temperatur.
Wenn der Sensor die Wäsche nicht erkennt, arbeitet der
Trockner nur 10 Minuten lang, bevor er die Abkühlphase
beginnt.
Bei zu großer oder zu nasser Füllung startet der Trockner
automatisch nach 185 Minuten mit der Abkühlphase.
Der Sensortrockner liefert Ihnen viele Möglichkeiten für das Trocknen der Wäsche.
In der folgenden Tabelle sind die Programme und die Funktionen der einzelnen
Programme aufgeführt.
33
Auswählen des Programms
Programm
Supertrocken
Extratrocken
Schranktrocken
Bügeltrocken
Wolle
Leichtbügeln
120 Min.
75 Min.
60 Min.
45 Min.
30 Min.
Auffrischen
Beschreibung
Wählen Sie den gewünschten Trockenheitsgrad.
Diese reichen von Supertrocken für Badehandtücher und
Bademäntel über Schranktrocken für Textilien, die nicht
gebügelt werden, bis zum Programm, das die Wäsche bis zur
richtigen Bügelfeuchte trocknet.
Ein sanftes Programm, speziell geschaffen um Wollwäsche nach
dem Lufttrocknen weicher zu machen.
Dieses leichte Warmluftprogramm dauert 12 Minuten und kann
auch dazu verwendet werden, Wollwäsche nach dem
Aufbewahren im Schrank 'aufzufrischen'.
Das Leichtbügel-Programm hat eine Form- und
Knitterschutzfunktion. Der Trockner erhitzt die Füllung für die
Dauer von 9 Minuten, worauf eine Abkühlphase von 3 Minuten
folgt, was insbesondere für Kleidungsstücke von Vorteil ist, die
normalerweise einige Zeit vor dem Bügeln, z.B. in einem
Wäschekorb, abgelegt werden. Kleidungsstücke können auch
hart werden, wenn sie draußen an der Luft auf einer
Wäscheleine oder in der Wohnung über Heizungen getrocknet
werden. Das ‘Schnellbügeln’-Verfahren lockert die Liegefalten
im Stoff, wodurch er sich schneller und leichter bügeln lässt.
120 Minuten Trocknen
75 Minuten Trocknen
60 Minuten Trocknen
45 Minuten Trocknen
30 Minuten Trocknen
Schleudern der Wäsche im kalten Luftstrom 30 Minuten lang
40005291Ger.qxd 20/09/2007 15:39 Page 33

1. Öffnen Sie die Tür, und füllen Sie die Wäsche in die Trommel. Achten Sie darauf,
dass keine Kleidungsstücke von der Tür eingeklemmt werden.
2. Die Tür mit einem sanften Druck schließen, bis Sie ein ‘Klick’-Geräusch hören.
3. Drücken Sie die Taste ‘Ein Aus’ zum Anstellen des Trockners. Die Lichtanzeige
leuchtet auf und die START-Anzeige blinkt.
4. Drehen Sie den Programmwählschalter, um das gewünschte Trocknerprogramm
auszuwählen (siehe Abschnitt ‘Waschprogramme’).
5. Betätigen Sie zur Trocknung empfindlicher Textilien die Taste ‘Schontrocknung’ für
die Einstellung einer geringeren Temperatur.
Die Lampe über der Drucktaste leuchtet auf, wenn die Maschine auf niedrige
Temperatur eingestellt ist. Um die Auswahl dieses Status bei Beginn des
Trocknungsvorgangs aufzuheben, muss die Maschine zurückgesetzt werden.
6. Drücken Sie die Taste Start. Der Trockner startet automatisch und die START-
Anzeige leuchtet auf.
7. Die Anzeige zeigt die verbleibende Zeit des Trocknungsvorgangs.
8. Wenn die Tür während des Programms geöffnet wird, um die Wäsche zu
überprüfen, müssen Sie Start drücken, um nach dem Schließen der Tür den
Trocknungsvorgang fortzusetzen.
9. Wenn das Display 15' anzeigt, beginnt das Gerät mit der Abkühlphase; die
Kleidung wird zum Abkühlen im kalten Luftstrom geschleudert.
10. Wenn das Programm beendet ist, leuchtet die STOPP-Anzeige auf.
Abbrechen und Zurücksetzen des
Programms
Zum Abbrechen eines Programms schalten Sie das Gerät aus und wieder ein. Die
Maschine zeigt an, dass sie zurückgesetzt wurde, und die START-Anzeige blinkt.
Startzeitvorwahl
Mit der Startzeitvorwahl-Funktion können Sie den Beginn des Trocknungsvorgangs um 6
bis 9 Stunden verzögern.
Wenn diese Funktion erstmalig ausgewählt wird, zeigt das Display eine Verzögerung von
6 Stunden. Durch nachfolgendes Drücken der Taste, wird die Verzögerung auf 9 Stunden
verlängert.
34
Betrieb
40005291Ger.qxd 20/09/2007 15:39 Page 34
Drücken Sie Start, um das Programm zu beginnen, und
das Gerät wird den Trocknungsvorgang am Ende dieses
Zeitraums durchführen. Die Lichtanzeige für 6 oder 9
Stunden blinkt, um anzuzeigen, dass die
Startverzögerung aktiviert wurde.
Reinigung des Trockners
● Reinigen Sie nach jedem Trocknungsvorgang das
Flusensieb und leeren Sie den Kondenswasser-
Behälter.
● Der Kondensator muss regelmäßig gereinigt
werden.
● Wischen Sie nach jeder Anwendungsphase die
Innenseite der Trommel aus und lassen Sie die Tür
einige Zeit offen stehen, damit sie durch die
Luftzirkulation getrocknet wird.
● Reinigen Sie die Außenseite der Maschine und der
Tür mit einem weichen Tuch.
● AUF KEINEN FALL Scheuerschwämme oder
Scheuermittel benutzen.
● Um ein Verkleben der Tür oder ein Ansammeln
von Flusen zu vermeiden, sollten Sie die Innentür
und die Türdichtung regelmäßig mit einem
feuchten Tuch reinigen.
Technische Daten
Trommelinhalt 115 Liter
Maximales Fassungsvermögen 6 kg
Höhe 85 cm
Breite 60 cm
Tiefe 60 cm
Energieeffizienzklasse C
35
WICHTIG
Schalten Sie immer
das Gerät aus und
ziehen Sie den
Stecker aus der
Steckdose, bevor
das Gerät gereinigt
wird.
Die elektrischen
Daten befinden
sich auf dem
Betriebstypenschild
an der Vorderseite
des Trockners (bei
offener Tür).
Reinigung und
Routinewartungen
WARNUNG!
Trommel, Tür und
die Wäsche selbst
können sehr heiß
sein.
40005291Ger.qxd 20/09/2007 15:39 Page 35

Mögliche Gründe für...
Fehler, die Sie selbst beheben können
Prüfen Sie alle Punkte in der folgenden Checkliste, bevor Sie sich an den GIAS-Service
wenden. Sollte die Waschmaschine funktionstüchtig sein oder unsachgemäß installiert
oder verwendet worden sein, wird Ihnen der Besuch des Kundendiensttechnikers in
Rechnung gestellt. Wenn das Problem weiterhin besteht, nachdem Sie die Checkliste
durchgegangen sind, wenden Sie sich bitte an den GIAS-Service, der Ihnen evtl.
telefonisch weiterhelfen kann.
Die Trocknungszeit ist zu lang/die Textilien sind nicht
trocken genug…
● Haben Sie die richtige Trocknungszeit/das richtige Programm gewählt?
● Waren die Textilien zu nass? Wurden die Textilien sorgfältig ausgewrungen oder
geschleudert?
● Muss das Sieb gereinigt werden?
● Muss der Kondensator gereinigt werden?
● Ist der Trockner überladen?
● Sind die Luftansaug- und Abluftanschlüsse sowie die Fläche unter dem Sockel des
Trockners frei?
● Ist die Taste ‘Schontrocknung’ noch von einem früher gewählten Programm
gedrückt?
Der Trockner funktioniert nicht…
● Ist der elektrische Netzanschluss für den Trockner in Ordnung? Kontrollieren Sie
diesen mit einem anderen Gerät, wie z.B. einer Tischlampe.
● Befindet sich der Stecker korrekt in der Steckdose?
● Gibt es einen Stromausfall?
● Ist die Sicherung herausgesprungen?
● Ist die Tür richtig geschlossen?
● Ist der Trockner sowohl am Netzanschluss als auch an der Maschine angestellt?
● Ist die Trocknungszeit oder das Programm gewählt worden?
● Ist die Maschine nach dem Türöffnen wieder angestellt worden?
● Hat der Trockner den Betrieb eingestellt, weil der Kondenswasser-Behälter voll ist
und entleert werden muss?
Der Trockner ist zu laut…
● Schalten Sie den Trockner aus und wenden Sie sich an den GIAS-Service.
Die Anzeige ‘Filter säubern’ leuchtet…
● Muss das Sieb gereinigt werden?
● Muss der Kondensator gereinigt werden?
Die Anzeige ‘Wasserbehälter leeren’ leuchtet…
● Muss der Kondenswasser-Behälter geleert werden?
36
Fehlersuche
40005291Ger.qxd 20/09/2007 15:39 Page 36

Sollten trotz obengenannter Kontrollen weiterhin
Störungen bei Ihrem Trockner auftreten, wenden Sie
sich bitte an den GIAS-Service, der Sie beraten kann. Der
Kundendienst kann Sie möglicherweise telefonisch
beraten oder mit Ihnen einen geeigneten Termin für
einem Techniker im Rahmen der Garantie vereinbaren.
Ihnen wird jedoch eventuell eine Gebühr berechnet,
wenn sich herausstellt, dass Ihre Maschine:
● funktionsfähig ist.
● nicht gemäß der Installationsanweisung installiert
worden ist.
● unsachgemäß benutzt wurde.
Ersatzteile
Verwenden Sie immer Original-Ersatzteile, die Sie direkt
beim GIAS-Service erhalten.
GIAS-Service
Wenden Sie sich für Wartungs- und Reparaturarbeiten
an Ihren GIAS-Servicetechniker.
Der Hersteller übernimmt keine Verantwortung für
etwaige Druckfehler in dieser Bedienungsanleitung. Der
Hersteller behält sich das Recht vor, seine Produkte ggf.
anzupassen, ohne wesentliche Eigenschaften zu
verändern.
37
Kundendienst
40005291Ger.qxd 20/09/2007 15:39 Page 37
40005291
40005291Eng.qxd 20/09/2007 15:31 Page 20

