Loading ...
Loading ...
Loading ...
Connect gas supply to dryer. If codes
allow, use new flexible metal tubing
(design certified by the American Gas
Association). Be sure there are no kinks.
For gas connections, you MUST use
pipe joint compound resistant to the ac-
tion of LP gas.
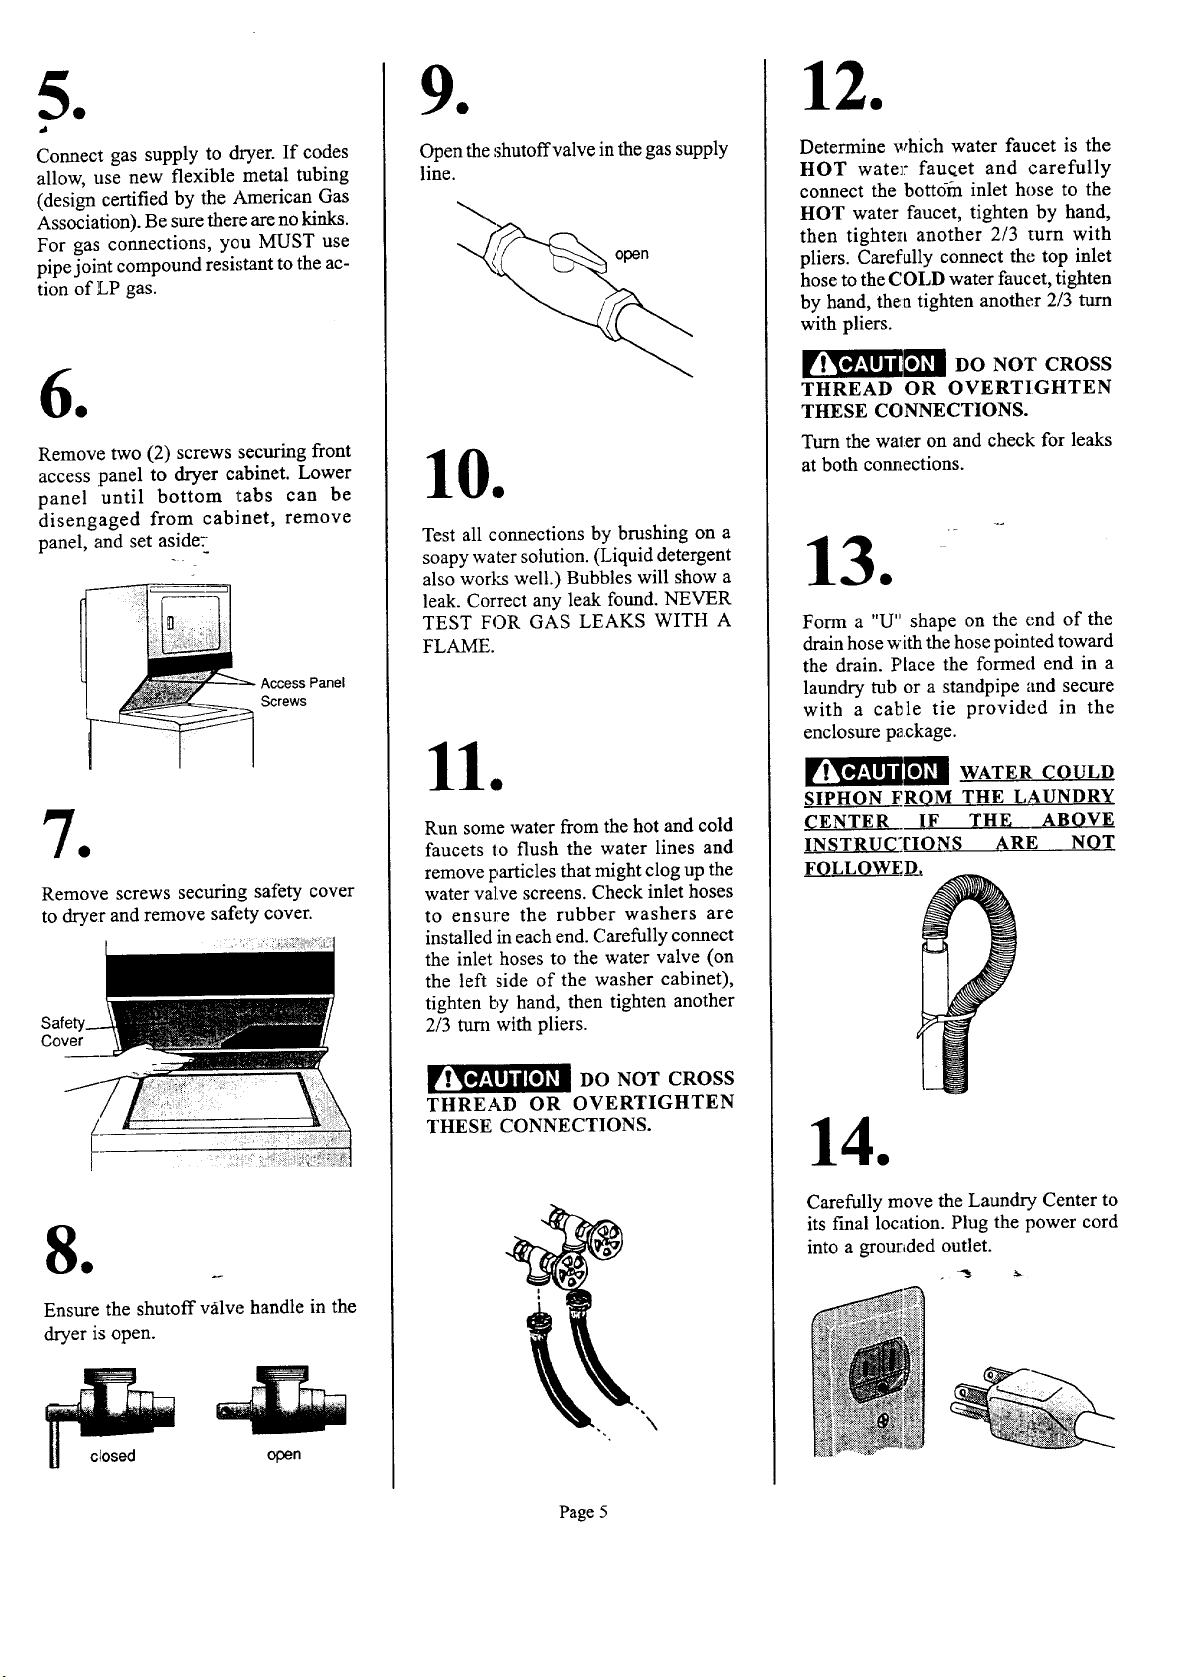
Remove two (2) screws securing front
access panel to dryer cabinet. Lower
panel until bottom tabs can be
disengaged from cabinet, remove
panel, and set aside_
Access Panel
Screws
Remove screws securing satbty cover
to dryer and remove safety cover.
Cover
Ensure the shutoff valw_ handle in the
dryer is open.
closed
open
Open the shutoffvalve in the gas supply
line.
Test all connections by brushing on a
soapy water solution. (Liquid detergent
also works well.) Bubbles will show a
leak. Correct any leak found. NEVER
TEST FOR GAS LEAKS WITH A
FLAME.
Run some water from the hot and cold
faucets to flush the water lines and
remove particles that might clog up the
water valxe screens. Check inlet hoses
to ensure the rubber washers are
installed in each end. Carefully connect
the inlet hoses to the water valve (on
the left side of the washer cabinet),
tighten by hand, then tighten another
2/3 turn with pliers.
__! DO NOT CROSS
THREAD OR OVERTIGHTEN
THESE CONNECTIONS.
Determine which water faucet is the
HOT water" faucet and carefully
connect the bott6in inlet hose to the
HOT water faucet, tighten by hand,
then tighten another 2/3 turn with
pliers. Carefully connect the top inlet
hose to the COLD water faucet, tighten
by hand, rhea tighten another 2/3 turn
with pliers.
__i DO NOT CROSS
THREAD OR OVERTIGHTEN
THESE CONNECTIONS.
Turn the water on and check for leaks
at both cormections.
Form a "U" shape on the end of the
drain hose with the hose pointed toward
the drain. Place the formed end in a
laundry tub or a standpipe and secure
with a cable tie provided in the
enclosure p_ckage.
__1 WATER COULD
SIPHON FROM THE LAUNDRY
CENTER IF TH A VE
INSTRUCTIONS ARE NOT
FOLLOWED.
}
Carefully move the Laundry Center to
its final location. Plug the power cord
into a grounded outlet.
Page 5
Loading ...
Loading ...
Loading ...