Please read these instructions carefully
and retain for future reference.
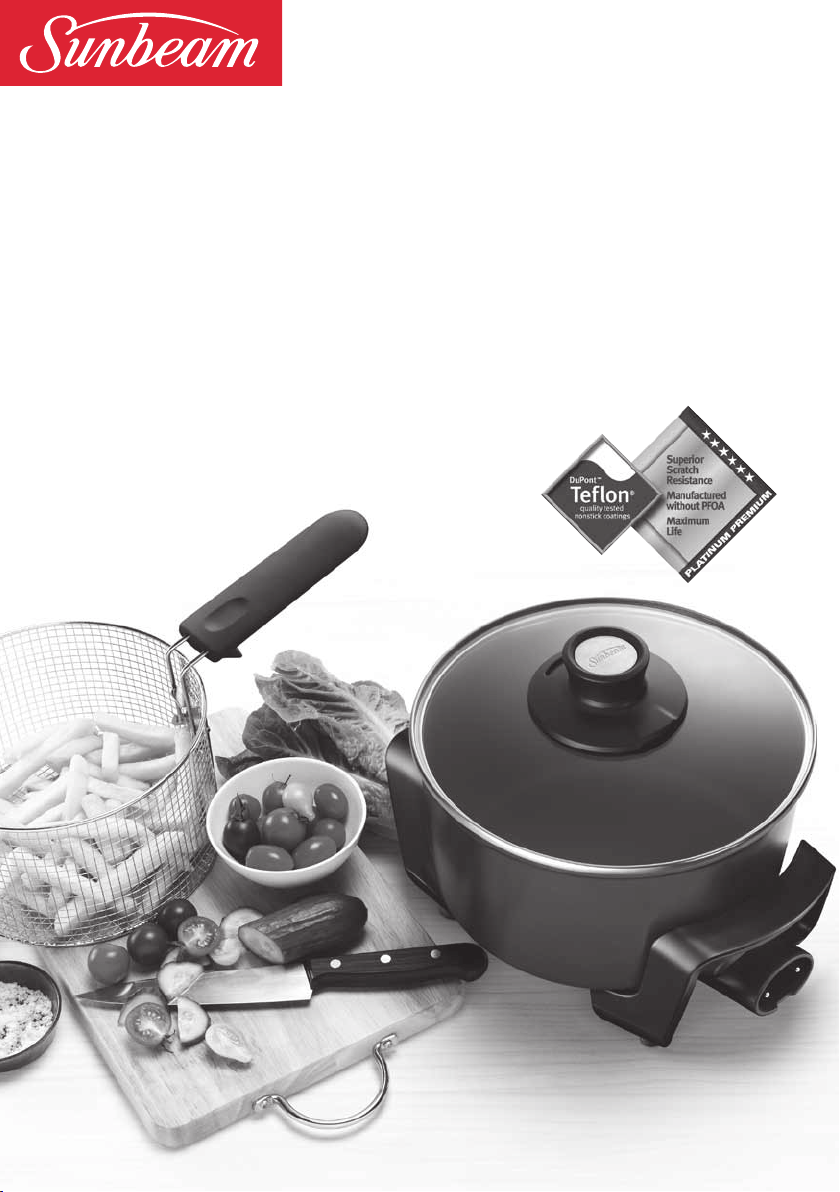
Multicooker Deep Fryer
5 litre non-stick electric cookware
Instruction Booklet
DF4500

Important instructions – retain for
future use.
Sunbeam’s Safety Precautions 1
Features of your Multicooker 2
An Introduction to Multicookers 4
Non-stick cooking 5
Temperature settings 6
Understanding your Multicooker 7
Using your Multicooker 8
Hints for perfect frying 9
Care and cleaning 10
High Grade Non-stick cooking surfaces 11
Cooking with your Multicooker 12
Vegetable cooking hints 14
Cooking information 17
Cooking Definitions 19
Recipes
Soups 20
Main courses 23
Desserts 28
Sauces 31
Cooking with your deep fryer
The perfect chip 33
Deep fry cooking with home battered food 34
Frying times and temperatures 3
5
Recipes For your Deep Fryer 37
Troubleshooting 45
Contents
Sunbeam’s Safety Precautions 1
Features of your Multicooker 2
An Introduction to Multicookers 4
Temperature settings 6
Understanding your Multicooker 7
Using your Multicooker 8
Hints for perfect frying 9
Care and cleaning 10
High Grade Non-stick cooking surfaces 11
Cooking with your Multicooker 12
Vegetable cooking hints 14
Cooking information 17
Cooking Definitions 19
Recipes for your Multicooker 20
Soups, Sauces, Stocks 20
Main Meals 23
Desserts and Sweets 28
Cooking with your deep fryer 31
The perfect chip 31
Deep fry cooking with home battered food 32
Frying times and temperatures 33
Recipes For your Deep Fryer 35
Troubleshooting 43

Sunbeam is very safety conscious when designing and
manufacturing consumer products, but it is essential
that the product user also exercise care when using
an electrical appliance. Listed below are precautions
which are essential for the safe use of an electrical
appliance:
1
Sunbeam’s Safety Precautions
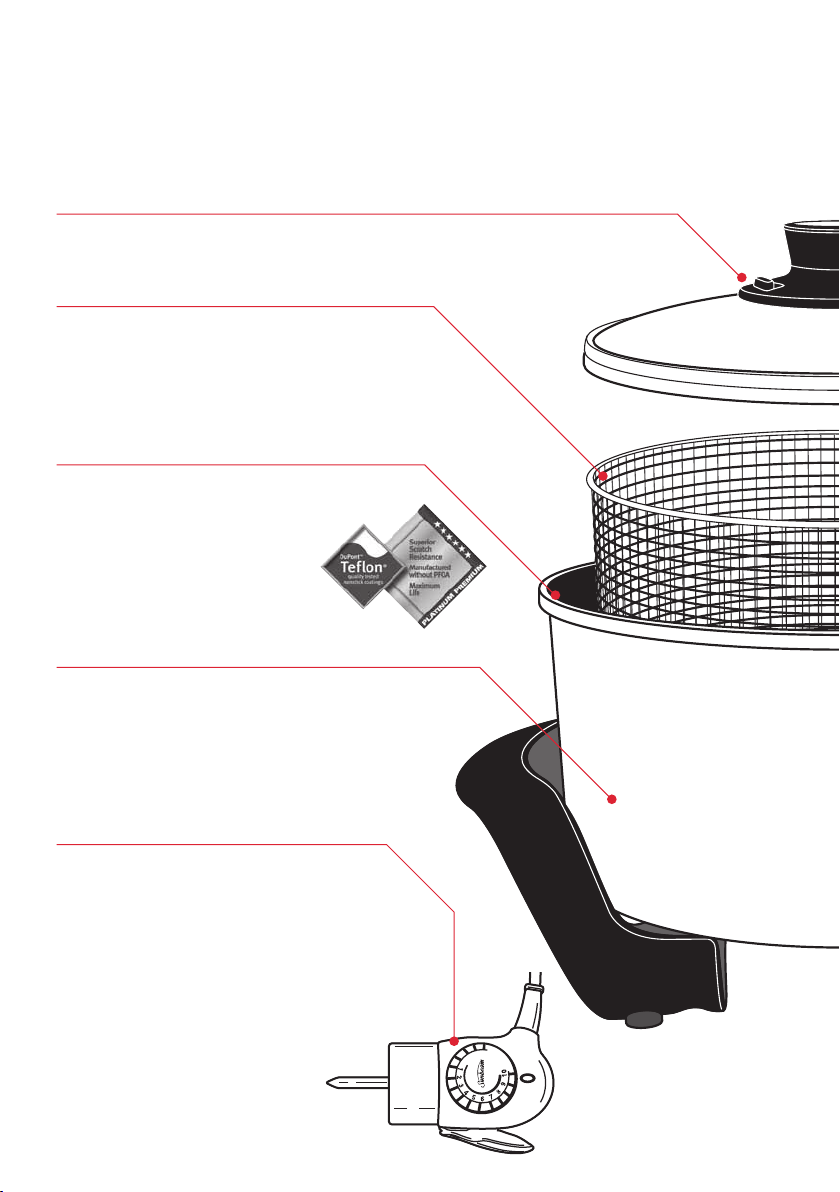
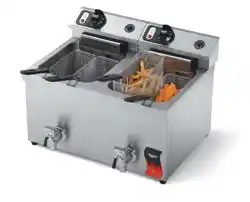
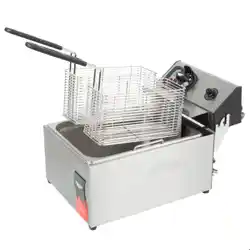
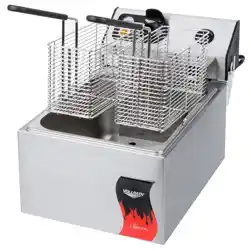
Features of your Sunbeam
Multicooker
Integrated knob & adjustable steam vent
Stainless Steel deep fry basket
Dupont Teflon
®
Platinum Premium
™
Non-Stick Cooking Surface
Extra large cooking vessel
Trigger Release Control Probe
2
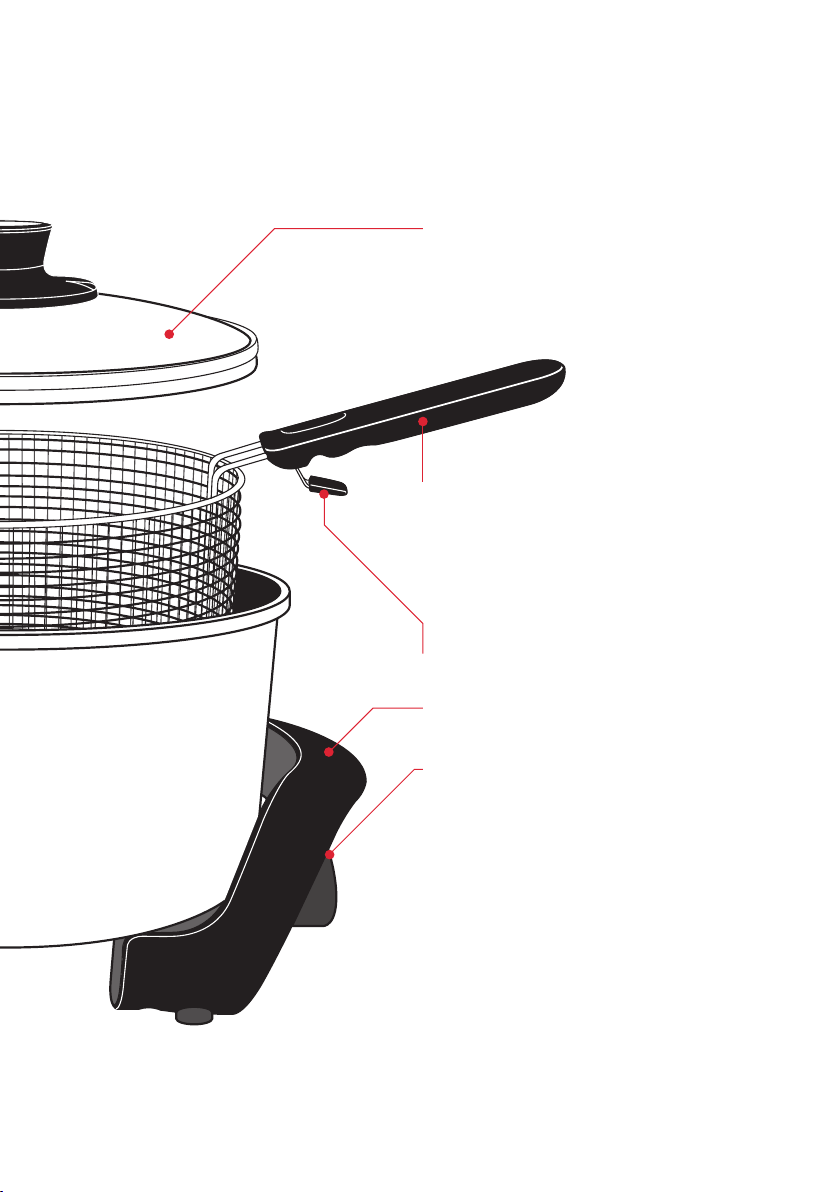
Glass lid
Basket handle
Draining lever
Cool Touch Handles
1600 watt die-cast element
3

Versatile
Economical
Easy to clean
An Introduction to Multicookers
4
DuPont Teflon
®
Platinum
Premium
™
-
Professional Use
®
™
®
®
™
®
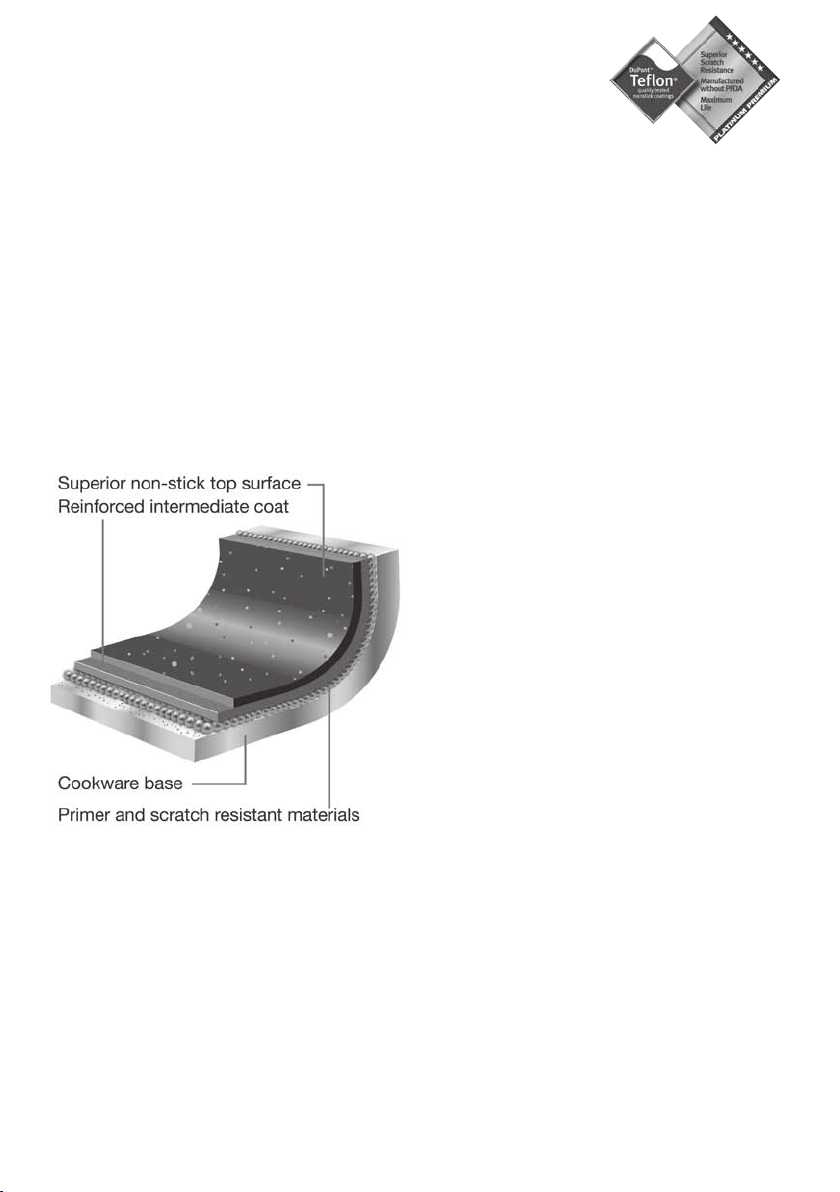
Teflon
Platinum Premium
™
– 3 layer scratch
resistant coating
5
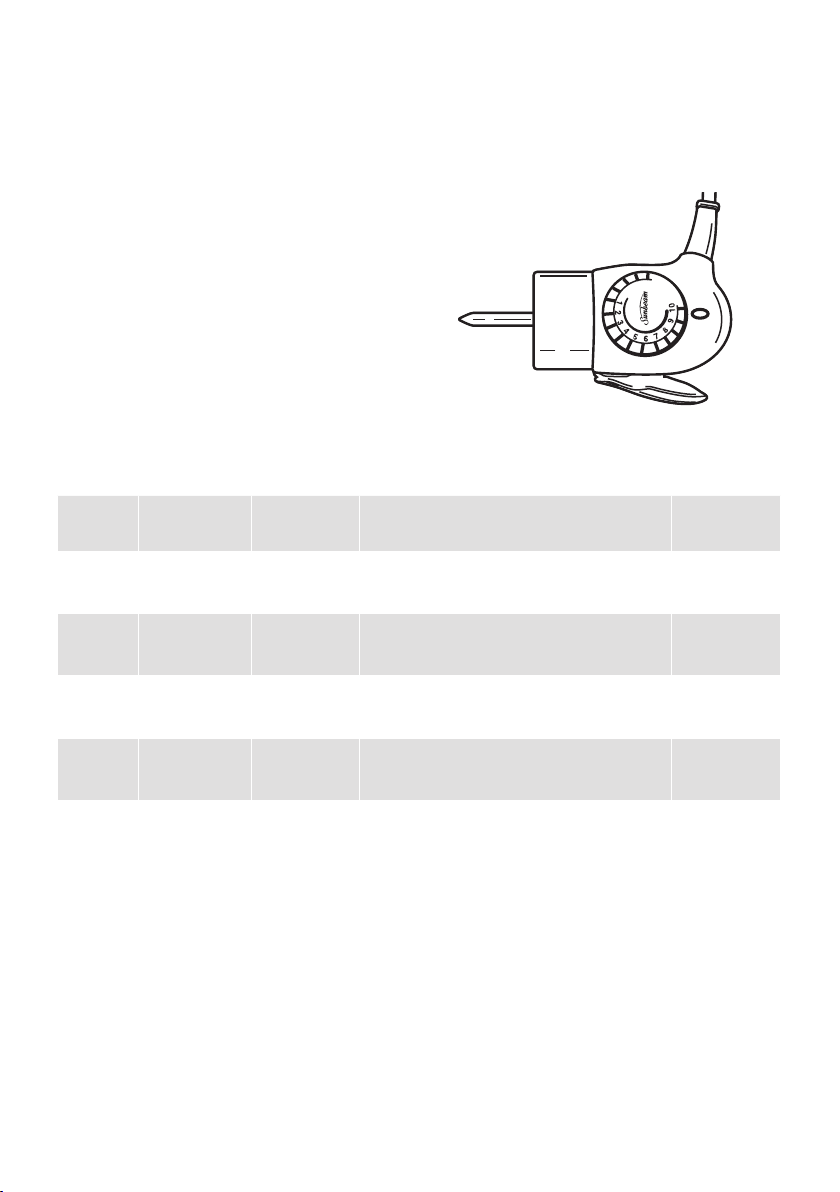
Trigger Release Control Probe
The Probe is thermostatically controlled and
incorporates an indicator light which switches
off automatically when the temperature
selected has been reached and then cycles
on and off to indicate that the selected
temperature is being maintained.
The trigger release makes removal of the
probe easy.
Dial
Setting
Celsius
(approx)
Farenheight
(approx)
Uses Temperature
1
2
100°C
110°C
Keeping food warm and reheating Low
3
4
125°C
140°C
260°F
285°F
Simmering, sauteing and slow cooking
5
6
150°C
160°C
300°F
320°F
Boiling, pan frying and stir-frying Medium
7
8
175°C
185°C
350°F
365°F
Shallow frying, baking
9
10
200°C
210°C
390°F
410°F
Deep frying, searing and sealing,
roasting
High
Note: The cooking surface temperatures given
are a guide only and may require adjustment
to suit various foods and individual tastes.
When the dial is set to a low setting, it
is quite normal for food to stop and start
bubbling, as the thermostat maintains the
selected temperature.
6
Temperature settings
The numbers on the dial represent the following approximate cooking surface temperatures.
Preheat your multicooker on setting 7-8, then change to your desired setting.

7
Glass Lid
With the lid in place, the multicooker can be
used as an oven, giving you the versatility to
roast pieces of beef, lamb and chicken.
The lid also retains heat and moisture when
simmering food such as casseroles.
Adjustable steam vent
The steam vent allows moisture to escape
without losing too much heat. Keep the vent
closed whenever cooking food where it is
necessary to retain the heat and/or moisture.
The vent should be left open for a crisper
result. When roasting chicken and meat,
open the vent in the last 15 minutes of
cooking to crispen.
Cast-in element
The element is completely cast into the he
avy
duty base for faster superior heating and a
longer element life.
Understanding your Sunbeam
Multicooker
Be careful when handling and lifting the hot
lid during and after cooking as steam can
result in burns.

Before the first use
Hint:
Note:
Saucepan cooking
Deep fry cooking
Note:
8
Using your Multicooker

9
1. Always use the best quality oil possible. We
recommend corn, nut, seed or vegetable
oils. Never use butter, margarine or olive
oils.
2. Avoid mixing oils of different qualities or
types.
3. Change the oil when it becomes brown or
milky in colour.
4. Take into account the food to be cooked
before setting the frying temperature. As a
general guide precooked food will need a
higher temperature than raw food, and the
larger th
e individual items the lower the
temperature should be.
5. Large pieces of food should not be deep
fried, as they take to long to cook thus
absorbing too much oil.
6. Fry small amounts at a time, adding too
much at a time will decrease the oils
temperature and increase the chance that
food will stick together.
7. Make sure that food is dry before frying,
wet food will splatter.

Vessel
Control Probe
WARNING:
Storage:
WARNING:
Washing the inside of the vessel
Note:
WARNING:
Washing the outside of the vessel
Cleaning the basket
Cleaning the lid
10
Care and cleaning

11
High Grade Non-Stick cooking
surfaces.
Cooking on a non-stick surface minimises the
need for oil, food does not stick and cleaning
is easier.
To ensure you get the best results from your
non-stick cooking surfaces, follow these
simple instructions:
Before the first use
“Season” the cooking surface by applying a
thin coat of cooking oil and rub in with paper
towelling. This will also be necessary after
cleaning in a dishwasher.
Avoid using high settings (8-10), as any food
which may burn on the non-stick surface may
cause it to discolour.
Any discolouration that may occur will only
detract from the appearance of the frypan
and will not affect the cooking performance.
To clean interior and exterior surface
Wash in hot soapy water. Remove stubborn
spots with a plastic washing pad or sponge.
WASH AS DIRECTED, AND RE-SEASON THE
MULTICOOKER DEEP FRYER BEFORE USING
AGAIN.
Dishwasher-safe
Your Multicooker Deep Fryer is completely
dishwasher-safe. The heating element is
totally sealed so it is safe to fully immerse in
water.
WARNING: DO NOT USE STEEL WOOL
OR COURSE SCOURING PADS.
These will damage the non-stick cooking
surface.

12
Cooking with your Multicooker
Shallow frying
Add only sufficient quantity of oil to cover
the surface of the vessel. Preheat oil on dial
setting 6-7 before adding food. Turn the
food as you fry it, reducing heat if necessary.
Remove the food with a slotted spoon or
tongs, drain well and serve.
Sauteing
This is a term which means foods are quickly
fried and gently stirred in a small amount of
hot butter, margarine or oil. Foods that are
commonly sauteed are onions, mushrooms,
garlic, capsicums and meats. Sauteing
develops flavour. Preheat the vessel to
dial
setting 3-4 with oil and saute as desired.
Boiling
Ideal for cooking vegetables where they
are completely immersed in water which is
brought to boiling point. Heat is regulated to
continue the boiling action. Place the lid on
the vessel unless stated in the recipe.
Dry Frying
Preheat the cooker to dial setting 6-8 with a
little butter, margarine or oil. Remove excess
fat from meat and place it directly into the
vessel. Turn the food to seal and brown
both sides. It may be necessary to lower the
setting after sealing to complete the cooking.
When small amounts of butter, marga
rine or
oil are used, tilt the vessel slightly to coat the
entire surface.
Reheating Foods
To keep foods hot or reheat foods, place the
leftovers into the vessel and heat on setting
1-2. To prevent food drying out add a small
amount of stock or water as required. Another
way to heat leftovers is to wrap them in foil,
seal and place in the vessel with the lid on.
Heat on settings 3 or 4 for 5 to 10 minutes.
Braising and Stewing
This is the ideal method for cooking tougher
cuts of meat. First saute the food in butter
or oil to develop the flavour. Then cover
with stock, water or wine and cook for the
suggested time and setting in the recipe.
Always keep the lid on and the vent closed
when braising or stewing.
Deep Frying
• It is essential that foods to be deep fried
are completely immersed in the frying
medium. Select any frying medium you
wish, but refined, deodorised vegetable oils
are recommended. They can be used more
than once without marked deterioration.
Sunbeam also recommends peanut oil
or solid vegetable shortening of reliable
brands. Lard is the best of animal fats,
but it tends to be very rich in flavour and
odour. Dripping darkens quickly and is
not completely satisfactory. DO NOT USE
BUTTER OR MARGARINE FOR DEEP
FRYING.
• Do not overfill the cooking vessel with oil
or
shortening. Allow at least 8cm from the
top
of the oil or shortening to the rim of
the vessel. About 8 to 10 cups (2 to 2 ½
litres) of
oil or 2kg of shortening is ample.
If more is used, boilovers may occur.
• Never leave oil or shortening at high frying
temperatures for long periods of time. If
cooking fried foods in batches, lower the
temperature to setting 1-2 between frying
sessions, as it helps to extend the life of
the oil.
• NEVER PLACE THE LID ON THE VESSEL
WHEN DEEP FRYING.

13
Cooking with your Multicooker continued
Care of oils and shortenings
• Strain after each use because food particles
or sediments cause oil to darken, foam and
lose its browning quality.
• Store in a cool place away from light.
• Renew oil frequently. We do not
recommend the addition of new oil to old,
as used oil breaks down the quality of the
new oil.
• DO NOT STORE OIL IN THE
MULTICOOKER.
To clarify oils and shortenings
Oil or shortening will last longer if clarified
regularly. For each 500g of shortening or
2 cups (500 ml) of oil, add one potato,
peeled and cut into 5mm slices. Heat oil
or shortening
gradually. When it ceases to
bubble and the potatoes are well browned,
strain the oil through several thicknesses of
muslin or cheese cloth placed over a strainer.
Set aside to cool. When ready to use, discard
any sediment left at the bottom of the bowl.
Hints for frying
• Vary time and temperature to suit taste,
size and quantity of foods.
• Do not heat more oil or shortening than
required.
• Dry foods thoroughly on absorbent
paper before adding to hot oil, or before
dipping into frying batter, to avoid excess
spattering.
• Use tongs or a long-handled slotted spoon
to gently lower food into
hot oil. To avoid
spatter burns, never drop foods from
fingers.
• Do not overcrowd the frying basket. It is
better to cook about half a basketful at a
time.
• Batter-covered foods such as doughnuts are
best cooked one layer at a time.
• Wait for indicator light to go OFF before
frying next batch. Skim off any food
particles.
• Have absorbent paper handy for draining
foods.
Boiling vegetables
• Prepare vegetables (see pages 14-16).
• Add enough water to the vessel to barely
cover vegetables.
• Bring water to a rapid boil on setting 5-6.
• Add vegetables and return to
the boil.
• Cover, unless stated in recipe
or chart.
• Reduce setting to 2 (or
gentle boil) and
cook for the suggested cooking time
(see pages 14-16).
• Drain vegetables.
Note: Vegetable stock may be used as a base
for sauces.
To blanch vegetables for freezing
• Prepare vegetables and plunge into boiling
water.
• Boil rapidly for 1 to 10 minutes
(depending on vegetable).
• Remove and cool vegetables quickly by
placing in iced or running cold tap water.
• Leave approximately 2.5 cm space before
sealing.
• Label, date and freeze.
The following pages give basic preparation
and cooking directions for boiling steaming or
sauteing a wide selection of vegetables.

Asparagus
Beans (green)
Boil:
Broad beans
Boil:
DRIED BEANS e.g. Red, Kidney, Haricot, Soya,
Lima
Boil:
Broccoli
Boil:
Brussel Sprouts
Boil:
Cabbage
Boil:
Saute:
Capsicums (peppers) red or green
Saute:
Carrots
Boil:
Vegetable Cooking Hints
14

Cauliflower
Boil:
Chokoes
Boil:
Corn – Cob
Boil:
Corn Kernels
Boil:
Eggplant (Aubergine)
Shallow or Deep Fried:
Saute:
Mushrooms
Saute:
Onion
To Blanch:
Saute:
Boil:
Parsnips
Parboil:
Peas
Boil:
15
Vegetable Cooking Hints continued

Potatoes
Boil:
Deep Fried:
Pumpkin
Boil:
Spinach
Cooking:
Swedes and Turnips
Boil:
Tomatoes
Saute:
Zucchini and Marrow
Boil:
Saute:
Vegetable Cooking Hints continued
16

17
Setting and cooking times
These are given as a guide for best results.
However, vary the temperature and cooking
times to suit the foods prepared and the
personal tastes of your family.
Omission or addition of ingredients to the
recipes will alter the suggested cooking
times, and adjustments should be made
accordingly – your own imagination will
personalise these recipes.
Many recipes in your files or cookbooks
are perfectly suitable for cooking in this
appliance. Check first to see if there is
a similar recipe in this book, then follow
accordingly.
Measurements
All cup and spoon measurements are level.
Recipes have
been tested using Australian
Standard Metric Cup and Spoon
Measurements. Australian Standard
Metric measuring utensils are available at
large departmental stores. There are four
measuring spoons: tablespoon, teaspoon, half
teaspoon and quarter teaspoon. Also there
are four fractional metric measuring cups:
full, half, third and quarter, for measuring dry
ingredients. As well there is a metric cup and
a litre measure for liquid measurement.
1 metric cup is equivalent to 250 ml
1 tablespoon is equivalent to 20 ml
1 teaspoon is equivalent to 5
ml
Ingredients
Most ingredients in this book are given in
volume (cups and spoons). Ingredients such
as meat, butter and margarine are given by
weight (kilograms or grams).
Chicken sizes are given in metric numbers.
Packets of butter or margarine may be
divided by length and width with sufficient
accuracy for cookery. It is essential to
thoroughly thaw frozen foods unless otherwise
stated in recipes in a refrigerator prior
to cooking. Just before cooking, wipe off
excess moisture with paper towelling. DO
NOT RE-FREEZE THAWED FOODS BEFORE
COOKING.
Abbreviations used in this book
g gram
kg kilogram
ml millilitre
pkt packet
HANDY HINTS
Au Gratin Topping
Melt 60g butter
on dial setting 5-6 in
cooking vessel. Add 1 cup fresh white
breadcrumbs and stir until browned. Sprinkle
over white sauce mixtures.
Blanching Tomatoes
Half fill cooking vessel with water and bring
to the boil on dial setting 5-8. Add 2-3
tomatoes and boil for 1 minute. Using a
slotted spoon lift tomatoes from water.
Plunge into iced water, drain and peel.
Browning Coconut
Heat the cooking vessel to dial setting 4-8.
Add coconut and stir continuously until
evenly browned. Turn power OFF and remove
coconut immediately.
Cooking Pastas (Macaroni, spaghetti,
vermicelli, noodles etc.)
Fill the cooking vessel two thirds full with
water; add salt. Bring to the boil on dial
setting 4-8. Ad
d pasta and boil for 10-15
minutes or until tender. Drain well in a
colander. Do not rinse. Add butter if desired
and toss. Note: 1 tablespoon oil added to the
water whilst cooking helps to keep the pasta
separate.
Cooking Information

18
Cooking Information continued
To Cook Rice
Fill the cooking vessel two thirds full with
water; add salt. Bring to the boil on dial
setting 5-10. Add rice and boil for 10-15
minutes, or until tender. Drain and rinse
under cold water. Add butter and toss.
Variations;
1. Add 1½ cup chopped shallots which have
been sauteed in 30g butter.
2. Add 1½ teaspoon tumeric whilst cooking.
Heating or Scalding Milk
For hot chocolate, desserts, custards,
puddings or where hot or scalded milk is
required, set control dial setting 3-4. Add
milk and bring to the desired temperature.
Melting Chocolate
Roughly chop chocolate and add to cooking
vessel. Set
control between dial setting 2-4.
When chocolate has almost melted, turn
power OFF. Chocolate will completely melt
using ‘stored heat’.
Reconstituting Dried Fruit
Place dried fruit into a bowl and cover with
cold water. Soak for several hours. Transfer
fruit and water to cooking vessel. Set control
to dial setting 3-4. Cover with lid. Simmer
for 15-20 minutes, or until tender. Add sugar
5 minutes before end of cooking time, if
desired.
Roasting And Baking Meats
You will find it quite convenient to cook
joints of 2-3 kg in the cooking vessel. When
roasting meat, chickens, rabbits, etc., you
will find that two or three small pieces may
be put in
side by side if required. Use only a
small quantity of oil,
up to
¼
cup, to prevent
meat from sticking
.
Heat the vessel to dial
setting 8-10, place the meat in and turn it
to brown and seal on all sides. Veal or fat
free fillets of meat may require a little more
oil, while lamb and fatty cuts can be cooked
in their own fat. If excess fat accumulates
in the vessel, it is advisable to spoon this
out during cooking. After browning, set
the control to 10 to achieve a sizzling
action whilst the light is ON. Only fat, not
juice should accumulate whilst roasting.
Moisture in the fat indicat
es the necessity
to increase the temperature. Turn the meat
two or three times during cooking and add
vegetables three-quarters to one hour before
anticipated serving time. If necessary, change
temperature to 6 for crisp, brown vegetables.
To obtain crisp pork crackling, it is necessary
to increase the temperature to 8-10.
Roasting Nuts
Heat ¼
cup oil in cooking vessel on dial
setting 4-10 and add dry blanched nuts.
Stir continuously until browned. Drain on
absorbent paper and
sprinkle with salt.

19
Baste To moisten meat, poultry or fish with
their own juices while they are being cooked.
Blanch
• To remove skins from vegetables, fruits and
nuts.
• To pre-cook vegetables or fruits before
freezing.
Blend To combine two or more ingredients,
usually a powder and a liquid, to form a
smooth paste.
Boil To cook in water,held at boiling point.
Boutquet Garni A selection of herbs, usually
sprigs of parsley, thyme, rosemary, a bayleaf,
peppercorns, which are tied in muslin; the bag
is placed in with the food being cooked and
removed on completion of cooking.
Caramelise To melt sugar slowly until it turns
golden brown.
Coat To cover entire surface of food with
ingredients, e.g. coating cutlets with seasoned
flour, egg and breadcrumbs.
Croutons Bread shapes which are fried or
toasted.
Dripping Residue remaining in pan after meat
or poultry is cooked.
Flake To separate food into small pieces with
a fork.
Garnish To decorate food, usually with
something edible.
Marinade To tenderise and add flavour to meat,
fish or poultry. The food is placed in a mixture
of oil, wine, vinegar and herbs.
Marinate To allow food to stand in marinade.
Par
boil To boil until partially cooked.
Preheat To have appliance or oven at desired
setting or temperature before adding food.
Puree To place cooked food in a blender or
through a fine sieve to form a thick smooth
mixture.
Reduce
• To simmer a liquid until it diminishes and
becomes concentrated.
• To reduce temperature.
Saute To cook or lightly fry food quickly
in a small amount of hot fat or oil, stirring
frequently.
Scald To heat liquids to a temperature just
below boiling point.
Seasoned Flour Add desired seasonings to flour,
when coating meat for frying or making
casseroles and stews.
Shred Cut food into thin strips.
Simmer To keep food at a constant temperature
just below boiling point.
Cooking definitions

Béchamel Sauce
Sweet and Sour Sauce
Recipes for your Multicooker
20
Soups, Sauces, Stocks

Soups, Sauces, Stocks continued
Spicy Barbeque Sauce
¹⁄
³
Pumpkin Soup
21

Soups, Sauces, Stocks continued
French Onion Soup
Basic Chicken Stock
TIP:
22

Main Meals
Garlic Prawns
Spaghetti Bolognese
23

Chilli Con Carne
Party Time Tacos
TIP:
24
Main Meals continued

25
Sweet and Sour Mince
TIP:
Spaghetti Marinara
TIP:
Main Meals continued

26
Main Meals continued
Normandy Chicken
¹⁄
³
Fried Rice

27
Main Meals continued
Chinese Fried Vegetables

28
Choux Pastry
Jamaican Bananas
Desserts and Sweets

29
Desserts and Sweets recipes continued
Golden Syrup Dumplings
Chocolate Fudge

30
Toffee Apples
Creamy Caramel Sauce
Desserts and Sweets recipes continued

33
• For perfect fries and wedges old potatoes
are ideal. The potato should be low starch,
waxy variety i.e. chats, new potato or
desiree potatoes.
• Make sure that the chips are cut evenly
to guarantee even cooking.
• The cut chips should be rinsed under
running water until the water runs
clear. This removes excess starch from
the potatoes, starch burns at high
temperatures.
• Dry on kitchen towel before frying.
• Shake the basket at short intervals to
encourage even browning and to prevent
chips from sticking together.
• Homemade fries are double cooked. The
first fry blanches the chips so that they
cook through. The second fry colours the
chips and gives them a crisp c
rust. Use the
table below as a guide.
• Cooking times will vary depending on the
size of your fries or chips and the variety of
the potato used.
Hints for cooking the perfect frozen chip.
• Do not defrost frozen precooked chips.
For the best results they should be taken
directly from the freezer to the fryer.
• Heat oil to the maximum setting, 8-10.
• Place up to 1kg frozen chips into the fryer
basket and lower into the hot oil for 1 - 2
minutes to seal.
• Lift the basket out and rest the drainage
lever inside the rim of the cooking vessel.
Allow the oil to heat up again.
• Lower the basket again and fry the chips
for a further 3 - 4 minutes until golden
brown. The time required will depend on
the size and cut of the chip, and personal
taste.
• Allow chips to drain for a moment before
removing from the basket and seasoning.
Cooking with your Deep Fryer
The Perfect Chip.
Temperature
Control settings
Time for first fry
(blanch)
Temperature
Control Settings
Time for second
fry - Max temp
Thin fries -
french fries
8 5 min 10 5 min
Thick chips 8 7-8 min 10 7-8 min
Wedges 8 10 min 10 10 min
• Allow oil to heat up to 2nd temperature before re-immersing the basket in the hot oil.
31

32
34
Deep fry cooking with home
battered food.
This method allows for the fact that if
wet batter is placed in the basket prior to
cooking the food may stick to the basket.
THIS METHOD OF COOKING REQUIRES
EXTREME CARE.
1. Follow steps 1 - 6 only from the deep fry
cooking instructions on page 8.
2. Place the frying basket into the vessel with
the heated oil.
3. Coat the food in batter (see recipes on
page 35) and allow it to drain slightly to
get rid of the excess coating.
4. Very carefully, slowly lower the coated food
into the hot oil, using a suitable implement
or tongs.
This allows the
batter to become solid
and prevents it sealing to the mesh of the
basket.
Note: Remember to take care as the oil may
spit as the food is added.
5. You can now follow the deep fry cooking
instructions from steps 8-10 on page 8.

35
Type
Maximum
Qty
Temperature
Control settings
Approx. time
(min)
Suggestions
PRAWNS
Fresh 600g 8-10 5-7 Crumb/batter
Frozen 600g 8-10 3-5 Fry frozen
FISH
Small pieces 400g 8-10 3-5 Crumb/batter
Fresh fillets 600g 8-10 7-10 Crumb/batter
Frozen fillets 600g 8-10 5-7 Fry frozen
CALAMARI
Fresh 500g 8-10 5-7 Crumb/batter
Frozen 500g 8-10 3-5 Fry frozen
Type
Maximum
Qty
Temperature
Control settings
Approx. time
(min)
Suggestions
Fresh chicken
portions
SMALL 400g 8-10 15-20 Crumb or batter
LARGE 600g 8-10 20-30 Crumb or batter
Chicken or Veal
Schnitzel
FRESH 250g 8-10 5-10 Crumb
FROZEN 250g 8-10 3-8 Crumb
Frying times and temperatures
Fish and Seafood
Meat and Poultry
33

36
Frying times and temperatures continued
Type
Maximum
Qty
Temperature
Control settings
Approx. time
(min)
Suggestions
Beans 200g 8-10 2-4 Tempura
Bok Choy 150g 8-10 2-4 Tempura
(ind. leaves)
Broccoli /
Cauliflower
250g 8-10 3-5 Tempura or batter
Eggplant (slices) 150g 8-10 4-6 Batter
Mushrooms whole
button
200g 8-10 3-5 Batter
Onion Rings 150g 8-10 3-5 Batter
Potatoes
French Fries 500g 8-10 4-6
Chips 500g 8-10 5-10
Wedges 500g 8-10 10-15
Vegetables
Always blanch potato chips at a lower temp; setting 8. Then brown at maximum temp;
setting 10.
34

Recipes for your Deep Fryer
For perfect batter:
Beer Batter
¹⁄
³
Sweet Fritter Batter
²⁄
³
Tempura Batter
TIP:
Easy Crispy Coating
35

Prawn Cutlets
Deep fried Pork Balls
Recipes for your Deep Fryer continued
36

37
Recipes for your Deep Fryer continued
Calamari
Dim Sims

Recipes for your Deep Fryer continued
Spring Rolls
Minted Pea Wontons
38

Recipes for your Deep Fryer continued
Southern Fried Chicken
Shallot and Sesame Puffs
39

40
Recipes for your Deep Fryer continued
Meatballs
Felafel

41
Recipes for your Deep Fryer continued
Corn Fritters
¹⁄
³
Apple Fritters
²⁄
³
TIP:

42
Recipes for your Deep Fryer continued
Strawberry Stack
Family Doughnuts
²⁄
³

43
45
Troubleshooting
Problem Possible Cause Solution
Strong Smell • Oil has gone bad
• The correct oil is not
being used
• Replace oil
• Use only high quality oil.
Do not mix oils of a different
quality or type.
Oil overflowing • Fryer is filled above the
maximum level
• Wet food placed in hot oil.
• Stated quantities
exceeded.
• Check oil level on the inside
of fryer.
• Dry food first
• Do not fry food above the
weight indicated.
Food is not browning • Cooking temperature is
too low.
• Basket is overloaded.
• Oil is not hot enough.
• Adjust the dial to the correct
cooking temperature.
• Do not fry food above the
stated quantities and
weights
• Faulty temperature control.
Consult Service Centre.
Chips are sticking together • Food not washed
thoroughly before placed
in the oil
• Wash potatoes thoroughly
and dry before frying.

Notes

Australia
New Zealand
In the unlikely event that this appliance develops any malfunction
within 12 months of purchase (3 months commercial use) due to
faulty materials or manufacture, we will replace it for you
free of charge.
12 Month Replacement Guarantee

is a registered trademark.
Need help with your appliance?
In Australia
Visit www.sunbeam.com.au
Or call 1300 881 861
In New Zealand
Visit www.sunbeam.co.nz
Or call 0800 786 232
‘Teflon’ and ‘Platinum Premium’ are trademarks of DuPont.
Made in China.
Due to minor changes in design or otherwise,
the product may differ from the one shown in this leaflet.
© Copyright.
Sunbeam Corporation Limited 2006.
ABN 45 000 006 771
Units 5 & 6, 13 Lord Street
Botany NSW 2019 Australia
Unit 3, Building D
26 Vestey Drive
Mt Wellington Auckland
New Zealand
Sunbeam Corporation is a division of GUD Holdings Ltd.