Search
Home
Bookmarks
Brands
Articles
About us
Home
Dell
Dell i3585-A080BLK-PUS User Manual
Page 39
User Manual - Page 39
For i3585-A080BLK-PUS.
Page 39/112
Page 1
Page 2
Page 3
Page 4
Page 5
Page 6
Page 7
Page 8
Page 9
Page 10
Page 11
Page 12
Page 13
Page 14
Page 15
Page 16
Page 17
Page 18
Page 19
Page 20
Page 21
Page 22
Page 23
Page 24
Page 25
Page 26
Page 27
Page 28
Page 29
Page 30
Page 31
Page 32
Page 33
Page 34
Page 35
Page 36
Page 37
Page 38
Page 39
Page 40
Page 41
Page 42
Page 43
Page 44
Page 45
Page 46
Page 47
Page 48
Page 49
Page 50
Page 51
Page 52
Page 53
Page 54
Page 55
Page 56
Page 57
Page 58
Page 59
Page 60
Page 61
Page 62
Page 63
Page 64
Page 65
Page 66
Page 67
Page 68
Page 69
Page 70
Page 71
Page 72
Page 73
Page 74
Page 75
Page 76
Page 77
Page 78
Page 79
Page 80
Page 81
Page 82
Page 83
Page 84
Page 85
Page 86
Page 87
Page 88
Page 89
Page 90
Page 91
Page 92
Page 93
Page 94
Page 95
Page 96
Page 97
Page 98
Page 99
Page 100
Page 101
Page 102
Page 103
Page 104
Page 105
Page 106
Page 107
Page 108
Page 109
Page 110
Page 111
Page 112
Contents
Table of Contents
Search
Previous
Next
Troubleshooting
Bookmarks
Loading ...
Loading ...
Loading ...
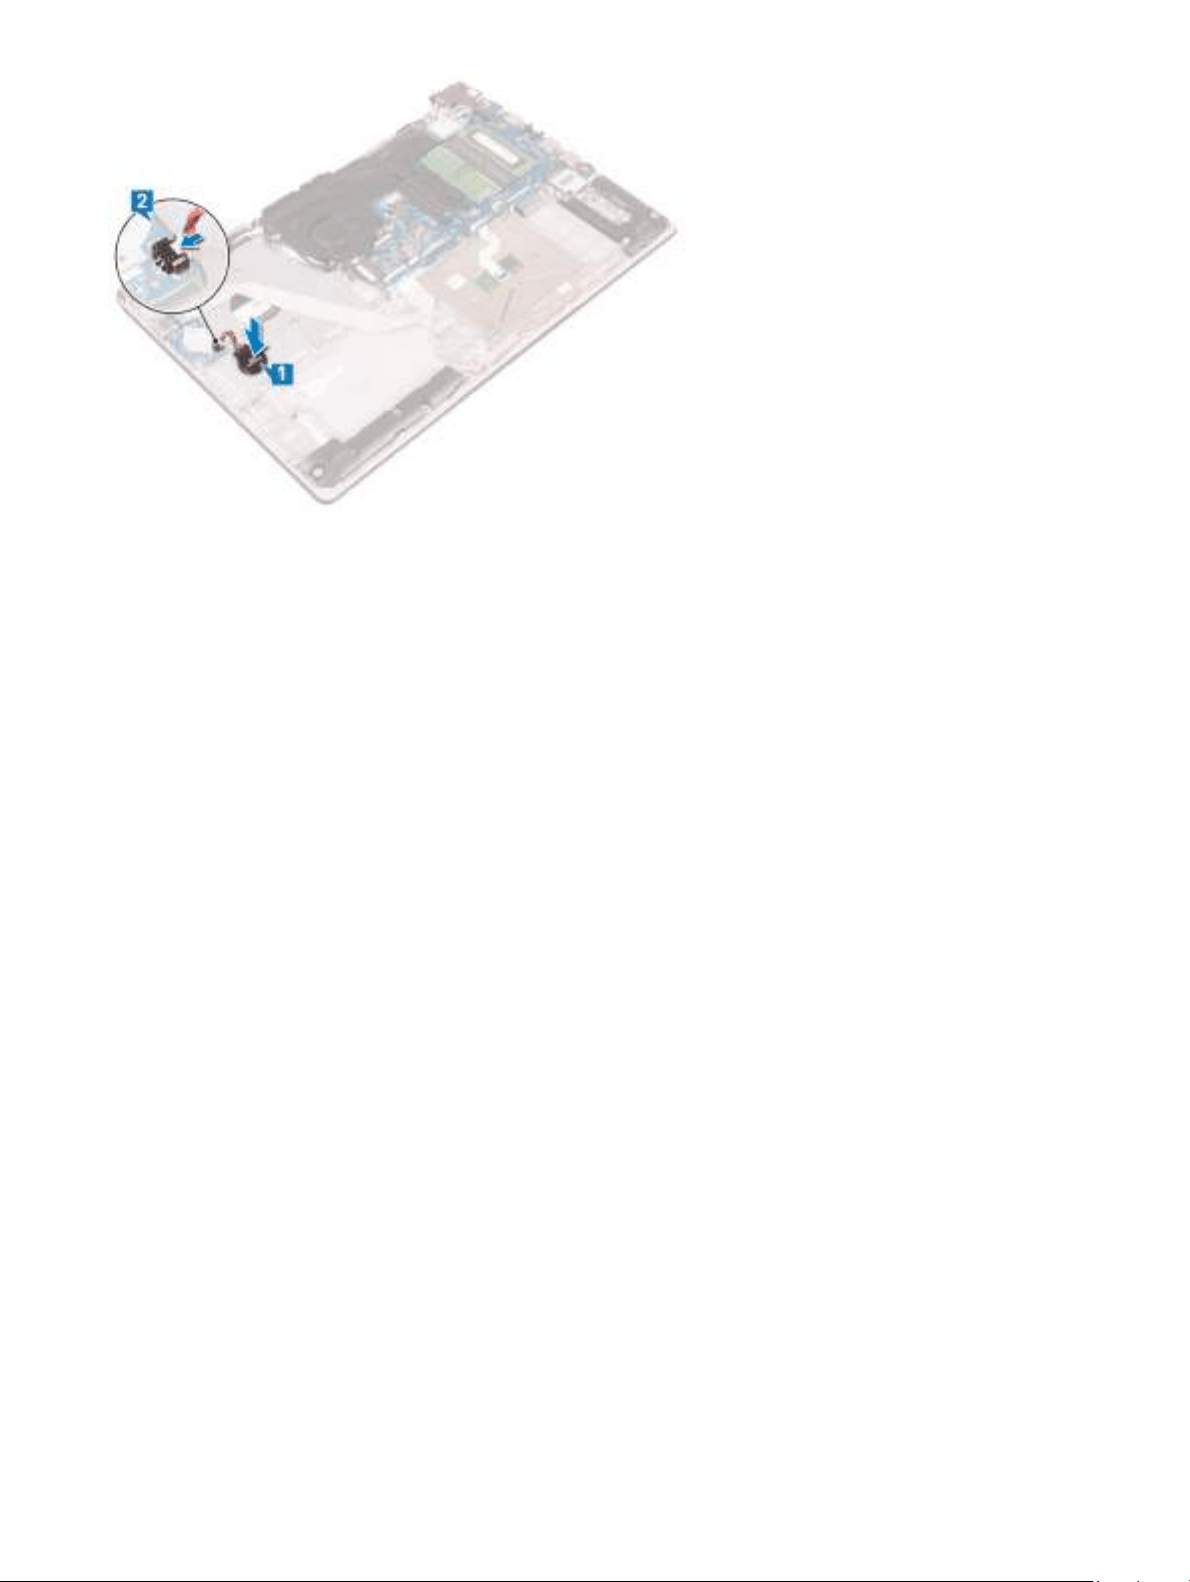
P
ost
-r
equisites
1
Replace the
base cov
er
.
2
Replace the
optical driv
e
(
optional).
Replacing the coin-cell bat
tery
39
Loading ...
Loading ...
Loading ...
<
36
37
38
39
40
41
>
File type: PDF
File name: i3585-a080blk-pus.pdf
File size: 966.62 KB
File Language: English
Pages: 112
Author: Dell
Published: 2020-03-18 00:00:00
Updated: 2023-05-21
Download File
Table of Contents
×
Inspiron 3585 Service Manual
3
Before working inside your computer
9
Before you begin
9
After working inside your computer
10
Safety instructions
11
Electrostatic dischargeâESD protection
11
ESD field service kit
12
Components of an ESD field service kit
12
ESD protection summary
12
Transporting sensitive components
13
Lifting equipment
13
Recommended tools
14
Screw list
15
Removing the optical drive
17
Procedure
17
Replacing the optical drive
19
Procedure
19
Removing the base cover
21
Prerequisites
21
Procedure
21
Replacing the base cover
23
Procedure
23
Post-requisites
24
Removing the battery
25
Lithium-ion battery precautions
25
Prerequisites
25
Procedure
25
Replacing the battery
27
Lithium-ion battery precautions
27
Procedure
27
Post-requisites
28
Removing the memory modules
29
Prerequisites
29
Procedure
29
Replacing the memory modules
30
Procedure
30
Post-requisites
30
Removing the wireless card
31
Prerequisites
31
Procedure
31
Replacing the wireless card
33
Procedure
33
Post-requisites
33
Removing the optical-drive connector board
34
Prerequisites
34
Procedure
34
Replacing the optical-drive connector board
35
Procedure
35
Post-requisites
35
Removing the coin-cell battery
36
Prerequisites
36
Procedure
36
Replacing the coin-cell battery
38
Procedure
38
Post-requisites
39
Removing the fan
40
Prerequisites
40
Procedure
40
Replacing the fan
42
Procedure
42
Post-requisites
43
Removing the solid-state drive
44
Prerequisites
44
Procedure
44
Replacing the solid-state drive
45
Procedure
45
Post-requisites
45
Removing the hard drive
46
Prerequisites
46
Procedure
46
Replacing the hard drive
48
Procedure
48
Post-requisites
49
Removing the touchpad
50
Prerequisites
50
Procedure
50
Replacing the touchpad
52
Procedure
52
Post-requisites
53
Removing the speakers
54
Prerequisites
54
Procedure
54
Replacing the speakers
55
Procedure
55
Post-requisites
55
Removing the heat sink
56
Prerequisites
56
Procedure
56
Replacing the heat sink
57
Procedure
57
Post-requisites
57
Removing the power-adapter port
58
Prerequisites
58
Procedure
58
Replacing the power-adapter port
59
Procedure
59
Post-requisites
59
Removing the display assembly
60
Prerequisites
60
Procedure
60
Replacing the display assembly
63
Procedure
63
Post-requisites
64
Removing the I/O board
65
Prerequisites
65
Procedure
65
Replacing the I/O board
67
Procedure
67
Post-requisites
68
Removing the power-button board
69
Prerequisites
69
Procedure
69
Replacing the power-button board
71
Procedure
71
Post-requisites
72
Removing the system board
73
Prerequisites
73
Procedure
73
Replacing the system board
76
Procedure
76
Post-requisites
78
Entering the Service Tag in the BIOS setup program
78
Removing the power button with fingerprint reader
79
Prerequisites
79
Procedure
79
Replacing the power button with fingerprint reader
81
Procedure
81
Post-requisites
81
Removing the palm-rest and keyboard assembly
83
Prerequisites
83
Procedure
83
Replacing the palm-rest and keyboard assembly
85
Procedure
85
Post-requisites
85
Removing the display bezel
87
Prerequisites
87
Procedure
87
Replacing the display bezel
88
Procedure
88
Post-requisites
88
Removing the camera
89
Prerequisites
89
Procedure
89
Replacing the camera
90
Procedure
90
Post-requisites
90
Removing the display panel
91
Prerequisites
91
Procedure
91
Replacing the display panel
93
Procedure
93
Post-requisites
94
Removing the display hinges
95
Prerequisites
95
Procedure
95
Replacing the display hinges
96
Procedure
96
Post-requisites
96
Removing the display cable
97
Prerequisites
97
Procedure
97
Replacing the display cable
98
Procedure
98
Post-requisites
98
Removing the display back-cover and antenna assembly
99
Prerequisites
99
Procedure
99
Replacing the display back-cover and antenna assembly
100
Procedure
100
Post-requisites
100
Device drivers
101
Video drivers
101
Wireless and Bluetooth drivers
101
System setup
102
System setup
102
Entering BIOS setup program
102
Navigation keys
102
Boot Sequence
102
System setup options
103
Clearing CMOS settings
106
Clearing BIOS (System Setup) and System passwords
107
Troubleshooting
108
Flashing the BIOS
108
Flashing BIOS (USB key)
108
Enhanced Pre-Boot System Assessment (ePSA) diagnostics
108
Running the ePSA diagnostics
109
System diagnostic lights
109
Recovering the operating system
110
WiFi power cycle
110
Flea power release
110
Getting help and contacting Dell
112
Self-help resources
112
Contacting Dell
112
Search:
×
Search