For product questions contact:
Jarden Consumer Service
USA: 1.800.334.0759
Canada: 1.800.667.8623
www.oster.com
©2010 Sunbeam Products, Inc. doing business as Jarden Consumer Solutions.
All rights reserved. Distributed by Sunbeam Products, Inc. doing business as
Jarden Consumer Solutions, Boca Raton, Florida 33431.
Para preguntas sobre los productos llame:
Jarden Consumer Service
EE.UU.: 1.800.334.0759
Canadá: 1.800.667.8623
www.oster.com
©2010 Sunbeam Products, Inc. operando bajo el nombre de Jarden Consumer Solutions.
Todos los derechos reservados. Distribuido por Sunbeam Products, Inc. operando bajo
el nombre de Jarden Consumer Solutions, Boca Raton, Florida 33431.
SPR-052710
User Manual
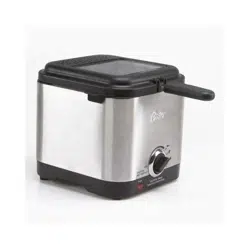
4 L Cool Zone Deep Fryer
Manual de Instrucctiones
Freidora de 4 L. Zona Fría
MODEL/MODELO
CKSTDFZM70
P.N. 133698 Rev. A
Visit us at www.oster.com
Printed in China Impreso en China

English-2 English-3
Th i s Un i T is Fo r ho U s e h o l d Us e on l y
This Deep fryer is equipped with an exclusive Sure Release Power Cord
System, which includes a detachable magnetic cord designed to separate
from the unit when certain amounts of force are applied. (See details on
page 4 for instructions on proper usage of the Sure Release magnetic cord.)
A short power supply cord is provided to reduce the risk resulting from
becoming entangled in or tripping over a longer cord.
WARNING: Do not use an extension cord.
No user-serviceable parts inside. Do not attempt to service this product.
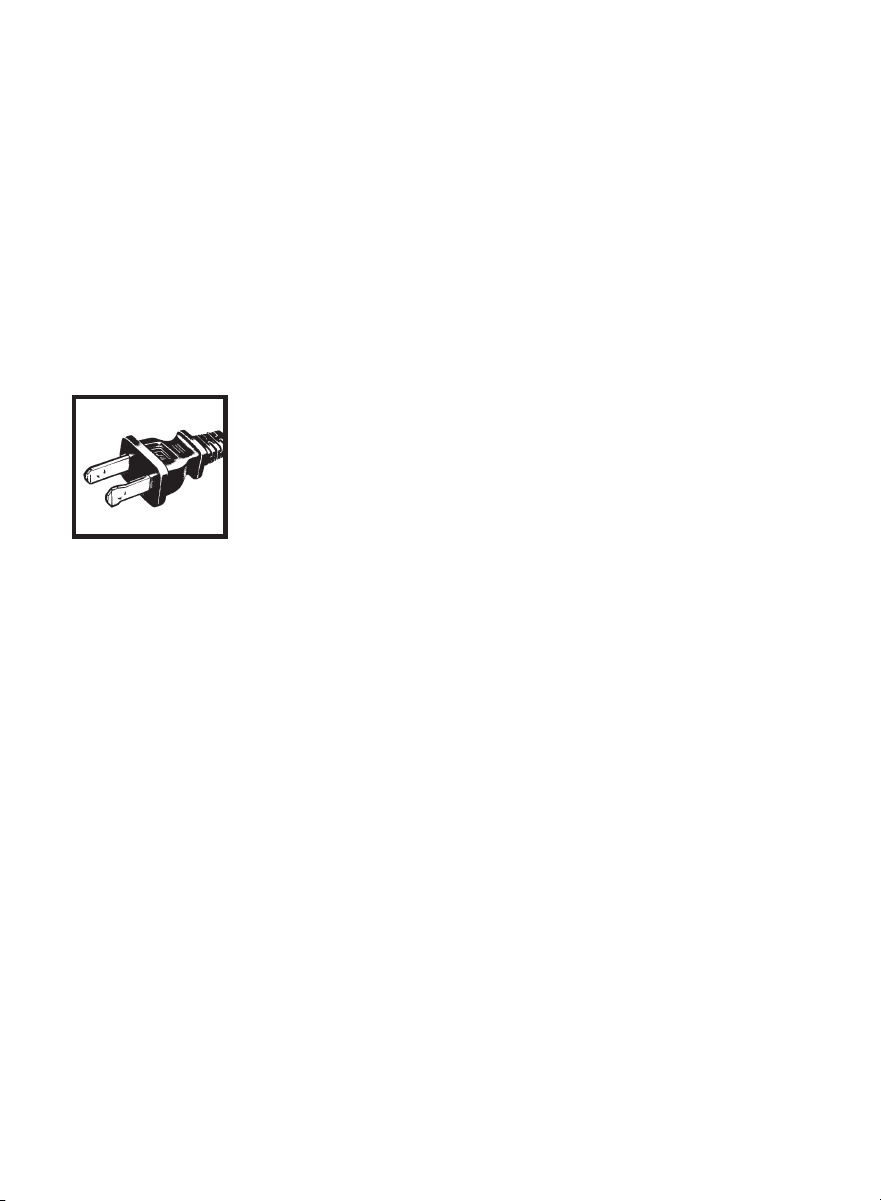
POLARIZED PLUG
This appliance has a polarized plug, (one blade is wider
than the other). As a safety feature to reduce the risk of
electrical shock, this plug is intended to fit in a polarized
outlet only one way. If the plug does not fit fully in the
outlet, reverse the plug. If it still does not fit, contact a
qualified electrician. Do not attempt to defeat this safety
feature or modify the plug in any way. If the plug fits
loosely into the AC outlet or if the AC outlet feels warm
do not use that outlet.
SAVE THESE INSTRUCTIONS
We l c o m e
Congratulations on your purchase of an OSTER
®
Deep Fryer!
To learn more about OSTER
®
products, please visit us at www.oster.com.
Be f o r e Us i n g Yo U r osTer
®
co o l Zo n e De e p fr Y e r
Before using your OSTER
®
Deep Fryer for the first time, remove all packaging
materials from the exterior and interior of the fryer. Make sure the fryer is unplugged.
Clean the frying basket, lid, oil reservoir and condensation trap (all these parts are
dishwasher safe). Gently wipe the Cool-Zone Heating Element with a damp cloth.
Dry all parts thoroughly. See
Care and Cleaning
.
DO NOT IMMERSE THE CORD, POWER STRIP
OR CONTROL PANEL ASSEMBLY
IN WATER OR ANY OTHER LIQUID!
IMPORTANT SAFEGUARDS
When using electrical appliances, basic safety precautions should always
be followed, including the following:
READ AND SAVE THESE INSTRUCTIONS
• Readallinstructionsbeforeusing.
• Donottouchhotsurfaces.Usehandlesorknobs.
• Toprotectagainstriskoffire,electricshock,andpersonalinjurydonot
immerse control panel assembly, cord or plugs in water or other liquids.
• ClosesupervisionisnecessarywhenDeepFryerisusednearchildren.
Children should not use this appliance.
• Unplugfromoutletwhennotinuse,beforeputtingonortakingoffparts
and before cleaning. Allow to cool before putting on or taking off parts,
and before cleaning appliance.
• Donotoperateanyappliancewithadamagedcordorplug,orafterthe
appliance malfunctions or has been dropped or damaged in any manner.
Contact Customer Service (see warranty) to return for examination,
repair, or electrical or mechanical adjustment.
• TheuseofaccessoryattachmentsnotrecommendedbyOster
®
may
result in injury.
• Donotuseoutdoors.
• Donotletcordhangoveredgeoftableorcountertop,ortouchhot
surfaces including the stove.
• Donotplaceonornearahotgasorelectricburner,orinaheatedoven.
• Extremecautionmustbeusedwhenmovingfryercontaininghotoil.
Always use oven mitts or hot pads.
• Alwaysattachplugtoappliancefirst,thenplugACcordintothewalloutlet.
To disconnect, turn control to OFF, then remove AC cord from wall outlet.
• Donotuseapplianceforotherthanintendeduse.
• Periodicallycheckthehandleforlooseness.Ifloose,retightenthescrews
using a Philips screwdriver. CAUTION: Over tightening can result in
stripping of screws or cracking of handle.
English-2 English-3
Th i s Un i T is Fo r ho U s e h o l d Us e on l y
This Deep fryer is equipped with an exclusive Sure Release Power Cord
System, which includes a detachable magnetic cord designed to separate
from the unit when certain amounts of force are applied. (See details on
page 4 for instructions on proper usage of the Sure Release magnetic cord.)
A short power supply cord is provided to reduce the risk resulting from
becoming entangled in or tripping over a longer cord.
WARNING: Do not use an extension cord.
No user-serviceable parts inside. Do not attempt to service this product.
POLARIZED PLUG
This appliance has a polarized plug, (one blade is wider
than the other). As a safety feature to reduce the risk of
electrical shock, this plug is intended to fit in a polarized
outlet only one way. If the plug does not fit fully in the
outlet, reverse the plug. If it still does not fit, contact a
qualified electrician. Do not attempt to defeat this safety
feature or modify the plug in any way. If the plug fits
loosely into the AC outlet or if the AC outlet feels warm
do not use that outlet.
SAVE THESE INSTRUCTIONS
We l c o m e
Congratulations on your purchase of an OSTER
®
Deep Fryer!
To learn more about OSTER
®
products, please visit us at www.oster.com.
Be f o r e Us i n g Yo U r osTer
®
co o l Zo n e De e p fr Y e r
Before using your OSTER
®
Deep Fryer for the first time, remove all packaging
materials from the exterior and interior of the fryer. Make sure the fryer is unplugged.
Clean the frying basket, lid, oil reservoir and condensation trap (all these parts are
dishwasher safe). Gently wipe the Cool-Zone Heating Element with a damp cloth.
Dry all parts thoroughly. See
Care and Cleaning
.
DO NOT IMMERSE THE CORD, POWER STRIP
OR CONTROL PANEL ASSEMBLY
IN WATER OR ANY OTHER LIQUID!
IMPORTANT SAFEGUARDS
When using electrical appliances, basic safety precautions should always
be followed, including the following:
READ AND SAVE THESE INSTRUCTIONS
• Readallinstructionsbeforeusing.
• Donottouchhotsurfaces.Usehandlesorknobs.
• Toprotectagainstriskoffire,electricshock,andpersonalinjurydonot
immerse control panel assembly, cord or plugs in water or other liquids.
• ClosesupervisionisnecessarywhenDeepFryerisusednearchildren.
Children should not use this appliance.
• Unplugfromoutletwhennotinuse,beforeputtingonortakingoffparts
and before cleaning. Allow to cool before putting on or taking off parts,
and before cleaning appliance.
• Donotoperateanyappliancewithadamagedcordorplug,orafterthe
appliance malfunctions or has been dropped or damaged in any manner.
Contact Customer Service (see warranty) to return for examination,
repair, or electrical or mechanical adjustment.
• TheuseofaccessoryattachmentsnotrecommendedbyOster
®
may
result in injury.
• Donotuseoutdoors.
• Donotletcordhangoveredgeoftableorcountertop,ortouchhot
surfaces including the stove.
• Donotplaceonornearahotgasorelectricburner,orinaheatedoven.
• Extremecautionmustbeusedwhenmovingfryercontaininghotoil.
Always use oven mitts or hot pads.
• Alwaysattachplugtoappliancefirst,thenplugACcordintothewalloutlet.
To disconnect, turn control to OFF, then remove AC cord from wall outlet.
• Donotuseapplianceforotherthanintendeduse.
• Periodicallycheckthehandleforlooseness.Ifloose,retightenthescrews
using a Philips screwdriver. CAUTION: Over tightening can result in
stripping of screws or cracking of handle.

English-4 English-5
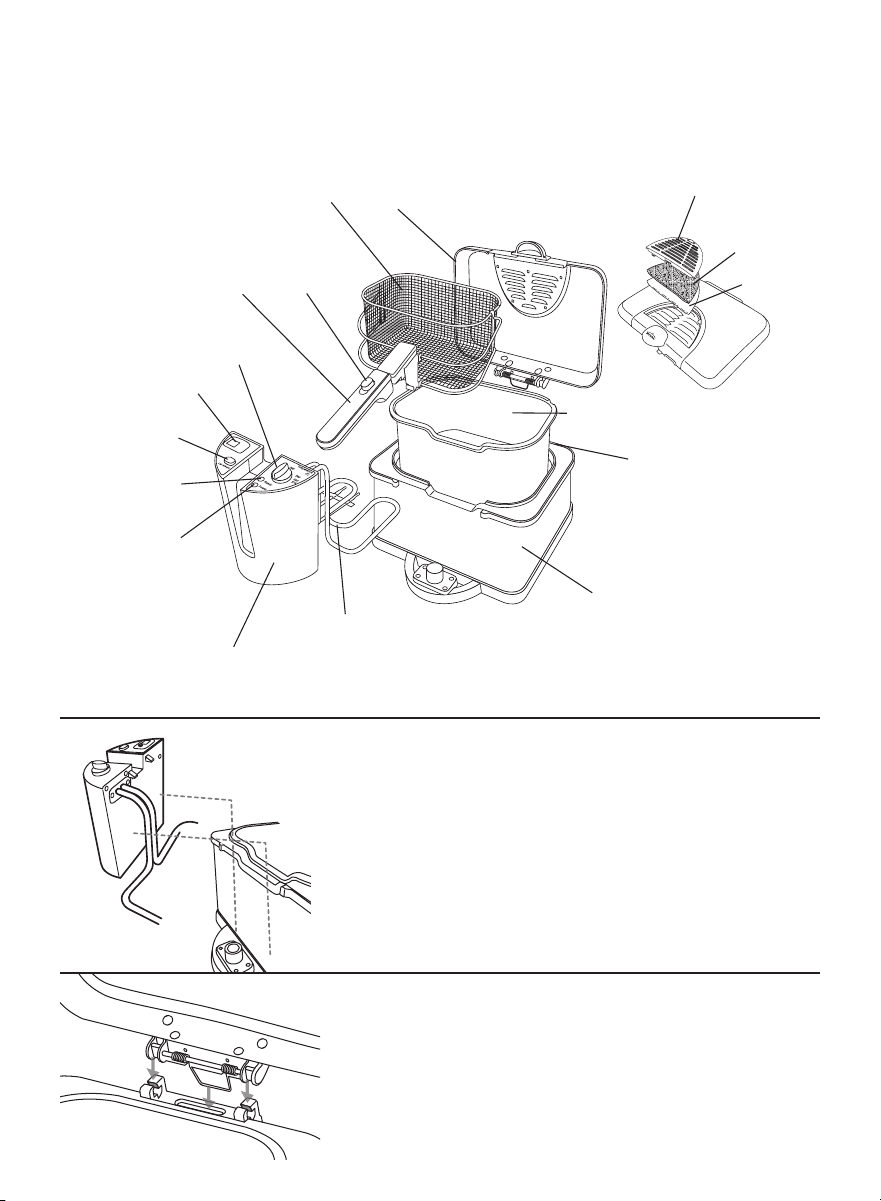
pa r T s iD e n T i f i c a T i o n
Before using your Deep Fryer for the first time, you should become familiar with all of
the parts. Read all Instructions and Safeguards carefully.
Us i n g Yo U r os T e r De e p fr Y e r
NOTE: Never turn on the fryer with an empty Oil Reservoir. Always use your fryer on
a flat, heat resistant surface.
• AttachmagneticendofSureReleasecordassemblydirectlytothefryer.
This should be done prior to plugging the cord into the wall outlet. The magnetic
end of the cord is designed only to go on one way. Be sure the side stating
“THIS SIDE UP” is facing up.
• OpenLidbypressingtheOpenLidButton.
• RemoveFryingBasketbypullingtheBasketHandleupuntilitlocksintothe
horizontal position.
• PourcookingoilintoOilReservoiruntilitreachesbetween“MIN” and “MAX”
marks inside reservoir. DO NOT OVER OR UNDER FILL. Place Frying Basket
back into Fryer.
• CloseLid.
• PresstheHandleReleaseButtontolowerbasketintooil.
• MakesurethatthefryerisOFFandinsertpluginto120voltACoutlet.
• Turnthefryertodesiredtemperatureposition.
• TurntimerknobtoSTAYONposition.Thepowerlightwillcomeon.
• Readylightwillturnonwhenoilispre-heated.PresstheOpenLidbuttonand
place Frying Basket into upper position, by lifting handle up until it clicks into
the horizontal position.
• PlacefoodinsideFryingBasket(Donotoverstackfood).CloseLid.LowerFrying
Basket into Oil Reservoir, by sliding down the handle release button.
CAUTION:AlwaysreplaceandcloseLidbeforeimmersingfoodinoil.Donot
immerseordrainfoodwithLidremovedoropen.
• Setelectronictimer.
NOTE: Timer can be set in 1 minute increments for up to 60 minutes and will beep
at completion. Press the button to desired time, after 2 seconds the timer will flash
twice then become constant. The Timer will then begin counting down. When one
minute is remaining, the timer will display seconds. At the end of the desired time, a
set of 10 beeps will be heard. After another 20 seconds, a set of 10 more beeps will
be heard. The timer will shut off in energy saving mode. This will not shut off the
Fryer.Youmustmanuallyturnthefryerto“OFF”.Resetthetimerbypressingand
holding the button for 2 seconds during countdown.
• Aftertimeisup,abellwillsound.LiftFryingBasketoutofOilReservoir,bysliding
down the handle release button. To remove excess grease and retain crispness, let
fooddraininFryingBasketatleast10-20seconds.OpenLid,thenliftFryingBasket
by handle and pour contents onto plate covered with paper towels before serving.
• Whenfinishedcooking,makesurefryerisintheOFFposition.
WARNING: DO NOT USE SURE RELEASE POWER CORD SYSTEM TO
DISCONNECT THE FRYER. ALWAYS DISCONNECT PLUG FROM WALL
OUTLET FIRST TO DISCONNECT FRYER.
Use only Model #MC-316 magnetic cord set with this product. The use of any other
magnetic cord set may cause fire, electric shock, or injury.
CAUTION: The Sure Release Power Cord is only for accidental disconnection and
is not to be removed during normal operation. If the cord becomes disconnected, the
user should immediately unplug the cord set from the wall outlet, then reconnect
the magnetic cord to the deep fryer.
NOTE: The Cool Zone Heating Element cannot be
switched on unless you insert the control panel assembly
into the locating slots of the connecting plate on the
Fryer exterior.
(See Figure 1)
Figure 1
Attaching the Lid:
The tight fitting rear hinge is designed for reliable
lockingofthedetachableLid,pleaseinserttherib-
shape lid hinge to the slot-shape base hinged for
properclose/openmovementoftheLid.

English-4 English-5
pa r T s iD e n T i f i c a T i o n
Before using your Deep Fryer for the first time, you should become familiar with all of
the parts. Read all Instructions and Safeguards carefully.
Us i n g Yo U r os T e r De e p fr Y e r
NOTE: Never turn on the fryer with an empty Oil Reservoir. Always use your fryer on
a flat, heat resistant surface.
• AttachmagneticendofSureReleasecordassemblydirectlytothefryer.
This should be done prior to plugging the cord into the wall outlet. The magnetic
end of the cord is designed only to go on one way. Be sure the side stating
“THIS SIDE UP” is facing up.
• OpenLidbypressingtheOpenLidButton.
• RemoveFryingBasketbypullingtheBasketHandleupuntilitlocksintothe
horizontal position.
• PourcookingoilintoOilReservoiruntilitreachesbetween“MIN” and “MAX”
marks inside reservoir. DO NOT OVER OR UNDER FILL. Place Frying Basket
back into Fryer.
• CloseLid.
• PresstheHandleReleaseButtontolowerbasketintooil.
• MakesurethatthefryerisOFFandinsertpluginto120voltACoutlet.
• Turnthefryertodesiredtemperatureposition.
• TurntimerknobtoSTAYONposition.Thepowerlightwillcomeon.
• Readylightwillturnonwhenoilispre-heated.PresstheOpenLidbuttonand
place Frying Basket into upper position, by lifting handle up until it clicks into
the horizontal position.
• PlacefoodinsideFryingBasket(Donotoverstackfood).CloseLid.LowerFrying
Basket into Oil Reservoir, by sliding down the handle release button.
CAUTION:AlwaysreplaceandcloseLidbeforeimmersingfoodinoil.Donot
immerseordrainfoodwithLidremovedoropen.
• Setelectronictimer.
NOTE: Timer can be set in 1 minute increments for up to 60 minutes and will beep
at completion. Press the button to desired time, after 2 seconds the timer will flash
twice then become constant. The Timer will then begin counting down. When one
minute is remaining, the timer will display seconds. At the end of the desired time, a
set of 10 beeps will be heard. After another 20 seconds, a set of 10 more beeps will
be heard. The timer will shut off in energy saving mode. This will not shut off the
Fryer.Youmustmanuallyturnthefryerto“OFF”.Resetthetimerbypressingand
holding the button for 2 seconds during countdown.
• Aftertimeisup,abellwillsound.LiftFryingBasketoutofOilReservoir,bysliding
down the handle release button. To remove excess grease and retain crispness, let
fooddraininFryingBasketatleast10-20seconds.OpenLid,thenliftFryingBasket
by handle and pour contents onto plate covered with paper towels before serving.
• Whenfinishedcooking,makesurefryerisintheOFFposition.
WARNING: DO NOT USE SURE RELEASE POWER CORD SYSTEM TO
DISCONNECT THE FRYER. ALWAYS DISCONNECT PLUG FROM WALL
OUTLET FIRST TO DISCONNECT FRYER.
Use only Model #MC-316 magnetic cord set with this product. The use of any other
magnetic cord set may cause fire, electric shock, or injury.
CAUTION: The Sure Release Power Cord is only for accidental disconnection and
is not to be removed during normal operation. If the cord becomes disconnected, the
user should immediately unplug the cord set from the wall outlet, then reconnect
the magnetic cord to the deep fryer.
NOTE: The Cool Zone Heating Element cannot be
switched on unless you insert the control panel assembly
into the locating slots of the connecting plate on the
Fryer exterior.
(See Figure 1)
Figure 1
Attaching the Lid:
The tight fitting rear hinge is designed for reliable
lockingofthedetachableLid,pleaseinserttherib-
shape lid hinge to the slot-shape base hinged for
properclose/openmovementoftheLid.

English-6 English-7
Hi n T s f o r Be s T re s U l T s
• Filltheunitwithoilbetweenthemaximumandminimumcapacitylinesonly.
• Donotoverfillthebasket.Toachievequalityresultsdeepfryingfoodneedstobe
surrounded by oil. Too much food causes the oil temperature to drop, resulting in
“soggy” food. Food should be no higher than the top of the basket.
• Besurethatallicecrystalsareremovedfromthefoodandfoodiscompletelydry.
Excessive water and ice can cause the oil to splatter and/or overflow.
• Coatedfoods(breadcrumbs,batters,etc.)arebestfordeepfrying.Thecoating
acts as a protective layer keeping food moist on the inside and crisp on the outside.
• Forbestresults,defrostfrozenfoodsfor20minutespriortofrying.
• Fryfoodsatthecorrecttemperatureforbestresults.Thiswillpreventburningand
give you even colored, crispy food.
• Prepackagedfrozencookedchickenmaycookfasterthanuncookedfood.
• Forevencooking,shakebaskethalfwaythroughcookingtime.
• Donotuseseasonedorflavoredoilsuchaswalnut,oliveoil,lardordrippings
because they have a low smoke point. Use blended vegetable oil, pure corn oil,
sunflower oil, soybean oil or grape seed oil (canola oil) because these oils have a
high smoke point. Peanut oil is not recommended because it impacts the
flavor greatly.
• Oilsshouldneverbemixedwhendeepfrying.
• Highheat,waterandburntfoodparticlesbreakdowntheoil’ssmokepoint.
• Replaceoilifyounotice:
- Excessive smoking at normal temperatures
- Strong oil discoloration
- A rancid smell
- Excessive foaming around the frying food
• Oildarkenswithusebecausetheoilandfoodmoleculesburnwhensubjectedto
high/prolonged heat. The more you use an oil, the more slowly it will pour.
Itsviscositychangesbecauseofchangestotheoil’smolecularstructure.When
smokeappearsontheoils’surfacebeforethetemperaturereaches375°F,youroil
will no longer deep-fry effectively.
• Whenfryingfoodswithstrongflavorand/oraromalikefishorchicken,usetheoil
only once.
• Filteringtheoilwithacookingoilfilterorfine-meshstrainercankeepitfresher.
Although storing oil in a refrigerator may extend the life of the oil, this should never
be done. This process of chilling oil then bringing the oil to room temperature causes
excessive splattering during the heat up process.
• Storethecoveredoilinacooldarkplace,foruptothreemonths.Checktheoil
before using for color, smell, or excessive foaming. Discard the oil if it shows any
of these qualities.
ca r e a n D cl e a n i n g
WARNING: Always turn control to OFF then disconnect plug from wall outlet
BEFORE disconnecting Sure Release Powercord.
CAUTION:
• Donotimmersecordsetsinwateroranyliquids
• DonotattempttodefeatthedetachablemagneticSureReleaseCordsystem
by trying to permanently attach cord set to product.
• Donotstickpinsorothersharpobjectsinholesonmagneticcordset.
• Donotuseanytypeofsteelwooltocleanmagneticcontacts.
NOTE: Make sure fryer has cooled before cleaning.
• TurnunitOFF.
• Unplugfromoutletandallowunittocoolcompletely.
• RemoveSureReleasemagneticcordfromthefryersocket.
• RemovetheLid.
• OpentheFilterCoverandremovetheFilters.
• RemoveFryingBasket.
• LiftControlPanelAssemblyupfromthefrontofthefryer.
• CarefullyliftOilReservoirstraightupoutoftheHousingbyholdingtherim
of the bowl. The built-in oil pour spout allows you to better drain the oil into your
storage container. Store oil in an airtight container. See Hints for Best Results.
Oil Reservoir is also Dishwasher Safe.
WARNING: Do not remove Oil Reservoir until the unit has cooled completely
and is unplugged.
• RemoveCondensationTrapfromthebackofthefryer.
NOTE: This trap will collect any water that has been condensed on the inside of the
LidwhentheLidisopenedafterfrying.Remembertoemptyandcleanthe
Condensation Trap after each use.
• TheFryingBasket,Lid,OilReservoirandCondensationTraparedishwashersafe.
Dry all parts thoroughly after cleaning.
• TheControlPanelAssemblyandPowerStripshouldneverbeimmersedinwateror
other liquids. Gently clean the outer surface of the Control Panel Assembly with a
damp cloth containing mild soap solution or plain water, and dry thoroughly.
• EnsurethatboththeLidandOilReservoirarecompletelydryafterwashingand
before use.
• InsertOilReservoirbackintoHousing.
• InsertControlPanelintofrontoftheunit.TheControlPanelassemblymustbe
attached properly to the front of the housing or the fryer will not operate. (see figure 1)
• PlaceFryingBasketintobowl.
• PutFiltersbackintoLidandputCoveron.
• ReplaceandcloseLid.

English-8 English-9
re p l a c i n g a n D cl e a n i n g fi l T e r s
NOTE: Replace every 3 months or after 12 uses.
• OpentheFilterCover,andremovefilters.
• FoamwhiteGreaseFiltermaybewashedinhotsoapywater.Allowtoairdry.
• CharcoalFiltersarenotmeanttobewashedanditisrecommendedtoreplace
every 3 months or after 12 uses.
• Cleantheinsideofthecoverwithadampsoapysponge.Rinseanddrythoroughly.
• PlacecleanWhiteGreaseFilteronLid,followedbyBlackCharcoalOdorFilter,
then replace Filter Cover.
NOTE: For replacement Charcoal Odor or Grease Filter, order through our website at
www.oster.com or by calling 1-800-334-0759.
re p l a c i n g T H e Ti m e r BaT T e r Y
This deep fryer is equipped with a Digital Timer that works on its own battery source.
From time to time it might be necessary to change the battery in the timer.
1. Insert a small screwdriver into the slot next to the timer display and “pop” out the
whole timer.
2.Removebatteryandreplacewithbatterytype#LR44.
3.Lineupthetimerwiththeholeandpushthetimerbackintothehousinguntilit
snaps into place.
fr Y i n g Ti m e a n D Te m p e r aT U r e
The frying times in this chart are a guide and should be adjusted to suit the different
quantities or thickness of food and to suit your own taste.
Preheat time is 7-10 minutes for fryer to reach desired temperature. (Ready light will
cycle On/Off during frying as temperature fluctuates due to food load.)
NOTE: Prepackaged frozen cooked chicken may cook faster than above time.
fo o D
Te m p .
s
e T T i n g
Ti m e
(
m i n U T e s )
Chicken Strips 375°F 5-8
Chicken Pieces, Bone-In 360°F 15-20
Fish, Battered 340°F 8-10
French Fries, Frozen 375°F 3-5
Fritters 375°F 2-4
Onion Rings 375°F 3-5
Shrimp, Breaded 375°F 2-4
pr o B l e m ca U s e so l U T i o n
Fryer not operating Control Panel Assembly not
seated properly.
Power Strip not in correctly
Not turned ON
Not plugged in
Outlet not energized
Reinstall Control Panel
Assembly.
Reinstall Power Strip
Turn to ON
Insert plug into outlet
Check fuses or circuit breaker
Oil spills over Oil reservoir over filled
Too much water in food
Remove excess oil (when cool)
Dry food with towel
Food greasy or not
crisp
Food batches too large
Oil temperatures too low
Using wrong type of oil
Use less food in basket
Increase oil temperature
Use good vegetable oil
(See Hints for Best Results)
Unpleasant smell Oil not fresh Replace oil
TROUBLE SHOOTING
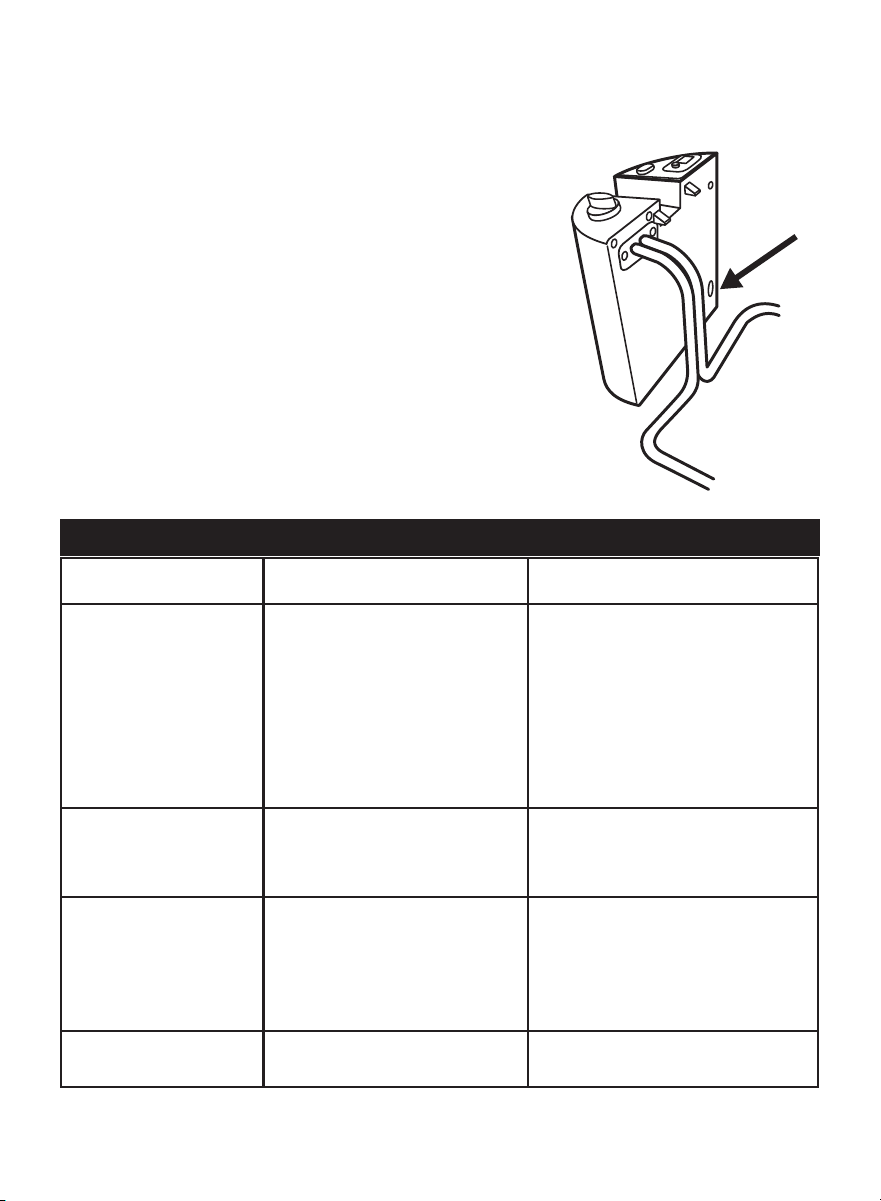
re s e T T H e ov e r H e aT pr o T e c T i o n BU T T o n
Resetting the Overheat Protection Reset Button may be necessary if unit will not turn
on at start up (power indicator light illuminated and temperature dial set to selected
temperature) or if unit appears to have stopped working during use.
1. Unplug the unit from the wall electric outlet.
2. Allow the unit to cool down.
3. Check the oil level in your unit. If it is below the
minimum level, oil should be added before resetting the
unit and resuming cooking cycle.
4. Remove the control box with heater.
5. Using a narrow slotted screwdriver or pen, gently press
the recessed reset button on the back of the control box,
located on the lower right hand side as indicated by the
arrow (see figure 3).
6. Replace the control box with heater onto the main body
and plug unit in for continued use.
Figure 3
English-8 English-9
re p l a c i n g a n D cl e a n i n g fi l T e r s
NOTE: Replace every 3 months or after 12 uses.
• OpentheFilterCover,andremovefilters.
• FoamwhiteGreaseFiltermaybewashedinhotsoapywater.Allowtoairdry.
• CharcoalFiltersarenotmeanttobewashedanditisrecommendedtoreplace
every 3 months or after 12 uses.
• Cleantheinsideofthecoverwithadampsoapysponge.Rinseanddrythoroughly.
• PlacecleanWhiteGreaseFilteronLid,followedbyBlackCharcoalOdorFilter,
then replace Filter Cover.
NOTE: For replacement Charcoal Odor or Grease Filter, order through our website at
www.oster.com or by calling 1-800-334-0759.
re p l a c i n g T H e Ti m e r BaT T e r Y
This deep fryer is equipped with a Digital Timer that works on its own battery source.
From time to time it might be necessary to change the battery in the timer.
1. Insert a small screwdriver into the slot next to the timer display and “pop” out the
whole timer.
2.Removebatteryandreplacewithbatterytype#LR44.
3.Lineupthetimerwiththeholeandpushthetimerbackintothehousinguntilit
snaps into place.
fr Y i n g Ti m e a n D Te m p e r aT U r e
The frying times in this chart are a guide and should be adjusted to suit the different
quantities or thickness of food and to suit your own taste.
Preheat time is 7-10 minutes for fryer to reach desired temperature. (Ready light will
cycle On/Off during frying as temperature fluctuates due to food load.)
NOTE: Prepackaged frozen cooked chicken may cook faster than above time.
fo o D
Te m p .
s
e T T i n g
Ti m e
(
m i n U T e s )
Chicken Strips 375°F 5-8
Chicken Pieces, Bone-In 360°F 15-20
Fish, Battered 340°F 8-10
French Fries, Frozen 375°F 3-5
Fritters 375°F 2-4
Onion Rings 375°F 3-5
Shrimp, Breaded 375°F 2-4
pr o B l e m ca U s e so l U T i o n
Fryer not operating Control Panel Assembly not
seated properly.
Power Strip not in correctly
Not turned ON
Not plugged in
Outlet not energized
Reinstall Control Panel
Assembly.
Reinstall Power Strip
Turn to ON
Insert plug into outlet
Check fuses or circuit breaker
Oil spills over Oil reservoir over filled
Too much water in food
Remove excess oil (when cool)
Dry food with towel
Food greasy or not
crisp
Food batches too large
Oil temperatures too low
Using wrong type of oil
Use less food in basket
Increase oil temperature
Use good vegetable oil
(See Hints for Best Results)
Unpleasant smell Oil not fresh Replace oil
TROUBLE SHOOTING
re s e T T H e ov e r H e aT pr o T e c T i o n BU T T o n
Resetting the Overheat Protection Reset Button may be necessary if unit will not turn
on at start up (power indicator light illuminated and temperature dial set to selected
temperature) or if unit appears to have stopped working during use.
1. Unplug the unit from the wall electric outlet.
2. Allow the unit to cool down.
3. Check the oil level in your unit. If it is below the
minimum level, oil should be added before resetting the
unit and resuming cooking cycle.
4. Remove the control box with heater.
5. Using a narrow slotted screwdriver or pen, gently press
the recessed reset button on the back of the control box,
located on the lower right hand side as indicated by the
arrow (see figure 3).
6. Replace the control box with heater onto the main body
and plug unit in for continued use.
Figure 3

English-10 English-11
re c i p e s
ap p l e fr i T T e r s
3 cups all-purpose flour 4 tbsp. cooking oil
2 tsp. baking powder 1 tsp. pure vanilla extract
1
/2 tsp. salt Juice of 1 orange (
1
/3 cup)
1 cup sugar 1 cup chopped apple
1 large egg, lightly beaten
Preheatoilto375°F.Combineflour,bakingpowder,saltandsugar;setaside.Combine
egg, cooking oil and vanilla. Combine dry and liquid ingredients and stir to blend
thoroughly. Add orange juice and apple and mix well. Drop from teaspoon into hot
oil (Basket should already be lowered into oil). Fry about 2 minutes or until crisp and
very brown. Remove from fat and drain. Dust with powdered sugar or a mixture of
granulatedsugarandcinnamon;serveatonce.
Be e r Ba T T e r fo r fi s H o r cH i c k e n
2 large eggs, separated
1
/4 tsp. ground black pepper
1 tbsp. oil or butter 1
1
/3 cups all-purpose flour
1 tsp. salt
3
/4 cup flat beer
Preheatoilto375°F.Beateggyolkswithoil/butter,saltandpepper.Alternatelyaddthe
beer and flour to mixture. Beat ingredients well and refrigerate for 3 to 12 hours. When
you are ready to use mixture, carefully fold in 2 stiffly beaten egg whites. Pat fish or
boneless chicken breasts. Coat lightly with flour then dip into beer batter. Place fish in
hot oil (basket should already be lowered) and fry for 3 minutes or until golden brown.
Fry chicken 5 to 8 minutes or until brown and fully cooked.
De e p fr i e D cH i c k e n
1 fryer chicken (2
1
/2 lbs.), cut up
1
/4 tsp. salt
1
1
/2 cups all-purpose flour 1
1
/4 cups milk
1 tsp. seasoned salt
Preheatoilto375°F.Combineflourandseasonings.Dipchickenpiecesinflour,then
milk, then flour again. Fry for 20 minutes or until golden brown and done.
cH i c k e n ki e v
4 whole boneless, skinless chicken breasts 1 stick of butter or margarine
1 tbsp. chopped onion
1
/2 cup all-purpose flour
1 tbsp. chopped parsley 1 large egg, beaten
1
1
/3 tsp. salt 1 cup fine, dry bread crumbs
Preheatoilto375°F.Placechickenbreastsbetweentwopiecesofplasticwrap.
Pound with wooden mallet to flatten to 1⁄4-inch thick. Remove plastic. Combine
onion, parsley and salt and sprinkle on chicken. Cut butter into 8 pieces. Place a piece
of butter on seasoned chicken toward one end. Roll as jelly roll, starting at end with
butter, tucking in sides of meat. Press to seal well. Secure with toothpicks. Dust with
flour, dip in beaten egg, then roll in bread crumbs. Chill rolls of chicken thoroughly
(atleastonehour).Placerolledchickeninasinglelayerinfrybasket.Lowerandcook
5 minutes or until brown. To test for doneness, remove a piece of chicken from the oil.
When fork can be inserted with ease, chicken is done.
QU i c k Do U g H n U T s
Refrigerated can of biscuits
1
/2 cup sugar
2 tbsp. ground cinnamon
Preheatoilto375°F.Takeeachbiscuitandflattenslightlywithpalmofhand.With
finger, punch holes in center of each biscuit to shape into doughnuts. Fry 2 minutes,
turning once. Remove from fat and drain on paper towels. Sprinkle doughnut in
mixture of cinnamon and sugar. Serve warm.

English-12 Español-13
1 Year Limited Warranty
Sunbeam Products, Inc. doing business as Jarden Consumer Solutions or if in Canada, Sunbeam
Corporation(Canada)LimiteddoingbusinessasJardenConsumerSolutions(collectively“JCS”)
warrants that for a period of one year from the date of purchase, this product will be free from
defects in material and workmanship. JCS, at its option, will repair or replace this product or any
component of the product found to be defective during the warranty period. Replacement will be
made with a new or remanufactured product or component. If the product is no longer available,
replacement may be made with a similar product of equal or greater value. This is your exclusive
warranty. Do NOT attempt to repair or adjust any electrical or mechanical functions on this
product. Doing so will void this warranty.
This warranty is valid for the original retail purchaser from the date of initial retail purchase and
is not transferable. Keep the original sales receipt. Proof of purchase is required to obtain warranty
performance. JCS dealers, service centers, or retail stores selling JCS products do not have the right
to alter, modify or any way change the terms and conditions of this warranty.
This warranty does not cover normal wear of parts or damage resulting from any of the following:
negligent use or misuse of the product, use on improper voltage or current, use contrary to the
operating instructions, disassembly, repair or alteration by anyone other than JCS or an authorized
JCS service center. Further, the warranty does not cover: Acts of God, such as fire, flood,
hurricanes and tornadoes.
What are the limits on JCS’s Liability?
JCS shall not be liable for any incidental or consequential damages caused by the breach of any
express, implied or statutory warranty or condition.
Except to the extent prohibited by applicable law, any implied warranty or condition of
merchantability or fitness for a particular purpose is limited in duration to the duration of the
above warranty.
JCS disclaims all other warranties, conditions or representations, express, implied, statutory
or otherwise.
JCS shall not be liable for any damages of any kind resulting from the purchase, use or misuse of,
or inability to use the product including incidental, special, consequential or similar damages or
loss of profits, or for any breach of contract, fundamental or otherwise, or for any claim brought
against purchaser by any other party.
Some provinces, states or jurisdictions do not allow the exclusion or limitation of incidental
or consequential damages or limitations on how long an implied warranty lasts, so the above
limitations or exclusion may not apply to you.
This warranty gives you specific legal rights, and you may also have other rights that vary from
province to province, state to state or jurisdiction to jurisdiction.
How To Obtain Warranty Service
In the U.S.A.
If you have any question regarding this warranty or would like to obtain warranty service, please
call 1-800-334-0759 and a convenient service center address will be provided to you.
In Canada
If you have any question regarding this warranty or would like to obtain warranty service, please
call 1-800-667-8623 and a convenient service center address will be provided to you.
In the U.S.A., this warranty is offered by Sunbeam Products, Inc. doing business as Jarden
Consumer Solutions located in Boca Raton, Florida 33431. In Canada, this warranty is offered by
SunbeamCorporation(Canada)LimiteddoingbusinessasJardenConsumerSolutions,located
at20BHerefordStreet,Brampton,OntarioL6Y0M1.Ifyouhaveanyotherproblemorclaimin
connection with this product, please write our Consumer Service Department.
PLEASE DO NOT RETURN THIS PRODUCT TO ANY OF THESE ADDRESSES
OR TO THE PLACE OF PURCHASE.
PRECAUCIONES IMPORTANTES
Cuando use algún aparato eléctrico siempre deben seguirse precauciones
básicas de seguridad incluyendo las siguientes:
LEA Y GUARDE ESTAS INSTRUCCIONES
• Leatodaslasinstruccionesantesdeusar.
• Notoquelassuperficiescalientes.Uselasmanijasolasperillas.
• Paraprotegersecontraincendios,descargaseléctricasylesionespersonales
no sumerja el panel de control, los cables o enchufes en agua ni en ningún
otro líquido.
• EsnecesariotenersupervisiónadultacercanacuandoseutilicelaFreidora
cercadelosniños.Losniñosnodebenutilizaresteartefacto
• Desenchufedeltomacorrientecuandonoestéenuso,antesdereubicarlo
o sacarle piezas y antes de limpiarlo. Permita que se enfríe antes de ponerle
o quitarle piezas, y antes de la limpieza del artefacto.
• Noopereningúnartefactoconuncableoenchufedañados,nidespuésdeun
mal funcionamiento del artefacto, o si se ha caído o se ha dañado de alguna
manera. Contacte Servicio a Clientes (vea la garantía) para devolverlo para
suexamen,reparación,oajustemecánicooeléctrico
• Elusodeaccesoriosnorecomendadosporelfabricante;Oster
®
pueden
causarincendio,descargaseléctricasolesionespersonales.
• Nolousealaintemperie.
• Nodejequeelcablecuelguesobreelbordedelamesaodelmostrador
o que toque superficies calientes incluyendo la estufa.
• Nocoloqueelartefactosobreocercadeunahornillacalientedegas
oeléctrica,nidentrodeunhornocaliente
• Debetenerseextremaprecauciónalmanipularotrasladarlafreidoracon
aceite caliente. Use siempre guantes o agarraderas
• Siempreconecteelcablealartefactoprimero,luegoenchúfeloenel
tomacorriente.Paradesconectar,lleveelcontrolalaposiciónOFF,
despuésdesenchúfela.
• Nouseelartefactoparaotrosfinesquenoseaelconcebido.
• Periódicamentereviseparaasegurarsequelamaniguetanoseafloje.Sila
manigueta se ha aflojado, asegure utilizando un desatornillador de estrella
(Philips). PRECAUCION: No apriete demasiado para asegurarse de que
los tornillos no se amellen.

Español-14 Español-15
es T a Un i d a d es só l o p a r a
U
s o do m é s T i c o
Esta Freidora está equipada con el exclusivo Sistema Sure Release de Cable de
Potencia,queincluyeuncablemagnéticoseparablediseñadoparasoltarsede
la unidad cuando cierta cantidad de fuerza es aplicada. (Vea los detalles en la pag. 4
de instrucciones para el uso adecuado del cable magnético Sure Release)
Se ha provisto
uncableeléctricocortoafindedisminuirelriesgodequehayatropiezosose
enrede con un cable más largo.
ADVERTENCIA:Nousecabledeextensión.
No se tiene adentro ninguna parte que el propio usuario pudiera utilizar
pararepararlo;portantonointenterepararloustedmismo.
ENCHUFE POLARIZADO
Este artefacto cuenta con una clavija polarizada (una
hojilla es más ancha que la otra). Como medida de
seguridadparareducirelriesgodedescargaeléctrica,esta
clavijaentrasólodeunamaneraenunenchufepolarizado.
Silaclavijanoencajaenelenchufe,simplementecolóquela
alrevés.Siaúnasínoencaja,contacteaunelectricista
calificado. De ninguna manera intente modificar esta
medida de seguridad o modificar el enchufe. Si el enchufe
queda flojo en el tomacorriente o el tomacorriente se
recalienta no utilice ese tomacorriente.
GUARDE ESTAS INSTRUCCIONES
Bi e n v e n i D o s
¡Felicitaciones en su compra de un Freidora OSTER.
®
Para aprender más sobre
productos OSTER
®
, por favor visítenos en www.oster.com!
le a an T e s D e Us a r sU fr e i D o r a D e Zo n a fr í a os T e r
®
Antes de usar su Freidora OSTER
®
por primera vez, remueva todos los materiales
del empaque tanto del interior como del exterior de su freidora. Asegúrese que su
freidoraestédesenchufada.LimpiarlaCestaparaFreír,Tapa,RecipientedeAceite,
CuerpodelaFreidoraylaTrampadeCondensación(todaslaspartessepuedenlavar
en el lava vajillas). Pase un paño húmedo al Elemento Calefactor de Zona Fría.
Sequecompletamentetodaslaspiezas.VeaCuidadoyLimpieza.
¡NO SUMERJA EL
CABLES, EL ELEMENTO CONECTOR
DE POTENCIA O PANEL DE CONTROL
EN AGUA O EN
NINGUN OTRO TIPO DE LIQUIDO!
iDenTificación D e l a s pa r T e s
Antes de usar su
Freidora OSTER.
®
por primera vez, debe familiarizarse con todas
laspartes.LeatodaslasInstruccionesyMedidasdeSeguridadconcuidado.
Cobertura removible
del filtro
Filtro para olor
del carbón
Filtro blanco
para grasa
Mango
plegable
Canasta
para freír
Cronómetro
digital Timer
Tapa
Contenedor de
aceite removible
Cavidad de la freidora
Elemento de
calefacción
Cavidad del panel
de control
Botón para
ajuste de la tapa
Termostato
regulable
Indicador de
listo (Verde)
Indicador de
corriente (Rojo)
Bandeja para
condensación
(detrás de la freidora.
No se muestra)
Botón para
desprender
el mango
Figura 1
NOTA:ElElementodeCalefaccióndelaZonaFría
no debe ser cambiado a no ser que usted inserte el
ensamblaje del panel de control en las ranuras para
ubicacióndelaplacaconectoraenelexteriordela
freidora. (Vea la Figura 1)
Colocación de la tapa
Labisagraenlaparteposteriorqueajusta
fuertemente está diseñada para cerrar bien la tapa
desmontable. Inserte la bisagra de la tapa a la
ranura de la bisagra de la base para que la tapa
tenga el movimiento adecuado de cerrar/abrir.

Español-16 Español-17
Us a r sU fr e i D o r a D e Zo n a fr í a os T e r
®
NOTA: Nunca encienda su freidora con el Recipiente de Aceite vacío. Siempre use su
freidora sobre una superficie plana, resistente al calor.
• ConecteelextremomagnéticodelcableSureReleasedirectamentealafreidora.
Esto debe realizarse antes de enchufar el cable en el tomacorriente. El extremo
magnéticodelcableestádiseñadoparaencajarenunasoladirección.Asegúrese
queelladoquedice“THISSIDEUP”estéhaciaarriba.
• AbralaTapapresionandoelBotóndeAbrirTapa.
• RemuevalaCestadeFreírhalándolaporelasahaciaarribahastaquesientaque
encajóenposiciónhorizontal.
• ViertaelaceitedentrodelRecipientedeAceitehastaquealcanceentrelasmarcas
“MIN” y “MAX” dentro del recipiente. NO LO LLENE NI EN EXCESO NI POR
DEBAJO. Coloque nuevamente la Cesta de Freír dentro de la Freidora.
• CierrelaTapa.
• PresioneelBotóndeLiberacióndelAsaparabajarlacestadentrodelaceite.
• AsegúresequelaFreidoraestéenOFFeinserteelcableenuntomacorrientede
120 voltios.
• Girelaperillaalaposicióndelatemperaturadeseada.
• GirelaperilladelcronómetroalaposiciónSTAYON.Laluzdeencendidoseprenderá.
• Laluzindicadoradelistoseencenderácuandoelaceiteestáprecalentado.Oprima
elbotóndeabrirlaTapaycoloquelaCestadeFreírenposiciónhaciaarriba,
levantandoelasahastaquesesientaqueencajaenposiciónhorizontal.
• ColoqueelalimentodentrodelaCestaparaFreír(Noamontonelosalimentos).
CierrelaTapa.Presioneydeslicehaciaabajoelbotónactivadordelamanigueta,
para bajar la canasta freidora al recipiente de aceite. PRECAUCIÓN: Siempre vuelva
a colocar y cerrar la Tapa antes de que el alimento sea inmerso en el aceite. No
escurranipongaalimentoseninmersiónsinoestálatapaosiestáabierta.
• Fijeelcronómetroelectrónico.
NOTA:Elcronómetropuedefijarseenincrementosde1minutoporhasta60minutos
ysonarácuandocompleteeltiempo.Presioneelbotónhastaeltiempodeseado,luego
de2segundoselcronómetrodestellarádosvecesyluegosequedaráconstante.
Elcronómetrocomenzaráentonceslacuentaregresiva.Cuandoquedeunminuto,el
cronómetromostrarálossegundos.Alfinaldeltiempodeseado,seoiránunconjunto
de10pitidos.Luegodeotros20segundos,seoiránunconjuntode10pitidosmás.
Elcronómetroseapagaráenmododeahorrodeenergía.Estonoapagarálafreidora.
Usteddebecompletarelpaso6parahacerlo.Fijenuevamenteelcronómetro
presionandoysosteniendoelbotónpor2segundosdurantelacuentaregresiva.
• Cuandoeltiemposehaalcanzado,untimbresonará.LevantelaCestaparaFreír
del Recipiente, para bajar la canasta freidora al recipiente de aceite. Para remover
elexcesodegrasaymantenerelalimentocrocante,déjeloescurrirenlaCestade
freír al menos 10-20 segundos. Abra la tapa, levante la Cesta con el asa y vierta el
contenido en un plato cubierto de papeles toalla antes de servir.
• Cuandoseterminelacocción,asegúresequelafreidoraestéenlaposiciónOFF.
ADVERTENCIA: NO USE EL SISTEMA SURE RELEASE DE CABLE DE
POTENCIA PARA DESCONECTAR LA FREIDORA. SIEMPRE DESENCHUFE EL
CABLE DEL TOMACORRIENTE ANTES DE DESCONECTAR LA FREIDORA.
Usesolamenteelmodelo#MC-316conjuntodecablesmagnéticoconesteproducto.
Elusodecualquierotrocablemagnéticopuedecausarincendio,choqueeléctricoo
lesiones.
PRECAUCIÓN:ELCABLEDEPOTENCIASureReleaseessolamenteparacuando
se desconecta accidentalmente y no está para ser removido durante el funcionamiento
normal. Si el cable se desconecta, el usuario debe desenchufar inmediatamente el
enchufedeltomacorrienteyentoncesvolveraconectarelcablemagnéticoalafreidora.
re c o m e n D a c i o n e s pa r a me j o r e s re s U lTa D o s
• Llenelaunidadconaceiteentrelaslíneasdemáximoymínimodecapacidadsolamente.
• Nolleneenexcesolacesta.Paralograrresultadosdecalidadfriendoporinmersión
los alimentos necesitan estar rodeados de aceite. Demasiado alimento causa que el
aceitepierdatemperatura,resultandounalimento“pegajoso”.Losalimentosno
deben quedar por encima del tope de la cesta.
• Asegúresequelosalimentosesténcompletamentesecos.Excesodeaguaorestosde
hielo pueden causar que el aceite salpique y /o se reboce
• Alimentosconcobertura(depanralladooalgunamezcla,etc.)sonlosmejores
parafreírporinmersión.Lacoberturadeafueraactúacomounacapaprotectora
manteniendo la humedad del alimento por dentro y dejándola crocante por fuera.
• Paramejoresresultados,descongelelosalimentoscongelados20min.antesdefreírlos.
• Paramejoresresultadosfríalosalimentosalastemperaturasadecuadas.Estoevitará
que se quemen y le brindará alimentos crocantes y con un colorido uniforme.
• Polloscocinados,congeladosypreempacadossecocinaránmásrápidamenteque
alimentos sin cocinar.
• Paracoccionesuniformes,meneelacestadurantelamitaddeltiempodecocción.
• Nouseaceiteaderezadooconsaborescomoaceitedenuez,deoliva,mantecao
restos de grasa porque tienen un punto de humo bajo. Use aceite vegetal, aceite puro
de maíz, de girasol, de soya o de canola porque estos aceites tienen un punto de
humo alto. El aceite de maní no es recomendado porque impacta mucho el sabor.
• Losaceitesnuncadebenmezclarsecuandoseestáfriendoeninmersión.
• Latemperaturamuyalta,elaguaylaspartículasdealimentoquemadasdescomponen
el punto de humo de los aceites
• Reemplaceelaceitesiustednota:
- Humo excesivo a temperaturas normales
-Decoloraciónfuerteenelaceite
- Un olor ranciol
- Espuma excesiva alrededor del alimento frito
• Elaceiteseoscurececonelusoporqueelaceiteylasmoléculasdealimentosequeman
cuando son sometidas a temperaturas muy altas por tiempo prolongado. Mientras más
use un aceite, más lento sale al verterse. Su viscosidad cambia por los cambios de la
estructura molecular del aceite. Cuando aparece humo en la superficie del aceite antes
de haber alcanzado la temperatura de 375º F, su aceite ya no freirá adecuadamente.
• Cuandofríaalimentosconsaboresy/oaromasfuertescomopescado,pollo,useel
aceite una sola vez.
• Colandoelaceiteconuncoladordeaceiteounfiltrodemallafinapuedemantenersu
frescura.Aunqueguardandoelaceiteenelrefrigeradorpuedeextendersuduración,
nunca debe hacerse. Este proceso de enfriar el aceite y volverlo a traer a la temperatura
ambiente causa que salpique excesivamente en el proceso de calentamiento.
• Almaceneelaceitecubiertoenunlugaroscuro,hastaportresmeses.Reviseantes
de usar el aceite tanto su color, olor, o espuma excesiva. Deseche el aceite si muestra
cualquiera de esas características.

Español-18 Español-19
cU i D a D o Y li m p i e Z a
ADVERTENCIA: Siempre gire la perilla de control a la posición OFF y luego
desenchufe el cable del tomacorriente antes de desconectar el Sure Release del cable.
PRECAUCIÓN:
• Nosumerjaelconjuntodecablesenaguaocualquierotrolíquido.
• Nomantengaconectadopermanentementeelsistemaremovibledecablemagnético
de potencia Sure Release al producto.
• Noclavepinzasuobjetosafiladosdentrodeloshuecosdelconjuntodecablesmagnéticos.
• Nouseningúntipodeesponjasdealambreparalimpiarloscontactosmagnéticos.
NOTA: Asegúrese que la Freidora se haya enfriado antes de limpiar.
• PongalaunidadenOFF.
• Desenchufedeltomacorrienteypermitaquelaunidadseenfríecompletamente.
• RemuevaelcablemagnéticoSureReleasedelafreidora.
• RemuevalaTapa.
• AbralaCubiertadelFiltroysaquelosFiltros.
• RemuevalaCestaparaFreír.
• LevanteelPaneldeControlhaciaarribadesdeelfrentedelafreidora.
• CuidadosamentelevanteelRecipientedeAceitehaciaarribayhaciafueradelcuerpo
de la freidora sosteniendo el borde del envase. El pico de verter aceite incorporado
permite escurrir mejor el aceite dentro del contenedor de almacenaje. Guarde el
aceiteenuncontenedorhermético.VeaRecomendacionesparaMejoresResultados.
El Recipiente de Aceite se puede meter en el lava vajillas.
ADVERTENCIA: No remueva el Recipiente de Aceite hasta que la unidad se haya
enfriadocompletamenteyestédesenchufada.
• RemuevalaTrampaparacondensacióndelapartetraseradelafreidora.
NOTA: Esta trampa recolectará el agua que haya sido condensado en el interior de
latapacuandolatapaesabiertadespuésdefreír.Recuerdedevaciarylimpiarla
TrampadeCondensacióndespuésdecadauso.
• LaCestaparaFreír,Tapa,RecipientedeAceite,ylaTrampadeCondensación
sepuedenlavarenellavavajillas.Sequetodaslaspartescompletamentedespués
de la limpieza.
• ElPaneldeControlyelelementoConectordePotencianuncadebensersumergidos
enaguauotroslíquidos.LimpiesuavementelapartedeafueradelPaneldeControl
con un paño mojado y un poco de agua jabonosa o agua sola, y seque completamente.
• AsegúresequetantolaTapacomoelRecipientedeAceiteesténcompletamentesecos
despuésdelavarlosyantesdeusarlos.
• InserteelRecipientedeAceitedentrodelcuerpodelaFreidora.
• InserteelPaneldeControldentrodelfrentedelaunidad.ElensamblajedelPanelde
Control debe ser fijado de manera apropiada al frente de la cavidad o la freidora no
operará. (Vea Figura 1).
• ColoquelaCestaparaFreírdentrodelRecipiente.
• PongalosFiltrosdevueltadentrodelatapaypongalaCubierta.
• ColoquelaTapaycierre.
ca m B i o Y li m p i e Z a De fi lT r o s
NOTA:Cambiecada3mesesodespuésde12usos.
• AbralaCubiertadelFiltro,yremuevalosfiltros.
• ElFiltroblancodegomaespumapuedeserlavadaconaguajabonosacaliente.
Deje secar al aire libre.
• LosFiltrosdeCarbónnosonparalavarseyserecomiendacambiarloscada3meses
odespuésde12usos.
• Limpielapartedeadentrodelacubiertaconunaesponjajabonosamojada.
Enjuague y seque completamente.
• ColoqueelFiltroBlancodeGrasasobrelaTapa,seguidoporelFiltroNegrode
CarbónparaOlor,entoncesvuelvaacolocarlaCubiertadelFiltro.
NOTA: Para remplazar los Filtros de Carbón para Olores o los de Grasa, ordénelos
a través de nuestra página Web www.oster.com o llame al 1-800-334-0759.
re e m p l a Z a n D o l a Ba T e r í a D e l cr o n ó m e T r o
Estafreidoraestaequipadaconuncronómetrodigitalquetrabajaconsupropiabatería.
Detiempoentiempopodríasernecesarioquecambielabateríaenelcronómetro.
1.Inserteundesarmadorpequeñoenlaranurajuntoalvisualizadordelcronómetroy
saquetodoelcronómetrohaciafuera.
2. RetirelabateríayreemplácelaconunabateríatipoLR44
3. Alineeelcronómetroconelhoyoyempujeelcronómetrodevueltadentrodela
cavidad hasta que escuche un chasquido y quede en su sitio
Ti e m p o s pa r a fr e í r Y Te m p e r aT U r a
Lostiemposparafreírenestecuadrosonunaguíaydebenserajustadosdeacuerdo
a las diferentes cantidades o grosores de los alimentos y de acuerdo a su propio gusto.
El tiempo de precalentamiento para que la freidora alcance la temperatura deseada es
de7-10minutos(Alempezarafreírse,laLuzindicadoradeListovaamoverseOn/
Off mientrás la temperatura fluctúa debido a que se están metiendo los alimentos.)
al i m e n T o
gr a D U a c i ó n
T
e m p .
T
i e m p o
(
m i n U T o s )
Tiras de Pollo 375°F 5-8
Piezas de Pollo, con Hueso 360°F 15-20
Pescado, Recubierto 340°F 8-10
Papas Fritas, Congeladas 375°F 3-5
Buñuelos 375°F 2-4
Aros de Cebollas 375°F 3-5
Langostinos, empanados 375°F 2-4
NOTA: Pollos cocinados, congelados y preempacados se cocinan más rápidamente
que los tiempos anteriores indicados.

Español-20 Español-21
pr o B l e m a ca U s a so l U c i ó n
La Freidora no está
funcionando
Panel de Control no puesto
apropiadamente
Elemento Conector de Potencia no
está correctamente adentro
No se encendió (ON)
No enchufado en tomacorriente con
electricidad
Reinstalar Panel de Control
Reinstalar Elemento Conector
de Potencia
Prender (ON)
Enchufar en tomacorriente
Revisar fusibles o circuitos
eléctricos e interruptores
Aceite salpicando Recipiente con exceso
de aceite
Mucha agua dentro del
alimento
Remover exceso de aceite (cuando
esté frío)
Secar el alimento con toalla
de papel
Alimento grasoso o
no crocante
Trozos de alimentos muy
largos
Temperatura del aceite
muy baja
Usando tipo de aceite
inadecuado
Poner menos alimento en la Cesta
Incrementar la temperatura
del aceite
Usar buen aceite vegetal
(vea Recomendaciones para Mejores
Resultados)
Olor desagradable Aceite no fresco Reemplazar el aceite
SOLUCIÓN DE PROBLEMAS
re c e Ta s
BU ñ U e l o s De ma n Z a n a
3 tazas de harina para todo uso 4 cdas. de aceite para freir
2 cditas. de polvo de hornear 1 cdita. de extracto de vainilla
1
/2 cdita. de sal Jugo de Naranja ( 1/3 de taza)
1 taza de azúcar 1 taza de trocitos de manzana
1 huevo, ligeramente batido
Precalentar el aceite a 375º F. Combine la harina, polvo de hornear, sal y azúcar, ponga
aparte. Combine el huevo, aceite y la vainilla. Mezcle muy bien los ingredientes secos
y líquidos. Agregue el jugo de naranja y la manzana y mezcle nuevamente. Con una
cucharadita vaya echando la mezcla dentro del aceite caliente (la Cesta ya debe estar
bajadadentrodelaceite).Fríaalrededorde2minutosohastaqueesténcrocantes
y bastante dorados. Remueva de la grasa y escurra. Espolvoree con azúcar en polvo
oconunamezcladeazúcargranuladaycanela;sirvainmediatamente.
me Z c l a pa r a pe s c a D o o po l l o a Ba s e De ce r v e Z a
2 huevos, separados
1
/4 cdita. pimienta negra molida
1 cda. de aceite o mantequilla 1
1
/3 taza de harina para todo uso
1 cdita. de sal
3
/4 taza de cerveza
Precalentar el aceite a 375º F. Bata las yemas de huevo con aceite/mantequilla, sal
y pimienta. Agregue alternadamente la cerveza y la harina a la mezcla. Bata bien los
ingredientesyrefrigérelasde3a12horas.Cuandoustedestélistaparausarlamezcla,
cuidadosamente agregue con movimientos envolventes las 2 claras de huevo batidas a
punto de nieve. Aplaste un poco el pescado o las pechugas de pollo sin huesos. Cubra
ligeramenteconharinaydespuésconlamezcladecerveza.Coloqueelpescadoenel
aceite caliente (la Cesta ya debe estar bajada dentro del aceite) y fría por 3 minutos o
hastaqueesténdorados.Fríaelpollode5a8minutosohastaqueestédorado
y completamente cocido
fi j a D o D e l Bo T ó n D e pr o T e c c i ó n D e so B r e c a l e n T a m i e n T o
Puedesernecesarioquetengaquefijarelbotóndeproteccióndesobrecalentamiento,
si la unidad no opera al inicio (la luz indicadora de corriente estará iluminada y el disco
delatemperaturafijadoalatemperaturaseleccionada)osilaoperacióndelaunidad
parece haberse detenido durante el uso.
1. Desenchufe la unidad del tomacorriente de la pared.
2. Deje que la unidad enfríe
3. Cheque el nivel de aceite en su unidad. Si está por
debajo del nivel mínimo, añada aceite antes de volver a
fijar la unidad y empezar el ciclo de cocido
4. Remueva la caja de control con el elemento calentador.
5. Usando un desarmador delgado o lapicero, presione
suavementeelbotóndereinicializarenlapartetrasera
de la caja de control, localizado en la parte inferior
derecha como se indica con la flecha (Vea la figura 3)
6. Reemplace la caja de control con el elemento
calentador en la cavidad principal y enchufe la
unidad para uso continuo.
Figura 3

Español-22 Español-23
po l l o fr T i o e n in m e r s i ó n
1 Pollo para freir (2 ½ lbs.), cortado en trozos
1
/4 cditas de sal
1
1
/2 tazas de harina para todo uso 1
1
/4 de taza de leche
1 cdita. de sal sazonada
Precalentar el aceite a 375º F. Combine la harina y los aderezos secos. Pase las piezas
de pollo por harina, luego leche y harina nuevamente. Fría por 20 min. o hasta que
sedorenyesténcocidos.
po l l o a l a ki e v
4 pechugas enteras de pollo 1 barrita de mantequilla
deshuesadas y sin piel o margarina
1 cda. de cebolla picadita
1
/2 taza de harina
1 cda. de perejil picadito 1 huevo, batido
1
1
/3 cdita de sal 1 taza de pan rallado fino
Precalentar el aceite a 375º F. Coloque las pechugas de pollo entre dos pedazos de
papeldeenvolturadeplástico.Golpéelasconunmazodemaderaparaaplanarlashasta
¼ de pulgada de grosor. Quite el plástico. Combine cebolla, perejil y sal y espolvoree
sobre el pollo. Corte la mantequilla en 8 trozos. Coloque cada trozo de mantequilla
sobre un extremo de pechuga sazonada. Enrolle como si fuera un rollo de mermelada,
comenzando por el extremo con mantequilla, metiendo los bordes de la carne. Apriete
bien para sellar. Asegúrelos con palillos de dientes. Espolvoree con harina, remoje en el
huevobatido,despuésruédelosobreelpanrallado.Refrigerelosrollitosdepollo(por
lomenos1hora).Colóquelosenunacamadadentrodelacestadefreír.Bajelacestay
cocine por 5 minutos o hasta que doren. Para probar si están listos, remueva del aceite
un pedazo de pollo. Cuando el tenedor entra con suavidad, el pollo ya está listo.
ro s Q U i l l a s rá p i D a s
Latadegalletasrefrigeradas
1
/2 taza de azúcar
2 cdas. de canela molida
Precalentar el aceite a 375º F. Agarre cada galleta y aplástela suavemente con la palma
de la mano. Con el dedo, oprímale un hueco en el centro de cada galleta para obtener
laformaderosquillas.Fría2minutos,volteándolasunavez.Remuévalasdelaceitey
séquelasconpapeltoalla.Espolvoreeconunamezcladeazúcarycanela.Sirvacaliente.
Garantía Limitada de 1 Año
Sunbeam Products, Inc. operando bajo el nombre de Jarden Consumer Solutions, o en Canadá,
SunbeamCorporation(Canada)LimitedoperandobajoelnombredeJardenConsumerSolutions,
(en forma conjunta, “JCS”), garantiza que por un período de un año a partir de la fecha de compra,
esteproductoestarálibrededefectosdematerialesymanodeobra.JCS,asuelección,reparará
o reemplazará este producto o cualquier componente del mismo que presente defectos durante el
período de garantía. El reemplazo se realizará por un producto o componente nuevo o reparado.
Si el producto ya no estuviera disponible, se lo reemplazará por un producto similar de valor igual
osuperior.Éstaessugarantíaexclusiva.Nointenterepararoajustarningunafuncióneléctricao
mecánicadeesteproducto.Alhacerloelimínaráéstagarantía.
Lagarantíaesválidaparaelcompradorminoristaoriginalapartirdelafechadecomprainicialyla
misma no es transferible. Conserve el recibo de compra original. Para solicitar servicio en garantía
serequierepresentarunrecibodecompra.LosagentesycentrosdeserviciodeJCSolastiendas
minoristas que venden productos de JCS no tienen derecho a alterar, modificar ni cambiar de
ningúnotromodolostérminosylascondicionesdeestagarantía.
Esta garantía no cubre el desgaste normal de las piezas ni los daños que se produzcan como
resultado de uso negligente o mal uso del producto, uso de voltaje incorrecto o corriente
inapropiada,usocontrarioalasinstruccionesoperativas,ydesarme,reparaciónoalteración
por parte de un tercero ajeno a JCS o a un Centro de Servicio autorizado por JCS. Asimismo, la
garantía no cubre actos fortuitos tales como incendios, inundaciones, huracanes y tornados.
¿Cuál es el límite de responsabilidad de JCS?
JCS no será responsable de daños incidentales o emergentes causados por el incumplimiento de
algunagarantíaocondiciónexpresa,implícitaolegal.
Exceptoenlamedidaenqueloprohíbalaleyaplicable,cualquiergarantíaocondiciónimplícita
decomerciabilidadoaptitudparaunfindeterminadoselimita,encuantoasuduración,alplazo
de la garantía antes mencionada.
JCS queda exenta de toda otra garantías, condiciones o manifestaciones, expresa, implícita, legal o
de cualquier otra naturaleza.
JCS no será responsable de ningún tipo de daño que resulte de la compra, uso o mal uso del
producto, o por la imposibilidad de usar el producto, incluidos los daños incidentales, especiales,
emergentesosimilares,olapérdidadeganancias,nideningúnincumplimientocontractual,seade
unaobligaciónesencialodeotranaturaleza,nideningúnreclamoiniciadocontraelcomprador
por un tercero.
Algunasprovincias,estadosojurisdiccionesnopermitenlaexclusiónolimitacióndelosdaños
incidentalesoemergentesnilaslimitacionesaladuracióndelasgarantíasimplícitas,demodoque
esposiblequelaexclusiónolaslimitacionesantesmencionadasnoseapliquenensucaso.
Esta garantía le otorga derechos legales específicos y es posible que usted tenga otros derechos que
varíandeunestado,provinciaojurisdicciónaotro.
Cómo solicitar el servicio en garantía
En los Estados Unidos
Si tiene alguna pregunta sobre esta garantía o desea recibir servicio de garantía, llame al
1-800-334-0759ypodráobtenerladireccióndelcentrodeservicioqueleresultemásconveniente.
En Canadá
Si tiene alguna pregunta sobre esta garantía o desea recibir servicio de garantía, llame al
1-800-667-8623ypodráobtenerladireccióndelcentrodeservicioqueleresultemásconveniente.
En los Estados Unidos, esta garantía es ofrecida por Sunbeam Products, Inc. operando bajo el nombre
deJardenConsumerSolutions,BocaRatón,Florida33431.EnCanadá,estagarantíaesofrecidapor
SunbeamCorporation(Canada)LimitedoperandobajoelnombredeJardenConsumerSolutions,20
BHerefordStreet,Brampton,OntarioL6Y0M1.Siustedtieneotroproblemaoreclamoenconexión
con este producto, por favor escriba al Departamento de Servicio al Consumidor.
POR FAVOR NO DEVUELVA ESTE PRODUCTO A NINGUNA DE ESTAS
DIRECCIONES NI AL LUGAR DE COMPRA.

For product questions contact:
Jarden Consumer Service
USA: 1.800.334.0759
Canada: 1.800.667.8623
www.oster.com
©2010 Sunbeam Products, Inc. doing business as Jarden Consumer Solutions.
All rights reserved. Distributed by Sunbeam Products, Inc. doing business as
Jarden Consumer Solutions, Boca Raton, Florida 33431.
Para preguntas sobre los productos llame:
Jarden Consumer Service
EE.UU.: 1.800.334.0759
Canadá: 1.800.667.8623
www.oster.com
©2010 Sunbeam Products, Inc. operando bajo el nombre de Jarden Consumer Solutions.
Todos los derechos reservados. Distribuido por Sunbeam Products, Inc. operando bajo
el nombre de Jarden Consumer Solutions, Boca Raton, Florida 33431.
SPR-052710
User Manual
4 L Cool Zone Deep Fryer
Manual de Instrucctiones
Freidora de 4 L. Zona Fría
MODEL/MODELO
CKSTDFZM70
P.N. 133698 Rev. A
Visit us at www.oster.com
Printed in China Impreso en China