Loading ...
Loading ...
Loading ...
25
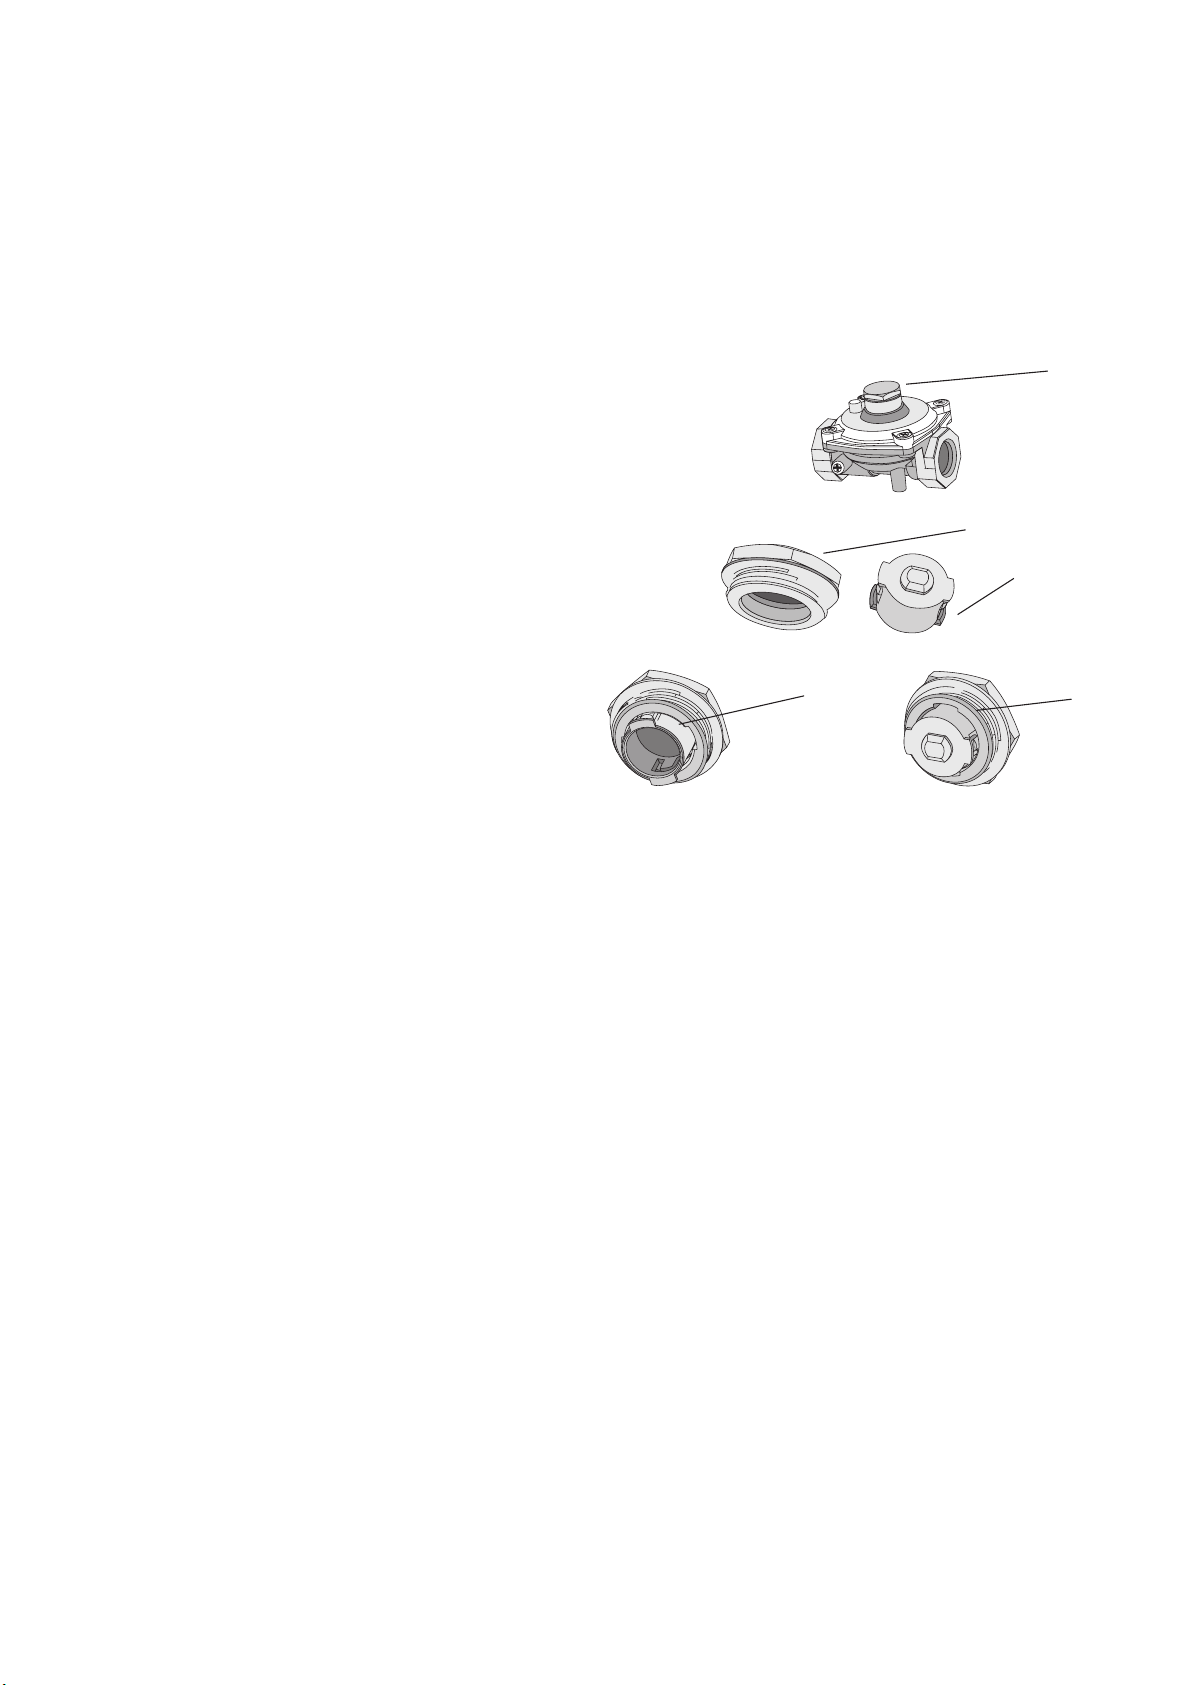
Hex nut
assembly,fully
screwed down
Hexnutassembly,
removed
from regulator
and insert
disassembled
Insert
oriented
for LPG
operation
Figure 10
Insert
oriented for
natural gas
operation
2. Unscrew the hex nut from the regulator. The hex
nut,brasswasherandnyloninsertwilldisengageas
an assembly.
3. Unclip the nylon insert and nut assembly by rotating
theinsert¼turn,andpullingitfree.
4. Turn over the insert and clip back into position.
5. Retthehexnutassemblytotheregulatorensuring
that it is fully screwed down. The regulator is now
set for connection to LP.
6. Turn on the gas supply and at each new connection
check for leaks using soapy water: each hotplate
valveshouldbeturnedon,oneatatime,andthe
injector hole blanked off for several seconds.
7. Theoperationoftheregulatorcanbeconrmedby
connecting a manometer to the pressure test point
located on the side of the regulator body adjacent to
the outlet.
With the appliance operating check the
outlet pressure:
• whenallburnersoftheapplianceareoperating
atmaximum,
• whenthesmallestburneroftheapplianceis
operating at minimum.
Under these conditions the outlet pressure should not vary
from the nominal outlet pressure of 2.60kPa by more the
+/-0.52kPa.
8. If the regulator appears to not be performing
satisfactorily then check the following points:
• Iftheoutletpressureisconsistentlytoolowthen
the inlet pressure may be too low and adjustment
ofanupstreamregulatormaybeneeded,oran
upstreamregulatororvalvewithinsufcientow
capacity may be present in the gas supply line.
If this is suspected then it may be necessary to
repeat the checks whilst measuring both the
inlet and outlet pressure to determine if the inlet
pressure is in the range 2.75 – 7.00kPa.
• Checkthattheinserthasbeenttedcorrectlyas
perdiagramgure10.Checkthatthehexnutis
fully screwed down.
• Checkthattheregulatorhasbeenttedtothe
gassupplylineinthecorrectorientation,thearrow
on the base of the body indicates the direction of
gas flow.
Oncethesecheckshavebeencompleted,ifthe
regulator still fails to perform in a satisfactory manner it
should be replaced.
9. Onebyone,turntheknobstominimumandscrew
in the bypass screw (accessible when the knob is
removed) until a small stable flame results. Turn the
knob to maximum and then back to minimum to
ensure that the correct minimum flame is maintained.
10. AttachtheLPGstickertothecooker,nearthegas
supply inlet. Cover the Natural Gas label that is
factorytted.
Use of hose assembly
Ensure that the hose assembly is restrained from
accidental contact with the flue outlet of an underbench
oven or any other hot surface of an adjacent appliance.
Loading ...
Loading ...
Loading ...