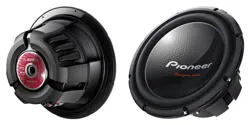
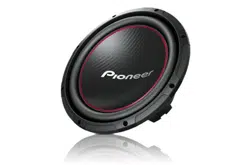
LARGE MOTOR STRUCTURE OPTIMIZED FOR DEEP AND POWERFUL BASS
OVERHUNG VOICE COIL FOR INCREASED LINEARITY AND REDUCED DISTORTION
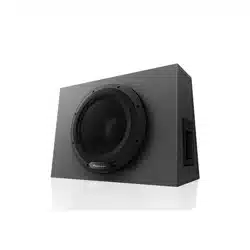
SHALLOW AND COMPACT DESIGN FOR INSTALLATION FLEXIBILITY
FULLY COVERED MESH GRILLE DESIGN
WIRED REMOTE CONTOL FOR GAIN ADJUSTMENT
BASS BOOST CONTROL
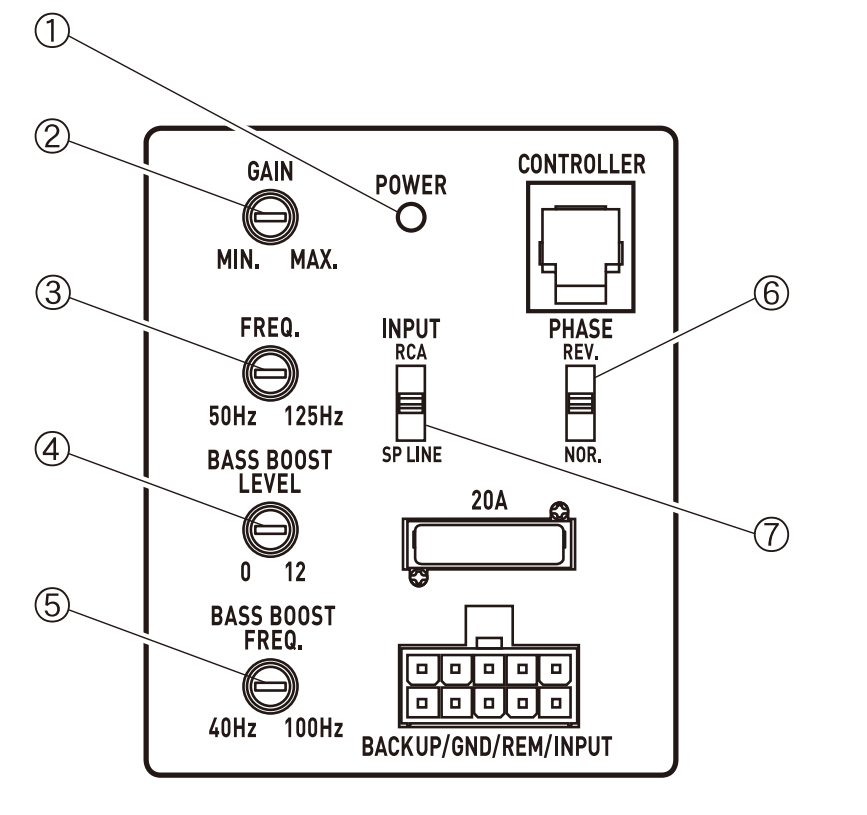
CONTROL PANEL
Power indicator Lights up when power is tumed on.
Gain control Use this countrol to set the desired gain level. The GAIN control circuit protects the subwoofer from excessive input and may automatically adjust the level to prevent damage.
Frequency control
Tum this knob to change the frequency during sound reproduction.
Set the knob to the bass setting of your choice (selectable frequency from 50 Hz to 125 Hz).
Bass boost control You can adjust a bass boost level from 0 dB to 12 dB.
Bass boost frequency control You can adjust a bass boost frequency from 40 Hz to 100 Hz.
Phase switch Use switch to select the phase according to the system.
INPUT MODE SELECT SWITCH
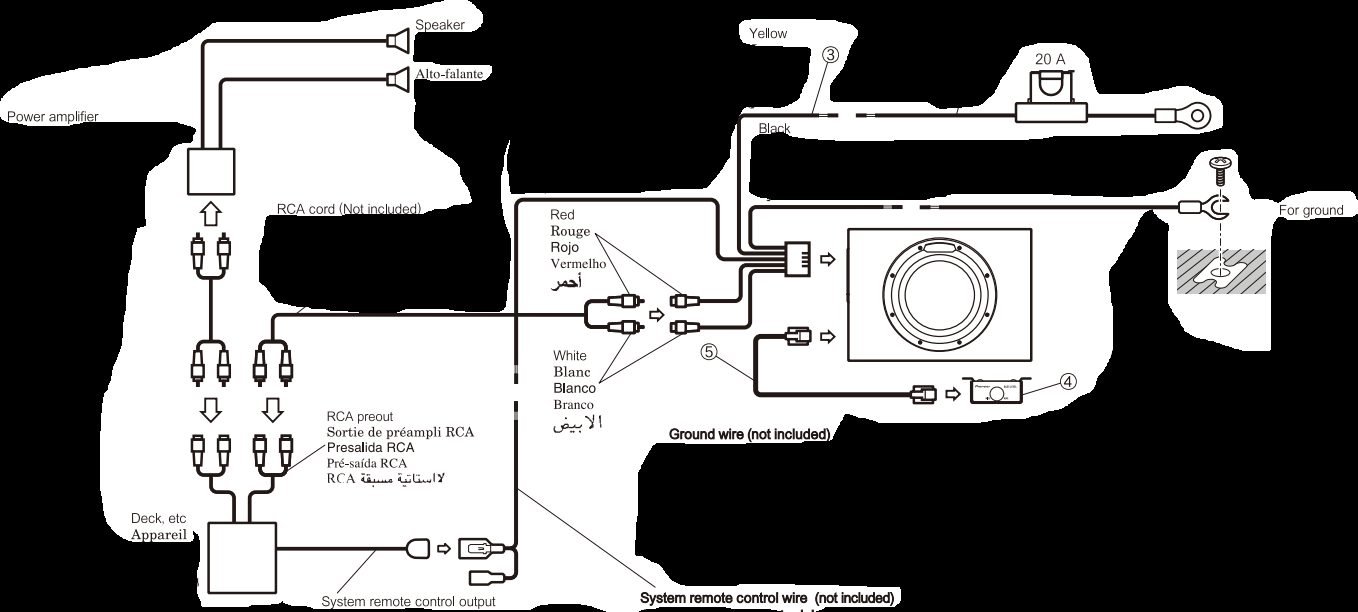
RCA: When using the RCA input
SP LINE: When using the speaker level input
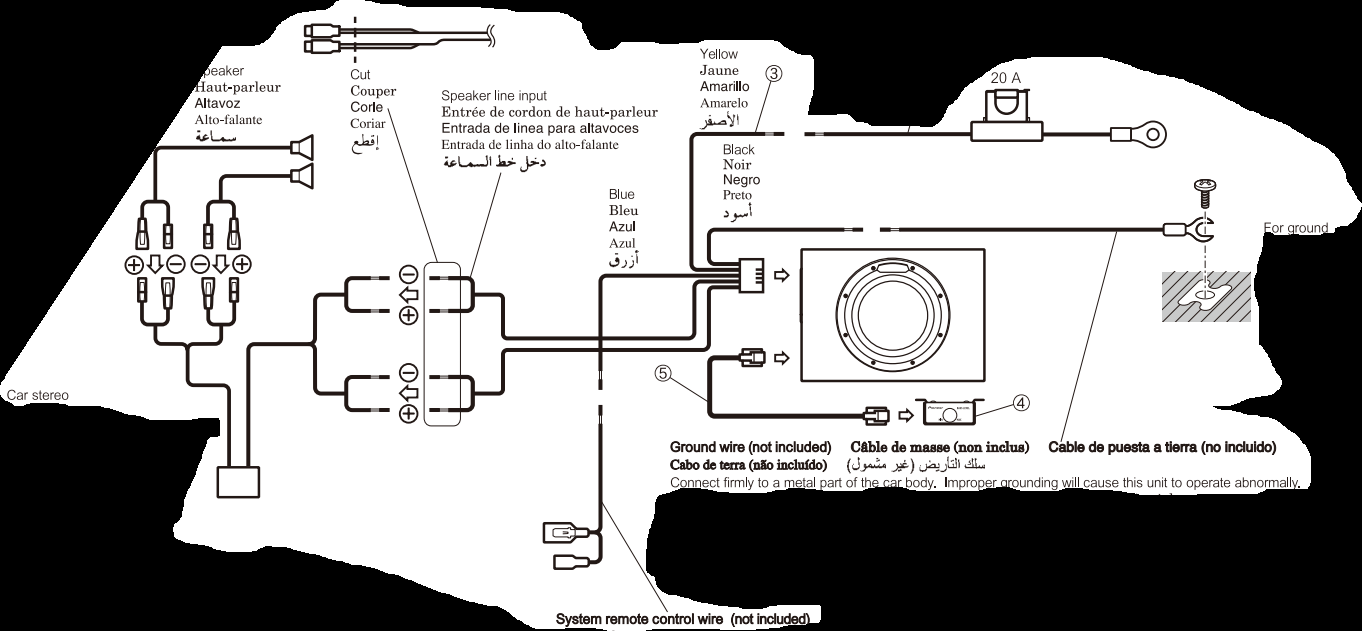
SPEAKER LINE INPUT SYSTEM
Battery wire (not included) Connect all the other leads, and finally connect this terminal to the positive (+) terminal of the battery.
Ground wire (not included) Connect firmly to a metal part of the car body. Improper grounding will cause this unit to operate abnormally.
System remote control wire (not included) This connection is made to the accessory connector in the car's fuse unit from which over 2 A can be supplied.
INPUT MODE SELECT SWITCH shall be set in SP LINE.
RCA INPUT SYSTEM
Battery wire (not included) Connect all the other leads, and finally connect this terminal to the positive (+) terminal of the battery.
Ground wire (not included) Connect firmly to a metal part of the car body. Improper grounding will cause this unit to operate abnormally.
System remote control wire (not included) System remote control input cord (blue cord included) supplies power to your unit, determining whether it is ON or OFF. Wire the cord to the system remote control output of your deck, etc.
INPUT MODE SELECT SWITCH shall be set in RCA.
FINAL STEP OF THE INSTALLATION
Finish the installation by reconnecting the vehicle's negative (−) battery lead.
SPECIFICATIONS
KEY FEATURES
System Type
Powered
Continuous Power handling (RMS) - Watts
350 Watts
Maximum Peak Power Handling - Watts
1300 Watts
Amp Max Power Output
300 Watts
Amp RMS Output
150 Watts
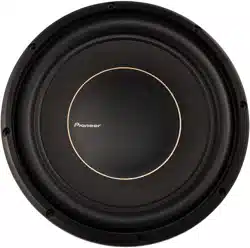
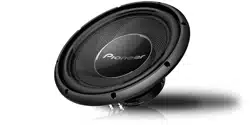
Speaker Specifications
Size
30 cm (12")
Amplifier
Input level (at Gain Max)
RCA
100mV+100mV/22k
Speaker Line
2V+3V/5 k
Power Source
DC 14.4 V (10.8 V to 15.1 V allowable)
Amp Max Current Consumption
13 A
Amp Grounding
Negative
Speaker system
Fully Covered Steel Mesh Grille
Frequency Response
20 Hz to 125 Hz (-20 dB)
Sensitivity (In car, input: 2V)
114 dB
Bass Boost Frequency
40Hz to 100Hz
Bass Boost Level
0 to +12 dB
Built In Amp
Yes
Size
528 mm (20-¾")(W) x 279 mm (11")(D) x 380 mm (15")(H)
Weight (including accessory parts)
10.6 kg (23lb 6oz)
Gross weight (including packaging)
12.3 kg (27 lb 2 oz)
Warranty
1 Year
BUILD
Shape
Round
Cone Material
Cellulose fiber
Surround Material
Urethane
Basket Material
Stamped Metal
Magnet Weight
33.5 oz
Voice Coil Bobbin
Polyimide
Damper
Aramid
Size
12"
Center Cap Material
PP
Surround Type
Rolled
Magnet Material
Ferrite
Voice Coil Type
Single Voice
Voice Coil wire
Copper
Gasket
ABS
SAFETY WARNING
Before installing this speaker
Before starting the installation make sure to disconnect the vehicle's negative (-) battery power cable. This will prevent possible electrical shock.
When wiring this unit please use the supplied connecting cords. DO NOT remove the fuses. The protection circuit will not work in case of an emergency.
TS-WX1210A,TS-WX1010A installed in the passenger compartment should be securely anchored in place.
Before drilling any mounting holes check behind where you want to drill the holes to make sure you DO NOT drill into anything such as the gas lines, brake lines or electrical wiring. 5.
Do not install the TS-WX1210A,TS-WX1010A anywhere it can get wet.
Install the TS-WX1210A,TS-WX1010A in a location with good ventilation. Do not place anything on top of TS-WX1210A,TS-WX1010A to prevent airflow through the unit.
While driving keep your listening volume at a level which does not mask important outside traffic noises, such as emergency vehicles, etc.
High sound levels may cause permanent hearing loss.
Caution
This device is for 12 volt (-) negative ground. Please check your automobile to make sure it is this type.
When routing leads and cords, secure them with cable retainers and electrician's adhesive tape or shrink tubing wherever they may touch sharp edges. Keep all wiring away from hot surfaces or heater outlets to prevent short circuits.
Refer to your car stereo's operation manual as well when installing speakers in your car.
Correctly set the input level switch to match the outputs of your car stereo. If this is not correct, you may experience distortion and sound level may not increase.
Do not leave this remote-control in direct sunshine or at a hot place for a long time. Prolonged exposure may cause the unit to deform, change in color, or become faulty.
Note:
If low frequency noise exists in head unit, noise may be amplified by TS-WX1210A,TS-WX1010A.
U.S and Canadian models only
The Safety of Your Ears is in Your Hands
Get the most out of your equipment by playing it at a safe level - a level that lets the sound come through clearly without annoying blaring or distortion and, most importantly, without affecting your sensitive hearing. Sound can be deceiving.
Over time, your hearing "comfort level" adapts to higher volumes of sound, so what sounds "normal" can actually be loud and harmful to your hearing. Guard against this by setting your equipment at a safe level BEFORE your hearing adapts.
ESTABLISH A SAFE LEVEL:
Set your volume control at a low setting.
Slowly increase the sound until you can hear it comfortably and clearly, without distortion.
Once you have established a comfortable sound level, set the dial and leave it there.
BE SURE TO OBSERVE THE FOLLOWING GUIDELINES:
Do not turn up the volume so high that you can't hear what's around you.
Use caution or temporarily discontinue use in potentially hazardous situations.
Do not use headphones while operating a motorized vehicle; the use of headphones may create a traffic hazard and is illegal in many areas.
NOTE
This equipment has been tested and found to comply with the limits for a Class B digital device, pursuant to Part 15 of the FCC Rules. These limits are designed to provide reasonable protection against harmful interference in a residential installation. This equipment generates, uses and can radiate radio frequency energy and, if not installed and used in accordance with the instructions, may cause harmful interference to radio communications. However, there is no guarantee that interference will not occur in a particular installation. If this equipment does cause harmful interference to radio or television reception, which can be determined by turning the equipment off and on, the user is encouraged to try to correct the interference by one or more of the following measures:
Reorient or relocate the receiving antenna.
Increase the separation between the equipment and receiver.
Connect the equipment into an outlet on a circuit different from that to which the receiver is connected.
Consult the dealer or an experienced radio/TV technician for help.

 30 cm (12")