Loading ...
Loading ...
Loading ...
20
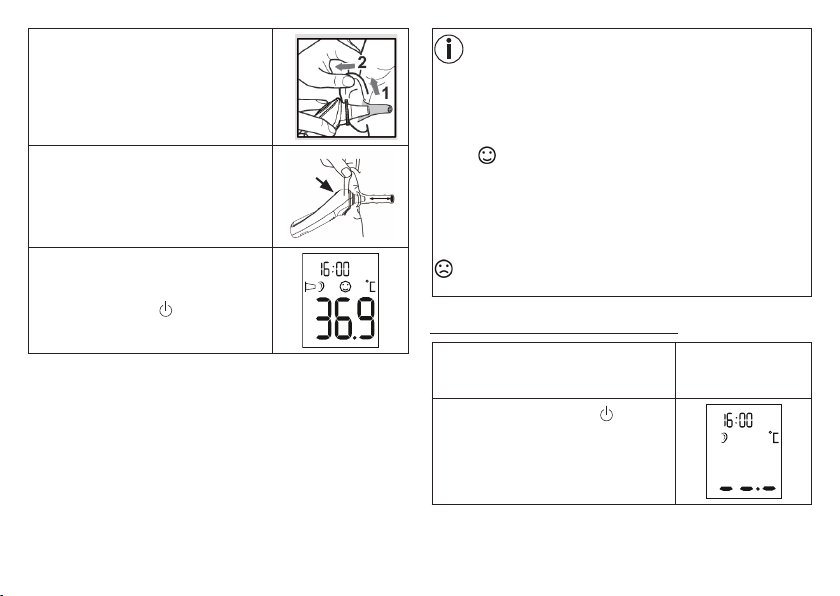
3. As the ear canal is slightly curved, you
have to pull the ear slightly up and
backwards before inserting the sensor
tip. This is important so that the tip of
the protective cap can be pointed di-
rectly at the eardrum.
4.
Insert the sensor tip with the protec-
tive cap carefully into the ear canal and
press the START button to begin the
measurement.
5.
After approx. one second, a long
acoustic signal sounds and the meas-
urement is shown in the display. Press
the ON/OFF button to switch o the
ear thermometer.
Note
If no button is pressed for one minute after the measurement,
the ear thermometer automatically switches itself o again.
Fever indicator
If the measured temperature is < 38 °C (100.4 °F), a laughing
smiley appears on the display and a short acoustic sig-
nal sounds.
If the measured temperature falls between 37.5 and 37.9 °C,
two short acoustic signals will also sound (the indication for
“raised temperature”).
If the measured temperature is ≥ 38 °C (100.4 °F), a sad smiley
appears on the display and a short, a long and three short
acoustic signals sound one after the other.
7.2 Measuring object temperature
1.
Remove the protective cap from the
sensor tip of the ear thermometer (if
it is on).
2. Press the ON/OFF button
to switch
on the ear thermometer. Three acoustic
signals sound and the display switch-
es on.
Loading ...
Loading ...
Loading ...