Loading ...
Loading ...
Loading ...
18
6. Settings
6.1 Setting the time/date
Before beginning to take measurements, we recommend that you
set the current time and date. This will allow you to organise the
saved measurements more easily later.
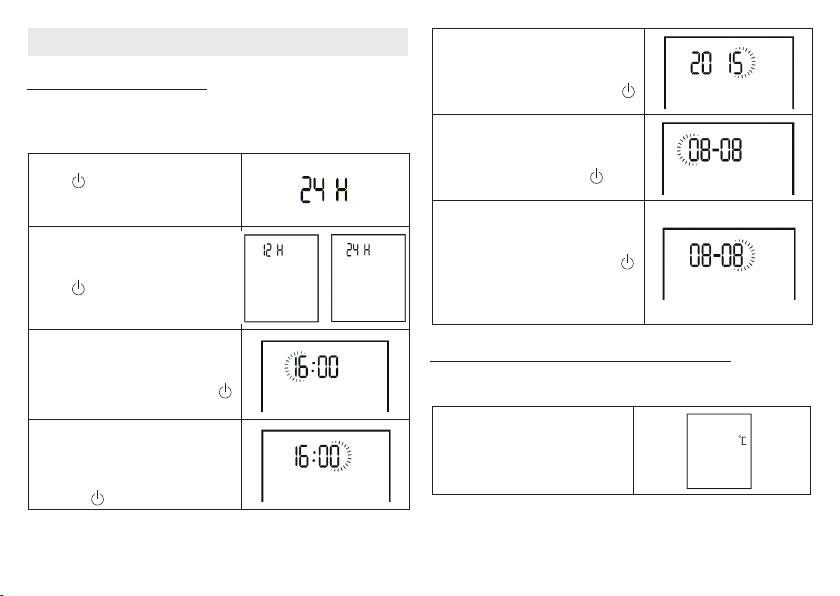
1. Press and hold the ON/OFF but-
ton on the switched-o de-
vice for three seconds. “24 H”
appears on the display.
2. Use the START button to select
the hour format (12h or 24h) and
confirm using the ON/OFF but-
ton .
3. The hour setting appears on the
display. Use the START button to
select the current hour and con-
firm using the ON/OFF button .
4.
The minute setting appears on
the display. Use the START but-
ton to select the current minute
and confirm using the ON/OFF
button .
5. The year setting appears on the
display. Use the START button to
select the current year and con-
firm using the ON/OFF button .
6.
The day flashes on the display.
Use the START button to select
the current day and confirm us
-
ing the ON/OFF button .
7.
The month flashes on the display.
Use the START button to select
the current month and confirm
using the
ON/OFF button
.
The device then switches itself
o automatically. The date and
time are now saved.
6.2 Setting the temperature unit (°C or °F)
You can set the device to display the temperature in degrees
Celsius (°C) or degrees Fahrenheit (°F).
1.
Press and hold the START but-
ton on the switched-o device
for three seconds. “°C” ap-
pears on the display.
Loading ...
Loading ...
Loading ...