Loading ...
Loading ...
Loading ...
49
English
Appendix
How to mount your Center and
Station onto walls
IMPORTANT!
– The wall mounting instructions are for
the use of the qualified wall mounting
person only!
– Ask a qualified person to help you
with the wall mounting, which includes
drilling holes on the wall, fixing the
mounting brackets to the wall, and
mounting the sets onto the brackets.
What’s in the supplied mounting kits
For Center:
1 x mounting bracket
3 x screws (for Center
mounting)
1 x protective card sheet
For Station:
1 x mounting bracket
2 x screws (for Station
mounting)
What else you’ll need
– 8 x screws for fixing the Center’s bracket
– 6 x screws for fixing the Station’s bracket
– Drilling tools (e.g. electric drill)
Preparation
● To find a suitable location for mounting, try
your necessary rear connections and the Wi-Fi
connection between Center and Station (see
the chapter Installation).
● Ask a qualified person to help you with the
wall mounting, who should:
– to avoid unexpected damage, learn about the
piping, wiring and other relevant information
inside your walls;
– according to your walls’ materials, decide what
type of screws you need to fix the mounting
brackets and hold the weight of a Center or
Station;
– according to the drilling requirements, choose
suitable drilling tools;
– take other precautions necessary for the wall
mounting work.
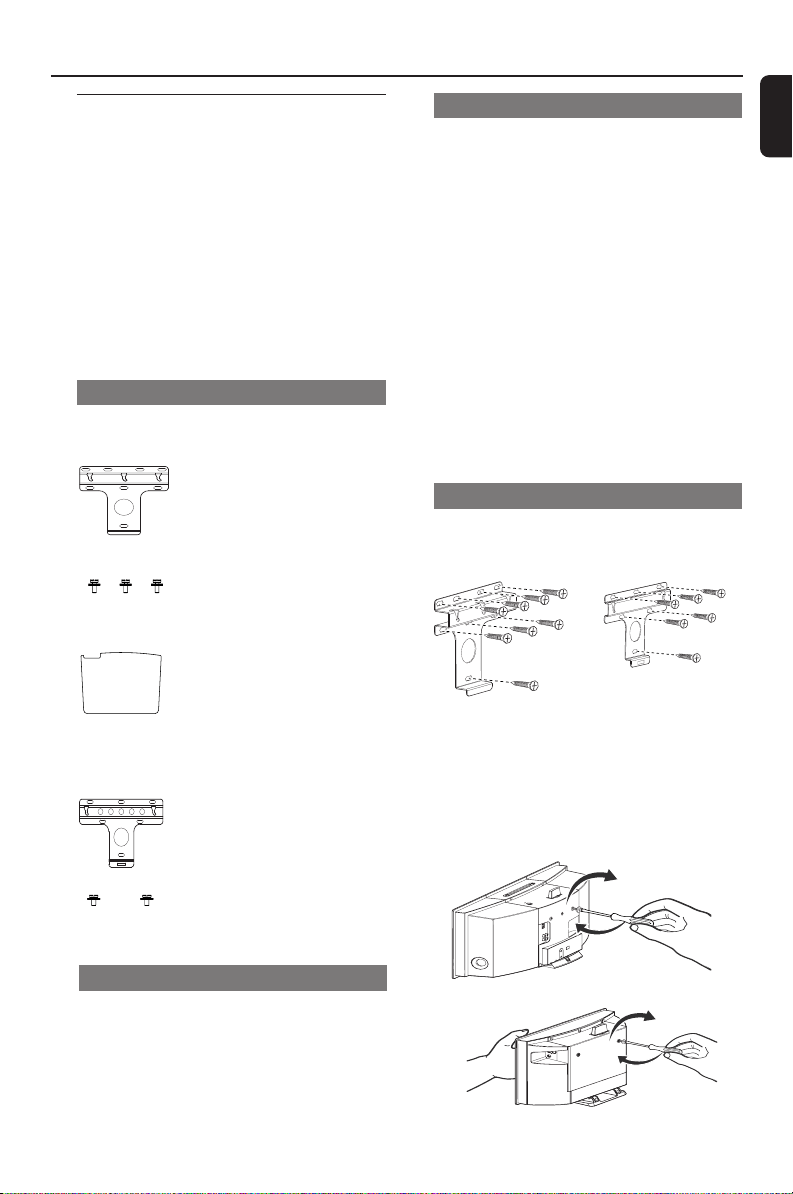
Mounting your Center or Station
1 Align the bracket (for Center or Station) in the
chosen location on a wall. Use a pencil to mark
the drilling positions.
2 Drill holes as marked.
3 Fix the brackets to the wall using suitable screws
(not supplied).
4 As shown, fasten the supplied screws to your
Center or Station using a screwdriver
Center
Station
Center Station
p001-p051_WACS700_EngNEW2 9/16/2005, 09:0849
Loading ...
Loading ...