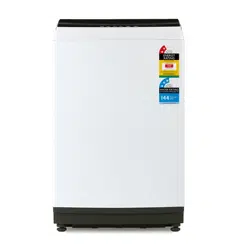
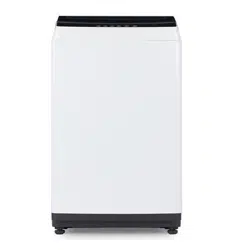
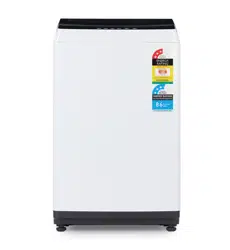
The product line chart is for reference only, please refer to real product as standard.
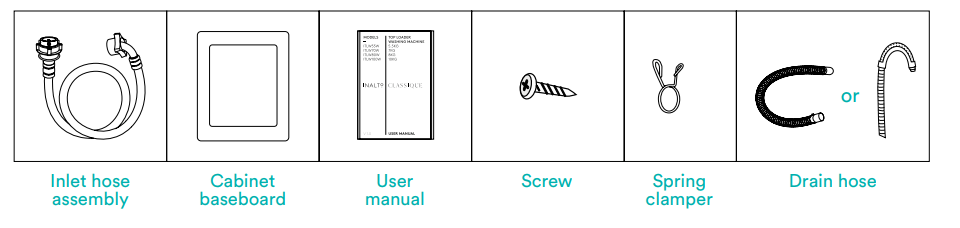
ACCESSORIES
NOTE!
If the drain hose is already installed on the machine, then there is no spring clamper and drain hose in the accessories.
Installation
INSTALLATION INSTRUCTIONS
It’s recommended to use the washing machine on its own dedicated power outlet for both convenience and safety. The power outlet must be grounded.
IMPORTANT!
If the power cord is damaged, it must be replaced by Residentia Group or one of it’s authorised service representatives. Please contact 1300 11 HELP (4357) and ensure the appliance is completely disconnected from the power supply.
WARNING!
Stability is important to prevent the product from moving!
Make sure that the product should not stand on the power cord.
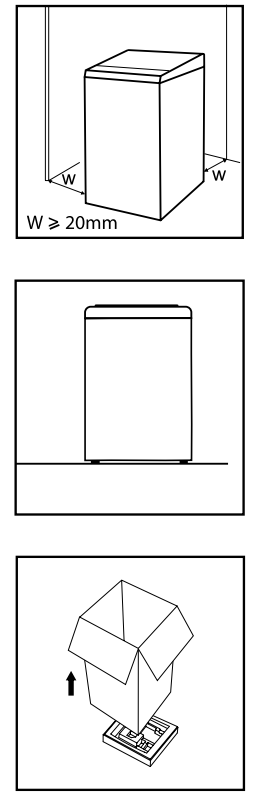
Before installing the machine, the location must be:
1. Rigid, dry, and a level surface
2. Avoiding direct sunlight
3. Sufficient ventilation
4. Room temperature is above 0 °C
5. Kept far away from the heat resources such as coal or gas.
UNPACKING THE WASHING MACHINE
WARNING!
Packaging material (e.g. Films, Styrofoam) can be dangerous for children.
There is a risk of suffocation! Keep all packaging well away from children.
1. Remove the cardboard box and styrofoam packing.
2. Lift the washing machine and remove the base packing.
3. Remove the tape securing the power supply cord and drain hose.
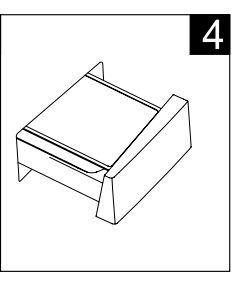
4. Remove the inlet hose from the drum.
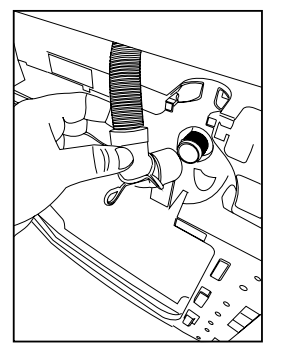
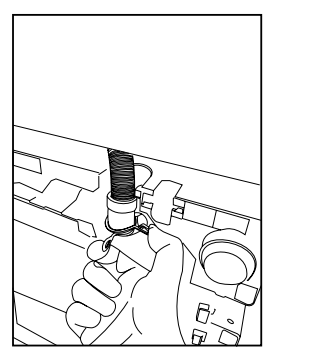
INSTALLATION OF THE DRAIN HOSE
Drain hose inserted into the drain
Clamping spring
Operating Instructions
WARNING!
To prevent leakage or water damage, follow the instructions in this chapter carefully:
Do not kink, crush, modify, sever or protract the inlet hose or drain hose.
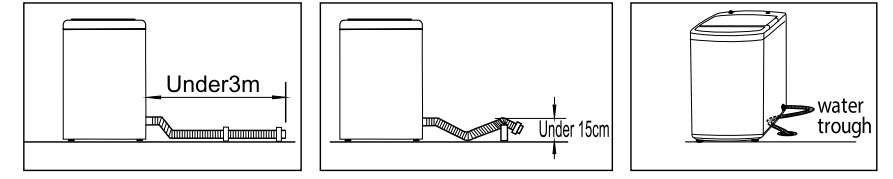
Position drain hose properly ,otherwise damage might result of water leakage.
If drain hose is too long, do not force it into washing machine as it will cause abnormal noises.
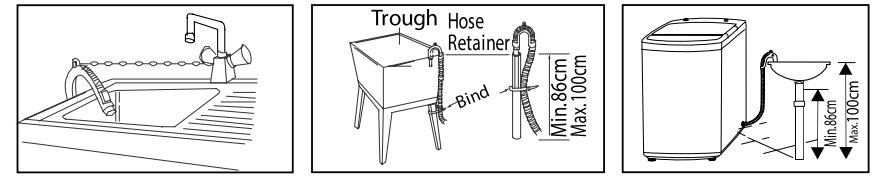
There are two ways to place the end of drain hose:
1. For lower drain system
2. For upper drain system
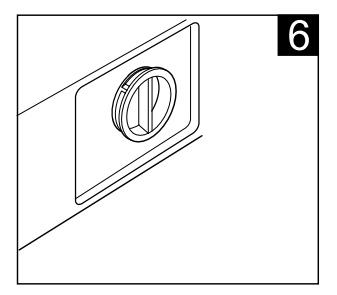
LEVELLING THE WASHING MACHINE
WARNING!
The lock nuts on all four feet must be screwed tightly against the housing.
1. Check if the legs are closely attached to the cabinet. If not, please turn them to their original positions tighten the nuts.
2. Check alignment of the product with a spirit level and if required, correct.
3. Loosen the lock nut and turn the feet until it closely contacts with to the floor.
4. After being locked properly, press four corners again to make sure that they has been adjusted properly.
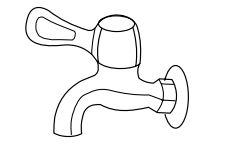
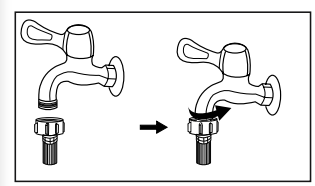
SELECTION OF TAP
Please select appropriate tap.
Ordinary faucet
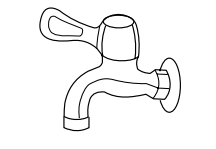
Screw tap
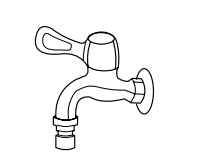
Special washing machine tap
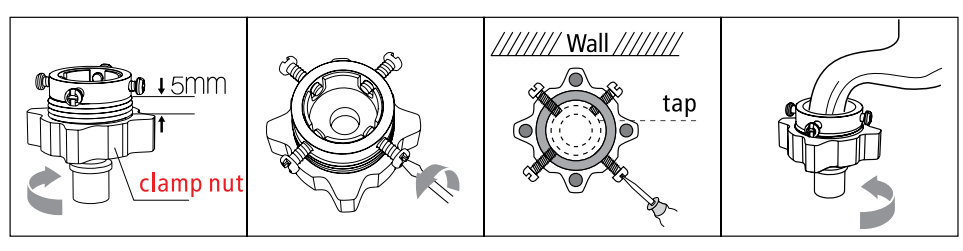
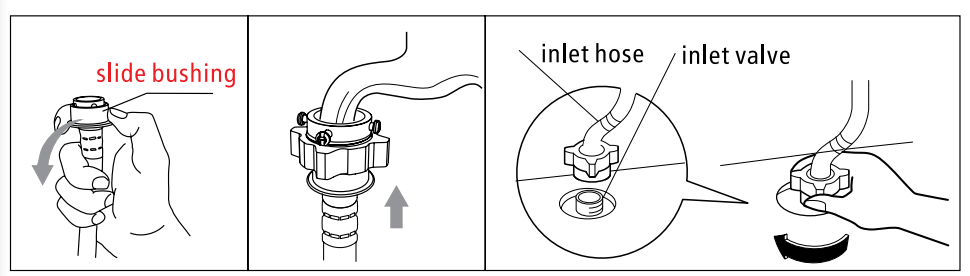
CONNECTION OF INLET HOSE, TAP AND WASHING MACHINE
1. Connection between ordinary tap and inlet hose.
a) Loosen clamp nut to show 5mm thread
b) Loosen four bolts
c) Set connecting base on tap and tighten bolts evenly
d) Tighten clamp nut
e) Press slide bushing, insert inlet hose into connecting base
f) Connection finished
g) After connection and installation, check if there is water leakage
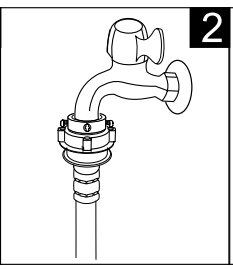
2. Connection between screw tap and inlet hose.
tap with threads and inlet hose
special tap for washing machine
PREPARATION BEFORE WASHING
CAUTION!
Before washing, please make sure it’s installed properly.
Before washing it at first time, the washing machine shall be operated in one round of the whole procedures without clothes in as follows.
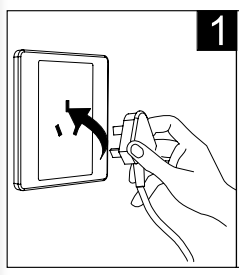
Plug in
Open tap
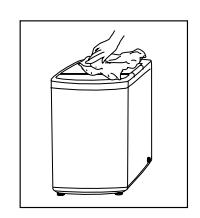
Load and Close door
Add detergent
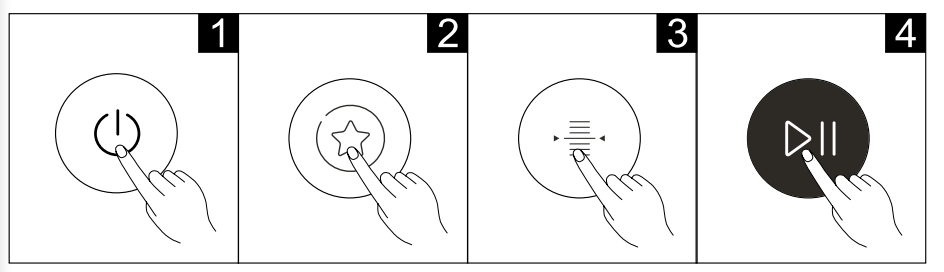
WASHING
Power On
Select Program
Select Water Level
Start up
NOTE!
If default is selected, step 2, 3 can be skipped.
AFTER WASHING
Buzzer will beep after washing finished and the power supply will be cut off automatically. Then unload the laundry.
WASHING MATTERS NEEDING ATTENTION
The working condition of the washer should be(0-40)°C. If used under 0°C, the inlet valve and draining system may be damaged. If the machine is placed under condition of 0°C or less, then it should be transferred to normal ambient temperature to ensure the water supply hose and drain hose are not frozen before use.
Please check the labels and the explanation of using detergent before wash. Use non-foaming or less-foaming detergent suitable for machine washing properly.
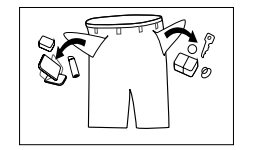
Check the label
Take out the items out of the pockets
Knot the long strips,zip or button
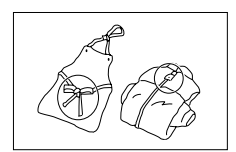
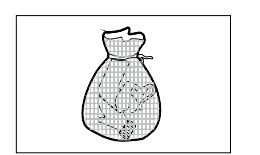
Put small clothes into the pillow slip
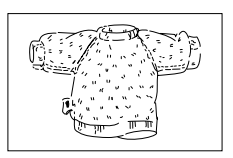
Turn easy-pilling and long-pile fabric inside out
Separate clothes with different textures
WARNING!
When washing a single clothes, it may easily cause great eccentricity and give alarm due to great unbalance. Therefore it is suggested to add one or two more clothes to be washed together so that draining can be done smoothly.
Don’t washing the clothes touching with kerosene, gasoline, alcohol and other flammable materials.
THE USAGE OF DETERGENT AND WASHING POWDER
As for the agglomerated or ropy detergent or additive, before they are poured into the detergent box, it is suggested to use some water for dilution to prevent the inlet of detergent box from being blocked and overflowing while filling water.
Please choose suitable type of detergent for the various washing temperature to get the best washing performance with less water and energy consumption.
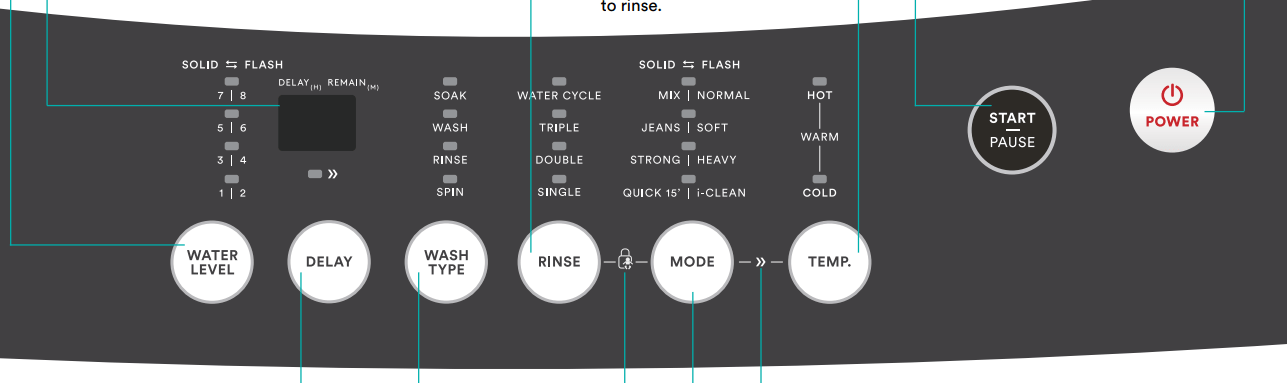
WATER LEVEL:
Select water level according to clothing categories, degree of soiling and washing habits of customers.
Press this button to set your Water Level, where 1 is low and 8 is high.
A solid indicator light indicates the water levels to the left (1, 3, 5, 7) and a flashing indicator light indicates the water levels to the right (2, 4, 6, 8).
DISPLAY:
The display shows the settings, estimated time remaining, options, and status messages for your washer. The display will remain on through the cycle.
When LED flashing, it means the time that delay to start the machine. When LED lighting, it means the program time that remaining.
CAUTION!
If there is any break in the power supply while the machine is operating, a special memory stores the selected program and when the power is restarted.
WATER TEMPERATURE:
Press this button to select your water temperature. When both the Hot and Cold indicators are lit, your washing machine will be set to use Warm water.
RINSE:
Press this button to select your desired amount of times to rinse.
START/PAUSE:
After selecting your desired wash settings, press this button to start your wash cycle.
You can also use this button to pause the washing machine during operation.
POWER:
Press this button to turn your washing machine On or Off.
DELAY:
After selecting a Program, press the Delay button to choose a delayed start time. Press Start/Pause to commense the delay operation.
To switch the delayed start off, simply press the button until the delay light is off. If the program has already started, press the Power button to reset the program.
WASH FUNCTION:
Press this button to select your wash function. I.e. Soak, Wash, Rinse or Spin, or a combination of these.
CHILD LOCK:
Simultaneously press the Rinse and Mode buttons to activate the child lock. Repeat this process to deactivate the child lock.
NOTE!
The Child Lock function will lock all buttons except Power.
MODE:
Press this button to select your wash mode. A solid indicator indicates the modes to the left, whereas a flashing indicator indicates the modes to the right.
QUICK CLEAN:
Quick Clean can save between 20-40% of your cycle time by strengthening the washing beats.
Simultaneously press the Mode and Temperature buttons to activate Quick Clean.
Repeat this process to deactivate Quick Clean.
PERSONALISED WASH MODE SETTING
Users can select washing program according to actual demand, set rinsing times, water volume and delay amount.
OPERATIONS OF WASHING PROCESS
Users can set single process or combinations of washing, rinsing and spinning freely according to demand. Detailed operations as follows for different models:
ONE TOUCH SMART WASH
SPIN
WASH + RINSE + SPIN
NOTE!
There are other process combinations just like the above.
WASHING MODES
MIX
Suitable to wash cotton, linen, flax. jute clothes
NORMAL (STANDARD)
Standard fabric washing program, suitable to wash ramie cotton fabric. Wash for once, rinsing for twice, the spin time is a little long.
JEANS
Suitable to wash heavy stained/wearable clothes.
SOFT
The tempo is soft, slow washing and spinning speed, to make the lightest wear and deformation.
STRONG
The wash time is longer, the stream is stronger, so the washing effect is better.
HEAVY
Suitable to wash heavy stained/wearable clothes.
QUICK 15'
Suitable to wash light stained clothes and summer clothes.
QUICK CLEAN
Start up Quick Clean: Power on, select "Normal", "Soft", "Mix", "Strong", "Jeans" program, then press the Quick Clean button combinations.
Cancellation of Quick Clean function:
The function can be cancelled by pressing Quick Clean combination buttons (Mode and Temperature) or Power off.
FUZZY WEIGHTING
The washing machine will select the water level automatically according to the load weight.
1. When there's water in the tub, this function is not available;
2. Before press [Start/Pause] button, if consumer selected the water level, there will be no fuzzy weighting function;
3. After press [Start/Pause] button, the washing machine will run the fuzzy weighting function. Consumer can also select the water level to set the water level as needed.
Cleaning & Maintenance
CLEANING AND CARE
WARNING!
Before you begin maintenance, please unplug the machine and close the tap.
CLEANING THE CABINET
Proper maintenance on the washing machine can extend its working life. The surface can be cleaned with diluted non-abrasive neutral detergents when necessary. If there is any water overflow, use the wet cloth to wipe it off immediately. No sharp items are allowed.
NOTE!
Formic acid and its diluted solvents or equivalent are forbidden, such as alcohol, solvents or chemical products, etc.
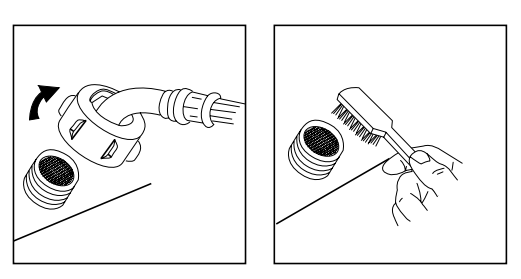
CLEANING THE INLET FILTER
NOTE!
Inlet filter must be cleaned if there is less water.
Washing the filter in washing machine:
1. Screw off the inlet pipe from the rear of the machine.
2. Pull out the filter with long pliers and reinstall it back after being washed. 3. Use a brush to clean the filter.
4. Reconnect the inlet pipe.
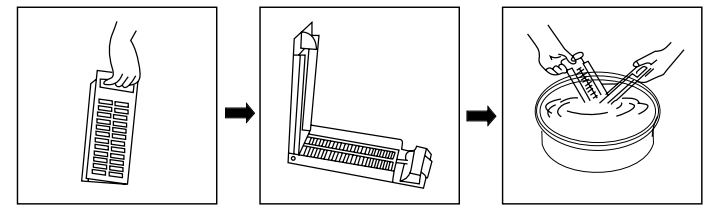
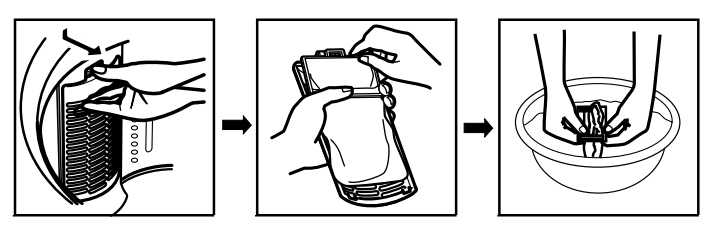
Lint filter clean:
1. There is a built-in lint filter in your washer. It can help to collect lint during washing cycle.
2. It is suggested to clean the lint filter every 10 cycles.
3. Take it out and clean the filter with water. Then place it back into the washer.
Magic filter
Normal filter
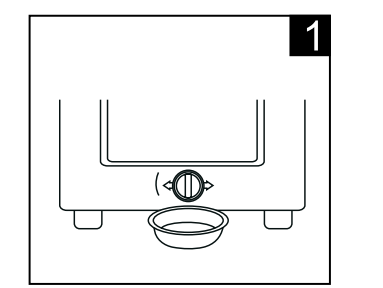
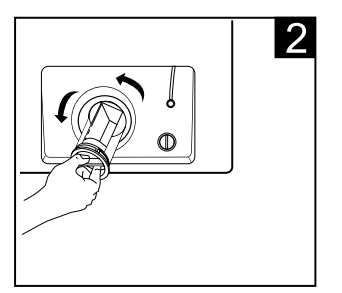
CLEANING THE DRAIN PUMP FILTER
WARNING!
Be careful of the hot water!
Allow detergent solution to cool down.
Unplug the machine to avoid electrical shock before washing.
Drain pump filter can filter the yarns and small foreign matters from the washing.
Clean the filter periodically to ensure the normal operation of washing machine.
Drain the water outof the pump, using a container to collect
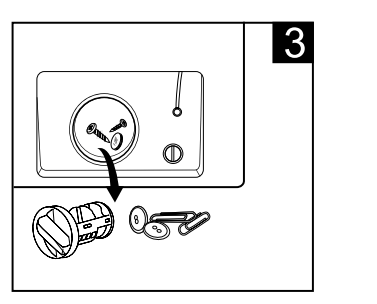
Open the filter by turning to the counter clockwise
Remove foreign objects
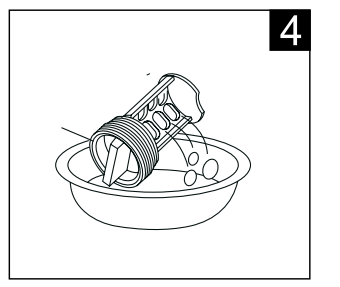
Clean the filter
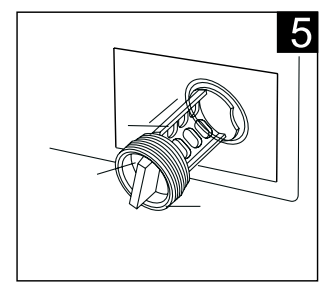
Restore it and adjust the convex place to align at the pump hole
Tighten the pump cover clockwise
CAUTION!
Make sure that valve cap and emergency drain hose are reinstalled properly, cap plates should be inserted aligning to hole plates otherwise water may leak;
Some machines don’t have emergency drain hose, so step 2 and step 3 can be skipped. Rotate lower cover cap directly to make water run into basin.
When the appliance is in use and depending on the program selected there can be hot water in the pump. Never remove the pump cover during a wash cycle, always wait until the appliance has finished the cycle, and is empty. When replacing the cover, ensure it is securely re-tightened.
Troubleshooting
OPERATION IN CASE OF EMERGENCY
In the event of an emergency you should:
Switch off all controls.
Switch the washing machine off at the power point or at the fuse box.
Call the Residentia Support Team on 1300 11 HELP (4357).
DESCRIPTION
INSPECTION ITEMS
No washing
If the power is off or the fuse is burned out.
If the power supply voltage is too low.
If the water amount reaches to the required water level. (The washer will not work if the water amount does not reach the required water level)
If it is set to "Delay" washing mode. (It will only start to work until the reservation time reached)
No water flows in
If the power is off or the fuse is burned out.
If the water supply is cut off or the water pressure too low.
If the inlet hose is properly connected and the water tap is opened.
If the filtering screen of inlet valve is blocked by dirt.
If the coil of inlet valve is damaged. (The slight electromagnetic sound is normal phenomenon when the inlet valve is switched on)
If the "Start / Pause" button is pressed after the power switch is pressed.
Abnormal draining
If the water drain hose is placed very high.
If the end of water drain hose is sealed in pond.
If the internal rubber ring of drain valve is blocked by dirt.
Abnormal spin
If the door lid is closed.
If all clothing piled largely at one side of barrel or the clothing is excessively placed.
If the washer is not placed in stable condition or it is placed in inclination state. (The ground is not flat).
If the motor belt is loosened.
When the washing machine experiences a fault, please contact the Residentia Group support team on: Telephone: 1300 11 HELP (4357).
WARNING! Never dismantle the washing machine.
ERROR MESSAGES AND SOLUTIONS
INDICATION
REASON
SOLUTION
"E1" displays
Alarm for abnormal water intake.
Check the water tap is opened or not
"E2" displays
Alarm for water drain has not finished.
Check the water level sensor and drain pump
"E3" displays
Alarm for lid not closed before wash and spin.
Close the lid, Press "Start" button
"E4" displays
Alarm for washing stay at one side.
Manually balance clothes in the barrel by hand.
Other
If problems still occur, please contact the support team with the number at the top of this page.
Technical Specifications
Below outlines the technical specifications for your Esatto Washing Machine.
#1 Does this appliance make any sound/s when the cycle is complete? My current machine "beeps" 8 times and I nearly go mad. Certainly dont want another machine which "beeps" as often as this one.
Thank you for this question in the product manual attached it say: AFTER WASHING Buzzer will beep after washing finished and the power supply will be cut off automatically. Then unload the laundry
#2 What is required space to install this washing machine please?
The washing machine itself is 630mm Width, 601mm Depth, and 1000mm Height and we recommend at least an extra 20mm each side so that would make the space needed 670mm Width, 621mm Depth and including space to open the lid on top it will be 1413mm Height
#3 Hi I need to know the height of this machine with the lid open
The height of this product with the lid open is: 1413mm.
#4 does this machine have a place to put softener in
No, this product does not have a fabric softener compartment, you can just pour it into the drum pre rinse cycle.