
Model Code/s:
EBF91S
Product:
91L Mini
Refrigerator
Document:
User Manual
Dear Customer, Congratulations on purchasing your new
refrigerator. The Esatto brand is proudly distributed
within Australia by Residentia Group Pty Ltd.
Please refer to the warranty card at the rear of this
manual for information regarding your product’s
parts and labour warranty, or visit us online at
www.residentiagroup.com.au.
At Residentia Group, we are customer obsessed
and our Support Team are there to ensure you get
the most out of your appliance. Should you want
to learn more about your refrigerator such as
temperature settings and importantly taking care
of it when cleaning, our Support Team are here
to help. You can use our online Support Centre at
anytime by visiting http://support.residentiagroup.
com.au, or you can contact us via phone by dialling:
1300 11 HELP (4357).
It is important that you read through the following
use and care manual thoroughly to familiarise
yourself with the installation and operation
requirements of your appliance to ensure optimum
performance.
Again, thank you for choosing an Esatto appliance
and we look forward to being of service to you.
Kind Regards,
The Residentia Team
T 1300 11 4357
E info@residentiagroup.com.au
W residentiagroup.com.au
ACN
600 546 656
Residentia Group
PO Box 581
Stanhope Gardens
NSW Australia 2768

Page:
3
User Manual:
Contents: Page:
Safety Warnings 04
Installation Instructions 05
Product Overview 08
Operation 08
Cleaning 09
Maintenance 09
Troubleshooting 10
Tips for Energy Saving 10
Disposal 11
Warranty 14
Page:
4
User Manual:
1
1. SAFETYWARNINGS
1)WARNING―Keep ventilation openings, in the appliance enclosure or in the built-in
structure,clearofobstruction.
2)WARNING―Do not use mechanical devices or other means to accelerate the defrosting
process,otherthanthoserecommendedbythemanufacturer.
3)WARNING―Donotdamagetherefrigerantcircuit.
4) WARNING―Donotuseelectricalappliancesinsidethefoodstoragecompartmentsofthe
appliance,unlesstheyareofthetyperecommendedbythemanufacturer.
5)Theappliancehastobeunpluggedafteruseandbeforecarryingoutusermaintenanceonthe
appliance.
6)
Thisappliancecanbeusedbychildrenagedfrom8yearsandaboveandpersonswithreduce
physicalsensoryormentalcapabilitiesorlackofexperienceandknowledgeiftheyhavebeen
givensupervisionorinstructionconcerninguseoftheapplianceinasafewayandunderstandthe
hazardsinvolved.Childrenshallnotplaywiththeappliance.Cleaningandusermaintenanceshall
notbemadebychildrenwithoutsupervision.
7) Ifthe supplycordisdamaged,it mustbereplacedbythemanufacturer,itsserviceagentor
similarlyqualifiedpersonsinordertoavoidahazard.
8)Pleaseabandontherefrigeratoraccordingtolocalregulatorsforituseflammableblowinggas
andrefrigerant.
9) Please according to local regulations regarding disposal of the appliance for its flammable
refrigerantandblowinggas.Beforeyouscraptheappliance,pleasetakeoffthedoorstoprevent
childrentrapped.
10)
Thisapplianceisintendedtobeusedinhouseholdandsimilarapplicationssuchas
–staffkitchenareasinshops,officesandotherworkingenvironments;
–farmhousesandbyclientsinhotels,motelsandotherresidentialtypeenvironments;
–bedandbreakfasttypeenvironments;
–cateringandsimilarnon-retailapplications.
11)
Donotstoreexplosivesubstancessuchasaerosolcanswithaflammablepropellantinthis
appliance.
ITISHAZARDOUSFORANYONEOTHERTHANAUTHORISEDSERVICEPERSONNELTO
CARRYOUTSERVICINGOFREPAIRSWHICHINVOLVETHEREMOVALOFCOVERS.
TOAVOIDTHERISKOFANELECTRICALSHOCKDONOTATTEMPTREPAIRSYOURSELF.
2. INSTALLTION
2
2.1 Location
Whenselectingapositionforyourunityoushouldmakesurethefloorisflatandfirm,andthe
roomiswellventilated.Avoidlocatingyourunitnearaheatsource,e.g.cooker,boilerorradiator.
Alsoavoiddirectsunlightas it mayincrease the electricalconsumption. Extreme cold ambient
temperaturesmayalsocausetheunitnottoperformproperly.Thisunitisnotdesignedforusein
agarageoroutdoorinstallation.Donotdrapetheunitwithanycovering.
Wheninstallingtheunit,ensurethat20cmoffreespaceisleftatbothsides,15cmattherear
and20cmatthetopoftheunit.Thiswillallowcoldairtocirculatearoundthewinecoolerand
improve theefficiencyofthecoolingprocess.The doorcanbeopenedtotherightortheleft,
dependingonwhatbettersuitsthelocation.Pleaseensurethereisadequatespaceforthedoor
tofullyopen.
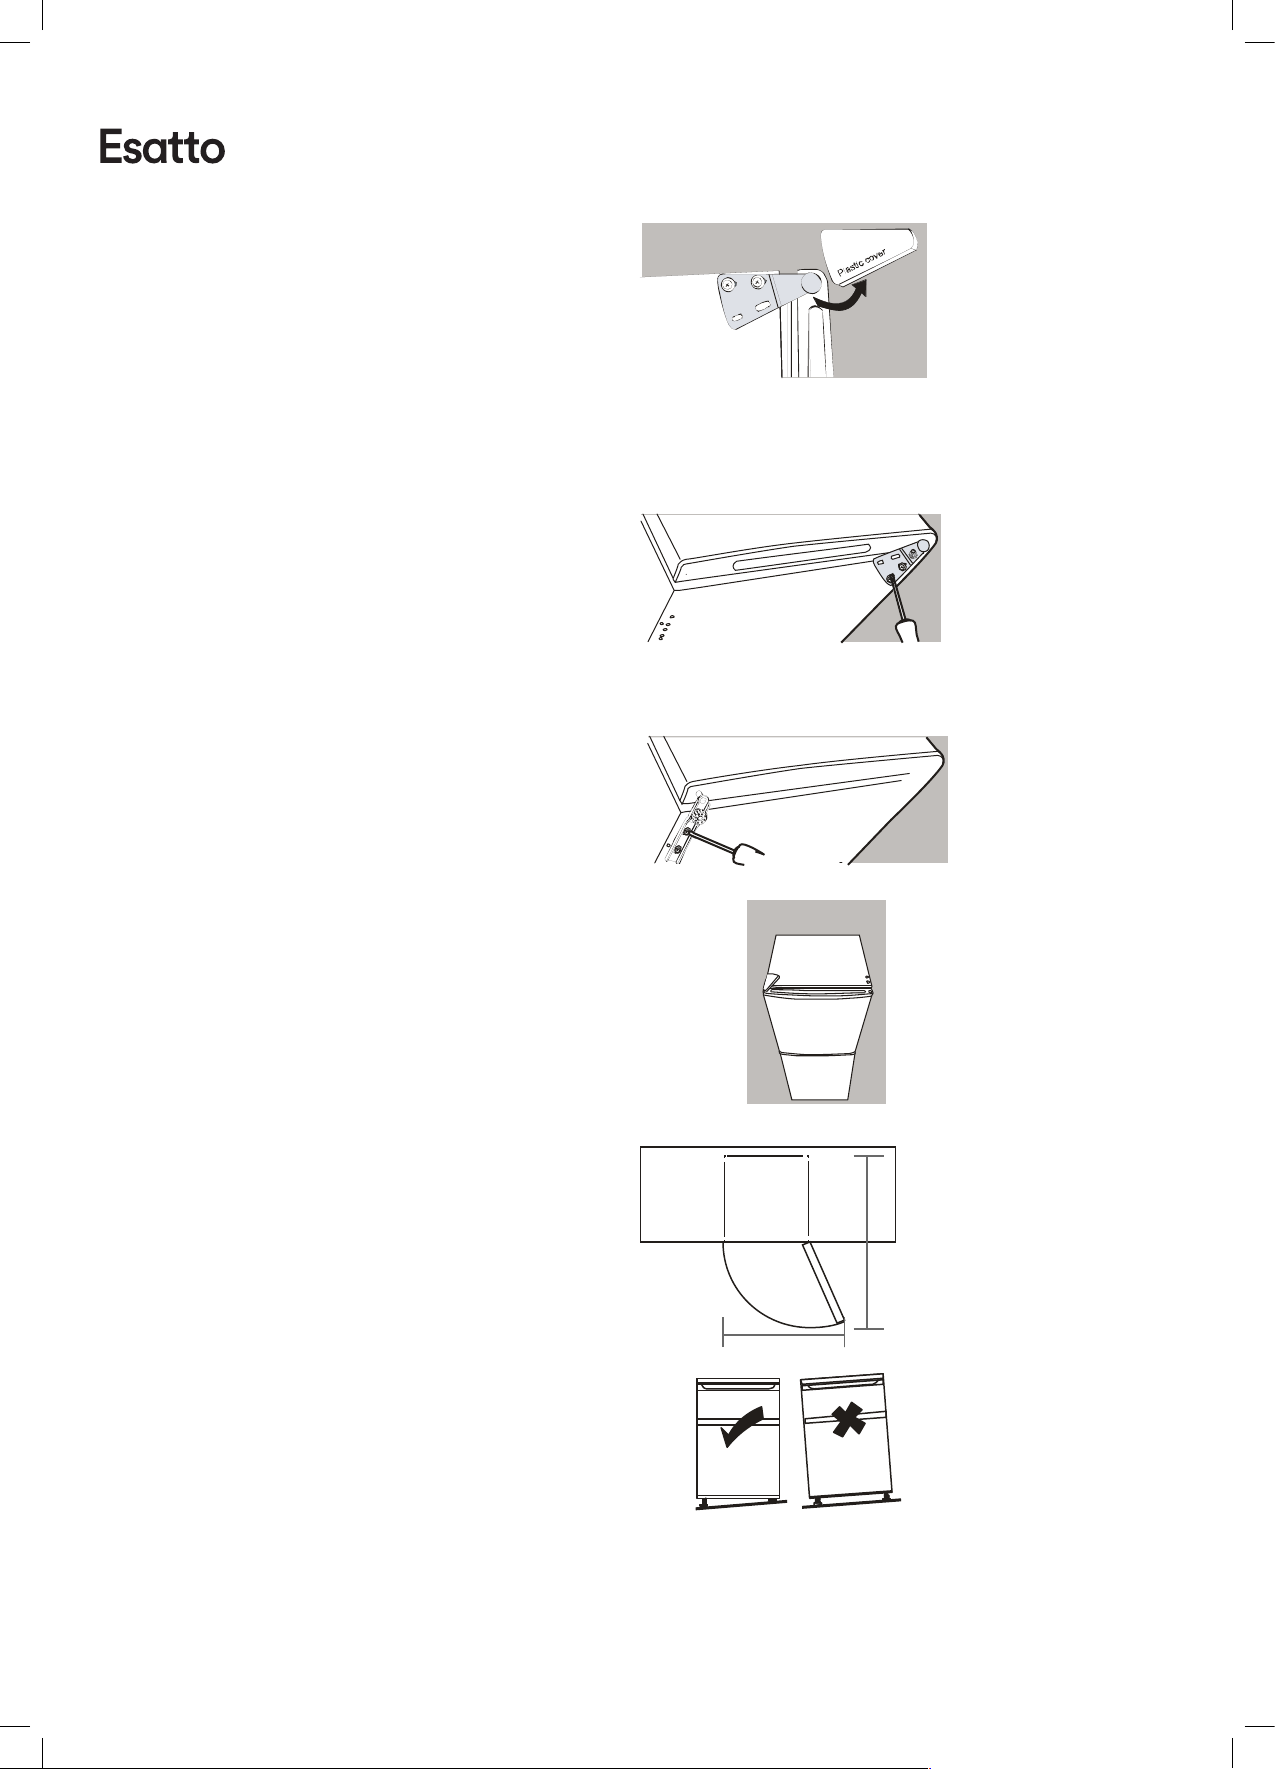
2.2 ReversingtheDoorSwing
ToolsRequired:Phillipsstylescrewdriver/Flatblatedscrewdriver/Hexagonalspanner
◆ If you want to have the door swing reversed, we recommend that you contact a
qualifiedtechnician.Youshouldonlytrytoreversethedooryourselfifyoubelievethat
youarequalifiedtodoso.
◆ Ensuretheunitisunpluggedandempty.
◆ Adjustthetwolevellingfeettotheirhighestposition.
◆ To takethedoorofitisnecessarytotilttheunitbackwards.Youshouldresttheuniton
somethingsolidsothatitwillnotslipduringthedoorreversingprocess.
◆ Allpartsremovedmustbesavedtodothereinstallationofthedoor.
◆ Donotlaytheunitfatasthismaydamagethecoolantsystem.
◆ Werecommendthat2peoplehandletheunitduringassembly.
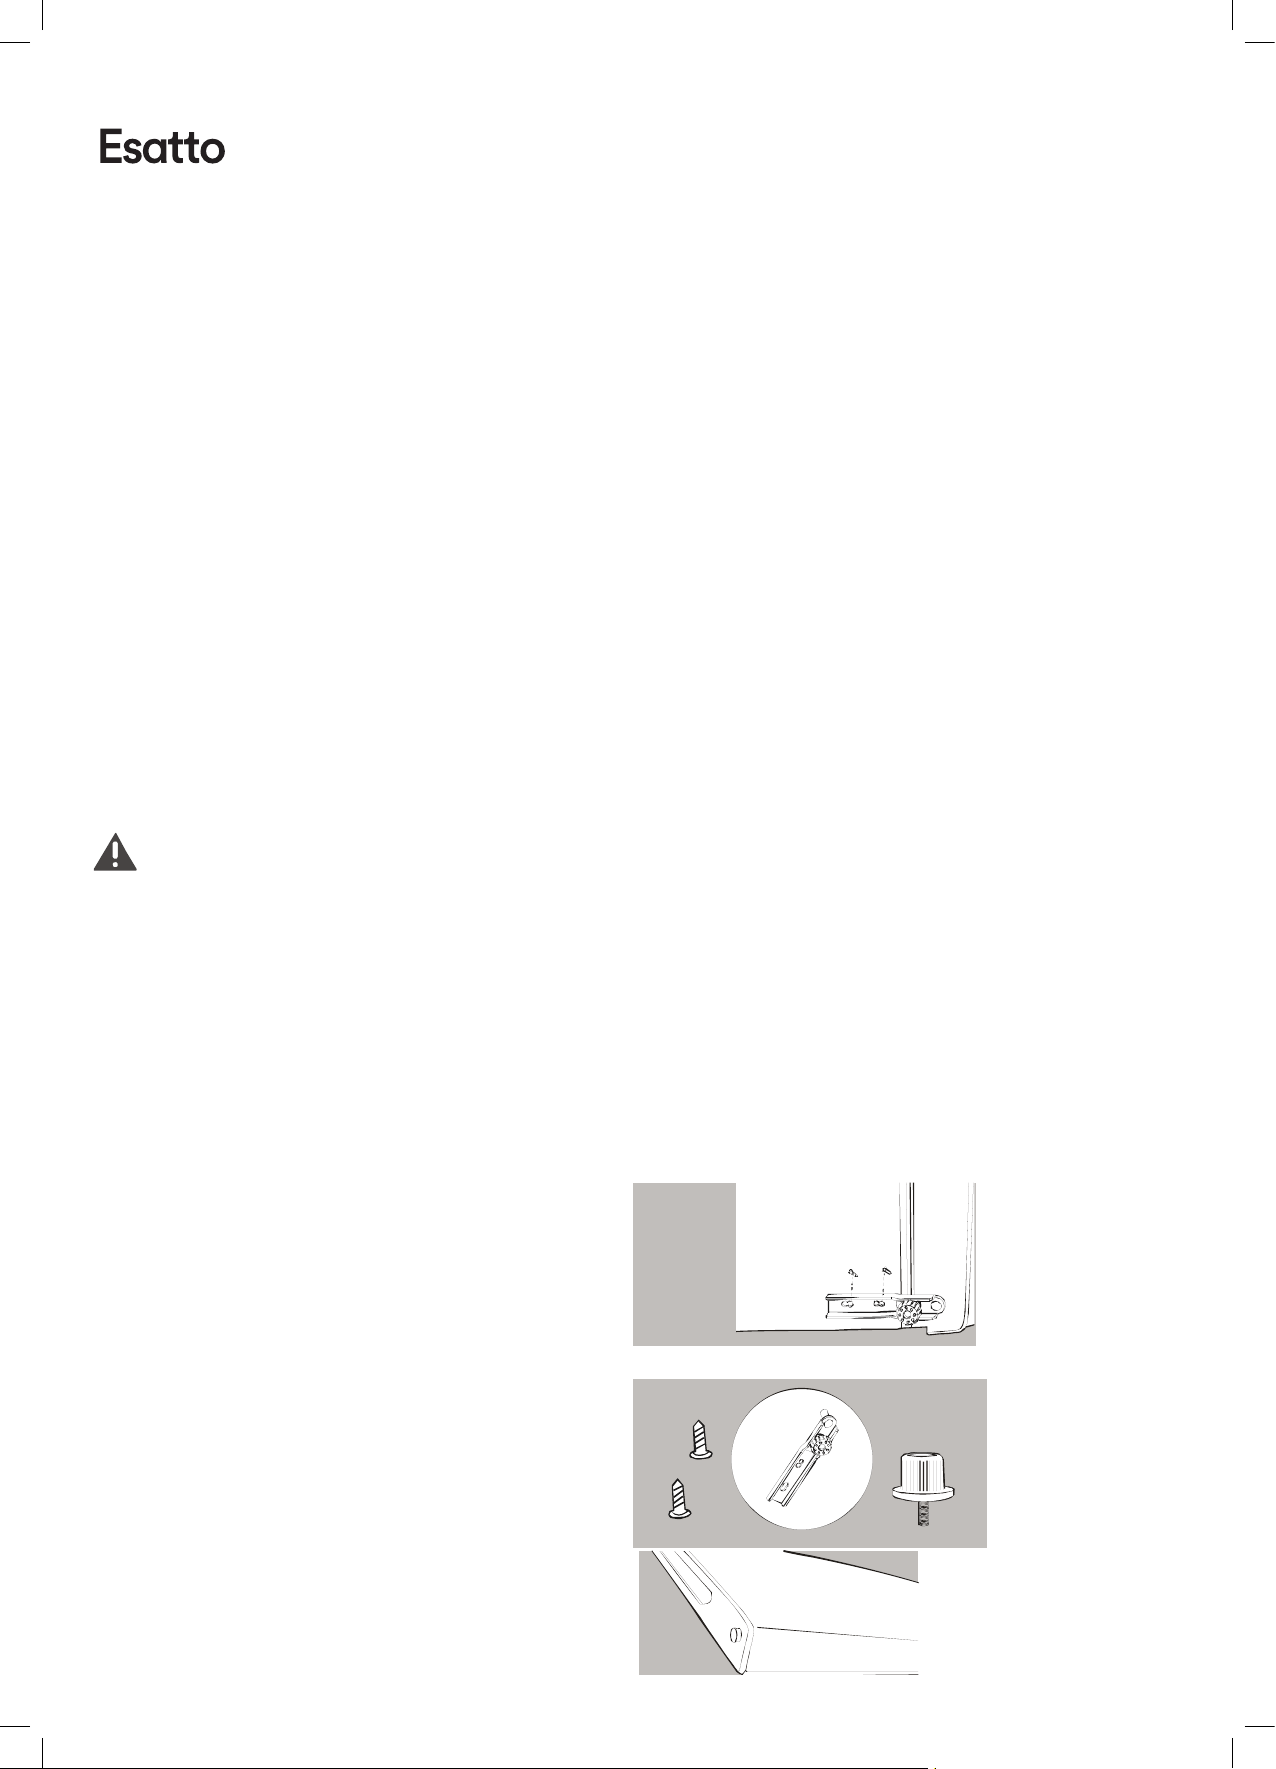
1) Startbyremovingthebracketfromthebottomofthe
refrigerator.Unscrewthetwoscrewsfromthebottom
bracket.Removethefootfromoppositeside.
2) Self-TappingScrews/BottomBracket/Foot
3) Slidethedoordown,awayfromthehingepinlocated
onthetopofthedoor.
1. Safety Warnings
Page:
5
User Manual:
2
2.1 Location
Whenselectingapositionforyourunityoushouldmakesurethefloorisflatandfirm,andthe
roomiswellventilated.Avoidlocatingyourunitnearaheatsource,e.g.cooker,boilerorradiator.
Alsoavoiddirectsunlightas it mayincrease the electricalconsumption. Extreme cold ambient
temperaturesmayalsocausetheunitnottoperformproperly.Thisunitisnotdesignedforusein
agarageoroutdoorinstallation.Donotdrapetheunitwithanycovering.
Wheninstallingtheunit,ensurethat20cmoffreespaceisleftatbothsides,15cmattherear
and20cmatthetopoftheunit.Thiswillallowcoldairtocirculatearoundthewinecoolerand
improve theefficiencyofthecoolingprocess.The doorcanbeopenedtotherightortheleft,
dependingonwhatbettersuitsthelocation.Pleaseensurethereisadequatespaceforthedoor
tofullyopen.
2.2 ReversingtheDoorSwing
ToolsRequired:Phillipsstylescrewdriver/Flatblatedscrewdriver/Hexagonalspanner
◆ If you want to have the door swing reversed, we recommend that you contact a
qualifiedtechnician.Youshouldonlytrytoreversethedooryourselfifyoubelievethat
youarequalifiedtodoso.
◆ Ensuretheunitisunpluggedandempty.
◆ Adjustthetwolevellingfeettotheirhighestposition.
◆ To takethedoorofitisnecessarytotilttheunitbackwards.Youshouldresttheuniton
somethingsolidsothatitwillnotslipduringthedoorreversingprocess.
◆ Allpartsremovedmustbesavedtodothereinstallationofthedoor.
◆ Donotlaytheunitfatasthismaydamagethecoolantsystem.
◆ Werecommendthat2peoplehandletheunitduringassembly.
1) Startbyremovingthebracketfromthebottomofthe
refrigerator.Unscrewthetwoscrewsfromthebottom
bracket.Removethefootfromoppositeside.
2) Self-TappingScrews/BottomBracket/Foot
3) Slidethedoordown,awayfromthehingepinlocated
onthetopofthedoor.
2. Installation Instructions
Page:
6
User Manual:
3
4) Removetheplasticcoverfromdoorhingefirst.Then
unscrewthetwoscrewsfromtopbracketandreplace
ontheotherside.
5) Toinstallthebracketontheleftsideoftheappliance,
screwthetwoscrewsthroughthebracketandintothe
topoftheappliance.Slidethedoorbackontothetop
hinge.Ensurethedoorisfaceup.Replacetheplastic
coveronthetopbracketbypressingdownuntilit
clicksintoposition.
6) Screwthebottomhingeintoplaceonthenewside.
Replacethefootontheotherside.
7) Checkthatthedoorisalignedhorizontallyandvertically
andthatthesealsareclosedonallsidesbeforefinally
tighteningthebottomhinge.Readjustthelevelingfeet.
2.3 DoorSpaceRequirements
Theunit'sdoormustbeabletoopenfullyasshown.
W×D≥800mm×780mm
2.4 LevellingtheUnit
Todothisadjustthetwolevellingfeetatthefrontoftheunit.
Iftheunitisnotlevel,thedoorandmagneticsealalignments
willnotbecoveredproperly.
W
D
4
2.5 CleaningBeforeUse
Wipe the inside of the unit with a weak solution of bicarbonate soda. Then rinse with warm
waterusinga'Wrung-out'spongeorcloth.Washtheshelvesandsaladbininwarmsoapywater
anddrycompletelybeforereplacingintheunit.Cleantheexterioroftheunitwithadampcloth.
IfyourequiremoreinformationrefertotheCleaningsection.
2.6 BeforeUsingYourUnit
Beforeplacinganyfoodinyourunit,turnitonandwaitfor24hours,tomakesureitisworking
properlyandtoallowittimetofalltothecorrecttemperature.Yourunitshouldnotbeoverfilled.
◆ BeforePluggingin
Youmustcheckthatyouhaveasocketwhichiscompatiblewiththeplugsupplied
withtheunit.
◆ BeforeTurningOn!
Donotturnonuntiltwohoursaftermovingtheunit.Thecoolantfluidneedstimeto
settle.
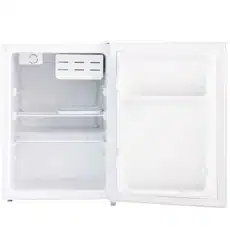
2.7 InteriorAccessories
Variousglass or plastic storage shelvesareincluded with yourappliance - different
modelshavedifferentcombinations.
Youshouldalwaysslideoneofthefullsizeglassstorageshelvesintothelowestsetof
guides,abovethefruitandvegetablecontainers,andkeepitinthisposition.Todo
this,pullthestorageshelfforward untilitcanbeswivelledupwardsordownwards
andremoved.
Pleasedothesameinreversetoinserttheshelfatadifferentheight.
Inordertomakethemostofthevolumeofthefreshfoodstoragecompartmentand
frozen-foodstoragecompartment,theusercanremoveoneormoreshelves,drawers,out
oftheappliance,accordingtoyourdailyuse.
3. PRODUCTOVERVIEW

Page:
7
User Manual:
4
2.5 CleaningBeforeUse
Wipe the inside of the unit with a weak solution of bicarbonate soda. Then rinse with warm
waterusinga'Wrung-out'spongeorcloth.Washtheshelvesandsaladbininwarmsoapywater
anddrycompletelybeforereplacingintheunit.Cleantheexterioroftheunitwithadampcloth.
IfyourequiremoreinformationrefertotheCleaningsection.
2.6 BeforeUsingYourUnit
Beforeplacinganyfoodinyourunit,turnitonandwaitfor24hours,tomakesureitisworking
properlyandtoallowittimetofalltothecorrecttemperature.Yourunitshouldnotbeoverfilled.
◆ BeforePluggingin
Youmustcheckthatyouhaveasocketwhichiscompatiblewiththeplugsupplied
withtheunit.
◆ BeforeTurningOn!
Donotturnonuntiltwohoursaftermovingtheunit.Thecoolantfluidneedstimeto
settle.
2.7 InteriorAccessories
Variousglass or plastic storage shelvesareincluded with yourappliance - different
modelshavedifferentcombinations.
Youshouldalwaysslideoneofthefullsizeglassstorageshelvesintothelowestsetof
guides,abovethefruitandvegetablecontainers,andkeepitinthisposition.Todo
this,pullthestorageshelfforward untilitcanbeswivelledupwardsordownwards
andremoved.
Pleasedothesameinreversetoinserttheshelfatadifferentheight.
Inordertomakethemostofthevolumeofthefreshfoodstoragecompartmentand
frozen-foodstoragecompartment,theusercanremoveoneormoreshelves,drawers,out
oftheappliance,accordingtoyourdailyuse.
3. PRODUCTOVERVIEW
Page:
8
User Manual:
5
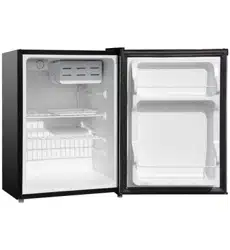
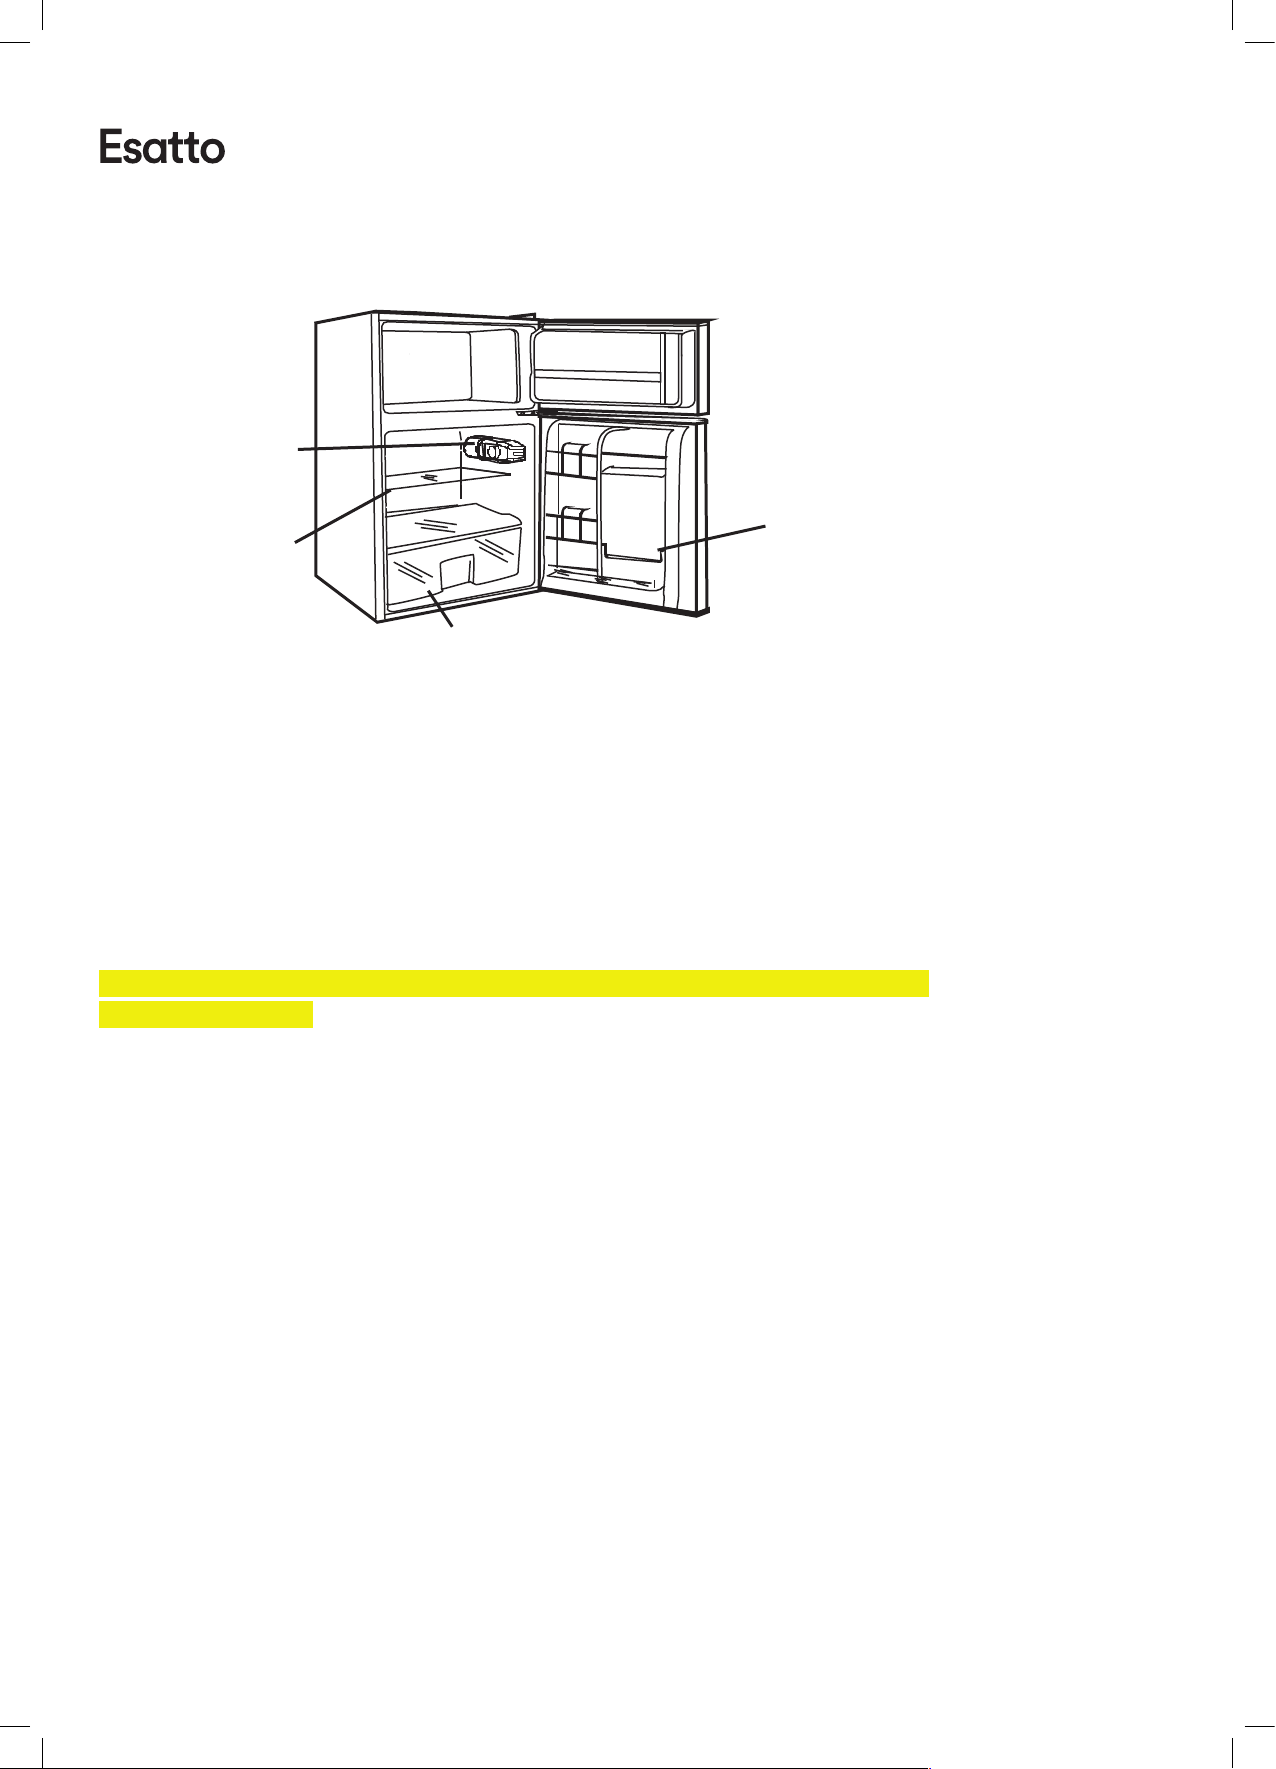
emperat
U
re control
Glass
ottle rack
Vegetable and fruit crisper
T
B
shelves
*Allimagesinthisinstructionmanualareforindicationonly;pleaserefertoyourindividualunitfordetails.
4. OPERATION
4.1 AdjustingtheTemperature
Whenusingtherefrigerator-freezerforthefirsttimeorafterdefrosting,
turnthetemperaturecontroltoset“MAX”foratleasttwohoursbefore
introducingthefoodtobestored.Allfrozenfoodproductsyoupurchase
shouldbeplacedinthefreezercompartmentassoonaspossibletoavoid
thefrozenfoodfromdefrosting.
In Winter or low temperature surrounded condition, please switch the temperature controller to
large settings, like:MAX.
Storagerecommendationprintedonthepackagingoffrozenfoodbythemanufacturersshould
bealwaysbefollowed.
Becarefulthatthedrawermustn’tmangletherefrigerationpipeline.
4.2 NoiseInsidetheUnit!
Youmaynoticethatyourunitmakessomeunusualnoises.Mostoftheseareperfectlynormal,
butyoushouldbeawareofthem!
Thesenoisesarecausedbythecirculationoftherefrigerantliquidinthecoolingsystem.Ithas
becomemorepronouncedsincetheintroductionofCFCfreegases.Thisisnotafaultandwillnot
affect the performance of your unit. This is the compressor motor working, as it pumps the
refrigerantaroundthesystem.
4.3 TipsforKeepingFoodintheUnit
◆ Cooked meats/fishes should always be stored on a shelf above raw meats/fishes to avoid
bacterialtransfer.Keeprawmeats/fishesinacontainerwhichislargeenoughtocollectjuices
andcoveritproperly.Placethecontaineronthelowestshelf.
◆ Leavespacearoundyourfood,toallowairtocirculateinsidetheunit.Ensureallpartsofthe
unitarekeptcool.
◆ To preventtransfer of favoursand dryingout,packor coverthefoodseparately. Fruitand
vegetablesdonotneedtobewrapped.
◆ Alwaysletpre-cookedfoodcooldownbeforeyouputintheunit.Thiswillhelptomaintain
theinternaltemperatureoftheunit.
6
◆ To prevent cold air escapingfromthe unit, tryto limit thenumber of times youopen the
door.Werecommendthatyouonlyopenthedoorwhenyouneedtoputfoodinortakefood
out.
5. CLEANING
5.1 Defrosting
Frostmayaccumulateontheinnerrearsurfaceoftheappliancewhichwillautomaticallydefrost
duringtheofcycleofthecompressor.
Waterischannelledviathedrainholetothecollectiontrayabovethecompressorwhereitwill
evaporate.
Please ensure the drain hole is checked and cleaned on a regular basis so water can exit the
storagecompartment.
5.2 CleaningtheInteriorandtheExterioroftheUnit
◆ Remove all the shelvesand the salad bin. To removethe salad binfirst remove the lower
doorshelf.
◆ Wipe the inside of the unit with a weak solutionof bicarbonate soda and then rinsewith
warmwaterusinga“wrung-out” spongeorcloth.Wipecompletelydrybeforereplacingthe
shelvesandsaladbin.
◆ Useadampclothtocleantheexterior,andthenwipewithastandardfurniturepolish.Make
surethatthedoorisclosedtoavoidthepolishgettingonthemagneticdoorsealorinside
theunit.
◆ The grille of the condenser at the back of the unit and the adjacent components can be
vacuumedusingasoftbrushattachment.
5.3 CleaningTips
Condensation may appear on the outside of the unit. This may be due to a change in room
temperature.Wipeofanymoistureresidue.Iftheproblemcontinues,pleasecontactaqualified
technicianforassistance.
6. MAINTENANCE
6.1 ChangingtheInternalLight
Lampreplacementbyprofessionals.
6.2 CareWhenHandling/MovingYourUnit
Holdtheunitarounditssidesorbasewhenmovingit.Undernocircumstancesshoulditbelifted
byholdingtheedgesofthetopsurface.
6.3 Servicing
Theunitshouldbeservicedbyanauthorized engineerand onlygenuinesparepartsshouldbe
used.Undernocircumstancesshouldyouattempttorepairtheunityourself.Repairscarriedout
by inexperienced persons may cause injury or serious malfunction. Contact a qualitatively
3. Product Overview
4. Operation

Page:
9
User Manual:
6
◆ To prevent cold air escapingfromthe unit, try to limit thenumber of times youopen the
door.Werecommendthatyouonlyopenthedoorwhenyouneedtoputfoodinortakefood
out.
5. CLEANING
5.1 Defrosting
Frostmayaccumulateontheinnerrearsurfaceoftheappliancewhichwillautomaticallydefrost
duringtheofcycleofthecompressor.
Waterischannelledviathedrainholetothecollectiontrayabovethecompressorwhereitwill
evaporate.
Please ensure the drain hole is checked and cleaned on a regular basis so water can exit the
storagecompartment.
5.2 CleaningtheInteriorandtheExterioroftheUnit
◆ Remove all the shelvesand the salad bin. To removethe salad bin first remove the lower
doorshelf.
◆ Wipe the inside of the unit with a weak solutionof bicarbonate soda and then rinsewith
warmwaterusinga“wrung-out” spongeorcloth.Wipecompletelydrybeforereplacingthe
shelvesandsaladbin.
◆ Useadampclothtocleantheexterior,andthenwipewithastandardfurniturepolish.Make
surethatthedoorisclosedtoavoidthepolishgettingonthemagneticdoorsealorinside
theunit.
◆ The grille of the condenser at the back of the unit and the adjacent components can be
vacuumedusingasoftbrushattachment.
5.3 CleaningTips
Condensation may appear on the outside of the unit. This may be due to a change in room
temperature.Wipeofanymoistureresidue.Iftheproblemcontinues,pleasecontactaqualified
technicianforassistance.
6. MAINTENANCE
6.1 ChangingtheInternalLight
Lampreplacementbyprofessionals.
6.2 CareWhenHandling/MovingYourUnit
Holdtheunitarounditssidesorbasewhenmovingit.Undernocircumstancesshoulditbelifted
byholdingtheedgesofthetopsurface.
6.3 Servicing
Theunitshouldbeservicedbyanauthorized engineerand onlygenuinesparepartsshouldbe
used.Undernocircumstancesshouldyouattempttorepairtheunityourself.Repairscarriedout
by inexperienced persons may cause injury or serious malfunction. Contact a qualitatively
5. Cleaning
6. Maintenance
Page:
10
User Manual:
7
technician.
6.4 SwitchingOfforLongPeriodsofTime
Whentheunitisnotinuseforalongperiodoftime,disconnectitfromthemainssupply,empty
allfoodandcleantheappliance,leavingthedoorajartopreventunpleasantsmells.
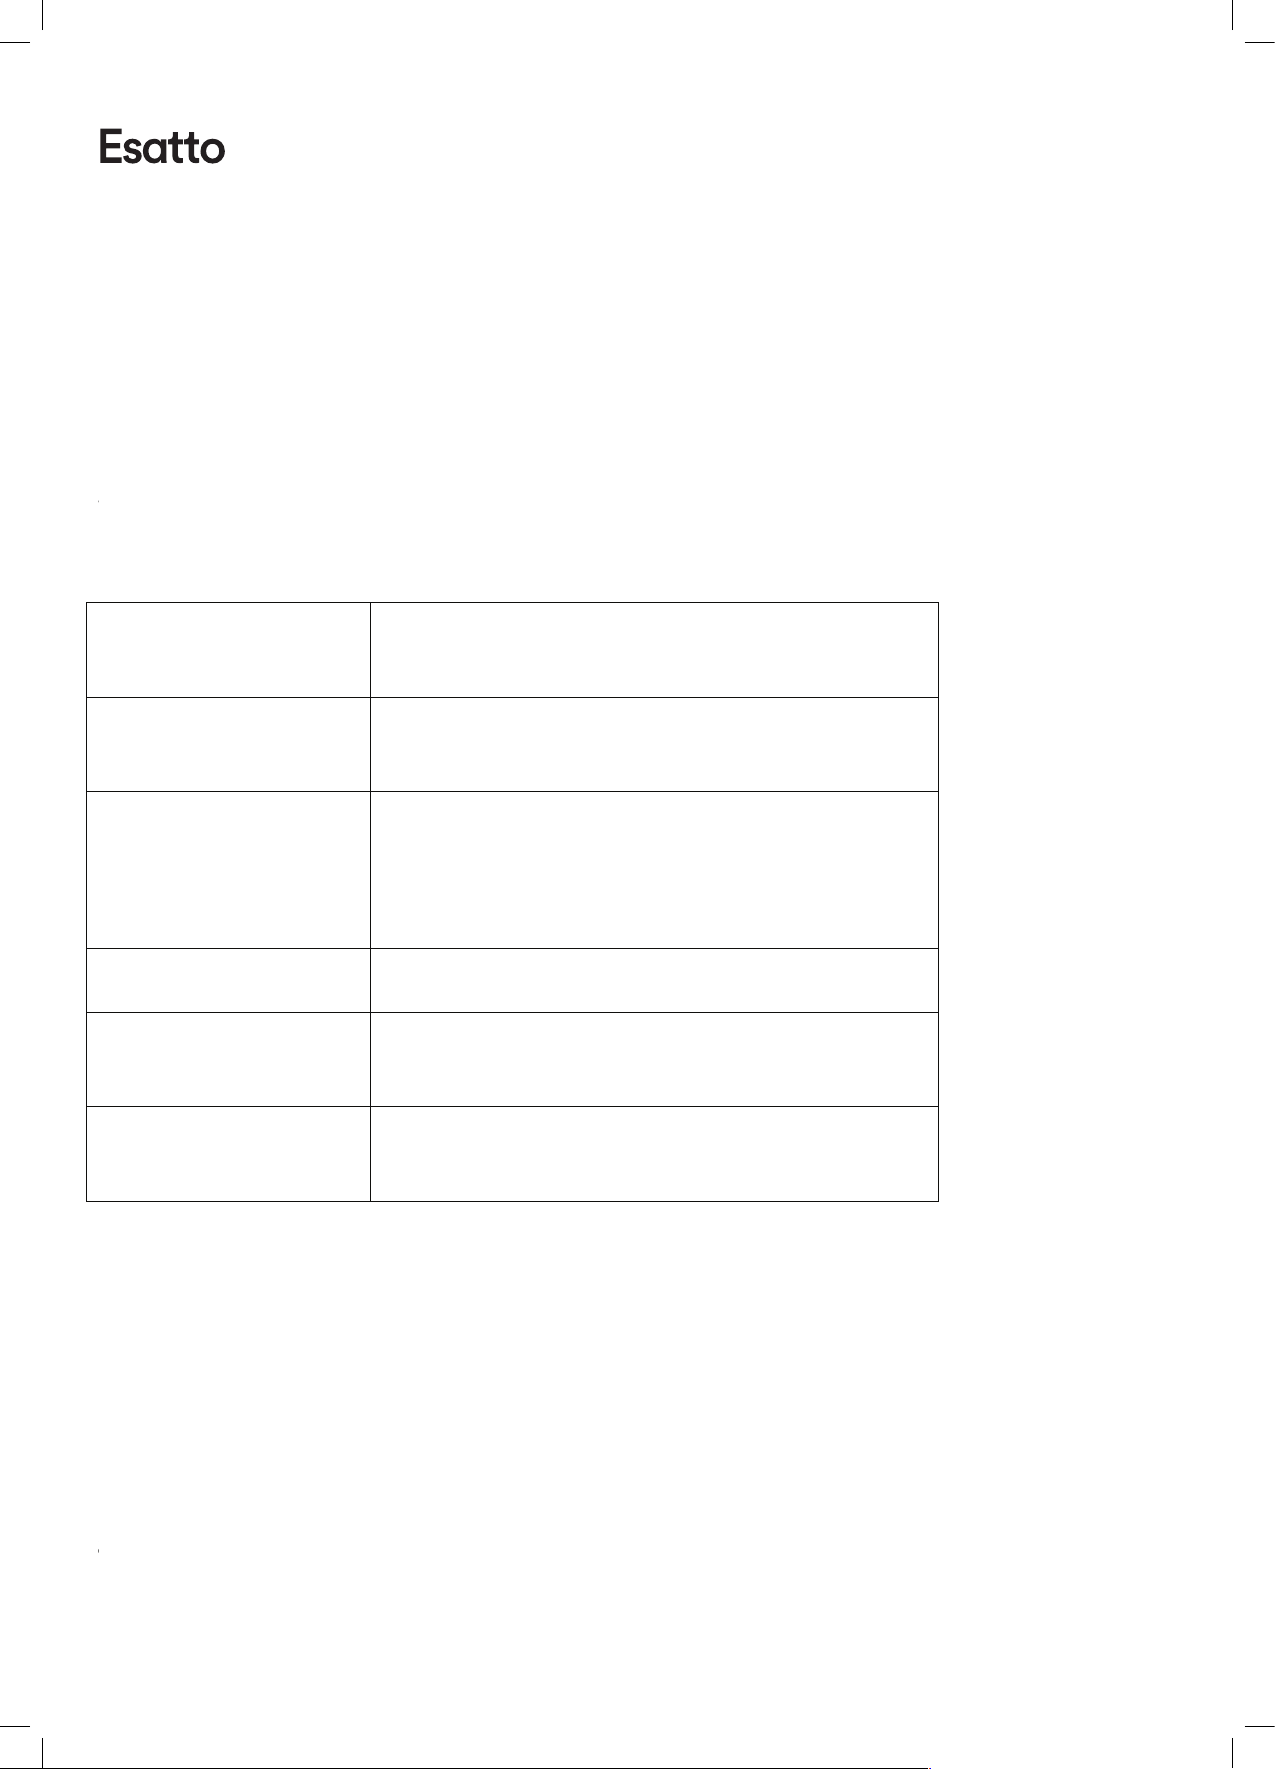
7. Troubleshooting
Thefollowingsimpleissuescanbehandledbytheuser.Pleasecalltheafter-saleservice
departmentiftheissuesarenotsettled.
Inoperation
Whetherthefreezerispluggedandconnectedtopower;
Lowvoltage;
Failurepowerortrippingcircuit
Odor
Odorousfoodsshouldcloselywrapped;
Whetherfoodsarerotten;
Whethertheinteriorshallbecleaned.
Long-termoperationof
compressor
Itisnormalthatrefrigeratoroperatesforlongertimein
summerwhentheambienttemperatureishigher;
Donotputtoomuchfoodinthefreezeratonetime;
Donotputfoodsuntiltheyarecooled;
Frequentopeningofrefrigeratordoor.
Illuminatinglightdoesnot
shine
Whethertherefrigeratorisconnectedtopower,
whethertheilluminatinglightisdamaged.
Therefrigeratordoorcannot
beproperlyclosed.
Thefreezerdoorisstuckbyfoodpackages;
Toomuchfood;
Tiltrefrigerator.
Loudnoises
Whetherthefoodisleveled,whethertherefrigeratoris
balanced;
Whethertherefrigeratorpartsareproperlyplaced.
7.1 Warmtips:
◆Therefrigeratorenclosuremayemitheatduringoperationspeciallyinsummer,thisiscaused
bytheradiationofthecondenser,anditisanormalphenomenon.
◆Condensation:condensationphenomenonwillbedetectedontheexteriorsurfaceanddoor
sealsofthefreezerwhentheambienthumidityislarge,thisisanormalphenomenon,andthe
condensationcanbewipedawaywithadrytowel.
◆Buzz: Buzz will be generated by running compressor specially when starting up or shutting
down.
8. TIPSFORENERGYSAVING
Trynottoopenthedoortoooften,especiallywhentheweatheriswetandhot.Onceyouopen
thedoor,closeitassoonaspossible.
Every now and then check if the appliance is sufficiently ventilated (adequate air circulation
8
behindtheappliance).
Innormaltemperatureconditions,pleasearrangethethermostatatthemiddlesetting.
Beforeloadingtheappliancewithpackagesoffreshfood,makesuretheyarecooledtoambient
temperature.
Iceandfrostlayerincreaseenergyconsumption,socleantheapplianceassoonasthelayeris3-5
mmthick.
◆ Theapplianceshouldbelocatedinthecoolestareaoftheroom,awayfromheatproducing
appliancesorheatingducts,andoutofthedirectsunlight.
◆ Let hot foods cool toroom temperaturebeforeplacingin the appliance. Overloading the
applianceforcesthecompressortorunlonger. Foodsthatfreezetooslowlymaylosequality,or
spoil.
◆ Besuretowrapfoodsproperly,andwipecontainersdrybeforeplacingthemintheappliance.
Thiscutsdownonfrostbuild-upinsidetheappliance.
◆ Appliancestoragebinshouldnotbelinedwithaluminumfoil,waxpaper,orpapertoweling.
Linersinterferewithcoldaircirculation,makingtheappliancelessefficient.
◆ Organizeandlabelfoodtoreducedooropeningsandextendedsearches. Removeasmany
itemsasneededatonetime,andclosethedoorassoonaspossible.
9. DISPOSAL
Old units still have some residual value. An environmentally friendly method of disposal will
ensurethatvaluablerawmaterialscanberecoveredandusedagain.Therefrigerantusedinyour
unitandinsulationmaterialsrequirespecialdisposalprocedures.Ensurethatnoneofthepipes
onthebackoftheunitaredamagedpriortodisposal.Uptodateinformationconcerningoptions
ofdisposingofyouroldunitandpackagingfromthenewonecanbeobtainedfromyourlocal
counciloffice.
When disposing of an old unit break of any old locks or latches and remove the door as a
safeguard.
CorrectDisposalofthisproduct
CorrectDisposalofthisproduct
Thismarkingindicatesthatthisproductshouldnotbedisposedwithother
householdwastesthroughouttheEU.Topreventpossibleharmtotheenvironment
orhumanhealthfromuncontrolledwastedisposal,recycleitresponsiblyto
promotethesustainablereuseofmaterialresources.Toreturnyouruseddevice,
pleaseusethereturnandcollectionsystemsorcontacttheretailerwherethe
productwaspurchased.Theycantakethisproductforenvironmentalsaferecycling.
Formoreinformation, please contact the local authority or yourretailer whereyoupurchased
theproduct.
7. Troubleshooting
8. Tips for Energy Saving

Page:
11
User Manual:
8
behindtheappliance).
Innormaltemperatureconditions,pleasearrangethethermostatatthemiddlesetting.
Beforeloadingtheappliancewithpackagesoffreshfood,makesuretheyarecooledtoambient
temperature.
Iceandfrostlayerincreaseenergyconsumption,socleantheapplianceassoonasthelayeris3-5
mmthick.
◆ Theapplianceshouldbelocatedinthecoolestareaoftheroom,awayfromheatproducing
appliancesorheatingducts,andoutofthedirectsunlight.
◆ Let hot foods cool toroom temperaturebeforeplacingin the appliance. Overloading the
applianceforcesthecompressortorunlonger. Foodsthatfreezetooslowlymaylosequality,or
spoil.
◆ Besuretowrapfoodsproperly,andwipecontainersdrybeforeplacingthemintheappliance.
Thiscutsdownonfrostbuild-upinsidetheappliance.
◆ Appliancestoragebinshouldnotbelinedwithaluminumfoil,waxpaper,orpapertoweling.
Linersinterferewithcoldaircirculation,makingtheappliancelessefficient.
◆ Organizeandlabelfoodtoreducedooropeningsandextendedsearches. Removeasmany
itemsasneededatonetime,andclosethedoorassoonaspossible.
9. DISPOSAL
Old units still have some residual value. An environmentally friendly method of disposal will
ensurethatvaluablerawmaterialscanberecoveredandusedagain.Therefrigerantusedinyour
unitandinsulationmaterialsrequirespecialdisposalprocedures.Ensurethatnoneofthepipes
onthebackoftheunitaredamagedpriortodisposal.Uptodateinformationconcerningoptions
ofdisposingofyouroldunitandpackagingfromthenewonecanbeobtainedfromyourlocal
counciloffice.
When disposing of an old unit break of any old locks or latches and remove the door as a
safeguard.
CorrectDisposalofthisproduct
CorrectDisposalofthisproduct
Thismarkingindicatesthatthisproductshouldnotbedisposedwithother
householdwastesthroughouttheEU.Topreventpossibleharmtotheenvironment
orhumanhealthfromuncontrolledwastedisposal,recycleitresponsiblyto
promotethesustainablereuseofmaterialresources.Toreturnyouruseddevice,
pleaseusethereturnandcollectionsystemsorcontacttheretailerwherethe
productwaspurchased.Theycantakethisproductforenvironmentalsaferecycling.
Formoreinformation, please contact the local authority or yourretailer whereyoupurchased
theproduct.
9. Disposal

Page:
12
User Manual:
This page is intentionally left blank

Page:
13
User Manual:
This page is intentionally left blank

Page:
14
User Manual:
Warranty
WARRANTY TERMS AND CONDITIONS
REFRIGERATION APPLIANCES
→ This document sets out the terms and conditions of the product warranties for Residentia
Group Appliances. It is an important document. Please keep it with your proof of
purchase documents in a safe place for future reference should you require service for
your Appliance.
1. In this warranty
(a) ‘ acceptable quality’ as referred to in clause 10 of this warranty has the same meaning
referred to in the ACL;
(b) ‘ ACL’ means Trade Practices Amendment (Australian Consumer Law) Act (No.2)
2010;
(c) ‘ Appliance’ means any Residentia Group product purchased by you accompanied by
this document;
(d) ‘ ASR’ means Residentia Group authorised service representative;
(e) ‘ Residentia Group’ means Residentia Group Pty Ltd of 20 Yaltara Avenue, Bundoora
Victoria 3083, ACN 600 546 656 in respect of Appliances purchased in Australia;
(f) ‘ major failure’ as referred to in clause 10 of this warranty has the same meaning
referred to in the ACL and includes a situation when an Appliance cannot be
repaired or it is uneconomic for Residentia Group, at its discretion, to repair an
Appliance during the Warranty Period;
(g) ‘Warranty Period’ means:
(i) where the Appliance is used for personal, domestic or household use
(i.e. normal single family use) as set out in the instruction manual, the
Appliance is warranted against manufacturing defects in Australia for 12
months following the date of original purchase of the Appliance;
(h) ‘ you’ means the purchaser of the Appliance not having purchased the Appliance for
re-sale, and ‘your’ has a corresponding meaning.
2. This warranty only applies to Appliances purchased and used in Australia and is in addition to (and does
not exclude, restrict, or modify in any way) any non-excludable statutory warranties in Australia.
3. During the Warranty Period Residentia Group or its ASR will, at no extra charge if your Appliance is
readily accessible for service, without special equipment and subject to these terms and conditions,
repair or replace any parts which it considers to be defective. Residentia Group or its ASR may use
remanufactured parts to repair your Appliance. You agree that any replaced Appliances or parts become
the property of Residentia Group. This warranty does not apply to light globes, batteries, lters or
similar perishable parts.
4. Parts and Appliances not supplied by Residentia Group are not covered by this warranty.
5. You will bear the cost of transportation, travel and delivery of the Appliance to and from Residentia
Group or its ASR. If you reside outside of the service area, you will bear the cost of:
(a) travel of an authorised representative;
(b) transportation and delivery of the Appliance to and from Residentia Group or its
ASR, in all instances, unless the Appliance is transported by Residentia Group or its
ASR, the Appliance is transported at the owner’s cost and risk while in transit to and
from Residentia Group or its ASR.
6. Proof of purchase is required before you can make a claim under this warranty.
Continued over page →

Page:
15
User Manual:
Warranty continued
7. You may not make a claim under this warranty unless the defect claimed is due to faulty or defective
parts or workmanship. Residentia Group is not liable in the following situations (which are not
exhaustive):
(a) the Appliance is damaged by:
(i) accident
(ii) misuse or abuse, including failure to properly maintain or service
(iii) normal wear and tear
(iv) power surges, electrical storm damage or incorrect power supply
(v) incomplete or improper installation
(vi) incorrect, improper or inappropriate operation
(vii) insect or vermin infestation
(viii) failure to comply with any additional instructions supplied with the
Appliance;
(b) the Appliance is modied without authority from Residentia Group in writing;
(c) the Appliance’s serial number or warranty seal has been removed or defaced;
(d) the Appliance was serviced or repaired by anyone other than Residentia Group, an
authorised repairer or ASR.
8. This warranty, the contract to which it relates and the relationship between you and Residentia Group
are governed by the law applicable where the Appliance was purchased.
9. To the extent permitted by law, Residentia Group excludes all warranties and liabilities (other than as
contained in this document) including liability for any loss or damage whether direct or indirect arising
from your purchase, use or non use of the Appliance.
10. For Appliances and services provided by Residentia Group in Australia, the Appliances come with a
guarantee by Residentia Group that cannot be excluded under the Australian Consumer Law. You are
entitled to a replacement or refund for a major failure and for compensation for any other reasonably
foreseeable loss or damage. You are also entitled to have the Appliance repaired or replaced if the
Appliance fails to be of acceptable quality and the failure does not amount to a major failure. The
benets to you given by this warranty are in addition to your other rights and remedies under a law in
relation to the Appliances or services to which the warranty relates.
11. At all times during the Warranty Period, Residentia Group shall, at its discretion, determine whether
repair, replacement or refund will apply if an Appliance has a valid warranty claim applicable to it.
12. To enquire about claiming under this warranty, please follow these steps:
(a) carefully check the operating instructions, user manual and the terms of this
warranty;
(b) have the model and serial number of the Appliance available;
(c) have the proof of purchase (e.g. an invoice) available;
(d) telephone the numbers shown below.
13. You accept that if you make a warranty claim, Residentia Group and its ASR may
exchange information in relation to you to enable Residentia Group to meet its
obligations under this warranty.
IMPORTANT Before calling for service, please ensure that the steps in point 12 have been followed.
Service: Please call 1300 11 HELP (4357)
Spare Parts: Please call 1300 11 SPARE (7727)
Our goods come with guarantees that cannot be excluded under the Australian Consumer Law. You are entitled
to a replacement or refund for a major failure and for compensation for any other reasonably foreseeable loss or
damage. You are also entitled to have the goods repaired or replaced if the goods fail to be of acceptable quality
and the failure does not amount to a major failure.
The Australian Consumer
Law requires the inclusion
of the following statement
with this warranty:

Model Code/s:
EBF91S