
GE Monogram
®
Use and Care Guide
Component
Cooktop System
Consumer Information
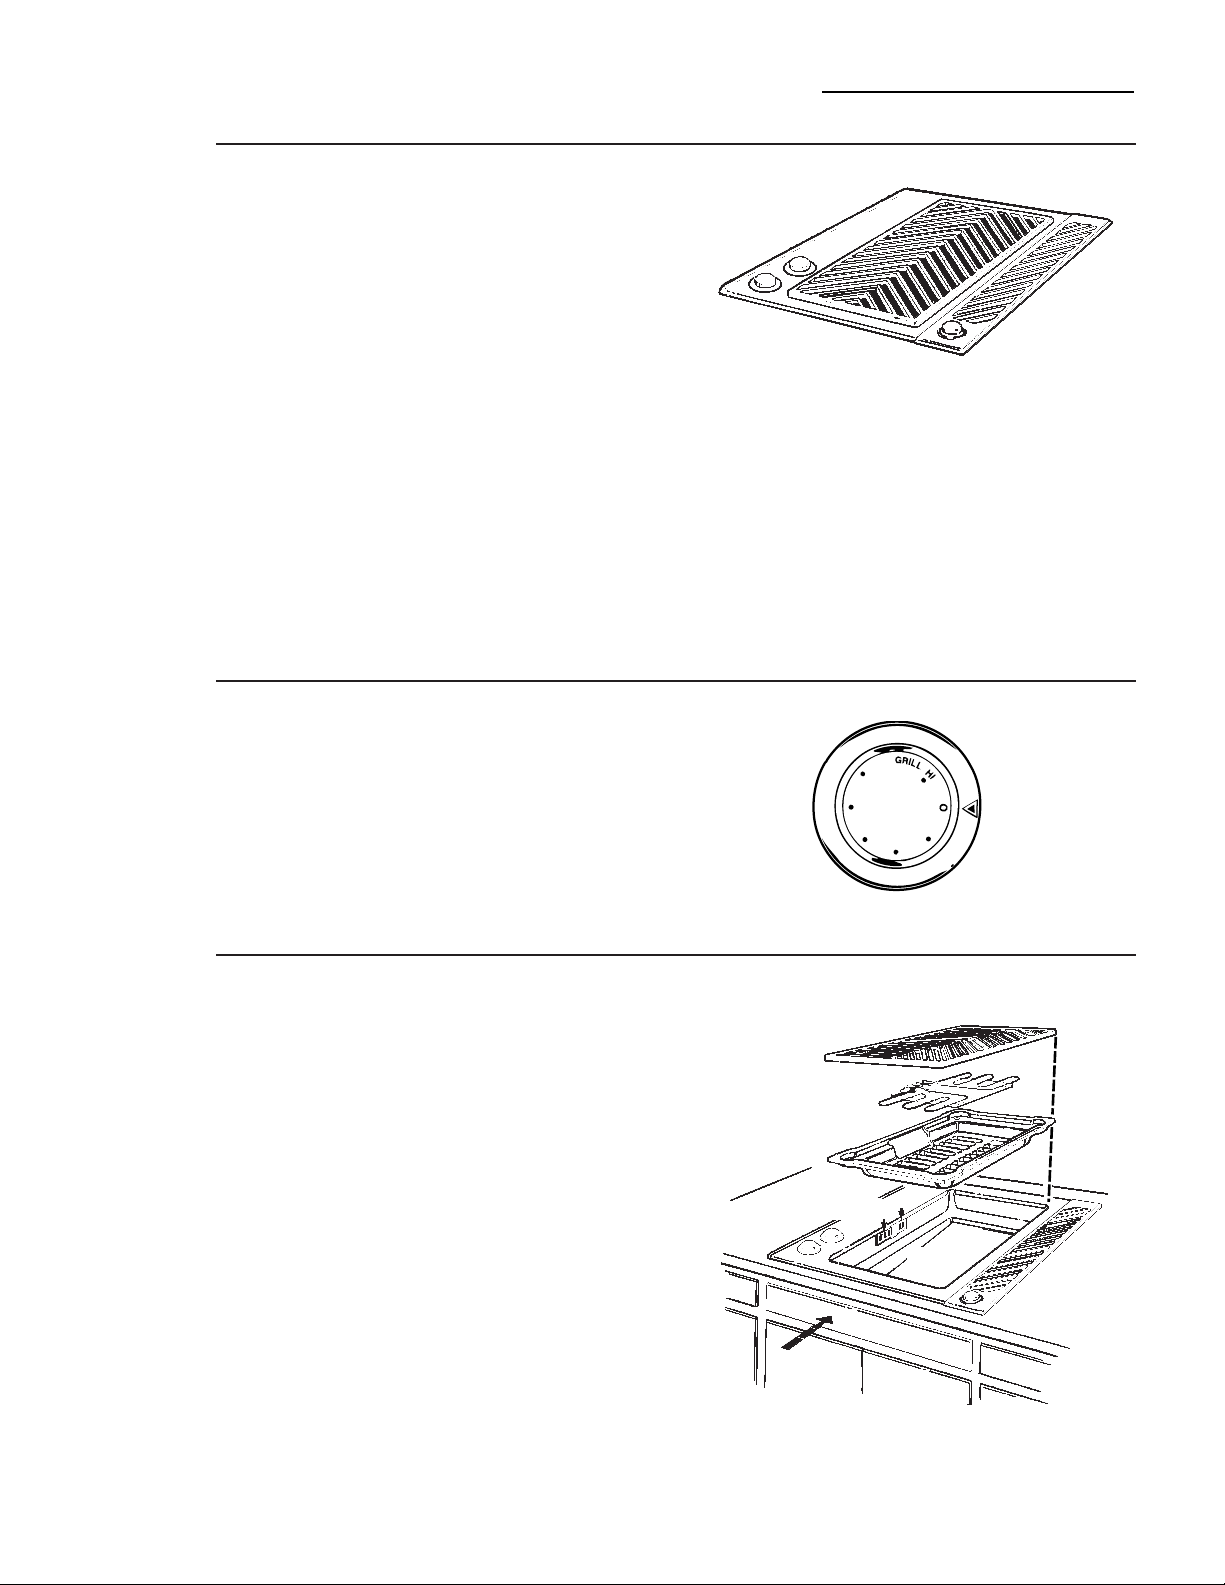
Component Cooktop System
2
Introduction
Your new Monogram cooktop makes an eloquent statement of style, convenience and kitchen
planning flexibility. Whether you chose it for its purity of design, assiduous attention to detail—
or for both of these reasons—you’ll find that your Monogram cooktop’s superior blend of form
and function will delight you for years to come.
Your Monogram cooktop was designed to provide the flexibility to blend in with your kitchen
cabinetry. Its sleek design can be beautifully integrated into the kitchen.
The information on the following pages will help you operate and maintain your cooktop properly.
If you have any other questions—please call the GE Answer Center® 800.626.2000.
Contents
Care and Cleaning
Brushed Stainless Steel Finish . . . . . . . . . . . . . . 23
Care of Components . . . . . . . . . . . . . . . . . . . 23–28
Control Panel and Knobs . . . . . . . . . . . . . . . . . . 23
Gas Burner Assembly . . . . . . . . . . . . . . . . . . . . . 26
Grease Jars . . . . . . . . . . . . . . . . . . . . . . . . . . . . . . . 27
Grill Component . . . . . . . . . . . . . . . . . . . . . . . . . 27
Halogen/Radiant Cooktop . . . . . . . . . . . . . 24, 25
Porcelain Enamel Grease Well . . . . . . . . . . . . . 27
Vent Filters . . . . . . . . . . . . . . . . . . . . . . . . . . . . . . 28
Vent Grille . . . . . . . . . . . . . . . . . . . . . . . . . . . . . . . 28
Vent System . . . . . . . . . . . . . . . . . . . . . . . . . . . . . . 28
Consumer Services
Important Phone Numbers . . . . . . . . . . . . . 33, 36
Model and Serial Number . . . . . . . . . . . . . . . 3, 36
Problem Solver . . . . . . . . . . . . . . . . . . . . . . . . 29–31
Product Registration . . . . . . . . . . . . . . . . . . . 35, 36
Safety Instructions . . . . . . . . . . . . . . . . . . . . . . . 4–7
Warranty . . . . . . . . . . . . . . . . . . . . . . . . . . . . . . . . 34
Using Your Cooktop
Gas Burner Component . . . . . . . . . . . . . . . . 15–17
Grill Component . . . . . . . . . . . . . . . . . . . . . . 18–21
Halogen/Radiant Component . . . . . . . . . 10–13
Home Canning Tips . . . . . . . . . . . . . . . . . . . . . . 14
Optional Components . . . . . . . . . . . . . . . . . . . 8, 9
Vent System . . . . . . . . . . . . . . . . . . . . . . . . . . . . . . 22
CANADIAN GAS ASSOCIATION
R
APPROVED
— Do not store or use gasoline or other
flammable vapors and liquids in the
vicinity of this or any other appliance.
— WHAT TO DO IF YOU SMELL GAS
•Do not try to light any appliance.
•Do not touch any electrical switch; do
not use any phone in your building.
•Immediately call your gas supplier from
a neighbor’s phone. Follow the gas
supplier’s instructions.
•If you cannot reach your gas supplier,
call the fire department.
— Installation and service must be
performed by a qualified installer, service
agency or the gas supplier.
WARNING: If the information in this
guide is not followed exactly, a fire or
explosion may result causing property
damage, personal injury or death.

3
Before
using your
cooktop
system
Read this guide carefully. It is intended to help
you operate and maintain your new cooktop
components properly.
Keep it handy for answers to your questions.
If you don’t understand something or need
more help, call:
GE Answer Center®
800.626.2000
24 hours a day, 7 days a week
Write
down the
model &
serial
numbers
You’ll find them on a label on the bottom of
each component.
These numbers are also on the Consumer
Product Ownership Registration Card
included in this guide.
Before sending in this card, please write these
numbers here:
Model Number
Serial Number
Use these numbers in any correspondence or
service calls concerning your cooktop.
If you
received
damaged
components
Immediately contact the dealer (or builder)
that sold you the cooktop system.
Save time
& money
Before you request service, check the Problem
Solver in the back of this guide.
It lists causes of minor operating problems that
you can correct yourself.
If you
need
service
To obtain service, see the Consumer Services
page in the back of this guide.
We’re proud of our service and want you to be
pleased. If for some reason you are not happy
with the service you receive, here are three
steps to follow for further help.
FIRST, contact the people who serviced your
appliance. Explain why you are not pleased. In
most cases, this will solve the problem.
NEXT, if you are still not pleased, write all the
details—including your phone number—to:
Manager, Consumer Relations
GE Appliances
Appliance Park
Louisville, KY 40225
FINALLY, if your problem is still not resolved,
write:
Major Appliance Consumer
Action Program
20 North Wacker Drive
Chicago, IL 60606

4
IMPORTANT SAFETY INSTRUCTIONS
IMPORTANT SAFETY NOTICE
• The California Safe Drinking Water and
Toxic Enforcement Act requires the
Governor of California to publish a list of
substances known to the state to cause
cancer, birth defects or other reproductive
harm, and requires businesses to warn
customers of potential exposure to such
substances.
• Gas appliances can cause minor exposure to
four of these substances, namely benzene,
carbon monoxide, formaldehyde and soot,
caused primarily by the incomplete
combustion of natural gas or LP fuels.
Properly adjusted burners, indicated by a
bluish rather than a yellow flame, will
minimize incomplete combustion. Exposure
to these substances can be minimized further
by venting with an open window or using a
ventilation fan or hood.
SAFETY PRECAUTIONS
When using the component cooktop system,
basic safety precautions should be followed,
including the following:
• Use this cooktop system only for its intended
use as described in this guide.
• If the cooktop is located near a window, do
not use long curtains, which could blow over
the gas burners or surface units, creating a
fire hazard.
• Have your cooktop installed and properly
grounded by a qualified installer in
accordance with the Installation Instructions.
Any adjustment and service should be
performed only by qualified gas and electric
appliance installers or service technicians.
• Have the installer show you the location of
the circuit breaker or fuse. Mark it for easy
reference.
• Have the installer show you the location of
the gas cut-off valve and how to shut it off if
necessary.
• Do not attempt to repair or replace any part
of the component cooktop system unless it is
specifically recommended in this guide. Any
adjustment and service should be performed
only by qualified electric and gas range
installers or service technicians.
• BEFORE PERFORMING ANY SERVICE,
DISCONNECT THE COOKTOP SYSTEM
POWER SUPPLY AT THE HOUSEHOLD
DISTRIBUTION PANEL BY REMOVING
THE FUSE OR SWITCHING OFF THE
CIRCUIT BREAKER.
• Do not leave children alone—children should
not be left alone or unattended in an area
where an appliance is in use. They should
never be allowed to sit or stand on any part of
the cooktop system.
• Avoid installing cabinets above the cooktop
system.
• To reduce the hazard caused by reaching into
cabinets over hot surface units, the open
flames of operating burners and hot
cookware, install a metal ventilation hood
over the cooktop components that projects
forward at least 5 inches beyond the front of
the cabinets.
• If cabinets are placed above the cooktop
components, allow a minimum clearance
of 30 inches between the cooking surface and
the bottom of unprotected cabinets.

5
SAFETY PRECAUTIONS
• CAUTION: ITEMS OF INTEREST TO
CHILDREN SHOULD NOT BE STORED IN
CABINETS INSTALLED ABOVE THE
COOKTOP SYSTEM—CHILDREN
CLIMBING ON THE COOKTOP SYSTEM
TO REACH ITEMS COULD BE
SERIOUSLY INJURED.
• Never wear loose-fitting or hanging garments
while using the cooktop system. Be careful
when reaching for items stored in cabinets
over the cooktop system. Flammable material
could be ignited if brought in contact with
hot surface units or gas burners and may
cause severe burns.
• Use only dry pot holders—moist or damp pot
holders on hot surfaces may result in burns
from steam. Do not let pot holders touch the
hot surface units or gas burners and grates.
Do not use a towel or other bulky cloth in
place of a pot holder.
• For your safety, never use any electric or gas
components of the cooktop system for
warming or heating the room.
• Do not store flammable materials in an oven
or near the cooktop system components.
• Do not store or use combustible materials,
gasoline or other flammable vapors and
liquids in the vicinity of this or any other gas
or electric appliance.
• Do not let cooking grease or other flammable
materials accumulate in or near the cooktop
system components.
• Never leave the kitchen while using the grill.
• Do not replace the grease collector jar with a
mayonnaise jar which could break when hot
grease drips into it. Replace with any wide
mouth canning jar.
• Do not use water on grease fires. Never pick
up a flaming pan. Turn the controls off.
Smother a flaming pan on a surface unit by
covering the pan completely with a well-
fitting lid, cookie sheet or flat tray. Use a
multi-purpose dry chemical or foam-type fire
extinguisher.
Flaming grease outside a pan can be put out
by covering it with baking soda or, if
available, by using a multi-purpose dry
chemical or foam-type fire extinguisher.
• Keep the grill drip pan and grease well clean
to reduce smoking and avoid grease fires.
• To control flame-ups, turn down the heat
setting to low, rather than off (O). This keeps
the downdraft vent blower on. Or, turn the
Variable Speed Vent blower to HI, then turn
the grill off (O).
Use a long-handled utensil to carefully
remove the food from the grill.
These steps should control the flame until it
eventually goes out. If it does not, cover the
entire grill module with a cookie sheet or the
lid from a large roasting pan. Use a pot
holder to remove this later because it will be
hot.
• Do not touch the surface units. These
surfaces may be hot enough to burn even
though they are dark in color. During and
after use, do not touch, or let clothing or
other flammable materials contact the
surface units, cooktop surfaces or areas
nearby the surface units. Allow sufficient time
for cooling of the cooking surfaces.
Potentially hot surfaces include the grill
grates and all components with electric
cooking elements or gas burners and grates.
• When cooking pork, follow the directions
exactly and always cook the meat to an
internal temperature of at least 170°F. This
assures that, in the remote possibility that
trichina may be present in the meat, it will be
killed and the meat will be safe to eat.

IMPORTANT SAFETY INSTRUCTIONS
6
USING YOUR COMPONENT COOKTOP
• Use proper pan size—this cooktop system has
components equipped with electric surface
units or gas burners. Select cookware having
flat bottoms large enough to cover the selected
surface unit or burner. The use of undersized
cookware will expose portions of the surface
units or gas burners to direct contact and may
result in ignition of clothing. Proper
relationship of cookware to the surface unit or
the burner will also improve efficiency.
• Only certain types of glass, glass/ceramic,
earthenware or other glazed containers are
suitable for cooktop service; others may break
because of the sudden change in temperature.
• Never leave the surface units or gas burners
unattended at high heat settings. Boilovers
cause smoking and greasy spillovers that may
catch fire.
• To minimize the possibility of burns, ignition
of flammable materials and spillage, the
handles of cookware should be turned without
extending over nearby surface units or burners.
• Always turn the electric surface unit or gas
burner controls off (O) before removing the
cookware.
• Watch foods being fried at high or medium-
high heat settings.
• When flaming foods are under the exhaust
hood, turn the hood fan off. The hood fan, if
operating, may spread the flame.
• Foods for frying should be as dry as possible.
Frost on frozen foods or moisture on fresh
foods can cause hot fat to bubble up and over
the sides of the pan.
• Use little fat for effective shallow or deep fat
frying. Filling the pan too full of fat can cause
spillovers when food is added.
• If a combination of oils or fats will be used in
frying, stir together before heating, or as fats
melt slowly.
• Always heat fat slowly, and watch as it heats.
• Use a deep-fat thermometer whenever possible
to prevent overheating fat beyond the smoking
point.
• Be sure the downdraft vent grille is not
covered. Be sure the filter is in place. Its
absence during cooking could damage blower
parts.
• Do not cover or block the area around the
cooktop system knobs. This area must be kept
clear for proper ventilation and burner
performance.
• Keep all plastics away from cooktop surface
units and burners.
• Do not operate the halogen/radiant surface
units if the glass is broken. Spillovers or
cleaning solution may penetrate a broken
cooktop and create a risk of electrical shock.
Contact a qualified technician immediately
should your glass cooktop become broken.
• Avoid scratching the glass cooktop surface.
The cooktop can be scratched with items such
as sharp instruments, rings or other jewelry and
rivets on clothing.
• Never use the glass cooktop surface as a
cutting board.
• Do not place or store items on top of the glass
cooktop surface when it is not in use.
• Do not stand on the glass cooktop.
• Be careful when placing spoons or other
stirring utensils on the glass cooktop surface
when it is in use. They may become hot and
could cause burns.
• Use care when touching the cooktop. The glass
surface of the cooktop will retain heat after the
controls have been turned off.
• To avoid possible damage to the cooking
surface, do not apply Cooktop Cleaning
Cream to the glass surface when it is hot.

7
USING YOUR COMPONENT COOKTOP
• After cleaning, use a dry cloth or paper towel to
remove all Cooktop Cleaning Cream residue.
• Read and follow all instruction and warnings
on Cooktop Cleaning Cream labels.
• Clean the cooktop with caution. If a wet sponge
or cloth is used to wipe spills on a hot surface
unit, be careful to avoid steam burns. Some
cleaners can produce noxious fumes if applied
to a hot surface.
When the cooktop is cool, use only Cooktop
Cleaning Cream brand cleaner to clean the
cooktop.
• Do not use a wok on the gas burners if the wok
has a round metal ring which is placed over the
burner grate to support the wok. This ring acts
as a heat trap that may damage the burner
grate and burner head. Also, it may cause the
burner to work improperly. This may cause a
carbon monoxide level above that allowed by
current standards, resulting in a health hazard.
• If you smell gas, turn off the gas to the cooktop
at the gas cutoff valve and call a qualified
service technician. Never use an open flame to
locate a leak.
• Do not operate the gas burners without all
burner parts and grate in place.
• Let the gas burner grate and other surfaces
cool before touching them.
• Do not leave grates removed from any
component where children can reach them.
• Never leave gas burners unattended at high
flame settings. Boilovers cause smoking and
greasy spillovers that may catch on fire.
• For your safety, never use your gas burners for
warming or heating the room. Prolonged use of
the cooktop in this way can be hazardous.
• Do not clean the cooktop system with
flammable or volatile cleaning fluids. See the
Care and Cleaning section.
• Do not clean any part of the cooktop system
when the appliance is in use.
• If you are using an overhead exhaust hood,
keep its grease filters clean to maintain good
venting and to avoid grease fires.
• Clean only parts listed in this Use and
Care Guide.
• Clean the cooktop with caution. If a wet sponge
or cloth is used to wipe spills on a hot cooktop,
be careful to avoid steam burns.
SAVE THESE INSTRUCTIONS
Optional Components
Component Cooktop System
8
General
information
Some of the components must be cured or
preconditioned before using them for the first
time.
Components and accessories should be
cleaned after each use. The longer a soil
remains, the harder it is to clean. See each
component section in the Care and Cleaning
section for specific instructions.
Never immerse any electric surface unit or
plug in water.
Components available are discussed in this
section. You may only have some installed in
your kitchen. All components are permanently
installed with the exception of the grill.
Read each component section for specific
instructions.
To purchase additional components, contact
your nearest GE Appliances dealer or service
center. Part numbers for additional
components are listed in this guide.
Electric
surface unit
components
You must consider heat up and cool down
times for the surface units when determining
cooking times. Heat up and cool down times
depend on initial temperature settings, the
type of cookware used and the amount of food
being cooked.
Start cooking at a higher setting to heat the
surface unit faster, then turn to a lower setting
to finish cooking.
Remember, cooking continues after the surface
unit is turned off, so train yourself to turn the
heat down or off before cooking is done.
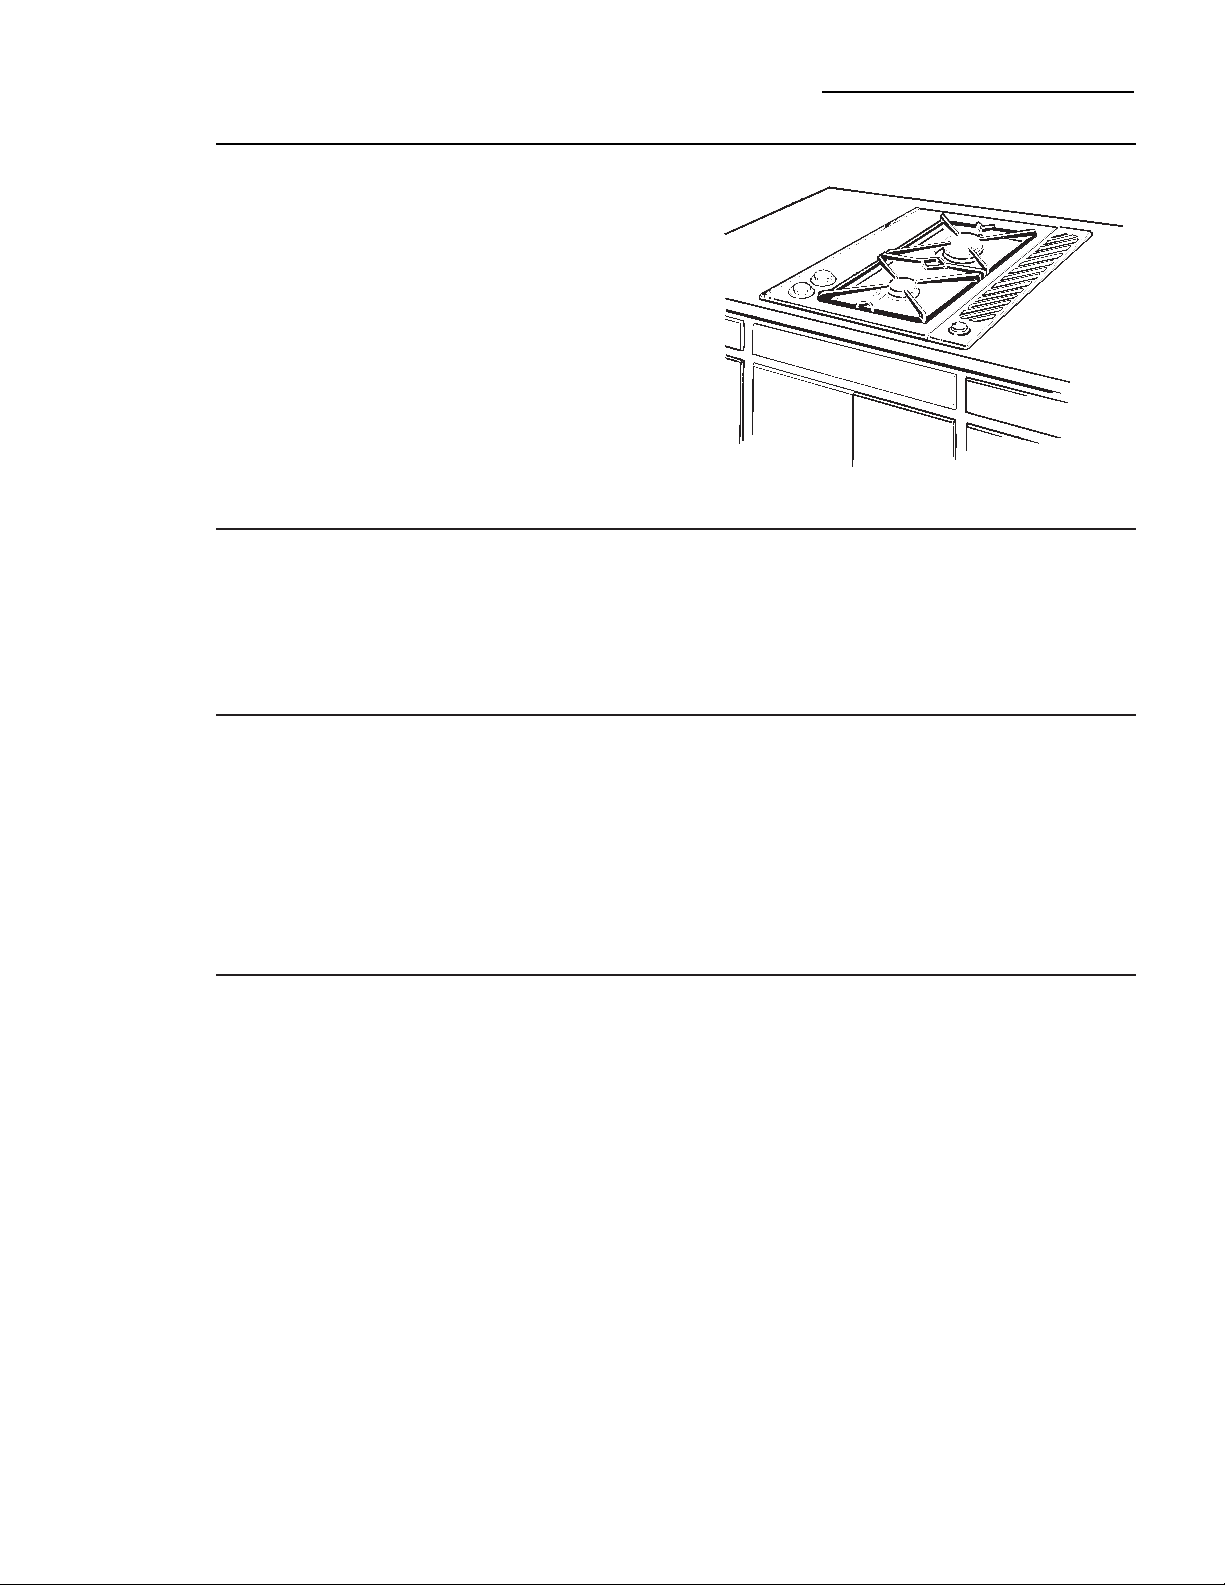
Gas
components
Monogram component gas cooktops (used
with either updraft or downdraft venting) are
designed to operate on natural gas at 4² water
column pressure.
Downdraft
vent
The downdraft vent component features an
integral variable-speed blower control switch
and a powerful centrifugal blower.
Halogen/
radiant
cooktop
Part Number:
ZEW145
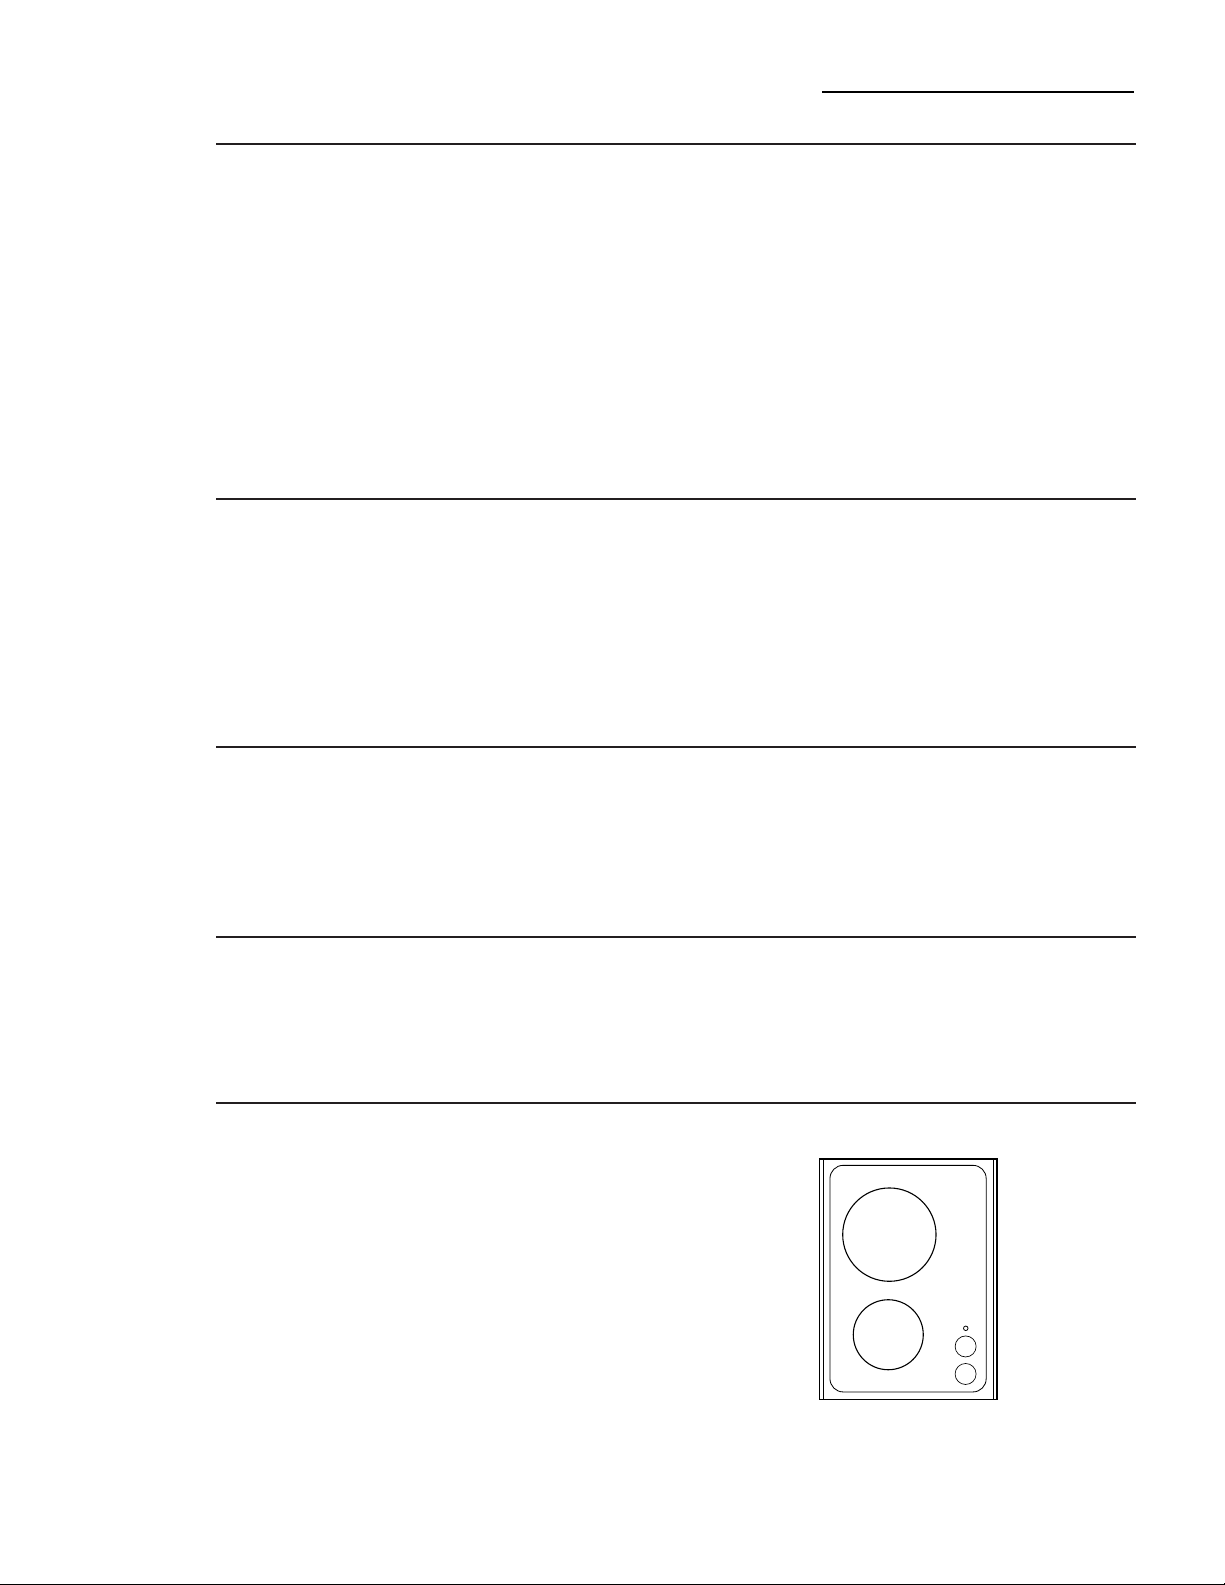
The component has one 8² 1800 watt halogen
surface unit (rear) and a 6² 1200 watt radiant
surface unit (front).
There is a hot surface light for each surface unit
that indicates the condition of the glass surface.
The heat up time for the halogen surface unit
may be less compared to the radiant surface
unit depending upon the control settings. See
the Controls section for additional performance
characteristics.

9
Electric
updraft grill
Part Number:
ZEW155–240 volts
With this component, you can charbroil meat
indoors all year long. Fat drains away and
collects in a jar attached below the grease well.
The element is divided so the front and back
sections can be controlled separately.
Gas burner
cooktop
Part Numbers:
ZGW124–right controls
ZGW125–left controls
This component has one large 10,500-BTU
burner (rear) and one smaller 6,000-BTU
burner (front). The grate is removable for
cleaning.
Grate
Electric
grill with
downdraft
vent
Part Number:
ZEW166–240 volts
ZEW176—downdraft
vent only
The downdraft vent component has an integral
variable-speed blower control.
Grease well Drip pan
Grill element Grill grate
Grease collector jar
Halogen/Radiant Component
Component Cooktop System
10
Halogen
surface unit
The controls selected for the halogen/radiant
component will give you a full range of heat
settings for cooking.
The control knobs must be pushed down to turn from
the off (0) position. When the control knobs are in any
position other than off (0), they may be turned without
pushing down.
You may notice that the knob that operates the
halogen surface unit is slightly harder to turn
than the knob for the radiant surface unit. This
is due to the difference in design between the
two controls.
NOTE:
• The lowest three settings will produce no
visible evidence of the surface unit being on
although up to 11% of the total wattage is
being generated. On the lowest settings, the
percentage of power may not cause the hot
surface lights to light. An indicator light near
the control knobs will glow when either surface
unit is on.
• The burner “on” light will glow for all
positions except the off position.
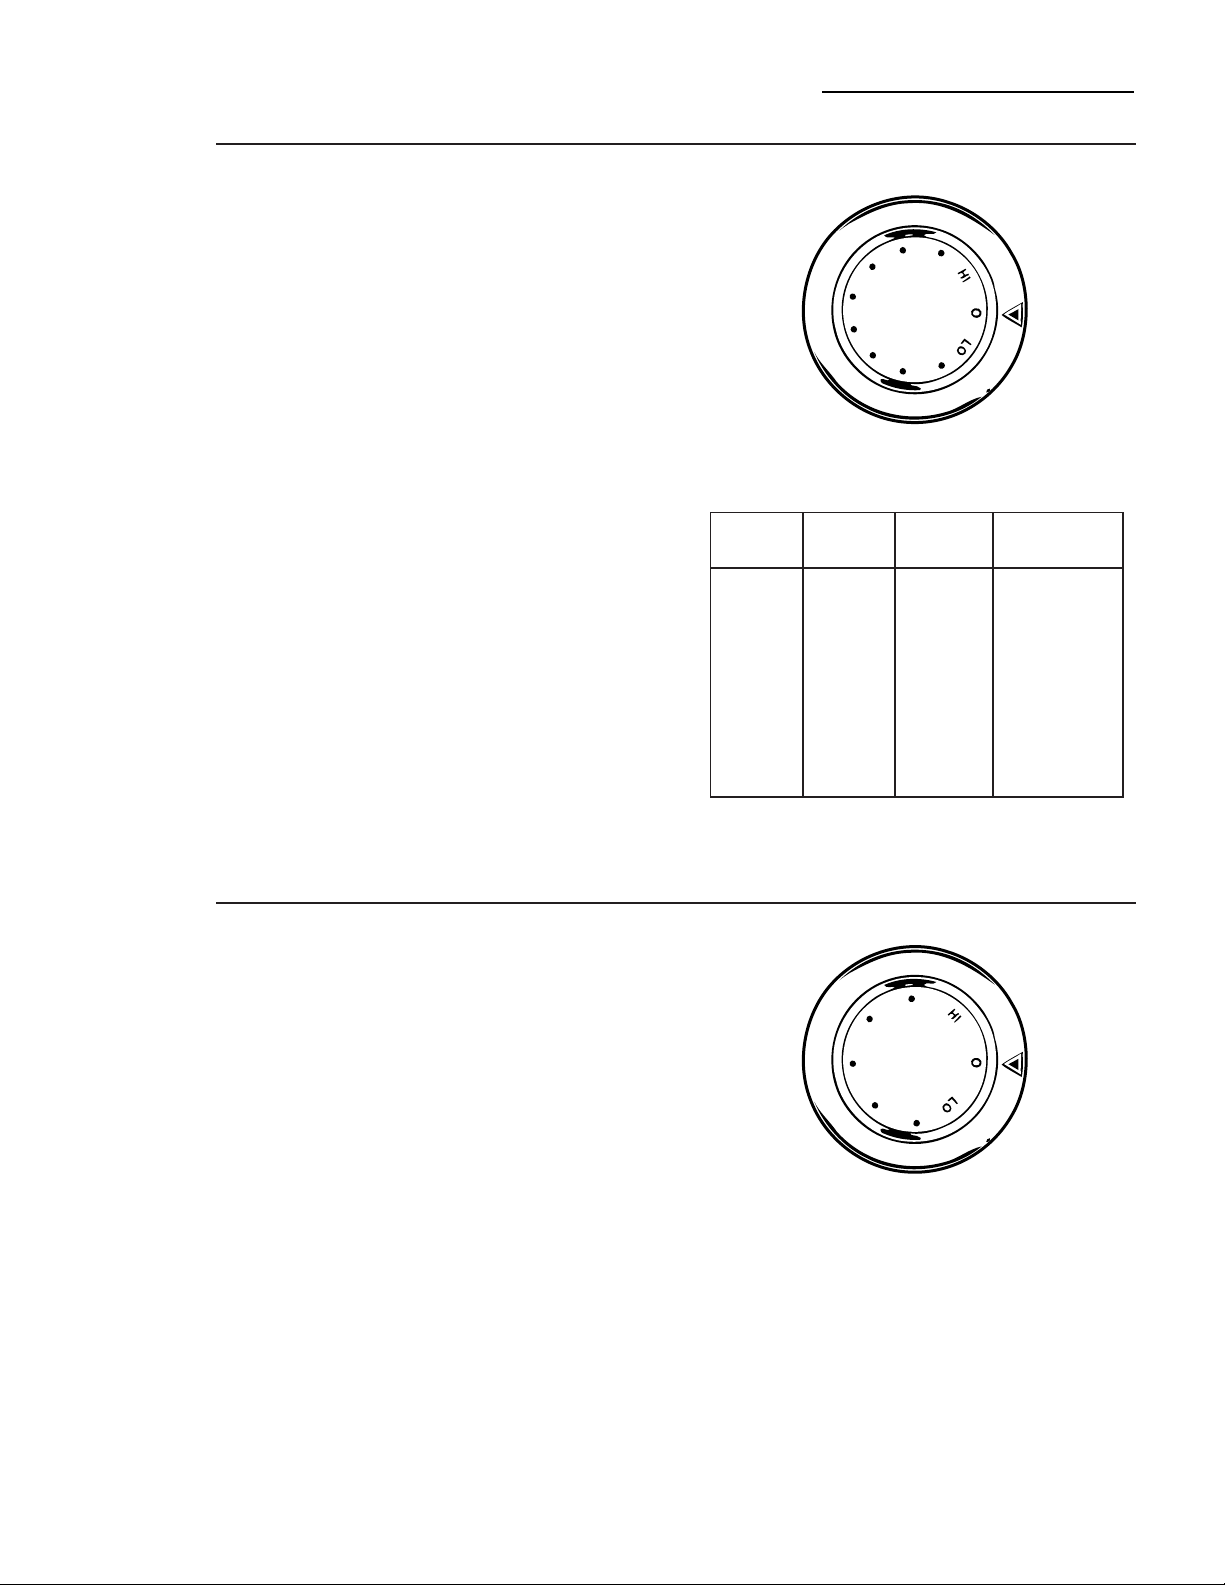
The eleven position halogen control produces the following
variation in cooking power.
If the halogen/radiant component is connected to 208 volts, you
will notice some increase in cooking times.
Switch Position Brightness Typical Heater
Settings of Lamp Power (%)
HI 10 Full 100
9 High 76
8 High 56
7 Medium 41
6 Medium 30
5 Low 23
4 Low 16
3 Invisible 11
2 Invisible 8
LO 1 Invisible 5
0 OFF Invisible 0
Radiant
surface unit
The control for the radiant surface unit is an
infinite switch that can be set anywhere between
LO and HI for an unlimited number of heat
settings.With the infinite switch the coil cycles
on and off to maintain your selected control
setting.
The control knobs must be pushed down to turn from
the off (0) position. When the control knobs are in any
position other than off (0), they may be turned without
pushing down.
Be sure you turn the control knob off (0) when
you finish cooking. You will feel a “click” at the
off position.

11
General
information
about halogen/
radiant surface
units
The halogen/radiant cooktop features heating
units beneath a smooth glass ceramic surface.
The surface units are shown by outlines on the
glass.
Before you use the cooktop for the first time,
clean it with Cooktop Cleaning Cream. This
helps protect the top and makes clean-up easier.
NOTE: A slight odor is normal when a new
cooktop is used for the first time. It is caused by
the heating of new parts and insulating
materials and will disappear in a short time.
When a surface unit is turned on, coils beneath
the surface unit radiate heat through the glass
to the cookware. The red glow of the coils will
be visible through the glass. It will take the
surface unit a few moments to heat up. The
coil cycles on and off to maintain your selected
control setting. With poor cookware, you will
see frequent cycling of the unit off and on.
Good, flat cookware will minimize the cycling.
Use only flat-bottomed cookware. Do not let pots
boil dry. Overheated metal can bond to glass
cooktop. An overheated copper pot will leave a
residue that will permanently stain the glass.
Sliding aluminum cookware across the glass
may leave metal marks. These metal marks
will appear as small scratches. They can be
removed with Cooktop Cleaning Cream and
a razor scraper.
It is safe to place hot cookware from the oven
or surface on the glass ceramic surface when
the surface is cool.
Avoid sliding pans on the glass cooktop. Pan
edges that are even slightly rough or grit on the
cooktop can cause scratches on the glass.
Even after the surface units are turned off, the
glass ceramic cooktop retains enough heat to
continue cooking. To avoid overcooking,
remove pans from the surface units when the
food is cooked. Avoid placing anything on the
surface unit until it has cooled completely.
Differences
between
halogen and
radiant
surface units
Some cooktops have both radiant and halogen
surface units. This is how they differ.
• Halogen units are much brighter than the
radiant units. Radiant units have a dull red
glow.
• Halogen and radiant units cycle on and off
frequently. This is normal. You will notice the
cycling more on the halogen units because of
their brightness.
• Radiant coils take about 10 seconds longer to
glow than halogen units.
Halogen units have radiant coils in the center that do not glow
as brightly as the outer halogen coils.
Halogen/Radiant Component
Component Cooktop System
12
Types of
cookware
The following information will help you choose
cookware which will give good performance.
Stainless Steel: recommended
Especially good with a sandwich clad bottom.
The sandwich bottom combines the benefits of
stainless steel (appearance, durability and
stability) with the advantages of aluminum or
copper (heat conduction, even heat
distribution).
Aluminum: heavy weight recommended
Good conductivity. Aluminum residues
sometimes appear as scratches on the surface
units, but can be removed if cleaned
immediately. Because of its low melting point,
thin weight aluminum should not be used.
Copper Bottom: recommended
Good performance, but copper may leave
residues which can appear as scratches. The
residues can be removed, as long as the surface
units are cleaned immediately.
However, do not let these pots boil dry.
Overheated metal can bond to the glass surface
units. An overheated copper bottom pot will
leave a residue that will permanently stain the
surface units if not removed immediately.
Porcelain Enamel Covered Cast Iron:
recommended
Good conductivity. As long as the cookware is
covered completely with porcelain enamel, this
cookware is recommended. Cast iron retains
heat, maximizing energy efficiency, and
provides smooth, even heat distribution.
Caution is recommended for cast iron
cookware that is not completely covered with
smooth porcelain enamel, as it may scratch the
glass surface units.
Glass-ceramic: usable, but not recommended
Poor performance. May scratch the surface units.
Stoneware: usable, but not recommended
Poor performance. May scratch the surface units.
How to
check pan
performance
Use of correct cookware can affect the cooking
performance and cleaning of your cooktop.
The correct cookware reduces the temperature
of the cooktop surface and minimizes the
chance of spillovers burning onto the cooktop.
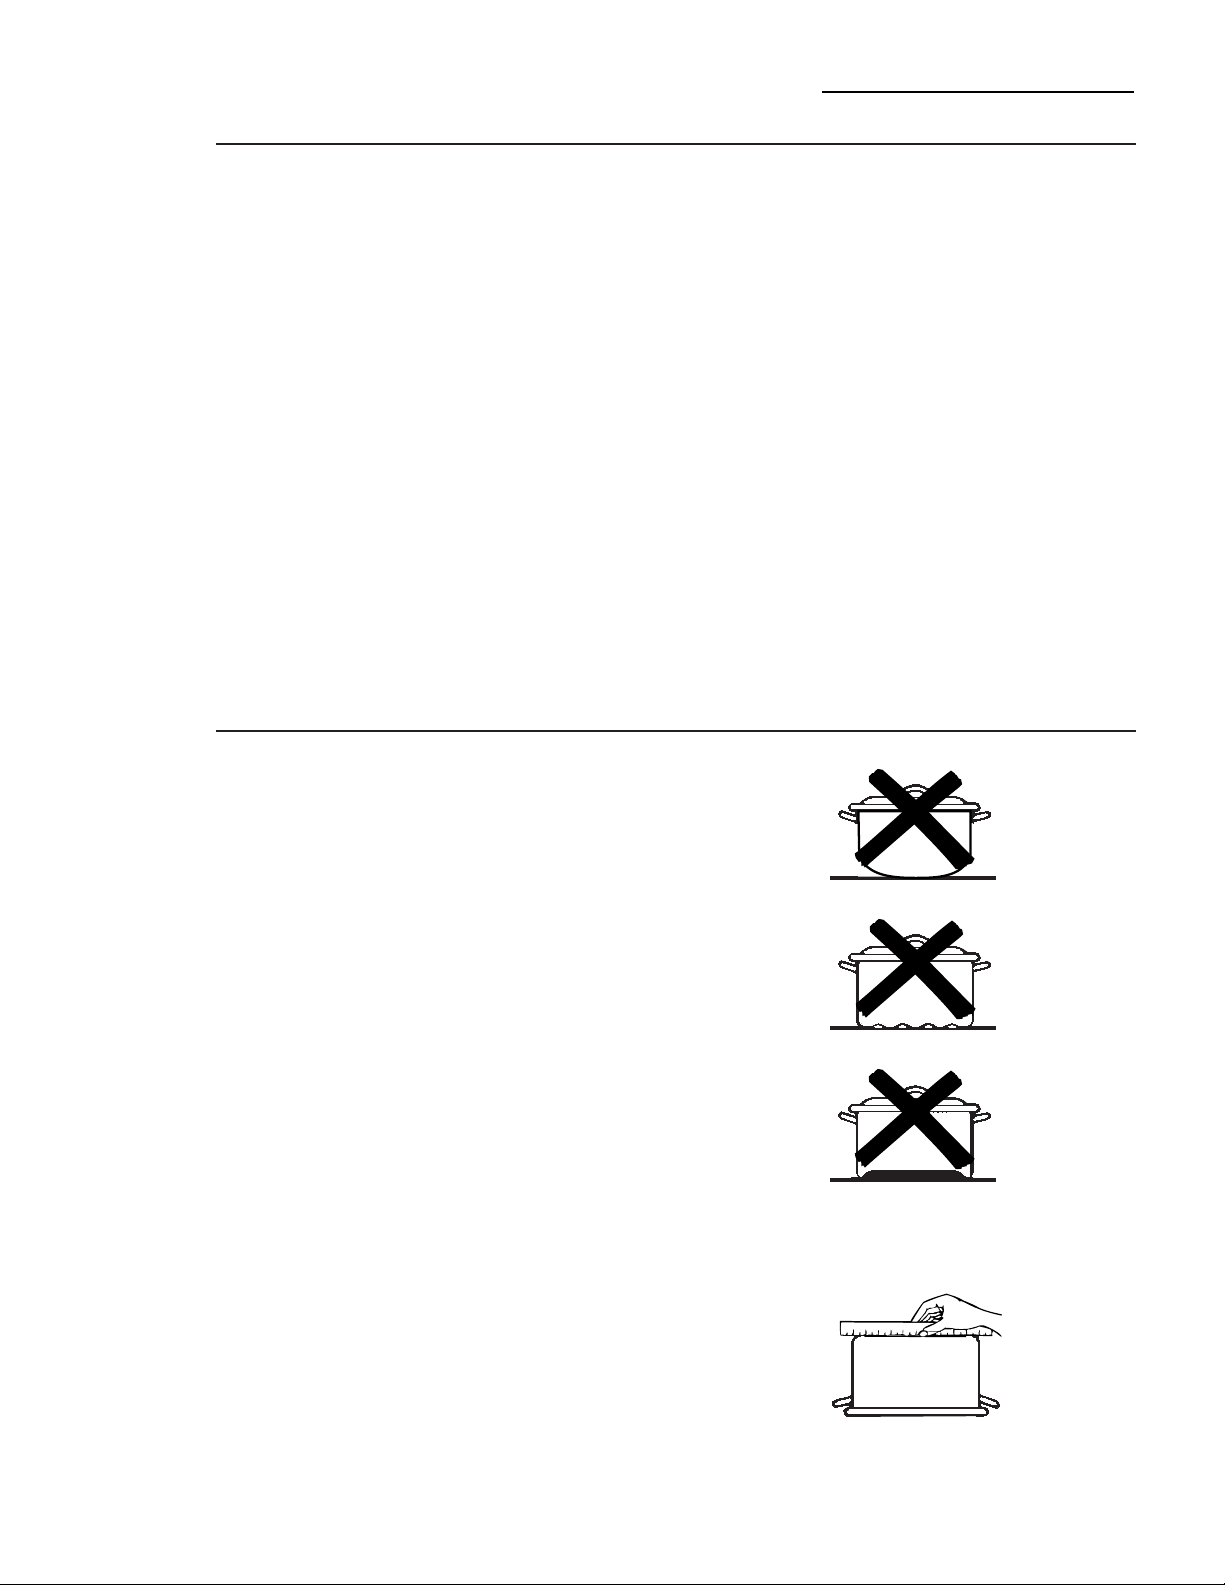
You must use pans with perfectly flat bottoms.
Some pans may have curved or rounded bottoms
or may be warped. If you are unsure of the
flatness of your pans you may do this quick test.
Turn your pan upside down on the countertop,
place a ruler flat against the pan surface. The
bottom of the pan and the straight edge of the
ruler should fit flush against each other all the
way across. Turn the ruler a full 360 degrees,
checking for any space between the ruler and
the bottom of the pan.
Another simple test to determine even heat
distribution across the cookware bottom is to put
one inch of water in the pan. Bring the water to
a boil and observe the location of bubbles as the
water starts to boil. Good flat cookware will have
an even distribution of bubbles over the bottom
surface area of the pan. Bubbles localized in
only a portion of the bottom indicate uneven
contact of the pan to the surface unit, uneven
heat transfer or an unsuitable pan.
Use pans that match the diameter of the surface
unit. Cooking performance will not be as good
if the cookware is either smaller or larger than
the surface unit.
Pans with rounded, curved, ridged or warped
bottoms are not recommended.
Check pans for flat bottoms by
using a straight edge.
13
For best
results
• Place only dry pans on the surface units. Do
not place lids on the surface units, particularly
wet lids.
• Do not use woks that have support rings.
This type of wok will not heat on the glass
surface units.
• We recommend that you use only a flat-
bottomed wok. They are available at your
local retail store. The bottom of the wok
should have the same diameter as the
surface unit to insure proper contact.
• Some special cooking procedures require
specific cookware such as pressure cookers,
deep fat fryers, etc. All cookware must have
flat bottoms and be the correct size.
Do not place wet pans on the glass surface units.
Do not use woks with support rings on the glass surface units.
Use flat-bottomed woks on the glass surface units.
Special
cautions
for glass
surface
units
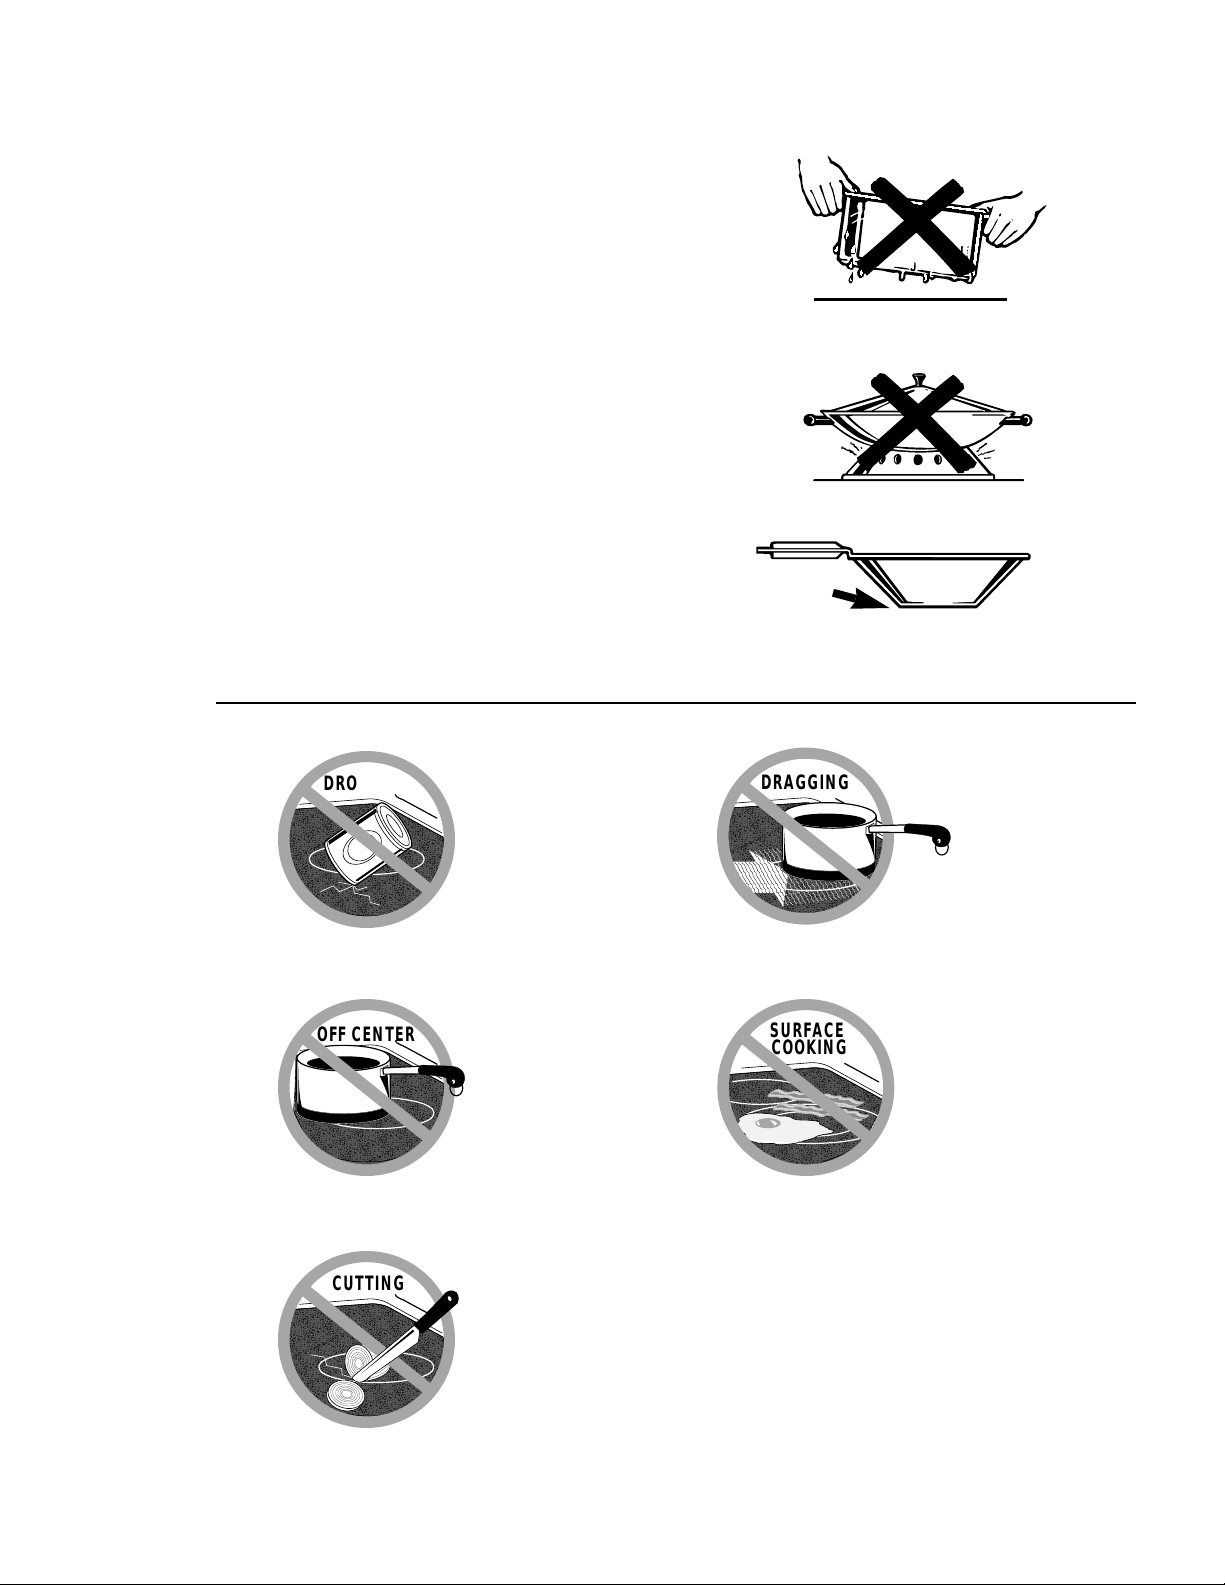
• Don’t store heavy
items above the
cooktop. If they
drop onto the
surface units,
they can cause
damage.
• Always place the
pan in the center
of the surface
unit you are
cooking on.
• Do not use the
surface as a
cutting board.
• Do not slide
cookware across
the surface units
because it can
scratch the
glass—the glass is
scratch resistant,
not scratch
proof.
• Never cook
directly on the
glass. Always use
cookware.
,,,,
,,,,,,,,
,,,,,,,,,,,
,,,,,,,,,,
,,,,,,,
,,,
SURFACE
COOKING
,,,,
,,,,,,,,
,,,,,,,,,,
,,,,,,,,,,,
,,,,,,,,,,
,,,,,,,
,,,,
DRAGGING
,,,
,,,,,,,
,,,,,,,,,,
,,,,,,,,,,,
,,,,,,,,,,
,,,,,,,,
,,,,,
CUTTING
,,,,
,,,,,,,,
,,,,,,,,,
,,,,,,,,,,
,,,,,,,,,
,,,,,,,
,,,
OFF CENTER
,,,
,,,,,,,
,,,,,,,,,,
,,,,,,,,,,,
,,,,,,,,,,
,,,,,,,,
,,,,,
DROPPING

Home Canning Tips
Component Cooktop System
14
Observe the
following
points in
canning
Note:
Flat-bottomed
canners are required
for glass surface
units.
Right! Wrong!
NOTE: Canning cannot be done on the grill
component.
Safe canning requires that harmful
microorganisms are destroyed and that the
jars are sealed completely. When canning
foods in a water-bath canner, a gentle but
steady boil must be maintained for the
required time. When canning foods in a
pressure canner, the pressure must be
maintained for the required time.
After you have adjusted the controls, it is very
important to make sure the prescribed boil or pressure
levels are maintained for the required time.
Since you must make sure to process the
canning jars for the prescribed time, with no
interruption in processing time, do not can on
any cooktop surface unit if your canner is not
flat.
1 Be sure the canner fits over the center of the
surface unit. If your cooktop or its location
does not allow the canner to be centered on
the surface unit, use smaller diameter pots
for good canning results.
2 When using the glass cooktop component,
flat-bottomed canners must be used. Do not
use canners with flanged or rippled bottoms
(often found in enamelware) because they
don’t make enough contact with the surface
units and take a long time to boil water.
Pots that extend beyond 1 inch of the surface
unit’s circle are not recommended for most
surface cooking.
When canning with water-bath or pressure
canner, larger-diameter pots may be used.
This is because boiling water temperatures
(even under pressure) are not harmful to
the cooktop surfaces surrounding the
surface units.
HOWEVER, DO NOT USE LARGE
DIAMETER CANNERS OR OTHER
LARGE DIAMETER POTS FOR FRYING
OR BOILING FOODS OTHER THAN
WATER. Most syrup or sauce mixtures—and
all types of frying—cook at temperatures
much higher than boiling water. Such
temperatures could eventually harm the
glass cooktop surfaces.
3 When canning, use recipes and procedures
from reputable sources. Reliable recipes
and procedures are available from the
manufacturer of your canner; manufacturers
of glass jars for canning, such as Ball and
Kerr; and the United States Department of
Agriculture Extension Service.
4 Remember that canning is a process that
generates large amounts of steam. To avoid
burns from steam or heat, be careful when
canning.
NOTE: If your house has low voltage, canning
may take longer than expected, even though
directions have been carefully followed. The
process time will be shortened by:
(1) using a pressure canner, and
(2) starting with HOT tap water for fastest
heating of large quantities of water.
What is a
temperature
limiter?
Every halogen and radiant surface unit has a
Temperature Limiter. The Temperature
Limiter protects the glass-ceramic surface from
getting too hot.
If the bottom of your canner is not flat, the
surface unit can overheat, triggering the
temperature limiters to turn the unit off for a
time. This will stop the boil or reduce the
pressure in the canner.
The Temperature Limiter may turn off the
elements if:
• The pan boils dry.
• The pan bottom is not flat.
• The pan is off center.
• There is no pan on the unit.
Gas Burner Component
Component Cooktop System
15
Before
using your
gas burners
The ZGW124 and ZGW125 gas cooktops are not
convertible to LP gas. They are designed to operate
on natural gas only.
This component has one large 10,500-BTU
burner and one smaller 6,000-BTU burner.
When a downdraft vent is used next to a gas
component, food will cook faster if you use a
low vent setting and keep the pan covered (if
recipe allows).
Automatic
ignition
Both burners on this gas cooktop component
are lighted by electric ignition that eliminates
the need for standing pilot lights.
All the igniters make sparking sounds and
spark even when only a single burner is being
turned on. Do not touch any of the burners
when the igniters are sparking.
Auto relight
The burners on this gas cooktop automatically
relight if the flame goes out. This helps prevent
the inconvenience of manually having to
relight a burner. As with automatic ignition, all
of the burner igniters spark while a burner is
relighting. Do not touch any of the burners
when the igniters are sparking.
The burners will relight at any setting.
However, for the burners to light quickly and
consistently when the gas is turned on, the
knobs should be turned to the LITE position
until ignition occurs.
Power
outage
In case of a power outage, you can light the
surface burners on your cooktop with a match.
Holding a lighted match to the burner, turn
the knob to the LO position.
If the knob setting is toward HI, the flame
flare-up could burn your hand. Use extreme
caution when lighting burners manually.
Cookware should not be in place over the
burner when lighting a burner this way.
Surface burners in use when an electrical
power failure occurs will continue to operate
normally.
Gas Burner Component
Component Cooktop System
16
To light a
burner
1. The gas burner controls must turn
counterclockwise to the LITE position to
ignite the burner. The burner ignites
automatically.
2. Once the burner is ignited, turn the control
knob counterclockwise to adjust the flame
lower. A sparking sound caused by the igniter
is normal until ignition occurs.
3. The burners will relight at any setting.
However, for the burners to light quickly and
consistently when the gas is turned on, the
knobs should be turned to the LITE position
until ignition occurs.
4. To turn a burner off, turn the knob clockwise
as far as it will go, to the off (O) position.
• The front burner is best for smaller pans and
cooking operations requiring carefully
controlled simmering conditions. The rear
burner is the high power burner for larger
pans and fast boiling operations.
• Do not operate a burner for an extended
period of time without cookware on the grate.
The finish on the grate may chip without
cookware to absorb the heat.
• Check to be sure the burner you turned on is
the one you want to use.
• Be sure the burners and grates are cool before
you place your hand, a pot holder, cleaning
cloths or other materials on them.
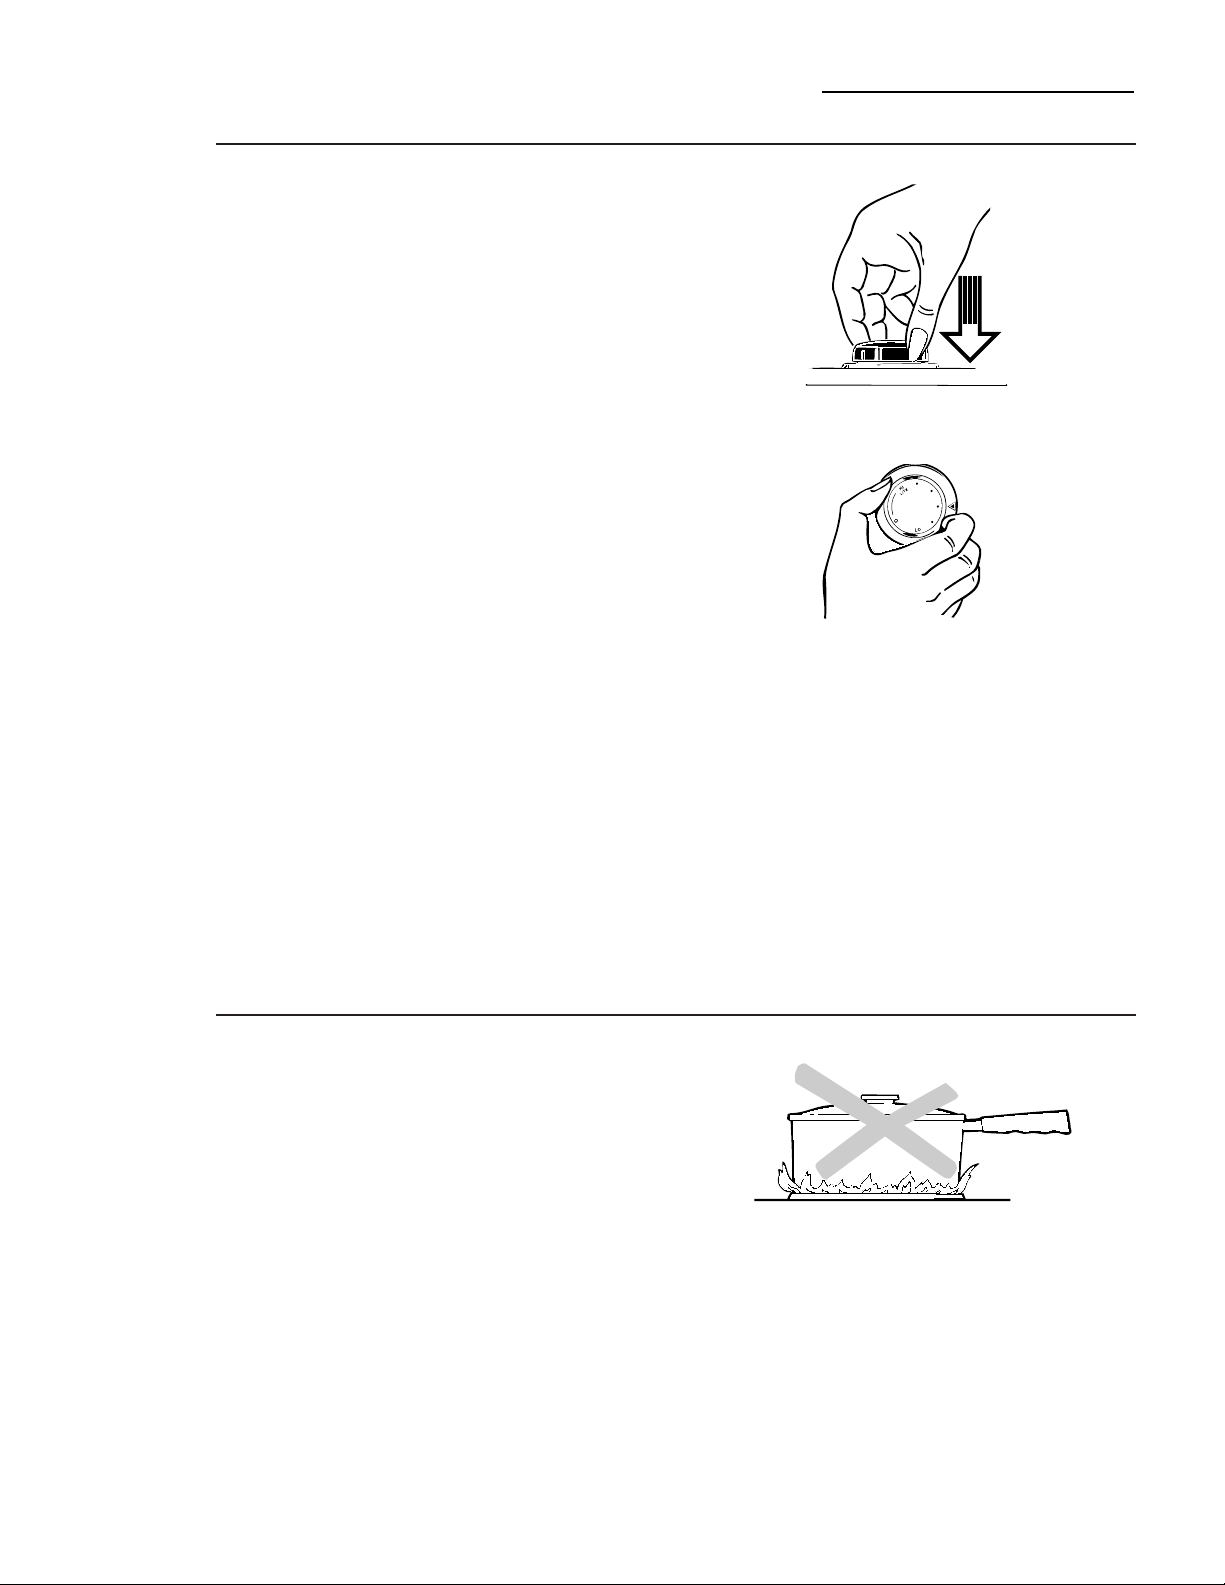
Push the control knob in and turn it counterclockwise to the
desired position.
Turn the knob either direction to adjust the flame size.
How to
select flame
size
Watch the flame, not the knob, as you reduce
heat.
The flame size on a gas burner should match
the cookware you are using.
FOR SAFE HANDLING OF COOKWARE,
NEVER LET THE FLAME EXTEND UP THE
SIDES OF THE COOKWARE.
Any flame larger than the bottom of the
cookware is wasted heat and only serves to heat
the handle.
17
Cookware
Aluminum: Medium-weight cookware is
recommended because it heats quickly and
evenly. Most foods brown evenly in an
aluminum skillet. Use saucepans with tight-
fitting lids for cooking with minimum amounts
of water.
Cast Iron: If heated slowly, most skillets will
give satisfactory results.
Enamelware: Under some conditions, the
enamel of some cookware may melt. Follow
cookware manufacturer’s recommendations
for cooking methods.
Glass: There are 2 types of glass cookware—
those for oven use only and those for surface
cooking (saucepans, coffee and teapots).
Glass conducts heat very slowly.
Heatproof Glass Ceramic: Can be used for
either surface or oven cooking. It conducts
heat very slowly and cools very slowly. Check
cookware manufacturer’s directions to be sure
it can be used on gas cooktops.
Stainless Steel: This metal alone has poor
heating properties, and is usually combined
with copper, aluminum or other metals for
improved heat distribution. Combination
metal skillets generally work satisfactorily if
they are used at medium heat as the
manufacturer recommends.
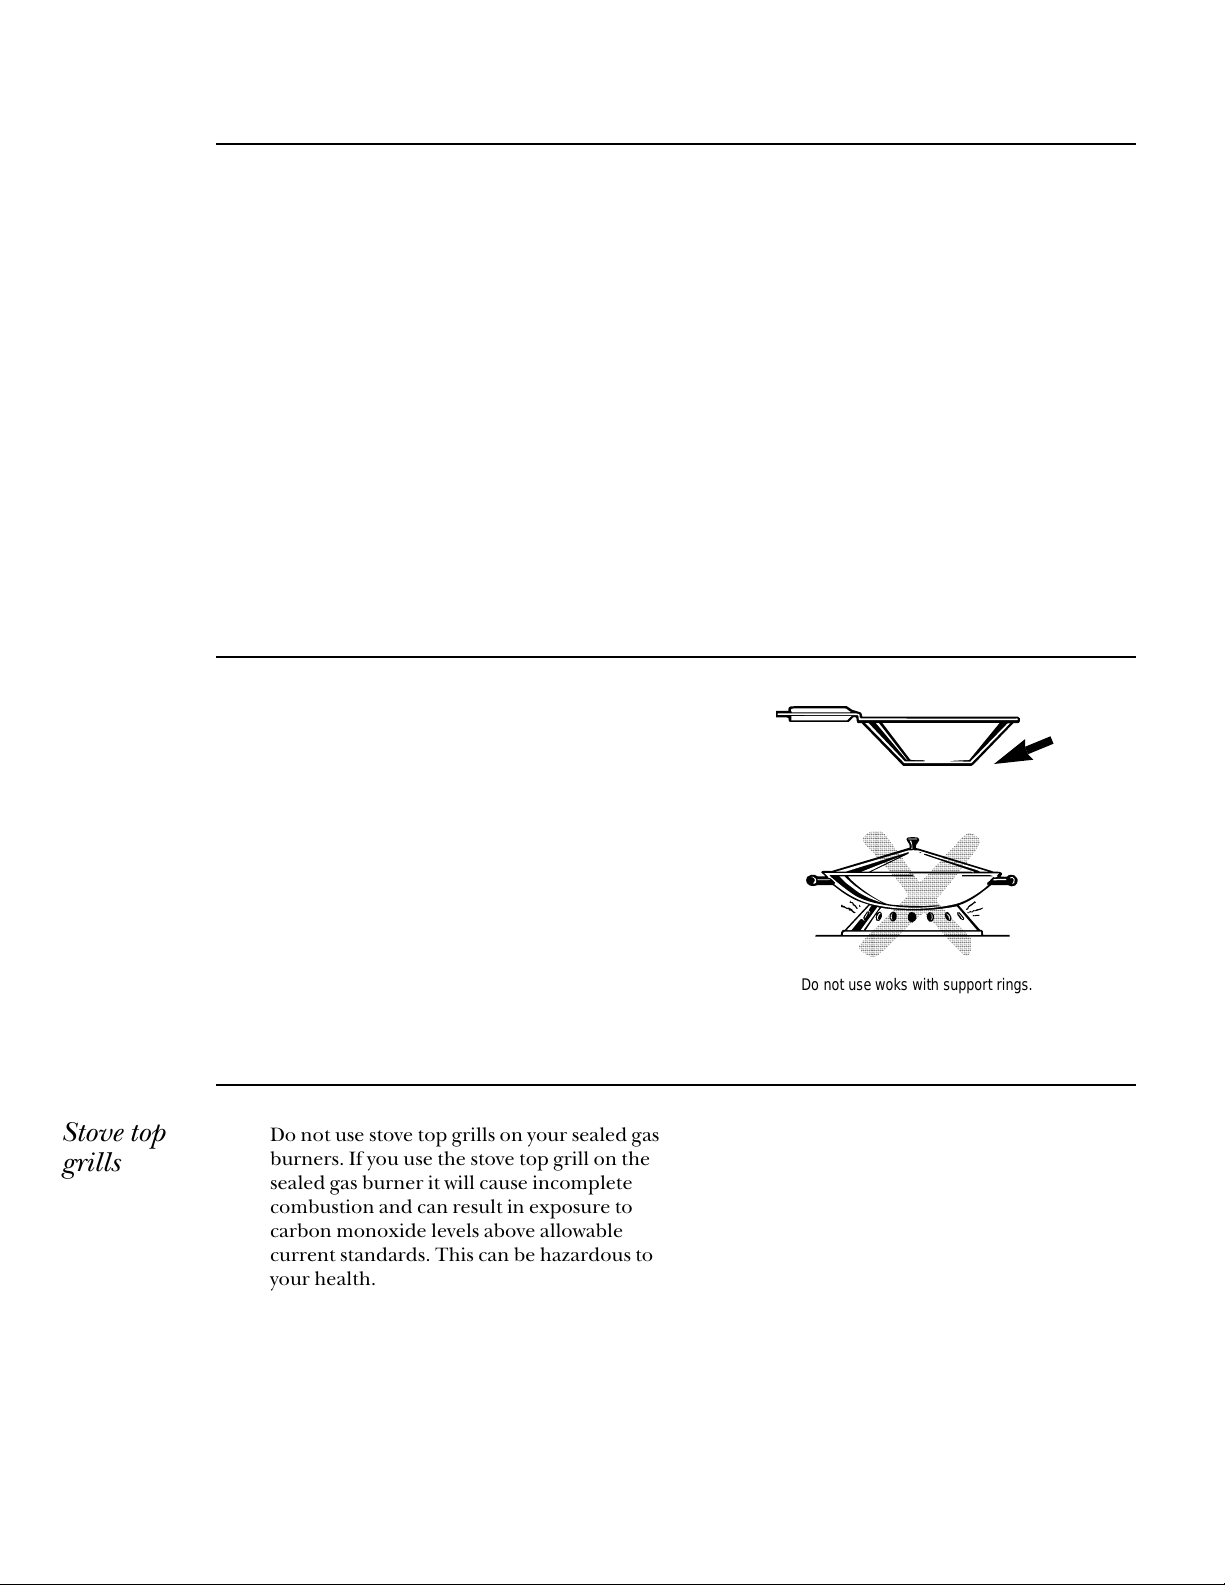
Wok
cooking
We recommend that you use only a flat-
bottomed wok. They are available at your local
retail store.
Do not use woks that have support rings.
Use of these types of woks, with or without the
ring in place, can be dangerous. Placing the
ring over the burner grate may cause the burner
to work improperly resulting in carbon
monoxide levels above allowable current
standards. This could be dangerous to your
health. Do not try to use such woks without the
ring. You could be seriously burned if the wok
tipped over.
Use only flat-bottomed woks.
,,,,,,,,,,,,,,,,,,,,,,,,,,,,,,
,,,,,,,,,,,,,,,,,,,,,,,,,,,,,,
,,,,,,,,,,,,,,,,,,,,,,,,,,,,,,
,,,,,,,,,,,,,,,,,,,,,,,,,,,,,,
,,,,,,,,,,,,,,,,,,,,,,,,,,,,,,
,,,,,,,,,,,,,,,,,,,,,,,,,,,,,,
,,,,,,,,,,,,,,,,,,,,,,,,,,,,,,
,,,,,,,,,,,,,,,,,,,,,,,,,,,,,,
,,,,,,,,,,,,,,,,,,,,,,,,,,,,,,
,,,,,,,,,,,,,,,,,,,,,,,,,,,,,,
,,,,,,,,,,,,,,,,,,,,,,,,,,,,,,
,,,,,,,,,,,,,,,,,,,,,,,,,,,,,,
,,,,,,,,,,,,,,,,,,,,,,,,,,,,,,
,,,,,,,,,,,,,,,,,,,,,,,,,,,,,,
,,,,,,,,,,,,,,,,,,,,,,,,,,,,,,
,,,,,,,,,,,,,,,,,,,,,,,,,,,,,,
,,,,,,,,,,,,,,,,,,,,,,,,,,,,,,
,,,,,,,,,,,,,,,,,,,,,,,,,,,,,,
,,,,,,,,,,,,,,,,,,,,,,,,,,,,,,
,,,,,,,,,,,,,,,,,,,,,,,,,,,,,,
,,,,,,,,,,,,,,,,,,,,,,,,,,,,,,
,,,,,,,,,,,,,,,,,,,,,,,,,,,,,,
,,,,,,,,,,,,,,,,,,,,,,,,,,,,,,
,,,,,,,,,,,,,,,,,,,,,,,,,,,,,,
,,,,,,,,,,,,,,,,,,,,,,,,,,,,,,
,,,,,,,,,,,,,,,,,,,,,,,,,,,,,,
,,,,,,,,,,,,,,,,,,,,,,,,,,,,,,
,,,,,,,,,,,,,,,,,,,,,,,,,,,,,,
,,,,,,,,,,,,,,,,,,,,,,,,,,,,,,
,,,,,,,,,,,,,,,,,,,,,,,,,,,,,,
,,,,,,,,,,,,,,,,,,,,,,,,,,,,,,
,,,,,,,,,,,,,,,,,,,,,,,,,,,,,,
,,,,,,,,,,,,,,,,,,,,,,,,,,,,,,
,,,,,,,,,,,,,,,,,,,,,,,,,,,,,,
Do not use woks with support rings.
Stove top
grills
Do not use stove top grills on your sealed gas
burners. If you use the stove top grill on the
sealed gas burner it will cause incomplete
combustion and can result in exposure to
carbon monoxide levels above allowable
current standards. This can be hazardous to
your health.
Grill Component
Component Cooktop System
18
Grease
collector
jar
Grill grate
Grill element
Drip pan
Grease
well
Electric receptacles
How to
assemble the
grill module
1. Be sure both the controls for the grill are
off (O).
2. Place the drip pan in the grease well first as
shown in the illustration in this section.
3. Grasp the grill element with both hands near
the plug. Keeping the element as nearly
horizontal as possible, push the plug firmly
into the electrical receptacles, to insure
complete contact. The element should lie flat
and rest on the ridges of the drip pan.
4. Place the grill grate into the opening in the
cooktop over the grill element.
5. Be certain the grease jar is clean and firmly
secured in the tube and lid assembly under
the porcelain enamel grease well.
Before
using your
grill
NOTE: The grill grate must be preconditioned
before using it for the first time. To
precondition, first wash it in soap and water.
Dry with a soft cloth. Then use a paper towel to
apply a small amount of no-stick cooking spray
to the grate. Remove excess with a clean paper
towel.
Use the grill for preparing meals with the
appearance and flavor of commercially char-
broiled meats. The grill must be very hot for this
type of cooking and smoke and spatter is to be
expected.
Be sure to use your venting system when grilling
to help minimize smoke.
You should have either a component downdraft
vent installed into the cooktop system or a high-
capacity vent hood.
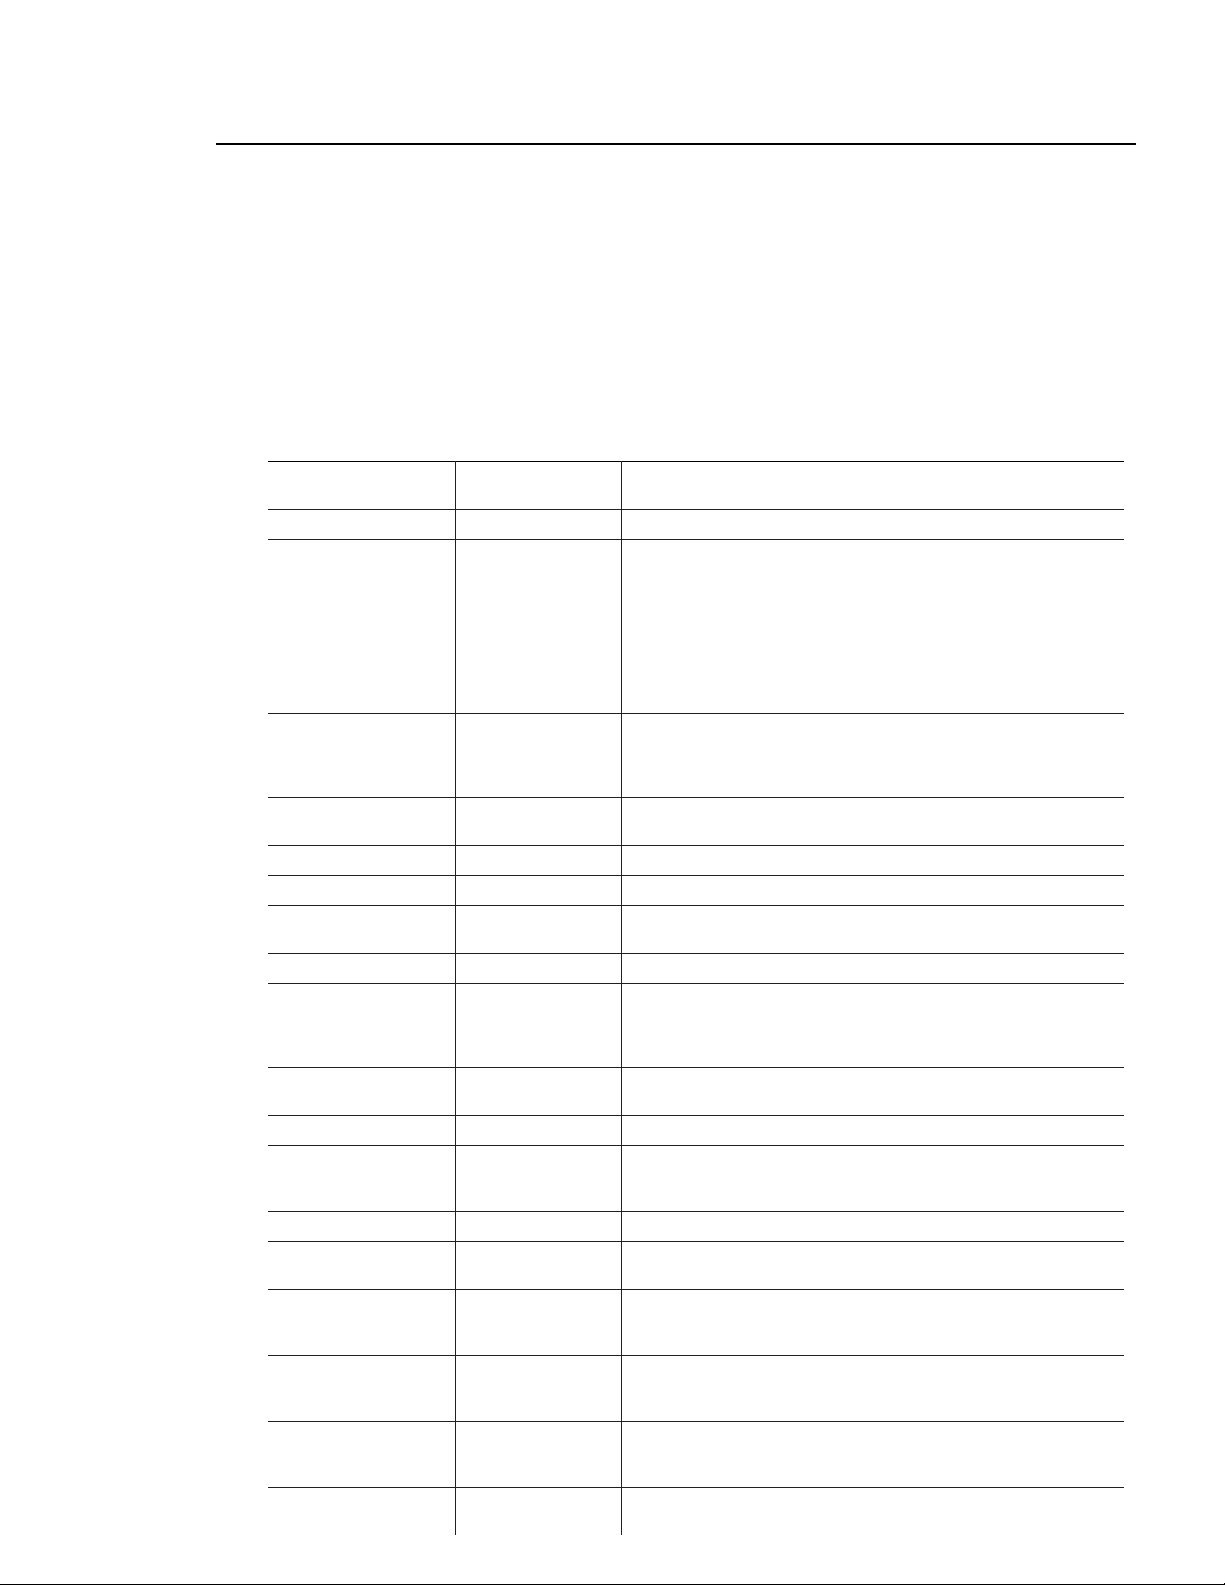
Grill
control
Most cooking on the grill is done at the HI
setting. Each half of the grill component is
controlled separately.

Grill tips
• The grill must be preheated to get the grill
components hot enough to sear the meat and
seal in the juices. Preheat the grill for 10
minutes at HI heat setting, then turn to the
desired setting for cooking.
• The grill element is divided so the front and
rear sections are controlled separately.
• You can heat both sections to the same
temperature for cooking large amounts of the
same food, or you can vary the temperatures
on front and rear for cooking two different
foods. Also, you can save energy when cooking
small amounts of food by turning only one
section on and leaving the other off entirely.
• Do not leave grill unattended while it is in use.
• Remove accumulated grease from the non-
removable grease well after each use to lessen
smoking and odors. Be sure opening to grease
tube is clean. Grease buildup can become a
fire hazard.
• Make sure the removable grease collector jar
and drip pan are clean and in place before
using the grill.
• Remove grease from the grease collector jar
after each use to avoid spillovers.
• The grates should be oiled or sprayed with a
non-stick coating before cooking to prevent
sticking. Remove the grate before spraying
and spray only while cool. Spraying directly
onto a hot grill may cause a fire.
• Trim the fat from meat before placing on the
grill. This will reduce smoking and lessen
grease buildup in the drip pan, grease well
and grease jar.
• Allow space between foods when placing
them on the grill. Air and heat need to
circulate around the food for best cooking
results.
• Occasionally rearrange foods on the grill to
prevent sticking and provide better browning.
What to do
if a flame-
up occurs
To control flame-ups, set heat setting at LO, rather
than off (O). If you have a bad flame-up and there is
danger of the fire spreading, take the following steps
immediately:
1. Turn the grill controls to off (O), and turn
the downdraft vent control to HI.
If you are using an overhead updraft vent hood,
turn it off until the flame-up stops.
2. Use a long-handled utensil to remove the
food from the grill. Be careful not to get burned.
The fire should start to go out. If it does not,
smother the flames by covering the entire
grill with a large cookie sheet or the lid from
a large roasting pan.
CAUTION!
• NEVER USE WATER ON A GREASE FIRE.
Water will spread the flames.
• Never line the grill grate or the porcelain
enamel grease well with aluminum foil. Doing
so may block drainage of grease, causing
excessive smoking, fire or component
damage.
• It is recommended that you have a dry
chemical, foam or Halon type fire
extinguisher where you can easily reach it in
case of a cooking fire.
• Never try to use charcoal or flavored wood
chips in the well under the grill grate. Use of
charcoal indoors without proper ventilation
produces carbon monoxide that can be fatal.
Also, burning charcoal in the well will
permanently damage the porcelain coating in
the well.
• NEVER LEAVE THE KITCHEN while grilling
meats or other juicy foods. Fats and juices
drip on the hot grill element and may cause
flame-ups. When grilling, you should always
be present to control flame-ups so they do not
get out of hand.
19

Grill Component
Component Cooktop System
20
Questions
and
answers
Q. When cooking many individual foods, what
can I do to insure that foods will cook
evenly?
A. When cooking foods of various sizes and
thicknesses, start larger or thicker pieces
first and add quicker-cooking smaller pieces
later. Press meat lightly to lie flat on grill.
Slash the fat on edges of steaks and chops to
prevent curling. Break the joints of split
chickens so they will lie flat.
Q. My grilled meats sometimes come out drier
than they should. What can I do to help
prevent this?
A. Season meats after cooking rather than
before—salt can draw out juices and dry out
meat. Use tongs to turn and rearrange
meats on the grill; forks will pierce the meat
and release juices.
Q. I follow the cooking times suggested, but my
foods don’t get done properly. Is there
something wrong with my grill?
A. Probably not. Suggested cooking times
should be used only as a general guide.
Variables in food can change the cooking
times required.
Q. How can I keep barbecued meats from
developing an unattractive burned look
and taste?
A. Sauces containing sugar will often burn if
used during the entire cooking time. If your
favorite sauce contains sugar, try adding it
only during the last 15 to 20 minutes of
cooking time for best results.
Q. Foods cooked on my grill are not browning
as much as I would like. What could cause
this?
A. A longer preheating and grill time may be
necessary to achieve the desired results.
Grill
cooking
guide
• Do not leave the cooktop unattended during
“preheat” (knobs turned to “HI”) or any
time the knobs are turned to “HI” with food
on the grill. Most foods will be grilled on the
HI setting.
• Preheat at the HI setting for 10 minutes
before grilling. Change the heat setting as
advised in your cookbook for the food you
are grilling.
• Trim the excess fat from the meat.
• Before cooking steaks, slash the fat around
the edges to prevent curling of the meat.
• Suggested cooking times should be used only
as a guide, since variables in food can change
the cooking times.
• Foods should be turned over and rearranged
as needed.
Total Cooking Time
Food in Minutes Comments
Beef Cubes (1 in.) 17–20 Marinate less-tender beef before grilling.
Beef Steaks, tender
(3/4 to 1
1
⁄
4
in.)
Rare 10–14 Turn over and rearrange as needed to achieve desired doneness.
Medium 12–16
Well 16–20
(1
1
⁄
2
to 2 in.)
Rare 18–22
Medium 26–30
Well 42–46
Beef Steaks, less-tender
(3/4 to 1 in.)
Medium 18–22 Tenderize before grilling. Turn and cover with foil after first half of
Well 26–30 cooking time for more juiciness.
Chicken
Pieces or Quarters 50–70 Turn over frequently and, if desired, baste with sauce last 10–15 minutes.
Chicken, halves 60–85 Place skin-side-down. Turn over every 15 minutes and baste frequently.
Cornish Hens, halves 40–50 Place skin-side-down. Turn over every 10 minutes and baste frequently.
Fish Steaks
(1 in. or less) 15–20 Brush with melted butter.
Fish, whole (6 to 8 oz.) 17–20 If stuffed, add 6 minutes to total cooking time. Cover top with foil.
Hamburgers (3/4 in.)
Rare 12–16 Turn over and rearrange as needed to achieve desired doneness.
Medium 16–20
Well 22–24
Ham Steaks (1 to 11⁄2 in.) 16–20
precooked
Hot Dogs 8–9 Turn frequently.
Kabobs
Meat 20–25
Vegetable 10–15 For less-tender vegetables, reduce time 4 to 6 minutes.
Lamb Chops (3/4 to 1 in.) 26–30
Lobster Tails 15–20 Cut thin undershell to expose meat. Turn over every 5 to 10 minutes.
Brush with butter.
Pork Chops, loin or rib
(1/2 in.) 18–20
(1 in.) 30–36
Sausage Links (4 oz. each)
Raw 22–24 Grill whole or cut into 2 to 4 pieces. Turn to brown all sides.
Precooked 12–16
Spareribs
Entree (3 lbs.) 60–80 Parboil 5 minutes before grilling. Rearrange and turn over frequently.
Appetizer (2 lbs.) 50–60 Baste with sauce last 10 minutes, if desired.
Vegetable Halves 25–30 Choose tender vegetables such as squash and tomatoes. Cover with foil.
For tomatoes, reduce cooking time 10 minutes.
21
Vent System Control
Component Cooktop System
22
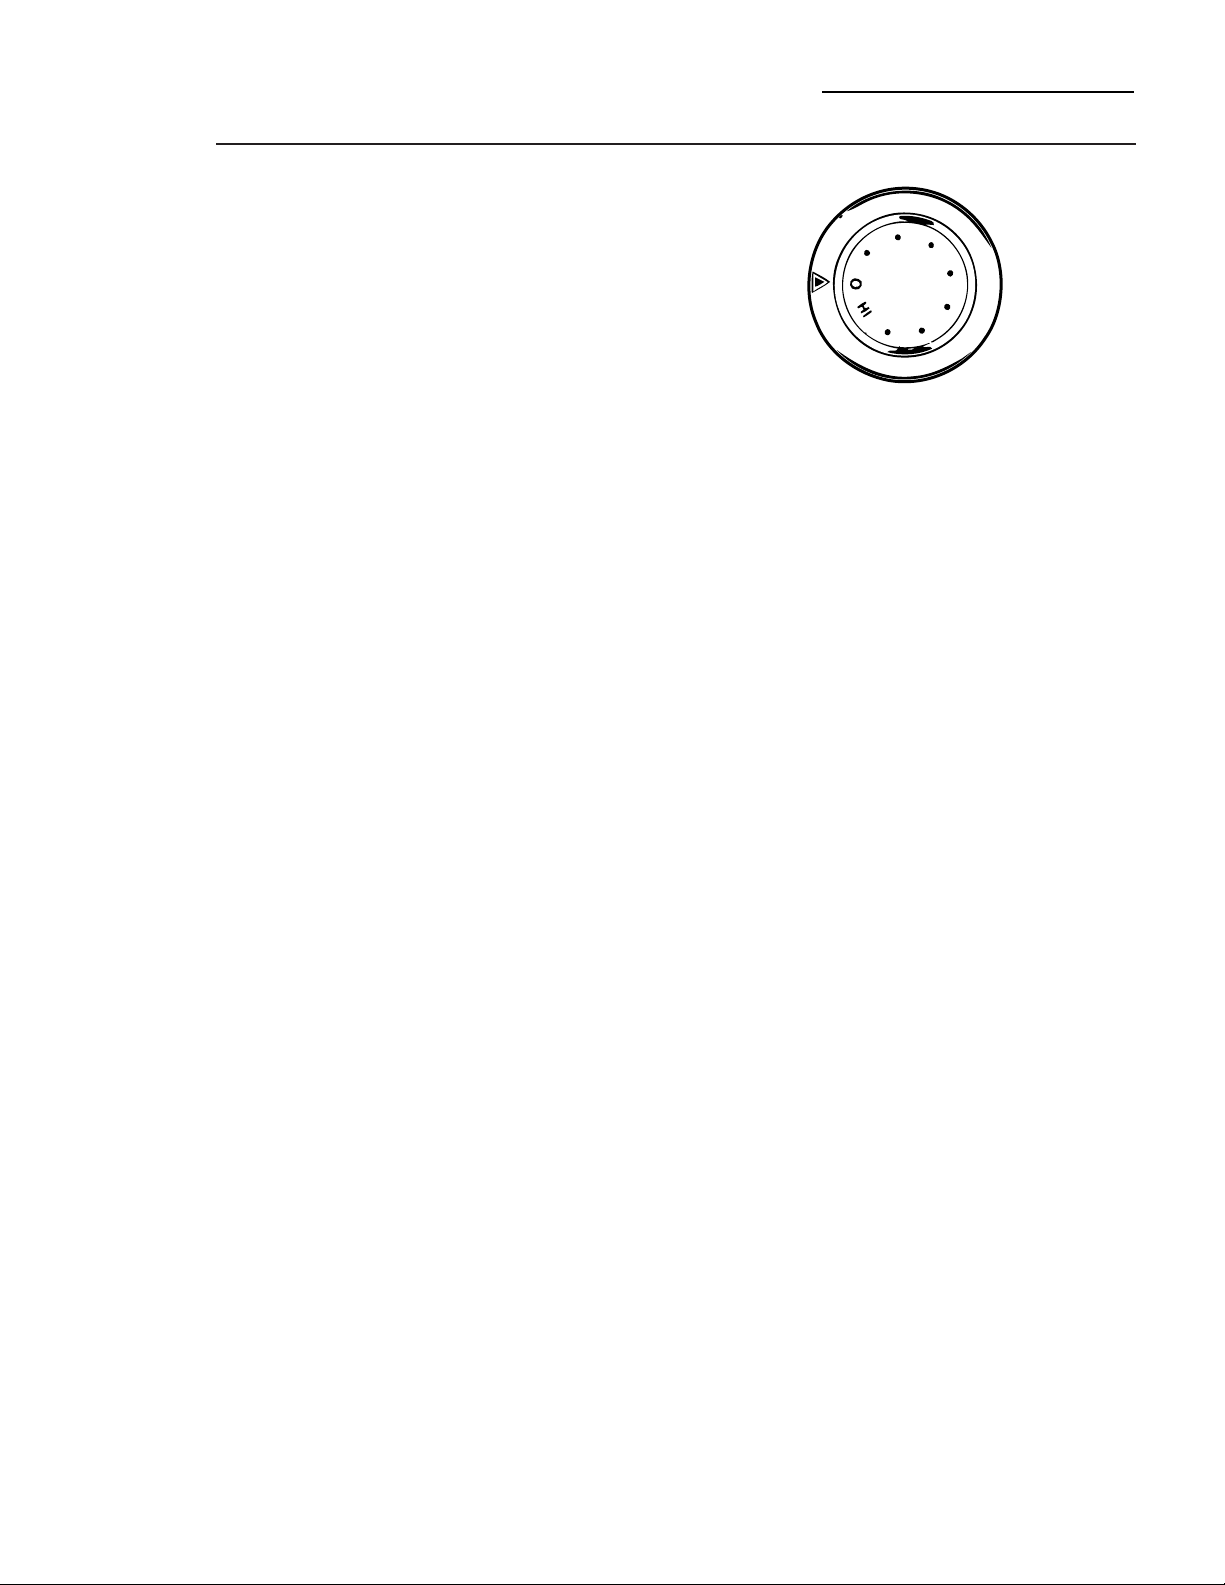
Using the
vent system
The built-in vent system helps remove cooking
vapors, odors and smoke from foods prepared
on the cooktop components.
To operate the vent system manually, turn the
knob on the control panel clockwise to the
desired blower speed.
Use the control knob at the front of the vent
grille to adjust the blower speed. A HI setting is
recommended when flame-ups occur while
cooking on the grill.
The downdraft blower adjacent to the grill
comes on automatically when the grill is turned
on. It turns off automatically when the grill is
turned off (O).
The blower speed, while grilling, will always be
the high speed. No adjustment is possible while
the grill is operating. The blower can be used
independent of the grill and then speed
adjustment is possible.

Care and Cleaning
Component Cooktop System
23
Proper care and cleaning are important so
your Component Cooktop System will give you
efficient and satisfactory service. Follow these
directions carefully to help assure safe and
proper maintenance.
BE SURE ELECTRICAL POWER IS OFF
BEFORE CLEANING ANY COMPONENTS.
Care of the
components
Some of the components must be cured or
preconditioned before using them for the
first time.
Components and accessories should be
cleaned after each use. The longer a soil
remains, the harder it is to clean. See each
component’s section in this guide for specific
instructions.
Brushed
stainless
steel finish
Wash with soap and water. For heavy soils, first
cover with a damp cloth and let soak 30
minutes. A stainless steel cleaner may be used.
To remove fingerprints, apply a little baby oil
or cooking oil with a cloth or paper towel. Rub
in the same direction as the brush marks in the
stainless steel finish.
Stubborn baked-on food residue or stains on
the stainless steel surfaces can be removed by
using pad-type oven cleaners. For your safety,
use extreme caution. Oven cleaners are caustic
and can damage or discolor most other surfaces.
Do not use spray-type oven cleaners. Overspray
will damage nearby surfaces. Use newspaper
and masking tape to cover surfaces such as
back wall, control panel, range sides,
countertop, etc. Remove grates, grill element
or porcelain enamel drip pan.
Control
panel and
knobs
Clean up any spills or spatters with a damp cloth.
Remove heavier soil with warm, soapy water.
Clean the control panel with mild liquid dish
detergent and a soft cloth. Rub the control
panel lightly.
CAUTION: Do not use abrasives of any kind
on the control panel.
The control knobs may be removed for easier
cleaning.
To remove a knob, pull it straight off the stem.
Wash the knobs in soap and water but do not
soak.
Do not allow water to run down inside the
surface of the panel while cleaning. After
drying, return the knobs to the cooktop,
making sure to match the flat area on the knob
to the shaft.

Care and Cleaning
Component Cooktop System
24
General
information
for glass
surface units
Before you use the cooktop for the first time,
clean the glass surface units with cleaning
cream. This helps protect them top and makes
clean-up easier.
Proper care and cleaning are important so
your cooktop will give you efficient and
satisfactory service.
If soil, mineral deposits from evaporated water
spills or metal rub-off from aluminum
cookware is not removed, it will burn on the
glass surface units and cause permanent
discoloration.
Follow the directions in this section carefully in
caring for the glass surface units to assure safe
and proper maintenance.
Daily
cleaning of
the glass
surface
units
Use only a recommended cleaning cream,
such as Cerama Brite or Cooktop Cleaning
Cream, on the glass surface units.
Normal,
light soil on
the glass
surface
units
1 Rub a few drops (less is better) of the cleaning
cream onto soiled area using a damp paper
towel. Buff with a dry paper towel until all soil
and cream are removed. Frequent cleaning
leaves a protective coating which is essential
in preventing scratches and abrasions.
2 Clean the surface units with the cleaning
cream after each use.
Heavy,
burned-on
soil on the
glass
surface
units
1 Apply a few drops of the cleaning cream to
the (cool) soiled area.
2 Using a damp paper towel, rub the cream
into the burned-on area. As with any
burned-on spill, this may require some effort.
3 Carefully scrape soil with razor scraper.
Hold scraper at a 30° angle against the
glass surface units.
4 If any soil remains, repeat the steps listed
above. For additional protection, after all
soil has been removed, polish the entire
surface unit with the cleaning cream.
5 Buff with a dry paper towel.
NOTE:
• Be sure to use a new, sharp razor scraper. Do
not use a dull or nicked blade.
• Store the razor scraper out of reach of children.
25
Special care
of the glass
surface
units
Sugary spillovers (such as jellies, fudge, candy
syrups) or melted plastics can cause pitting of
the surface units of your cooktop (not covered
by the warranty) unless the spill is removed
while still hot. Special care should be taken
when removing hot substances. Follow these
instructions carefully and remove soil while
spill is still hot.
1 Turn off all surface units affected by the
spillover. Remove hot pans.
2 Wearing an oven mitt, hold the razor scraper
at a 30° angle to the cooktop and scrape hot
spill to a cool area outside the surface unit.
3 With the spill in a cool area, use a dry paper
towel to remove any excess. Any spillover
remaining should be left until the surface of
the cooktop has cooled.
Do not continue to use the soiled surface unit
until all of the spillover has been removed.
Follow the steps under Heavy Soil to continue
the cleaning process.
Future care
of the glass
surface
units
• Do not use dishwashing detergents. They
will remove the protective coating and
therefore make the surface units more
susceptible to staining.
To conveniently order more cream and/or
scrapers for cleaning your glass surface units,
please call our toll free number:
National Parts Center 800-626-2002
Cleaner # WX10X300
Scraper # WX5X1614
Cream and scraper kit # WB64X5027
Precautions
for the glass
surface
units
• If pots with a thin overlay of aluminum,
copper or enamel are allowed to boil dry, the
overlay may bond with the glass surface units
and leave a black discoloration. This should
be removed immediately before heating again
or the discoloration may be permanent.
• Water stains (mineral deposits) are removable
using the cleaning cream or full strength
white vinegar.
• Use of window cleaner may leave an iridescent
film on the glass surface units. The cleaning
cream will remove this discoloration.
• If you slide aluminum or copper cookware
across the glass surface units of your cooktop,
they may leave metal markings which appear
as scratches. If this should happen, use
the razor scraper and cleaning cream to
remove these markings. Failure to remove
these residues immediately may leave
permanent marks.
• Most cleaners contain ammonia, chemicals
and abrasives which can damage the surface
units. Use only the recommended cleaning
cream for proper cleaning and protection of
your glass surface units.
• Read and follow all instructions and warnings
on the cleaning cream labels.
Note:
Using a razor scraper will not damage the glass
surface units if the 30° angle is maintained.
Care and Cleaning
Component Cooktop System
26
Gas burner
assembly
The burner assemblies should be washed
regularly and after spillovers.
Turn all control knobs to the off (O) position
before removing burner parts. Allow parts to
cool before removing.
CAUTION: DO NOT OPERATE THE
BURNER WITHOUT ALL BURNER PARTS
CORRECTLY IN PLACE. The electrode of the
spark igniter is exposed when the burner cap is
removed. Contact with an exposed igniter while
a burner is being turned on will cause a slight
electrical shock.
The burner grate, burner caps and burner
support rings can be lifted off, making them
easy to clean. (The drip pan cannot be
removed.) Wash burner parts with an all-
purpose, non-abrasive cleaner and warm water.
Soak stubborn soil. Dry the burner assemblies
with a cloth—don’t reassemble them wet.
To reassemble: Place the burner support ring
onto the burner bowl first. Before replacing the
burner cap, first examine the four notches on
its underside. One of the notches, shaped
differently from the other three, includes an
indexing key for the spark igniter—this notch
fits over the spark igniter. When replacing the
burner grate, make sure the bottom of the
burner grate fits securely into a corresponding
ridge in the drip pan.
Burner grates can be cleaned by hand or in a
self-cleaning oven. Although the burner grate is
durable, it will gradually lose its shine,
regardless of the care you take of it. This is due
to its exposure to the high temperature of the
gas flames.
To preserve the porcelain enamel finish as long
as possible, have a pan on the grate before you
turn on the burner, and lower the flame when
food reaches the desired cooking temperature.
Burner cap
Alignment
cap
Igniter
exposed
Burner grate
Burner cap
Igniter
Burner support ring
Burner body
CAUTION:
DO NOT OPERATE THE BURNER WITHOUT ALL
BURNER PARTS CORRECTLY IN PLACE.

27
Grill
component
Clean the grill component after every use. Do
not put the element into water. It cleans itself
when heated during normal use. To remove
any charred soil, clean with a dry, stiff brush
when the element is cool.
Never use steel wool or metal scouring pads
because they may damage the outer casing of
the element.
Wash the grill grate in the sink in soap and
water. The grate may be soaked in a solution of
dishwasher detergent and hot water. Use a
non-metal scouring pad if necessary. Do not
use abrasive cleaning products. The grill grate
can also be cleaned in a self-cleaning oven.
From time to time, you should recondition the
grate with no-stick cooking spray. See the Grill
Component section.
Wash the porcelain enamel drip pan in the
sink with soap and water, or put it in the
dishwasher. Soak stubborn stains, then rub
gently with a scouring pad.
Do not put the drip pan in the oven during a
self-cleaning cycle. Doing so will cause
discoloration and damage the finish.
Porcelain
enamel
grease well
Porcelain enamel can crack or chip with
misuse. It can stain if spillovers of foods with a
high acid content (such as tomatoes or lemon
juice) are not cleaned up quickly.
When cleaning a porcelain enamel grease well,
be careful not to get the electrical receptacles
wet. Do not try to fill the well with water when
cleaning. Be sure the drain hole and tube in the
grease well are not clogged.
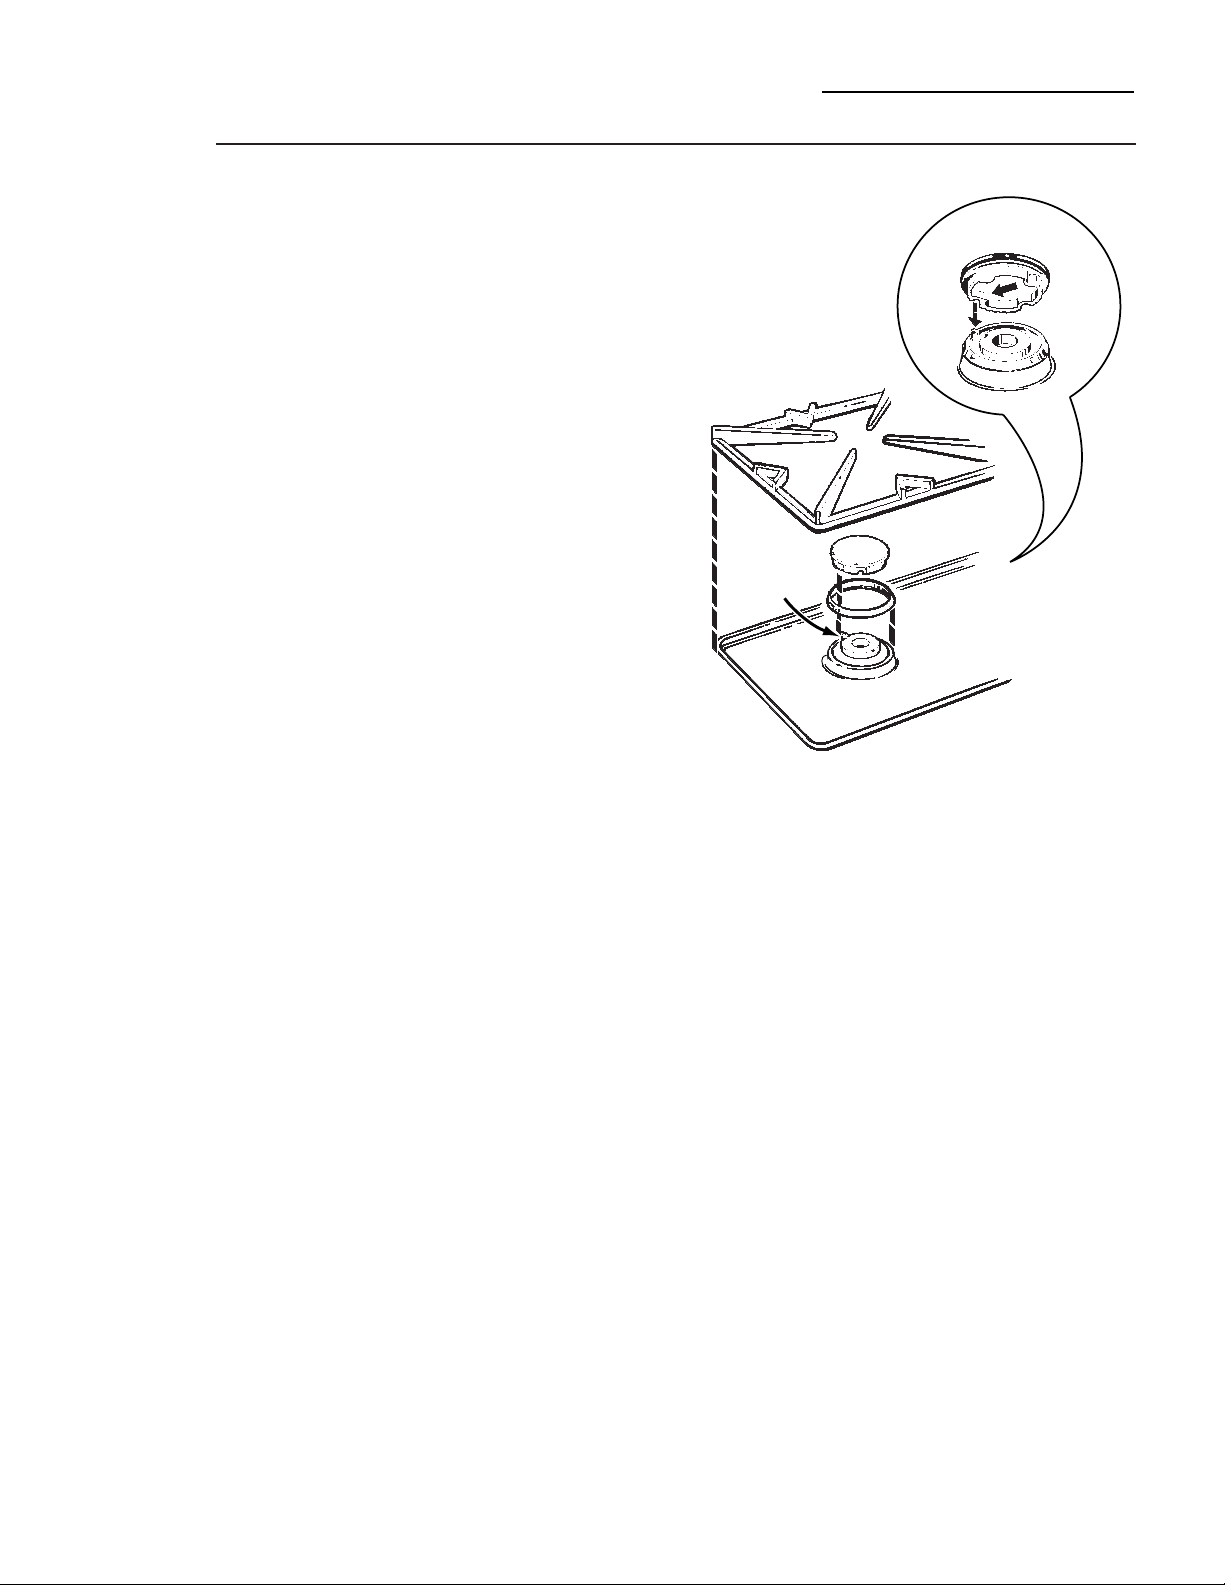
Grease jars
On the underside of the grill cooktop
component, a grease jar is mounted to catch
fat and drippings.
The lid of the jar is permanently mounted to
the bottom of the cooktop component box.
The lid is connected by a tube to a spout at the
front of the grease well. The jar can be
unscrewed from the lid to be emptied and
cleaned or to be replaced. The jar is a standard
1-pint jar. Quart canning jars may also fit.
Do not use thin-walled glass or plastic jars, such
as those having contained food products. Such
jars could fracture.
Different foods give different amounts of fat
and drippings, so you should inspect the jar
each time it is used. If the jar is not emptied or
replaced often enough, the fat and drippings
may overflow. Be sure the drain hole and tube
in the grease well are not clogged.
Care and Cleaning
Component Cooktop System
28
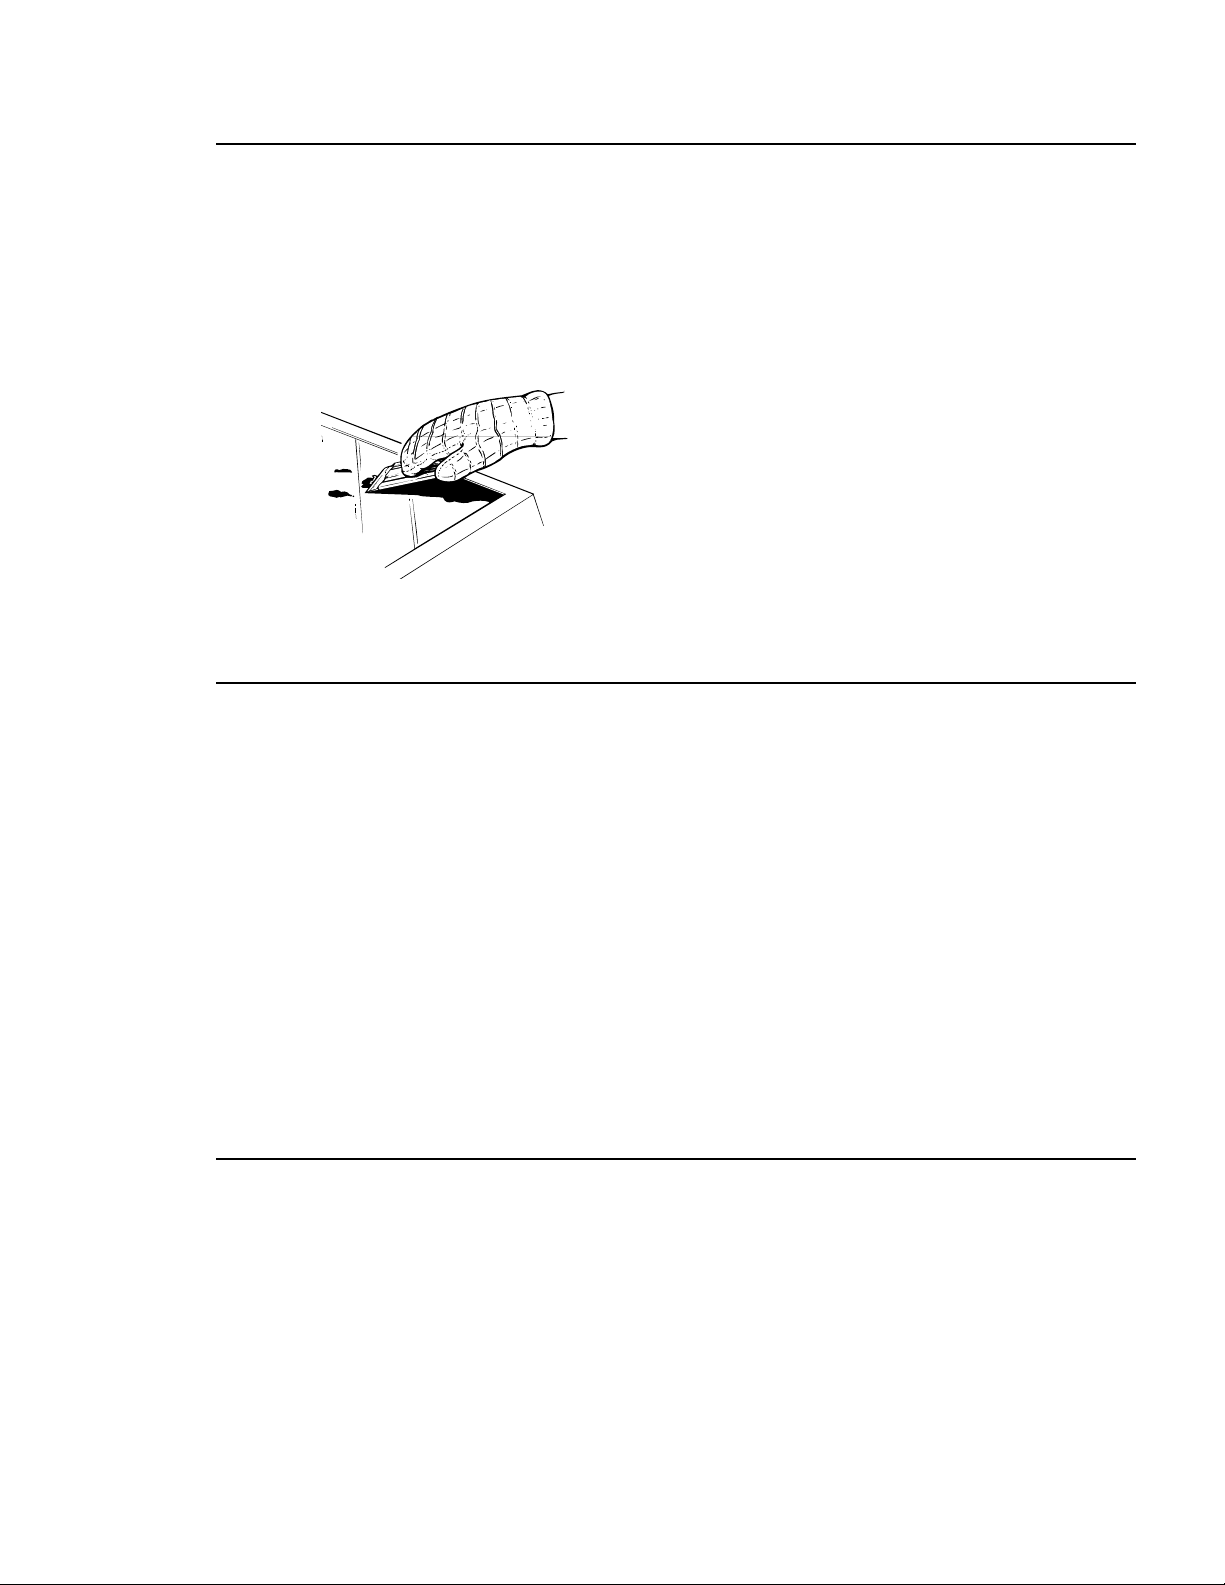
How to
clean the
vent system
The downdraft vent grille and filter should be
cleaned frequently—after every use is best.
Before cleaning the vent system, be sure
exhaust blower is shut off.
To remove parts for cleaning:
1. Lift off the vent grille.
2. Lift the filter straight up from the filter
supports.
How to
clean the
vent grille
To clean the vent grille, remove it from the
cooktop by lifting it up.
It can be cleaned by hand, in the dishwasher or
in a self-cleaning oven.
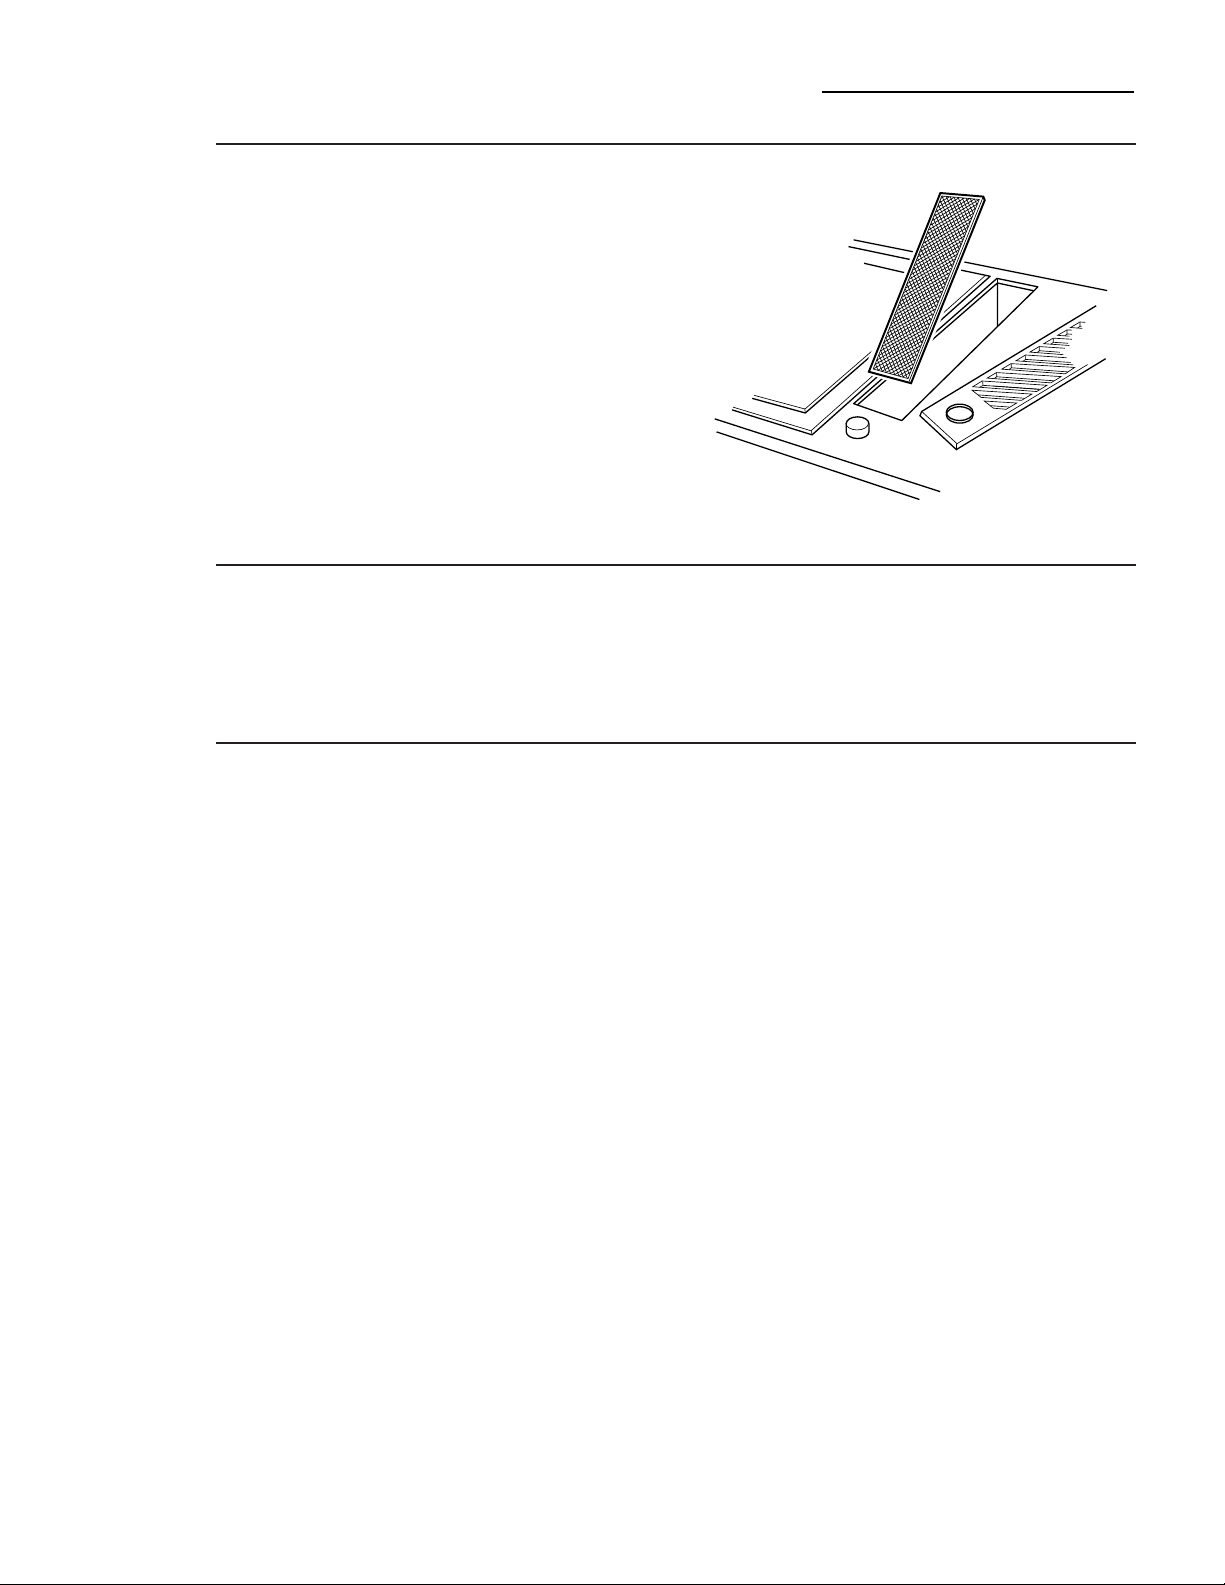
How to
clean the
filters
To clean the filter, soak, then agitate filter in
hot detergent solution prepared in the sink.
Using ammonia or other alkali will darken the
metal. Light brushing can be used to remove
embedded dirt. Be careful not to disturb the
aluminum fabric of the filter body.
Rinse, shake and remove moisture before
replacing. It is advised that filters should be
cleaned after every use.
Before replacing the filter into the vent
system housing, inspect and wipe clean the
housing walls. Do not allow grease
accumulation to form.
Never operate the vent system without the
filter in place. In situations where flaming
might occur, the filter will retard entry of
flames into the exhaust blower.
To replace the filter after cleaning, place it on
the filter supports. Replace the vent grille.
Filter
Grille removed
Control knob
The Problem Solver
Component Cooktop System
29
Questions?
Use this
problem
solver!
PROBLEM POSSIBLE CAUSE
COMPONENTS • Difficulty may be in the main distribution panel of your house caused
ARE NOT by a blown circuit fuse, a tripped circuit breaker, the main fuse or the
FUNCTIONING main circuit breaker, depending on the nature of the power supply.
PROPERLY If a circuit breaker is involved, reset it. If the control box uses fuses,
the circuit fuse (a cartridge-type) should be changed, BUT ONLY
BY SOMEONE FAMILIAR WITH ELECTRICAL CIRCUITS.
If, after performing one of these procedures, the fuse blows or circuit
breaker trips again, call for service.
NOTE: Apartment tenants or condominium owners should request
their building management perform this check before calling for
service.
•Controls are not properly set or wrong control is set for the component
or surface unit you are using.
•Grill element is not plugged in properly.
•Consider the possibility of interruption in gas or electric service from
the utility source.
HALOGEN/RADIANT •You must use pans which are absolutely flat. If light can be seen
SURFACE UNITS between the pan bottom and a straight edge, the halogen/radiant
WILL NOT MAINTAIN surface units will not transfer heat properly.
A ROLLING BOIL OR
•Pan bottoms should closely match the diameter of the surface unit
FRYING RATE IS NOT
selected.
FAST ENOUGH
HALOGEN/RADIANT •The halogen/radiant cooktop may seem hotter than you are used to.
COOKTOP FEELS HOT This is normal.
•Make sure flat-bottomed pans are used.
•Using the vent will help keep the halogen/radiant cooktop cooler.
FOODS COOK •Improper cookware being used. Pan bottoms should be flat, fairly
SLOWLY ON heavy weight and the same diameter as the surface unit selected.
HALOGEN/RADIANT
COOKTOP
TINY SCRATCHES •Incorrect cleaning methods have been used, cookware with rough
(may appear as cracks) bottoms have been used or coarse particles (salt or sand) were
OR ABRASIONS ON between the cookware and the surface of cooktop. Use recommended
HALOGEN/RADIANT cleaning procedures, be sure cookware bottoms and cookware are
COOKTOP GLASS clean before use and use cookware with smooth bottoms. Tiny
SURFACE scratches are not removable but will become less visible in time as a
result of cleaning.
METAL MARKINGS •Do not slide aluminum cookware across the surface. Use the
(may appear as scratches recommended cleaning procedure to remove marks.
on halogen/radiant
•Incorrect cleaning materials have been used, encrusted boilovers or
cooktop glass surface)
grease spatters remain on the surface. Use a razor scraper and the
recommended cleaning procedure.

The Problem Solver
Component Cooktop System
30
Questions?
Use this
problem
solver!
PROBLEM POSSIBLE CAUSE
DARK STREAKS •Use a razor scraper and recommended cleaning procedure.
OR SPECKS ON
HALOGEN/RADIANT
COMPONENT
AREAS OF •Marks from aluminum and copper pans as well as mineral deposits
DISCOLORATION from water or food can be removed with Cooktop Cleaning Cream.
ON HALOGEN/
RADIANT SURFACE
COOKTOP
FREQUENT CYCLING •Incorrect cookware used. Use only flat cookware to minimize cycling.
OFF AND ON OF
HALOGEN/RADIANT
SURFACE UNITS
HOT SUGAR •Turn the surface unit to LO, wipe the hot cooktop with several dry
MIXTURES/PLASTIC paper towels. Use a razor scraper held at a 30° angle to the cooktop
MELTED TO THE to scrape the hot spill to a cool area outside the surface unit. Let the
HALOGEN/RADIANT cooktop cool. Clean with Cooktop Cleaning Cream.
SURFACE
CONTROL KNOB •When the knob is at the off (O) position, it must be pushed in before
WILL NOT TURN it can be turned.When the knob is at any other position, it can be
turned without being pushed in.
SPARKING SOUND •Sparking of the igniter is normal. Air currents in the kitchen from
PERSISTS AFTER an open window or a person moving quickly can interrupt the flame,
BURNER LIGHTS causing automatic relight sparking. As the burner warms, the
sparking is less likely to occur. If the sparking persists for a long time,
call for service.
SPARKING SOUND •Be sure the control knobs are in the off (O) position. If the sparking
PERSISTS AFTER sound persists call for service.
BURNER IS OFF
BURNERS DO •Make sure electrical plug is plugged into a live power outlet.
NOT LIGHT
•Gas supply not connected or not turned on.
•Orifice in burner body may be clogged (see the Gas Burner
Component section). Remove the obstruction.
•Burner parts not replaced correctly (see the Gas Burner Component
section).
•Counter unit not properly grounded or polarized. This can affect
spark ignition.
•Soil clogging holes in burner cap. Remove and clean.
•Cooktop burner top not replaced correctly.

31
PROBLEM POSSIBLE CAUSE
BURNERS HAVE
YELLOW OR
YELLOW-TIPPED
FLAMES
•If burner flames look like (A) or (B), call for service. Normal burner
flames should look like (C), burning with a soft blue flame.
VENT SYSTEM •The circuit breaker in your house has been tripped, or a fuse has
BLOWER DOES been blown.
NOT WORK
•If the components operate but the blower doesn’t, the fault may be
in the blower control switch or blower wiring connections. Be sure to
disconnect power to the cooktop at the household distribution panel
before attempting to service the blower yourself.
GRILL OR IS NOT •Grill element is not plugged in solidly.
FUNCTIONING
•Grill element controls are not properly set.
PROPERLY
•To use the entire surface of the grill, it is necessary to turn on both
the front and the rear controls.
FOODS STICK •Grill was not pre-seasoned before first use.
TO GRILL
•Heat setting is too high.
EXCESSIVE SMOKE • Accumulated grease in the drip pan or grease well or food soil on
the grate are causing excessive smoke.
•Fats were not trimmed from meats prior to cooking.
If you need more help…call, toll free:
GE Answer Center®
800.626.2000
consumer information service
A. Yellow flames:
Call for
service.
B. Yellow-tipped flames:
Call
for service.
C. Soft blue flames:
Normal
burner flames.

32
Notes
Component Cooktop System
33
Consumer Services
With the purchase of your new Monogram appliance, receive the
assurance that if you ever need information or assistance from GE,
we’ll be there. All you have to do is call—toll- free!
GE Answer
Center®
800.626.2000
Whatever your question about any Monogram major appliance, GE Answer Center®
information service is available to help. Your call—and your question—will be answered
promptly and courteously. And you can call any time. GE Answer Center® service is open
24 hours a day, 7 days a week.
In-Home Repair
Service
800-444-1845
A GE consumer service professional will provide expert repair service, scheduled at a time
that’s convenient for you. Many GE Consumer Service company-operated locations offer
you service today or tomorrow, or at your convenience (7:00 a.m. to 7:00 p.m. weekdays,
9:00 a.m. to 2:00 p.m. Saturdays). Our factory-trained technicians know your appliance
inside and out—so most repairs can be handled in just one visit.
Service Contracts
800-626-2224
You can have the secure feeling that GE Consumer Service will still be there after your
warranty expires. Purchase a GE contract while your warranty is still in effect and you’ll
receive a substantial discount. With a multiple-year contract, you’re assured of future
service at today’s prices.
Parts and
Accessories
800-626-2002
Individuals qualified to service their own appliances can have parts or accessories sent directly
to their home. The GE parts system provides access to over 47,000 parts…and all GE Genuine
Renewal Parts are fully warranted. VISA, MasterCard and Discover cards are accepted.
User maintenance instructions contained in this guide cover procedures intended to be
performed by any user. Other servicing generally should be referred to qualified service
personnel. Caution must be exercised, since improper servicing may cause unsafe operation.
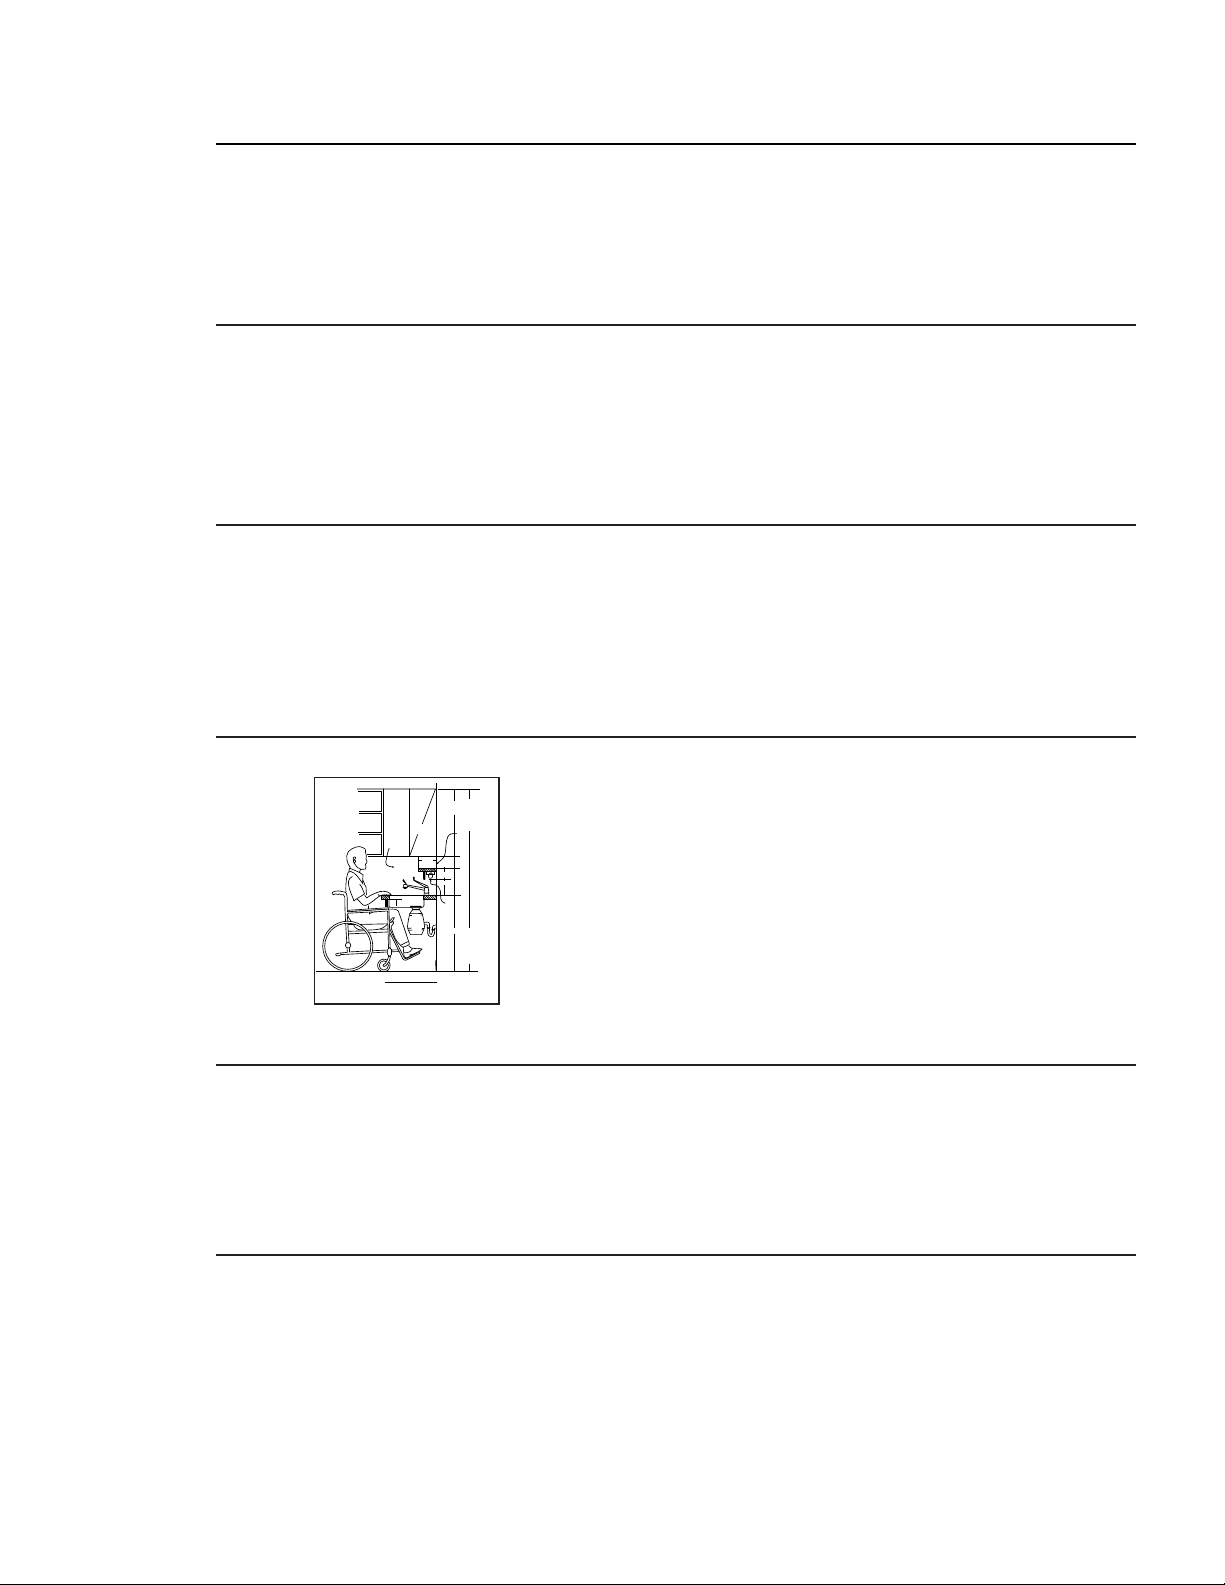
For Customers
With Special
Needs…
800.626.2000
GE offers, free of charge, a brochure to assist in planning a barrier-
free kitchen for persons with limited mobility.
Consumers with impaired hearing or speech who have access to a
TDD or a conventional teletypewriter may call 800-TDD-GEAC
(800-833-4322) to request information or service.
SINGLE CONTROL
FAUCET
TBXTOLITE
ON WALL
6’ 10"
5"
8"
6"
5"
7"
1’ 0"
R SHALLOW DEPTH SINKS (6") WITH REAR DRAIN.
SINK SHOULD ALSO BE UNDERCOATED
2’ 10"
3’
1/8
"
SCALE 1’
=
1"
SECTION A-A
FLUORESCENT
FIXTURE
THIS LIGHT CAN
BE INSTALLED
IN BOTTOM OF
WALL CABINETS
2’ 6"

34
WARRANTY
YOUR MONOGRAM COMPONENT COOKTOP WARRANTY
Staple sales slip or cancelled check here. Proof of original
purchase date is needed to obtain service under warranty.
WHAT IS
COVERED
FULL ONE-YEAR WARRANTY
For one year from date of original purchase,
we will provide, free of charge, parts and
service labor in your home to repair or
replace any part of the cooktop that fails
because of a manufacturing defect.
FULL FIVE-YEAR WARRANTY
(on some models) For five years from the
date of original purchase, we will provide,
free of charge, parts and service labor in
your home to repair or replace the glass
cooktop due to:
• Cracking of the glass cooktop due to
thermal shock
• Discoloration of the glass cooktop
• Wear off of the pattern on the glass cooktop
• Cracking of the rubber seal between the
glass cooktop and the porcelain edge
• Burn out of any of the radiant or halogen
surface units.
This warranty is extended to the original
purchaser and any succeeding owner for
products purchased for ordinary home use
in the 48 mainland states, Hawaii and
Washington, D.C. In Alaska the warranty is
the same except that it is LIMITED because
you must pay to ship the product to the
service shop or for the service technician’s
travel costs to your home.
All warranty service will be provided by our
Factory Service Centers or by our authorized
Customer Care® servicers during normal
working hours.
Should your appliance need service, during
warranty period or beyond, call 800-444-1845.
Some states do not allow the exclusion or limitation of incidental or consequential damages,
so the above limitation or exclusion may not apply to you. This warranty gives you specific
legal rights, and you may also have other rights which vary from state to state.
To know what your legal rights are in your state, consult your local or state consumer affairs
office or your state’s Attorney General.
Warrantor: General Electric Company. If further help is needed concerning this warranty,
write: Manager—Consumer Affairs, GE Appliances, Louisville, KY 40225
WHAT IS NOT
COVERED
• Service trips to your home to teach you how
to use the product.
Read your Use and Care material.
If you then have any questions about
operating the product, please contact your
dealer or our Consumer Affairs office at
the address below, or call, toll free:
GE Answer Center®
800.626.2000
consumer information service
• Replacement of house fuses or resetting of
circuit breakers.
• Failure of the product if it is used for other
than its intended purpose or used
commercially.
• Damage to the glass surface units caused
by the use of cleaners other than the
recommended cleaning cream.
• Damage to the glass surface units caused
by hardened spills of sugary materials
or melted plastic that are not cleaned
according to the directions in the Use
and Care Guide.
• Improper installation.
If you have an installation problem, contact
your dealer or installer. You are responsible
for providing adequate electrical, gas,
exhausting and other connecting facilities
as described in the Installation Instructions
provided with the product.
• Damage to the product caused by accident,
fire, floods or acts of God.
• Damage to the product due to misuse
or abuse.
WARRANTOR IS NOT RESPONSIBLE
FOR CONSEQUENTIAL DAMAGES.
ZEW145
ZEW155
ZEW166
ZEW176
ZGW124
ZGW125
35
General Electric Company
Warranty Registration Department
P.O. Box 34070
Louisville, KY 40232-4070
Place
1st Class
Letter
Stamp
Here
GE Appliances
Consumer Product
Ownership Registration
Important Mail Today
Consumer Product Ownership Registration
Dear Customer:
Thank you for purchasing our product and thank you for placing your confidence in us. We are proud to
have you as a customer!
Follow these three steps to protect your new appliance investment:
1
Complete and mail
your Consumer
Product Ownership
Registration today.
Have the peace of mind
of knowing we can
contact you in the
unlikely event of a
safety modification.
2
After completing this
registration, write your
model and serial numbers
in this guide. You will
need this information
should you require
service. Our service
number is 800-444-1845.
3
Read your “Use and Care
Guide” carefully. It will
help you operate your new
appliance properly. If you
have questions, or need
more information call
the GE Answer Center
®
800.626.2000.
Important: To ensure that your product is registered, fold and mail this form. No envelope is needed.
Consumer Product Ownership Registration
Product Model Serial
Component Cooktop System
Important
Mail
Today!
First
Name
Apt. #
Street
Address
City
Last
Name
Zip
CodeState
Date Placed
In Use
Month Day Year
Phone
Number
GE Appliances
General Electric Company
Louisville, Kentucky 40225
CUT HERE
D-953-0555-000
Part No. 164D3333P077
Pub No. 49-8835
Printed in the United States
6-97 CG
Mr.
l Ms. l Mrs. l Miss l
General Electric Company
Louisville, KY 40225
Monogram®

