Loading ...
Loading ...
Loading ...
7
US
General Information
POWER
123
12
PC
INPUT
COMPONENT
MUTE
MENU ENTER
VOL
AV INPUT
LCD MONITOR
1
3
4
6
8
0
q
5
7
9
2
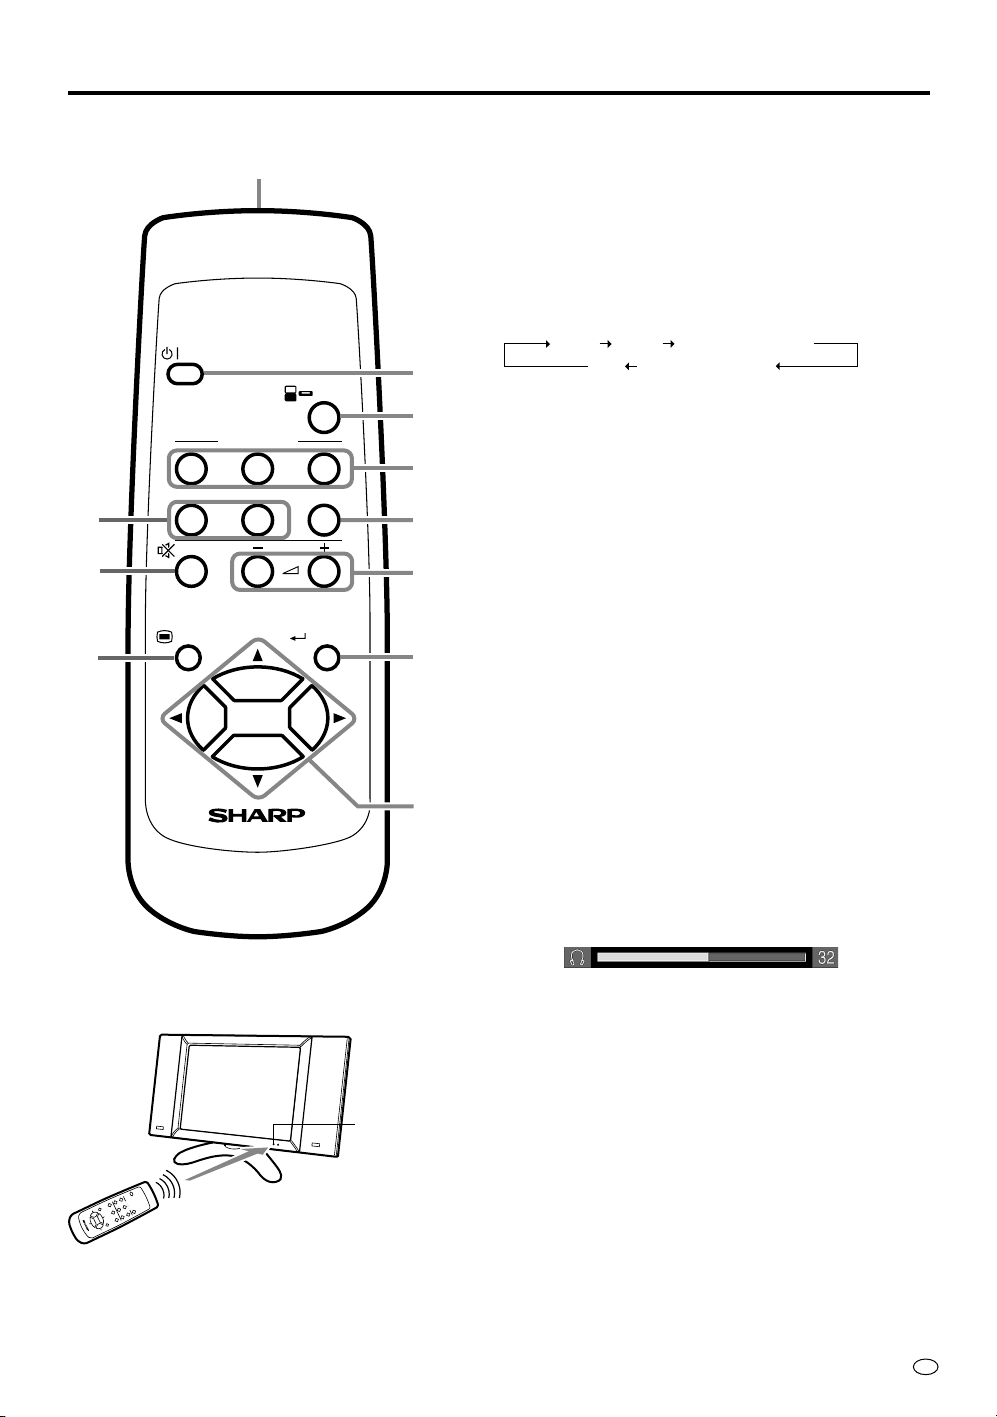
Remote Control
1 Infrared transmitter window
2 POWER button [p.14]
• To switch on the power, press this button.
The POWER/Standby indicator lights up green.
• To switch off the power, press this button.
The POWER/Standby indicator lights up red.
3 INPUT button [p.14]
Use this button to select an input source.
AV-1 AV-2 COMPONENT1
PC COMPONENT2
• The input source mode is skipped if the corre-
sponding input terminal is not connected with
external equipment (except “PC”).
• If you change the AV INPUT 3/AV OUT select,
you can select “AV-3”. See page 29 for details.
4 AV INPUT buttons
Use these buttons to select an AV input terminal
directly.
• You can not select an input source to which
external equipment is not connected.
5 COMPONENT buttons
Use these buttons to select a COMPONENT termi-
nal directly.
• You can not select an input source to which
external equipment is not connected.
6 PC button
Use this button to select the PC mode.
7 MUTE button
Use this button to temporarily turn off the sound.
Press the button again to turn the sound back to the
previous level.
8 VOL (+)/(–) buttons [p.15]
Use these buttons to increase/decrease sound volume.
The sound volume can be adjusted in the range 0~60.
9 MENU button [p.17]
Use this button to turn on/off the MENU screen.
0 ENTER button [p.18]
Use this button to execute a command.
q Cursor buttons [p.18]
Use these buttons to select a desired item on the
setting screen.
L
C
D
M
O
N
I
T
O
R
Remote Control
Display
Remote sensor
window
Loading ...
Loading ...
Loading ...