Loading ...
Loading ...
Loading ...
49-60792 Rev. 3 33
INSTALLATION INSTRUCTIONS
IMPORTANT!
The 6 mounting screws (3 on each side) are NOT interchangeable with the center or top hinge screws.
Drawer screws have flat washer heads, and other screws have lines/ribs on washer heads.
$IWHULQVWDOODWLRQRIWKHIUHH]HUGRRUFKHFNIRUXQLIRUPJDSVWRSDQGERWWRPRIULJKWDQGOHIWKDQGVLGHZLWKWKH
template provided.
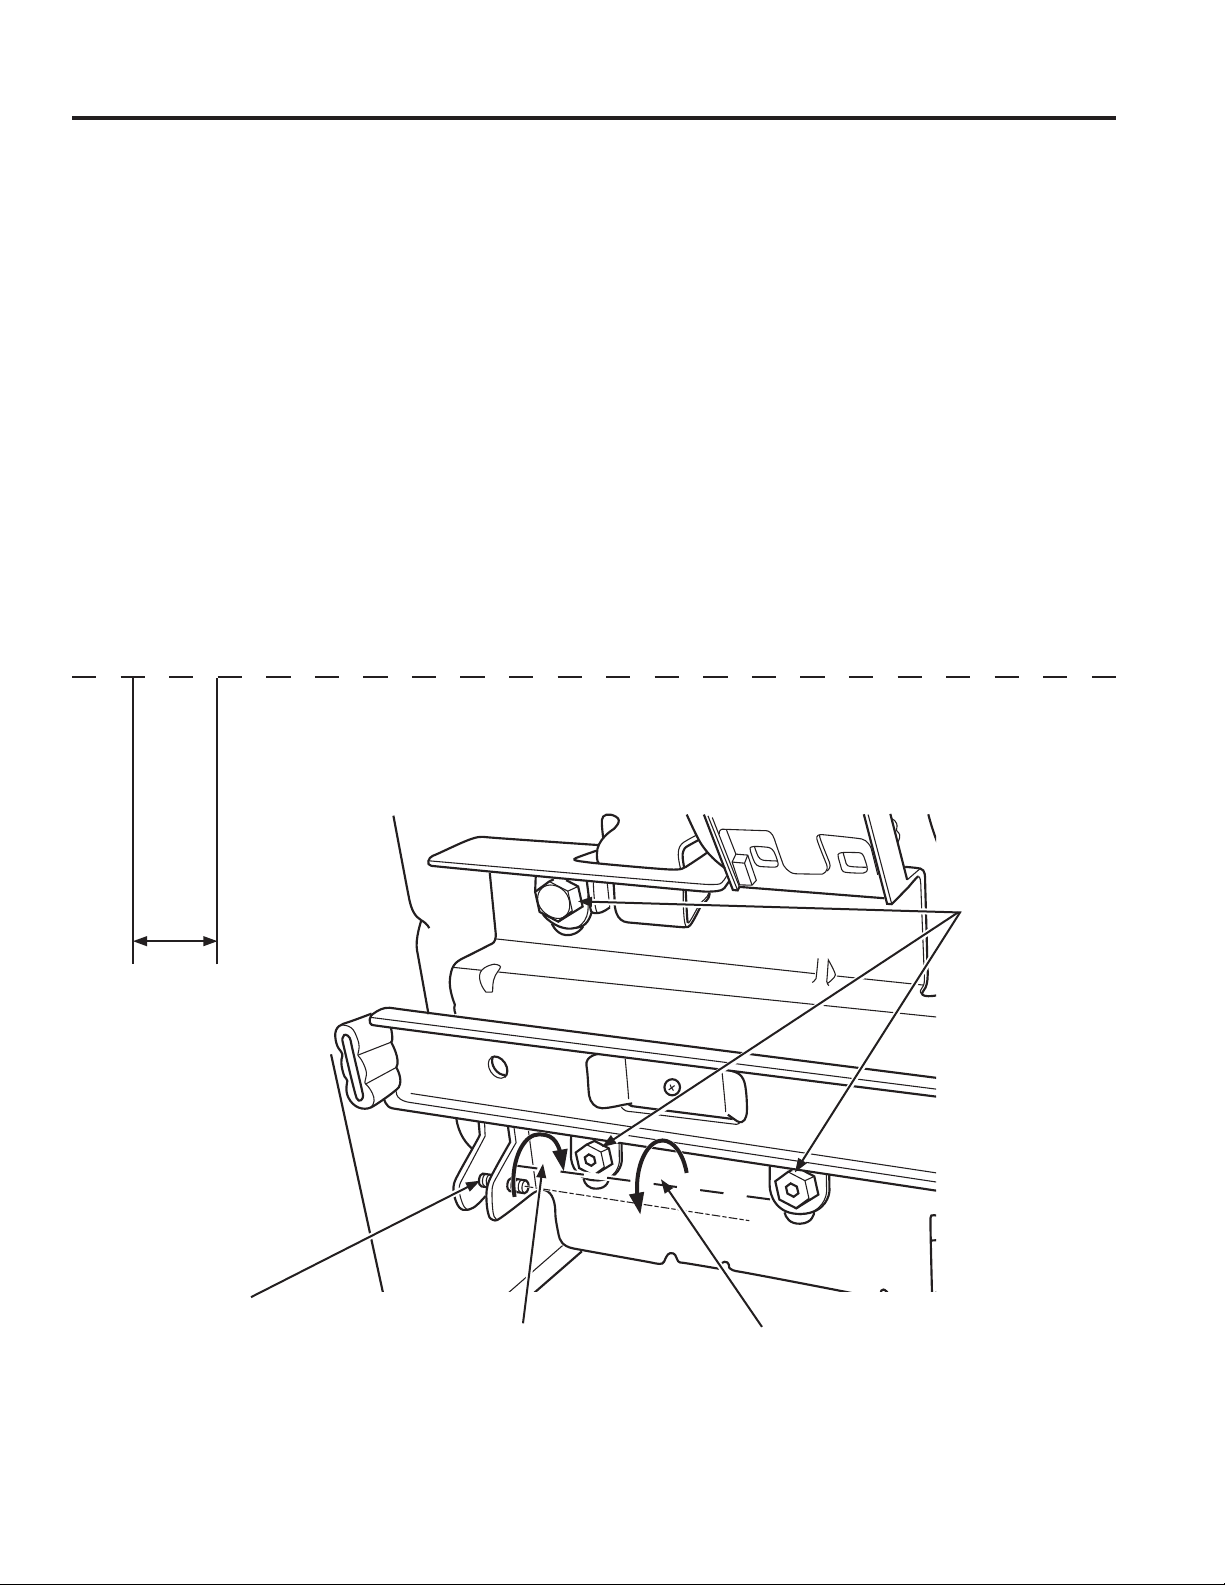
,QWKHHYHQWRIH[FHVVLYHJDSVXVHWKHIROORZLQJVWHSVWRDGMXVWWKHIUHH]HUGRRU
Step 1 /RRVHQWKHVFUHZVRQHDFKVLGHULJKWDQGOHIWRIWKHIUHH]HUGRRU
Step 2 -$GMXVWVHWVFUHZFORFNZLVHLIJDSDWWKHWRSLVWRRELJVHHWHPSODWH7XUQWKHVHWVFUHZXVLQJ´KH[
key clockwise by quarter to half a rotation
Step 3 -$GMXVWVHWVFUHZFRXQWHUFORFNZLVHLIJDSDWWKHERWWRPLVWRRELJVHHWHPSODWHTurn the set screw using
´KH[NH\FRXQWHUFORFNZLVHE\TXDUWHUWRKDOIDURWDWLRQ
Step 4 -7LJKWHQWKHVFUHZVRQHDFKVLGHULJKWDQGOHIW
Step 5 - Re-check the gaps using the template and repeat steps 1 to 4 if required and complete with step 5.
Instructions for adjusting freezer door gaps:
Fold here for using template
FP
´
Template for checking gaps.
*DSVKRXOGEH´RUEHORZ
Gabarit pour vérifier les écarts.
L’écart doit être de 0,6 po (1,5
FPRXPRLQV
Plantilla para el control de
espacios. El espacio debería
VHUGH´RLQIHULRU
Step 1
Étape 1
Paso 1
Step 4
Étape 4
Paso 4
Set Screw
Vis d’ajustement
Tornillo del Set
Step 3
Étape 3
Paso 3
Step 2
Étape 2
Paso 2
Plier ici pour utiliser le gabarit Dóblelo aquí para usar la plantilla
Installation Instructions
INSTALLING THE REFRIGERATOR (Cont.)
Loading ...
Loading ...
Loading ...