Loading ...
Loading ...
Loading ...
32 49-60792 Rev. 3
RE-INSTALL FREEZER DRAWER
5HLQVWDOOIUHH]HUGUDZHUE\SODFLQJWKHGUDZHU
wheels onto the top of the track mounted to the
VLGHRIWKHIUHH]HUZDOOV7KHZKHHOVRQWKH
IUHH]HUGUDZHUVKRXOGEHRQWRSRIWKHERWWRP
basket sides.
ON MODELS EQUIPPED WITH ICE MAKER
IN THE FREEZER: Place the ice bucket in the
GUDZHUDQGSXVKWKHGUDZHULQWRWKHIUHH]HUZLWK
the front of the bucket to the front of the basket,.
Make sure:
- The ice bucket does not hit the icemaker arm
DQGWKHIUHH]HUGUDZHUUHWUDFWVFRPSOHWHO\LQWR
WKHIUHH]HUFRPSDUWPHQW
- The fill tube extends into the fill cup opening at
the back of the icemaker.
9
A
Installation Instructions
INSTALLING THE REFRIGERATOR (Cont.)
INSTALLATION INSTRUCTIONS
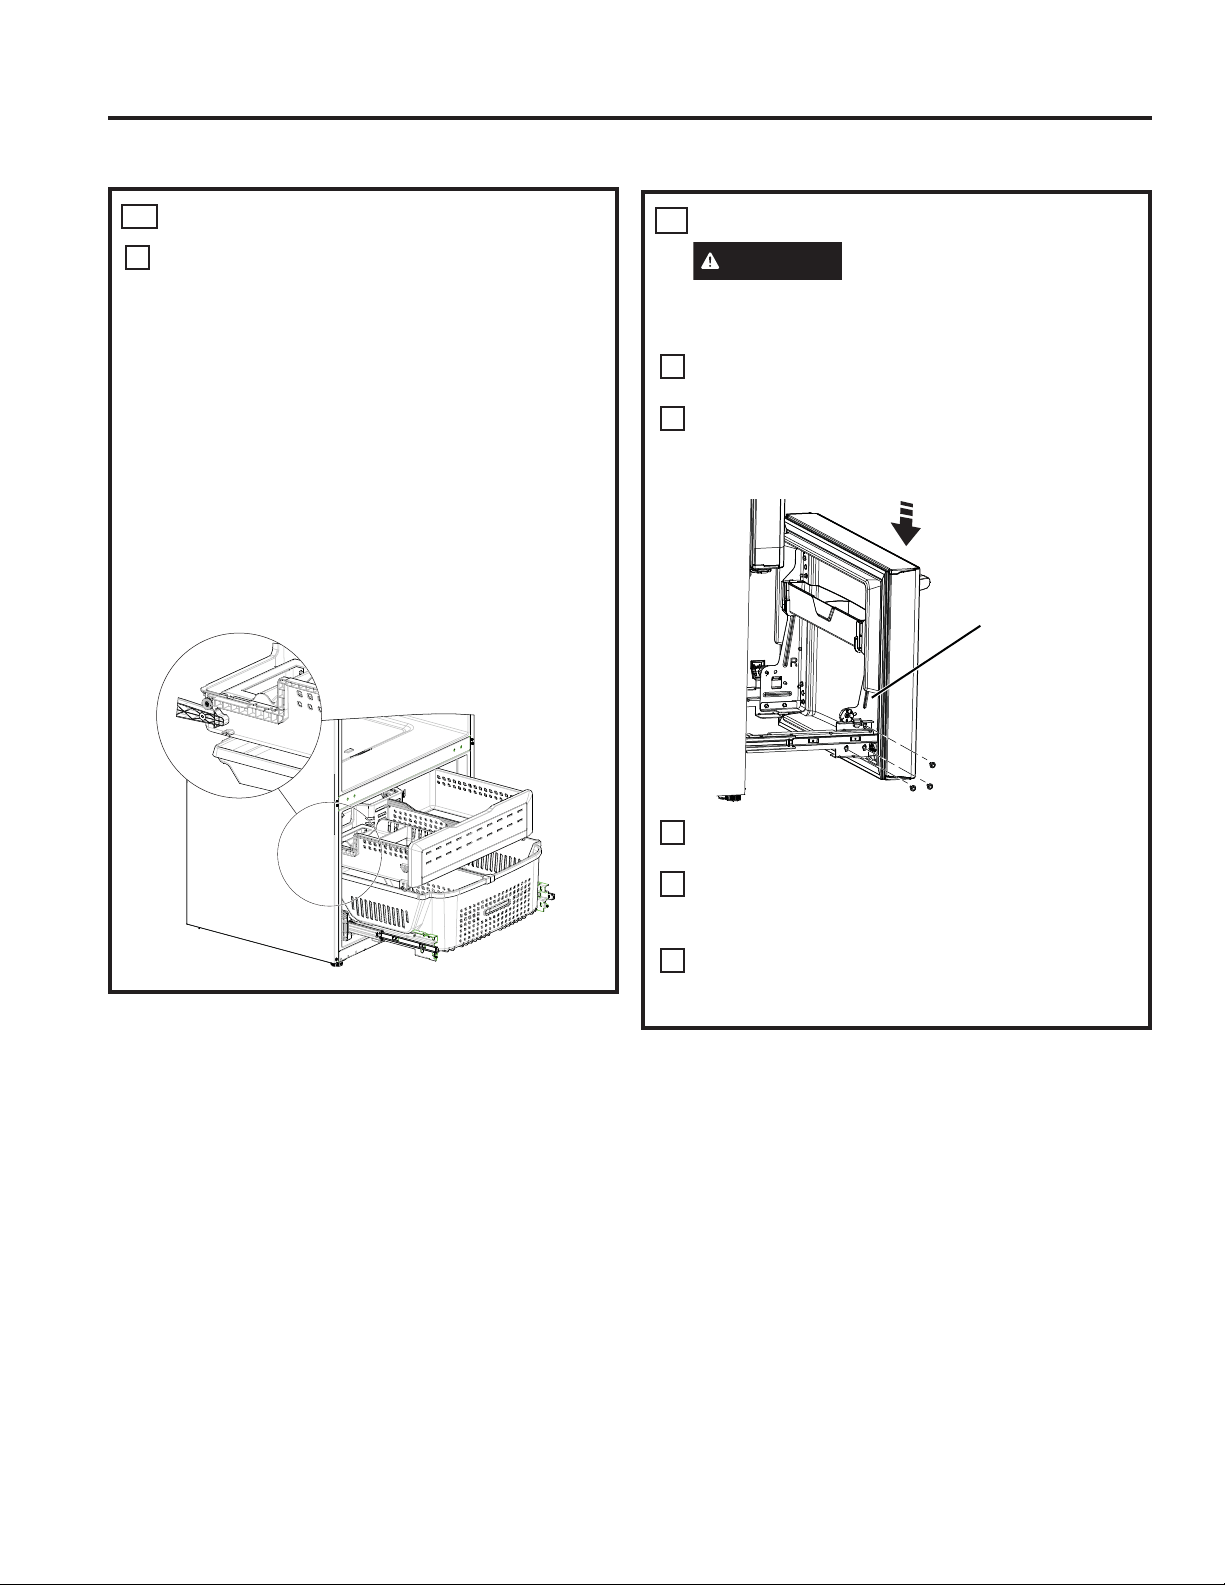
REPLACE FREEZER DOOR
CAUTION
Lifting Hazard
Freezer door is heavy Use both hands to
secure the door before lifting.
Pull the lower basket slide mechanism to full
extension with both hands.
/LIWWKHIUHH]HUGRRUDQGDOLJQWKHWDEVRQWKH
door bracket sides with the square holes in slide
mechanisms.
Replace the attachment screws and torque the
VFUHZVWRLQOE1P
)RUDGMXVWLQJIUHH]HUGRRUJDSVIROORZWKH
instructions on page 30 or in the Owner’s
Manual.
5HSODFHIUHH]HUEDVNHWRQWRWKHVOLGHEUDFNHWV
DQGPDNHVXUHWKHIUHH]HUGRRURSHUDWHVDQG
closes freely.
10
Align and insert
WDERQ)UHH]HU
'RRU%UDFNHWZLWK
VORWRQ)UHH]HU
Slide Bracket.
NOTE: Place one
side in first and
then align the
other side.
A
B
C
'
E
Loading ...
Loading ...
Loading ...