Loading ...
Loading ...
Loading ...
11
Using Your Induction Warmer
Programming Magneeto
TM
II
● Starting with the unit off, hold the Down Arrow while pressing the Power button.
● The display will start with the text “CLR.” Use this to clear the tag (the unit will no longer
enter auto mode). Otherwise, use the Up and Down Arrows to select a temperature.
● To set the tag, press the Lock Button twice. The display will read “TAG SET.”
● Repeat if necessary with other Magneeto™ IIs.
Magneeto
TM
II Operation
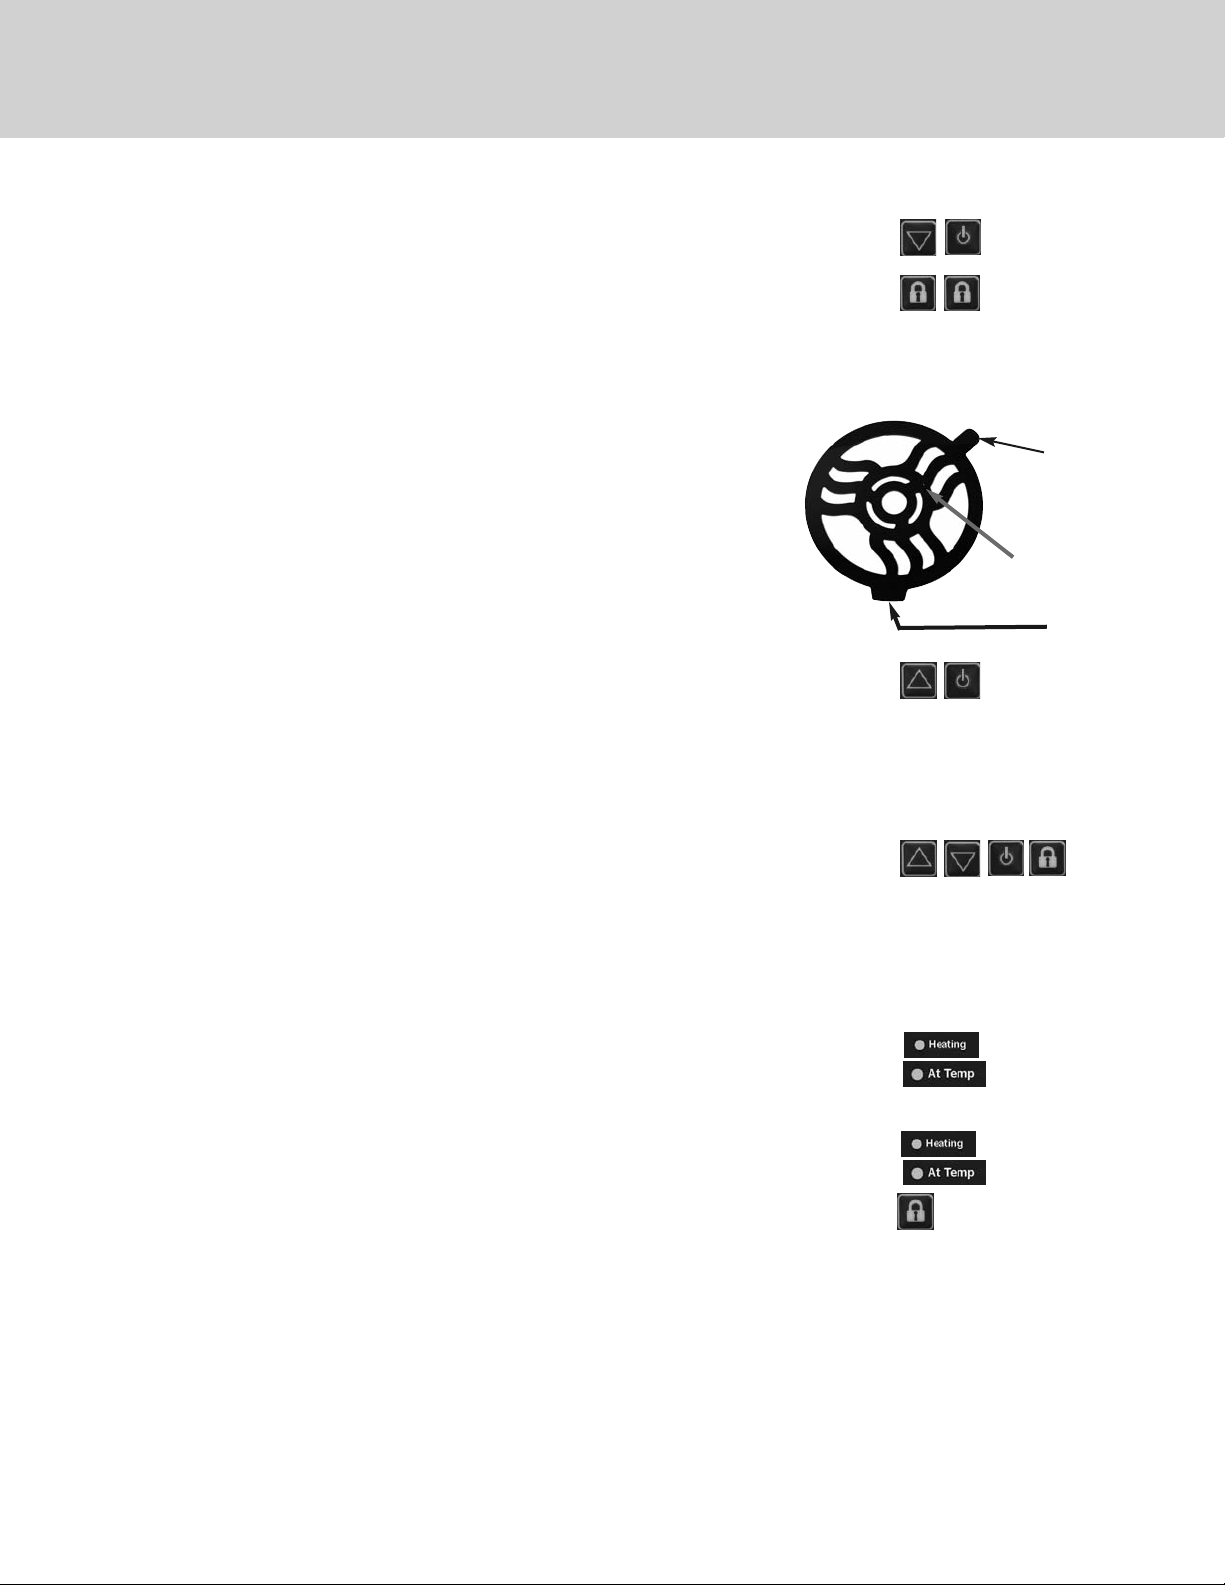
● With the unit turned on, place Magneeto™ II on countertop in expected
vicinity of unit (ribbed side down). Slowly slide the Magneeto™ II
around until the red light flashes.
● Placement where the light flashes brightest is the optimum position.
● Place induction compatible cookware/bakeware on top of Magneeto™ II
for warming. Make sure the cookware/bakeware covers the
temperature sensor, but do not cover the wireless communicator
tab with the cookware. Locating may also be performed with the
cookware/bakeware already on the Magneeto™ II.
Wireless
Communicator
tab
Red LED
Temperature
Sensor
Change Temperature Scale
Starting with the unit off, hold down the Up Arrow while pressing the Power button. Then use the
Down Arrow to select the desired scale. Powering the unit off completes the selection.
Note: if a button is not pressed for more than five minutes, the unit will power off keeping the
previously set temperature scale.
Timer Operation
● To enable/disable the timer feature, see “Setting the Timer” below.
● If the timer is enabled, the timer will start counting when a pan is placed on the unit and the
Heating or At Temp LED will turn on.
● The timer will count up to the preset interval (in minutes). When the interval is reached, the unit
will start to beep once per second to alert the operator and flash “DonE” on the display. The unit
will continue to maintain the temperature of the pan when the timer is expired.
● The timer is reset when the pan is removed from the unit and the Heating or At Temp LED turns
off. The next time a pan is placed on the unit the timer will start again from the beginning.
● To view the elapsed time from when the pan was place on the unit, press the Lock button once.
This will display the time (in minutes) from when the pan was placed on the unit for 5 seconds.
After 5 seconds the normal temperature display will return.
Change Temperature Options (Short/Long)
Starting with the unit off, hold down both the Up and Down Arrows and press the Power button. Use
the arrows to select “NUM” and press the Lock button. Use the arrows again to select “PART” or
“FULL” for the partial or full set of temperatures. Press the Power button to set the value
Loading ...
Loading ...
Loading ...