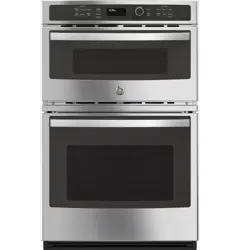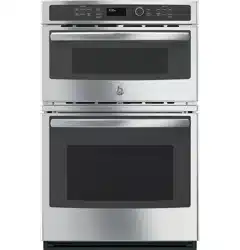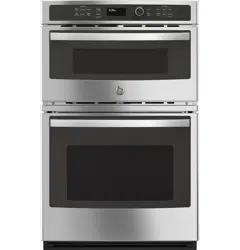

JT3800 - 30" Double Wall Oven
JK3800 - 27" Double Wall Oven
Owner’s Manual
GEAppliances.com
Safety Information ............2
Warranty ........................8
Assistance / Accessories ......9
Using The Oven
Oven Controls ....................10
Oven Settings ....................11
Oven Options ....................12
Upper Oven
Microwaving .....................13
Lower Oven
Cooking Modes ..................17
Sabbath Mode ...................18
Cooking Guide ...................19
Racks ............................20
Aluminum Foil and Oven Liners . . . 21
Cookware ........................21
Care and Cleaning
Cleaning The Oven ...............22
Lower Oven Maintenance ........24
Troubleshooting Tips ........25
Wall Oven
Write the model and serial
numbers here:
Model # __________________
Serial # ___________________
You can find them on a label on the
side trim or on the front of the oven
behind the oven door.
Printed in the United States
Printed on
Recycled Paper
For a Spanish version of this
manual, visit our Website at
GEAppliances.com.
Para consultar una version
en español de este manual
de instrucciones, visite
nuestro sitio de internet
GEAppliances.com.
Built-In Combination Microwave/Thermal
49-80737-1 06-14 GE
2
49-80737-1
PRECAUTIONS TO AVOID POSSIBLE EXPOSURE
TO EXCESSIVE MICROWAVE ENERGY
(a) Do Not Attempt to operate this oven with
the door open since open-door operation
can result in harmful exposure to microwave
energy. It is important not to defeat or tamper
with the safety interlocks.
(b) Do Not Place any object between the oven
front face and the door or allow soil or cleaner
residue to accumulate on sealing surfaces.
(c) Do Not Operate the oven if it is damaged. It is
particularly important that the oven door close
properly and that there is no damage to the:
(1) door (bent),
(2) hinges and latches (broken or loosened),
(3) door seals and sealing surfaces.
(d) The Oven Should Not be adjusted or repaired
by anyone except properly qualified service
personnel.
To reduce the risk of burns, electric shock, fire, injury to persons or exposure to excessive microwave energy:
SAVE THESE INSTRUCTIONS
IMPORTANT SAFETY INFORMATION.
READ ALL INSTRUCTIONS BEFORE USING.
SAFETY INFORMATION (Upper Oven)
Ŷ Read all instructions before using this
appliance. When using electrical appliances,
basic safety precautions should be followed,
including the following:
Ŷ 5HDGDQGIROORZWKHVSHFLILFSUHFDXWLRQVLQ
WKH35(&$87,21672$92,'3266,%/(
(;32685(72(;&(66,9(0,&52:$9(
(1(5*<VHFWLRQ
Ŷ %HVXUH\RXUDSSOLDQFHLVSURSHUO\LQVWDOOHG
and grounded by a qualified technician in
accordance with the provided installation
instructions.
Ŷ ,QVWDOORUORFDWHWKLVDSSOLDQFHRQO\LQ
accordance with the provided installation
instructions.
GENERAL SAFETY INSTRUCTIONS
WARNING

3
49-80737-1
SAVE THESE INSTRUCTIONS
SAFETY INFORMATION (Upper Oven)
Ŷ 6RPHSURGXFWVVXFKDVZKROHHJJVDQGVHDOHG
containers—for example, closed jars—are
able to explode and should not be heated in
WKLVRYHQ6XFKXVHRIWKHRYHQFRXOGUHVXOWLQ
injury.
Ŷ 'RQRWPRXQWWKLVDSSOLDQFHRYHUDVLQN
Ŷ 7KLVRYHQLVQRWDSSURYHGRUWHVWHGIRUPDULQH
use.
Ŷ 7KLVRYHQLV8/OLVWHGIRUVWDQGDUGZDOO
installation.
Ŷ 'RQRWRSHUDWHWKLVDSSOLDQFHLILWKDVEHHQ
damaged or dropped.
Ŷ $VZLWKDQ\DSSOLDQFHFORVHVXSHUYLVLRQLV
necessary when used by children.
Ŷ 8VHWKLVDSSOLDQFHRQO\IRULWVLQWHQGHGXVHDV
described in this manual.
Ŷ 'RQRWXVHFRUURVLYHFKHPLFDOVRUYDSRUVLQWKLV
appliance.
Ŷ 7KLVRYHQLVVSHFLILFDOO\GHVLJQHGWRKHDWGU\RU
cook food and is not intended for laboratory or
industrial use.
Ŷ 7KLVDSSOLDQFHPXVWRQO\EHVHUYLFHGE\
TXDOLILHGVHUYLFHSHUVRQQHO&RQWDFWQHDUHVW
authorized service facility for examination, repair
or adjustment.
Ŷ 'RQRWFRYHURUEORFNDQ\RSHQLQJVRQWKH
appliance.
Ŷ 'RQRWVWRUHWKLVDSSOLDQFHRXWGRRUV'RQRW
use this product near water—for example, in a
wet basement, near a swimming pool, near a
sink or in similar locations.
Ŷ 6HHGRRUVXUIDFHFOHDQLQJLQVWUXFWLRQVLQWKH
&DUHDQG&OHDQLQJRIWKH2YHQVHFWLRQRIWKLV
manual.
Ŷ 7RUHGXFHWKHULVNRIILUHLQWKHRYHQFDYLW\
²'RQRWRYHUFRRNIRRG&DUHIXOO\DWWHQG
appliance when paper, plastic or other
combustible materials are placed inside the
oven while microwave cooking.
²5HPRYHZLUHWZLVWWLHVDQGPHWDOKDQGOHV
from paper or plastic containers before
placing them in the oven.
²'RQRWXVHWKHRYHQIRUVWRUDJHSXUSRVHV
'RQRWOHDYHSDSHUSURGXFWVFRRNLQJ
utensils or food in the oven when not in use.
— If materials inside the oven ignite, keep the
oven door closed, turn the oven off and shut
off power at the fuse or circuit breaker panel.
If the door is opened, the fire may spread.
²'RQRWXVHWKH6HQVRU)HDWXUHVWZLFHLQ
succession on the same food portion. If food
is undercooked after the first countdown, use
&22.%<7,0(IRUDGGLWLRQDOFRRNLQJWLPH
Ŷ 'RQRWRSHUDWHWKHRYHQZLWKRXWWKHWXUQWDEOHLQ
SODFH7KHWXUQWDEOHPXVWEHXQUHVWULFWHGVRLW
can turn.
Ŷ 3RWHQWLDOO\KRWVXUIDFHVLQFOXGHWKHRYHQGRRU
floor, walls, oven rack and turntable.
Ŷ 'RQ¶WGHIURVWIUR]HQEHYHUDJHVLQQDUURZ
necked bottles (especially carbonated
EHYHUDJHV(YHQLIWKHFRQWDLQHULVRSHQ
SUHVVXUHFDQEXLOGXS7KLVFDQFDXVHWKH
container to burst, possibly resulting in injury.
Ŷ )RRGVFRRNHGLQOLTXLGVVXFKDVSDVWDPD\WHQG
to boil more rapidly than foods containing less
PRLVWXUH6KRXOGWKLVRFFXUUHIHUWRWKH&DUHDQG
&OHDQLQJRIWKHRYHQVHFWLRQIRULQVWUXFWLRQVRQ
how to clean the inside of the oven.
Ŷ +RWIRRGVDQGVWHDPFDQFDXVHEXUQV%H
careful when opening any containers of hot food,
including popcorn bags, cooking pouches and
ER[HV7RSUHYHQWSRVVLEOHLQMXU\GLUHFWVWHDP
away from hands and face.
Ŷ 'RQRWRYHUFRRNSRWDWRHV7KH\FRXOGGHK\GUDWH
and catch fire, causing damage to your oven.
Ŷ $YRLGKHDWLQJEDE\IRRGLQJODVVMDUVHYHQZLWK
WKHOLGRII0DNHVXUHDOOLQIDQWIRRGLVWKRURXJKO\
FRRNHG6WLUIRRGWRGLVWULEXWHWKHKHDWHYHQO\
%HFDUHIXOWRSUHYHQWVFDOGLQJZKHQZDUPLQJ
IRUPXOD7KHFRQWDLQHUPD\IHHOFRROHUWKDQWKH
IRUPXODUHDOO\LV$OZD\VWHVWWKHIRUPXODEHIRUH
feeding the baby.
Ŷ 'RQRWDWWHPSWWRGHHSIU\LQWKHRYHQ
GENERAL SAFETY INSTRUCTIONS
WARNING
4
49-80737-1
SAVE THESE INSTRUCTIONS
$UFLQJFDQRFFXUGXULQJPLFURZDYHFRRNLQJ,I\RXVHHDUFLQJSUHVVWKHClear/Off pad and correct the
problem.
$UFLQJLVWKHPLFURZDYHWHUPIRUVSDUNVLQWKH
RYHQ$UFLQJLVFDXVHGE\
Ŷ 0HWDORUIRLOWRXFKLQJWKHVLGHRIWKHRYHQ
Ŷ )RLOQRWPROGHGWRIRRGXSWXUQHGHGJHVDFWOLNH
antennas).
Ŷ 8VHIRLORQO\DVUHFRPPHQGHGLQWKLVPDQXDO
Ŷ 0HWDOFRRNZDUHXVHGGXULQJPLFURZDYHFRRNLQJ
Ŷ 0HWDOVXFKDVWZLVWWLHVSRXOWU\SLQVRUJROG
rimmed dishes, in the oven.
Ŷ 5HF\FOHGSDSHUWRZHOVFRQWDLQLQJVPDOOPHWDO
pieces being used in the oven.
Ŷ :KHQPLFURZDYLQJSODFHDOOIRRGVDQG
containers on the clear glass tray.
Ŷ 'RQRWSRSSRSFRUQLQ\RXURYHQXQOHVVLQD
special microwave popcorn accessory or unless
you use popcorn labeled for use in microwave
ovens.
Ŷ 'RQRWERLOHJJVLQWKLVRYHQ3UHVVXUHZLOOEXLOG
up inside egg yolk and will cause it to burst,
possibly resulting in injury.
Ŷ 'RQRWRSHUDWHWKHRYHQZLWKRXWIRRGLQVLGH
7KLVPD\FDXVHGDPDJHWRWKHRYHQ,W
increases the heat around the magnetron and
can shorten the life of the oven.
Ŷ )RRGVZLWKXQEURNHQRXWHU³VNLQ´VXFKDV
potatoes, hot dogs, sausages, tomatoes,
apples, chicken livers and other giblets, and
egg yolks should be pierced to allow steam to
escape during cooking.
Ŷ SUPERHEATED WATER
/LTXLGVVXFKDVZDWHUFRIIHHRUWHDDUHDEOHWR
be overheated beyond the boiling point without
DSSHDULQJWREHERLOLQJ9LVLEOHEXEEOLQJRU
boiling when the container is removed from the
PLFURZDYHRYHQLVQRWDOZD\VSUHVHQW7+,6
&28/'5(68/7,19(5<+27/,48,'6
68''(1/<%2,/,1*29(5:+(17+(
&217$,1(5,6',6785%('25$63221
2527+(587(16,/,6,16(57(',1727+(
/,48,'
7RUHGXFHWKHULVNRILQMXU\WRSHUVRQV
²'RQRWRYHUKHDWWKHOLTXLG
²6WLUWKHOLTXLGERWKEHIRUHDQGKDOIZD\
through heating it.
²'RQRWXVHVWUDLJKWVLGHGFRQWDLQHUVZLWK
narrow necks.
²$IWHUKHDWLQJDOORZWKHFRQWDLQHUWRVWDQGLQ
the microwave oven for a short time before
removing the container.
²8VHH[WUHPHFDUHZKHQLQVHUWLQJDVSRRQRU
other utensil into the container.
ARCING
FOODS
WARNING
WARNING
SAFETY INFORMATION (Upper Oven)
Ŷ 0RVWSDFHPDNHUVDUHVKLHOGHGIURPLQWHUIHUHQFH
from electronic products, including microwaves.
+RZHYHUSDWLHQWVZLWKSDFHPDNHUVPD\ZLVKWR
consult their physicians if they have concerns.
127,&(³3$&(0$.(56
WARNING
IMPORTANT SAFETY INFORMATION.
READ ALL INSTRUCTIONS BEFORE USING.
5
49-80737-1
The turntable must always be
in place when using the oven.
The clear glass tray should
always be in place when
microwaving.
SAVE THESE INSTRUCTIONS
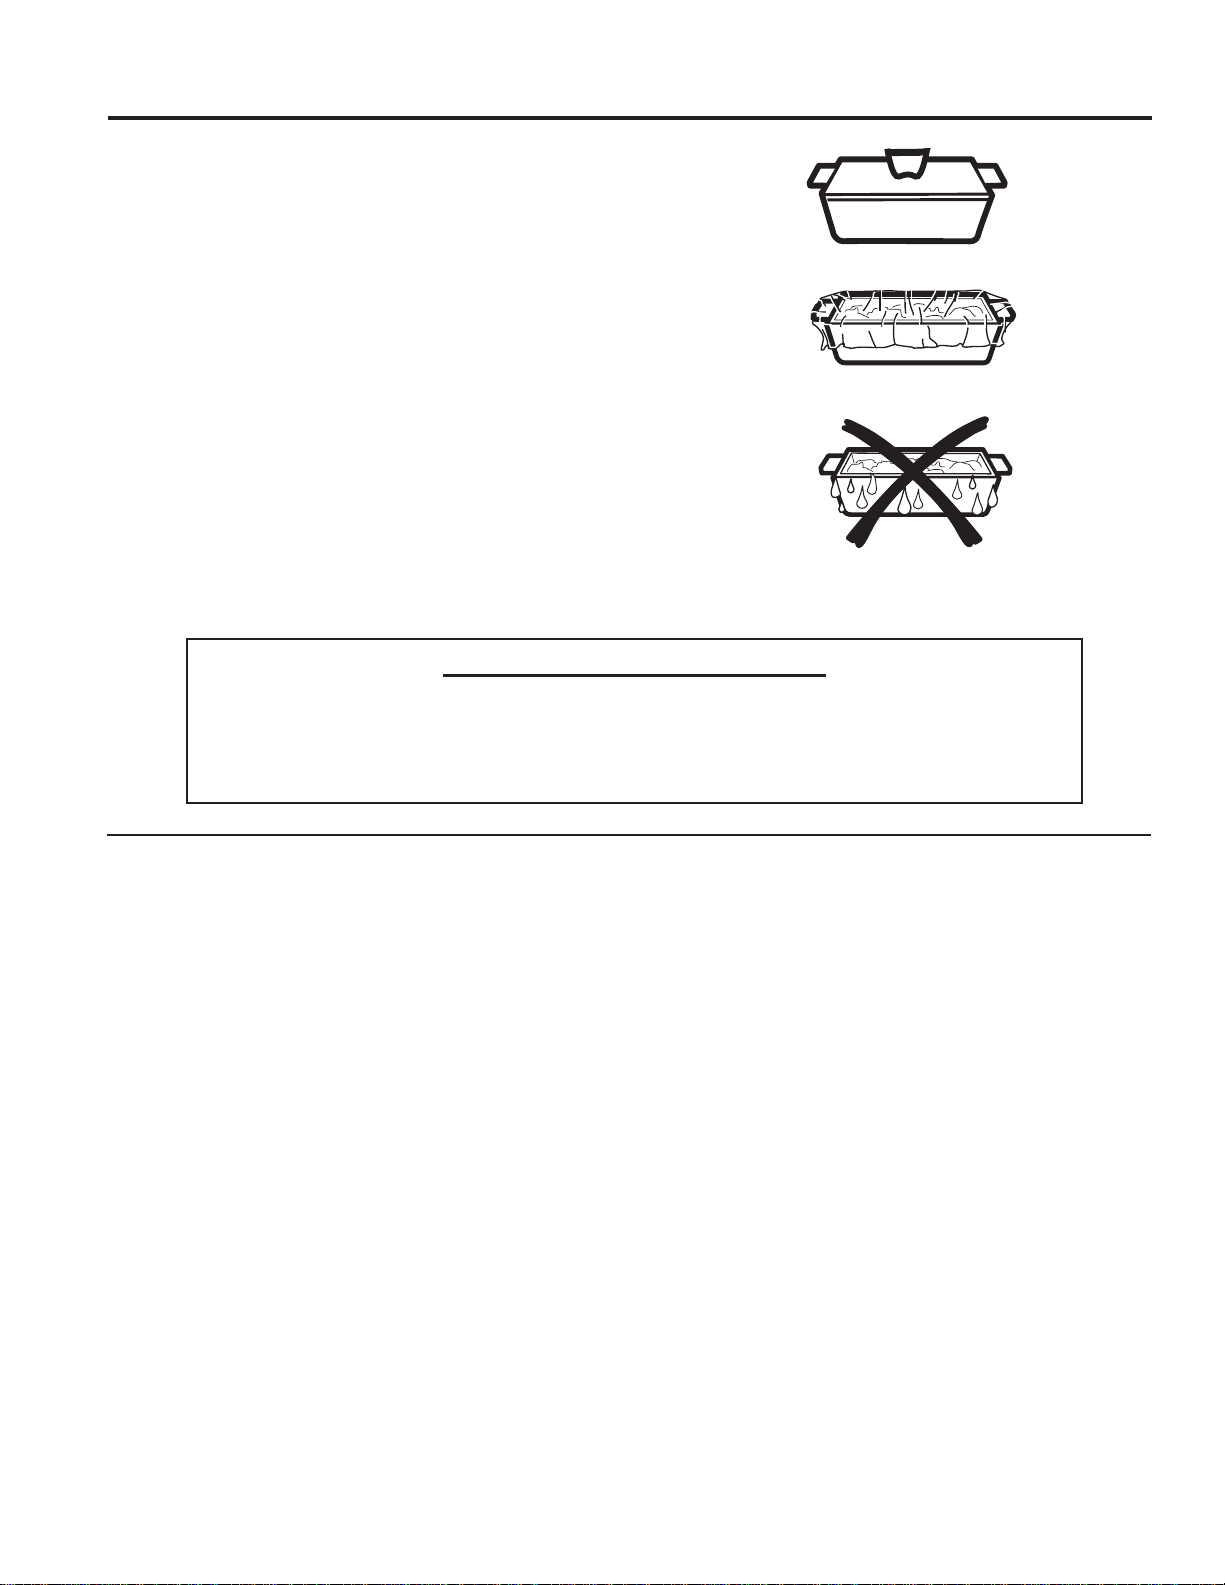
0DNHVXUHWRXVHVXLWDEOHFRRNZDUHGXULQJPLFURZDYHFRRNLQJ0RVWJODVVFDVVHUROHVFRRNLQJGLVKHV
measuring cups, custard cups, pottery or china dinnerware which does not have metallic trim or glaze with
DPHWDOOLFVKHHQFDQEHXVHG6RPHFRRNZDUHLVODEHOHG³VXLWDEOHIRUPLFURZDYLQJ´
Ŷ 3ODFHIRRGRUPLFURZDYDEOHFRQWDLQHUGLUHFWO\
on the clear glass tray to cook your food.
Ŷ 8VHRIWKHQRQVWLFNPHWDOWUD\GXULQJ
microwave cooking will result in inferior cooking
performance.
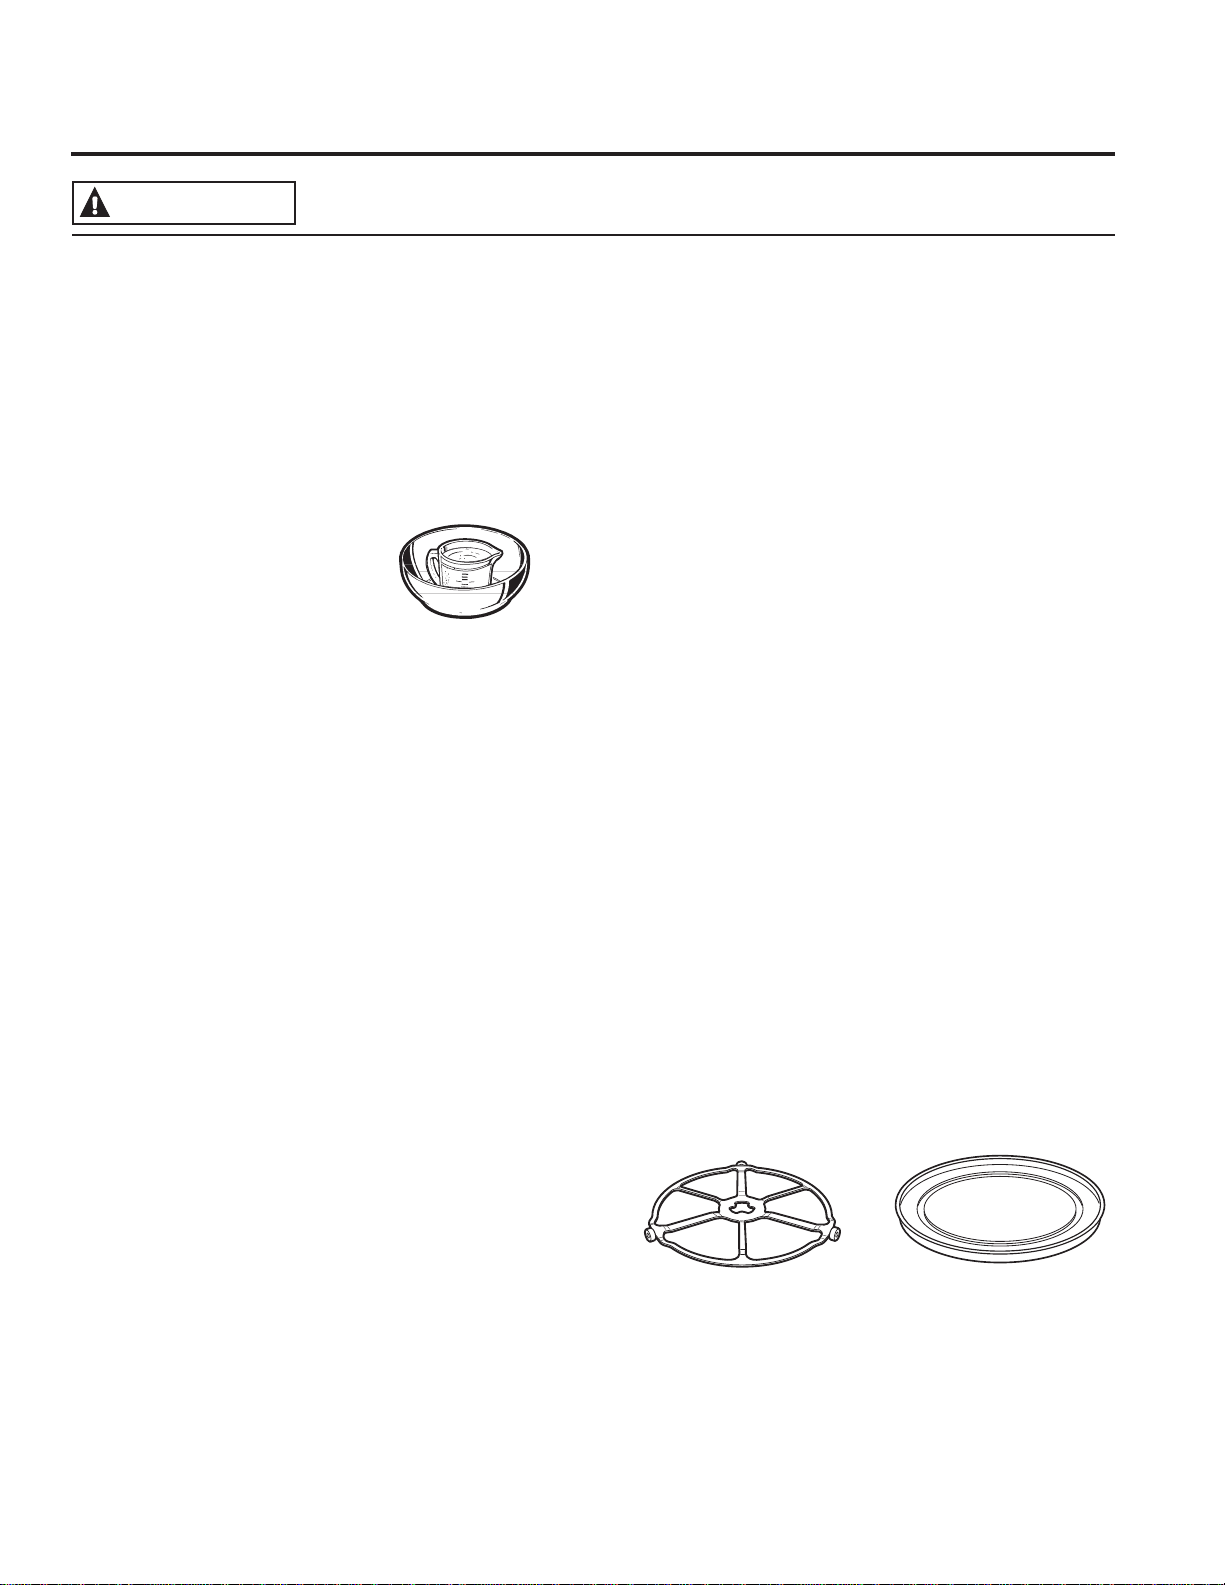
Ŷ ,I\RXDUHQRWVXUHLIDGLVKLVPLFURZDYH
safe, use this test: Place in the oven both the
dish you are testing
and a glass measuring
cup filled with 1 cup of
water—set the measuring
cup either in or next
WRWKHGLVK0LFURZDYH
30-45 seconds at high. If
the dish heats, it should
not be used for microwaving.
If the dish remains cool and only the water in
the cup heats, then the dish is microwave-safe.
Ŷ &RRNZDUHPD\EHFRPHKRWEHFDXVHRIKHDW
WUDQVIHUUHGIURPWKHKHDWHGIRRG2YHQPLWWV
may be needed to handle the cookware.
Ŷ 'RQRWXVHUHF\FOHGSDSHUSURGXFWV5HF\FOHG
paper towels, napkins and waxed paper can
contain metal flecks which may cause arcing or
ignite. Paper products containing nylon or nylon
filaments should be avoided, as they may also
ignite.
Ŷ 8VHIRLORQO\DVGLUHFWHGLQWKLVPDQXDO:KHQ
XVLQJIRLOLQWKHRYHQNHHSWKHIRLODWOHDVW´
away from the sides of the oven.
Ŷ 'RQRWXVHWKHRYHQWRGU\QHZVSDSHUV
Ŷ ,I\RXXVHDPHDWWKHUPRPHWHUZKLOHFRRNLQJ
make sure it is safe for use in microwave ovens.
Ŷ 6RPHIRDPWUD\VOLNHWKRVHWKDWPHDWLV
packaged on) have a thin strip of metal
HPEHGGHGLQWKHERWWRP:KHQPLFURZDYHG
the metal can burn the floor of the oven or ignite
a paper towel.
Ŷ 3DSHUWRZHOVZD[HGSDSHUDQGSODVWLFZUDS
can be used to cover dishes in order to retain
PRLVWXUHDQGSUHYHQWVSDWWHULQJ%HVXUHWRYHQW
plastic wrap so steam can escape.
Ŷ 1RWDOOSODVWLFZUDSLVVXLWDEOHIRUXVHLQ
PLFURZDYHRYHQV&KHFNWKHSDFNDJHIRU
proper use.
Ŷ ³%RLODEOH´FRRNLQJSRXFKHVDQGWLJKWO\FORVHG
plastic bags should be slit, pierced or vented
as directed by package. If they are not, plastic
could burst during or immediately after cooking,
SRVVLEO\UHVXOWLQJLQLQMXU\$OVRSODVWLFVWRUDJH
containers should be at least partially uncovered
EHFDXVHWKH\IRUPDWLJKWVHDO:KHQFRRNLQJ
with containers tightly covered with plastic wrap,
remove covering carefully and direct steam
away from hands and face.
Ŷ
Plastic cookware—Plastic cookware designed for
microwave cooking is very useful, but should be
XVHGFDUHIXOO\(YHQPLFURZDYHVDIHSODVWLFPD\
not be as tolerant of overcooking conditions as
are glass or ceramic materials and may soften or
char if subjected to short periods of overcooking.
In longer exposures to overcooking, the food and
cookware could ignite.
Follow these guidelines:
8VHPLFURZDYHVDIHSODVWLFVRQO\DQGXVH
them in strict compliance with the cookware
PDQXIDFWXUHU¶VUHFRPPHQGDWLRQV
'RQRWPLFURZDYHHPSW\FRQWDLQHUV
'RQRWSHUPLWFKLOGUHQWRXVHSODVWLFFRRNZDUH
without complete supervision.
0,&52:$9(6$)(&22.:$5(
WARNING
How to test for a
microwave-safe dish.
SAFETY INFORMATION (Upper Oven)
6
49-80737-1
SAVE THESE INSTRUCTIONS
Ŷ8VHWKLVDSSOLDQFHRQO\IRULWVLQWHQGHGSXUSRVH
DVGHVFULEHGLQWKLV2ZQHU¶V0DQXDO
Ŷ%HVXUH\RXUDSSOLDQFHLVSURSHUO\LQVWDOOHGDQG
grounded by a qualified installer in accordance
with the provided installation instructions.
Ŷ'RQRWDWWHPSWWRUHSDLURUUHSODFHDQ\SDUWRI
your oven unless it is specifically recommended
LQWKLVPDQXDO$OORWKHUVHUYLFLQJVKRXOGEH
transferred to a qualified technician.
Ŷ%HIRUHSHUIRUPLQJDQ\VHUYLFHGLVFRQQHFWWKH
power supply at the household distribution panel
by removing the fuse or switching off the circuit
breaker.
Ŷ'RQRWOHDYHFKLOGUHQDORQH²FKLOGUHQVKRXOGQRW
be left alone or unattended in an area where an
DSSOLDQFHLVLQXVH7KH\VKRXOGQHYHUEHDOORZHG
to climb, sit or stand on any part of the appliance.
Ŷ
CAUTION: 'RQRWVWRUHLWHPVRI
interest to children in cabinets above an oven
- children climbing on the oven to reach items
could be seriously injured.
Ŷ8VHRQO\GU\SRWKROGHUV²PRLVWRUGDPSSRW
holders on hot surfaces may result in burns from
VWHDP'RQRWOHWSRWKROGHUVWRXFKKRWKHDWLQJ
HOHPHQWV'RQRWXVHDWRZHORURWKHUEXON\FORWK
in place of pot holders.
Ŷ 1HYHUXVH\RXUDSSOLDQFHIRUZDUPLQJRUKHDWLQJ
the room.
Ŷ 'RQRWWRXFKWKHKHDWLQJHOHPHQWVRUWKHLQWHULRU
VXUIDFHRIWKHRYHQ7KHVHVXUIDFHVPD\EHKRW
enough to burn even though they are dark in
FRORU'XULQJDQGDIWHUXVHGRQRWWRXFKRUOHW
clothing or other flammable materials contact any
interior area of the oven; allow sufficient time for
FRROLQJILUVW2WKHUVXUIDFHVRIWKHDSSOLDQFHPD\
become hot enough to cause burns. Potentially
hot surfaces include the oven vent opening,
surfaces near the opening and crevices around
the oven door.
Ŷ 'RQRWKHDWXQRSHQHGIRRGFRQWDLQHUV3UHVVXUH
could build up and the container could burst,
causing an injury.
Ŷ 'RQRWXVHDQ\W\SHRIIRLORUOLQHUWRFRYHUWKH
oven bottom or anywhere in the oven, except as
GHVFULEHGLQWKLVPDQXDO2YHQOLQHUVFDQWUDS
heat or melt, resulting in damage to the product
and risk of shock, smoke or fire.
Ŷ $YRLGVFUDWFKLQJRULPSDFWLQJJODVVGRRUVRU
FRQWUROSDQHOV'RLQJVRPD\OHDGWRJODVV
EUHDNDJH'RQRWFRRNRQRULQDSURGXFWZLWK
EURNHQJODVV6KRFNILUHRUFXWVPD\RFFXU
Ŷ &RRNPHDWDQGSRXOWU\WKRURXJKO\²PHDWWR
DWOHDVWDQLQWHUQDOWHPSHUDWXUHRI)DQG
poultry to at least an internal temperature of
)&RRNLQJWRWKHVHWHPSHUDWXUHVXVXDOO\
protects against foodborne illness.
GENERAL SAFETY INSTRUCTIONS
5HDGDOOVDIHW\LQVWUXFWLRQVEHIRUHXVLQJWKHSURGXFW)DLOXUHWRIROORZWKHVHLQVWUXFWLRQVPD\UHVXOWLQILUH
electrical shock, serious injury or death.
STATE OF CALIFORNIA PROPOSITION 65 WARNING
WARNING
WARNING
7KH&DOLIRUQLD6DIH'ULQNLQJ:DWHUDQG7R[LF(QIRUFHPHQW$FWUHTXLUHVWKH*RYHUQRURI&DOLIRUQLDWR
publish a list of substances known to the state to cause cancer, birth defects or other reproductive harm,
and requires businesses to warn customers of potential exposure to such substances.
WARNING 7KLVSURGXFWFRQWDLQVRQHRUPRUHFKHPLFDONQRZQWRWKH6WDWHRI&DOLIRUQLDWR
cause cancer, birth defects or other reproductive harm.
6HOIFOHDQRYHQVFDQFDXVHORZOHYHOH[SRVXUHWRVRPHRIWKHVHVXEVWDQFHVLQFOXGLQJFDUERQPRQR[LGH
GXULQJWKHFOHDQLQJF\FOH([SRVXUHFDQEHPLQLPL]HGE\YHQWLQJZLWKDQRSHQZLQGRZRUXVLQJD
ventilation fan or hood.
SAFETY INFORMATION (Lower Oven)
IMPORTANT SAFETY INFORMATION.
READ ALL INSTRUCTIONS BEFORE USING.

7
49-80737-1
SAVE THESE INSTRUCTIONS
.((3)/$00$%/(0$7(5,$/6$:$<)5207+(29(1
Failure to do so may result in fire or personal injury.
Ŷ 'RQRWXVHZDWHURQJUHDVHILUHV1HYHUSLFNXS
a flaming pan.
Ŷ ,IWKHUHLVDILUHLQWKHRYHQGXULQJEDNLQJ
smother the fire by closing the oven door and
turning the oven off or by using a multi-purpose
dry chemical or foam-type fire extinguisher.
Ŷ ,IWKHUHLVDILUHLQWKHRYHQGXULQJVHOIFOHDQWXUQ
the oven off and wait for the fire to go out. 'R
not force the door open. Introduction of fresh air
at self-clean temperatures may lead to a burst
RIIODPHIURPWKHRYHQ)DLOXUHWRIROORZWKLV
instruction may result in severe burns.
,17+((9(172)$),5(7$.(7+()2//2:,1*
STEPS TO PREVENT INJURY AND FIRE SPREADING
Ŷ 6WDQGDZD\IURPWKHRYHQZKHQRSHQLQJWKH
RYHQGRRU+RWDLURUVWHDPZKLFKHVFDSHVFDQ
cause burns to hands, face and/or eyes.
Ŷ .HHSWKHRYHQYHQWXQREVWUXFWHG
Ŷ .HHSWKHRYHQIUHHIURPJUHDVHEXLOGXS*UHDVH
in the oven may ignite.
Ŷ
Place oven racks in desired location while oven is
cool. If rack must be moved while oven is hot, do not
let pot holder contact hot heating element in oven.
Ŷ :KHQXVLQJFRRNLQJRUURDVWLQJEDJVLQWKH
RYHQIROORZWKHPDQXIDFWXUHU¶VGLUHFWLRQV
Ŷ 3XOOLQJRXWWKHVWDQGDUGUDFNVWRWKHLUVWRSORFNV
or the extension rack to its fully open position is
a convenience in lifting heavy foods. It is also
a precaution against burns from touching hot
surfaces of the door or oven walls.
Ŷ 'RQRWOHDYHLWHPVVXFKDVSDSHUFRRNLQJ
utensils or food in the oven when not in use.
Items stored in an oven can ignite.
Ŷ
1HYHUSODFHFRRNLQJXWHQVLOVSL]]DRUEDNLQJ
stones, or any type of foil or liner on the oven
IORRU7KHVHLWHPVFDQWUDSKHDWRUPHOWUHVXOWLQJ
in damage to the product and risk of shock,
smoke or fire.
OVEN SAFETY INSTRUCTIONS
WARNING
WARNING
WARNING
7KHVHOIFOHDQLQJIHDWXUHRSHUDWHVWKHRYHQDWWHPSHUDWXUHVKLJKHQRXJKWREXUQDZD\IRRGVRLOVLQWKH
RYHQ)ROORZWKHVHLQVWUXFWLRQVIRUVDIHRSHUDWLRQ
Ŷ 'RQRWWRXFKRYHQVXUIDFHVGXULQJVHOIFOHDQ
RSHUDWLRQ.HHSFKLOGUHQDZD\IURPWKHRYHQ
GXULQJVHOIFOHDQLQJ)DLOXUHWRIROORZWKHVH
instructions may cause burns.
Ŷ %HIRUHVHOIFOHDQLQJWKHRYHQUHPRYHVKLQ\
silver colored oven racks (on some models), the
probe, any aluminum foil, and any broiler pan,
JULGDQGRWKHUFRRNZDUH2QO\SRUFHODLQFRDWHG
oven racks may be left in the oven.
Ŷ %HIRUHRSHUDWLQJWKHVHOIFOHDQF\FOHZLSH
JUHDVHDQGIRRGVRLOVIURPWKHRYHQ([FHVVLYH
amount of grease may ignite, leading to smoke
damage to your home.
Ŷ ,IWKHVHOIFOHDQLQJPRGHPDOIXQFWLRQVWXUQWKH
RYHQRIIDQGGLVFRQQHFWWKHSRZHUVXSSO\+DYH
it serviced by a qualified technician.
Ŷ 'RQRWFOHDQWKHGRRUJDVNHW7KHGRRUJDVNHWLV
HVVHQWLDOIRUDJRRGVHDO&DUHVKRXOGEHWDNHQ
not to rub, damage or move the gasket.
Ŷ
'RQRWXVHRYHQFOHDQHUV1RFRPPHUFLDORYHQ
cleaner or oven liner protective coating of any kind
should be used in or around any part of the oven.
SELF-CLEANING OVEN SAFETY INSTRUCTIONS
WARNING
Ŷ
'RQRWVWRUHRUXVHIODPPDEOHPDWHULDOVLQRUQHDU
an oven, including paper, plastic, pot holders,
linens, wall coverings, curtains, drapes and gasoline
or other flammable vapors and liquids.
Ŷ
1HYHUZHDUORRVHILWWLQJRUKDQJLQJJDUPHQWVZKLOH
XVLQJWKHDSSOLDQFH7KHVHJDUPHQWVPD\LJQLWHLI
they contact hot surfaces, causing severe burns.
Ŷ 'RQRWOHWFRRNLQJJUHDVHRURWKHUIODPPDEOH
PDWHULDOVDFFXPXODWHLQRUQHDUWKHRYHQ*UHDVH
in the oven or near the oven may ignite.
SAFETY INFORMATION (Lower Oven)

8
49-80737-1
Thank You! ... for your purchase of a GE Brand appliance.
WARRANTY
GE Electric Range Warranty
GEAppliances.com
$OOZDUUDQW\VHUYLFHLVSURYLGHGE\RXU)DFWRU\6HUYLFH&HQWHUVRUDQDXWKRUL]HG&XVWRPHU&DUH
®
technician.
7RVFKHGXOHVHUYLFHRQOLQHYLVLWXVDWZZZJHDSSOLDQFHVFRPVHUYLFHBDQGBVXSSRUWRUFDOO*(&$5(6
(800.432.2737). Please have serial number and model number available when calling for service.
6HUYLFLQJ\RXUDSSOLDQFHPD\UHTXLUHWKHXVHRIWKHRQERDUGGDWDSRUWIRUGLDJQRVWLFV7KLVJLYHVD*(IDFWRU\
VHUYLFHWHFKQLFLDQWKHDELOLW\WRTXLFNO\GLDJQRVHDQ\LVVXHVZLWK\RXUDSSOLDQFHDQGKHOSV*(LPSURYHLWVSURGXFWV
E\SURYLGLQJ*(ZLWKLQIRUPDWLRQRQ\RXUDSSOLDQFH,I\RXGRQRWZDQW\RXUDSSOLDQFHGDWDWREHVHQWWR*(SOHDVH
DGYLVH\RXUWHFKQLFLDQQRWWRVXEPLWWKHGDWDWR*(DWWKHWLPHRIVHUYLFH
)RUWKHSHULRGRIRQH\HDUIURPWKHGDWHRIWKHRULJLQDOSXUFKDVH*(ZLOOSURYLGHDQ\SDUWRIWKHUDQJHZKLFKIDLOVGXH
WRDGHIHFWLQPDWHULDOVRUZRUNPDQVKLS'XULQJWKLVOLPLWHGRQH\HDUZDUUDQW\*(ZLOODOVRSURYLGHIUHHRIFKDUJHDOO
labor and in-home service to replace the defective part.
What GE will not cover:
Ŷ 6HUYLFHWULSVWR\RXUKRPHWRWHDFK\RXKRZWRXVH
the product.
Ŷ Improper installation, delivery or maintenance.
Ŷ )DLOXUHRIWKHSURGXFWLILWLVDEXVHGPLVXVHG
modified or used for other than the intended purpose
or used commercially.
Ŷ 5HSODFHPHQWRIKRXVHIXVHVRUUHVHWWLQJRIFLUFXLW
breakers.
Ŷ 'DPDJHWRWKHSURGXFWFDXVHGE\DFFLGHQWILUH
IORRGVRUDFWVRI*RG
Ŷ Incidental or consequential damage caused by
possible defects with this appliance.
Ŷ 'DPDJHFDXVHGDIWHUGHOLYHU\
Ŷ Product not accessible to provide required service.
Ŷ 6HUYLFHWRUHSDLURUUHSODFHOLJKWEXOEVH[FHSWIRU/('
lamps.
EXCLUSION OF IMPLIED WARRANTIES
<RXUVROHDQGH[FOXVLYHUHPHG\LVSURGXFWUHSDLUDVSURYLGHGLQWKLV/LPLWHG:DUUDQW\$Q\LPSOLHGZDUUDQWLHV
including the implied warranties of merchantability or fitness for a particular purpose, are limited to one year or the
shortest period allowed by law.
7KLVZDUUDQW\LVH[WHQGHGWRWKHRULJLQDOSXUFKDVHUDQGDQ\VXFFHHGLQJRZQHUIRUSURGXFWVSXUFKDVHGIRUKRPHXVH
ZLWKLQWKH86$,IWKHSURGXFWLVORFDWHGLQDQDUHDZKHUHVHUYLFHE\D*($XWKRUL]HG6HUYLFHULVQRWDYDLODEOH\RX
PD\EHUHVSRQVLEOHIRUDWULSFKDUJHRU\RXPD\EHUHTXLUHGWREULQJWKHSURGXFWWRDQ$XWKRUL]HG*(6HUYLFHORFDWLRQ
IRUVHUYLFH,Q$ODVNDWKHZDUUDQW\H[FOXGHVWKHFRVWRIVKLSSLQJRUVHUYLFHFDOOVWR\RXUKRPH
6RPHVWDWHVGRQRWDOORZWKHH[FOXVLRQRUOLPLWDWLRQRILQFLGHQWDORUFRQVHTXHQWLDOGDPDJHV7KLVZDUUDQW\JLYHV\RX
VSHFLILFOHJDOULJKWVDQG\RXPD\DOVRKDYHRWKHUULJKWVZKLFKYDU\IURPVWDWHWRVWDWH7RNQRZZKDW\RXUOHJDOULJKWV
DUHFRQVXOW\RXUORFDORUVWDWHFRQVXPHUDIIDLUVRIILFHRU\RXUVWDWH¶V$WWRUQH\*HQHUDO
:DUUDQWRU*HQHUDO(OHFWULF&RPSDQ\/RXLVYLOOH.<
Extended Warranties:3XUFKDVHD*(H[WHQGHGZDUUDQW\DQGOHDUQDERXWVSHFLDOGLVFRXQWVWKDWDUHDYDLODEOHZKLOH
\RXUZDUUDQW\LVVWLOOLQHIIHFW<RXFDQSXUFKDVHLWRQOLQHDQ\WLPH
ZZZJHDSSOLDQFHVFRPVHUYLFHBDQGBVXSSRUWVKRSIRUH[WHQGHGVHUYLFHSODQVKWP
RUFDOOGXULQJQRUPDOEXVLQHVVKRXUV*(&RQVXPHU+RPH6HUYLFHVZLOOVWLOOEHWKHUHDIWHU\RXU
warranty expires.
Register Your Appliance: 5HJLVWHU\RXUQHZDSSOLDQFHRQOLQHDW\RXUFRQYHQLHQFH
ZZZJHDSSOLDQFHVFRPVHUYLFHBDQGBVXSSRUWUHJLVWHU
7LPHO\SURGXFWUHJLVWUDWLRQZLOODOORZIRUHQKDQFHGFRPPXQLFDWLRQDQGSURPSWVHUYLFHXQGHUWKHWHUPVRI\RXUZDUUDQW\
VKRXOGWKHQHHGDULVH<RXPD\DOVRPDLOLQWKHSUHSULQWHGUHJLVWUDWLRQFDUGLQFOXGHGLQWKHSDFNLQJPDWHULDO
6WDSOH\RXUUHFHLSWKHUH3URRIRIWKHRULJLQDOSXUFKDVH
date is needed to obtain service under the warranty.

9
49-80737-1
Schedule Service: ([SHUW*(UHSDLUVHUYLFHLVRQO\RQH
VWHSDZD\IURP\RXUGRRU*HWRQOLQHDQGVFKHGXOH\RXU
VHUYLFHDWZZZJHDSSOLDQFHVFRPVHUYLFHBDQGBVXSSRUW
2UFDOO*(&$5(6GXULQJQRUPDO
business hours.
Parts and Accessories: Individuals qualified to service
their own appliances can have parts or accessories sent
GLUHFWO\WRWKHLUKRPHV9,6$0DVWHU&DUGDQG'LVFRYHU
FDUGVDUHDFFHSWHG2UGHURQOLQHWRGD\KRXUVHYHU\
day or by phone at 800.626.2002 during normal business
hours.
Instructions contained in this manual cover procedures
WREHSHUIRUPHGE\DQ\XVHU2WKHUVHUYLFLQJJHQHUDOO\
VKRXOGEHUHIHUUHGWRTXDOLILHGVHUYLFHSHUVRQQHO&DXWLRQ
must be exercised, since improper servicing may cause
unsafe operation.
Real Life Design Studio: *(VXSSRUWVWKH8QLYHUVDO
'HVLJQFRQFHSWRISURGXFWVVHUYLFHVDQGHQYLURQPHQWV
that can be used by people of all ages, sizes and
FDSDELOLWLHV:HUHFRJQL]HWKHQHHGWRGHVLJQIRUDZLGH
range of physical and mental abilities and impairments.
)RUGHWDLOVRI*(¶V8QLYHUVDO'HVLJQDSSOLFDWLRQVLQFOXGLQJ
kitchen design ideas for people with disabilities, check out
RXU:HEVLWHWRGD\)RUWKHKHDULQJLPSDLUHGSOHDVHFDOO
7''*($&
Contact Us: If you are not satisfied with the service you
UHFHLYHIURP*(FRQWDFWXVRQRXU:HEVLWHZLWKDOOWKH
details including your phone number, or write to:
General Manager, Customer Relations
GE Appliances, Appliance Park Louisville, KY 40225
ASSISTANCE / ACCESSORIES
7U\WKH*($SSOLDQFHV:HEVLWHwww.geappliances.com/service_and_support/) 24 hours a day, any day of the
\HDU)RUJUHDWHUFRQYHQLHQFHDQGIDVWHUVHUYLFH\RXFDQQRZGRZQORDG2ZQHU¶V0DQXDOVRUGHUSDUWVRUHYHQ
schedule service on-line.
Have a question or need assistance with your appliance?
Accessories
Looking For Something More?
GE offers a variety of accessories to improve your cooking and maintenance experiences!
7RSODFHDQRUGHUYLVLWXVRQOLQHDW
www.GEApplianceParts.com86RUwww.GEAppliances.ca&DQDGD
or call 800.626.200286800.661.1616&DQDGD
7KHIROORZLQJSURGXFWVDQGPRUHDUHDYDLODEOH
How to Remove Protective Shipping Film and Packaging Tape
&DUHIXOO\JUDVSDFRUQHURIWKHSURWHFWLYHVKLSSLQJILOP
with your fingers and slowly peel it from the appliance
VXUIDFH'RQRWXVHDQ\VKDUSLWHPVWRUHPRYHWKHILOP
5HPRYHDOORIWKHILOPEHIRUHXVLQJWKHDSSOLDQFHIRUWKH
first time.
7RDVVXUHQRGDPDJHLVGRQHWRWKHILQLVKRIWKH
product, the safest way to remove the adhesive from
packaging tape on new appliances is an application of
DKRXVHKROGOLTXLGGLVKZDVKLQJGHWHUJHQW$SSO\ZLWKD
soft cloth and allow to soak.
NOTE: 7KHDGKHVLYHPXVWEHUHPRYHGIURPDOOSDUWV,W
cannot be removed if it is baked on.
Accessories
6PDOO%URLOHU3DQô´[ó´[ò³ :%;86'*&DQDGD
/DUJH%URLOHU3DQô´[ó´[ò³ :%;86'*&DQDGD
;/%URLOHU3DQ´[ó´[³ :%;861RWDYDLODEOHLQ&DQDGD
Parts
*ODVV7UD\ 3DUWQXPEHUVYDU\E\PRGHO
7XUQWDEOH 3DUWQXPEHUVYDU\E\PRGHO
2YHQUDFNV 3DUWQXPEHUVYDU\E\PRGHO
2YHQHOHPHQWV 3DUWQXPEHUVYDU\E\PRGHO
/LJKWEXOEV 3DUWQXPEHUVYDU\E\PRGHO
Cleaning Supplies
R]0LFUR%U\WH
®
$SSOLDQFH&OHDQHU :;;
&LWUX6KLQH6WDLQOHVV6WHHO:LSHV :;;
&HUDPD%U\WH
®
6WDLQOHVV6WHHO$SSOLDQFH&OHDQHU 30;
*UDSKLWH/XEULFDQW :%7
7KHODUJHEURLOHUSDQGRHVQRWILWLQ´´UDQJHV
7KH;/EURLOHUSDQGRHVQRWILWLQ´ZDOORYHQV´GURSLQVRU´´UDQJHV
10
49-80737-1
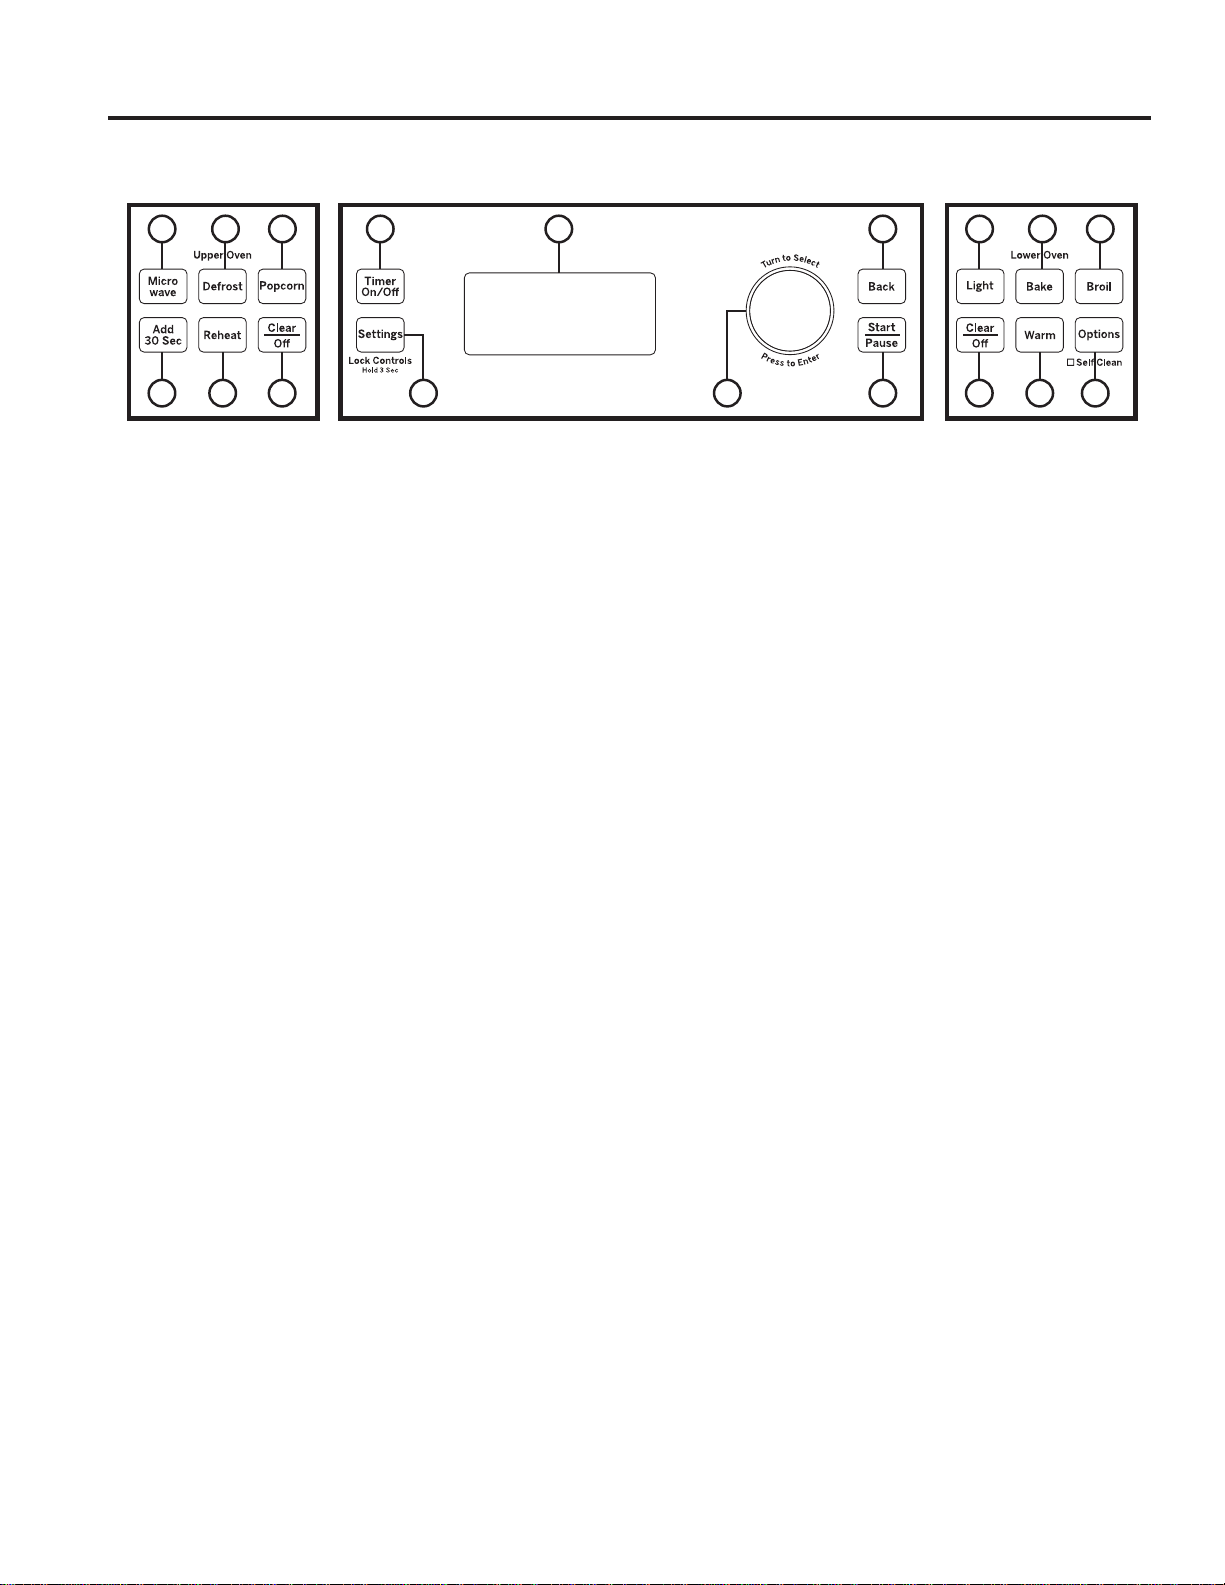
Oven Controls
Common Controls
1. Timer On/Off: :RUNVDVDFRXQWGRZQWLPHU3UHVV
the Timer On/Off pad, select the timer type (hours and
minutes or minutes and seconds), use the selector dial to
set the time, and press the selector dial to start the timer
FRXQWGRZQ7KHRYHQZLOOFRQWLQXHWRRSHUDWHZKHQWKH
WLPHUFRXQWGRZQLVFRPSOHWH7RWXUQWKHWLPHURIISUHVV
the Timer On/Off pad.
2. Settings / Lock Controls: )LQGRYHQRSWLRQVIRU
+HOS&ORFN6HWWLQJV'LVSOD\0RGH$XWR&RQYHUVLRQ$XWR
6KXW2II%HHSHU9ROXPH5HPLQGHU7HPSHUDWXUH8QLWV
7KHUPRVWDW$GMXVWDQG2YHQ,QIRUPDWLRQXQGHUWKLVVHOHFWLRQ
6HHWKH2YHQ6HWWLQJVVHFWLRQIRUPRUHGHWDLOV3UHVV
and hold Settings pad for 3 seconds to lock or unlock the
FRQWUROV7KLVORFNVRXWWKHFRQWUROVRWKDWSUHVVLQJDQ\RI
WKHFRQWUROSDGVGRHVQRWDFWLYDWHWKHIHDWXUH&OHDU2IILV
always active, even when the control is locked.
3. Selector Dial: 7KHVHOHFWRUGLDOLVXVHGIRUERWK
WKHXSSHUDQGORZHURYHQV5RWDWHGLDOWRVHOHFWRYHQ
settings, upper/lower oven options and cooking options
WKHQSUHVVWRFRQILUPWKHVHOHFWLRQ5RWDWHGLDOWRLQFUHDVH
or decrease temperatures or time and then press to
confirm the set temperature or time.
4. Back: Press this pad to go back a menu level in the
display.
5. Start/Pause: Press the Start/Pause pad to start any
cooking, clean or timed function. Press the Start/Pause
pad to pause any upper oven features.
6. Display: Information about both the upper and lower
ovens is shown in this display window.
Upper Oven Controls
7. Microwave: Press the Microwave pad for microwaving
RSWLRQV8VHWKHVHOHFWRUGLDOWRILQGWKHPLFURZDYLQJ
option desired and press the selector dial to select it.
2SWLRQVDYDLODEOHLQFOXGH&RRNE\7LPH&RRN'HIURVW
%HYHUDJH3RSFRUQ0HOW5HKHDW6LPPHUDQG6RIWHQ
8VHWKHFOHDUJODVVWUD\DQGPLFURZDYHVDIHFRRNZDUH
ZKHQXVLQJWKHPLFURZDYHIHDWXUHV6HH8SSHU2YHQ
0LFURZDYLQJVHFWLRQIRUPRUHGHWDLO
8. Add 30 Sec: Press the Add 30 Sec pad for 30
VHFRQGVRIPLFURZDYHFRRNLQJWLPH(DFKWLPHWKLVSDG
is pressed an additional 30 seconds is added to the
UHPDLQLQJFRRNLQJWLPH7KHRYHQVWDUWVLPPHGLDWHO\
9. Defrost: Press the Defrost pad to defrost, rotate
selector dial to select the type of defrost and press to
VHOHFW7\SHRIGHIURVWDYDLODEOHLQFOXGH'HIURVWE\)RRG
7\SH'HIURVWE\7LPH'HIURVWE\:HLJKWOE4XLFN
'HIURVW0HOWDQG6RIWHQ6HHWKH0LFURZDYLQJVHFWLRQIRU
more information.
10. Reheat: Press the Reheat pad to reheat, rotate selector
dial to select food type to reheat and press to select.
7\SHVRIIRRGDYDLODEOHXQGHUWKH5HKHDWIHDWXUHLQFOXGH
%HYHUDJH&DVVHUROH&KLFNHQ3DVWD3L]]D3ODWHRI
)RRG5LFH6RXS6WHDNV&KRSVDQG9HJHWDEOHV
11. Popcorn: Press the Popcorn pad to microwave
popcorn, press the selector dial to select. Popcorn feature
is a microwave sensor feature and automatically senses
ZKHQSRSFRUQLVGRQHDQGVKXWVLWVHOIRII'RQRWXVHWKH
6HQVRU)HDWXUHVWZLFHLQVXFFHVVLRQRQWKHVDPHIRRG
portion.
12. Clear/Off: 7KH&OHDU2IISDGFDQFHOV$//XSSHURYHQ
programs except the clock and timer.
Lower Oven Controls
13. Light: Press the Light pad to turn the oven light on or
RIILQWKHORZHURYHQ1RWHWKDWOLJKWLQWKHORZHURYHQZLOO
not turn on if the oven is in a clean mode.
14. Bake: Press the Bake pad to bake, rotate selector dial
to select baking temperature and press to select.
15. Broil: Press the Broil pad to broil, rotate selector dial to
VHOHFW+L/RDQGSUHVVWRVHOHFW
16. Options: )LQGWKH'HOD\6WDUW3URRI6DEEDWK6HOI
&OHDQ6WHDP&OHDQDQG:DUPIHDWXUHVXQGHUWKLV
VHOHFWLRQ6HHWKH2YHQ2SWLRQVVHFWLRQIRUPRUHGHWDLOV
17. Warm: Press the Warm pad to warm, press the selector
GLDOWRVHOHFW'RQRWXVH:DUPWRFRRNRUKHDWFROGIRRG
6HHWKH&RRNLQJ0RGHVHFWLRQIRUPRUHLQIRUPDWLRQ
18. Clear/Off: 7KH&OHDU2IISDGFDQFHOV$//ORZHURYHQ
programs except the clock and timer.
USING THE OVEN: Oven Controls
10 12 18 1617
11 13 14 15
Common Controls
Upper Oven
Controls
Lower Oven
Controls
179 6 4
582 3

11
49-80737-1
Oven Settings
Help
8VHWKLVIHDWXUHWRILQGRXWPRUHDERXW\RXURYHQDQG
its features by pressing the Settings pad and selecting
KHOS7XUQWKHVHOHFWRUGLDODQGSUHVVWRVHOHFWWKH
feature you want to find out more about.
NOTE:1RWDOOIHDWXUHVRIKHOSPD\EHRQ\RXURYHQ
PRGHO%HORZDUHIHDWXUHVIRXQGLQWKH+HOSIXQFWLRQ
Clock Settings
8VHWKLVIHDWXUHWRVHWWKHWLPHRIGD\DQGWRVSHFLI\
KRZWKHWLPHRIGD\ZLOOEHGLVSOD\HG<RXFDQVHOHFWD
standard 12-hour clock (12 hr) or 24-hour military time
display (24 hr). Prior to the first use of your oven, the
clock must be set.
Display Mode
8VHWKLVIHDWXUHWRVHW3RZHU6DYHURU'LVSOD\$OZD\V
2QGLVSOD\PRGH
Auto Shut-Off
8VHWKLVIHDWXUHWRDFWLYDWHGHDFWLYDWH$XWR6KXW2II
$FWLYDWLQJWKH$XWR6KXW2IIIHDWXUHZLOOWXUQRIIWKH
lower oven after 12 hours of continuous operations.
7KHIDFWRU\VHWWLQJIRU$XWR6KXW2IIIHDWXUHLV
DFWLYDWHG:KHQLQ6DEEDWKPRGH$XWR6KXW2IIZLOOEH
deactivated.
Beeper Volume
8VHWKLVIHDWXUHWRVHW%HHSHU9ROXPHWR0XWHRU1RUPDO
NOTE:6RPHWRQHVDUHQRWPXWDEOH
Reminder
8VHWKLVIHDWXUHWR6HW5HYLHZRU&OHDU5HPLQGHU
Temperature Units
8VHWKLVIHDWXUHWRVHWWKHGLVSOD\WHPSHUDWXUHXQLWWR°)
)DKUHQKHLWRU°&&HOVLXV
Thermostat Adjust
7KLVIHDWXUHDOORZVWKHRYHQEDNLQJDQGFRQYHFWLRQ
baking temperature to be adjusted up to 35°)KRWWHU
or down to 35°)FRROHURQWKHORZHURYHQ7KHXSSHU
RYHQFDQQRWEHDGMXVWHG8VHWKLVIHDWXUHLI\RXEHOLHYH
your oven temperature is too hot or too cold and wish to
FKDQJHLW7KLVDGMXVWPHQWDIIHFWV%DNHPRGHV1RRWKHU
cooking modes are affected.
Oven Information
7KLVIHDWXUHVKRZVWKH2YHQ0RGHODQG6HULDOQXPEHU
USING THE OVEN: Oven Settings
Features found in the Help function.
$GGLQJ7LPH 'HIURVWE\:HLJKW 6WDUW3DXVH
$XWR&RQYHUVLRQ 'HOD\6WDUW/RZHU 6WHDP&OHDQ
$XWR6KXW2II 'LVSOD\0RGH 7HPSHUDWXUH8QLWV
%DFN (GLW 7KHUPRVWDW$GMXVW
%DNH +HOS 7LPHU2Q2II
%HHSHU9ROXPH 0HOW 7RDVW
%HYHUDJH 0LFUR6HFV :DUP
%URLO 0LFURZDYH
&OHDU2II 0\UHFLSHV
&ORFN Probe
&RQWURO/RFNRXW Proof
&RRN 5HKHDW
&RRNE\)RRG 5HPLQGHU
&RRNE\7LPH 5HSHDW/DVW
&RRNE\7LPH 5HVXPH
&RRNLQJ2SWLRQV/RZHU 6DEEDWK
&RRNLQJ2SWLRQV8SSHU 6HOI&OHDQ
'HIURVW 6HQVRU&RRNLQJ
'HIURVWE\)RRG 6LPPHU
'HIURVWE\7LPH 6RIWHQ
6SHHG&RRN

12
49-80737-1
Oven Options
Lower Oven Options
Delay Start
8VHWKLVIHDWXUHWRGHOD\VWDUWLQJD%DNHRU6HOI&OHDQ
IHDWXUH7RXVHWKLVIHDWXUHVHOHFW'HOD\6WDUWDQGVHW
WKHWLPHWRVWDUWWKHQVHOHFWFRRNPRGH<RXFDQDOVR
XVHWKH'HOD\6WDUWIHDWXUHZKLOHSURJUDPPLQJD%DNH
cooking feature.
Proof
8VHWKLVIHDWXUHWRSURRIGRXJK6HH/RZHU2YHQ
&RRNLQJ0RGHVIRUPRUHGHWDLO
Sabbath
8VHWKLVIHDWXUHWRHQWHU6DEEDWKPRGH6DEEDWKPRGH
VHWVWKHRYHQIRUREVHUYDQFHRIWKH-HZLVK6DEEDWK
DQG+ROLGD\V7KLVIHDWXUHFRQIRUPVWRWKH6WDU.
-HZLVK6DEEDWKUHTXLUHPHQWV6DEEDWKPRGHGLVDEOHV
the oven lights (the oven light will not turn on when the
door is opened), all sounds (the control will not beep
when a button is pressed, but will still beep if certain
oven faults occur), and all upper oven functions and
ORZHURYHQIXQFWLRQVH[FHSWORZHURYHQ%DNH'XULQJ
6DEEDWKPRGHRQO\ORZHURYHQ%DNHLVDYDLODEOH
:KLOHLQ6DEEDWKPRGHDIWHUVHWWLQJFKDQJLQJDEDNH
temperature, a random delay of approximately 30
seconds to 1 minute will occur before the oven will begin
EDNLQJ7RVWRSFRRNLQJSUHVVWKHBack pad and then
the Start/PauseSDG<RXURYHQZLOOVKXWRIIDIWHUD
random delay of approximately 30 seconds to 1 minute.
7RLPPHGLDWHO\H[LWORZHURYHQ%DNHSUHVVWKHClear/
Off pad at any time – cooking elements will immediately
WXUQRIIDQG6DEEDWK%DNHZLOOFKDQJHWR6DEEDWKRQ
WKHGLVSOD\LQGLFDWLQJWKDWWKHRYHQKDVWXUQHGRII7R
H[LW6DEEDWKPRGHSUHVVDQGKROGWKHBack pad for 3
VHFRQGV'RQRWSUHVVDQ\RWKHUEXWWRQVXQWLO6DEEDWK
PRGHKDVH[LWHGRU6DEEDWKPRGHZLOOEHUHLQLWLDOL]HG
DQGZLOOQRWH[LW6HH/RZHU2YHQ6DEEDWK0RGHIRU
more detail.
NOTE:,ISRZHURXWDJHRFFXUVGXULQJ6DEEDWKPRGHWKH
XQLWZLOOUHPDLQLQ6DEEDWKPRGHEXWZLOOQRORQJHUEH
cooking when power is restored.
Self Clean
8VHWKLVIHDWXUHWRHQWHU6HOI&OHDQPRGH6HH&OHDQLQJ
7KH2YHQVHFWLRQIRUPRUHGHWDLO
Steam Clean
8VHWKLVIHDWXUHWRHQWHU6WHDP&OHDQPRGH6HH
&OHDQLQJ7KH2YHQVHFWLRQIRUPRUHGHWDLO
Warm
8VHWKLVIHDWXUHWRZDUP6HH/RZHU2YHQ&RRNLQJ
0RGHVIRUPRUHGHWDLO
USING THE OVEN: Oven Options

13
49-80737-1
Microwaving
Using The Microwave Features
0DNHVXUHWKHWXUQWDEOHDQGFOHDUJODVVWUD\DUHLQSODFH
Place food or microwavable container directly on the
clear glass tray to cook your food.
UPPER OVEN: Microwaving
The turntable must always be in
place when using the oven.
The clear glass tray should always
be in place when microwaving.
MICROWAVE PRESET SELECTIONS:
ŶBeverage
±:DWHUR]
±&RIIHH
(8-12 oz.)
±7HDR]
±0LONR]
±+RW&RFRD
(8-12 oz.)
ŶPopcorn
±3RSFRUQ6HQVRU
ŶMelt
±%XWWHU
±&DUDPHO
±&KHHVH
±&KRFRODWH&KLSV
±0DUVKPDOORZ
ŶSimmer
ŶCook
±%\)RRG7\SH
±%\7LPH
±%\7LPH
ŶSoften
±%XWWHU
±&UHDP&KHHVH
±)URVWLQJR]
±,FH&UHDP
ŶDefrost
±OE4XLFN
±%\7LPH
±%\:HLJKW
±%\)RRG7\SH
±0HOW
±6RIWHQ
ŶReheat
±%HYHUDJH
±&DVVHUROH
±&KLFNHQ
– Pasta
– Pizza
±3ODWHRI)RRG
±5LFH
±6RXS
±6WHDNV&KRSV
±9HJHWDEOHV
How To Use Pre-Set Microwave Selections
1. Press the Microwave pad.
If no selection is made within 15 seconds, the display will
revert back to the time of day.
7XUQWKHVHOHFWRUGLDOWRILQGWKHIRRGRUEHYHUDJH
you want to cook, defrost, soften, melt, simmer or
reheat. Press the selector dial to enter.
7XUQWKHVHOHFWRUGLDOWRVHOHFWWKHW\SHDPRXQW
ZHLJKWDQGRUVL]H$VUHTXLUHGWKHRYHQZLOOSURPSW
you.) Press the selector dial after each selection.
4. Press the selector dial or the Start/Pause pad to
start cooking.
7RUHYLHZRUHGLWVHWWLQJVGXULQJFRRNLQJSUHVVWKH
selector dial.
If the door is opened during cooking, the oven will stop
DQG3$86(ZLOODSSHDULQWKHGLVSOD\&ORVHWKHGRRU
and press Start/Pause pad to resume cooking.
If you enter an undesired selection at any time, simply
press the Back pad and reenter the desired selections.
Ŷ :KHQWKHRYHQLVRQOLJKWPD\EHYLVLEOHDURXQGWKH
door or outer case.
Ŷ 7KHRYHQFDYLW\OLJKWZLOOFRPHRQGXULQJD
microwave cooking cycle.
Ŷ 6WHDPRUYDSRUPD\HVFDSHIURPDURXQGWKHGRRU
&RRN%\7LPH$QG&RRN%\7LPH
8VH&RRN%\7LPHDQG&RRN%\7LPHWR
microwave food that is not in the recipe section and at
the time(s) you set.
Ŷ 7KHSRZHUOHYHOLVDXWRPDWLFDOO\VHWDWKLJKEXW\RX
can change it for more flexibility.
1. Press the Microwave pad.
7XUQWKHVHOHFWRUGLDOWRVHOHFW&RRN%\7LPHRU
&RRN%\7LPHDQGSUHVVWKHVHOHFWRUGLDOWR
enter.
7XUQWKHVHOHFWRUGLDOWRVHWWKHFRRNWLPHDQGSUHVV
the selector dial to enter.
6HOHFWSRZHUOHYHOVHWWLQJ
,I\RXVHOHFWHG&RRN%\7LPHWXUQWKHVHOHFWRU
dial to set the second cook time, second power level
setting and press the selector dial to enter.
5. Press the selector dial or the Start/Pause pad to
start cooking.
<RXPD\RSHQWKHGRRUGXULQJ&RRN%\7LPHDQG&RRN
%\7LPHWRFKHFNWKHIRRG&ORVHWKHGRRUDQG
press Start/Pause to resume cooking.

14
49-80737-1
Microwaving (Cont.)
Microwave Power Level(s)
Ŷ <RXFDQFKDQJHWKHSRZHUOHYHOGXULQJPRVWFRRNLQJ
program.
1. Press the selector dial to edit
5RWDWHVHOHFWRUGLDOWRFKDQJHWLPHDQGRUSUHVV
selector dial to enter.
7XUQWKHVHOHFWRUGLDOFORFNZLVHWRLQFUHDVHDQG
counterclockwise to decrease the power level. Press
the selector dial to enter.
+HUHDUHVRPHH[DPSOHVRIXVHVIRUYDULRXVSRZHUOHYHOV
High 10)LVKEDFRQYHJHWDEOHVERLOLQJOLTXLGV
Med-High 7:*HQWOHFRRNLQJRIPHDWDQGSRXOWU\EDNLQJ
casseroles and reheating.
Medium 5:6ORZFRRNLQJDQGWHQGHUL]LQJIRUVWHZVDQG
less tender cuts of meat.
Low 2 or 3:'HIURVWLQJVLPPHULQJGHOLFDWHVDXFHV
Warm 1:.HHSLQJIRRGZDUPVRIWHQLQJEXWWHU
Defrost By Food Type
$XWR'HIURVWDXWRPDWLFDOO\VHWVWKHGHIURVWLQJWLPHVDQG
power levels to give even defrosting results for meats,
poultry and fish weighing up to 6 pounds.
5HPRYHIRRGIURPWKHSDFNDJHDQGSODFHLWRQD
microwave-safe dish.
2. Press the Microwave pad and select defrost.
7XUQWKHVHOHFWRUGLDOWR'HIURVW%\)RRG7\SH
Press the selector dial to enter.
7XUQWKHVHOHFWRUGLDOWRVHOHFWIRRGW\SH3UHVVWKH
selector dial to enter.
7XUQWKHVHOHFWRUGLDOWRWKHIRRGZHLJKWXVLQJWKH
&RQYHUVLRQ*XLGHDWWKHULJKW)RUH[DPSOHGLDO
for 1.2 pounds (1 pound, 3 oz.) Press the selector
dial to enter.
6. Press the selector dial or Start/Pause pad to start
defrosting.
7XUQWKHIRRGRYHUZKHQWKHRYHQVLJQDOV7XUQ)RRG
2YHU
Ŷ 5HPRYHGHIURVWHGPHDWRUVKLHOGZDUPDUHDVZLWK
small pieces of foil for even defrosting.
Ŷ $IWHUGHIURVWLQJPRVWPHDWVQHHGWRVWDQGPLQXWHV
WRFRPSOHWHGHIURVWLQJ/DUJHURDVWVVKRXOGVWDQGIRU
about 30 minutes.
Conversion Guide
If the weight of food is stated in pounds and ounces, the
ounces must be converted to tenths (.1) of a pound.
Weight of Food Enter Food Weight
in Ounces (tenths of a pound)
1–2 .1
3 .2
4–5 .3
6–7 .4
8 .5
9–10 .6
11 .7
12–13 .8
14–15 .9
Defrost By Time
8VH'HIURVW%\7LPHWRGHIURVWIRUDVHOHFWHGOHQJWKRI
time.
1. Press the Microwave pad and select defrost.
7XUQWKHVHOHFWRUGLDOWR'HIURVW%\7LPH3UHVVWKH
selector dial to enter.
7XUQWKHVHOHFWRUGLDOWRVHOHFWWKHWLPH\RXZDQW
Press the selector dial to enter.
4. Press the selector dial or Start/Pause pad to start
defrosting.
7XUQWKHIRRGRYHUZKHQWKHRYHQVLJQDOV7XUQ)RRG
2YHU
Power level is automatically set at 3, but can be
FKDQJHG7RFKDQJHWKHSRZHUOHYHOVVHHWKH
0LFURZDYH3RZHU/HYHOVVHFWLRQ<RXFDQGHIURVW
small items quickly by raising the power level after
entering the time. Power level 7 cuts the total defrosting
time in about half; power level 10 cuts the total time to
DERXW:KHQGHIURVWLQJDWKLJKSRZHUOHYHOVIRRG
will need more frequent attention than usual.
UPPER OVEN: Microwaving

15
49-80737-1
UPPER OVEN: Microwaving
Microwaving (Cont.)
Defrost By Weight
8VH'HIURVW%\:HLJKWWRGHIURVWIRUDVHOHFWHGOHQJWKRI
time.
1. Press the Microwave pad and select defrost.
7XUQWKHVHOHFWRUGLDOWR'HIURVW%\:HLJKW3UHVVWKH
selector dial to enter.
7XUQWKHVHOHFWRUGLDOWRVHOHFWWKHZHLJKW\RXZDQW
Press the selector dial to enter.
3UHVVWKHVHOHFWRUGLDORU6WDUW3DXVHSDGWRVWDUW
defrosting.
7XUQWKHIRRGRYHUZKHQWKHRYHQVLJQDOV7XUQ)RRG
2YHU
Power level cannot be changed during this setting.
OE4XLFN'HIURVW
8VHOE4XLFN'HIURVWIRUTXLFNGHIURVWRIOERI
frozen food.
1. Press the MicrowaveSDGDQGVHOHFW/ETXLFN
defrost.
2. Press selector dial or Start/Pause pad to start
defrosting. Press the selector dial to enter.
7XUQWKHIRRGRYHUZKHQWKHRYHQVLJQDOV7XUQ)RRG
2YHU
Power level cannot be changed during this setting.
Defrosting Tips
Ŷ )RRGVIUR]HQLQSDSHURUSODVWLFFDQEHWLPH
defrosted in the package, but foods should be taken
RXWRIWKHSDFNDJHZKHQXVLQJ'HIURVW%\)RRG
7\SH&ORVHGSDFNDJHVVKRXOGEHVOLWSLHUFHGRU
vented after food has partially defrosted. Plastic
storage containers should be partially uncovered.
Ŷ )DPLO\VL]HSUHSDFNDJHGIUR]HQGLQQHUVFDQEH
defrosted and microwaved. If the food is in a foil
container, transfer it to a microwave-safe dish.
Ŷ )RRGVWKDWVSRLOHDVLO\VKRXOGQRWEHDOORZHGWR
sit out for more than one hour after defrosting.
5RRPWHPSHUDWXUHSURPRWHVWKHJURZWKRIKDUPIXO
bacteria.
Ŷ )RUPRUHHYHQGHIURVWLQJRIODUJHUIRRGVVXFKDV
URDVWVXVH'HIURVW%\7LPH%HVXUHODUJHPHDWV
are completely defrosted before cooking.
Ŷ :KHQGHIURVWHGIRRGVKRXOGEHFRROEXWVRIWHQHGLQ
all areas. If still slightly icy, return to the microwave
very briefly, or let it stand a few minutes.
16
49-80737-1
Microwaving (Cont.)
UPPER OVEN: Microwaving
Microwave Sensor Cooking
7KHVHQVRUIHDWXUHGHWHFWVWKHLQFUHDVLQJKXPLGLW\
UHOHDVHGGXULQJFRRNLQJ7KHRYHQDXWRPDWLFDOO\DGMXVWV
the cooking time to various types and amounts of food.
'RQRWXVHWKH6HQVRU)HDWXUHVWZLFHLQVXFFHVVLRQ
on the same food portion— it may result in severely
overcooked or burnt food. If food is undercooked after
WKHILUVWFRXQWGRZQXVH&RRN%\7LPHIRUDGGLWLRQDO
cooking time.
The proper containers and covers are essential for
best sensor cooking.
Ŷ $OZD\VXVHPLFURZDYHVDIHFRQWDLQHUVDQGFRYHU
WKHPZLWKOLGVRUYHQWHGSODVWLFZUDS1HYHUXVHWLJKW
sealing plastic containers—they can prevent steam
from escaping and cause food to overcook.
Ŷ %HVXUHWKHRXWVLGHRIWKHFRRNLQJFRQWDLQHUVDQG
the inside of the oven are dry before placing food in
WKHRYHQ%HDGVRIPRLVWXUHWXUQLQJLQWRVWHDPFDQ
mislead the sensor.
Ŷ %HYHUDJHVDUHEHVWKHDWHGXQFRYHUHG
Covered
Vented
Dry off dishes so they don’t
mislead the sensor.
MICROWAVE SENSOR PROGRAMS:
Ŷ*URXQG0HDW
Ŷ3RSFRUQ
Ŷ6RXS
Ŷ5LFH
Ŷ9HJHWDEOHV
(Canned, Fresh, Frozen)
Ŷ&KLFNHQ5HKHDW
Ŷ3DVWD5HKHDW
Ŷ3ODWHRI)RRG5HKHDW
Ŷ6RXS5HKHDW
Ŷ9HJHWDEOH5HKHDW
To Use All Sensor Programs
8SSHU2YHQPLFURZDYHPRGHIHDWXUHVVHQVRUFRRNLQJ,W
automatically senses when food is done and shuts itself
off—eliminating the need to program cook times and
power levels.
1. Press the Microwave pad and turn the selector dial
WR&RRN%\)RRG7\SHRU5HKHDW3UHVVWKHVHOHFWRU
dial to enter.
7XUQWKHVHOHFWRUGLDOWRVHOHFWWKHIRRG\RXZDQW
Press the selector dial to enter.
3. Press the selector dial or press the Start/Pause pad
to start cooking.
'RQRWRSHQWKHRYHQGRRUXQWLOWLPHLVFRXQWLQJGRZQ
in the display or the microwave stop cooking. If the door
is opened, close it and press Start/Pause immediately.
,IWKHIRRGLVQRWGRQHHQRXJKXVH&RRN%\7LPHLQWKH
microwave selector to cook for more time.
NOTE:'RQRWXVHWKH6HQVRU)HDWXUHVWZLFHLQ
succession on the same food portion—it may result in
severely overcooked or burnt food.
Ŷ ,I\RXKDYHEHHQVSHHGFRRNLQJDQGWKHRYHQLV
already hot, it may indicate that it is too hot for
VHQVRUFRRNLQJ2IFRXUVH\RXFDQDOZD\VFRQWLQXH
ZLWK&RRN%\7LPH
NOTE: If the oven is too hot then it will automatically
change to time cooking.
Ŷ 7RVKRUWHQRUOHQJWKHQWKHFRRNWLPHZDLWXQWLOWKH
WLPHFRXQWGRZQVKRZVLQWKHGLVSOD\7KHQWXUQWKH
selector dial to add or subtract time.
Ŷ ,I\RXRSHQWKHGRRUZKLOH6HQVRU&RRNLQJ6HQVRU
(UURUZLOODSSHDU&ORVHWKHGRRUSUHVVStart/Pause
to begin again.
Notes about the Reheat program:
5HKHDWHGIRRGVPD\KDYHZLGHYDULDWLRQVLQ
WHPSHUDWXUH6RPHDUHDVPD\EHH[WUHPHO\KRW
,WLVEHVWWRXVH&RRN%\7LPHDQGQRW5HKHDWIRUWKHVH
foods:
Ŷ %UHDGSURGXFWV
Ŷ )RRGWKDWPXVWEHUHKHDWHGXQFRYHUHG
Ŷ )RRGVWKDWQHHGWREHVWLUUHGRUWXUQHG
Ŷ )RRGVFDOOLQJIRUDGU\ORRNRUFULVSVXUIDFHDIWHU
reheating.

17
49-80737-1
<RXUQHZRYHQKDVDYDULHW\RIFRRNLQJPRGHVWRKHOS\RXJHWWKHEHVWUHVXOWV7KHVHPRGHVDUHGHVFULEHGEHORZ5HIHU
WRWKH&RRNLQJ*XLGHVHFWLRQIRUUHFRPPHQGDWLRQVIRUVSHFLILFIRRGV5HPHPEHU\RXUQHZRYHQPD\SHUIRUPGLIIHUHQWO\
than the oven it is replacing.
Baking and Roasting Modes
6HOHFWDPRGHIRUEDNLQJDQGURDVWLQJEDVHGRQWKHW\SH
DQGTXDQWLW\RIIRRG\RXDUHSUHSDULQJ:KHQSUHSDULQJ
baked goods such as cakes, cookies, and pastries always
SUHKHDWWKHRYHQILUVW)ROORZUHFLSHUHFRPPHQGDWLRQVIRU
food placement. If no guidelines are provided, center food
in the oven.
Traditional Bake
7KHWUDGLWLRQDOEDNHPRGHLVLQWHQGHGIRUVLQJOHUDFNFRRNLQJ
7KLVPRGHXVHVKHDWSULPDULO\IURPWKHORZHUHOHPHQWEXW
DOVRIURPWKHXSSHUHOHPHQWWRFRRNIRRG7RXVHWKLVPRGH
press the Bake pad, turn the selector dial to set the oven
temperature and press to enter, then press Start. Preheating
is generally recommended when using this mode.
Broiling Modes
$OZD\VEURLOZLWKWKHGRRUFORVHG7KHEURLOHOHPHQWLQWKLV
RYHQLVYHU\SRZHUIXO0RQLWRUIRRGFORVHO\ZKLOHEURLOLQJ
8VHFDXWLRQZKHQEURLOLQJRQXSSHUUDFNSRVLWLRQVDV
placing food closer to the broil element increases smoking,
spattering, and the possibility of fats igniting. Broiling on
rack position 6 is not recommended.
7U\EURLOLQJIRRGVWKDW\RXZRXOGQRUPDOO\JULOO$GMXVWUDFN
positions to adjust the intensity of the heat to the food. Place
foods closer to the broil element when a seared surface
DQGUDUHLQWHULRULVGHVLUHG7KLFNHUIRRGVDQGIRRGVWKDW
need to be cooked through should be broiled on a rack
SRVLWLRQIDUWKHUIURPWKHEURLOHURUE\XVLQJ%URLO/R. )RUEHVW
performance center food below the broil heating element.
Broil Hi
7KH7UDGLWLRQDO%URLO+LPRGHXVHVLQWHQVHKHDWIURPWKH
XSSHUHOHPHQWWRVHDUIRRGV8VH%URLO+LIRUWKLQQHUFXWV
of meat and/ or foods you prefer less done on the interior.
7RXVHWKLVPRGHSUHVVWKHBroil pad, turn the selector
GLDOWR+LDQGSUHVVWRHQWHUDQGWKHQSUHVVStart. It is not
necessary to preheat when using this mode.
Broil Lo
7KH7UDGLWLRQDO%URLO/RPRGHXVHVOHVVLQWHQVHKHDWIURP
the upper element to cook food thoroughly while also
SURGXFLQJVXUIDFHEURZQLQJ8VH%URLO/RIRUWKLFNHUFXWVRI
meat and/or foods that you would like cooked all the way
WKURXJK7RXVHWKLVPRGHSUHVVWKHBroil pad, turn the
VHOHFWRUGLDOWR/RDQGSUHVVWRHQWHUDQGWKHQSUHVVStart.
It is not necessary to preheat when using this mode.
Proof
Proof mode is designed for rising (fermenting and proofing)
bread dough. Press the Options pad, turn the selector
dial to select Proof and press to select, then press Start.
&RYHUGRXJKZHOOWRSUHYHQWGU\LQJRXW%UHDGZLOOULVHPRUH
UDSLGO\WKDQDWURRPWHPSHUDWXUH1RWHWKDWIRUGRXEOHZDOO
ovens, proof cannot be run when running a clean mode in
the lower oven.
Warm
:DUPPRGHLVGHVLJQHGWRNHHSKRWIRRGVKRWIRUXSWR
KRXUV7RXVHWKLVPRGHSUHVVWKHOptions pad, turn the
VHOHFWRUGLDOWRVHOHFW:DUPDQGSUHVVWRVHOHFWRUSUHVV
the Warm pad, then press Start&RYHUIRRGVWKDWQHHGWR
remain moist and do not cover foods that should be crisp.
3UHKHDWLQJLVQRWUHTXLUHG'RQRWXVHZDUPWRKHDWFROG
food other than crisping crackers, chips or dry cereal. It is
also recommended that food not be kept warm for more
than 2 hours.
Cooking Modes
LOWER OVEN: Cooking Modes

18
49-80737-1
Sabbath Mode
<RXUQHZRYHQFRQIRUPVWRWKH6WDU.-HZLVK6DEEDWKUHTXLUHPHQWVZLWKWKH6DEEDWKPRGHFRRNLQJIHDWXUH%HORZ
GHVFULEHVWKHGHWDLORI6DEEDWKPRGHIHDWXUH
To Enter Sabbath Mode
Press the lower oven Options pad and turn the selector
GLDOWR6DEEDWKDQGSUHVVWRVHOHFW7KHGLVSOD\
ZLOOVKRZ³'XULQJ6DEEDWK0RGHWKHXSSHURYHQLV
XQDYDLODEOH´3UHVVWKHVHOHFWRUGLDOWRFRQWLQXH$Q\
upper oven features running will exit, and the lower oven
ZLOOLPPHGLDWHO\WUDQVLWLRQLQWR6DEEDWKPRGH
To Change Temperature
2QFHLQ6DEEDWKPRGHLQRUGHUWRFKDQJHRYHQ
temperature or start a bake feature, the user can change
temperature to one of 10 pre-set temperatures as
indicated below:
&KDQJLQJWRRQHRIWKHDERYHWHPSHUDWXUHVUHTXLUHVWKH
user to press the keypad associated with the desired
temperature and then press the Start/PauseSDG)RU
H[DPSOHWRVHWD%DNH)WKHXVHUZLOOSUHVVWKHBake
pad on the lower oven and then press Start/Pause pad.
7KH%DNHIHDWXUHZLOOVWDUWRULIDOUHDG\UXQQLQJWKH
oven temperature will change) at a random time between
30 – 60 seconds after the Start/Pause pad is pressed,
with the exception of pressing the Clear/Off pad, which
ZLOOLPPHGLDWHO\FDQFHOWKHFRRNLQJVHWWLQJV7KHXQLW
ZLOOUHPDLQLQ6DEEDWKPRGH&KDQJHRIWHPSHUDWXUH
may be executed at any time in the cooking cycle.
To Turn Oven Off
Press Clear/Off pad or Back and then Start pads at
DQ\WLPH7KHRYHQZLOOLPPHGLDWHO\WXUQRIIEXWZLOOVWD\
LQ6DEEDWKPRGHDQGUHWXUQWRWKHVWDQGE\6DEEDWK
display screen.
To Exit Sabbath Mode
Press and hold the BackSDGIRUVHFRQGV7KHRYHQ
will shut down at a random time between 30 – 60
seconds after the Back pad is pressed and held.
NOTE'RQRWSUHVVDQ\RWKHUSDGVGXULQJWKLVWLPHRU
WKH6DEEDWKPRGHZLOOEHUHLQLWLDOL]HGDQGZLOOQRWH[LW
7KHRYHQZLOOH[LW6DEEDWKPRGHDQGUHWXUQWRLWVGHIDXOW
screen.
Timed Cook Feature In Sabbath Mode
7KH6DEEDWKPRGHLVQRWFDSDEOHRIUXQQLQJDWLPHG
cook feature on its own. If there is a desire to run a
7LPHG&RRNWKHIROORZLQJVWHSVPXVWEHIROORZHG
8VHWKHSettingsSDGWRVHW\RXU%HHSHU9ROXPHWR
0XWH
8VHWKHLightSDGWRVHW\RXUORZHURYHQ/LJKWWR2Q
8VHBakeWRSURJUDPDWHPSHUDWXUH$IWHU
programming a temperature select a cook time and
enter your cook time. Press Start to start the oven.
2QFHWKHRYHQLVVWDUWHGGR127RSHQWKHGRRU
until the oven has finished preheating and reached a
VWHDG\VWDWHWHPSHUDWXUH'RLQJVRSULRUWRSUHKHDWLQJ
completing will result in the air distribution fan
de-energizing immediately upon door opening.
2QFHWKHIRRGKDVEHHQSODFHGLQWKHRYHQGRQRW
RSHQWKHGRRUXQWLOFRRNLQJKDVFRPSOHWHG'RLQJVR
will result in the display on the screen changing to
prompt you to close your door.
'R127RSHQWKHXSSHURYHQGRRU'RLQJVRZLOOWXUQ
the light on immediately.
'RQRWSUHVVDQ\DGGLWLRQDOEXWWRQVRQWKHORZHU
oven controls once started or the display will change
immediately upon the button press.
NOTES
Ŷ 'XULQJ6DEEDWKPRGHRQO\ORZHURYHQ%DNHLV
DYDLODEOH%URLO:DUPRURWKHUIXQFWLRQVDUHQRW
available.
Ŷ :KHQLQ6DEEDWKPRGHWKHKRXUDXWRVKXWRII
is disabled regardless of the setting selected in the
Settings.
Ŷ 6DEEDWKPRGHFDQEHHQWHUHGRQO\LIQRFRRNLQJ
PRGHLVUXQQLQJLQWKHORZHURYHQ(QWHULQJWKH
6DEEDWK0RGHZLOOFDQFHODOOIXQFWLRQVLQWKHORZHU
and upper oven (including timer and reminder).
Ŷ :KHQDQ\EXWWRQVDUHSUHVVHGLQ6DEEDWK0RGH
there are no beeps or tones, no changes to lights or
FKDQJHLQWKHGLVSOD\$OVRZKHQWKHGRRULVRSHQHG
RUFORVHGLQ6DEEDWK0RGHWKHUHDUHQREHHSVRU
tones, no changes to lights or change in the display.
Ŷ ,IDSRZHURXWDJHRFFXUVGXULQJ6DEEDWKPRGH
EDNLQJWKHXQLWZLOOUHWXUQWR6DEEDWK0RGHZKHQ
power comes back, but will not return in the baking
mode.
LOWER OVEN: Sabbath Mode
UI Key Temp. (°F)
Left Side Keys (Upper Oven)
0LFURZDYH 170
6SHHG&RRN'HIURVW 200
&RRNLQJ2SWLRQV3RSFRUQ 225
$GG6HF 250
&RQYHFWLRQ%DNH5HKHDW 300
Right Side Keys (Lower Oven)
%DFN 0
&OHDU2II &DQFHOVLPPHGLDWHO\
/LJKW 325
%DNH 350
%URLO 375
&RQYHFWLRQ%DNH:DUP 400
2SWLRQV 450
19
49-80737-1
LOWER OVEN: Cooking Guide
Cooking Guide
FOOD TYPE
RECOMMENDED
MODE(S)
RECOMMENDED
5$&.326,7,216 ADDITIONAL SUGGESTIONS
Baked Goods
/D\HUFDNHVVKHHWFDNHV
bundt cakes, muffins, quick
EUHDGVRQD6LQJOH5DFN
%DNH 3 8VHVKLQ\FRRNZDUH
/D\HUFDNHVRQ0XOWLSOH
5DFNV
%DNH 2 and 4
(QVXUHDGHTXDWHDLUIORZ
(see illustration below).
&KLIIRQFDNHVDQJHOIRRG %DNH 1 8VHVKLQ\FRRNZDUH
&RRNLHVELVFXLWVVFRQHV
RQD6LQJOH5DFN
%DNH 3 8VHVKLQ\FRRNZDUH
&RRNLHVELVFXLWVVFRQHV
RQ0XOWLSOH5DFNV
%DNH 2 and 4
)RUIRRGVOLNHVXJDUFRRNLHVVZLWFKIRRGORFDWLRQ
partially through cooking for more even cooking
UHVXOWVEHWZHHQUDFNV(QVXUHDGHTXDWHDLUIORZ
Beef & Pork
+DPEXUJHUV %URLO+L 5
8VHDEURLOSDQPRYHIRRGGRZQIRUPRUH
GRQHQHVVOHVVVHDULQJ:DWFKIRRG
FORVHO\ZKHQEURLOLQJ)RUEHVWSHUIRUPDQFH
center food below the broil heating element.
6WHDNV&KRSV %URLO+L 5
8VHDEURLOSDQPRYHIRRGGRZQIRU
PRUHGRQHQHVVOHVVVHDULQJ:DWFKIRRG
FORVHO\ZKHQEURLOLQJ)RUEHVWSHUIRUPDQFH
center food below the broil heating element.
5RDVWV %DNH 2 or 3
/HDYHXQFRYHUHGXVHDORZVLGHGSDQVXFK
as a broil pan. Preheating is not necessary.
Poultry
:KROHFKLFNHQ %DNH 2 or 3 8VHDORZVLGHGSDQVXFKDVDEURLOSDQ
%RQHLQFKLFNHQEUHDVWV
legs, thighs
%URLO+L 1 ,IEUHDGHGRUFRDWHGLQVDXFHDYRLG%URLO
+LPRGHV%URLOVNLQVLGHGRZQILUVW
:DWFKIRRGFORVHO\ZKHQEURLOLQJ)RUEHVW
performance when broiling, center food below
the broil heating element.
%URLO/R
%DNH
3
%RQHOHVVFKLFNHQEUHDVWV
%URLO/R
%DNH
1 (broil) or 3
0RYHIRRGGRZQIRUPRUHGRQHQHVVOHVV
searing and up for greater searing/browning
ZKHQEURLOLQJ)RUEHVWSHUIRUPDQFHZKHQEURLO-
ing, center food below the broil heating element.
:KROHWXUNH\ %DNH 1 or 2 8VHDORZVLGHGSDQVXFKDVDEURLOSDQ
7XUNH\%UHDVW %DNH 2 or 3 8VHDORZVLGHGSDQVXFKDVDEURLOSDQ
Fish %URLO/R
5 (1/2 thick or less)
4 (>1/2 inch)
:DWFKIRRGFORVHO\ZKHQEURLOLQJ)RUEHVW
performance center food below the broil heating
element.
Casseroles %DNH 3
Frozen Convenience Foods
Pizza, french fries, tator tots,
chicken nuggets, appetizers
RQD6LQJOH5DFN
%DNH 3 8VHVKLQ\FRRNZDUH
Pizza, french fries, tator tots,
chicken nuggets, appetizers
RQ0XOWLSOH5DFNV
%DNH 2 and 4
8VHVKLQ\FRRNZDUH
6ZLWFKIRRGORFDWLRQSDUWLDOO\WKURXJK
cooking for more even cooking results.
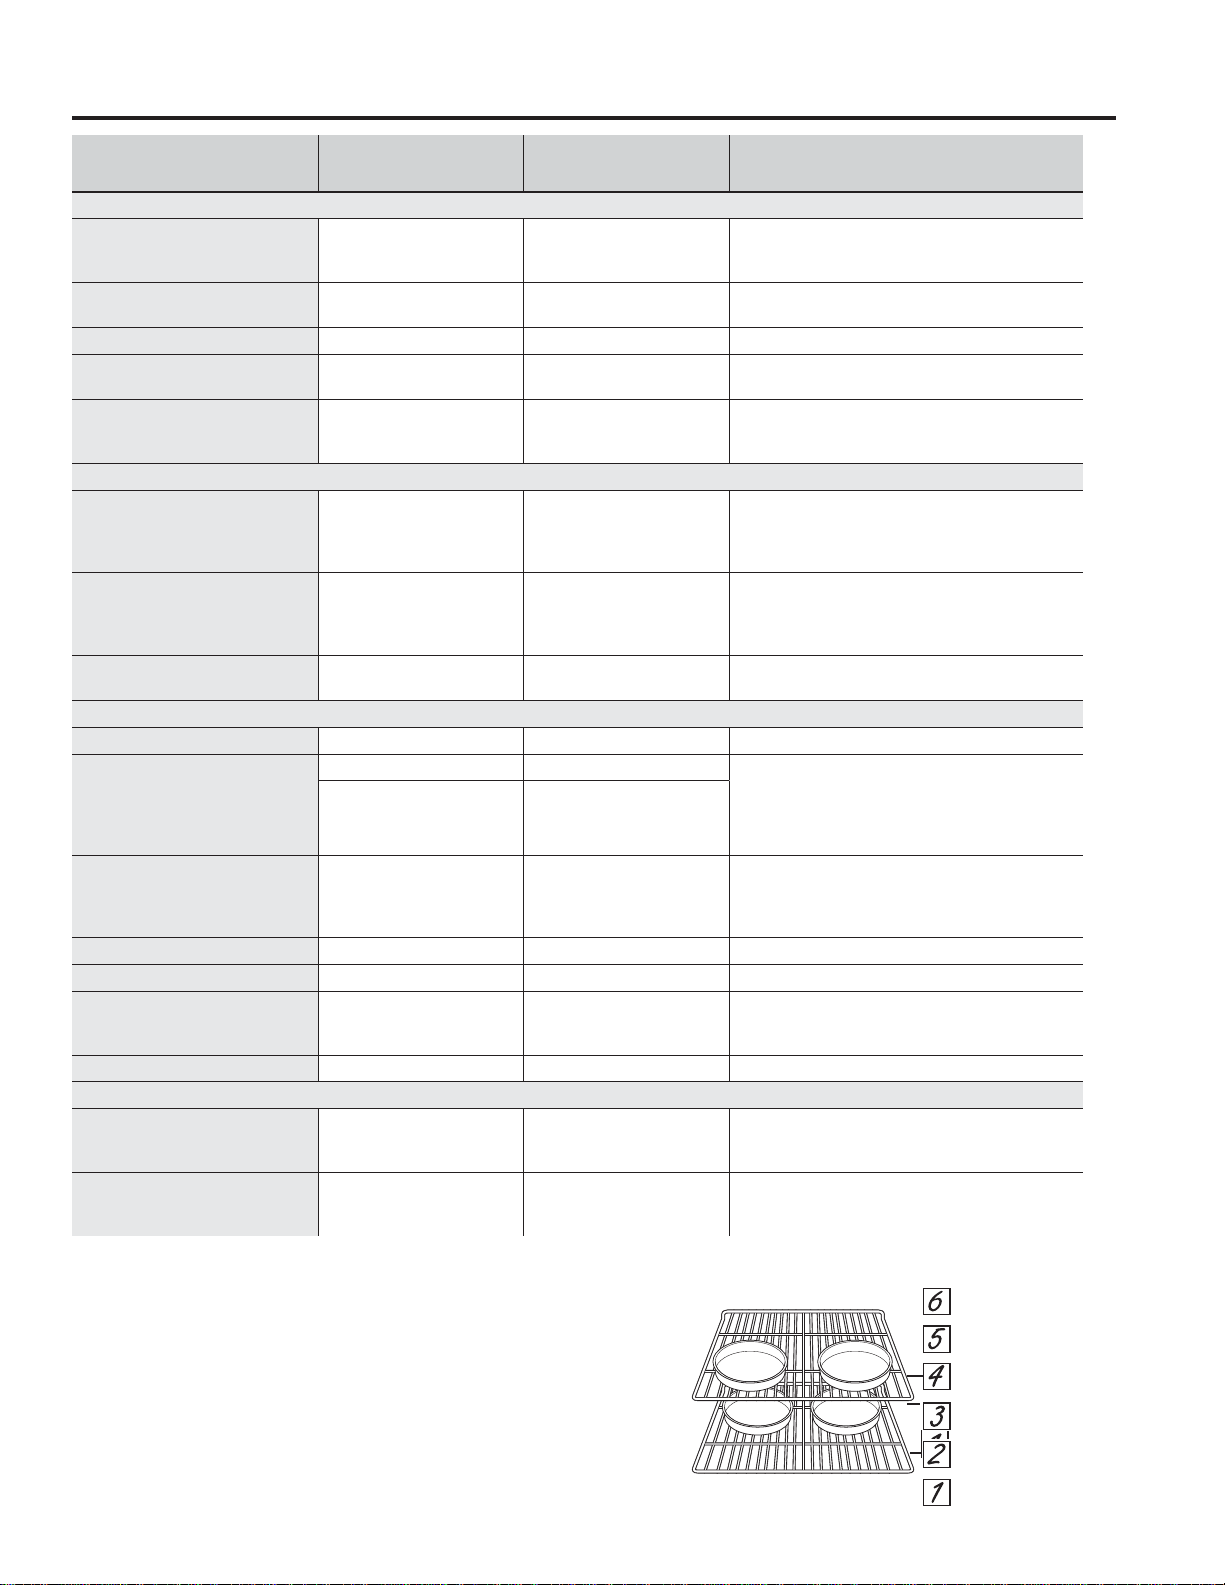
:KHQEDNLQJIRXUFDNHOD\HUVDWDWLPHXVHUDFNV
and 4. Place the pans as shown so that one pan is not
directly above another.
&RRNIRRGWKRURXJKO\WRKHOSSURWHFWDJDLQVWIRRG
ERUQHLOOQHVV0LQLPXPVDIHIRRGWHPSHUDWXUH
recommendations for food safety can be found at
www.IsItDoneYet.gov0DNHVXUHWRXVHDIRRG
thermometer to take food temperatures.
20
49-80737-1
LOWER OVEN: Racks
Racks
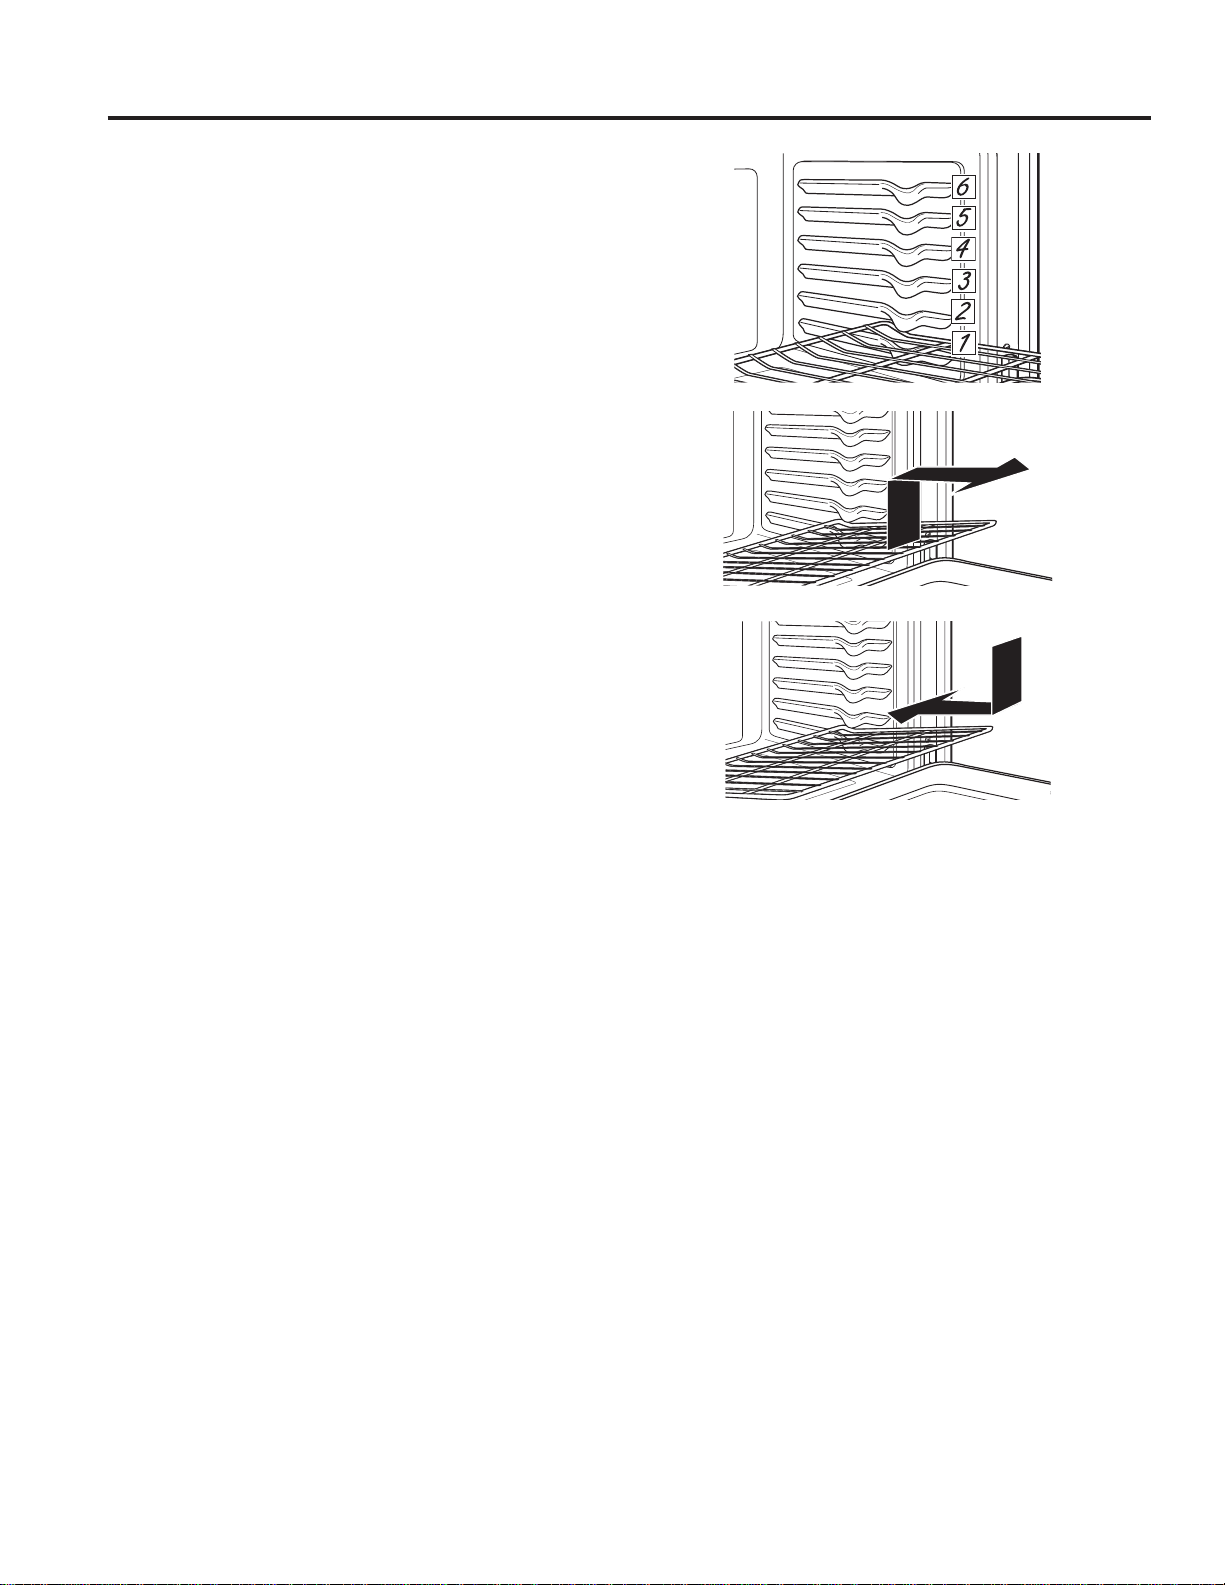
<RXURYHQKDVVL[UDFNSRVLWLRQV5HFRPPHQGHGUDFN
positions for various types of foods are provided in the
&RRNLQJ*XLGH$GMXVWLQJUDFNSRVLWLRQLVRQHZD\WR
LPSDFWFRRNLQJUHVXOWV)RUH[DPSOHLI\RXZRXOGSUHIHU
darker tops on cakes, muffins, or cookies, try moving
food one rack position higher. If you find foods are too
brown on top try moving them down next time.
:KHQEDNLQJZLWKPXOWLSOHSDQVDQGRQPXOWLSOHUDFNV
ensure there is sufficient space between pans to allow
air to flow.
Flat Racks
:KHQSODFLQJDQGUHPRYLQJFRRNZDUHSXOOWKHUDFNRXW
to the bump (stop position) on the rack support.
7RUHPRYHDUDFNSXOOLWWRZDUG\RXWLOWWKHIURQWHQGXS
and pull it out.
7RUHSODFHSODFHWKHFXUYHGHQGRIWKHUDFNVWRSORFNV
onto the oven supports, tilt up the front of the rack and
push the rack in.
5DFNVPD\EHFRPHGLIILFXOWWRVOLGHHVSHFLDOO\DIWHUD
self-clean. Put some vegetable oil on a soft cloth or
paper towel and rub onto the left and right edges.

21
49-80737-1
LOWER OVEN: Aluminum Foil and Oven Liners / Cookware
Cookware
Cookware Guidelines
7KHPDWHULDOILQLVKDQGVL]HRIFRRNZDUHDIIHFWEDNLQJ
performance.
'DUNFRDWHGDQGGXOOSDQVDEVRUEKHDWPRUHUHDGLO\
than light, shiny pans. Pans that absorb heat more
readily can result in a browner, crisper, and thicker crust.
If using dark and coated cookware check food earlier
than minimum cook time. If undesirable results are
obtained with this type of cookware consider reducing
RYHQWHPSHUDWXUHE\)QH[WWLPH
6KLQ\SDQVFDQSURGXFHPRUHHYHQO\FRRNHGEDNHG
goods such as cakes and cookies.
*ODVVDQGFHUDPLFSDQVKHDWVORZO\EXWUHWDLQKHDWZHOO
7KHVHW\SHVRISDQVZRUNZHOOIRUGLVKHVVXFKDVSLHV
and custards.
$LULQVXODWHGSDQVKHDWVORZO\DQGFDQUHGXFHERWWRP
browning.
.HHSFRRNZDUHFOHDQWRSURPRWHHYHQKHDWLQJ
CAUTION: Do not use any type of foil or oven liner to cover the oven bottom. These items can trap
heat or melt, resulting in damage to the product and risk of shock, smoke or fire. Damage from improper use
of these items is not covered by the product warranty.
)RLOPD\EHXVHGWRFDWFKVSLOOVE\SODFLQJDVKHHWRQDORZHUUDFNVHYHUDOLQFKHVEHORZWKHIRRG'RQRWXVHPRUH
IRLOWKDQQHFHVVDU\DQGQHYHUHQWLUHO\FRYHUDQRYHQUDFNZLWKDOXPLQXPIRLO.HHSIRLODWOHDVW´IURPRYHQZDOOV
to prevent poor heat circulation.
Aluminum Foil and Oven Liners
22
49-80737-1
Helpful Hints
$QRFFDVLRQDOWKRURXJKZLSLQJZLWKDVROXWLRQRI
EDNLQJVRGDDQGZDWHUNHHSVWKHLQVLGHIUHVK$OVR
we recommend against using cleaners with ammonia
or alcohol, as they can damage the appearance of
the oven. If you choose to use a common household
cleaner, first apply the cleaner directly to a clean cloth,
then wipe the soiled area.
Control Panel
,W¶VDJRRGLGHDWRZLSHWKHFRQWUROSDQHODIWHUHDFKXVH
&OHDQZLWKPLOGVRDSDQGZDWHURUYLQHJDUDQGZDWHU
rinse with clean water and polish dry with a soft cloth.
'RQRWXVHDEUDVLYHFOHDQVHUVVWURQJOLTXLGFOHDQVHUV
plastic scouring pads or oven cleaners on the control
panel—they will damage the finish.
Oven Exterior
'RQRWXVHRYHQFOHDQHUVDEUDVLYHFOHDQVHUVVWURQJ
liquid cleansers, steel wool, plastic scouring pads, or
cleaning powders on the interior or exterior of the oven.
&OHDQZLWKDPLOGVRDSDQGZDWHURUYLQHJDUDQGZDWHU
VROXWLRQ5LQVHZLWKFOHDQZDWHUDQGGU\ZLWKDVRIWFORWK
:KHQFOHDQLQJVXUIDFHVPDNHVXUHWKDWWKH\DUHDW
room temperature and not in direct sunlight.
If stain on the door vent trim is persistent, use a mild
abrasive cleaner and a sponge-scrubber for best results.
6SLOODJHRIPDULQDGHVIUXLWMXLFHVWRPDWRVDXFHVDQG
basting liquids containing acids may cause discoloration
DQGVKRXOGEHZLSHGXSLPPHGLDWHO\/HWKRWVXUIDFHV
cool, then clean and rinse.
Stainless Steel Surfaces (on some models)
'RQRWXVHDVWHHOZRROSDGLWZLOOVFUDWFKWKHVXUIDFH
7RFOHDQWKHVWDLQOHVVVWHHOVXUIDFHXVHZDUPVXGV\
ZDWHURUDVWDLQOHVVVWHHOFOHDQHURUSROLVK$OZD\V
ZLSHWKHVXUIDFHLQWKHGLUHFWLRQRIWKHJUDLQ)ROORZ
the cleaner instructions for cleaning the stainless steel
surface.
7RLQTXLUHDERXWSXUFKDVLQJFOHDQLQJSURGXFWVLQFOXGLQJ
stainless steel appliance cleaner or polish, read the
$VVLVWDQFHDQG$FFHVVRULHVVHFWLRQDWWKHEHJLQQLQJRI
this manual.
How To Clean The Upper Oven Interior
&OHDQWKHLQVLGHRIWKHRYHQRIWHQIRUSURSHUKHDWLQJ
performance.
6RPHVSDWWHUVFDQEHUHPRYHGZLWKDSDSHUWRZHO
RWKHUVPD\UHTXLUHDZDUPVRDS\FORWK5HPRYHJUHDV\
spatters with a sudsy cloth; then rinse with a damp cloth.
'RQRWXVHDEUDVLYHFOHDQHUVRUVKDUSXWHQVLOVRQRYHQ
walls.
Never use a commercial oven cleaner on any part of
your oven.
'RQRWFOHDQWKHLQVLGHRIWKHRYHQZLWKPHWDOVFRXULQJ
pads. Pieces can break off the pad, causing electrical
shock.
Door Seal
,W¶VLPSRUWDQWWRNHHSWKHDUHDFOHDQZKHUHWKHGRRU
VHDOVDJDLQVWWKHRYHQ8VHRQO\PLOGQRQDEUDVLYH
detergents applied with a clean sponge or soft cloth.
5LQVHZHOO
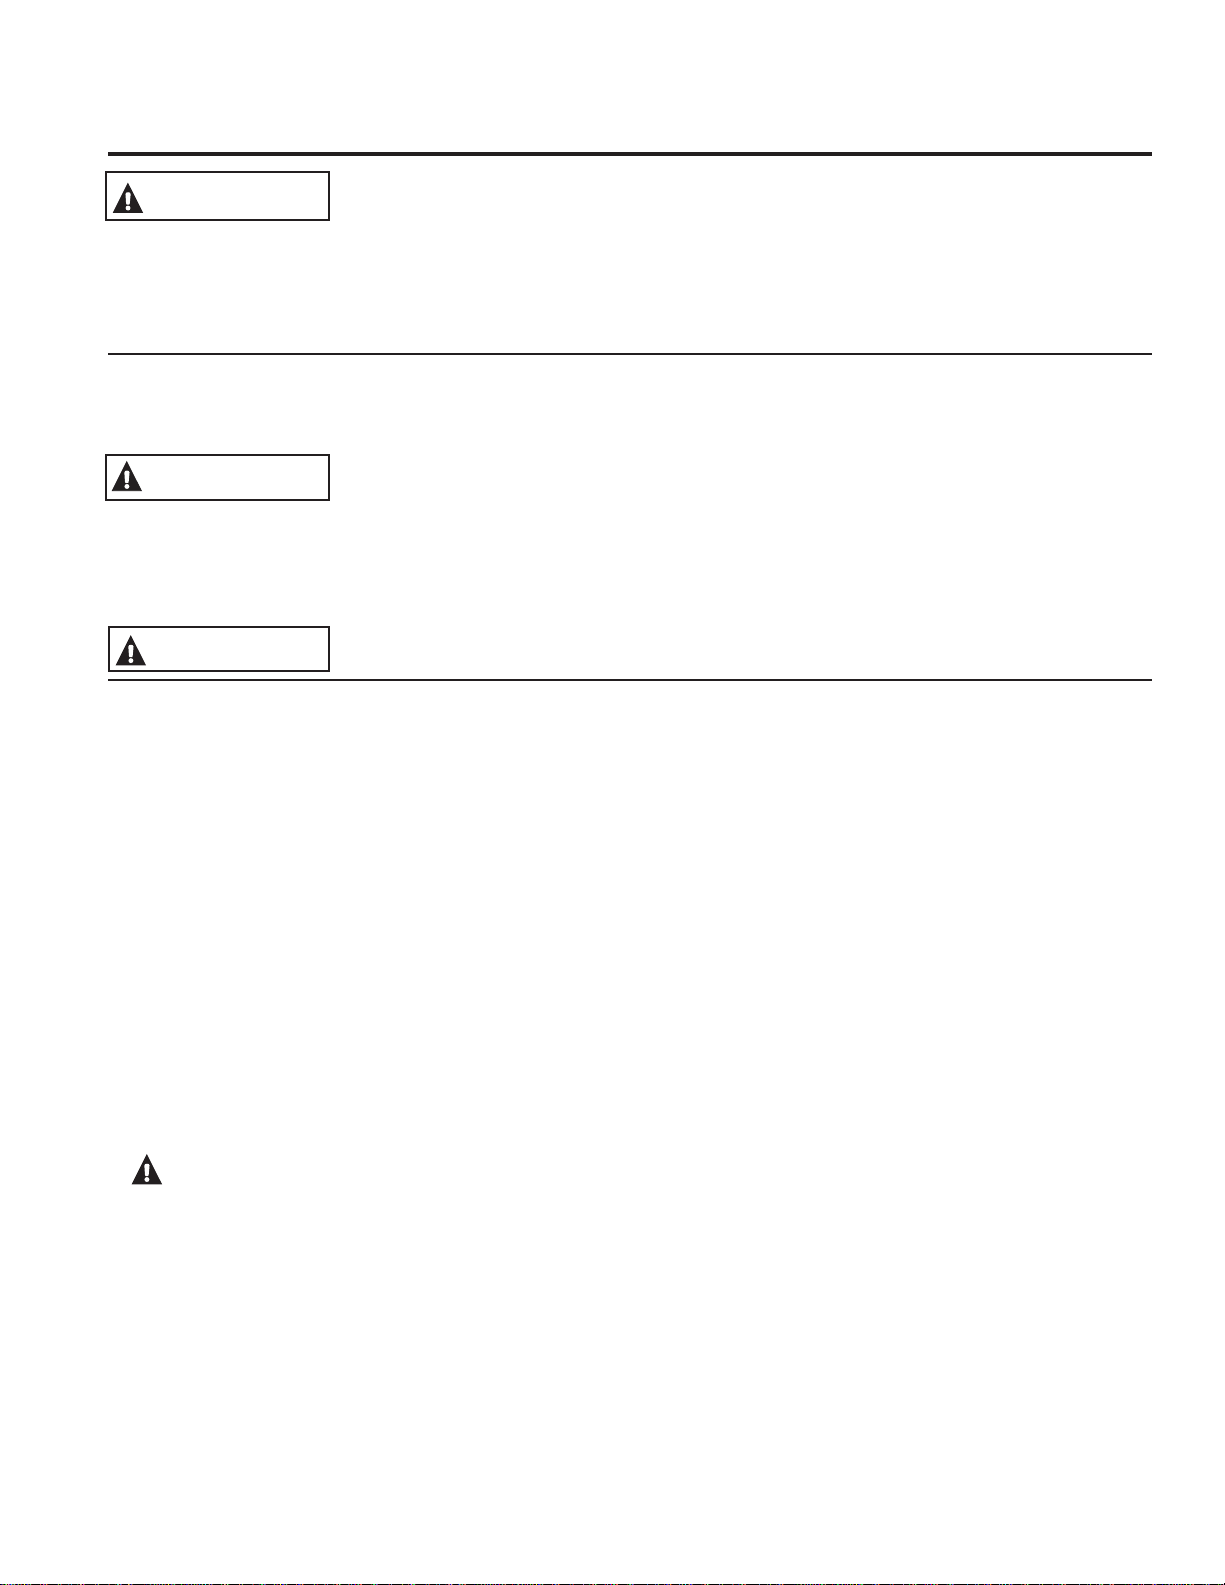
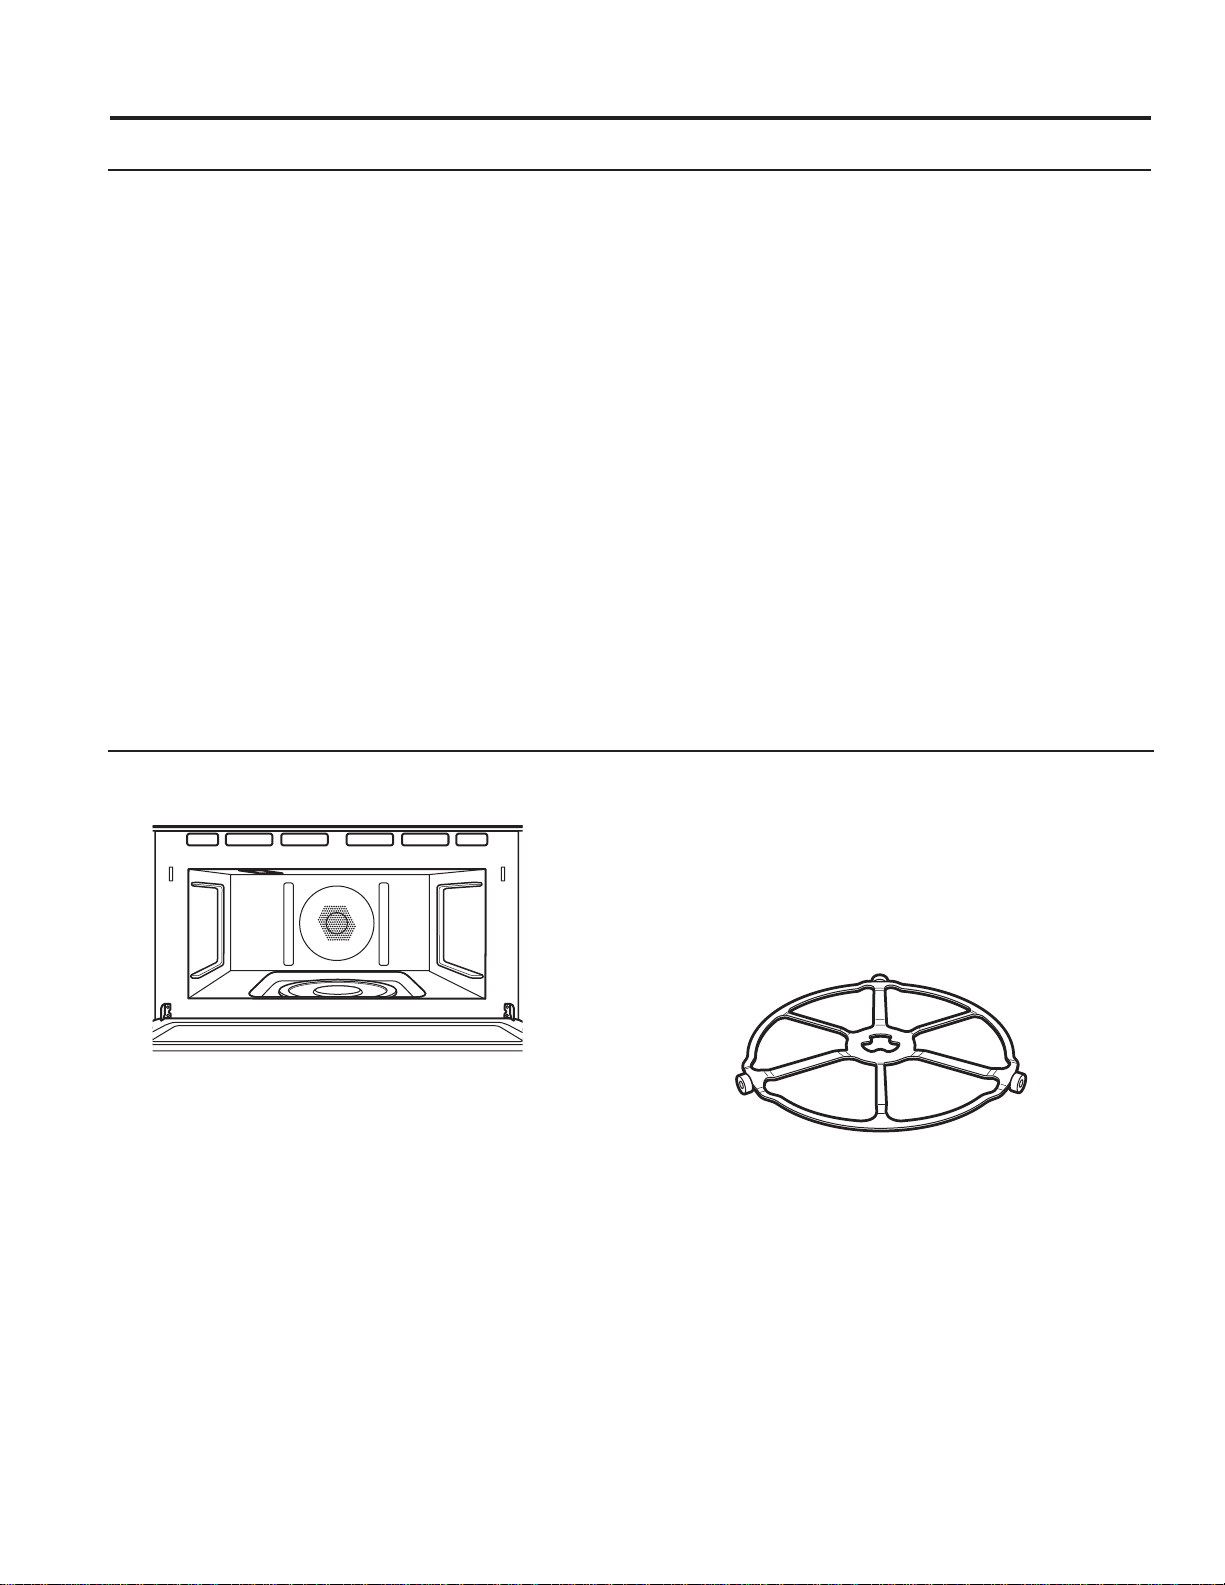
Removable Turntable
7KHDUHDXQGHUQHDWKWKHWXUQWDEOHVKRXOGEHFOHDQHG
frequently to avoid odors and smoking during a cooking
cycle.
7KHWXUQWDEOHFDQEHEURNHQLIGURSSHG:DVKFDUHIXOO\
LQZDUPVXGV\ZDWHU'U\FRPSOHWHO\DQGUHSODFH
7RUHSODFHWKHWXUQWDEOHSODFHLWVFHQWHURYHUWKHVSLQGOH
in the center of the oven and turn it until it seats into place.
0DNHVXUHWKHVPRRWKVLGHRIWKHWXUQWDEOHLVIDFLQJXS
and that its center seats securely on the spindle.)
Cleaning The Oven
%HVXUHHOHFWULFDOSRZHULVRIIDQGDOOVXUIDFHVDUHFRROEHIRUHFOHDQLQJDQ\SDUWRIWKHRYHQ
CARE AND CLEANING: Cleaning The Oven
Walls, Floor, Inside Window, Metal and
Plastic Parts on the Door
Do not use the oven without the
turntable in place.
Turntable

23
49-80737-1
Cleaning The Oven (Cont.)
CARE AND CLEANING: Cleaning The Oven
Clear glass tray for microwaving
How To Clean The Lower Oven Interior
7KHLQWHULRURI\RXUQHZRYHQFDQEHFOHDQHGPDQXDOO\
RUE\XVLQJWKH6WHDP&OHDQRU6HOI&OHDQPRGHV
6SLOODJHRIPDULQDGHVIUXLWMXLFHVWRPDWRVDXFHVDQG
basting liquids containing acids may cause discoloration
DQGVKRXOGEHZLSHGXSLPPHGLDWHO\/HWKRWVXUIDFHV
cool, then clean and rinse.
Manual Cleaning
'RQRWXVHRYHQFOHDQHUVDEUDVLYHFOHDQHUVVWURQJ
liquid cleansers, steel wool, scouring pads, or cleaning
SRZGHUVRQWKHLQWHULRURIWKHRYHQ&OHDQZLWKDPLOG
VRDSDQGZDWHURUYLQHJDUDQGZDWHUVROXWLRQ5LQVHZLWK
FOHDQZDWHUDQGGU\ZLWKDVRIWFORWK:KHQFOHDQLQJ
surfaces, make sure that they are at room temperature.
Steam Clean Mode
6WHDPFOHDQLVLQWHQGHGWRFOHDQVPDOOVSLOOVXVLQJZDWHU
DQGDORZHUFOHDQLQJWHPSHUDWXUHWKDQ6HOI&OHDQ
7RXVHWKH6WHDP &OHDQIHDWXUHZLSHJUHDVHDQGVRLOV
from the oven. Pour one cup of water into the bottom
RIWKHRYHQ&ORVHWKHGRRU3UHVVWKHOptions pad,
VHOHFW6WHDP&OHDQ and then press Start7KHRYHQ
GRRUZLOOORFN<RXFDQQRWRSHQWKHGRRUGXULQJWKH
30 minute steam clean as this will decrease the steam
FOHDQSHUIRUPDQFH$WWKHHQGRIWKHVWHDPFOHDQF\FOH
WKHGRRUZLOOXQORFN:LSHRXWDQ\H[FHVVZDWHUDQGDQ\
remaining soil.
Self Clean Mode
5HDG6HOI&OHDQLQJ2YHQ6DIHW\,QVWUXFWLRQVDWWKH
EHJLQQLQJRIWKLVPDQXDOEHIRUHXVLQJ6HOI&OHDQ0RGH
6HOIFOHDQXVHVYHU\KLJKWHPSHUDWXUHVWRFOHDQWKHRYHQ
LQWHULRU7KHRYHQGRRUZLOOORFNZKHQXVLQJWKLVIHDWXUH
%HIRUHRSHUDWLQJWKHVHOIFOHDQF\FOHZLSHXSJUHDVH
DQGVRLOVIURPWKHRYHQ5HPRYHDOOLWHPVIURPWKH
RYHQRWKHUWKDQHQDPHOHGGDUNFRORUUDFNV6KLQ\RU
silver racks and any cookware or other items should all
be removed from the oven before initiating a self-clean
F\FOH&ORVHWKHGRRU3UHVVWKHOptions pad, select
6HOI&OHDQDQGDGHIDXOWVHOIFOHDQWLPHLVGLVSOD\HG
7KHFOHDQWLPHFDQEHFKDQJHGWRRU
KRXUVE\XVLQJWKHVHOHFWRUGLDO)RUKHDYLO\VRLOHG
ovens, the maximum 5 hour clean time is recommended.
If you wish to use the default time, press the Start pad
LPPHGLDWHO\DIWHUVHOHFWLQJWKH6HOI&OHDQ7KHRYHQ
will turn off automatically when the self-clean cycle is
FRPSOHWH7KHGRRUZLOOVWD\ORFNHGXQWLOWKHRYHQKDV
FRROHGGRZQ$IWHUWKHRYHQKDVFRROHGGRZQZLSHDQ\
ash out of the oven.
IMPORTANT:7KHKHDOWKRIVRPHELUGVLVH[WUHPHO\
sensitive to the fumes given off during the self-cleaning
F\FOHRIDQ\UDQJH0RYHELUGVWRDQRWKHUZHOOYHQWLODWHG
room.
Flat Racks
)ODWUDFNVFDQEHOHIWLQWKHFDYLW\GXULQJVHOIFOHDQ
(if enameled racks, not shiny) or can be washed with
warm, soapy water.
5DFNVPD\EHPRUHGLIILFXOWWRVOLGHHVSHFLDOO\DIWHU
a self-clean. Put some vegetable oil on a soft cloth or
paper towel and rub onto the left and right edges.
How To Clean The Upper Oven Interior (Cont.)
Cooking Trays And Baking Sheet
7RSUHYHQWEUHDNDJHDOORZWKHWUD\VWRFRROFRPSOHWHO\
EHIRUHFOHDQLQJ:DVKFDUHIXOO\LQZDUPVXGV\ZDWHURU
in the dishwasher.
'RQRWXVHPHWDOVFRXULQJSDGVRUDEUDVLYHVDVWKH\
PD\GDPDJHWKHILQLVK$VRDSILOOHGVFRXULQJSDGPD\
be used to clean the trays.
24
49-80737-1
SHOCK OR BURN HAZARD:%HIRUHUHSODFLQJRYHQOLJKWEXOEGLVFRQQHFWWKHHOHFWULFDO
SRZHUWRWKHRYHQDWWKHPDLQIXVHRUFLUFXLWEUHDNHUSDQHO)DLOXUHWRGRVRPD\UHVXOWLQ
electric shock or burn.
WARNING
BURN HAZARD:7KHJODVVFRYHUDQGEXOEVKRXOGEHUHPRYHGZKHQFRRO7RXFKLQJKRW
glass with bare hands or a damp cloth can cause burns.
CAUTION
Lower Oven Light Replacement
'LVFRQQHFWSRZHUDWWKHPDLQIXVHRUFLUFXLWEUHDNHU
panel.
5HPRYHRYHQUDFNV
6OLGHDIODWEODGHVFUHZGULYHUEHWZHHQWKHKRXVLQJ
and the glass light cover.
6XSSRUWWKHJODVVOLJKWFRYHUZLWKWZRILQJHUVWR
prevent the cover from falling to the bottom of the
RYHQ%HFDUHIXOQRWWRFKLSWKHRYHQFRDWLQJ
*HQWO\WZLVWWKHVFUHZGULYHUEODGHWRORRVHQWKH
glass light cover.
5HPRYHWKHJODVVOLJKWFRYHU
5HPRYHWKHEXOEE\ILUPO\JUDVSLQJDQGVOLGLQJWKH
bulb straight out until the two prongs have cleared
the ceramic holder.
'RQRWWRXFKWKHJODVVRIWKHQHZUHSODFHPHQWEXOE
with your fingers. It will cause the bulb to fail when it
OLJKWV*UDVSWKHUHSODFHPHQWEXOEZLWKDFOHDQWRZHO
RUIDFLDOWLVVXHZLWKWKHSURQJVIDFLQJGRZQ$OLJQ
the two prongs in the ceramic holder, pressing gently
until the bulb is securely in the ceramic socket.
6OLGHWKHSURWHFWLYHOHQV LQWRWKHKROGHUDQGSXVK
until the clips snap into the housing.
5HFRQQHFWSRZHU
Lower Oven Maintenance
CARE AND CLEANING: Lower Oven Maintenance
Lift-Off Lower Oven Door
7KHGRRULVYHU\KHDY\%HFDUHIXOZKHQUHPRYLQJDQGOLIWLQJWKHGRRU
'RQRWOLIWWKHGRRUE\WKHKDQGOH
To remove the door:
)XOO\RSHQWKHGRRU
2. Pull the hinge locks down toward the door frame, to
WKHXQORFNHGSRVLWLRQ$WRROVXFKDVDVPDOOIODW
blade screwdriver, may be required.
)LUPO\ JUDVS ERWK VLGHV RI WKH GRRU DW WKH WRS
&ORVHGRRUWRWKHGRRUUHPRYDOSRVLWLRQ7KHGRRU
should be open approximately 3" with no obstruction
above the door.
/LIWGRRUXSDQGRXWXQWLOERWKKLQJHDUPVDUHFOHDURI
the slots.
To replace the door:
)LUPO\JUDVSERWKVLGHVRIWKHGRRUDWWKHWRS
6WDUWLQJRQWKHOHIWVLGHZLWKWKHGRRUDWWKHVDPH
angle as the removal position, seat the indentation of
the hinge arm into the bottom edge of the hinge slot.
7KHQRWFKLQWKHKLQJHDUPPXVWEHIXOO\VHDWHGLQWR
WKHERWWRPRIWKHVORW5HSHDWIRUULJKWVLGH
)XOO\RSHQWKHGRRU,IWKHGRRUZLOOQRWIXOO\RSHQWKH
indentation is not seated correctly in the bottom edge
of the slot.
4. Push the hinge locks up against the front frame of the
oven cavity, to the locked position.
&ORVHWKHRYHQGRRU
Removal position
Hinge lock
Slot
Pull hinge locks down to unlock
Push hinge locks up to lock
Hinge
lock
Hinge
arm
Indentation
Bottom
edge of
slot
Hinge arm
25
49-80737-1
Troubleshooting tips ... Before you call for service
TROUBLESHOOTING TIPS (Upper Oven)
Save time and money! Review the charts on the following pages first and you may not need to call for service.
Problem Possible Cause What To Do
FAN
Fan continues to run after
cooking stops
The oven is cooling. 7KHIDQZLOODXWRPDWLFDOO\VKXWRIIZKHQWKHLQWHUQDO
parts of the oven have cooled.
Oven vent emits warm air
while oven is on
This is normal.
Fan comes on
automatically when using
the microwave
This is normal.
COOKING
The oven makes unusual
sounds while cooking
Clicks and fans blowing are normal.
The relay board is turning the
components on and off.
7KHVHVRXQGVDUHQRUPDO
Smoke comes out of the
oven when I open the
door
Food is high in fat content. Aerosol
spray used on the pans.
6PRNHLVQRUPDOZKHQFRRNLQJKLJKIDWIRRGV
Food is not fully cooked
or browned at the end of
a cooking program
Programmed times may not match
the size or amount of food you are
cooking.
$GMXVWWLPHIRUGRQHQHVVRUDGMXVWWKHXSSHURU
lower lamps for browning and doneness.
SENSOR ERROR
displayed along with an
oven signal
Food amount or type placed in the
oven does not match the program
that was set.
Press the Clear/OffSDG6HWWKHRYHQSURJUDPWR
match the food or liquid to be cooked or heated.
Steam was not sensed by the oven
because plastic wrap was not
vented, a lid too tight was on the
dish or a liquid was covered.
9HQWSODVWLFZUDSXVHDORRVHUOLGRUXQFRYHUOLTXLGV
when cooking or heating.
DISPLAY
The display is blank Power saver mode may be
activated.
&KHFNWKHSettings menu for clock display settings.
7XUQWKHGLVSOD\RQ
A fuse in your home may be blown or
the circuit breaker tripped.
5HSODFHWKHIXVHRUUHVHWWKHFLUFXLWEUHDNHU
Power outage or surge 5HVHWWKHFORFN,IWKHRYHQZDVLQXVH\RXPXVW
reset it by pressing the Clear/Off pad, setting the
clock and resetting any cooking function.
“Control is LOCKED”
appears in display
The control has been locked. Press and hold Settings pad for 3 seconds to unlock
the control.
Control display is lit yet
oven will not start
Clock is not set. 6HWWKHFORFN
Door not securely closed. 2SHQWKHGRRUDQGFORVHVHFXUHO\
Start/Pause pad or selector dial
not pressed after entering cooking
selection.
Press Start/Pause pad or selector dial.
Another selection already entered
in oven and Clear/Off pad not
pressed to cancel it.
Press Clear/Off pad.
Size, quantity or cooking time not
entered after final selection.
0DNHVXUH\RXKDYHHQWHUHGFRRNLQJWLPHDIWHU
selecting.
Clear/Off pad was pressed
accidentally.
5HVHWFRRNLQJSURJUDPDQGSUHVVStart/Pause pad.

26
49-80737-1
Problem Possible Cause What To Do
OTHER PROBLEMS
The door and inside of
the oven feels hot
The heat lamps produce intense heat
in a small space.
7KLVLVQRUPDO8VHRYHQPLWWVWRUHPRYHIRRG
when ready.
Oven will not start A fuse in your home may be blown or
the circuit breaker tripped.
5HSODFHIXVHRUUHVHWFLUFXLWEUHDNHU
Cannot edit cooking
features
Some pre-programmed cooking
features may not be able to be edited
to prevent degradation of cooking
performance.
7KLVLVQRUPDO
The pads on one side
of the control do not
function
The control has locked out the use of
these pads and need to be reset.
Press and hold the Clear/Off pad on the other
side of the display for 30 seconds. If this does not
reset the control, it may be necessary to cycle the
circuit breaker.
TROUBLESHOOTING TIPS (Upper Oven)
Troubleshooting tips ... Before you call for service
)&&5$',2)5(48(1&<,17(5)(5(1&(
7KLVHTXLSPHQWJHQHUDWHVDQGXVHV,60
frequency energy and if not installed and
used properly, that is in strict accordance with
the manufacturer's instructions, may cause
interference to radio and television reception. It
has been type tested and found to comply with
OLPLWVIRUDQ,60(TXLSPHQWSXUVXDQWWRSDUW
RI)&&5XOHVZKLFKDUHGHVLJQHGWRSURYLGH
reasonable protection against such interference
LQDUHVLGHQWLDOLQVWDOODWLRQ+RZHYHUWKHUHLVQR
guarantee that interference will not occur in a
particular installation. If this equipment does cause
interference to radio or television reception, which
can be determined by turning the equipment off
and on, the user is encouraged to try to correct
the interference by one or more of the following:
Ŷ5HRULHQWWKHUHFHLYLQJDQWHQQDRIUDGLRRU
television.
Ŷ5HORFDWHWKH0LFURZDYHRYHQZLWKUHVSHFWWR
the receiver.
Ŷ0RYHWKHPLFURZDYHRYHQDZD\IURPWKH
receiver.
ŶPlug the microwave oven into a different outlet
so that microwave oven and receiver are on
different branch circuits.
The manufacturer is not responsible for any
UDGLRRU79LQWHUIHUHQFHFDXVHGE\unauthorized
modification to this microwave oven. It is
the responsibility of the user to correct such
interference.
27
49-80737-1
Troubleshooting tips ... Before you call for service
TROUBLESHOOTING TIPS (Lower Oven)
Problem Possible Cause What To Do
My new oven doesn't
cook like my old one.
Is something wrong
with the temperature
settings?
Your new oven has a different cooking
system from your old oven and
therefore may cook differently than your
old oven.
)RUWKHILUVWIHZXVHVIROORZ\RXUUHFLSHWLPHV
and temperatures carefully. If you still think your
new oven is too hot or too cold, you can adjust the
temperature yourself to meet your specific cooking
preference. NOTE:7KLVDGMXVWPHQWDIIHFWV%DNH
WHPSHUDWXUHVLWZLOOQRWDIIHFW%URLORU&OHDQ
Food does not bake
properly
Oven controls improperly set. 6HHWKH&RRNLQJ0RGHVVHFWLRQ
Rack position is incorrect or rack is
not level.
6HHWKH&RRNLQJ0RGHVVHFWLRQDQG&RRNLQJ*XLGH
Incorrect cookware or cookware of
improper size being used.
6HHWKH&RRNZDUHVHFWLRQ
Oven temperature needs adjustment. 6HHWKHSettings section.
Ingredient substitution 6XEVWLWXWLQJLQJUHGLHQWVFDQFKDQJHWKHUHFLSH
outcome.
Food does not broil
properly
Oven controls improperly set. 0DNHVXUH\RXVHOHFWWKHDSSURSULDWHEURLOPRGH
Improper rack position being used. 6HH&RRNLQJ*XLGHIRUUDFNORFDWLRQVXJJHVWLRQV
Food being cooked in a hot pan. 0DNHVXUHFRRNZDUHLVFRRO
Cookware not suited for broiling. 8VHDSDQVSHFLILFDOO\GHVLJQHGIRUEURLOLQJ
Aluminum foil used on the broiling pan
and grid has not been fitted properly
and slit as recommended.
If using aluminum foil conform to pan slits.
In some areas the power (voltage)
may be low.
Preheat the broil element for 10 minutes.
Oven temperature too
hot or too cold
Oven temperature needs adjustment. 6HHWKHSettings section.
Oven does not work or
appears not to work
A fuse in your home may be blown or
the circuit breaker tripped.
5HSODFHWKHIXVHRUUHVHWWKHFLUFXLWEUHDNHU
Oven controls improperly set. 6HHWKH8VLQJWKH2YHQVHFWLRQ
Oven is in Sabbath Mode. 9HULI\WKDWWKHRYHQLVQRWLQ6DEEDWK0RGH
6HHWKHSabbath Mode section.
“Crackling” or
“popping” sound
This is the sound of the metal heating
and cooling during both the cooking and
cleaning functions.
7KLVLVQRUPDO
Why is my range
making a "clicking"
noise when using my
oven?
Your range has been designed to maintain
a tighter control over your oven's
temperature. You may hear your oven's
heating elements "click" on and off more
frequently than in older ovens to achieve
better results during baking, broiling,
convection, and self-clean cycles.
7KLVLVQRUPDO
Clock and timer do not
work
A fuse in your home may be blown or
the circuit breaker tripped.
5HSODFHWKHIXVHRUUHVHWWKHFLUFXLWEUHDNHU

28
49-80737-1
TROUBLESHOOTING TIPS (Lower Oven)
Troubleshooting tips ... Before you call for service
Problem Possible Cause What To Do
Oven light does not
work
Light bulb is loose or defective. 7LJKWHQRUUHSODFHEXOE
Pad operating light is broken. &DOOIRUVHUYLFH
Oven will not self-
clean
The temperature is too high to set a
self-clean operation.
$OORZWKHRYHQWRFRRODQGUHVHWWKHFRQWUROV
Oven controls improperly set. 6HHWKH&OHDQLQJWKH2YHQVHFWLRQ
Excessive smoking
during clean cycle
Excessive soil or grease. Press the Clear/Off SDG2SHQWKHZLQGRZVWRULGWKH
URRPRIVPRNH:DLWXQWLOWKH29(1,6&22/,1*'225
IS LOCKEDGLVSOD\JRHVRII:LSHXSWKHH[FHVVVRLO
and reset the clean cycle.
Excessive smoking
during broiling
Food too close to burner element. /RZHUWKHUDFNSRVLWLRQRIWKHIRRG
Oven door will not
open after a clean
cycle
Oven too hot. $OORZWKHRYHQWRFRROEHORZORFNLQJWHPSHUDWXUH
Oven not clean after
a clean cycle
Oven controls improperly set. 6HHWKH&OHDQLQJWKH2YHQVHFWLRQ
Oven was heavily soiled. &OHDQXSKHDY\VSLOORYHUVEHIRUHVWDUWLQJWKHFOHDQF\FOH
+HDYLO\VRLOHGRYHQVPD\QHHGWRVHOIFOHDQDJDLQRUIRU
a longer period of time.
"CLOSE DOOR
TO CONTINUE
COOKING" show on
display section
The door is open during a cooking or
cleaning feature.
&ORVHWKHRYHQGRRU
29(1,6&22/,1*
DOOR IS LOCKED"
show on display
section
The oven door is locked because
the temperature inside the oven has
not dropped below the unlocking
temperature.
Press the Clear/OffSDG$OORZWKHRYHQWRFRRO
An oven error and
6(59,&(0$<%(
NEEDED" show in
the display
You have a function error code. Press the Clear/OffSDG$OORZWKHRYHQWRFRROIRURQH
hour. Put the oven back into operation.
If the function code repeats. 'LVFRQQHFWDOOSRZHUWRWKHRYHQIRUDWOHDVWVHFRQGV
and then reconnect power. If the function error code
repeats, call for service.
“Burning” or “oily”
odor emitting from
the vent
This is normal in a new oven and will
disappear in time.
7RVSHHGWKHSURFHVVVHWDVHOIFOHDQF\FOHIRUD
PLQLPXPRIKRXUV6HHWKH&OHDQLQJWKH2YHQ VHFWLRQ
Strong odor An odor from the insulation around
the inside of the oven is normal for the
first few times the oven is used.
7KLVLVWHPSRUDU\DQGZLOOJRDZD\DIWHUVHYHUDOXVHVRU
a self-clean cycle.
Fan noise
A cooling fan may automatically turn on.
7KLVLVQRUPDO7KHFRROLQJIDQZLOOWXUQRQWRFRRO
internal parts. It may run for up to 1-1/2 hours after the
oven is turned off.
My oven door glass
appears to be
"tinted" or have a
"rainbow" color. Is
this defective?
No. The inner oven glass is coated with
a heat barrier to reflect the heat back
into the oven to prevent heat loss and
keep the outer door cool while baking.
7KLVLVQRUPDO8QGHUFHUWDLQOLJKWRUDQJOHV\RXPD\
see this tint or rainbow color.
Sometimes the
oven takes longer to
preheat to the same
temperature
Cookware or food in oven 7KHFRRNZDUHRUIRRGLQWKHRYHQZLOOFDXVHWKHRYHQWR
WDNHORQJHUWRSUHKHDW5HPRYHLWHPVWRUHGXFHSUHKHDW
time.
Number of racks in oven $GGLQJPRUHUDFNVWRWKHRYHQZLOOFDXVHWKHRYHQWR
WDNHORQJHUWRSUHKHDW5HPRYHVRPHUDFNV

GEAppliances.com
Información de Seguridad .....2
Garantía ..........................8
Asistencia / Accesorios .........9
Uso del Horno
Controles del Horno ................10
Configuraciones del Horno .........11
Opciones del Horno ................12
Horno Superior
Cocción con Microondas ...........13
Horno Inferior
Modos de Cocción .................17
Modo Sabático .....................18
Guía de Cocción ....................19
Estantes ...........................20
Papel de Aluminio y
Cobertores del Horno .............21
Utensilios ..........................21
Cuidado y Limpieza
Limpieza del Horno .................22
Mantenimiento del Horno Inferior . . .24
Consejos para la
Solución de Problemas
........25
Horno de Pared
Escriba los números de modelo
y de serie aquí:
Nº de Modelo ______________
Nº de Serie ________________
Los podrá encontrar en una etiqueta
en el borde lateral o en el frente del
horno detrás de la puerta del horno.
Impreso en Estados Unidos
Impreso en
Papel Reciclado
Horno de Pared Doble JT3800 de 30”
Horno de Pared Doble JK3800 de 27”
Manual del Propietario
Incorporado con Combinación Microondas/ Térmico
49-80737-1 06-14 GE

2
49-80737-1
PRECAUCIONES PARA EVITAR LA POSIBLE
EXPOSICIÓN A ENERGÍA DE MICROONDAS EXCESIVA
(a) No intente hacer funcionar el horno con la
compuerta abierta ya que ésto puede provocar
exposición peligrosa a la energía de microondas.
Es importante no forzar ni dañar los seguros.
(b) No coloque ningún objeto entre la parte frontal del
horno y la compuerta, ni permita que se acumulen
residuos de producto limpiador o detergente,
suciedad o polvo en las superficies de sellado.
(c) No haga funcionar el horno si se encuentra
dañado. Es particularmente importante cerrar bien
la compuerta del horno y que no haya daños en:
(1) la compuerta (doblada o curvada),
(2) las bisagras y pestillos (rotos o flojos),
(3) sellos de la compuerta y superficies de sellado.
(d) El horno no debe ser ajustado o reparado
por ninguna persona, excepto por personal de
mantenimiento calificado.
Para reducir el riesgo de quemaduras, descargas eléctricas, incendio, lesiones o exposición a energía de microondas excesiva:
GUARDE ESTAS INSTRUCCIONES
Ŷ Lea todas las instrucciones antes de utilizar
este aparato. Cuando utilice aparatos eléctricos,
se deben seguir las precauciones de seguridad
básicas, entre las que se incluyen las siguientes:
Ŷ /HD\VLJDODVSUHFDXFLRQHVHVSHFtILFDVGHVFULWDV
en la sección PRECAUCIONES PARA EVITAR
/$326,%/((;326,&,Ï1$(1(5*Ë$'(
0,&5221'$6(;&(6,9$
Ŷ $VHJ~UHVHTXHVXDSDUDWRHVWpLQVWDODGR\SXHVWRD
tierra apropiadamente por un técnico cualificado de
acuerdo a las instrucciones de instalación suministradas.
Ŷ ,QVWDOHRXELTXHHVWHDSDUDWR~QLFDPHQWHGHDFXHUGR
a las instrucciones de instalación suministradas.
INSTRUCCIONES GENERALES DE SEGURIDAD
ADVERTENCIA
INFORMACIÓN IMPORTANTE DE SEGURIDAD
LEA TODAS LAS INSTRUCCIONES ANTES DE USAR
INFORMACIÓN DE SEGURIDAD (Horno Superior)

3
49-80737-1
GUARDE ESTAS INSTRUCCIONES
INFORMACIÓN DE SEGURIDAD (Horno Superior)
Ŷ $OJXQRVSURGXFWRVWDOHVFRPRKXHYRVHQWHURV\
contenedores sellados (por ejemplo, frascos sellados) son
propensos a explotar y no deben calentarse en este horno.
Tal uso del horno puede resultar en lesiones personales.
Ŷ 1RPRQWHHVWHDSDUDWRVREUHHOIUHJDGHUR
Ŷ (VWHKRUQRQRKDVLGRDSUREDGRQLSUREDGRSDUD
utilización marina.
Ŷ (VWHKRUQRHVWiOLVWDGRSRU8/SDUDODLQVWDODFLyQGH
SDUHGHVWiQGDU
Ŷ 1RKDJDIXQFLRQDUHVWHDSDUDWRVLKDVLGRGDxDGRR
dejado caer.
Ŷ &RPRFRQFXDOTXLHUDSDUDWRFXDQGRVHDXWLOL]DGR
por niños es necesaria una estrecha vigilancia.
Ŷ 8WLOLFHHVWHDSDUDWRVRODPHQWHSDUDHOILQSUHYLVWR
como se describe en este manual.
Ŷ 1RXWLOLFHTXtPLFRVQLYDSRUHVFRUURVLYRVHQHVWHDSDUDWR
Ŷ (VWHKRUQRHVWiHVSHFtILFDPHQWHGLVHxDGRSDUDFDOHQWDU
VHFDURFRFLQDUDOLPHQWRV\EHELGDV\QRHVWiGLVHxDGR
para usarse en un laboratorio ni para uso industrial.
Ŷ 6yORSHUVRQDOFXDOLILFDGRGHEHUHSDUDUHVWH
aparato. Póngase en contacto con el centro de
PDQWHQLPLHQWRDXWRUL]DGRPiVFHUFDQRHQFDVRGH
necesitar revisión, reparación o ajuste.
Ŷ 1RFXEUDQLEORTXHHQLQJXQDDSHUWXUDGHHVWHDSDUDWR
Ŷ 1RDOPDFHQHHVWHDSDUDWRDODLUHOLEUH1RXWLOLFH
este producto cerca del agua; por ejemplo, en un
sótano húmedo, cerca de una piscina, cerca de un
lavabo o lugares similares.
Ŷ &RQVXOWHODVLQVWUXFFLRQHVGHOLPSLH]DGHODVXSHUILFLH
de la puerta en la sección de Mantenimiento y
limpieza del horno de este manual.
Ŷ 3DUDUHGXFLUHOULHVJRGHLQFHQGLRGHQWURGHOKRUQR
— No cocine excesivamente los alimentos. Vigile
cuidadosamente el aparato cuandose coloque
SDSHOSOiVWLFRXRWURVPDWHULDOHVFRPEXVWLEOHV
dentro del microondas mientras se cocina.
— Quite las tiritas de seguridad (twist-ties) y asas
PHWiOLFDVGHORVUHFLSLHQWHVGHSDSHORSOiVWLFR
antes de colocarlos dentro del microondas.
— No utilice el horno para propósitos de
almacenamiento. No deje productos de papel,
utensilios de cocina ni comestibles dentro del
horno cuando no se utilicen.
— Si los materiales que se encuentran dentro del
horno prenden fuego, mantenga la compuerta del
microondas cerrada, apague el horno y corte el
suministro eléctrico a nivel del fusible o del panel
de interruptores de su hogar. Puede propagar el
fuego si abre la compuerta del microondas.
— No utilice las funciones del sensor dos veces
sucesivamente en la misma porción de alimento. Si
el alimento no se cocina completamente después
del primer conteo regresivo, utilice la función
&22.%<7,0(&2&,1$53257,(032SDUD
permitir tiempo de cocción adicional.
Ŷ 1RKDJDIXQFLRQDUHOKRUQRVLQWHQHUFRORFDGDHQVX
OXJDUODEDVHJLUDWRULD/DEDVHJLUDWRULDGHEHHVWDU
libre de bloqueos para poder girar.
Ŷ (QWUHODVVXSHUILFLHVSRWHQFLDOPHQWHFDOLHQWHV
se incluye la compuerta, base, paredes, parrilla
y base giratoria del horno.
Ŷ 1RGHVFRQJHOHEHELGDVHQERWHOODVFRQFXHOORV
angostos (especialmente bebidas gaseosas/
carbonatadas). Incluso si el recipiente se encuentra
abierto, se puede acumular presión. Esto puede
ocasionar que el recipiente explote, dando
posiblemente como resultando una lesión.
Ŷ /RVDOLPHQWRVFRFLQDGRVHQOtTXLGRVWDOHVFRPR
ODSDVWDSXHGHQWHQHUODWHQGHQFLDGHKHUYLUPiV
UiSLGDPHQWHTXHORVDOLPHQWRVTXHFRQWLHQHQPHQRV
humedad. En caso de que ocurra esto, consulte la
sección de Mantenimiento y limpieza del horno para
las instrucciones de cómo limpiar el interior del horno.
Ŷ /RVDOLPHQWRVFDOLHQWHV\HOYDSRUSXHGHQSURYRFDU
quemaduras. Tenga cuidado al abrir cualquier tipo
de recipiente que contenga alimentos calientes,
incluyendo bolsas de palomitas de maíz, bolsas
y cajas de cocina. Para prevenir la posibilidad de
lesiones, dirija el vapor en dirección contraria a las
manos y el rostro.
Ŷ 1RFRFLQHODVSDSDVH[FHVLYDPHQWH3XHGHQ
deshidratarse y provocar fuego, causando daños al
horno.
Ŷ (YLWHFDOHQWDUORVDOLPHQWRVSDUDEHEpHQIUDVFRVGH
vidrio, incluso sin la tapa. Asegúrese de cocinar bien
toda la comida del bebé. Remueva los alimentos
para distribuir el calor uniformemente. Tenga cuidado
de evitar las escaldaduras al calentar la fórmula.
(OUHFLSLHQWHSXHGHVHQWLUVHPiVIUtRGHORTXHOD
IyUPXODUHDOPHQWHHVWi5HYLVHVLHPSUHODIyUPXOD
antes de alimentar al bebé.
Ŷ 1XQFDLQWHQWHIUHtUHQDEXQGDQWHDFHLWHHQHO
microondas.
INSTRUCCIONES GENERALES DE SEGURIDAD
ADVERTENCIA
4
49-80737-1
GUARDE ESTAS INSTRUCCIONES
INFORMACIÓN IMPORTANTE DE SEGURIDAD
LEA TODAS LAS INSTRUCCIONES ANTES DE USAR
INFORMACIÓN DE SEGURIDAD (Horno Superior)
Se pueden producir arqueos voltaicos al cocinar con microondas. Si nota que ocurre arqueo voltaico, apriete el
ERWyQWiFWLOClear/Off (Borrar/ Apagar) y corrija el problema.
El arqueo voltaico es el término técnico que define las
chispas en el horno. El arqueo voltaico es causado por:
Ŷ 0HWDOROiPLQDGHPHWDOHQFRQWDFWRFRQHOFRVWDGR
del horno.
Ŷ /iPLQDGHPHWDOPROGHDGDDODOLPHQWRORVERUGHV
doblados hacia arriba actúan como antenas).
Ŷ 8WLOLFHODOiPLQDGHPHWDOVHJ~QODV
recomendaciones de este manual.
Ŷ 8WHQVLOLRVGHPHWDOXVDGRVGXUDQWHODFRFFLyQFRQ
microondas
Ŷ 0HWDOWDOFRPRWLULWDVPHWiOLFDVGHVHJXULGDG
sujetadores para carne de ave o platos con borde de
oro en el horno.
Ŷ 7RDOODVGHSDSHOUHFLFODGRTXHFRQWHQJDQSHGD]RV
de metal pequeños que se utilizan en el horno.
Ŷ &XDQGRXWLOLFHHOPLFURRQGDVFRORTXHWRGRVORV
alimentos y contenedores en la bandeja de vidrio
transparente.
Ŷ 1RFRFLQHSDORPLWDVGHPDt]HQHOKRUQRDPHQRV
que se coloquen en un accesorio de palomitas de
maíz para microondas especial o a menos que
utilice palomitas de maíz aptas para hornos de
microondas.
Ŷ 1RKLHUYDKXHYRVHQHVWHKRUQR6HDFXPXODUi
SUHVLyQGHQWURGHOD\HPDGHOKXHYR\FDXVDUiTXH
explote, posiblemente causando lesiones.
Ŷ 1RSRQJDDIXQFLRQDUHOKRUQRVLQDOLPHQWRVHQHO
interior. Esto podría dañar el horno. Aumenta el
calor alrededor del magnetrón y puede acortar la
vida útil del microondas.
Ŷ $OLPHQWRVFRQODFiVFDUDQRFRUWDGDFRPRSDSDV
salchichas, embutidos, tomates, manzanas, hígado
de pollo y otras menudencias y yemas de huevo
deben perforarse para permitir que el vapor escape
durante la cocción.
Ŷ AGUA SOBRECALENTADA
/tTXLGRVWDOHVFRPRDJXDFDIpRWpVRQFDSDFHV
GHVREUHFDOHQWDUVHPiVDOOiGHOSXQWRGHHEXOOLFLyQ
sin parecer que estén hirviendo. No siempre
hay burbujeo o hervor visible cuando se saca el
UHFLSLHQWHGHOKRUQRPLFURRQGDV(67238('(
5(68/7$5(1/$(%8//,&,Ï15(3(17,1$'(
/Ë48,'2608<&$/,(17(6&8$1'26(08(9(
(/5(&,3,(17(26(,16(57$81$&8&+$5$8
275287(16,/,2'(1752'(//Ë48,'2
Para reducir el riesgo de lesión física:
— No sobrecaliente el líquido.
— Revuelva el líquido antes y a la mitad del tiempo
de calentamiento.
— No utilice recipientes con costados rectos y
cuellos angostos.
²'HVSXpVGHFDOHQWDUHOUHFLSLHQWHGpMHORHQ
el horno microondas por un período corto de
tiempo antes de sacarlo.
— Tenga extrema precaución cuando introduzca
una cuchara u otro utensilio en el recipiente.
ARQUEO VOLTAICO
ALIMENTOS
ADVERTENCIA
ADVERTENCIA
Ŷ
/DPD\RUtDGHORVPDUFDSDVRVVHHQFXHQWUDQ
protegidos contra la interferencia de productos
electrónicos, incluyendo los microondas. Sin embargo,
los pacientes que tengan marcapasos deberían
consultar a sus médicos si tienen alguna duda.
AVISO: MARCAPASOS
ADVERTENCIA
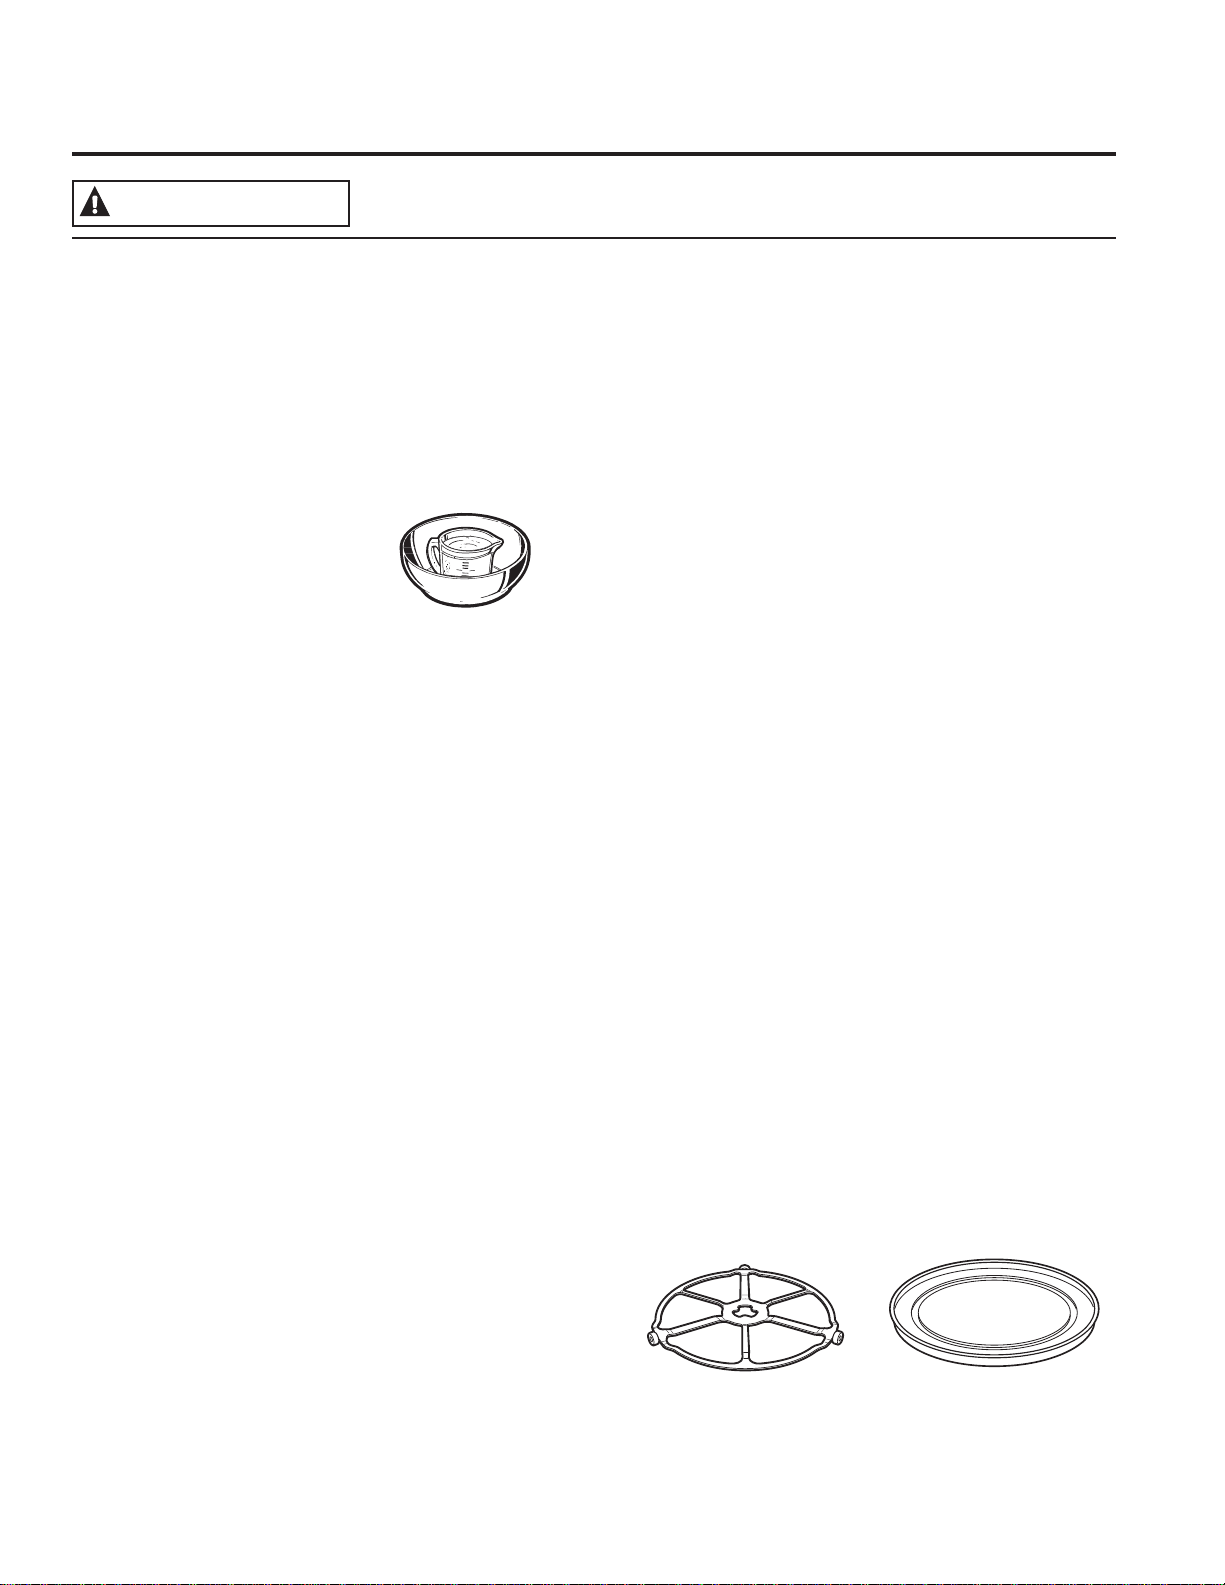
5
49-80737-1
GUARDE ESTAS INSTRUCCIONES
INFORMACIÓN DE SEGURIDAD (Horno Superior)
La base giratoria siempre debe
estar colocada en su lugar cuando
se utiliza el horno.
La bandeja de cristal
transparente siempre deberá
estar en su lugar cuando se
cocina con microondas.
Asegúrese de utilizar recipientes de cocina adecuados durante la cocción a microondas. Se pueden utilizar la mayoría
GHODVFDFHURODVSODWRVSDUDFRFLQDUWD]DVGHPHGLUWD]DVQRUPDOHVFHUiPLFDROR]DTXHQRWHQJDQERUGHVPHWiOLFRV
RYLGULDGRVFRQXQUHFXEULPLHQWRPHWiOLFR$OJXQRVUHFLSLHQWHVGHFRFLQDVHHQFXHQWUDQPDUFDGRVFRPRDGHFXDGRV
para microondas.
Ŷ /DXWLOL]DFLyQGHODEDQGHMDPHWiOLFDDQWLDGKHUHQWH
durante la cocción en microondas puede producir
resultados insatisfactorios.
Ŷ 6LQRHVWiVHJXURGHTXHVXUHFLSLHQWHGHFRFLQD
sea adecuado para microondas, realice la siguiente
prueba: coloque en el horno el plato que desee
probar y una taza de medida
de vidrio llena con 1 taza de
agua coloque la taza junto
o sobre el plato. Prenda el
microondas durante 30–45
segundos a alta potencia. Si
el plato se calienta, no debe
utilizarse en el microondas.
Si el plato permanece frío y
sólo se calienta el agua de la taza, entonces el plato
es adecuado para microondas.
Ŷ /RVXWHQVLOLRVGHFRFLQDSXHGHQWRUQDUVHPX\
calientes debido a la transferencia de calor
proveniente de los alimentos calentados. Podrían
requerirse guantes de cocina para manipular los
recipientes de cocina.
Ŷ 1RXWLOLFHSURGXFWRVGHSDSHOUHFLFODGR/DVWRDOODV
servilletas y papel encerado fabricados de material
UHFLFODGRSXHGHQFRQWHQHUSDUWtFXODVPHWiOLFDVTXH
pueden causar arqueo voltaico o prender fuego. Se
deben evitar los productos de papel que contienen
nylon o filamentos de nylon, ya que también pueden
incendiarse.
Ŷ 8WLOLFHODVOiPLQDVPHWiOLFDV~QLFDPHQWHFRPRVH
LQGLFDHQHVWHPDQXDO&XDQGRXWLOLFHODOiPLQDGH
PHWDOHQHOKRUQRPDQWHQJDODOiPLQDSRUORPHQRV
ƎDOHMDGDGHORVFRVWDGRVGHOKRUQR
Ŷ 1RXWLOLFHHOKRUQRSDUDVHFDUSHULyGLFRV
Ŷ 6LXWLOL]DXQWHUPyPHWURGHFDUQHPLHQWUDVFRFLQD
asegúrese que sea seguro para utilizarse en hornos
microondas.
Ŷ $OJXQDVEDQGHMDVGHHVSXPDFRPRDTXHOODVHQODV
que se empaca la carne) tienen una tirita de metal
delgada empotrada en la parte inferior. Cuando se
cocinan con microondas, el metal puede quemar el
fondo del horno o hacer que arda una toalla de papel.
Ŷ 6HSXHGHXWLOL]DUWRDOODVGHSDSHOSDSHOHQFHUDGR
\ODVHQYROWXUDVSOiVWLFDVSDUDFXEULUORVSODWRVFRQ
el propósito de mantener la humedad y prevenir
los salpicones. Asegúrese de ventilar cortando la
HQYROWXUDSOiVWLFDSDUDTXHSXHGDHVFDSDUHOYDSRU
Ŷ 1RWRGDVODVFXELHUWDVSOiVWLFDVVRQDGHFXDGDVSDUD
KRUQRVPLFURRQGDV/HDHQODFDMDODVLQVWUXFFLRQHV
correspondientes.
Ŷ 6HGHEHQFRUWDUSHUIRUDURYHQWLODUFRPRVHLQGLFD
en la caja las bolsas de cocina “hervibles” y bolsas
SOiVWLFDVFHUUDGDVKHUPpWLFDPHQWH'HORFRQWUDULRHO
SOiVWLFRSXHGHUHYHQWDUVHGXUDQWHRLQPHGLDWDPHQWH
después de la cocción, resultando en una posible
lesión. También, los recipientes de almacenamiento
SOiVWLFRVGHEHQDOPHQRVHVWDUSDUFLDOPHQWH
descubiertos debido a que forman un sello muy
ajustado. Al cocinar con recipientes cubiertos con
HQYROWXUDSOiVWLFDGHPDQHUDPX\DMXVWDGDTXLWH
cuidadosamente la cubierta y dirija el vapor fuera y
alejado de manos y rostro.
Ŷ 5HFLSLHQWHVGHFRFLQDSOiVWLFRV²/RVUHFLSLHQWHV
de cocina diseñados para microondas son muy
útiles, pero deben utilizarse con cuidado. Incluso
HOSOiVWLFRGLVHxDGRSDUDPLFURRQGDVSRGUtDQR
tolerar condiciones de sobre cocción, así como los
PDWHULDOHVGHYLGULRRFHUiPLFD\SRGUtDQVXDYL]DUVH
o carbonizarse si se exponen a períodos cortos de
VREUHFRFFLyQ(QH[SRVLFLRQHVPiVSURORQJDGDVDOD
sobrecocción, los alimentos y los recipientes
de cocina podrían coger fuego.
Siga las siguientes pautas:
8WLOLFHSOiVWLFRVVHJXURVSDUDPLFURRQGDV~QLFDPHQWH
y utilícelos estrictamente según
las especificaciones del fabricante.
2. No cocine en el microondas recipientes vacíos.
3. No permita que los niños utilicen recipientes
GHSOiVWLFRVLQYLJLODUORVELHQ
Cómo probar si un envase
es seguro para usarse en un
horno de microondas
Recipientes de cocina seguros diseñados para microondas
ADVERTENCIA
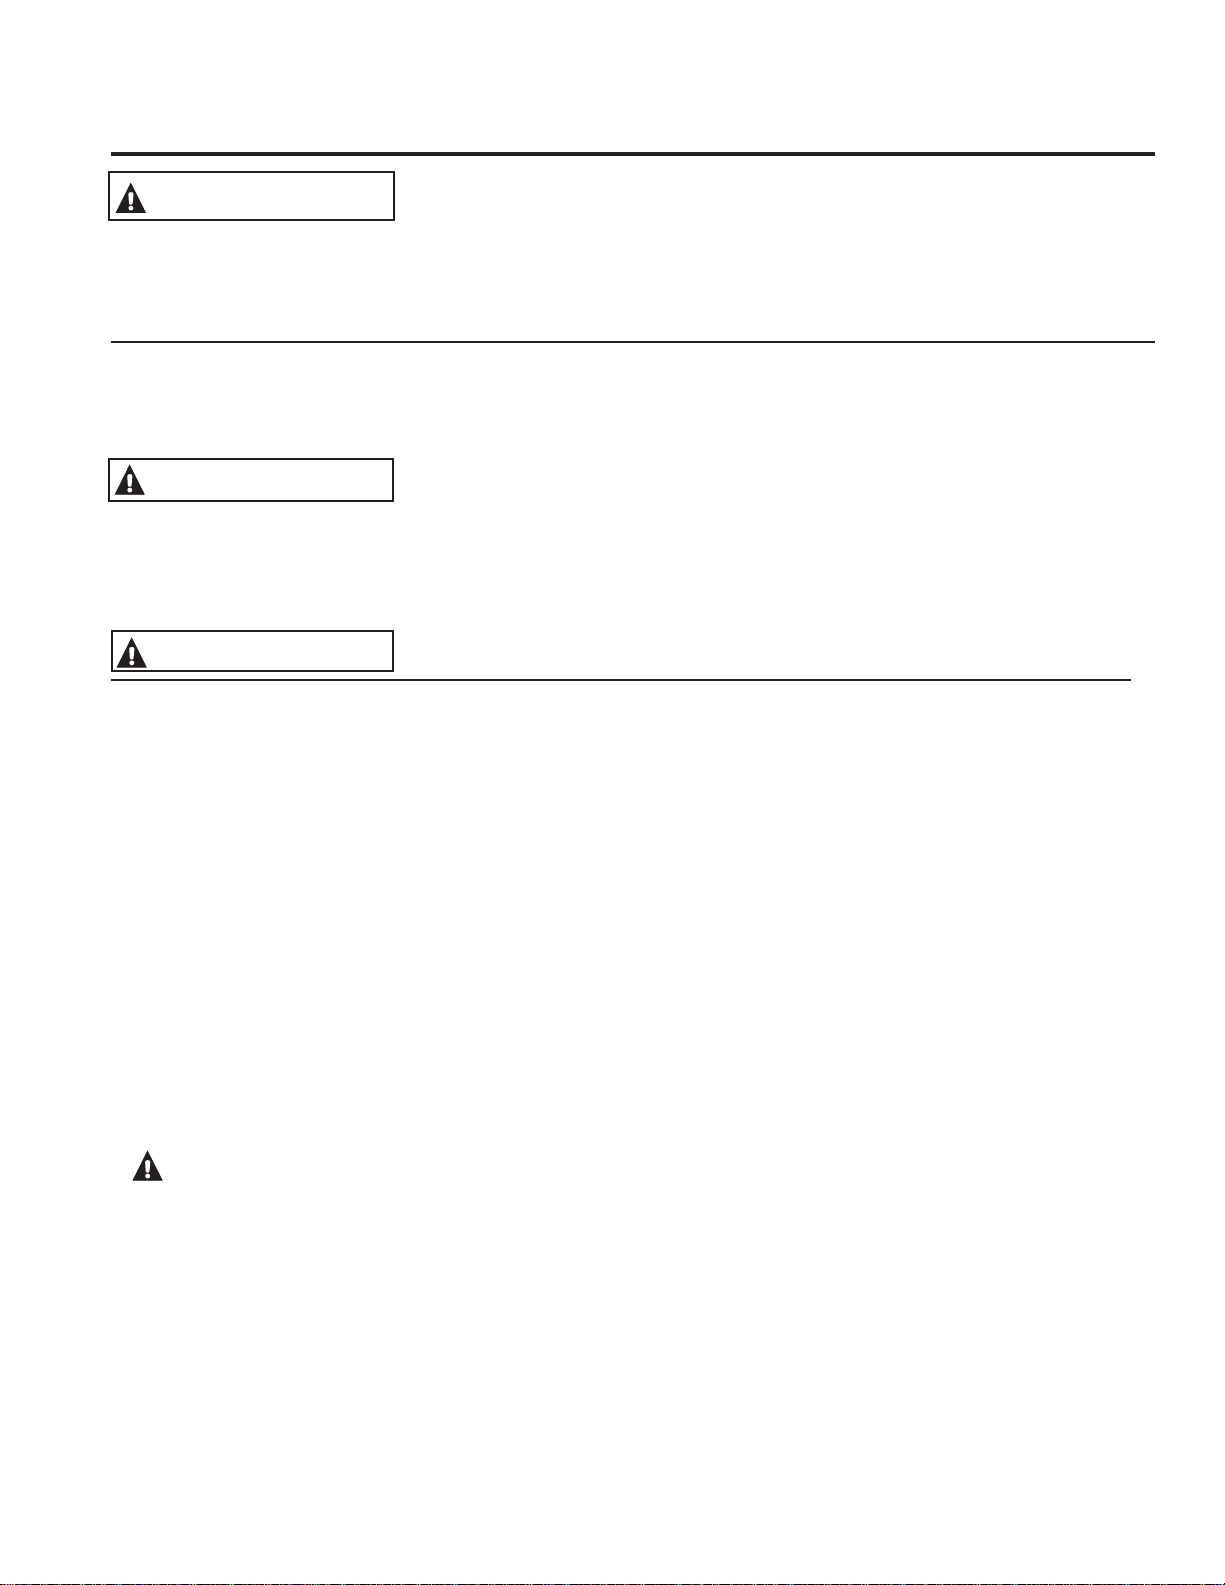
6
49-80737-1
GUARDE ESTAS INSTRUCCIONES
INFORMACIÓN DE SEGURIDAD (Horno Inferior)
Ŷ Use este electrodoméstico sólo para su propósito
original, como se describe en el Manual del Propietario.
Ŷ Solicite que un instalador calificado instale su
electrodoméstico y que esté adecuadamente conectado
a tierra, de acuerdo con las instrucciones de instalación
provistas.
Ŷ No intente reparar o reemplazar ninguna parte del horno,
a menos que se recomiende específicamente en este
PDQXDO&XDOTXLHURWUDUHSDUDFLyQGHEHUiVHUUHDOL]DGD
por un técnico calificado.
Ŷ Antes de realizar cualquier servicio técnico, desconecte
el suministro de corriente desde el panel de distribución
del hogar, retirando el fusible o desconectando el
disyuntor.
Ŷ1RGHMHDORVQLxRVVRORV±QRVHGHEHUiGHMDUDORV
QLxRVVRORVRIXHUDGHVXUDGLRGHDWHQFLyQHQHOiUHD
donde el electrodoméstico se encuentre en uso. Nunca
VHOHVGHEHUiSHUPLWLUWUHSDUVHQWDUVHRSDUDUVHVREUH
ninguna parte del electrodoméstico.
Ŷ PRECAUCIÓN: No coloque artículos de
LQWHUpVSDUDORVQLxRVVREUHORVJDELQHWHVTXHHVWiQ
sobre un horno – si los niños se trepan sobre el horno
para llegar a estos artículos podrían sufrir lesiones
graves.
Ŷ Use sólo mangos de ollas secas – los mangos húmedos
sobre superficies calientes pueden producir quemaduras
debido al vapor. No deje que los mangos de las ollas
WRTXHQORVHOHPHQWRVTXHHVWiQFDOLHQWHV1RXVHXQD
toalla u otra tela voluminosa para reemplazar el mango
de las cacerolas.
Ŷ Nunca use el electrodoméstico para calentar o
calefaccionar la habitación.
Ŷ No toque el elemento calentador ni la superficie interior
del horno. Es posible que estas superficies estén
demasiado calientes como para quemar, aunque su
FRORUVHDRVFXUR'XUDQWH\GHVSXpVGHOXVRQRWRTXHQL
permita que telas u otros materiales inflamables toquen
FXDOTXLHUiUHDLQWHULRUGHOKRUQRHVSHUHDTXHKD\D
pasado un tiempo suficiente para que se enfríen. Otras
VXSHUILFLHVGHOHOHFWURGRPpVWLFRVHSRGUiQFDOHQWDUOR
VXILFLHQWHFRPRSDUDRFDVLRQDUOHVLRQHV/DVVXSHUILFLHV
potencialmente calientes incluyen la abertura de la
ventilación del horno, superficies cercanas a la abertura y
grietas alrededor de la puerta del horno.
Ŷ No caliente envases de comida que no hayan sido
abiertos. Se podría acumular presión y el envase podría
explotar, ocasionando una lesión.
Ŷ No use ningún tipo de aluminio o cobertor para cubrir
el fondo del horno o cualquier parte del horno, excepto
FRPRVHGHVFULEHHQHVWHPDQXDO/RVFREHUWRUHVGH
horno pueden atrapar el calor o derretirse, ocasionando
daños sobre el producto y el riesgo de descargas, humo
o incendios.
Ŷ Evite las ralladuras o impactos sobre las puertas de vidrio
RORVSDQHOHVGHFRQWURO+DFHUHVWRSRGUiSURGXFLUOD
rotura de vidrios. No cocine sobre ni en un producto con
un vidrio roto. Es posible que se produzcan descargas,
incendios o cortes.
Ŷ Cocine carnes y carnes de ave en forma completa – la
carne por lo menos a una temperatura interna de 160º F
y la carne de ave por lo menos a una temperatura interna
de 180º F. Normalmente la cocción a estas temperaturas
es una protección contra las enfermedades transmitidas
por la comida.
INSTRUCCIONES GENERALES DE SEGURIDAD
/HDWRGDVODVLQVWUXFFLRQHVDQWHVGHXVDUHOSURGXFWR6LQRVHVLJXHQHVWDVLQVWUXFFLRQHVVHSRGUiQSURGXFLULQFHQGLRV
descargas eléctricas, lesiones graves o la muerte.
ADVERTENCIA DE LA PROPOSICIÓN 65 DEL ESTADO DE CALIFORNIA
ADVERTENCIA
ADVERTENCIA
/D/H\VREUH$JXD3RWDEOH,QRFXD\7UDWDPLHQWRGH5HVLGXRV7y[LFRVGH&DOLIRUQLD&DOLIRUQLD6DIH'ULQNLQJ:DWHU
DQG7R[LF(QIRUFHPHQW$FWVROLFLWDDO*REHUQDGRUGH&DOLIRUQLDTXHSXEOLTXHXQDOLVWDGHVXVWDQFLDVTXHHOHVWDGR
UHFRQRFHTXHSURGXFHQFiQFHUGHIHFWRVGHQDFLPLHQWRXRWURVGDxRVUHSURGXFWLYRV\VROLFLWDDORVHPSUHVDULRVTXH
adviertan a sus clientes sobre la posible exposición a tales sustancias.
ADVERTENCIA (VWHSURGXFWRFRQWLHQHXQRRPiVTXtPLFRVTXHHO(VWDGRGH&DOLIRUQLDHQWLHQGH
TXHSURGXFHQFiQFHUGHIHFWRVHQHOQDFLPLHQWRXRWURVGDxRVUHSURGXFWLYRV
/RVKRUQRVFRQOLPSLH]DDXWRPiWLFDSXHGHQRFDVLRQDUH[SRVLFLRQHVGHEDMRQLYHODDOJXQDVGHHVWDVVXVWDQFLDV
LQFOX\HQGRPRQy[LGRGHFDUERQRGXUDQWHHOFLFORGHOLPSLH]D/DH[SRVLFLyQSXHGHVHUPLQLPL]DGDVLVHYHQWLODFRQ
una ventana abierta o si se usa un ventilador o campana.
INFORMACIÓN IMPORTANTE DE SEGURIDAD
LEA TODAS LAS INSTRUCCIONES ANTES DE USAR

7
49-80737-1
GUARDE ESTAS INSTRUCCIONES
Ŷ No guarde ni use materiales inflamables en o cerca
GHXQKRUQRLQFOX\HQGRSDSHOSOiVWLFRPDQJRVGH
ollas, trapos, cobertores de pared, cortinas, paños y
gasolina u otros vapores y líquidos inflamables.
Ŷ Nunca use prendas holgadas o que cuelguen
mientras usa el electrodoméstico. Estas prendas se
SRGUiQLQFHQGLDUVLHQWUDQHQFRQWDFWRFRQVXSHUILFLHV
calientes, ocasionando quemaduras graves.
Ŷ No permita que la grasa de la cocción u otros
materiales inflamables se acumulen en o cerca del
KRUQR/DJUDVDTXHHVWiHQRFHUFDGHOKRUQRVH
SRGUiLQFHQGLDU
MANTENGA LOS MATERIALES INFLAMABLES ALEJADOS DE LA COCINA
EN CASO DE INCENDIO, SIGA LOS SIGUIENTES PASOS PARA
EVITAR LESIONES O LA PROPAGACIÓN DEL FUEGO
INSTRUCCIONES DE SEGURIDAD DEL HORNO
INSTRUCCIONES DE SEGURIDAD DEL HORNO CON LIMPIEZA AUTOMÁTICA
Si esto no se cumple, se podrán sufrir lesiones personales graves o incendios.
Ŷ No use agua sobre el fuego de la grasa. Nunca tome
una olla que se esté incendiando.
Ŷ Si hay un incendio en el horno durante el horneado,
ahogue el fuego cerrando la puerta del horno y
apagando el mismo o usando un químico seco
multipropósito o un extintor de incendio con espuma.
Ŷ En caso de que haya fuego en el horno durante el ciclo
GHOLPSLH]DDXWRPiWLFDDSDJXHHOKRUQR\HVSHUHDTXH
el fuego se extinga. No fuerce la puerta para abrirla.
/DHQWUDGDGHDLUHIUHVFRVREUHODVWHPSHUDWXUDVGHOD
OLPSLH]DDXWRPiWLFDSRGUiFRQGXFLUDODSURGXFFLyQGH
llamas en el horno. Si no se siguen estas instrucciones,
VHSRGUiQSURGXFLUTXHPDGXUDVJUDYHV
Ŷ Manténgase alejado del horno al abrir la puerta del
mismo. El aire caliente o el vapor que sale puede
causar quemaduras en las manos, rostro y/u ojos.
Ŷ Mantenga desobstruida la ventilación del horno.
Ŷ 0DQWHQJDHOKRUQROLEUHGHDFXPXODFLyQGHJUDVD/D
grasa del horno se puede incendiar.
Ŷ Coloque los estantes del horno en la ubicación
deseada mientras éste se encuentra frío. Si es
QHFHVDULRPRYHUHOHVWDQWHPLHQWUDVHOKRUQRHVWi
caliente, evite que el mango de la olla tenga contacto
con el elemento calentador en el horno.
Ŷ Al usar las bolsas para cocinar o dorar en el horno,
siga las instrucciones del fabricante.
Ŷ Es conveniente empujar hacia afuera los estantes
HVWiQGDUHVKDVWDHOWRSHRHPSXMDUHOHVWDQWH
extensible hasta la posición completamente abierta
para levantar comidas pesadas. Esto también es una
precaución contra quemaduras por tocar superficies
calientes de la puerta o las paredes del horno.
Ŷ No deje productos tales como papel, utensilios de
cocina ni comida en el horno cuando éste no se
HQFXHQWUHHQXVR/RVDUWtFXORVJXDUGDGRVHQHO
horno se pueden incendiar.
Ŷ
Nunca coloque los utensilios de cocina, piedras para
pizza u horneado o cualquier otro tipo de aluminio o
cobertor en la base del horno. Estos ítems pueden
atrapar el calor o derretirse, ocasionando daños sobre
el producto y el riesgo de descargas, humo o incendios.
ADVERTENCIA
ADVERTENCIA
ADVERTENCIA
ADVERTENCIA
/DIXQFLyQGHOLPSLH]DDXWRPiWLFDXVDHOKRUQRHQWHPSHUDWXUDVORVXILFLHQWHPHQWHDOWDVFRPRSDUDFRQVXPLUOD
suciedad de comida que haya dentro del horno. Para un funcionamiento seguro, siga estas instrucciones.
Ŷ No toque las superficies del horno durante el ciclo de
OLPSLH]DDXWRPiWLFD0DQWHQJDDORVQLxRVDOHMDGRV
GHOKRUQRGXUDQWHODOLPSLH]DDXWRPiWLFD6LQR
VHVLJXHQHVWDVLQVWUXFFLRQHVVHSRGUiQSURGXFLU
quemaduras.
Ŷ $QWHVGHXVDUHOFLFORGHOLPSLH]DDXWRPiWLFDGHO
horno, retire los estantes de color gris brillante (en
algunos modelos), la sonda, cualquier papel de
aluminio, y cualquier bandeja para asar, rejilla, u otros
utensilios. Sólo se pueden dejar dentro del horno los
estantes para horno cubiertos de porcelana.
Ŷ $QWHVGHXWLOL]DUHOFLFORGHOLPSLH]DDXWRPiWLFD
limpie la grasa y restos de comida que haya en el
horno. Una cantidad excesiva de grasa se puede
incendiar, lo cual puede producir daños con humo en
su hogar.
Ŷ 6LHOPRGRGHOLPSLH]DDXWRPiWLFDIXQFLRQDGH
forma incorrecta, apague el horno y desconecte el
suministro de corriente. Solicite el servicio de un
técnico calificado.
Ŷ 1ROLPSLHODMXQWDGHODSXHUWD/DMXQWDGHODSXHUWD
es esencial para un buen sellado. Se debe tener
cuidado de no frotar, dañar ni mover la junta.
Ŷ 1RXVHOLPSLDGRUHVSDUDKRUQR1RVHGHEHUiXVDU
limpiadores comerciales para horno ni revestimientos
de protección para hornos de ningún tipo en o
alrededor de cualquier parte del horno.
INFORMACIÓN DE SEGURIDAD (Horno Inferior)

8
49-80737-1
¡Gracias! ... por su compra de un electrodoméstico de la Marca GE
GARANTÍA
Garantía de la Cocina Eléctrica de GE
GEAppliances.com
Todo el servicio de garantía es provisto por nuestros Centros de Servicio de Fabricación, o un técnico autorizado de Servicio al
Cliente (Customer Care®). Para programar una visita del servicio técnico a través de Internet, visítenos en www.geappliances.
FRPVHUYLFHBDQGBVXSSRUWROODPHDO*(&$5(6&XDQGROODPHSDUDVROLFLWDUHOVHUYLFLRWHQJDORVQ~PHURV
de serie y de modelo disponibles.
3DUDUHDOL]DUHOVHUYLFLRWpFQLFRGHVXHOHFWURGRPpVWLFRVHSRGUiUHTXHULUHOXVRGHGDWRVGHOSXHUWRGHDERUGDMHSDUDVX
GLDJQyVWLFR(VWRGDDOWpFQLFRGHOVHUYLFLRGHIiEULFDGH*(ODKDELOLGDGGHGLDJQRVWLFDUGHIRUPDUiSLGDFXDOTXLHUSUREOHPDFRQ
VXHOHFWURGRPpVWLFR\GHD\XGDUD*(DPHMRUDUVXVSURGXFWRVDOEULQGDUOHD*(ODLQIRUPDFLyQVREUHVXHOHFWURGRPpVWLFR6LQR
GHVHDTXHORVGDWRVGHVXHOHFWURGRPpVWLFRVHDQHQYLDGRVD*(VROLFLWDPRVTXHOHLQGLTXHDVXWpFQLFRQRHQWUHJDUORVGDWRVD
*(HQHOPRPHQWRGHOVHUYLFLR
'XUDQWHHOSHUtRGRGHXQDxRGHVGHODIHFKDRULJLQDOGHFRPSUD*(OHEULQGDUiFXDOTXLHUSDUWHGHODFRFLQDTXHIDOOHGHELGRD
XQGHIHFWRHQORVPDWHULDOHVRODIDEULFDFLyQ'XUDQWHHVWDJDUDQWtDOLPLWDGDGHXQDxR*(WDPELpQSURYHHUiVLQFRVWRWRGRHO
trabajo y el servicio en el hogar relacionado con el reemplazo de la parte que presente defectos.
Qué no cubrirá GE:
Ŷ Viajes del técnico del servicio a su hogar para enseñarle
sobre cómo usar el producto.
Ŷ Instalación, entrega o mantenimiento inadecuados.
Ŷ Fallas del producto en caso de abuso, mal uso, modificación
o uso para propósitos diferentes al original o uso comercial.
Ŷ Reemplazo de fusibles de la casa o reinicio de disyuntores.
Ŷ 'DxRVRFDVLRQDGRVVREUHHOSURGXFWRSRUDFFLGHQWH
LQFHQGLRLQXQGDFLRQHVRFDWiVWURIHVQDWXUDOHV
Ŷ 'DxRVLQFLGHQWDOHVRFRQVHFXHQWHVFDXVDGRVSRUSRVLEOHV
defectos sobre este producto.
Ŷ 'DxRFDXVDGRGHVSXpVGHODHQWUHJD
Ŷ Producto no accesible para brindar el servicio requerido.
Ŷ Solicite el servicio técnico para reparar o reemplazar las
OiPSDUDVH[FHSWRODVOiPSDUDV/('
EXCLUSIÓN DE GARANTÍAS IMPLÍCITAS
6X~QLFD\H[FOXVLYDDOWHUQDWLYDHVODUHSDUDFLyQGHOSURGXFWRFRPRVHLQGLFDHQOD*DUDQWtD/LPLWDGD/DVJDUDQWtDVLPSOtFLWDV
incluyendo garantías implícitas de comerciabilidad o conveniencia sobre un propósito particular, se limitan a un año o al período
PiVFRUWRSHUPLWLGRSRUODOH\
Esta garantía se extiende al comprador original y a cualquier dueño subsiguiente de productos comprados para uso hogareño
GHQWURGH((886LHOSURGXFWRHVWiHQXQiUHDGRQGHQRVHHQFXHQWUDGLVSRQLEOHXQ3URYHHGRU$XWRUL]DGRGHO6HUYLFLR7pFQLFR
GH*(XVWHGVHUiUHVSRQVDEOHSRUHOFRVWRGHXQYLDMHRVHSRGUiUHTXHULUTXHWUDLJDHOSURGXFWRDXQDXELFDFLyQGHO6HUYLFLR
7pFQLFRGH*($XWRUL]DGRSDUDUHFLELUHOVHUYLFLR(Q$ODVNDODJDUDQWtDH[FOX\HHOFRVWRGHHQYtRROODPDGDVGHOVHUYLFLRDVX
hogar.
Algunos estados no permiten la exclusión o limitación de daños fortuitos o consecuentes. Esta garantía le da derechos legales
HVSHFtILFRV\HVSRVLEOHTXHWHQJDRWURVGHUHFKRVOHJDOHVTXHYDUtDQHQWUHXQHVWDGR\RWUR3DUDFRQRFHUFXiOHVVRQVXV
derechos legales, consulte a la oficina de asuntos del consumidor local o estatal o al Fiscal de su estado.
Garante: General Electric Company. Louisville, KY 40225
Garantías Extendidas:$GTXLHUDXQDJDUDQWtDH[WHQGLGDGH*(\DSUHQGDVREUHGHVFXHQWRVHVSHFLDOHVTXHHVWiQGLVSRQLEOHV
PLHQWUDVVXJDUDQWtDD~QHVWiYLJHQWH/DSXHGHDGTXLULUHQFXDOTXLHUPRPHQWRDWUDYpVGH,QWHUQHWHQ
www.geappliances.com/service_and_support/shop-for-extended-service-plans.htm
ROODPDQGRDOGXUDQWHHOKRUDULRFRPHUFLDOKDELWXDO/RV6HUYLFLRVSDUDHO&RQVXPLGRU+RJDUHxRGH*(D~QHVWDUiQ
allí cuando su garantía caduque.
Registre su Electrodoméstico: ¡Registre su electrodoméstico nuevo a través de Internet, según su conveniencia!
www.geappliances.com/service_and_support/register/
8QUHJLVWURSXQWXDOGHVXSURGXFWRSHUPLWLUiXQDPHMRUFRPXQLFDFLyQ\XQVHUYLFLRPiVSXQWXDOGHDFXHUGRFRQORVWpUPLQRVGHVX
garantía, en caso de surgir la necesidad. También puede enviar una carta en la tarjeta de inscripción pre-impresa que se incluye con
el material embalado.
Abroche su recibo aquí. Para acceder al servicio técnico de acuerdo con
ODJDUDQWtDGHEHUiFRQWDUFRQODSUXHEDGHODIHFKDRULJLQDOGHFRPSUD

9
49-80737-1
Servicio Programado: El servicio de reparación de expertos de
*(HVWiDVyORXQSDVRGHVXSXHUWD(QWUHD,QWHUQHW\SURJUDPH
su servicio en www.geappliances.com/service_and_ support/ o
OODPHDO*(&$5(6GXUDQWHHOKRUDULRGH
atención comercial.
Piezas y Accesorios: Aquellas personas calificadas para
realizar el servicio técnico sobre sus propios electrodomésticos
SRGUiQVROLFLWDUHOHQYtRGHSLH]DVRDFFHVRULRVGLUHFWDPHQWH
a sus hogares (se aceptan las tarjetas VISA; MasterCard y
'LVFRYHU2UGHQHDWUDYpVGH,QWHUQHWKR\GXUDQWHODV
horas o en forma telefónica al 800.626.2002 durante el horario
de atención comercial.
/DVLQVWUXFFLRQHVTXHILJXUDQHQHVWHPDQXDOFXEUHQORV
SURFHGLPLHQWRVTXHVHUiQUHDOL]DGRVSRUFXDOTXLHUXVXDULR
Otros servicios técnicos generalmente deberían ser
GHULYDGRVDSHUVRQDOFDOLILFDGRGHOVHUYLFLR6HGHEHUiWHQHU
FXLGDGR\DTXHXQDUHSDUDFLyQLQGHELGDSRGUiKDFHUTXHHO
funcionamiento no sea seguro.
Estudio de Diseño de la Vida Real: *(DSR\DHOFRQFHSWR
GH'LVHxR8QLYHUVDOHQSURGXFWRVVHUYLFLRV\DPELHQWHVTXH
pueden ser usados por personas de todas las edades, tamaños
y capacidades. Reconocemos la necesidad de realizar diseños
para una amplia gama de habilidades e incapacidades físicas y
PHQWDOHV3DUDPiVGHWDOOHVVREUHODVDSOLFDFLRQHVGH'LVHxR
8QLYHUVDOGH*(LQFOX\HQGRLGHDVGHGLVHxRGHFRFLQDVSDUD
personas con incapacidades, visite nuestro sitio web hoy. Sobre
FDVRVGHLQFDSDFLGDGDXGLWLYDFRPXQtTXHVHDO7''*($&
(800.833.4322).
Contáctenos: Si no se encuentra satisfecho con el servicio
TXHUHFLELyGH*(FRPXQtTXHVHFRQQRVRWURVDWUDYpVGH
nuestro sitio web con todos los detalles, incluyendo su número
telefónico, o escriba a:
General Manager, Customer Relations
GE Appliances, Appliance Park Louisville, KY 40225
ASISTENCIA / ACCESORIOS
£&RQVXOWHHO6LWLR:HEGH(OHFWURGRPpVWLFRVGH*(www.geappliances.com/service_and_support/) durante las 24 horas, cual-
TXLHUGtDGHODxR3DUDPD\RUFRQYHQLHQFLD\XQVHUYLFLRPiVUiSLGRDKRUDSXHGHGHVFDUJDUHO0DQXDOGHO3URSLHWDULRRUGHQDU
piezas o incluso programar el servicio técnico a través de Internet.
¿Desea realizar una consulta o necesita ayuda con su electrodoméstico?
Accesorios
¿Busca Algo Más?
¡GE ofrece una variedad de accesorios para mejorar sus experiencias de cocción y mantenimiento!
Para realizar una orden, visítenos a través de Internet en:
www.GEApplianceParts.com (EE.UU.) o en www.GEAppliances.ca&DQDGi
o llame al 800.626.2002 (EE.UU.) 800.661.1616&DQDGi
(VWRV\RWURVSURGXFWRVHVWiQGLVSRQLEOHV
Cómo Retirar la Película Protectora de Envío y la Cinta de Embalaje
Con cuidado tome un extremo de la película protectora de envío
con los dedos y lentamente retire la misma de la superficie del
electrodoméstico.
No utilice ningún producto filoso para retirar la película. Retire toda
la película antes de usar el electrodoméstico por primera vez.
Para asegurar que no haya daños sobre el acabado del
SURGXFWRODIRUPDPiVVHJXUDGHUHWLUDUHODGKHVLYRGHODFLQWD
de embalaje en electrodomésticos nuevos es aplicando un
detergente líquido hogareño para lavar platos. Aplique con una
tela suave y deje que se seque.
NOTA: (ODGKHVLYRGHEHUiVHUHOLPLQDGRGHWRGDVODVSDUWHV
No se puede retirar si se hornea con éste dentro.
Accesorios
2OODSDUD$VDU3HTXHxDô´[ó´[ò³ :%;((88'*&DQDGi
2OODSDUD$VDU*UDQGHô´[ó´[ò³ :%;((88'*&DQDGi
2OODSDUD$VDU([WUD*UDQGHô´[ó´[ò³ :%;((881RGLVSRQLEOHHQ&DQDGi
Piezas
%DQGHMDGH9LGULR /RVQ~PHURVGHSLH]DYDUtDQVHJ~QHOPRGHOR
3ODWR*LUDWRULR /RVQ~PHURVGHSLH]DYDUtDQVHJ~QHOPRGHOR
(VWDQWHVGHOKRUQR /RVQ~PHURVGHSLH]DYDUtDQVHJ~QHOPRGHOR
(OHPHQWRVGHOKRUQR /RVQ~PHURVGHSLH]DYDUtDQVHJ~QHOPRGHOR
/iPSDUDVGHOX] /RVQ~PHURVGHSLH]DYDUtDQVHJ~QHOPRGHOR
Suministros de Limpieza
/LPSLDGRUSDUD(OHFWURGRPpVWLFRV0LFUR%U\WH
®
GHRQ]DV :;;
/LPSLDGRUHVGH$FHUR,QR[LGDEOH&LWUL6KLQH :;;
/LPSLDGRUGH(OHFWURGRPpVWLFRVGH$FHUR,QR[LGDEOH&HUDPD%U\WH
®
30;
/XEULFDQWHGH*UDILWR :%7
7KHODUJHEURLOHUSDQGRHVQRWILWLQ´´UDQJHV
7KH;/EURLOHUSDQGRHVQRWILWLQ´ZDOORYHQV´GURSLQVRU´´UDQJHV

10
49-80737-1
Controles del Horno
USO DEL HORNO: Controles del Horno
10 12 18 1617
11 13 14 15
179 6 4
582 3
Controles Comunes
Controles del
Horno Superior
Controles del
Horno Inferior
Controles Comunes
1. Timer On/Off (Temporizador Encendido/ Apagado):
Funciona como un temporizador con cuenta regresiva: Presione la tecla
Timer On/Off (Temporizador Encendido/ Apagado), seleccione el tipo
de temporizador (horas y minutos o minutos y segundos), use el dial de
selección para configurar la hora, y presione el dial del selector para iniciar
ODFXHQWDUHJUHVLYDGHOWHPSRUL]DGRU(OKRUQRFRQWLQXDUiIXQFLRQDQGR
cuando la cuenta regresiva del temporizador se haya completado. Para
apagar el temporizador, presione la tecla Timer On/Off (Temporizador
Encendido/ Apagado).
2. Settings/Lock Controls (Controles de Configuraciones/
Bloqueo): %XVTXHODVRSFLRQHVGHOKRUQRSDUD+HOS$\XGD
&ORFN6HWWLQJV&RQILJXUDFLRQHVGHO5HORM'LVSOD\0RGH0RGRGH
3DQWDOOD$XWR&RQYHUVLRQ&RQYHUVLyQ$XWRPiWLFD$XWR6KXW2II
$SDJDGR$XWRPiWLFR%HHSHU9ROXPH9ROXPHQGHO3LWLGR5HPLQGHU
(Recordatorio), Temperature Units (Unidades de Temperatura), Thermostat
$GMXVW$MXVWDUHO7HUPRVWDWR\2YHQ,QIRUPDWLRQ,QIRUPDFLyQGHO+RUQR
EDMRHVWDVHOHFFLyQ3DUDPiVGHWDOOHVFRQVXOWHODVHFFLyQ2YHQ6HWWLQJV
&RQILJXUDFLRQHVGHO+RUQR0DQWHQJDSUHVLRQDGDODWHFODSettings
(Configuraciones) durante 3 segundos para bloquear o desbloquear los
controles. Esto bloquea el control, de modo que al presionar las teclas de
FRQWUROQRVHDFWLYHHVWDIXQFLyQ/DIXQFLyQ&OHDU2II%RUUDU$SDJDU
VLHPSUHHVWiDFWLYDLQFOXVRFXDQGRHOFRQWUROHVWiEORTXHDGR
3. Selector Dial (Dial de Selección): El dial de selección se
XVDWDQWRSDUDHOKRUQRVXSHULRUFRPRSDUDHOLQIHULRU*LUHHOGLDOSDUD
seleccionar las configuraciones del horno, opciones del horno superior/
inferior y opciones de cocción, y luego presione el mismo para confirmar
ODVHOHFFLyQ*LUHHOGLDOSDUDLQFUHPHQWDURUHGXFLUODVWHPSHUDWXUDVR
el tiempo y luego presione el mismo para configurar la temperatura o el
tiempo configurados.
4. Back (Retroceder): 3UHVLRQHHVWDWHFODSDUDLUKDFLDDWUiVHQXQ
nivel del menú en la pantalla.
5. Start/Pause (Iniciar/ Pausar): Presione la tecla Start/Pause
(Iniciar/ Pausar) para iniciar cualquier función de cocción, limpieza o con
temporizador. Presione la tecla Start/Pause (Iniciar/ Pausar) para pausar
cualquier función del horno superior.
6. Display (Pantalla): /DLQIRUPDFLyQVREUHHOKRUQRVXSHULRU\HO
horno inferior se muestra en la ventana de esta pantalla.
Controles del Horno Superior
7. Microwave (Cocinar con Microondas): Presione la tecla
Microwave (Cocinar con Microondas) para acceder a las opciones de
cocción con microondas. Use el dial de selección para buscar la opción
de cocción con microondas deseada y presione el dial para seleccionar
ODPLVPD/DVRSFLRQHVGLVSRQLEOHVLQFOX\HQ&RRNE\7LPH&RFLQDUSRU
7LHPSR&RRN&RFLQDU'HIURVW'HVFRQJHODU%HYHUDJH%HELGD
3RSFRUQ3DORPLWDVGH0Dt]0HOW'HUUHWLU5HKHDW5HFDOHQWDU
6LPPHU+HUYLU\6RIWHQ$EODQGDU8VHODEDQGHMDGHYLGULRWUDVSDUHQWH
y el utensilio para uso seguro en el microondas al usar las funciones
GHFRFFLyQFRQPLFURRQGDV3DUDPiVGHWDOOHVFRQVXOWHODVHFFLyQGH
Cocción con microondas en el horno superior.
8. Add 30 Sec (Agregar 30 Segundos): Presione la tecla Add
30 Sec (Agregar 30 Segundos) de tiempo de cocción en el microondas.
Cada vez que se presiona esta tecla, se suman 30 segundos al tiempo de
cocción restante. El horno se inicia de inmediato.
9. Defrost (Descongelar): Presione la tecla Defrost (Descongelar)
para descongelar, gire el dial para seleccionar el tipo de descongelación
y presione el dial para hacer la selección. El tipo de descongelación
GLVSRQLEOHLQFOX\H'HIURVWE\)RRG7\SH'HVFRQJHODFLyQSRU7LSRGH
&RPLGD'HIURVWE\7LPH'HVFRQJHODFLyQSRU7LHPSR'HIURVWE\
:HLJKW'HVFRQJHODFLyQSRU3HVROE4XLFN'HIURVW'HVFRQJHODFLyQ
5iSLGD0HOW'HUUHWLU\6RIWHQ$EODQGDU3DUDPiVLQIRUPDFLyQ
consulte la sección Cocinar con el Microondas.
10. Reheat (Recalentar): Presione la tecla Reheat (Recalentar) para
recalentar, gire el dial para seleccionar el tipo de comida que desea
UHFDOHQWDU\SUHVLRQHHOGLDOSDUDKDFHUODVHOHFFLyQ/RVWLSRVGHFRPLGDV
GLVSRQLEOHVHQODIXQFLyQ5HKHDW5HFDOHQWDULQFOX\HQ%HYHUDJH%HELGD
&DVVHUROH&D]XHOD&KLFNHQ3ROOR3DVWD3DVWD3L]]D3L]]D3ODWHRI
)RRG3ODWRGH&RPLGD5LFH$UUR]6RXS6RSD6WHDNV&KRSV%LIHV
Costillas), y Vegetables (Verduras).
11. Popcorn (Palomitas de Maíz): Presione la tecla Popcorn
(Palomitas de Maíz) para cocinar palomitas de maíz con el microondas;
SUHVLRQHHOGLDOSDUDKDFHUODVHOHFFLyQ/DIXQFLyQ3RSFRUQ3DORPLWDV
de Maíz) es una función con sensor de microondas y detecta de forma
DXWRPiWLFDFXiQGRODVSDORPLWDVGHPDt]HVWiQKHFKDV\VHDSDJD
DXWRPiWLFDPHQWH1RXVHODVIXQFLRQHVGHOVHQVRUGRVYHFHVVHJXLGDV
con la misma porción de comida.
12. Clear/Off (Borrar/ Apagar): /DWHFOD&OHDU2II%RUUDU$SDJDU
FDQFHOD72'26ORVSURJUDPDVGHOKRUQRVXSHULRUH[FHSWRHOUHORM\HO
temporizador.
Controles del Horno Inferior
13. Light (Luz): Presione la tecla Light (Luz) para encender o apagar la
luz del horno en el horno inferior. Observe que la luz del horno inferior no
VHHQFHQGHUiVLpVWHVHHQFXHQWUDHQHOPRGRGHOLPSLH]D
14. Bake (Hornear): Presione la tecla Bake (Hornear) para hornear, gire
el dial para seleccionar la temperatura de horneado y presione el dial para
hacer la selección.
15. Broil (Asar): Presione la tecla Broil (Asar) para asar, gire el dial para
VHOHFFLRQDU+L/R$OWR%DMR\SUHVLRQHHOGLDOSDUDKDFHUODVHOHFFLyQ
16. Options (Opciones): %XVTXHODVIXQFLRQHV'HOD\6WDUW5HWUDVDU
,QLFLR3URRI/HXGDU6DEEDWK6DEiWLFR6HOI&OHDQ/LPSLH]D
$XWRPiWLFD6WHDP&OHDQ/LPSLH]DFRQ9DSRU\:DUP&DOHQWDUHQ
HVWDVHOHFFLyQ3DUDPiVGHWDOOHVFRQVXOWHODVHFFLyQ2YHQ2SWLRQV
2SFLRQHVGHO+RUQR
17. Warm (Calentar): Presione la tecla Warm (Calentar) para calentar;
SUHVLRQHHOGLDOSDUDKDFHUODVHOHFFLyQ1RXVHODIXQFLyQ:DUP
&DOHQWDUSDUDFRFLQDURFDOHQWDUFRPLGDIUtD3DUDPiVLQIRUPDFLyQ
consulte la sección de Modos de Cocción.
18. Clear/Off (Borrar/ Apagar): /DWHFOD&OHDU2II%RUUDU$SDJDU
FDQFHOD72'26ORVSURJUDPDVGHOKRUQRLQIHULRUH[FHSWRHOUHORM\HO
temporizador.

11
49-80737-1
Configuraciones del Horno
USO DEL HORNO: Configuraciones del Horno
Ayuda
8VHHVWDIXQFLyQSDUDVDEHUPiVVREUHVXKRUQR\VXV
funciones, presionando la tecla Settings (Configuraciones)
y seleccionando Help (Ayuda)*LUHHOGLDOGHVHOHFFLyQ\
SUHVLRQHHOPLVPRSDUDVHOHFFLRQDUODIXQFLyQVREUHODFXiO
GHVHHVDEHUPiV
NOTA: Es posible que su horno no cuente con todas las
funciones de ayuda. A continuación figuran funciones de la
IXQFLyQ+HOS$\XGD
Clock Settings (Configuraciones del Reloj)
Use esta función para configurar la hora del día y para especificar
FyPRpVWDVHUiH[KLELGD3XHGHVHOHFFLRQDUHOUHORMHVWiQGDUGH
12 horas (12 hrs.) o el reloj militar de 24 horas (24 hrs.). El reloj
GHEHUiVHUFRQILJXUDGRDQWHVGHOSULPHUXVRGHOKRUQR
Display Mode (Modo de Pantalla)
Use esta función para configurar el modo de pantalla Power
6DYHU$KRUURGH(QHUJtDR'LVSOD\$OZD\V0RVWUDU
Siempre).
Auto Shut-Off (Apagado Automático)
Use esta función para activar/ desactivar la función Auto
6KXW2II$SDJDGR$XWRPiWLFR$FWLYDUODIXQFLyQ$XWR6KXW
2II$SDJDGR$XWRPiWLFRDSDJDUiHOKRUQRLQIHULRUOXHJRGH
12 horas de funcionamiento continuo. Esta configuración de
IiEULFDSDUDODIXQFLyQ$XWR6KXW2II$SDJDGR$XWRPiWLFR
HVWiDFWLYDGD&XDQGRHVWpHQHOPRGR6DEEDWK6DEiWLFROD
IXQFLyQ$XWR6KXW2II$SDJDGR$XWRPiWLFRVHUiGHVDFWLYDGD
Beeper Volume (Volumen del Pitido)
Use esta función para configurar el volumen del pitido en Mute
(Mudo) o Normal (Normal).
NOTA: Algunos tonos no se pueden enmudecer.
Reminder (Recordatorio)
Use esta función con Set (Configurar), Review (Revisar), o
&OHDU5HPLQGHU%RUUDU5HFRUGDWRULR
Temperature Units (Unidades de Temperatura)
Use esta función para configurar la unidad de temperatura en
pantalla a ºF (Fahrenheit) o ºC (Celsius).
Thermostat Adjust (Ajustar el Termostato)
Esta función permite que la temperatura de horneado del horno
\GHKRUQHDGRSRUFRQYHFFLyQVHDQDMXVWDGDVKDVWD)PiV
FDOLHQWHR)PiVIUtDHQHOKRUQRLQIHULRU(OKRUQRVXSHULRU
no puede ser ajustado. Use esta función si piensa que la
temperatura de su horno es demasiado caliente o demasiado
IUtD\GHVHDPRGLILFDUOD(VWHDMXVWHDIHFWDORVPRGRV%DNH
+RUQHDU1LQJ~QRWURPRGRGHFRFFLyQVHYHDIHFWDGR
Oven Information (Información del Horno)
Esta función muestra el modelo y número de serie del horno.
Funciones que se encuentran en la función HELP (AYUDA).
Adding time
(Añadir tiempo)
'HIURVWE\:HLJKW
'HVFRQJHODFLyQ
por peso)
Start/Pause (Iniciar/
Pausar)
Auto Convection
(Convección
$XWRPiWLFD
'HOD\6WDUW/RZHU
(Retrasar Inicio,
Inferior)
Steam Clean
/LPSLH]DDO9DSRU
Auto Shut-Off
$SDJDGR$XWRPiWLFR
'LVSOD\0RGH
(Modo de Pantalla)
Temperature Units
(Unidades de
Temperatura)
%DFN5HJUHVDU Edit (Editar) Thermostat Adjust
(Ajustar el Termos-
tato)
%DNH+RUQHDU +HOS$\XGD Timer On/Off
(Temporizador En-
cendido/ Apagado)
%HHSHU9ROXPH
(Volumen del Pitido)
0HOW'HUUHWLU Toast (Tostar)
%HYHUDJH%HELGD Micro 30 Secs (30
seg. de Microondas)
:DUP&DOHQWDU
%URLO$VDU Microwave (Cocinar
con Microondas)
Clear/Off
%RUUDU$SDJDU
My recipes (Mis
recetas)
&ORFN5HORM Probe (Sonda)
&RQWURO/RFNRXW
%ORTXHRGHO&RQWURO
3URRI/HXGDU
&RRN&RFLQDU Reheat (Recalentar)
&RRNE\WLPH
(Cocción por tiempo)
Reminder
(Recordatorio)
&RRNE\7LPH
(Cocinar por Tiempo)
5HSHDW/DVW5HSHWLU
el Último Paso)
&RRNE\7LPH
(Cocinar por Tiempo
1 y 2)
Resume (Reiniciar)
&RRNLQJ2SWLRQV
(Opciones de Cocción)
(Inferior)
6DEEDWK6DEiWLFR
&RRNLQJ2SWLRQV
(Opciones de Cocción)
(Superior)
6HOI&OHDQ/LPSLH]D
$XWRPiWLFD
'HIURVW'HVFRQJHODU 6HQVRU&RRNLQJ
(Cocción por sensor)
'HIURVWE\)RRG
'HVFRQJHODUSRU
Comida)
6LPPHU+HUYLU
'HIURVWE\7LPH
'HVFRQJHODFLyQSRU
tiempo)
Soften (Ablandar)
6SHHG&RRN
&RFFLyQ5iSLGD

12
49-80737-1
Opciones del Horno
USO DEL HORNO: Opciones del Horno
Opciones del Horno Inferior
Delay Start (Iniciar con Retraso)
8VHHVWDIXQFLyQSDUDUHWUDVDUHOLQLFLRGHODVIXQFLRQHV%DNH
+RUQHDUR6HOI&OHDQ/LPSLH]D$XWRPiWLFD3DUDXVDUHVWD
IXQFLyQVHOHFFLRQH'HOD\6WDUW,QLFLDUFRQ5HWUDVR\FRQILJXUH
la hora de inicio, y luego seleccione el modo de cocción.
7DPELpQSXHGHXVDUODIXQFLyQ'HOD\6WDUW,QLFLDUFRQ5HWUDVR
PLHQWUDVSURJUDPDXQDIXQFLyQGHFRFFLyQFRQ%DNH+RUQHDU
Proof (Leudar)
8VHHVWDIXQFLyQSDUDOHXGDUPDVD3DUDPiVGHWDOOHV
FRQVXOWHORV0RGRVGH&RFFLyQHQHO+RUQR,QIHULRU
Sabbath (Modo Sabático)
8VHHVWDIXQFLyQSDUDLQJUHVDUHOPRGR6DEEDWK6DEiWLFR
(VWHPRGRFRQILJXUDHOKRUQRSDUDHO)HVWHMR6DEiWLFR-XGtR\
Feriados. Esta función cumple con los requisitos de la Estrella
.GHO)HVWHMR6DEiWLFR-XGtR(OPRGRVDEiWLFRGHVDFWLYDODV
OXFHVGHOKRUQRODOX]GHOKRUQRQRVHHQFHQGHUiFXDQGROD
SXHUWDVHDDELHUWDWRGRVORVVRQLGRVHOFRQWUROQRHPLWLUi
QLQJ~QSLWLGRFXDQGRXQERWyQVHDSUHVLRQDGRSHURHPLWLUi
un pitido si ciertas fallas del horno se producen), y todas las
IXQFLRQHVGHOKRUQRVXSHULRUHLQIHULRUH[FHSWR%DNH+RQHDU
HQHOKRUQRLQIHULRU'XUDQWHHOPRGR6DEEDWK6DEiWLFRVyOR
%DNH+RUQHDUHQHOKRUQRLQIHULRUHVWiGLVSRQLEOH'XUDQWH
este modo, luego de configurar/ modificar una temperatura
de horneado, un retraso al azar de aproximadamente entre
VHJXQGRV\PLQXWRVHSURGXFLUiDQWHVGHTXHHOKRUQR
comience a hornear. Para detener la cocción, presione la
tecla Back (Retroceder) y luego la tecla Start/Pause (Iniciar/
Pausar)(OKRUQRVHDSDJDUiOXHJRGHXQUHWUDVRDOD]DU
de aproximadamente entre 30 segundos y 1 minuto. Para
VDOLULQPHGLDWDPHQWHGH%DNH+RUQHDUHQHOKRUQRLQIHULRU
presione la tecla Clear/Off (Borrar/ Apagar) en cualquier
PRPHQWRORVHOHPHQWRVGHFRFFLyQVHDSDJDUiQGHIRUPD
LQPHGLDWD\6DEEDWK%DNH+RUQHDUHQHO0RGR6DEiWLFR
FDPELDUiD6DEEDWK6DEiWLFRHQODSDQWDOODLQGLFDQGRTXH
HOKRUQRIXHDSDJDGR3DUDVDOLUGHOPRGR6DEEDWK6DEiWLFR
mantenga presionada la tecla Back (Retroceder) durante
3 segundos. No presione ningún otro botón hasta que se
KD\DVDOLGRGHOPRGR6DEEDWK6DEiWLFRRHOPRGR6DEEDWK
6DEiWLFRVHYROYHUiDLQLFLDU\QRVHVDOGUiGHOPLVPR3DUD
PiVGHWDOOHVFRQVXOWHODVHFFLyQGH0RGR6DEiWLFRHQHO
+RUQR,QIHULRU
NOTA: Si se produce un corte de corriente durante el modo
6DEiWLFRODXQLGDGSHUPDQHFHUiHQHOPRGR6DEiWLFRSHUR
apagada cuando vuelva la corriente.
Self Clean (Limpieza Automática)
8VHHVWDIXQFLyQSDUDLQJUHVDUHOPRGR6HOI&OHDQ/LPSLH]D
$XWRPiWLFD3DUDPiVGHWDOOHVFRQVXOWHODVHFFLyQGH
/LPSLH]DGHO+RUQR
Steam Clean (Limpieza al Vapor)
8VHHVWDIXQFLyQSDUDLQJUHVDUHOPRGR6HOI&OHDQ/LPSLH]D
$XWRPiWLFD3DUDPiVGHWDOOHVFRQVXOWHODVHFFLyQGH
/LPSLH]DGHO+RUQR
Warm (Calentar)
8VHHVWDIXQFLyQSDUDFDOHQWDU3DUDPiVGHWDOOHVFRQVXOWHORV
0RGRVGH&RFFLyQHQHO+RUQR,QIHULRU
13
49-80737-1
Cocción con Microondas
Cómo Utilizar las Funciones de Microondas
Asegúrese de que la base giratoria y la bandeja de vidrio
transparente se encuentran colocadas.
Coloque los alimentos o recipiente para microondas directamente
en la bandeja de vidrio transparente para cocinar sus alimentos.
Horno Superior: Cocción con Microondas
La base giratoria siempre debe
estar colocada en su lugar
cuando se utiliza el horno.
La bandeja de cristal transparente
siempre deberá estar en su lugar
cuando se cocina con microondas.
Cómo Utilizar las Selecciones de Microondas Preprogramadas
1. Presione la tecla Microwave (Cocinar con Microondas).
Si no se realiza una selección dentro del plazo de 15
VHJXQGRVODSDQWDOODUHJUHVDUiDODKRUDGHOGtD
*LUHHOGLDOGHVHOHFFLyQSDUDEXVFDUODFRPLGDREHELGD
que desee cocinar, descongelar, ablandar, derretir, hervir
o recalentar. Presione el dial de selección para ingresar.
*LUHHOGLDOSDUDVHOHFFLRQDUHOWLSRFDQWLGDGSHVR\R
WDPDxR(OKRUQROHFRQVXOWDUiHQODPHGLGDTXHVHD
necesario.) Presione el dial luego de cada selección.
4. Presione el dial de selección o la tecla Start/Pause
(Iniciar/ Pausar) para iniciar la cocción.
Para revisar o editar las configuraciones durante la cocción,
presione el dial de selección.
Si se abre la compuerta durante la cocción, el horno se
GHWHQGUi\VHPRVWUDUi3DXVH3DXVDHQODSDQWDOOD&LHUUH
la compuerta y apriete el botón Start/Pause (Iniciar/Pausar)
para continuar cocinando.
Si ingresa una selección no deseada en cualquier momento,
simplemente apriete el botón Back (Regresar) y reingrese las
selecciones deseadas.
Ŷ &XDQGRHOKRUQRHVWiHQFHQGLGRVHSRGUiYHUODOX]
alrededor de la compuerta o de la cubierta externa.
Ŷ /DOX]GHOLQWHULRUGHOKRUQRVHHQFHQGHUiGXUDQWHXQFLFOR
de cocción por microondas.
Ŷ 3RGUtDHVFDSDUYDSRUGHOUHGHGRUGHODFRPSXHUWD
Cook By Time (Cocinar Por Tiempo) y Cook By Time 1 & 2 (Cocinar Por Tiempo 1 y 2)
8WLOLFHODVIXQFLRQHVGH&RRN%\7LPH&RFLQDU3RU7LHPSR\
&RRN%\7LPHSDUDFRFLQDUSRUPLFURRQGDVORVDOLPHQWRV
que no se encuentran en la sección de recetas y en el tiempo
que programó.
Ŷ (OQLYHOGHSRWHQFLDVHHQFXHQWUDDMXVWDGR
DXWRPiWLFDPHQWHHQ+LJK$OWRSHURSXHGHFDPELDUOR
para dar mayor flexibilidad.
1. Presione la tecla Microwave (Cocinar con Microondas).
*LUHHOGLDOSDUDVHOHFFLRQDU&RRN%\7LPH&RFLQDUSRU
7LHPSRR&RRN%\7LPH&RFLQDUSRU7LHPSR\
y presione el dial de selección para ingresar.
*LUHHOGLDOGHVHOHFFLyQSDUDFRQILJXUDUHOWLHPSRGH
cocción y presione el mismo para ingresar.
4. Seleccione la configuración del nivel de potencia.
6LVHOHFFLRQy&RRN%\7LPH&RFLQDUSRU7LHPSR
y 2), gire el dial de selección para configurar el segundo
tiempo de cocción, la segunda configuración de nivel de
potencia y presione el dial para ingresar.
5. Presione el dial de selección o la tecla Start/Pause
(Iniciar/ Pausar) para iniciar la cocción.
'XUDQWHODVIXQFLRQHVGH&RRN%\7LPH&RFLQDU3RU7LHPSR
R&RRN%\7LPH&RFLQDU3RU7LHPSRSXHGHDEULU
la compuerta para revisar la comida. Cierre la compuerta y
apriete el botón Start/Pause (Iniciar/Pausar) para continuar
cocinando.
SELECCIONES MICROWAVE PRE-SET (PREPROGRAMACIONES DE MICROONDAS)
ŶBebidas
– Agua (8-12 onzas)
– Café
(8-12 onzas)
– Té (8-12 onzas)
±/HFKH
(8-12 onzas)
– Cacao Caliente
(8-12 onzas)
ŶPalomitas de Maíz
–
Sensor de
palomitas de maíz
ŶDerretir
– Manteca
– Caramelo
– Queso
– Trozos de
Chocolate
– Malvavisco
ŶHervir
ŶCocinar
– Por tipo de
alimento
– Por tiempo
– Por tiempo 1 y 2
ŶSuavizar
– Manteca
– Queso Crema
±*ODVHDGR
(16 onzas)
±+HODGR
ŶDescongelar
±OE5iSLGR
– Por tiempo
– Por peso
– Por tipo de
alimento
±'HUUHWLU
– Suavizar
ŶRecalentar
±%HELGDV
– Cazuela
– Pollo
– Pasta
– Pizza
– Plato de comida
– Arroz
– Sopa
±%LVWHFV&KXOHWDV
– Verduras

14
49-80737-1
Cocción con Microondas (Continúa)
Nivel(es) De Potencia Del Horno Microondas
Ŷ 3XHGHPRGLILFDUHOQLYHOGHSRWHQFLDGXUDQWHODPD\RU
parte del programa de cocción.
1. Presione el dial de selección para editar.
*LUHHOGLDOGHVHOHFFLyQSDUDFDPELDUODKRUD\RSUHVLRQH
el dial de selección para ingresar.
*LUHHOGLDOGHVHOHFFLyQHQGLUHFFLyQGHODVDJXMDVGHO
reloj para incrementar el nivel de potencia y en contra de
las agujas del reloj para reducir el mismo. Presione el dial
de selección para ingresar.
Aquí se presentan algunos ejemplos de utilizaciones para varios
niveles de potencia:
High (Alto) 10: Pescado, tocino, verduras, líquidos hirvientes.
Med (Medio) - High (Alto) 7: Cocción moderada de carne de
res y pollo; hornear guisados y recalentamiento.
Med (Medio) 5: Cocción lenta y ablandamiento para guisados
y cortes de carne de res menos suaves.
Low (Bajo) 2 o 3:'HVFRQJHODFLyQKHUYLUDIXHJROHQWRVDOVDV
delicadas.
Warm (Caliente) 1: Mantener comidas calientes; suavizar
mantequilla.
Descongelación Por Tipo De Alimento
/DIXQFLyQ$XWR'HIURVW'HVFRQJHODFLyQDXWRPiWLFDDMXVWD
los tiempos de descongelación y los niveles de potencia para
ofrecer resultados de descongelación uniformes para carnes
de res, pollo y pescado de hasta 6 libras de peso.
1. Saque los alimentos de la caja y colóquelos en un plato
adecuado para microondas.
2. Presione la tecla Microwave (Cocinar con Microondas)
\VHOHFFLRQH'HIURVW'HVFRQJHODU
*LUHHOVHOHFWRUGHOGLDOD'HIURVW'HVFRQJHODU\D)RRG
Type (Tipo de Comida). Presione el dial de selección para
ingresar.
*LUHHOGLDOSDUDVHOHFFLRQDUHOWLSRGHFRPLGD3UHVLRQHHO
dial de selección para ingresar.
*LUHHOGLDOGHVHOHFFLyQDOSHVRGHODFRPLGDXVDQGROD
*XtDGH&RQYHUVLyQTXHILJXUDDODGHUHFKD3RUHMHPSOR
seleccione 1.2 para 1.2 libras (1 libra, 3 onzas). Presione
el dial de selección para ingresar.
6. Presione el dial de selección o la tecla Start/Pause
(Iniciar/ Pausar) para iniciar la descongelación.
*LUHORVDOLPHQWRVFXDQGRHOKRUQROHLQGLTXH7XUQ)RRG
2YHU'DU9XHOWD$/RV$OLPHQWRV
Ŷ 6DTXHODFDUQHGHVFRQJHODGDRFXEUDODViUHDVFDOLHQWHV
FRQSHGD]RVSHTXHxRVGHOiPLQDGHDOXPLQLRSDUDORJUDU
una descongelación uniforme.
Ŷ 'HVSXpVGHGHVFRQJHODUODPD\RUtDGHODVFDUQHV
necesitan dejarse en reposo durante 5 minutos para
completar la descongelación. Asados de mayor tamaño
deben permanecer en reposo por cerca de 30 minutos.
Guía de conversión
Si se indica el peso de los alimentos en libras y onzas, se
deben convertir las onzas a décimos (.1) de libra.
Ingresar el peso
Peso del alimento del alimento
en onzas (décimos de libra)
1–2 .1
3 .2
4–5 .3
6–7 .4
8 .5
9–10 .6
11 .7
12–13 .8
14–15 .9
Descongelación Por Tiempo
8VH'HIURVW%\7LPH'HVFRQJHODUSRU7LHPSRSDUD
descongelar durante un período de tiempo seleccionado.
1. Presione la tecla Microwave (Cocinar con Microondas)
\VHOHFFLRQH'HIURVW'HVFRQJHODU
*LUHHOGLDOGHVHOHFFLyQD'HIURVW%\7LPH'HVFRQJHODU
por Tiempo). Presione el dial de selección para ingresar.
*LUHHOGLDOSDUDVHOHFFLRQDUHOWLHPSRTXHGHVHH
Presione el dial de selección para ingresar.
4. Presione el dial de selección o la tecla Start/Pause
(Iniciar/ Pausar) para iniciar la descongelación.
*LUHORVDOLPHQWRVFXDQGRHOKRUQROHLQGLTXH7XUQ)RRG
2YHU'DU9XHOWD$/RV$OLPHQWRV
(OQLYHOGHSRWHQFLDVHDMXVWDDXWRPiWLFDPHQWHDSHUR
puede cambiarse. Para cambiar los niveles de potencia,
consulte la sección Nivel de potencia del microondas. Puede
descongelar alimentos pequeños aumentando el nivel de
SRWHQFLDGHVSXpVGHLQJUHVDUHOWLHPSR(OQLYHOGHSRWHQFLD
corta el tiempo de descongelación total a cerca de la mitad; el
nivel de potencia 10 corta el tiempo total de descongelación a
cerca de un tercio. Cuando descongela a niveles de potencia
PiVDOWRVORVDOLPHQWRVQHFHVLWDUiQDWHQFLyQPiVIUHFXHQWH
de la normal.
Horno Superior: Cocción con Microondas

15
49-80737-1
Horno Superior: Cocción con Microondas
Cocción con Microondas (Continúa)
Defrost By Weight (Descongelar por Peso)
8VH'HIURVW%\:HLJKW'HVFRQJHODUSRU3HVRSDUD
descongelar durante un período de tiempo seleccionado.
1. Presione la tecla Microwave (Cocinar con Microondas) y
VHOHFFLRQH'HIURVW'HVFRQJHODU
*LUHHOGLDOGHVHOHFFLyQD'HIURVW%\:HLJKW'HVFRQJHODU
por Peso). Presione el dial de selección para ingresar.
*LUHHOGLDOSDUDVHOHFFLRQDUHOSHVRTXHGHVHH3UHVLRQH
el dial de selección para ingresar.
4. Presione el dial de selección o la tecla Start/Pause (Iniciar/
Pausar) para iniciar la descongelación.
*LUHORVDOLPHQWRVFXDQGRHOKRUQROHLQGLTXH7XUQ)RRG
2YHU'DU9XHOWD$/RV$OLPHQWRV
El nivel de potencia no puede ser modificado durante esta
configuración.
Quick Defrost (Descongelación Rápida) con 1.0 lbs.
8VH4XLFN'HIURVW'HVFRQJHODFLyQ5iSLGDFRQOEVSDUD
XQDGHVFRQJHODFLyQUiSLGDGHOEVGHFRPLGDFRQJHODGD
1. Presione la tecla Microwave (Cocinar con Microondas)
\VHOHFFLRQHODGHVFRQJHODFLyQUiSLGDFRQOEV
2. Presione el dial de selección o la tecla Start/Pause
(Iniciar/ Pausar) para iniciar la descongelación. Presione
el dial de selección para ingresar.
*LUHORVDOLPHQWRVFXDQGRHOKRUQROHLQGLTXH7XUQ)RRG
2YHU'DU9XHOWD$/RV$OLPHQWRV
El nivel de potencia no puede ser modificado durante esta
configuración.
Consejos Para Descongelar
Ŷ 6HSXHGHQGHVFRQJHODUDOLPHQWRVFRQJHODGRVHQSDSHOR
SOiVWLFRHQHOSDTXHWHFXDQGRVHXWLOL]DODIXQFLyQ'HIURVW
%\)RRG7\SH'HVFRQJHODU3RU7LSR'H&RPLGD6H
deben cortar, perforar o ventilar los paquetes cerrados
después de que se hayan descongelado los alimentos
parcialmente. Se deben descubrir parcialmente los
UHFLSLHQWHVGHDOPDFHQDPLHQWRSOiVWLFRV
Ŷ 6HSXHGHQGHVFRQJHODU\FRFLQDUFRQPLFURRQGDV
las meriendas preempacadas, de tamaño familiar,
congeladas. Si el alimento se encuentra en un recipiente
GHOiPLQDGHDOXPLQLRWUDQVILpUDORDXQSODWRDGHFXDGR
para microondas.
Ŷ /RVDOLPHQWRVTXHVHHFKDQDSHUGHUIiFLOPHQWHQRVH
GHEHQGHMDUIXHUDGHOUHIULJHUDGRUGXUDQWHPiVGHXQD
KRUDGHVSXpVGHVFRQJHODUVH/DWHPSHUDWXUDDPELHQWH
promueve el crecimiento de bacterias nocivas.
Ŷ 3DUDXQDGHVFRQJHODFLyQPiVXQLIRUPHGHDOLPHQWRVPiV
JUDQGHVWDOHVFRPRDVDGRVXWLOLFHODIXQFLyQ'HIURVW%\
7LPH'HVFRQJHODFLyQ3RU7LHPSR$VHJ~UHVHTXHODV
carnes se encuentran completamente descongeladas
antes de cocinarlas.
Ŷ &XDQGRORVDOLPHQWRVVHHQFXHQWUDQGHVFRQJHODGRV
GHEHQHQFRQWUDUVHIUtRVSHURVXDYHVHQWRGDVODViUHDV
Si aún se encuentran restos de hielo, vuélvalos a colocar
en el microondas pero por un período muy corto de tiempo
o déjelos reposar durante un par de minutos.
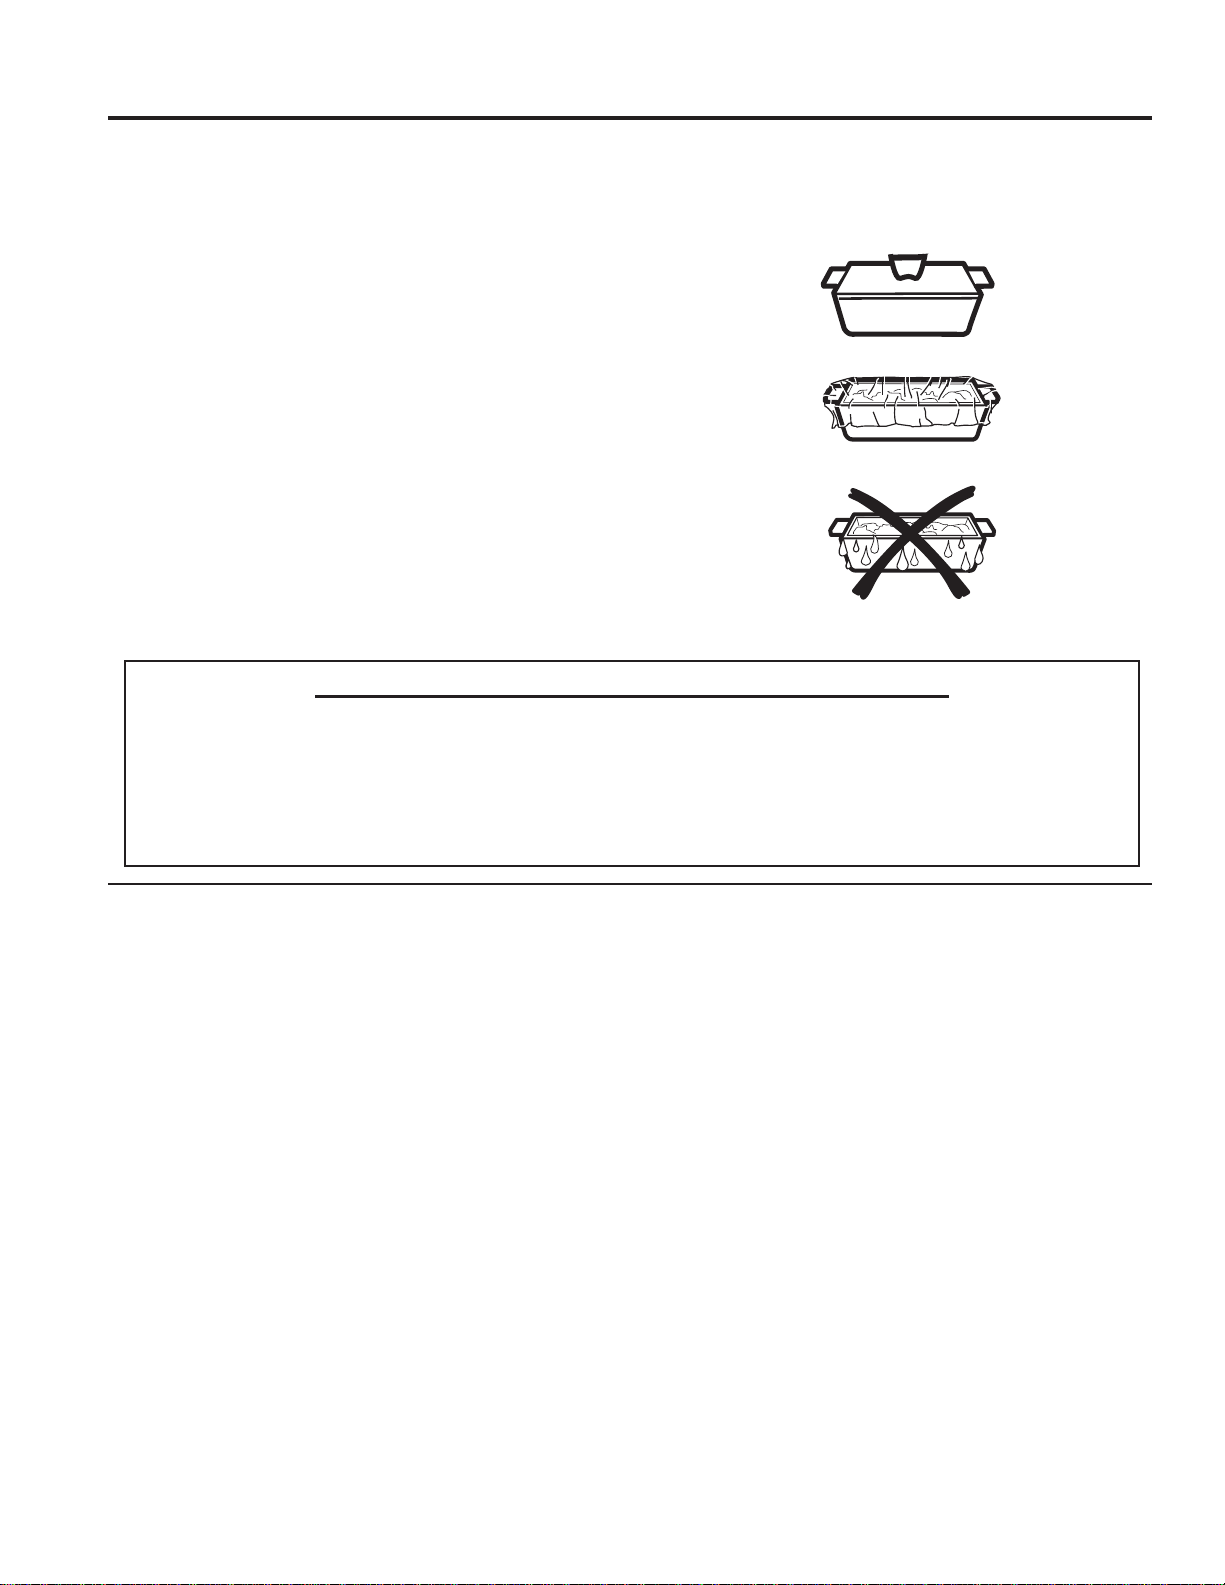
16
49-80737-1
Cocción con Microondas (Continúa)
Horno Superior: Cocción con Microondas
PROGRAMAS DE SENSOR PARA COCCIÓN POR MICROONDAS:
Ŷ*URXQG0HDW&DUQHPROLGD
Ŷ3RSFRUQ3DORPLWDV
Ŷ6RXS6RSD
Ŷ5LFH$UUR]
Ŷ9HJHWDEOHV9HUGXUDV
(enlatadas, frescas, congeladas)
Ŷ&KLFNHQ5HKHDW5HFDOHQWDPLHQWR
de pollo)
Ŷ3DVWD5HKHDW
(Recalentamiento de pasta)
Ŷ3ODWHRI)RRG5HKHDW
(Plato de recalentamiento de comida
Ŷ6RXS5HKHDW5HFDOHQWDPLHQWRGH
sopa)
Ŷ9HJHWDEOH5HKHDW
(Recalentamiento de verduras)
Cocción De Microondas Por Sensor
/DIXQFLyQGHVHQVRUGHWHFWDHODXPHQWRGHKXPHGDGOLEHUDGD
durante la cocción. El horno ajusta el tiempo de cocción
DXWRPiWLFDPHQWHDORVGLIHUHQWHVWLSRV\FDQWLGDGHVGHFRPLGD
No utilice las funciones de sensor dos veces en sucesión en la
misma porción de comida ya que puede tener como resultado
comida severamente sobrecocinada o quemada. Si el alimento
no se cocina completamente después del primer conteo
UHJUHVLYRXWLOLFHODIXQFLyQGH&RRN%\7LPH&RFLQDU3RU
Tiempo) para permitir tiempo de cocción adicional.
Los recipientes y tapas o cubiertas apropiadas son
esenciales para obtener los mejores resultados con la
cocción por sensor.
Ŷ 8WLOLFHVLHPSUHUHFLSLHQWHVDGHFXDGRVSDUDPLFURRQGDV\
F~EUDORVFRQWDSDVRHQYROWXUDSOiVWLFDYHQWLODGD1XQFD
XWLOLFHUHFLSLHQWHVGHSOiVWLFRFRQVHOODGRDMXVWDGR\DTXH
pueden prevenir que el vapor escape ocasionando que se
sobrecocinen los alimentos.
Ŷ $VHJ~UHVHGHTXHHOH[WHULRUGHORVUHFLSLHQWHVGH
cocina y el interior del horno se encuentren secos antes
GHFRORFDUORVDOLPHQWRVHQHOKRUQR/DVJRWDVGH
humedad que se convierten en vapor pueden dar lecturas
incorrectas al sensor.
Ŷ /DVEHELGDVVHFDOLHQWDQPHMRUGHVFXELHUWDV
Cubiertas
Ventiladas
Seque los platos de modo que no
den lecturas incorrectas al sensor.
Para Utilizar Todos Los Programas De Sensor
El modo de microondas del horno superior cuenta con cocción
FRQVHQVRU'HIRUPDDXWRPiWLFDGHWHFWDFXiQGRODFRPLGD
HVWiOLVWD\VHDSDJDHOLPLQDQGRODQHFHVLGDGGHSURJUDPDU
tiempos de cocción y niveles de potencia.
1. Presione la tecla Microwave (Cocinar con Microondas)
\JLUHHOGLDOGHVHOHFFLyQD&RRN%\)RRG7\SH&RFLQDU
por Tipo de Comida) o Reheat (Recalentar). Presione el
dial de selección para ingresar.
*LUHHOGLDOSDUDVHOHFFLRQDUODFRPLGDTXHGHVHH
Presione el dial de selección para ingresar.
3. Presione el dial de selección o la tecla Start/Pause
(Iniciar/ Pausar) para iniciar la cocción.
No abra la puerta del horno hasta que se esté realizando la
cuenta regresiva en la pantalla o hasta que el microondas
finalice la cocción. Si la compuerta se encuentra abierta, ciérrela
y apriete Start/Pause (Iniciar/Pausar) inmediatamente. Si los
alimentos aún no se encuentran lo suficientemente cocinados,
XWLOLFHODIXQFLyQ&RRN%\7LPH&RFFLyQ3RU7LHPSRHQHO
VHOHFWRUGHPLFURRQGDVSDUDFRFLQDUSRUPiVWLHPSR
NOTA: No utilice las funciones de sensor dos veces en
sucesión en la misma porción de comida ya que puede dar
como resultado comida severamente sobrecocinada o quemada.
Ŷ 6LKDHVWDGRXWLOL]DQGRODIXQFLyQGHFRFFLyQUiSLGD\HO
horno se encuentra caliente, esto puede ser una indicación
GHTXHHVWiGHPDVLDGRFDOLHQWHFRPRSDUDFRFLQDUSRU
sensor. Por supuesto, siempre puede proceder a cocinar
FRQODIXQFLyQ&RRN%\7LPH&RFFLyQ3RU7LHPSR
NOTA:6LHOKRUQRVHHQFXHQWUDGHPDVLDGRFDOLHQWHFDPELDUi
DXWRPiWLFDPHQWHDFRFFLyQSRUWLHPSR
Ŷ 3DUDGLVPLQXLURDXPHQWDUHOWLHPSRGHFRFFLyQHVSHUH
hasta que se muestre el conteo de tiempo regresivo en
ODSDQWDOOD/XHJRJLUHHOGLDOGHVHOHFFLyQSDUDDJUHJDUR
restar tiempo.
Ŷ 6LDEUHODFRPSXHUWDPLHQWUDVVHHQFXHQWUDXWLOL]DQGROD
IXQFLyQ6HQVRU&RRNLQJ&RFFLyQ3RU6HQVRUDSDUHFHUi
HOPHQVDMH6HQVRU(UURU(UURU'H6HQVRU&LHUUHOD
compuerta y apriete el botón Start/Pause (Iniciar/Pausar)
para comenzar nuevamente.
Notas sobre el programa de Recalentamiento:
/RVDOLPHQWRVUHFDOHQWDGRVSRGUtDQWHQHUDPSOLDVYDULDFLRQHV
GHWHPSHUDWXUD$OJXQDViUHDVVHSXHGHQHQFRQWUDU
extremadamente calientes.
(VPHMRUXWLOL]DUODIXQFLyQ&RRN%\7LPH&RFFLyQ3RU
Tiempo) y no Recalentar estos alimentos:
Ŷ 3URGXFWRVGHSDQ
Ŷ /RVDOLPHQWRVTXHGHEHQUHFDOHQWDUVHFXELHUWRV
Ŷ /RVDOLPHQWRVTXHQHFHVLWDQUHYROYHUVHRYROWHDUVH
Ŷ /RVDOLPHQWRVTXHQHFHVLWDQWHQHUXQDVSHFWRVHFRR
superficie crujiente después del recalentamiento.

17
49-80737-1
Su nuevo horno posee una variedad de modos de cocción para que pueda obtener los mejores resultados. Estos modos
VHGHVFULEHQDFRQWLQXDFLyQ3DUDDFFHGHUDUHFRPHQGDFLRQHVSDUDFRPLGDVHVSHFtILFDVFRQVXOWHODVHFFLyQGHOD*XtDGH
&RFFLyQ5HFXHUGHTXHHVSRVLEOHTXHVXQXHYRKRUQRIXQFLRQHGHPDQHUDGLIHUHQWHTXHDTXHOTXHHVWiUHHPSOD]DQGR
Modos de Horneado y Dorado
Seleccione un modo para hornear y dorar basado en el tipo y
FDQWLGDGGHFRPLGDTXHHVWiSUHSDUDQGR$OSUHSDUDUFRPLGDV
horneadas tales como tartas, galletas y masas, siempre
precaliente el horno primero. Siga las recomendaciones de
la receta sobre la colocación de la comida. Si no se brindan
pautas, centre la comida en el horno.
Horneado Tradicional
(OPRGRGHKRUQHDGRWUDGLFLRQDOHVWiSHQVDGRSDUDODFRFFLyQ
en un solo estante. Este modo usa el calor principalmente
desde el elemento inferior, pero también desde el elemento
superior para cocinar la comida. Para usar este modo presione
la tecla Bake (Hornear), gire el dial de selección para
configurar la temperatura del horno y presione el dial para
ingresar, y luego presione Start (Iniciar). El precalentamiento
generalmente se recomienda al usar este modo.
Modo para Asar
Siempre ase con la puerta cerrada. El elemento para asar en
el horno es muy potente. Monitoree la comida de cerca al asar.
Tenga cuidado al asar en posiciones de estantes superiores,
\DTXHFRORFDUODFRPLGDPiVFHUFDGHOHOHPHQWRSDUDDVDU
incrementa el humo, salpicaduras y la posibilidad de que se
incendien las grasas. No se recomienda asar en el estante
de la posición 6.
Intente asar las comidas que normalmente haría a la parrilla.
Ajuste las posiciones de los estantes para ajustar la intensidad
GHOFDORUDODFRPLGD&RORTXHODVFRPLGDVPiVFHUFDGHO
HOHPHQWRSDUDDVDUFXDQGRVHGHVHHXQDVXSHUILFLHPiV
FRFLQDGD\XQLQWHULRUSRFRFRFLGR/DVFRPLGDVPiVJUXHVDV
y las comidas cuyo interior debe ser cocinado deberían ser
asadas en un estante en una posición alejada del usado
SDUDDVDURXVDQGRODVIXQFLRQHV%URLO/R$VDU%DMR3DUD
un mejor rendimiento, centre la comida debajo del elemento
calentador para asar.
Asar Alto
(OPRGR%URLO+L$VDU$OWRXVDFDORULQWHQVRGHOHOHPHQWR
VXSHULRUSDUDVRDVDUODVFRPLGDV8VHODIXQFLyQ%URLO+L
$VDGR$OWRSDUDFRUWHVPiVGHOJDGRVGHFDUQH\RFRPLGDV
que prefiera que quedan menos cocinadas en su interior.
Para usar este modo presione la tecla Broil (Asar), gire el
GLDOGHVHOHFFLyQD+L$OWR\SUHVLRQHHOGLDOSDUDLQJUHVDU
y luego presione Start (Iniciar). No es necesario realizar el
precalentamiento al usar este modo.
Asar Bajo
(OPRGR%URLO/R$VDU%DMRXVDPHQRVFDORULQWHQVRGHO
elemento superior para cocinar la comida completamente
mientras también se realiza el dorado superficial. Use la
IXQFLyQ%URLO/R$VDGR%DMRSDUDFRUWHVGHFDUQHPiV
gruesos y/o comidas que desee que queden completamente
cocinadas. Para usar este modo presione la tecla Broil (Asar),
JLUHHOGLDOGHVHOHFFLyQD/R%DMR\SUHVLRQHHOGLDOSDUDLQJUHVDU
y luego presione Start (Iniciar).
No es necesario realizar el
precalentamiento al usar este modo.
Leudar
(OPRGR3URRI/HXGDUHVWiGLVHxDGRSDUDHOHYDUIHUPHQWDU\
leudar) masas de pan. Presione la tecla Options (Opciones),
JLUHHOGLDOSDUDVHOHFFLRQDU3URRI/HXGDU\SUHVLRQHHOGLDO
para hacer la selección, y luego presione Start (Iniciar). Cubra
ELHQODPDVDSDUDHYLWDUTXHVHVHTXH(OSDQVHHOHYDUiPiV
UiSLGDPHQWHTXHDWHPSHUDWXUDDPELHQWH6HGHEHUiREVHUYDU
que con los hornos de pared doble, la función para leudar no
VHSRGUiDFWLYDUFXDQGRVHHVWpXVDQGRXQPRGRGHOLPSLH]D
en el horno inferior.
Calentar
(OPRGR:DUP&DOHQWDUHVWiGLVHxDGRSDUDPDQWHQHU
comidas calientes hasta durante 3 horas. Para usar este
modo, presione la tecla Options (Opciones), gire el dial para
seleccionar Warm (Caliente) y presione el dial para hacer la
selección, y luego presione Start (Iniciar). Cubra las comidas
que necesitan mantener la humedad y no cubra aquellas
comidas que deberían quedar crocantes. No se requiere
SUHFDOHQWDUODVPLVPDV1RXVHODIXQFLyQ:DUP&DOHQWDU
para calentar comida fría, excepto galletas crujientes, papas
fritas o cereales secos. También se recomienda que la comida
QRVHPDQWHQJDFDOLHQWHSRUPiVGHGRVKRUDV
Modos de Cocción
Horno Inferior: Modos de Cocción
18
49-80737-1
Modo Sabático
Horno Inferior: Modo Sabático
6XQXHYRKRUQRFXPSOHFRQORVUHTXLVLWRVGHO)HULDGR6DEiWLFR-XGtRGHOD(VWUHOOD.FRQWDQGRFRQODIXQFLyQGHFRFFLyQGHO
PRGR6DEEDWK6DEiWLFR$FRQWLQXDFLyQVHGHVFULEHHQGHWDOOHODIXQFLyQGHOPRGR6DEEDWK6DEiWLFR
Para Ingresar a Sabbath Mode (Modo Sabático)
Presione la tecla Options (Opciones) del horno inferior y gire
HOGLDOD6DEEDWK6DEiWLFR\SUHVLRQHHOPLVPRSDUDKDFHUOD
VHOHFFLyQ(QODSDQWDOODDSDUHFHUi³'XULQJ6DEEDWK0RGHWKH
XSSHURYHQLVXQDYDLODEOH´'XUDQWHHO0RGR6DEiWLFRHOKRUQR
VXSHULRUQRHVWiGLVSRQLEOH3UHVLRQHHOGLDOGHVHOHFFLyQ
para continuar. Cualquier función del horno superior que esté
IXQFLRQDQGRVHGHWHQGUi\HOKRUQRLQIHULRUKDUiXQDWUDQVLFLyQ
LQPHGLDWDDOPRGR6DEEDWK6DEiWLFR
Para Cambiar la Temperatura
8QDYH]HQHOPRGR6DEEDWK6DEiWLFRDILQGHPRGLILFDUOD
temperatura del horno o de iniciar una función de horneado, el
XVXDULRSRGUiFDPELDUODWHPSHUDWXUDDXQDGHODVWHPSHUDWXUDV
configuradas previamente, como se indica a continuación:
El cambio a una de las temperaturas anteriores requiere que el
usuario presione la tecla asociada con la temperatura deseada
y que luego presione la tecla Start/Pause (Iniciar/ Pausar).
3RUHMHPSORSDUDFRQILJXUDU+RUQHDU)HOXVXDULRGHEHUi
presionar la tecla Bake (Hornear) en el horno inferior y luego
presionar la tecla Start/Pause (Iniciar/ Pausar).
/DIXQFLyQ%DNH+RUQHDUVHLQLFLDUiRVL\DHVWiIXQFLRQDQGR
ODWHPSHUDWXUDGHOKRUQRFDPELDUiHQXQPRPHQWRDOD]DUHQWUH
los 30 y 60 segundos luego de que la tecla Start/Pause (Iniciar/
Pausar) haya sido presionada, con la excepción de presionar la
tecla Clear/Off (Borrar/ Apagar)ORFXDOFDQFHODUiGHLQPHGLDWR
ODVFRQILJXUDFLRQHVGHFRFFLyQ/DXQLGDGSHUPDQHFHUiHQHO
PRGR6DEiWLFR(OFDPELRGHWHPSHUDWXUDSXHGHVHUHMHFXWDGR
en cualquier momento durante el ciclo de cocción.
Para Apagar el Horno
Presione la tecla Clear/Off (Borrar/ Apagar) o Back
(Retroceder) y luego la tecla Start (Iniciar) en cualquier
PRPHQWR(OKRUQRVHDSDJDUiGHLQPHGLDWRSHUR
SHUPDQHFHUiHQHOPRGR6DEEDWK6DEiWLFR\UHJUHVDUiDOD
SDQWDOODGHVXVSHQVLyQGH6DEEDWK6DEiWLFR
Para Salir del Modo Sabático
Mantenga presionada la tecla Back (Retroceder) durante
VHJXQGRV(OKRUQRVHDSDJDUiHQXQPRPHQWRDOD]DU
entre los 30 y 60 segundos, luego de que la tecla Back
(Retroceder) se mantenga presionada.
NOTA: No presione ninguna otra tecla durante este momento,
\DTXHGHORFRQWUDULRHOPRGR6DEEDWK6DEiWLFRVHUi
UHLQLFLDGR\QRVHSRGUiVDOLUGHOPLVPR
(OKRUQRVDOGUiGHOPRGR6DEEDWK6DEiWLFR\UHJUHVDUiDOD
pantalla por omisión.
Función de Cocción por Tiempo en el Modo Sabático
(OPRGR6DEEDWK6DEiWLFRQRSXHGHDFWLYDUXQDIXQFLyQGH
FRFFLyQSRUWLHPSRSRUVtVROR6LVHGHVHDDFWLYDU7LPHG&RRN
&RFLQDUSRU7LHPSRVHGHEHUiQUHDOL]DUORVVLJXLHQWHVSDVRV
1. Use la tecla Settings (Configuraciones) para configurar
%HHSHU9ROXPHQ9ROXPHQGHO3LWLGRHQ0XWH0XGR
2. Use la tecla Light (Luz) para configurar la luz de su horno
inferior en On (Encender).
3. Use Bake (Hornear) para programar una temperatura.
/XHJRGHSURJUDPDUXQDWHPSHUDWXUDVHOHFFLRQHXQ
tiempo de cocción e ingrese su tiempo de cocción.
Presione la tecla Start (Iniciar) para iniciar el horno.
4. Una vez iniciado el horno, NO abra la puerta hasta que el
mismo se haya terminado de precalentar y haya alcanzado
XQDWHPSHUDWXUDSDUHMD+DFHUHVWRDQWHVGHTXHVHFRPSOHWH
HOSUHFDOHQWDPLHQWRKDUiTXHHOYHQWLODGRUGHGLVWULEXFLyQGHO
aire pierda potencia de forma inmediata al abrir la puerta.
5. Una vez que la comida fue colocada en el horno, no abra
ODSXHUWDKDVWDTXHODFRFFLyQVHKD\DFRPSOHWDGR+DFHU
HVWRKDUiTXHODLPDJHQGHODSDQWDOODFDPELH\OHLQGLTXH
que cierre la puerta.
12DEUDODSXHUWDGHOKRUQRVXSHULRU+DFHUHVWR
HQFHQGHUiODOX]GHIRUPDLQPHGLDWD
No presione ningún botón adicional en los controles del horno
inferior una vez iniciada la cocción, ya que de lo contrario la
SDQWDOODFDPELDUiLQPHGLDWDPHQWHDOSUHVLRQDUHOERWyQ
NOTAS
Ŷ 'XUDQWHODIXQFLyQ6DEEDWK0RGH0RGR6DEiWLFRVyOR
%DNH+RUQHDUHQHOKRUQRLQIHULRUHVWiGLVSRQLEOH%URLO
$VDU:DUP&DOHQWDUXRWUDVIXQFLRQHVQRHVWiQ
disponibles.
Ŷ (QHOPRGR6DEEDWK6DEiWLFRHODSDJDGRDXWRPiWLFR
OXHJRGHKRUDVHVWiGHVDFWLYDGRVLQLPSRUWDU
qué configuración fue seleccionada en Settings
(Configuraciones).
Ŷ (OPRGR6DEEDWK6DEiWLFRSXHGHVHULQJUHVDGRVyORVL
QLQJ~QPRGRGHFRFFLyQHVWiIXQFLRQDQGRHQHOKRUQR
LQIHULRU,QJUHVDUD6DEEDWK0RGR0RGR6DEiWLFR
FDQFHODUiWRGDVODVIXQFLRQHVGHOKRUQRLQIHULRU\VXSHULRU
(incluyendo el temporizador y el recordatorio).
Ŷ &XDQGRXQERWyQHVSUHVLRQDGRHQ6DEEDWK0RGH0RGR
6DEiWLFRQRKD\SLWLGRVQLWRQRVQLFDPELRVHQODVOXFHV
RHQODSDQWDOOD$GHPiVFXDQGRODSXHUWDHVDELHUWDR
FHUUDGDHQ6DEEDWK0RGH0RGR6DEiWLFRQRKD\SLWLGRV
ni tonos, ni cambios en las luces o en la pantalla.
Ŷ 6LVHSURGXFHXQFRUWHGHFRUULHQWHGXUDQWHHOKRUQHDGRHQ
HOPRGR6DEEDWK6DEiWLFRODXQLGDGUHJUHVDUiDGLFKR
modo cuando el suministro de corriente sea restablecido,
SHURQRUHJUHVDUiDOPRGRGHKRUQHDGR
Tecla UI Temperatura (ºF)
Teclas del Lado Izquierdo (Horno Superior)
Microwave (Cocinar en el Microondas)
6SHHG&RRN'HIURVW
&RFFLyQ5iSLGD'HVFRQJHODU
200
&RRNLQJ2SWLRQV3RSFRUQ
(Opciones de Cocción/ Palomitas de Maíz)
225
Add 30 Sec (Agregar 30 Segundos) 250
&RQYHFWLRQ%DNH5HKHDW
+RUQHDUSRU&RQYHFFLyQ5HFDOHQWDU
300
Teclas del Lado Derecho (Horno Inferior)
%DFN5HWURFHGHU 0
&OHDU2II%RUUDU$SDJDU Se cancela inmediatamente
/LJKW/X] 325
%DNH+RUQHDU 350
%URLO$VDU
&RQYHFWLRQ%DNH:DUP
+RUQHDUSRU&RQYHFFLyQ&DOHQWDU
400
Options (Opciones) 450
19
49-80737-1
Guía de Cocción
Horno Inferior: Guía de Cocción
TIPO DE COMIDA
MODO(S) RECOMEN-
DADO(S)
POSICIÓN(ES) DE ESTANTES
RECOMENDADA SUGERENCIAS ADICIONALES
Productos Horneados
Tortas con capas, tortas rectan-
gulares, roscas, panecillos, pan
UiSLGRHQXQ6ROR(VWDQWH
Hornear
3 Use utensilios brillantes.
7RUWDVFRQFDSDVHQ0~OWLSOHV
Estantes
Hornear
2 y 4
Asegúrese de que haya un flujo de aire adecuado
(Vea la ilustración).
7RUWDVGHJUDVDSDVWHOGHiQJHO
Hornear
1 Use utensilios brillantes.
*DOOHWDVJDOOHWLWDVEL]FRFKLWRVHQ
un Solo Estante
Hornear
3 Use utensilios brillantes.
*DOOHWDVJDOOHWLWDVEL]FRFKLWRVHQ
Múltiples Estantes
Hornear
2 y 4
1, 3 y 5
Con comidas tales como galletas con azúcar, cambie la ubi-
cación de la comida parcialmente durante la cocción, a fin de
lograr resultados de cocción más parejos entre los estantes.
Bife y Cerdo
+DPEXUJXHVDV Asar Alto 5
8VHXQDROODSDUDDVDSUHFDOLHQWHPLQXWRVVLXVDUiHO
Modo para Asar por Convección. Mueva la comida hacia
DEDMRSDUDTXHTXHGHPiVSUHSDUDGD\PHQRVVRDVDGD
Preste atención a la comida al asarla.
Para un mejor rendi-
miento, centre la comida debajo del elemento que emite
calor para asar.
%LIHV\&KXOHWDV Asar Alto 5
Use una olla para asar; Mueva la comida hacia abajo
SDUDTXHTXHGHPiVSUHSDUDGD\PHQRVVRDVDGD3UHVWH
atención a la comida al asarla. Para un mejor rendimiento,
centre la comida debajo del elemento que emite calor
para asar.
'RUDGRV
Hornear
2 o 3
'HMHVLQFXEULUuse una olla chata tal como una olla para
asar. No se requiere precalentarla.
Ave
Pollo entero
Hornear
2 o 3 Use una olla chata tal como una olla para asar.
Pechugas, patas, muslos con
huesos
Asar Alto 1
6LVHHPSDQyRFXEULyFRQVDOVDHYLWHORVPRGRV%URLO+L
(Asar Alto). Ase del lado de la piel hacia abajo primero.
Preste atención a la comida al asarla.
Para un mejor rendi-
miento, centre la comida debajo del elemento que emite
calor para asar.
$VDGR%DMR
+RUQHDU
3
Pechugas de pollo deshuesadas
$VDGR%DMR
+RUQHDU
3
0XHYDODFRPLGDPiVDEDMRSDUDTXHTXHGHPiVSUHSD-
UDGD\PHQRVVRDVDGD\PiVDUULEDSDUDVRDVDUGRUDUDO
asar.
Para un mejor rendimiento, centre la comida debajo
del elemento que emite calor para asar.
Pavo entero +RUQHDU 1 o 2 Usa una olla chata tal como una olla para asar.
Pechuga de Pavo +RUQHDU 2 o 3 Use una olla chata tal como una olla para asar.
Pescado $VDGR%DMR
5 (mitad del grosor o menos)
4 (>1/2 pulgada)
Precaliente 5 minutos al Asar por Convección. Preste
atención a la comida al asarla.
Para un mejor rendimiento,
centre la comida debajo del elemento que emite calor
para asar.
Cazuelas +RUQHDU 3
Comidas Congeladas a Conveniencia
Pizza, papas fritas, tator tots,
patitas de pollo fritas, aperitivos en
un Solo Estante
+RUQHDU 3 Use utensilios brillantes.
Pizza, papas fritas, tator tots,
patitas de pollo fritas, aperitivos en
Múltiples Estantes
+RUQHDU 2 y 4
Use utensilios brillantes.
Cambie la ubicación de la comida parcialmente durante
ODFRFFLyQDILQGHREWHQHUUHVXOWDGRVGHFRFFLyQPiV
parejos.
$OKRUQHDUFXDWURWRUWDVFRQFDSDVDODYH]XVHORVHVWDQWHV
2 y 4. Coloque las ollas como se muestra, de modo que no
quede una olla encima de la otra.
Cocine la comida completamente para evitar que se produzcan
enfermedades a partir de la comida. Puede encontrar
recomendaciones sobre temperatura mínima para cocinar de
forma segura en www.IsItDoneYet.gov. Asegúrese de usar
un termómetro de comidas para medir la temperatura de las
mismas.

20
49-80737-1
Horno Inferior: Estantes
Estantes
(OKRUQRFXHQWDFRQVHLVSRVLFLRQHVGHHVWDQWHV(QOD*XtD
de Cocción, se brindan recomendaciones de posiciones de
los estantes para diferentes tipos de comidas. Se ajusta
un estante en una dirección para afectar los resultados de
FRFFLyQ3RUHMHPSORVLVHSUHILHUHQSDUWHVVXSHULRUHVPiV
oscuras en tartas, panecillos o galletas, pruebe moviendo
ODFRPLGDDXQHVWDQWHTXHVHHQFXHQWUHXQDSRVLFLyQPiV
DUULED6LHQFXHQWUDTXHODVFRPLGDVHVWiQGHPDVLDGRGRUDGDV
HQODSDUWHVXSHULRUSUXHEHPRYLHQGRODVPLVPDVPiVDEDMR
la próxima vez.
Al hornear con múltiples ollas y en múltiples estantes,
asegúrese de que haya suficiente espacio entre las ollas para
que fluya el aire.
Flat Racks
Al colocar y retirar utensilios de cocina, empuje el estante
hacia afuera del tope (posición de detención) sobre el soporte
del estante.
Para retirar el estante, empuje el mismo hacia usted,
incline el extremo frontal hacia arriba y empuje hacia
afuera.
Para hacer un reemplazo, coloque el extremo curvo del
estante (bloqueadores) en los soportes del horno, incline
hacia arriba el frente y empuje el estante hacia adentro.
Es posible que resulte difícil deslizar los estantes,
HVSHFLDOPHQWHOXHJRGHODOLPSLH]DDXWRPiWLFD&RORTXH
aceite vegetal en una tela húmeda o toalla de papel y
frote sobre los extremos izquierdo y derecho.

21
49-80737-1
Horno Inferior: Papel de Aluminio y Cobertores del Horno / Utensilios
Utensilios
Pautas de Uso de Utensilios
El material, el acabado y el tamaño de los utensilios afectan el
horneado.
/DVROODVRVFXUDVUHYHVWLGDV\RSDFDVDEVRUEHQHOFDORUPiV
UiSLGDPHQWHTXHODVROODVFODUDV\EULOODQWHV$OXVDUROODVTXH
DEVRUEHQHOFDORUPiVUiSLGDPHQWHODVFRPLGDVSRGUiQUHVXOWDU
PiVGRUDGDVFURFDQWHV\FRQXQDFDSDPiVJUXHVD
Si utiliza utensilios oscuros y revestidos, controle la comida antes
del tiempo mínimo de cocción. Si se obtienen resultados no
deseados con este tipo de utensilios, considere la posibilidad de
reducir la temperatura del horno en 25º F la próxima vez.
/DVROODVEULOODQWHVSXHGHQSURGXFLUUHVXOWDGRVGHKRUQHDGRPiV
parejos en tortas y galletas.
/DVROODVGHYLGULR\FHUiPLFDFDOLHQWDQFRQOHQWLWXGSHURUHWLHQHQ
bien el calor.
Estos tipos de ollas funcionan bien con platos tales como tartas y
postres con natilla.
/DVROODVFRQDLVODQWHGHDLUHFDOLHQWDQOHQWDPHQWH\SXHGHQ
producir fondos dorados.
0DQWHQJDORVXWHQVLOLRVOLPSLRVSDUDXQDFRFFLyQPiVSDUHMD
PRECAUCIÓN
:
No use ningún tipo de aluminio o cobertor de horno para cubrir el fondo del horno. Estos
ítems pueden atrapar el calor o derretirse, ocasionando daños sobre el producto y el riesgo de descargas, humo o incen-
dios. Los daños por uso inadecuado de estos ítems no están cubiertos por la garantía del producto.
6HSRGUiXVDUDOXPLQLRSDUDHYLWDUGHUUDPHVFRORFDQGRXQDKRMDVREUHXQHVWDQWHLQIHULRUYDULDVSXOJDGDVGHEDMRGHODFRPLGD
1RXVHPiVDOXPLQLRTXHHOQHFHVDULR\QXQFDFXEUDWRWDOPHQWHHOHVWDQWHGHXQKRUQRFRQSDSHOGHDOXPLQLR0DQWHQJDHO
aluminio a por lo menos 1 1/2” de las paredes del horno, para evitar una circulación deficiente del calor.
Papel de Aluminio y Cobertores del Horno
22
49-80737-1
Consejos Útiles
Una limpieza minuciosa ocasional con un trapo empapado
GHELFDUERQDWRVyGLFR\DJXDPDQWHQGUiHOLQWHULRUIUHVFR
También recomendamos no usar limpiadores con amoníaco
o alcohol, ya que pueden dañar el aspecto del horno. Si
elige usar un limpiador hogareño común, primero aplique el
limpiador directamente sobre una tela seca, y luego limpie el
iUHDTXHVHHQFXHQWUHVXFLD
Panel de Control
Una buena idea es limpiar el panel de control luego de cada
XVR/LPSLHFRQXQMDEyQVXDYH\DJXDRYLQDJUH\DJXD
enjuague con agua limpia y pula en seco con una tela suave.
No use limpiadores abrasivos, limpiadores líquidos fuertes,
DOPRKDGLOODVSDUDIUHJDUGHSOiVWLFRQLOLPSLDGRUHVGHKRUQRHQ
HOSDQHOGHFRQWUROGDxDUiQHODFDEDGR
Exterior del Horno
No use limpiadores de horno, limpiadores abrasivos,
limpiadores líquidos fuertes, estropajos de acero, almohadillas
SDUDIUHJDUGHSOiVWLFRQLSROYRVOLPSLDGRUHVHQHOLQWHULRU
RHOH[WHULRUGHOKRUQR/LPSLHHOPLVPRFRQDJXD\MDEyQR
una solución de vinagre y agua. Enjuague con agua limpia y
seque con una tela seca. Al limpiar supeficies, asegúrese de
que estén a temperatura ambiente y fuera del contacto con
la luz solar. Si las manchas en el borde de la ventana de la
puerta son persistentes, use un limpiador abrasivo suave o
una esponja con estropajo para obtener un mejor resultado. El
derrame de adobo, jugos de fruta, salsas de tomate y líquidos
SDUDKXPHGHFHUTXHFRQWHQJDQiFLGRVSXHGHQRFDVLRQDU
GHVFRORUDFLyQ\VHGHEHUiQOLPSLDUGHLQPHGLDWR'HMHTXHODV
superficies calientes se enfríen, y luego limpie y enjuague.
Superficies de Acero Inoxidable (en algunos modelos)
1RXVHYLUXWDVGHDFHURpVWDVGDxDUiQODVXSHUILFLH3DUD
limpiar la superficie de acero inoxidable, use agua tibia
con jabón o un limpiador o pulidor para acero inoxidable.
Siempre limpie la superficie en la dirección del veteado. Siga
las instrucciones del limpiador para limpiar la superficie de
acero inoxidable. Para realizar consultas sobre la adquisición
de productos, incluyendo limpiadores o pulidores para
electrodomésticos de acero inoxidable, lea las secciones de
Asistencia y Accesorios, en el comienzo de este manual.
Cómo Limpiar el Interior del Horno Superior
/LPSLHHOLQWHULRUGHOKRUQRFRQIUHFXHQFLDSDUDTXH
caliente bien.
Se pueden remover algunas partículas con una toalla
de papel; otras pueden requerir un trapo caliente con
una solución jabonosa. Elimine las partículas de grasa
con un trapo humedecido con agua jabonosa, luego
enjuague con un trapo húmedo.
No utilice limpiadores abrasivos o utensilios puntiagudos
en las paredes del horno.
Nunca utilice un limpiador de horno comercial en
ninguna pieza del horno.
1ROLPSLHHOLQWHULRUGHOKRUQRFRQHVSRQMLOODVPHWiOLFDV
para fregar. Pueden desprenderse piezas de la esponjilla
PHWiOLFDRFDVLRQDQGRXQDGHVFDUJDHOpFWULFD
Sello de la compuerta
(VLPSRUWDQWHPDQWHQHUHOiUHDOLPSLDHQHOOXJDUGRQGH
la compuerta se sella contra el horno. Utilice únicamente
detergentes de acción mediana, no abrasivos aplicados con
XQDHVSRQMDRWUDSRK~PHGR(QMXiJXHODELHQ
Base Giratoria Desmontable
6HGHEHOLPSLDUFRQIUHFXHQFLDHOiUHDORFDOL]DGDGHEDMRGH
la base giratoria para evitar olores y humo durante un ciclo de
cocción.
Si se deja caer, la base giratoria se puede romper.
/iYHODFXLGDGRVDPHQWHHQDJXDWLELDMDERQRVD6pTXHOD
completamente y vuelva a colocarla.
Para colocar la base giratoria, coloque su centro sobre el rotor
ubicado en el centro del horno y gírela hasta que se asiente
en su lugar. (Asegúrese de que la superficie lisa de la base
giratoria se encuentre colocada hacia arriba y que el centro se
encuentre asentado de manera segura en el rotor.)
Asegúrese de que la corriente eléctrica esté apagada y que todas las superficies estén frías antes de limpiar cualquier parte del horno.
Limpieza del Horno
CUIDADO Y LIMPIEZA: Limpieza del Horno
Paredes, piso, ventanilla interna, piezas
de metal y plástico en la compuerta
No haga funcionar el horno sin tener
colocada en su lugar la base giratoria.
Base giratoria

23
49-80737-1
How To Clean The Upper Oven Interior (Continúa)
Bandejas Para Cocinar Y Lámina De Hornear
Para evitar que se rompan las bandejas, deje que se enfríen
FRPSOHWDPHQWHDQWHVGHOLPSLDUODV/DYHODVEDQGHMDVHQ
DJXDMDERQRVDWLELDRHQODPiTXLQDODYDSODWRV
1RXWLOLFHHVSRQMLOODVPHWiOLFDVSDUDIUHJDUROLPSLDGRUHV
abrasivos, ya que pueden dañar el acabado. Se puede utilizar
una esponjilla cubierta de jabón para limpiar las bandejas.
Limpieza del Horno (Continúa)
CUIDADO Y LIMPIEZA: Limpieza del Horno
Cómo Limpiar el Interior del Horno Inferior
El interior de su nuevo horno puede ser limpiado de forma
PDQXDORXWLOL]DQGRORVPRGRV6WHDP&OHDQ/LPSLH]DFRQ
9DSRUR6HOI&OHDQ/LPSLH]D$XWRPiWLFD
El derrame de adobo, jugos de fruta, salsas de tomate y
OtTXLGRVSDUDKXPHGHFHUTXHFRQWHQJDQiFLGRVSXHGHQ
RFDVLRQDUGHVFRORUDFLyQ\VHGHEHUiQOLPSLDUGHLQPHGLDWR
Espere a que las superficies calientes se enfríen, y luego
limpie y enjuague.
Limpieza Manual
No use limpiadores de horno, limpiadores abrasivos,
limpiadores líquidos fuertes, estropajos de acero, almohadillas
para fregar, ni polvos limpiadores en el interior del horno.
/LPSLHHOPLVPRFRQDJXD\MDEyQRXQDVROXFLyQGHYLQDJUH
y agua. Enjuague con agua limpia y seque con una tela seca.
Al limpiar supeficies, asegúrese de que estén a temperatura
ambiente y fuera del contacto con la luz solar.
Modo de Limpieza con Vapor
/DOLPSLH]DFRQYDSRUHVWiSHQVDGDSDUDOLPSLDUSHTXHxRV
GHUUDPHVXVDQGRDJXD\DXQDWHPSHUDWXUDGHOLPSLH]DPiV
EDMDTXHODIXQFLyQ6HOI&OHDQ/LPSLH]D$XWRPiWLFD
3DUDXVDUODIXQFLyQ6WHDP&OHDQ/LPSLH]DFRQ9DSRUOLPSLH
las grasas y suciedades del horno. Vierta una taza de agua en
la parte inferior del horno. Cierre la puerta. Presione la tecla
Options (Opciones)VHOHFFLRQH6WHDP&OHDQ/LPSLH]DFRQ
Vapor), y luego presione Start (Iniciar)/DSXHUWDGHOKRUQR
VHWUDEDUi1RSRGUiDEULUODSXHUWDGXUDQWHORVPLQXWRVGH
ODOLPSLH]DFRQYDSRU\DTXHHVWRUHGXFLUiVXUHQGLPLHQWR$O
ILQDOL]DUHOFLFORGHOLPSLH]DDOYDSRUODSXHUWDVHGHVWUDEDUi
/LPSLHFXDOTXLHUH[FHVRGHDJXD\FXDOTXLHUVXFLHGDGTXH
haya quedado.
Modo de Limpieza Automática
/HDODV,QVWUXFFLRQHVGH6HJXULGDGGHO+RUQRFRQ/LPSLH]D
$XWRPiWLFDHQHOFRPLHQ]RGHHVWHPDQXDODQWHVGHXVDU
HOPRGR6HOI&OHDQ/LPSLH]D$XWRPiWLFD(VWHPRGRXVD
temperaturas muy altas para limpiar el interior del horno.
&XDQGRXVHHVWDIXQFLyQODSXHUWDGHOKRUQRVHWUDEDUi
$QWHVGHXWLOL]DUHOFLFORGHOLPSLH]DDXWRPiWLFDOLPSLHOD
grasa y restos de comida que haya en el horno. Retire todos
los artículos del horno, excepto los estantes esmaltados
FRORURVFXUR/RVHVWDQWHVEULOODQWHVRGHSODWD\FXDOTXLHU
utensilio u otros artículos deberían ser retirados del horno
DQWHVGHLQLFLDUXQFLFORGHOLPSLH]DDXWRPiWLFD
Presione la
tecla Options (Opciones)VHOHFFLRQH6HOI&OHDQ/LPSLH]D
$XWRPiWLFD\VHH[KLELUiXQWLHPSRGHOLPSLH]DDXWRPiWLFD
por omisión. El tiempo de limpieza puede ser modificado a
3, 4 o 5 horas, usando el dial de selección. Cuando el nivel
de suciedad en el horno sea muy alto, se recomienda usar el
WLHPSRGHOLPSLH]DPi[LPRGHKRUDV6LGHVHDXVDUHOWLHPSR
por omisión, presione la tecla Start (Iniciar) inmediatamente
OXHJRGHVHOHFFLRQDUODWHFOD6HOI&OHDQ/LPSLH]D$XWRPiWLFD
(OKRUQRVHDSDJDUiGHIRUPDDXWRPiWLFDFXDQGRHOFLFORGH
OLPSLH]DDXWRPiWLFDVHDFRPSOHWDGR/DSXHUWDSHUPDQHFHUi
bloqueada hasta que el horno se haya enfriado. Una vez que
el horno se haya enfriado, limpie cualquier ceniza que haya
quedado en el horno.
IMPORTANTE:/DVHPDQDFLRQHVSURGXFLGDVSRUHOFLFORGH
autolimpieza de cualquier horno afectan la salud de algunas
aves de manera notoria. Procure llevar sus aves a otra
habitación bien ventilada.
Bandeja de vidrio transparente
para la función de microondas
Estantes Planos
/RVHVWDQWHVSODQRVVHSRGUiQGHMDUHQODFDYLGDGGXUDQWHOD
OLPSLH]DDXWRPiWLFDVLVHWUDWDGHHVWDQWHVHVPDOWDGRVQR
EULOODQWHVRVHSRGUiQODYDUFRQDJXDFDOLHQWH\MDEyQ
(VSRVLEOHTXHUHVXOWHPiVGLItFLOGHVOL]DUORVHVWDQWHV
HVSHFLDOPHQWHOXHJRGHODOLPSLH]DDXWRPiWLFD&RORTXH
aceite vegetal en una tela húmeda o toalla de papel y frote
sobre los extremos izquierdo y derecho.

24
49-80737-1
PELIGRO DE DESCARGA O QUEMADURAS:$QWHVGHUHHPSOD]DUODOiPSDUDGHOX]
del horno, desconecte la conexión eléctrica del horno del fusible principal o del panel del
GLV\XQWRU6LHVWRQRVHFXPSOHVHSRGUiSURGXFLUXQDGHVFDUJDHOpFWULFDRXQLQFHQGLR
ADVERTENCIA
PRECAUCIÓN
RIESGO DE INCENDIO:/DWDSDGHYLGULR\ODOiPSDUDGHOX]VHGHEHUiQUHWLUDUFXDQGR
estén frías. Tocar el vidrio caliente sin protección en las manos o con un trapo húmedo
puede ocasionar quemaduras.
'HVFRQHFWHODFRUULHQWHGHVGHHOIXVLEOHSULQFLSDORHOSDQHO
del disyuntor.
2. Retire los estantes del horno.
'HVOLFHXQGHVWRUQLOODGRUGHSXQWDSODQDHQWUHODFDMD\OD
tapa de luz de vidrio.
4. Apoye la tapa de luz de vidrio con dos dedos para evitar
que se caiga al fondo del horno. Tenga cuidado de no
astillar la cubierta del horno.
'HIRUPDVXDYHJLUHODSXQWDGHOGHVWRUQLOODGRUSDUDDIORMDU
la tapa de luz de vidrio.
6. Retire la tapa de luz de vidrio.
5HWLUHODOiPSDUDVRVWHQLHQGRILUPHPHQWH\GHVOL]DQGR
la misma hacia afuera, hasta que las dos clavijas hayan
GHMDGRHOVRSRUWHGHFHUiPLFD
1RWRTXHHOYLGULRGHODQXHYDOiPSDUDFRQORVGHGRV(VWR
KDUiTXHODOiPSDUDIDOOHDOGDUOX]7RPHODOiPSDUDGH
reemplzado con una toalla limpia o un pañuelo de papel
con las clavijas hacia abajo. Aliñe las dos clavijas en el
VRSRUWHGHFHUiPLFDSUHVLRQDQGRVXDYHPHQWHKDVWDTXHOD
OiPSDUDTXHGHDVHJXUDGDHQODILFKDGHFHUiPLFD
'HVOLFHODVOHQWHVSURWHFWRUDVGHOVRSRUWH\SUHVLRQHKDVWD
que las pinzas queden enganchadas en la caja.
10. Vuelva a conectar la corriente.
Reemplazo de la Lámpara del Horno Inferior
Mantenimiento del Horno Inferior
CUIDADO Y LIMPIEZA: Mantenimiento del Horno Inferior
Levante la Puerta del Horno Inferior
/DSXHUWDHVPX\SHVDGD7HQJDFXLGDGRDOUHWLUDU\OHYDQWDUODSXHUWD
No levante la puerta usando la manija.
Para retirar la puerta:
1. Abra la puerta totalmente.
2. Empuje los bloqueos de la bisagra hacia abajo en
dirección a la estructura de la puerta, hasta la posición
desbloqueada. Es posible que necesite una herramienta tal
como un destornillador pequeño de punta plana.
3. Firmemente tome ambos lados de la puerta por la parte
superior.
4. Cierre la puerta hasta la posición de retiro de la misma.
/DSXHUWDGHEHUtDVHUDELHUWDDSUR[LPDGDPHQWHD´VLQ
obstrucción sobre la misma.
/HYDQWHODSXHUWDKDFLDDUULED\DIXHUDKDVWDTXHORV
brazos de las bisagras queden fuera de las ranuras.
Para reemplazar la puerta:
1. Firmemente tome ambos lados de la puerta por la parte
superior.
2. Comenzando desde el lado izquierdo, con la puerta en el
PLVPRiQJXORGHODSRVLFLyQGHUHWLURDSR\HODKHQGLGXUD
del brazo de la bisagra en el extremo inferior de la ranura
GHODELVDJUD/DDEHUWXUDHQHOEUD]RGHODELVDJUDGHEHUi
estar totalmente apoyada en la parte inferior de la ranura.
Repita el procedimiento del lado derecho.
3. Abra la puerta totalmente. Si la puerta no se abre
WRWDOPHQWHODKHQGLGXUDQRHVWiFRUUHFWDPHQWHDSR\DGDHQ
el extremo inferior de la ranura.
4. Empuje los bloqueos de la bisagra contra la estructura
frontal de la cavidad del horno, hasta la posición de
bloqueo.
5. Cierre la puerta del horno.
Posición de retiro
Bloqueo de la bisagra
Ranura
Empuje los bloqueos de la bisagra
hacia abajo para desbloquear
Extremo inferior de la ranura
Bloqueo de
la bisagra
Brazo de
la bisagra
Hendidura
Empuje el
bloqueo de la
bisagra hacia
arriba hasta
que quede
bloqueado
Brazo de la
bisagra

25
49-80737-1
CONSEJOS PARA LA SOLUCIÓN DE PROBLEMAS (Horno Superior)
Problema Causa Posible Qué Hacer
VENTILADOR
El ventilador continúa
funcionando después de
terminar de cocinar
El horno se está enfriando. (OYHQWLODGRUVHDSDJDUiDXWRPiWLFDPHQWHFXDQGRODV
piezas internas del horno se hayan enfriado.
El ventilador del horno
irradia aire caliente mientras
el horno se encuentra
encendido
Esto es normal.
El ventilador se enciende
automáticamente cuando
utilizando el microondas
Esto es normal.
COCCIÓN
El horno hace sonidos
inusuales mientras se cocina
Chasquidos y ventiladores soplando
son normales. El tablero de relés
está encendiendo y apagando los
componentes.
Estos sonidos son normales.
Se expulsa humo del horno
cuando abro la compuerta
Los alimentos tienen alto contenido de
grasa. Pulverizador en aerosol utilizado
en las bandejas.
El humo es normal cuando se cocina alimentos con alto
contenido de grasa.
La comida no está
completamente cocinada
o dorada al finalizar un
programa de cocción
Los tiempos programados podrían no
corresponder al tamaño o cantidad de
comida que está cocinando.
Ajustar el tiempo para nivel de cocción o ajuste las luces
superiores o inferiores para asar y para el nivel de cocción.
SENSOR ERROR (ERROR
DE SENSOR) mostrado junto
con una señal del horno
Cantidad o tipo de comida colocado
en el horno no corresponde con la
programación que fue elegido.
Apriete el botón Clear/Off (Borrar/ Apagar) Ajuste el
programa del horno corresponda con la comida o líquido a
ser cocinado o calentado.
Vapor no detectado por el horno porque
la envoltura plástico no se ventiló, una
tapa muy ajustada estaba sobre el plato
o se cubrió un líquido.
9HQWLOHODHQYROWXUDGHSOiVWLFRXWLOLFHXQDWDSDPiVIORMDR
destape los líquidos cuando los cocine o caliente.
PANTALLA
La pantalla se encuentra en
blanco
Es posible que el modo de ahorro de
corriente esté activado.
Revise el menú Settings (Configuraciones) para el reloj
ajustes de la pantalla. Encienda la pantalla.
Es posible que un fusible de su hogar
se haya quemado o que el disyuntor se
haya desconectado.
Reemplace el fusible o reinicie el disyuntor.
Corte o exceso de corriente 5HLQLFLHHOUHORM6LHOKRUQRHVWXYRHQXVRGHEHUiUHLQLFLDU
el mismo presionando la tecla Clear/Off (Borrar/ Apagar)
configurando el reloj y reiniciando cualquier función de
cocción.
Control is LOCKED (Control
BLOQUEADO) aparece en la
pantalla
El control ha sido bloqueado. Mantenga presionada la tecla Settings (Configuraciones)
durante 3 segundos para desbloquear el control.
La pantalla de control está
iluminada pero el horno no
se inicia
No se ha programado el reloj. Programe el reloj.
Compuerta no cerrada bien. Abra la compuerta y ciérrela bien.
La tecla Start/Pause (Iniciar/ Pausar)
no se presionó luego de ingresar la
configuración de la cocción.
Presione la tecla Start/Pause (Iniciar/ Pausar) o el dial de
selección.
Ya se ha ingresado otra selección
en el horno y no se ha apretado el
botón Clear/Off (Borrar/ Apagar) para
cancelarla.
Presione la tecla Clear/Off (Borrar/ Apagar).
Tamaño, cantidad o tiempo de cocción
no ingresado después de la selección
final.
Asegúrese que ha ingresado el tiempo después de
seleccionar.
Se apretó Clear/Off (Borrar/ Apagar)
accidentalmente.
Reinicie el programa de cocción y presione la tecla Start/
Pause (Iniciar/ Pausar).
¡Ahorre tiempo y dinero! Primero revise los cuadros que aparecen en las siguientes páginas y es posible que no necesite
solicitar reparaciones.
Consejos para la Solución de Problemas... Antes de solicitar el servicio técnico

26
49-80737-1
CONSEJOS PARA LA SOLUCIÓN DE PROBLEMAS (Horno Superior)
Problema Causa Posible Qué Hacer
OTROS PROBLEMAS
La compuerta y el interior del
horno se sienten calientes
Las lámparas térmicas producen calor intenso
en un espacio reducido.
Esto es normal. Use guantes térmicos de cocina
para sacar la comida cuando esté lista.
El horno no enciende Un fusible en su hogar puede haberse fundido
o el interruptor de circuitos fue activado.
Reemplace el fusible o reinicie sus interruptores de
circuitos.
No puede editar las
funciones de cocción
Es posible que algunas funciones de cocción
programadas previamente no se puedan
editar a fin de evitar la degradación del
rendimiento de la cocción.
Esto es normal.
La teclas de este lado del
control no funcionan
El control bloqueó el uso de estas teclas y se
debe reiniciar.
Mantenga presionada la tecla Clear/Off (Borrar/
Apagar) del otro lado de la pantalla durante 30
VHJXQGRV6LHVWRQRUHLQLFLDHOFRQWUROSRGUiVHU
necesario hacer que el disyuntor realice ciclos.
Consejos para la Solución de Problemas... Antes de solicitar el servicio técnico
DECLARACIÓN DE LA FCC SOBRE INTERFERENCIA DE
FRECUENCIAS RADIALES
Este equipo genera y usa potencia de frecuencia
ISM y si no es instalado y usado de forma adecuada,
en cumplimiento estricto con las instrucciones del
IDEULFDQWHVHSRGUiQRFDVLRQDULQWHUIHUHQFLDVHQ
la recepción de radio y televisión. Se realizó una
evaluación por tipo y se encontró en cumplimiento
con los límites de un equipo ISM, de acuerdo con la
parte 18 de las Reglas FCC, que fueron diseñadas
para brindar una protección razonable contra dichas
interferencias en una instalación residencial. Sin
embargo, no se garantiza que no se presenten
interferencias en una instalación en particular. Si el
equipo provoca interferencias en la recepción de radio
o televisión, lo que se puede determinar encendiendo y
apagando el equipo, se aconseja al usuario que intente
FRUUHJLUODLQWHUIHUHQFLDDWUDYpVGHXQDRPiVGHODV
siguientes medidas:
ŶReoriente la antena receptora de radio o televisión.
Ŷ5HXELTXHHOKRUQRPLFURRQGDVFRQUHVSHFWRDO
receptor.
Ŷ8ELTXHHOKRUQRPLFURRQGDVHQXQDSRVLFLyQDOHMDGD
del receptor.
Ŷ(QFKXIHHOKRUQRPLFURRQGDVHQXQWRPDFRUULHQWH
diferente, de modo que el horno microondas y el
receptor estén en diferentes circuitos de empalmes.
El fabricante no es responsable por cualquier
interferencia de radio o TV ocasionada por una
modificación no autorizada sobre este horno
microondas. Es responsabilidad del usuario corregir
dicha interferencia.
27
49-80737-1
Problema Causa Posible Qué Hacer
Mi horno nuevo no
cocina como el anterior.
¿Hay algún problema con
las configuraciones de
temperatura?
Su horno nuevo cuenta con un sistema de cocción
diferente con relación al anterior y, por lo tanto, es
posible que cocine de forma diferente.
En los primeros usos, use los tiempos y
temperaturas de su receta con cuidado. Si aún
piensa que su horno nuevo cocina con demasiado
FDORURGHPDVLDGRIUtRSRGUiDMXVWDUHOWHUPRVWDWR
usted mismo para aplicar su preferencia de
cocción específica. NOTA: Este ajuste afecta las
WHPSHUDWXUDVGHODIXQFLyQ%DNH+RUQHDUQR
DIHFWDUiODVIXQFLRQHV%URLO$VDUR&OHDQ/LPSLDU
La comida no se hornea
de forma apropiada
Controles del horno configurados de forma
incorrecta.
Consulte la sección Modos de Cocción.
La posición del estante es incorrecta o el estante no
está nivelado.
6H&RQVXOWHODVHFFLyQ0RGRVGH&RFFLyQ\OD*XtD
de Cocción.
Uso de una cacerola incorrecta o de una cacerola de
tamaño incorrecto.
Consulte la sección Utensilios.
La temperatura del horno debe ser ajustada. Consulte la sección Settings (Configuraciones).
Sustitución de ingredientes Sustituir ingredientes puede modificar el resultado
de la receta.
La comida no asa de
forma apropiada
Controles del horno configurados de forma
incorrecta.
Asegúrese de seleccionar el modo correcto para
asar.
Se usó una posición incorrecta del estante. Para acceder a sugerencias de ubicación de
HVWDQWHVFRQVXOWHOD*XtDGH&RFFLyQ
Se cocinó comida en una olla caliente. Asegúrese de que el utensilio esté frío
Utensilio de cocina inadecuado para asar. Use una olla específicamente diseñada para asar
El papel de aluminio usado para la olla y la rejilla
para asar no se ajustó ni cortó de forma apropiada,
según lo recomendado.
6LXVDUiSDSHOGHDOXPLQLRGHEHUiXVDUVH
conforme con las aberturas de la olla.
En algunas áreas, es posible que el nivel de corriente
(voltaje) sea bajo.
Precaliente el elemento para asar durante 10
minutos.
La temperatura del horno
es demasiado caliente o
demasiado fría
La temperatura del horno debe ser ajustada. Consulte la sección Settings (Configuraciones).
El horno no funciona o
parece no funcionar
Es posible que un fusible de su hogar se haya
quemado o que el disyuntor se haya desconectado.
Reemplace el fusible o reinicie el disyuntor.
Controles del horno configurados de forma
incorrecta.
&RQVXOWHODVHFFLyQ8VRGHO+RUQR
El horno se encuentra en Sabbath Mode (Modo
Sabático)
Verifique que el horno no esté en Sabbath Mode
0RGR6DEiWLFR&RQVXOWHODVHFFLyQGHO0RGR
6DEiWLFR
Sonido de “chisporroteo”
o “traqueo”
Éste es el sonido de metal calentándose o enfriándose
durante las funciones de cocción y limpieza.
Esto es normal.
¿Por qué la estufa hace
un sonido de “clic”
cuando uso el horno?
Su estufa fue diseñada para mantener un control más
ajustado sobre la temperatura del horno. Es posible
que escuche que los elementos de calentamiento del
horno hagan sonidos de “clic” con mayor frecuencia
que con hornos más antiguos para lograr mejores
resultados durante los ciclos de horneado, asado,
convección y limpieza automática.
Esto es normal.
El reloj y el temporizador
no funcionan
Es posible que un fusible de su hogar se haya
quemado o que el disyuntor se haya desconectado.
Reemplace el fusible o reinicie el disyuntor.
CONSEJOS PARA LA SOLUCIÓN DE PROBLEMAS (Horno Inferior)
Consejos para la Solución de Problemas... Antes de solicitar el servicio técnico

28
49-80737-1
Problema Causa Posible Qué Hacer
La luz del horno no funciona La lámpara está floja o presenta defectos. $MXVWHRUHHPSODFHODOiPSDUD
La luz de funcionamiento del interruptor
está rota.
/ODPHDOVHUYLFLRWpFQLFR
El modo de limpieza
automática del horno no
funciona
La temperatura del horno es demasiado
caliente como para configurar la limpieza
automática.
Espere a que el horno se enfríe y reinicie los controles.
Los controles del horno están configurados
de forma incorrecta.
&RQVXOWHODVHFFLyQGH/LPSLH]DGHO+RUQR
Exceso de humo durante un
ciclo de limpieza
Suciedad o grasa excesiva. Presione la tecla Clear/Off (Borrar/ Apagar)
Abra las
ventanas para liberar el humo en la habitación. Espere
KDVWDTXHODSDQWDOOD29(1,6&22/,1*'225,6
/2&.('(OKRUQRVHHVWiHQIULDQGRODSXHUWDHVWi
EORTXHDGDGHVDSDUH]FD/LPSLHHOH[FHVRGHVXFLHGDG\
reinicie el ciclo de limpieza.
Humo excesivo al asar La comida está demasiado cerca del
quemador.
%DMHODSRVLFLyQGHOHVWDQWHFRQFRPLGD
La puerta del horno no se
abrirá luego de un ciclo de
limpieza
El horno está demasiado caliente. Espere a que el horno se enfríe por debajo de la
temperatura de bloqueo.
El horno no limpia luego de
un ciclo de limpieza
Los controles del horno están configurados
de forma incorrecta.
&RQVXOWHODVHFFLyQGH/LPSLH]DGHO+RUQR
El horno estaba demasiado sucio. /LPSLHGHUUDPHVH[FHVLYRVDQWHVGHLQLFLDUHOFLFORGH
limpieza. Es posible que, en hornos con mucha suciedad,
VHDQHFHVDULRXVDUODOLPSLH]DDXWRPiWLFDQXHYDPHQWHR
XVDUODGXUDQWHXQSHUtRGRGHWLHPSRPiVSURORQJDGR
Aparece “CLOSE DOOR TO
CONTINUE COOKING” (Cierre
la puerta para continuar
cocinando) en la sección de
pantalla
La puerta está abierta durante una función
de cocción o limpieza.
Cierre la puerta del horno.
Aparece “OVEN IS COOLING
DOOR IS LOCKED” (El horno
se está enfriando; la puerta
está bloqueada) en la sección
de pantalla.
La puerta del horno está bloqueada debido
a que la temperatura interior del horno no
descendió por debajo de la temperatura de
bloqueo.
Presione la tecla Clear/Off (Borrar/ Apagar)
'HMHTXHHO
horno se enfríe.
En la pantalla se muestra un
error del horno y “SERVICE
MAY BE NEEDED” (Es posible
que necesite el servicio
técnico).
Tiene un código de error de función. Presione la tecla Clear/Off (Borrar/ Apagar)
Permita que el
horno se enfríe durante una hora. Vuelva a poner el horno
en funcionamiento.
Si el código de función se repite. 'HVFRQHFWHWRWDOPHQWHODFRUULHQWHGHODFRFLQDGXUDQWHSRUOR
menos 30 minutos y vuelva a conectar la misma. Si el código
de error de función se repite, llame al servicio técnico.
Olor a “quemado” o “aceite”
desde la ventilación
Esto es normal en un horno nuevo y
desaparecerá con el tiempo.
Para acelerar el proceso, configure un ciclo de limpieza
DXWRPiWLFDSRUXQPtQLPRGHKRUDV&RQVXOWHODVHFFLyQ
GH/LPSLH]DGHO+RUQR
Olor fuerte Un olor en la aislación alrededor del interior
del horno es normal desde las primeras
veces en que el horno es usado.
(VWRHVWHPSRUDULR\GHVDSDUHFHUiOXHJRGHYDULRVXVRVR
GHXQFLFORGHOLPSLH]DDXWRPiWLFD
Ruido del ventilador Es posible que un ventilador de
enfriamiento se active automáticamente.
(VWRHVQRUPDO(OYHQWLODGRUGHHQIULDPLHQWRVHHQFHQGHUi
para enfriar las partes internas. Es posible que funcione
hasta durante una hora y media, una vez que el horno se
haya apagado.
La puerta de vidrio del horno
parece estar “teñida” o tener
un color “arcoíris”. ¿Es esto
un defecto?
No. El vidrio del horno interno está cubierto
con una barrera de calor que refleja este
último nuevamente hacia el horno, a fin de
evitar la pérdida de calor y de mantener fría
la puerta externa mientras se hornea.
(VWRHVQRUPDO%DMRFLHUWDVOXFHV\iQJXORVHVSRVLEOHTXH
visualice esta tinta o arcoíris.
A veces el horno tarda más
en precalentarse a la misma
temperatura
Utensilio o comida en el horno (OXWHQVLOLRRODFRPLGDHQHOKRUQRKDUiTXHpVWHWDUGH
PiVHQSUHFDOHQWDUVH5HWLUHHVWRVDUWtFXORVSDUDUHGXFLUHO
tiempo de precalentamiento.
Número de estantes en el horno $JUHJDUPiVHVWDQWHVDOKRUQRKDUiTXHpVWHWDUGHPiVHQ
precalentarse. Retire algunos estantes.
CONSEJOS PARA LA SOLUCIÓN DE PROBLEMAS (Horno Inferior)
Consejos para la Solución de Problemas... Antes de solicitar el servicio técnico