Loading ...
Loading ...
Loading ...
24 INSTALLATION
6
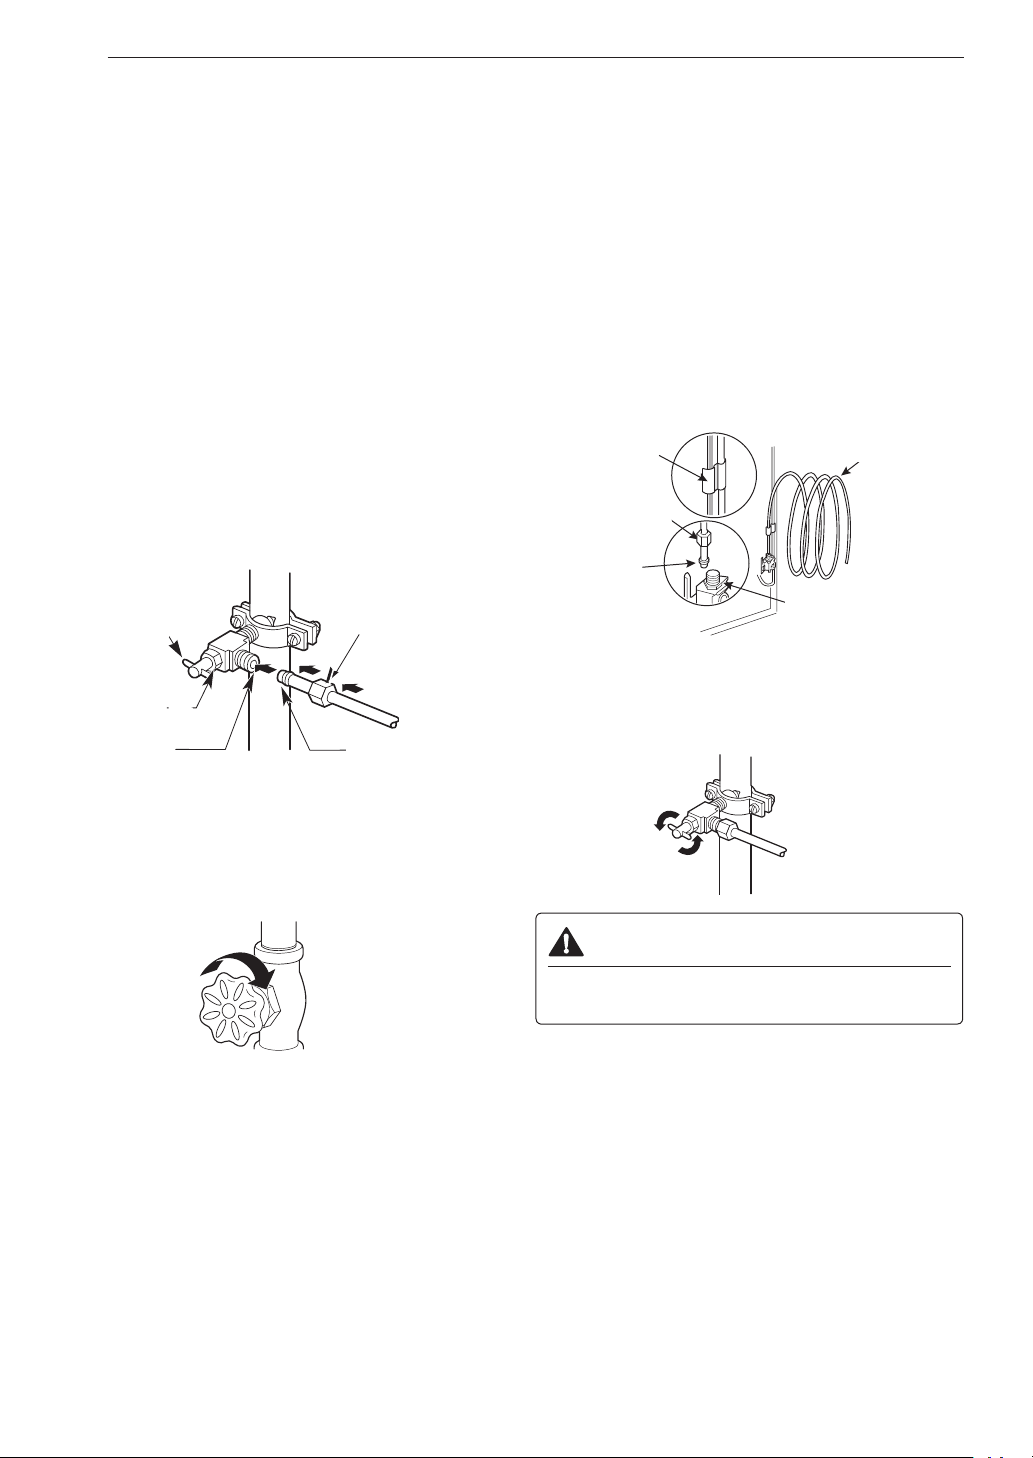
Route the tubing.
Route the tubing between the cold water line and
the refrigerator.
Route the tubing through a hole drilled in the wall
or floor (behind the refrigerator or adjacent base
cabinet) as close to the wall as possible.
NOTE
• Be sure there is sufficient extra tubing (about 8 ft.
coiled into three turns of about 10 in. diameter) to
allow the refrigerator to move out from the wall after
installation.
7
Connect the tubing to the valve.
Place the compression nut and ferrule (sleeve)
for copper tubing onto the end of the tubing and
connect it to the shutoff valve.
Make sure the tubing is fully inserted into the
valve. Tighten the compression nut securely.
Saddle-Type
Shutoff Valve
Packing Nut
Outlet Valve
Compression Nut
Ferrule (sleeve)
8
Flush out the tubing.
Turn the main water supply on and flush out the
tubing until the water is clear. Shut the water off at
the water valve after about one quart of water has
been flushed through the tubing.
9
Connect the tubing to the refrigerator.
NOTE
• Before making the connection to the refrigerator, be
sure that the refrigerator power cord is not plugged
into the wall outlet.
• Remove the plastic flexible cap from the water
valve.
• Place the compression nut and ferrule (sleeve) onto
the end of the tubing as shown.
• Insert the end of the copper tubing into the
connection as far as possible. While holding the
tubing, tighten the fitting.
Tubing Clamp
¼ in. Compression Nut
Ferrule (sleeve)
¼ in. Tubing
Refrigerator Connection
10
Turn the water on at the shutoff valve.
Tighten any connections that leak.
CAUTION
• Check to see if leaks occur at the water line
connections.
Loading ...
Loading ...
Loading ...