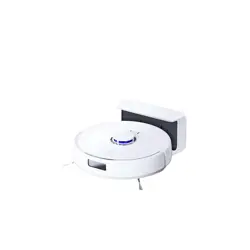

Narwal Freo X Plus Robot Vacuum and Mop
Model: YJCC018
User Manual
TM
01
Dear users:
Thank you for purchasing Narwal products. To access comprehensive support from Narwal, you are recommended to read carefully the
manual and illustrations before using the product. Please keep the manual properly.
The manual may be updated from time to time based on product updates and user feedback. Please scan the QR code below to browse
In case of any problem in using the product, please contact Narwal after-sales customer service through the following ways:
Customer service email:
[email protected](North America)
[email protected](Germany)
[email protected](Italy)
[email protected](Japan)
[email protected](France)
[email protected](South Korea)
[email protected](Spain)
*For other countries, please refer to the after-sales contact information provided by your local vendors
We wish you a pleasant experience!
Electronic user manual
Elektronisches Benutzerhandbuch
Manual de usuario electrónico
Manuel d'utilisation électronique
Электронное руководство пользователя
Sổ tay điện tử
ינורטקלאךירדמ
Elektronik Kılavuz
Instrukcja elektroniczna

02
CONTENTS
1. Product At a Glance
1.1 Check list
1.2 Robot
1.3 Base station
1.4 Buons and indicators
2. Get Ready Before Use
3. How to Use
3.1 Organize the home environment
3.2 Mapping
3.3 Cleaning
4. Parameters
7.1 Specifications
03
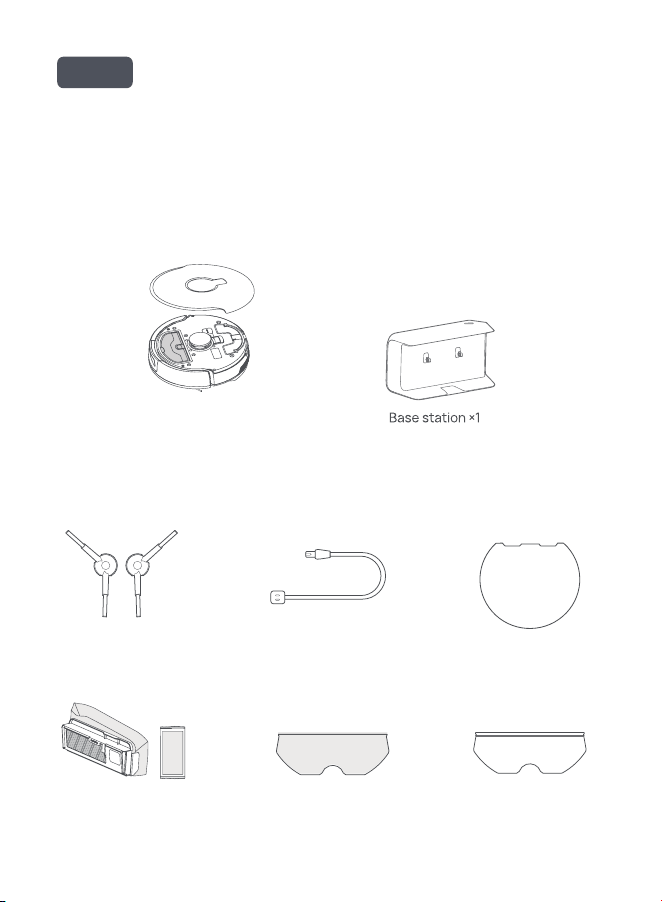
Robot ×1 (dust bin ×1,
water tank ×1, roller brush ×1,
mopping module ×1 included)
1. Product at a Glance
1.1 Check list
Main parts
Accessories
Side brush ×2 Power cord ×1 Moisture-proof pad ×1
Disposable dust bag &
dust bag guardian ×2
Disposable mop pad ×2Washable mop
pad ×1
en
04
Structured light
forward sensor
Bumper sensor
Structured light
edge sensor
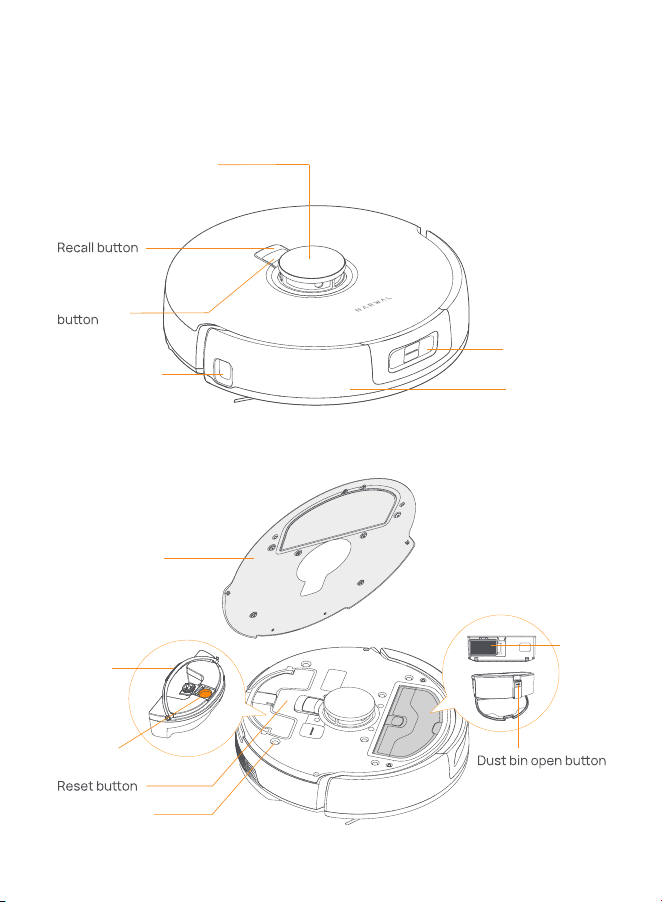
Start/Stop
Radar positioning sensor
Front (top cover open)
water tank
Robot top cover
Top cover slot
Dust bin
Dust bin
filter
Tank opening
Handle
1.2 Robot
Front (top cover closed)
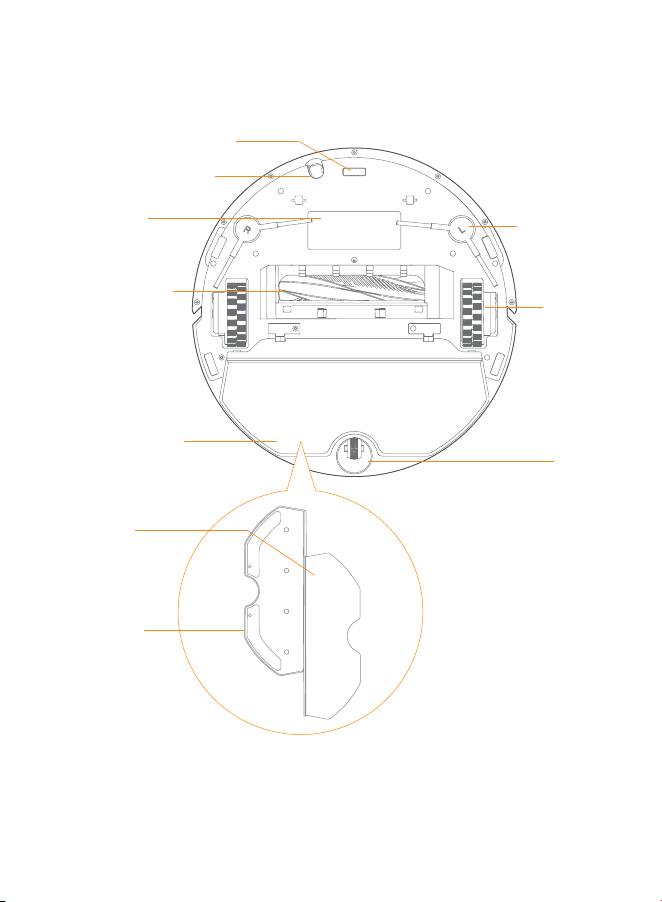
05
Infrared anti-drop sensor ×5
Ultrasonic carpet sensor
Nameplate
(S/N included)
Side brush ×2
Anti-tangle silent
roller brush
Drive
wheel ×2
Mopping module ×1
Mop pad ×1
Mop base ×1
Caster
Robot bottom
06
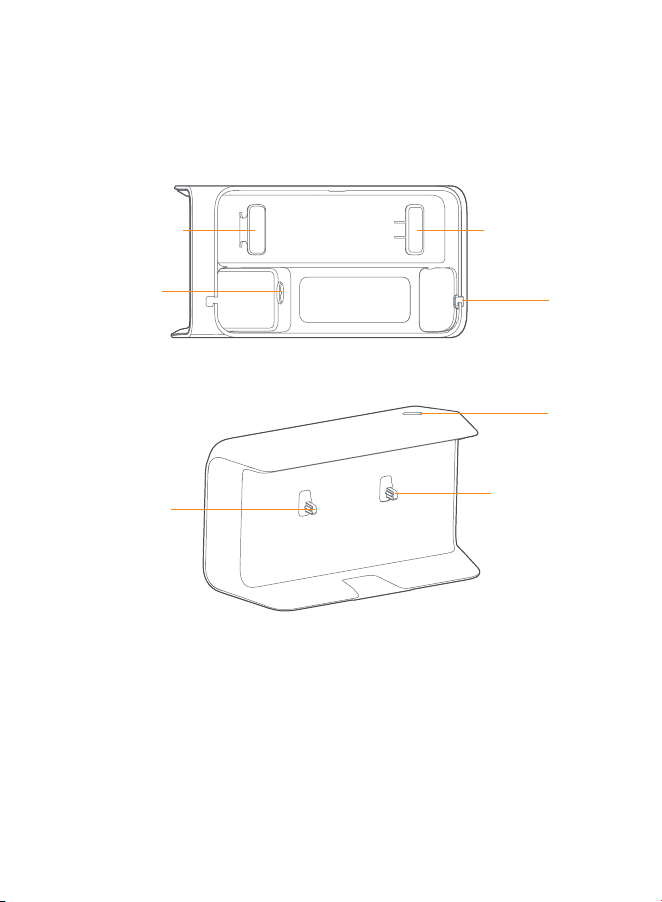
Opening
Power Cord Holder
Power Cord Holder
Power interface
Indicator
Charging contact
Charging contact
1.3 Base station
07
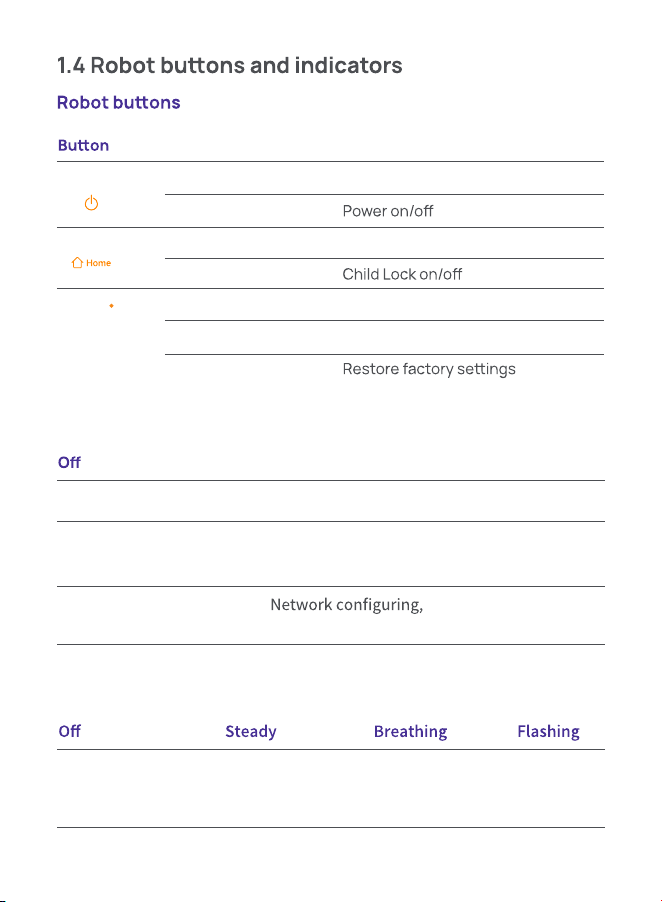
Breathing white
Steady blue
Shutdown or standby Standby
Task underway
Breathing blue Breathing orange
Flashing red
Task paused
updating or resetting
Error
Start/Stop
Recall
Reset
1) Robot indicators
Fully charged or
base station
disconnected
Not charging
Charging Base station
failure
2) Base station indicators
Action Function
Short press
Press and hold for 2s
Short press
Press and hold for 2s
Short press
Press and hold for 5s
Press and hold for 10s
Start/pause/resume current task
Return to the base station
Enter the pairing mode
Unbind the account and clear user data
08
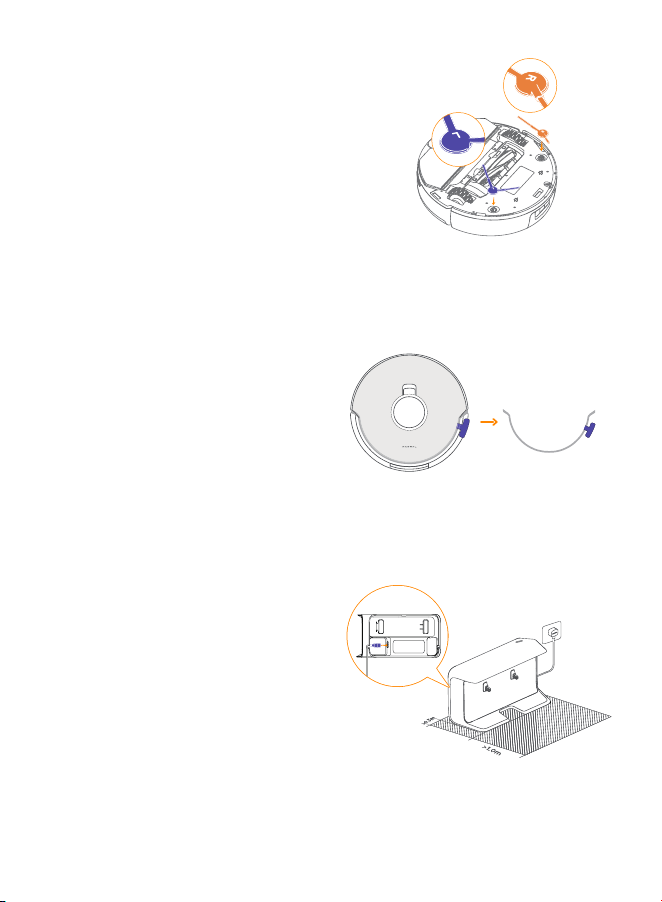
Install the side brushes
2. Get Ready before Use
Press side brushes into the slots as
indicated by color until they click into
place.
Place the base station
Plug in the power cord in the back of the
base station. Put the base station on
the flat and hard surface against the
wall and leave an open space of at least
1.0m in front of the base station for the
robot to enter and leave the base
station.
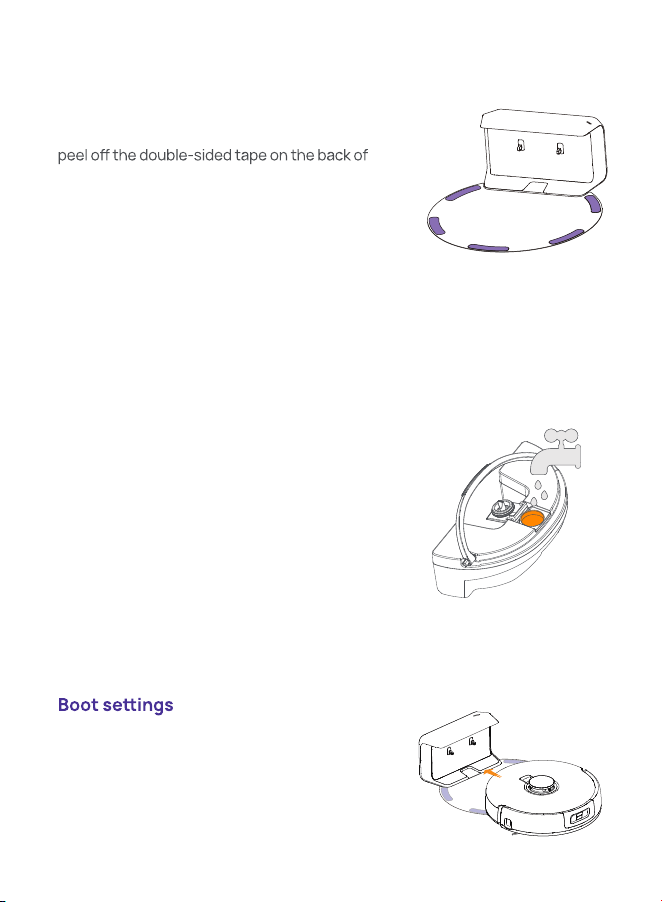
Remove the anti-collision foam
Open the robot top cover and remove the
anti-collision foam.
09
Fix the moisture-proof pad
Once the base station is put in place, wipe
the indicated area clean with a dry cloth,
the moisture-proof pad, and stick the map
onto the floor as indicated.
Note:
1. The moisture-proof pad only applies to the
wooden floor.
2. To remove the pad from the floor, please
keep it slow to avoid residual glue.
Push the robot into the base station and
ensure the charging contacts are properly
connected. The base station indicator goes
out and the robot will turn itself on and
broadcast a message.
Add Water
Before mopping, add clean water to the
water tank.
· Open the robot's top cover, remove the
water tank. Fill the water tank with clean
water through the tank opening.
· Close the tank, put it back into the robot,
and place the robot's top cover back.
10
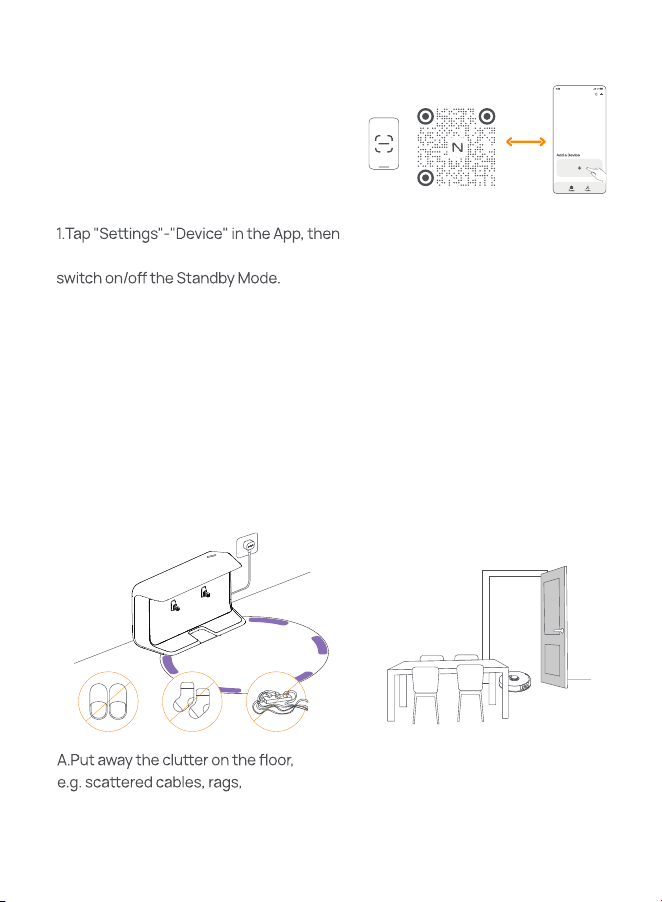
3.1 Organize the home environment
3. How to Use
Connect and bind the robot in the App
Scan the QR code to download the Narwal
App, tap “Add Device” and select the model
in the App, and follow the instructions for
connecting and binding the robot.
Note:
long press the "Restart Robot" for 10s to
—Only available in the US market.
slippers, clothes and books.
B.Open the doors of the rooms to
be cleaned and arrange the
furniture to leave as much space as
possible for cleaning.
Before using the robot, please make sure you have finished the installation and
base station setup in Chapter 2.
11
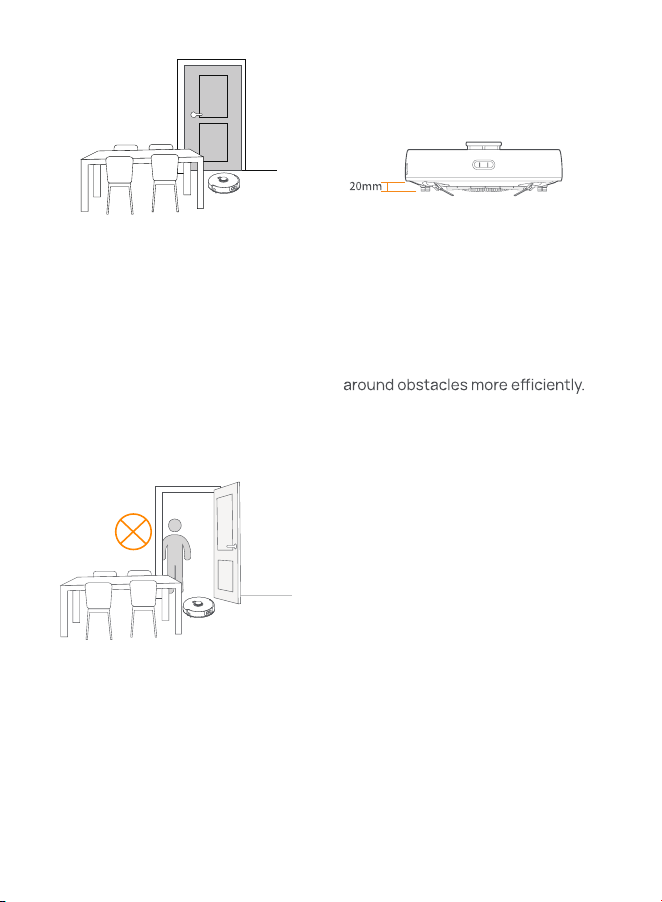
C.Leave other doors closed and
install the fence to prevent the
robot from entering elevated or low
areas.
E.DO NOT stand in front of the robot,
on the threshold or in narrow aisles to
avoid omission.
D.The maximum obstacle crossing
height is 20mm and the robot
cannot enter rooms with a threshold
height of over 20mm. You can
purchase Narwal Threshold Ramp to
help the robot climb over and
12
Before cleaning a new home, the robot needs to explore the environment and
create a map. Before first-time cleaning, you can trigger mapping by short
pressing the
Start/Stop “Start Mapping”
in the App.
Note:
1.Once a map is created, it can be edited in the App.
2.Please DO NOT move the base station after a map is created, or you have to
restart mapping. If large furniture in your home is rearranged, it is
recommended to create a new map.
3.2 Mapping
3.3 Cleaning
Select cleaning modes
The product comes with four built-in cleaning modes: Vacuum, Mop, Vacuum
and Mop, and Vacuum then Mop. You can select and adjust parameters like
cleaning cycles, suction, and mop humidity for each mode in the App.
Set Freo Advise
Freo Advise is an intelligent cleaning assistant. When the Freo Advise mode is
on, the robot can intelligently set cleaning parameters. You can enable Freo
Advise after selecting the cleaning mode in the App.
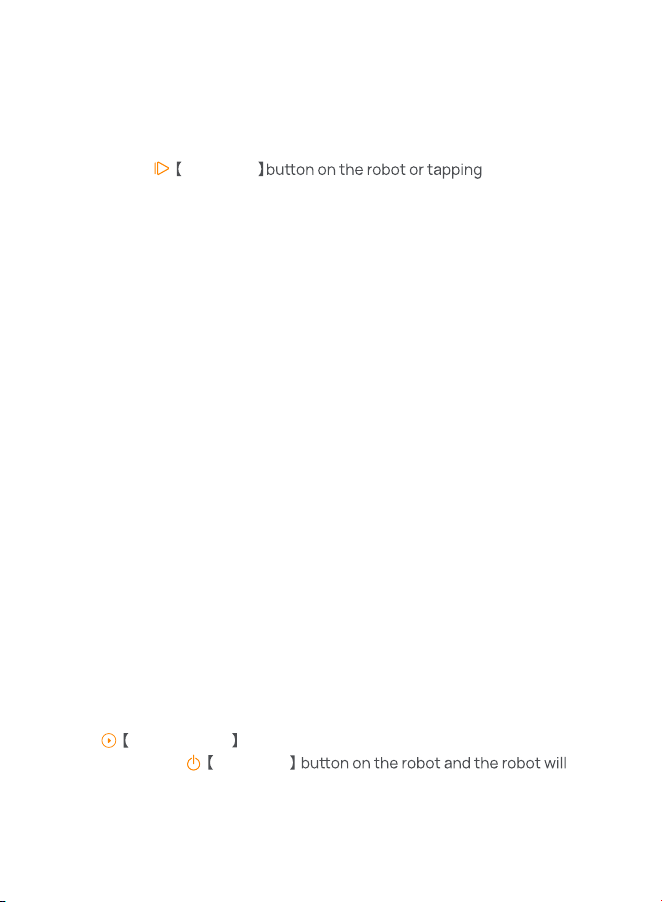
Start cleaning task
You can start the robot for cleaning in the following two ways:
•Tap
Start Cleaning in the App
•Short press the
Start/Stop
activate the Vacuum Mode by default;
Note: You can adjust the cleaning mode and set more cleaning parameters in the App.
13
Pause/resume current task
You can pause/resume the task in the following two ways:
•Tap
Pause / Resume in the App;
•Short press the
Start/Stop
End current task
The robot will navigate itself back to the base station when cleaning ends. You
can view the current cleaning report in the App.
You can manually end the task in the following two ways:
•Press and hold
Finish for 2s in the App;
•Short press the
Recall
4. Parameters
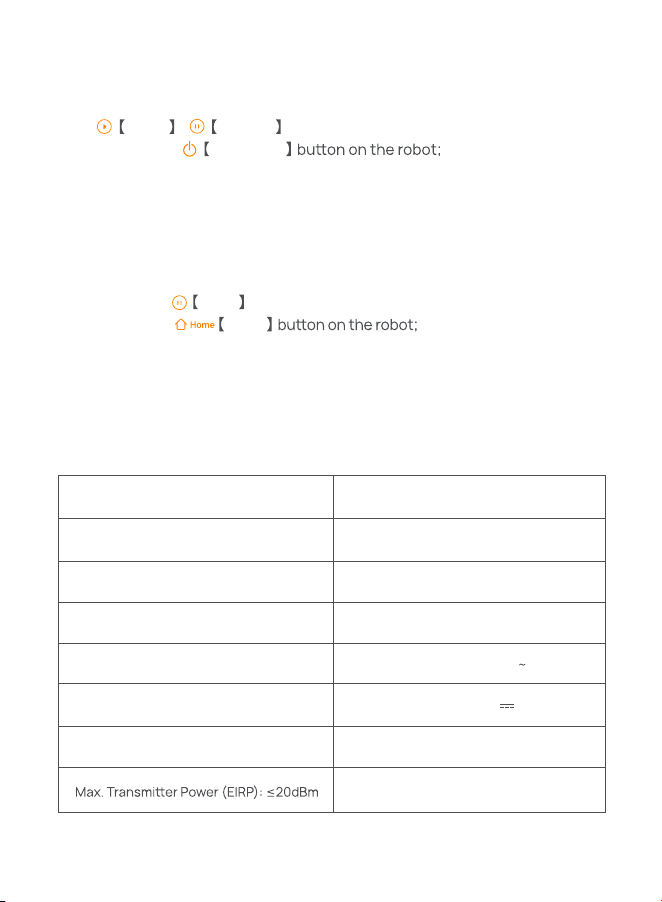
4.1 Specifications
Robot
Dimensions: 350*355*107 mm
Color: White
Weight: ~4.25kg
Wi-Fi
Protocol: IEEE 802.11b/g/n
Frequency Range: 2412~2472MHz
Dimensions: 275*118*137 mm
Color: White
Weight: ~0.86kg
Rated input: 100-240V
Rated output: 20V 1.8A
Rated frequency: 50-60Hz
Base station
14
Protocol: BLE 4.2
Frequency Range: 2402-2480MHz
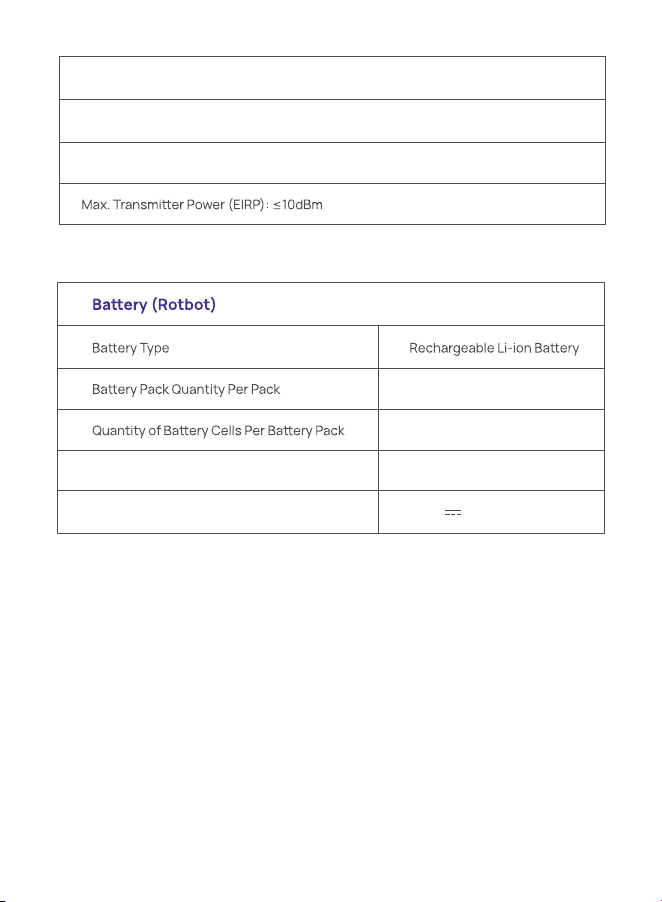
Bluetooth (Rotbot)
Rated Capacity, Rated Energy
Nominal Voltage
1 pcs
8 pcs
5000mAh, 72Wh
14.4V

WWW.NARWAL.COM
Manufacturer:Yunjing Intelligence Innovation (Shenzhen) Co., Ltd.
Address:Room A2901, Yunzhongcheng, Building 1, Vanke Yuncheng VI, Dashi 2nd Road,
Xili Community, Xili Street, Nanshan District, Shenzhen, Guangdong, China
