Read carefully before use & keep for future reference
Vinyl Cutter/Plotter
User Manual
V20230228

CONTENTS
Safety Information·········································································· 1
Specifications ··············································································· 1
Parts Diagram··············································································· 2
Installation ··················································································· 3
Operation····················································································· 4
Maintenance················································································· 5
Troubleshooting ············································································ 6
Contact Information········································································ 6

Safety Information
Specifications
Warning!
• Ensure that the product is connected to a compatible and stable power supply via a properly
grounded outlet.
• DO NOT connect or disconnect any cord while the product is turned on.
• DO NOT apply pressure to the top beam.
• DO NOT expose this product to high humidity, direct sunlinght, or temperatures outside its
stated operational range.
• DO NOT get this product wet or operate it with wet hands.
• DO NOT block the vinyl output end of the product.
• DO NOT manually move the tool carriage rapidly.
• Be careful with loose clothing, hair, and body parts around the product while it is operational.
1
Model SK-720T SK-870T
Rated Power 45W
Motor Type Stepper
Dimensions
Length 102 cm 40 in. 115 cm 45 in.
Width 26 cm 10 in. 30 cm 12 in.
Height 88 cm 34.5 in. 100 cm 40 in.
Feeding Width 72 cm 28 in. 87 cm 34 in.
Max. Cutting Width 63 cm 25 in. 87 cm 30 in.
Blade Type Rotary
Cutting Speed 1–80 cm/s 0.4–31 ips 1–80 cm/s 0.4–31 ips
Cutting Force 10–500 g 0.02–1.1 lb. 10–500 g 0.02–1.1 lb.
Min. Resolution 0.625 mm 0.001 in. 0.625 mm 0.001 in.
Interface RS-232 (Serial)
Display LCD
Memory 4 MB
Compatible Software Flexi, SignLab, SignCut, Wentai, WinPCSign, CorelDraw
Connection USB
Operational Temp. Range 0–35 °C 32–95°F 0–35 °C 32–95°F
Weight Capacity 55 kg 120 lb. 55 kg 120 lb.
Net Weight 17 kg 37.5 lb. 18 kg 40 lb.
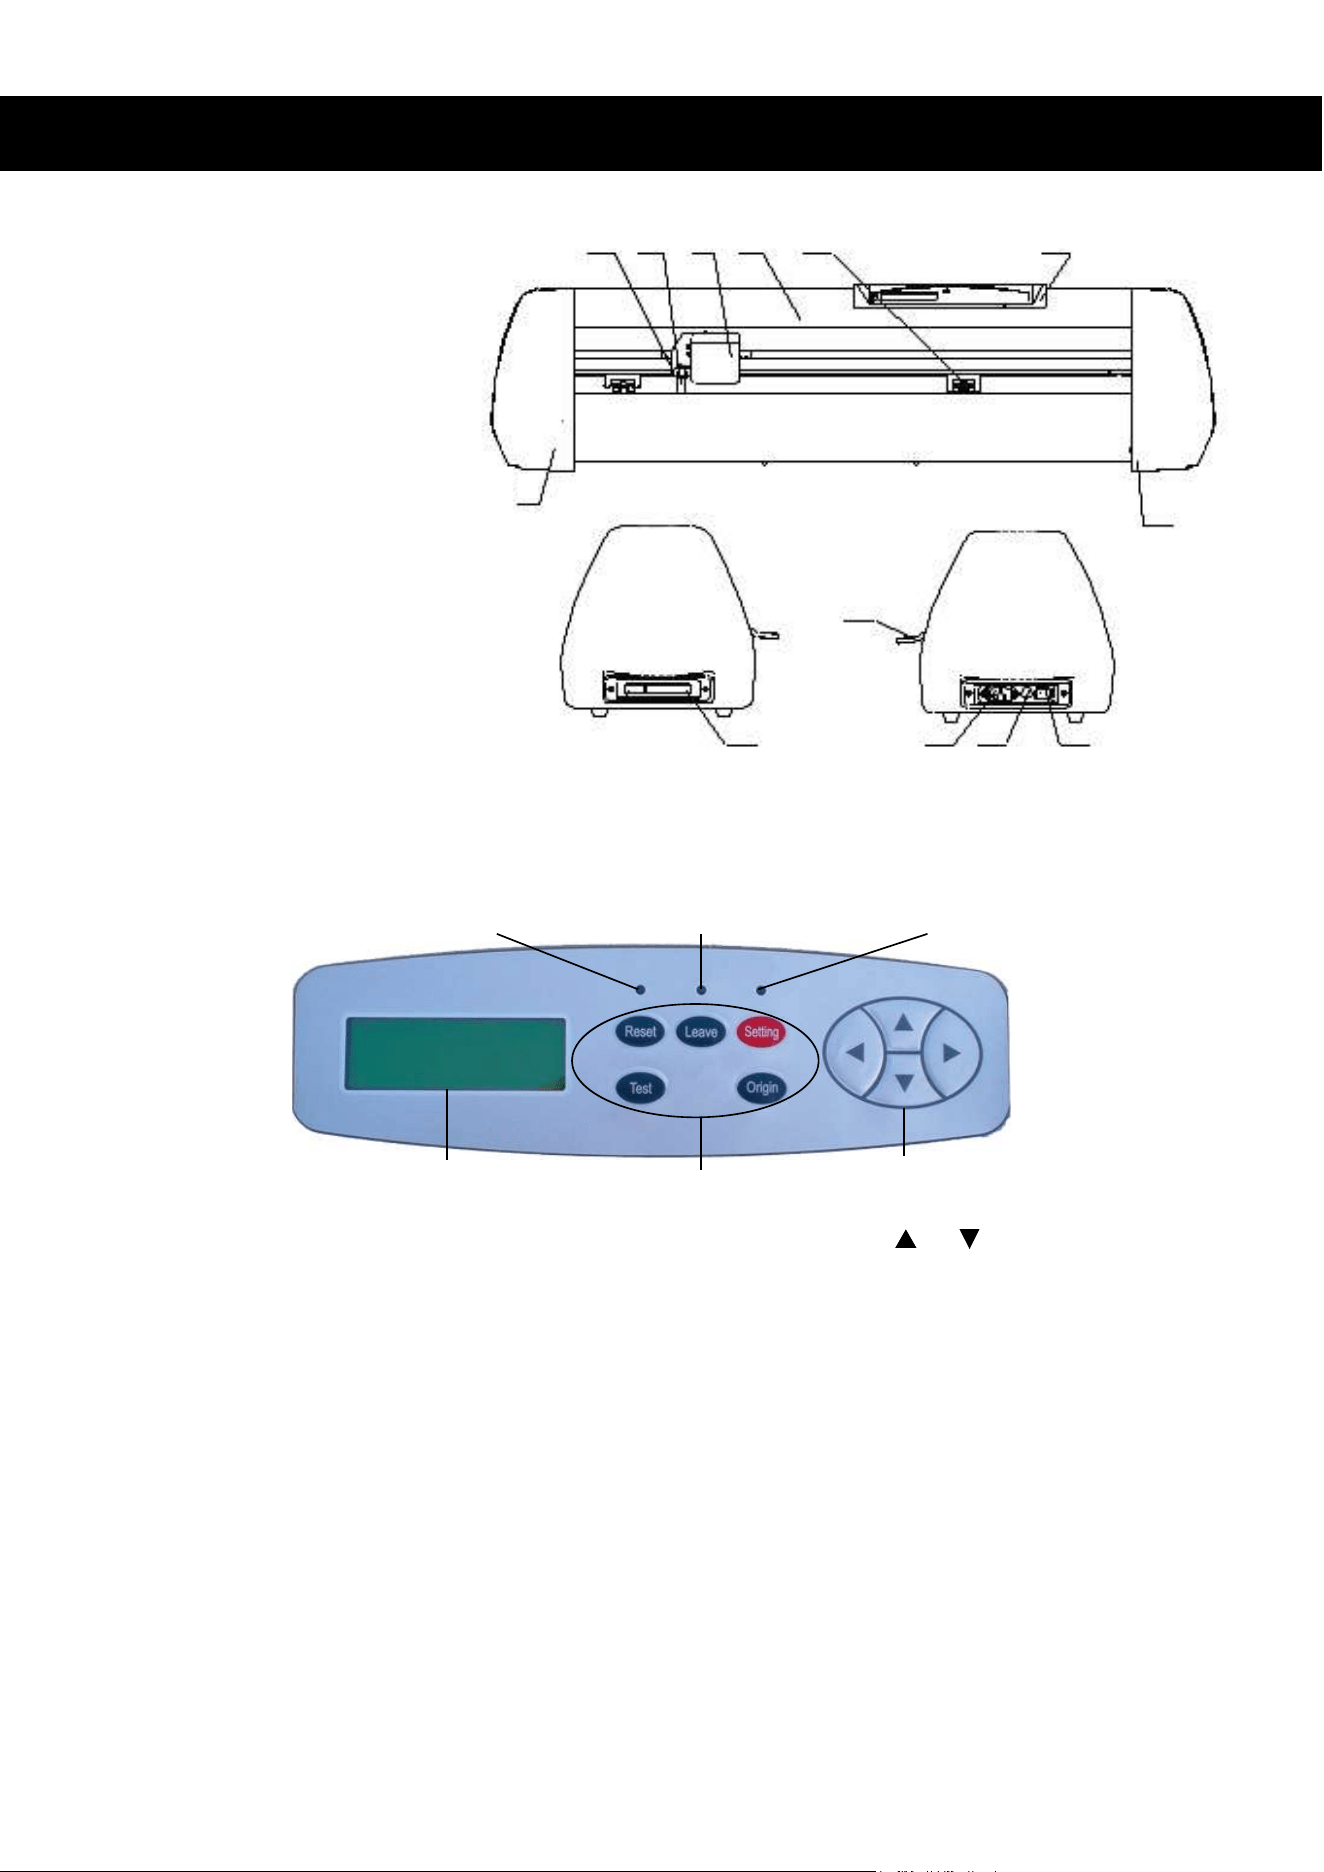
Parts Diagram
1
2 3 4 5 6 7
8
9
13
10 11
12
Speed Regulation: The cutting speed can be adjusted by pressing or . Holding these keys
will continually alter the cutting speed until the button is released.
Force Regulation: The force of the blade can be adjusted by pressing ◄ or ►. Holding these keys
will continually alter the force until the button is released.
Reset Status: Pressing RESET returns the machine to factory settings.
Offline Status: Pressing LEAVE causes the machine to enter offline mode. The offline indicator
light will turn on. In this mode, the cutter cannot receive input from its connected computer. In
this mode, pressing ORIGIN will set a new cutting origin. Pressing LEAVE again returns to
online mode and the cutter will again accept computer input.
Setup Status: Pressing SETUP causes the machine to enter setup mode. In this mode, the
baud rate of the serial port can be adjusted. Once adjusted, pressing SETUP again exits
setup mode.
Test/Stop Functions: Pressing TEST will initiate a test cut protocol wherein a triangle and rectangle
will be cut into whatever medium is present in the machine. Pressing TEST again while the test cut
is being processed will half the procedure.
LCD Display
Power Indicator Light
Offline Indicator Light Setting Indicator Light
Function Keys
Direction Keys
2
1. Left Cover
2. Pen Holder Bracket
3. Pen Holder
4. Tool Carriage
5. Top Beam
6. Pinch Roller
7. Control Panel
8. Right Cover
9. Serial Port
10. Power Inlet
11. Fuse
12. Power Switch
13. Pinch-Roller Holder with Handle
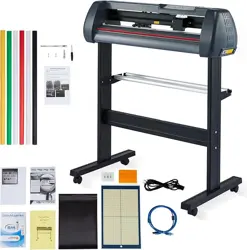
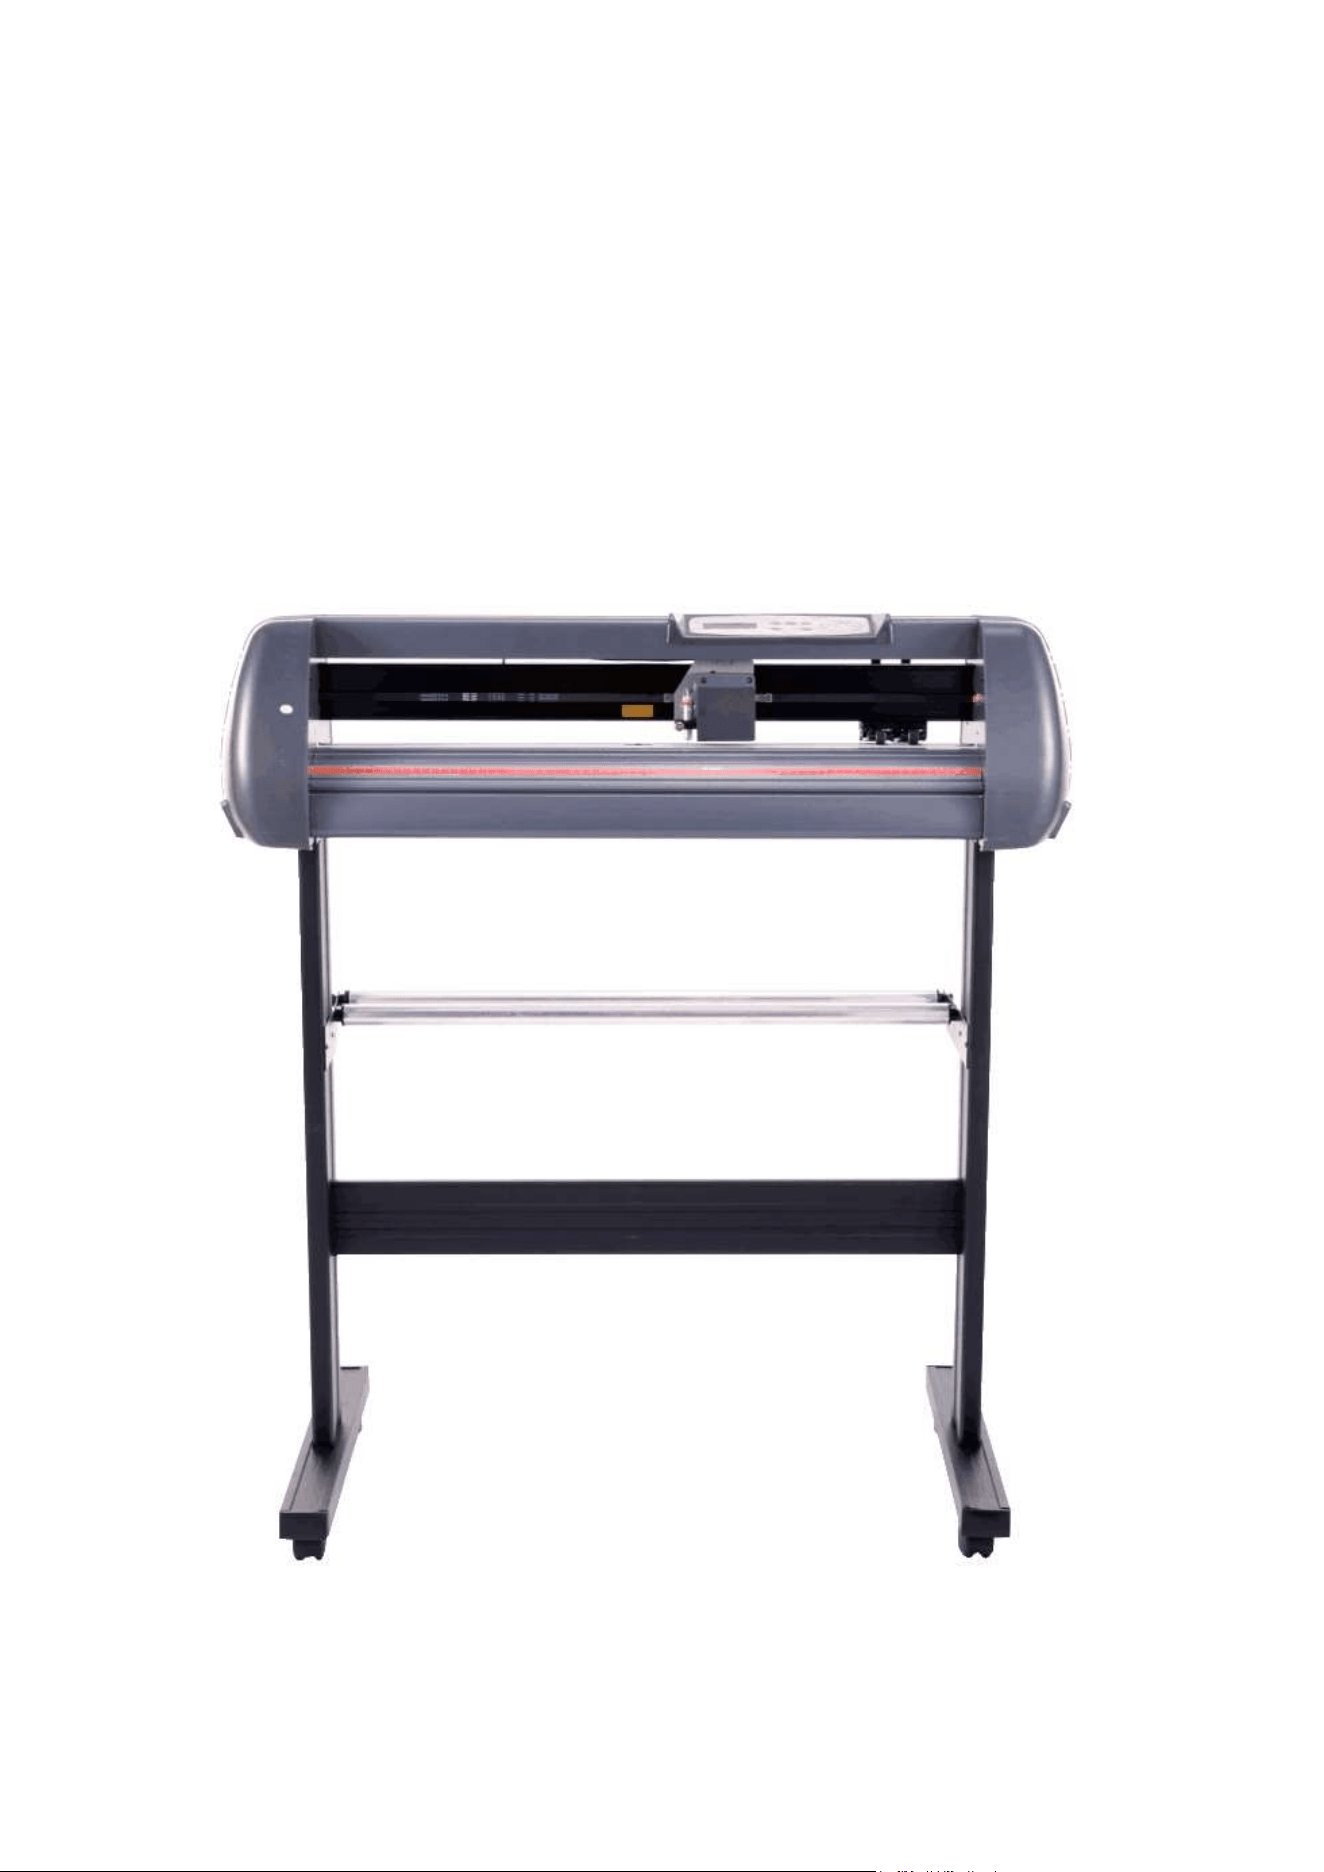
Cutter/Plotter
Control Panel
Installation
Stand
Take the cutter plotter and place it onto the appropriate slots on the stand Screw it into place.
Pen
1. Remove the pen holder bolt.
2. Insert any standard ballpoint pen into the holder.
3. Replace the bolt and tighten.
Refill Tube
Lid
Spring
Shelf
3
Loading Media
• Adjust the pinch rollers to fit the width of the media being introduced. To move them, lift
up their handle and grab their back side. Ensure that the pinch rollers are roughly 25mm
away from both edges of the cutting media. Lower the pinch rollers back into place.
Operation
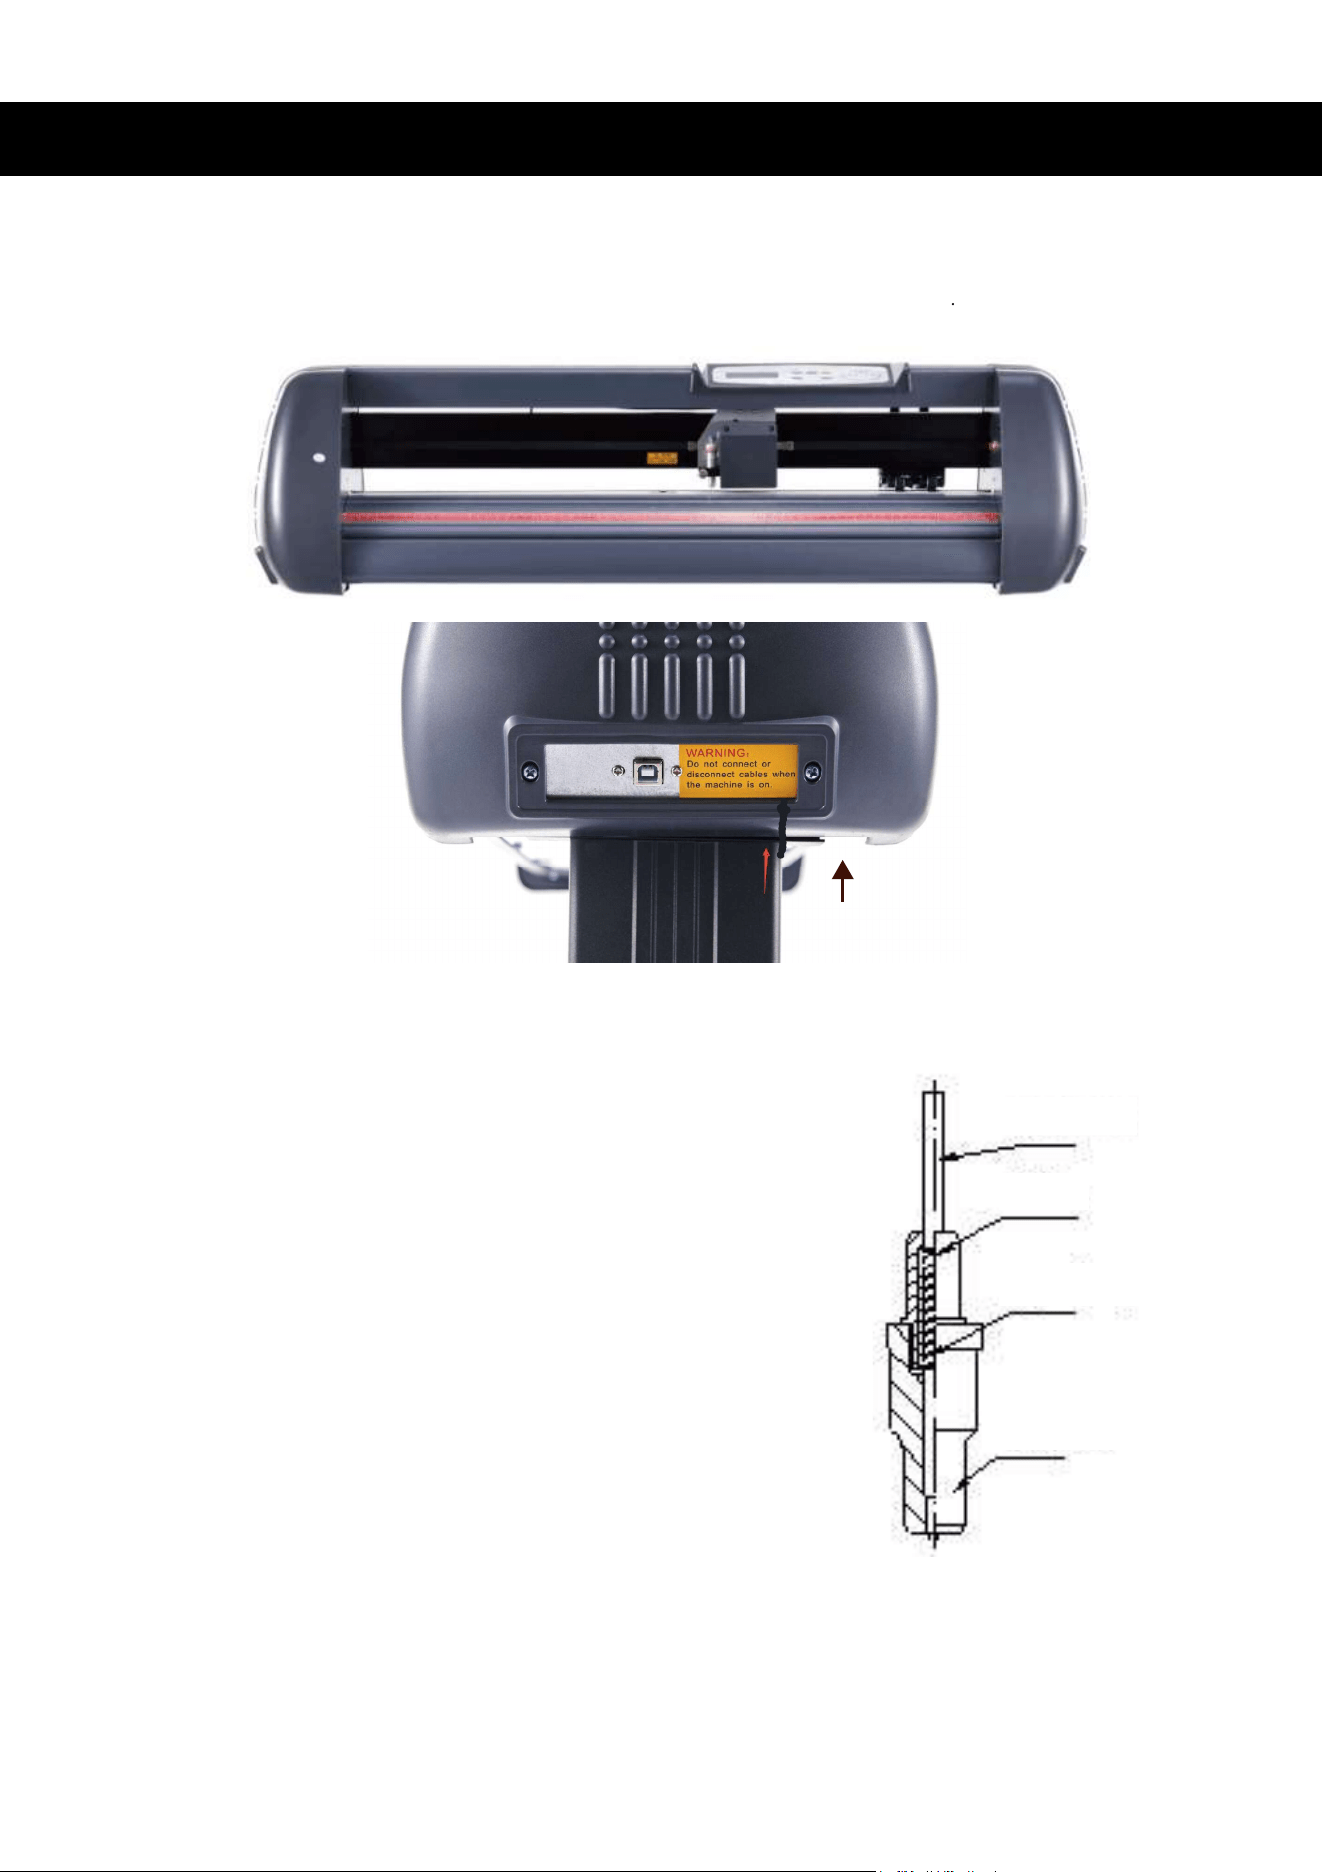
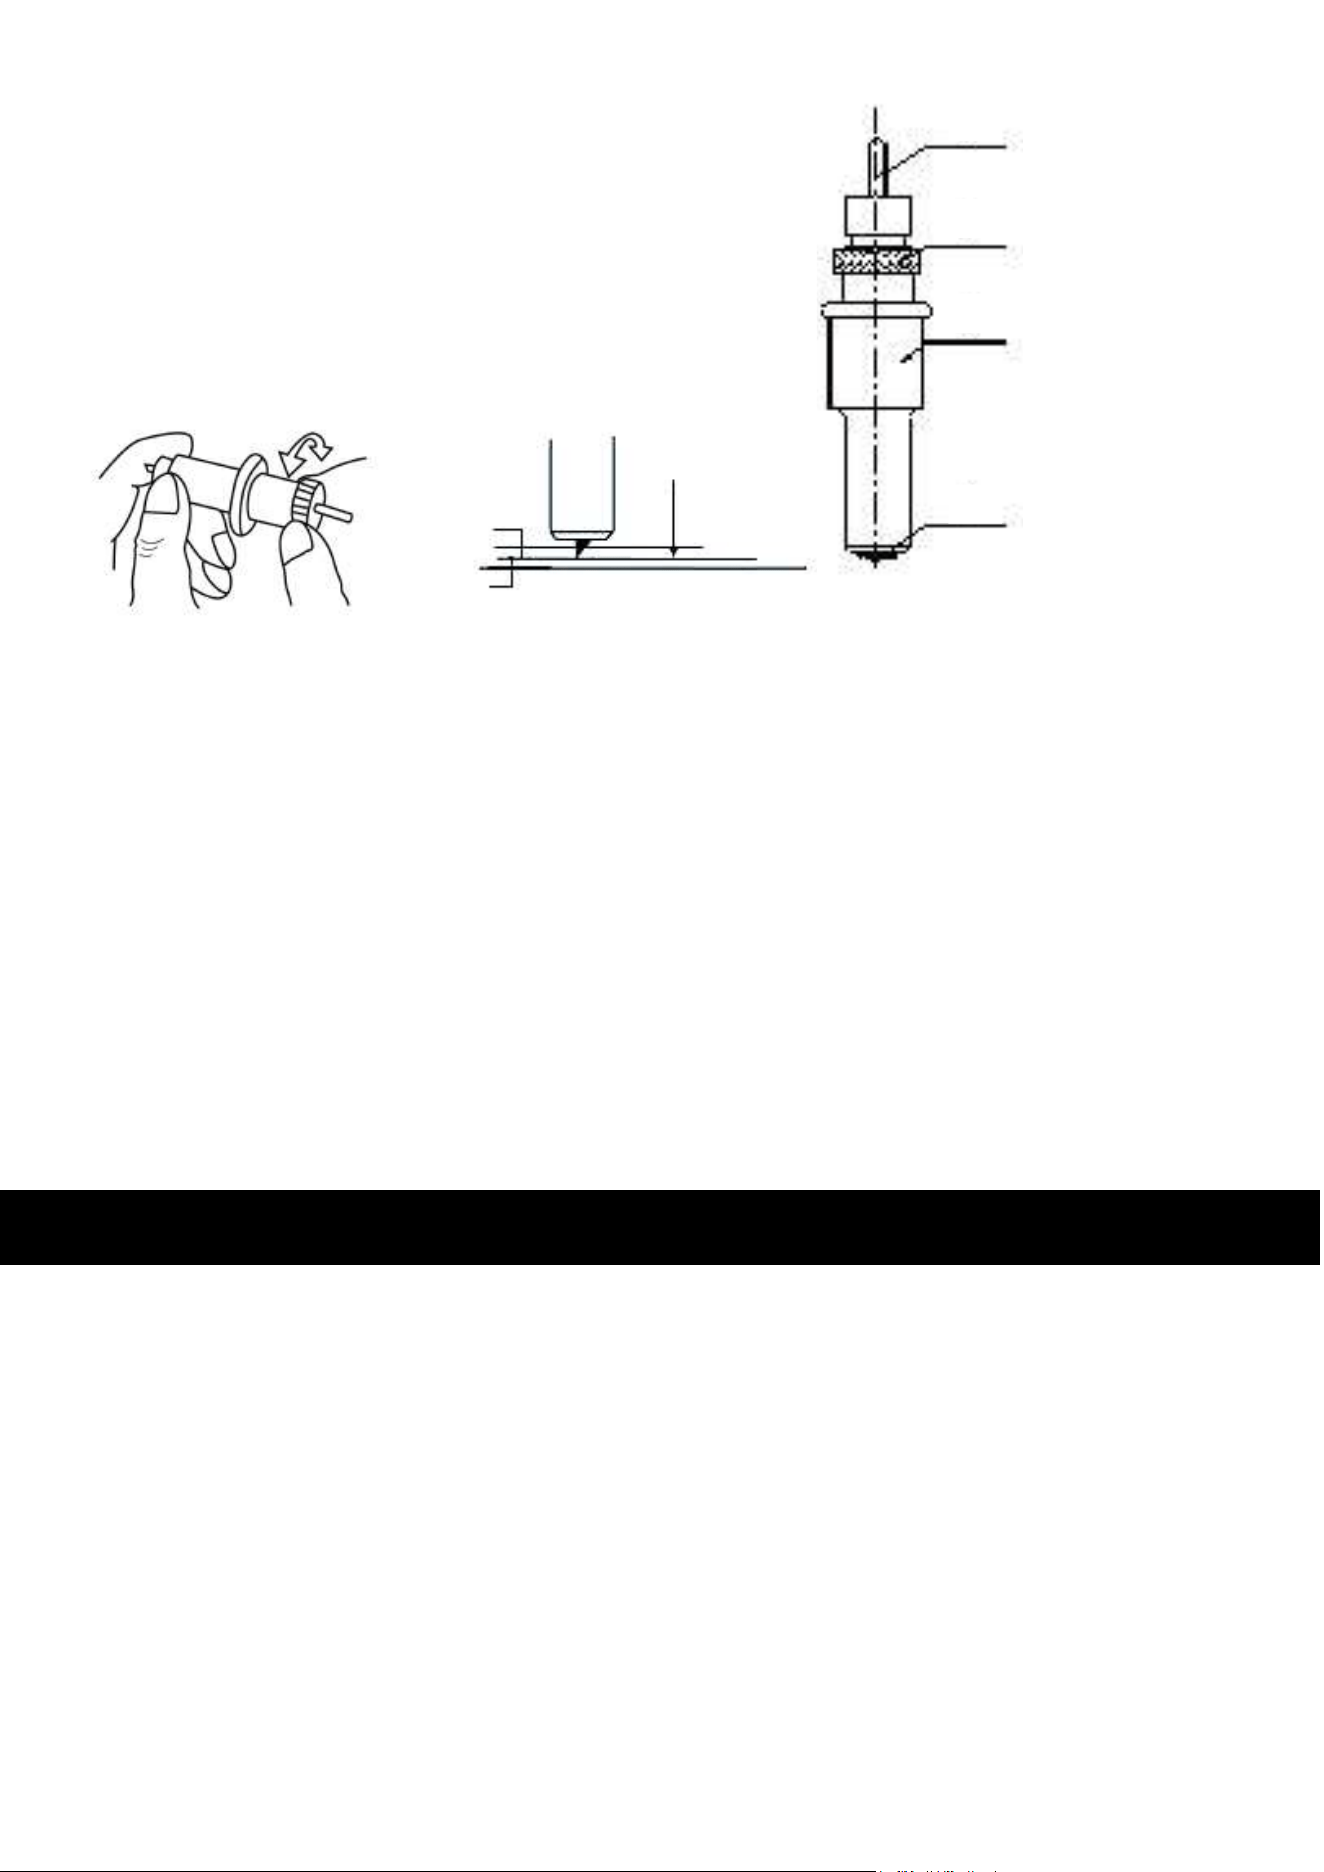
Blade
1. Place the blade into the holder.
2. Adjust the blade length by rotating the end of
the holder.
3. Ensure that the blade is long enough to cut
through the film entirely but only slightly touches
the backing. Generally, a length of 3–4 mm is
recommended.
Pen or Blade Holders
1. Turn off the machine’s power.
2. Remove the bolt on the holder bracket and place the pen or blade holder in the V branch.
3. Replace the bolt . Ensure that the tip of the blade or pen is roughly 3mm away from
the protection strip.
4. Fasten the bolt and restore power to the machine.
Blade-Exiting Pole
Blade Holder Shell
Blade Holder Body
Blade
Film
Backing
T
4

• Remove any dust that accumulates anywhere on the machine before and after each use.
• Periodically clean the machine with 75% isopropyl alcohol.
• Periodically confirm that all screws and bolts are fastened properly and tighten any that
have become loose
Maintenance
Cutting Small Designs
When cutting designs that are smaller than 20mm, the cutting speed should be adjusted to
its slowest setting. The length of the knife tip should also be shortened slightly.
Cutting Very Large Designs
When cutting designs that are larger than the cutting plotter, the software will automatically
separate it into different sections. The design must subsequently be joined together.
Testing
1. Place the machine on a flat surface and ensure there is enough room for the media to be
fed through without obstruction.
2. Connect the machine to a computer and turn on the machine.
3. Press RESET.
4. Test the holder by pressing ORIGIN. If the bracket falls when pressed, it is functional.
5. To adjust the cutting origin, press LEAVE and adjust the location of the holder with the
direction keys. Press ORIGIN to set this location as the new origin.
6. Press TEST to begin testing the cutting capacity of the machine. A square and a triangle
should be cut.
5
Potential Problems
The pattern is deformed
or incomplete.
The cutter is not receiving
input from the computer.
The cutter is running
abnormally.
The cutting pattern is
uneven.
The cutter is jammed
Possible Solution
Lower the force of the blade.
Shorten the exposed length of the blade.
Correct any blade jam by clearing the media and thoroughly
cleaning the cutter/plotter with alcohol.
Correct any roller jam by cleaning the media and repairing the
pinch roller.
Correct any software errors.
Verify all connections between the cutter/plotter and the
computer.
Correct any software errors.
Correct any software or hardware error with the computer.
If using third-party software check that it is compatible with
this device.
Deactivate the production function by setting the knife
pressure to 120g and restarting the machine.
Place the media correctly into the cutter/plotter.
Clear any blockage to the cutter/plotter’s output area.
Replace the pinch rollers if they have become uneven.
Increase the pinch roller’s pressure.
Shorten the exposed blade length.
Clear any possible jam, adjust the knife pressure to 120g,
restart the machine to remove the protection function.
Troubleshooting
6
Thank you for choosing our products! If you have any questions or
comments, contact us at help@cs-supportpro.com and we'll resolve
your issue ASAP!
For a .pdf copy of the latest version of these instructions, use the
appropriate app on your smartphone to scan the QR code to the right.
Contact Us
VCP-S720-UK VCP-S870-UK
Rev. 28 Feb. 2023
