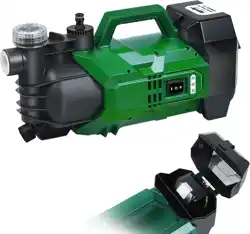

Garden Pump
USER MANUAL
MODEL:MFGP003
YOUR ULTIMATE POWER TOOL PARTNER
MADE IN CHINA
Ocial Website: www.mellif-tools.com
1
Safety information
1. Please read the instructions for use very carefully and observe
the information they contain. By referring to these instructions,
familiarize yourself with the appliance, learn how to use it
correctly, and note the safety precautions to be taken.
2. Take the appropriate steps to ensure that children have no
access to the appliance.
3. The user of the appliance is responsible for any third parties in
the work area.
4. Before using the appliance for the first time an electrician must
check that the necessary electrical protection measures have
been taken.
Caution!
1. The pump must not be used when people are in the water.
2. This appliance can be used by children aged from 8 years and
above and persons with reduced physical, sensory or mental
capabilities or lack of experience and knowledge if they have
been given supervision or instruction concerning use of the
appliance in a safe way and understand the hazards involved.
Children shall not play with the appliance. Cleaning and user
maintenance shall not be made by children without supervision.
3. The battery pack must be charged indoors.
4. Please contact your electrician!
5. Inspect the appliance before each use. Do not use the appli-
ance if the safety devices are damaged or worn. Never deacti-
vate the safety devices.
6. Use the appliance only for the purposes specified in these
instructions for use.
7. You are responsible for safety in the work area.
Safety information
EN

2
8. Your battery must comply with the voltage of direct voltage
specified on the type plate.
9. Always remove the battery from the pump before doing any
work on the pump.
10.Avoid exposing the pump to direct jet of water. 。
11.The operator is responsible for any local safety and installation
regulations (Ask your electrician for advice.)
12.Rule out any indirect damage caused by the flooding of rooms
following the failure of the pump by adopting the appropriate
measures (e.g. the installation of an alarm system, a reserve
pump or the like).
13.If the pump fails, any repair work necessary must be performed
only by an electrician
14.Never let the pump run dry and never operate it with fully
closed intake power. The manufacturer’s warranty shall lapse if
the pump is damaged due to it being allowed to run dry.
15.The pump must not be used to operate swimming pools.
16.The pump must not be installed in the drinking water pipe line.
Safety information
EN
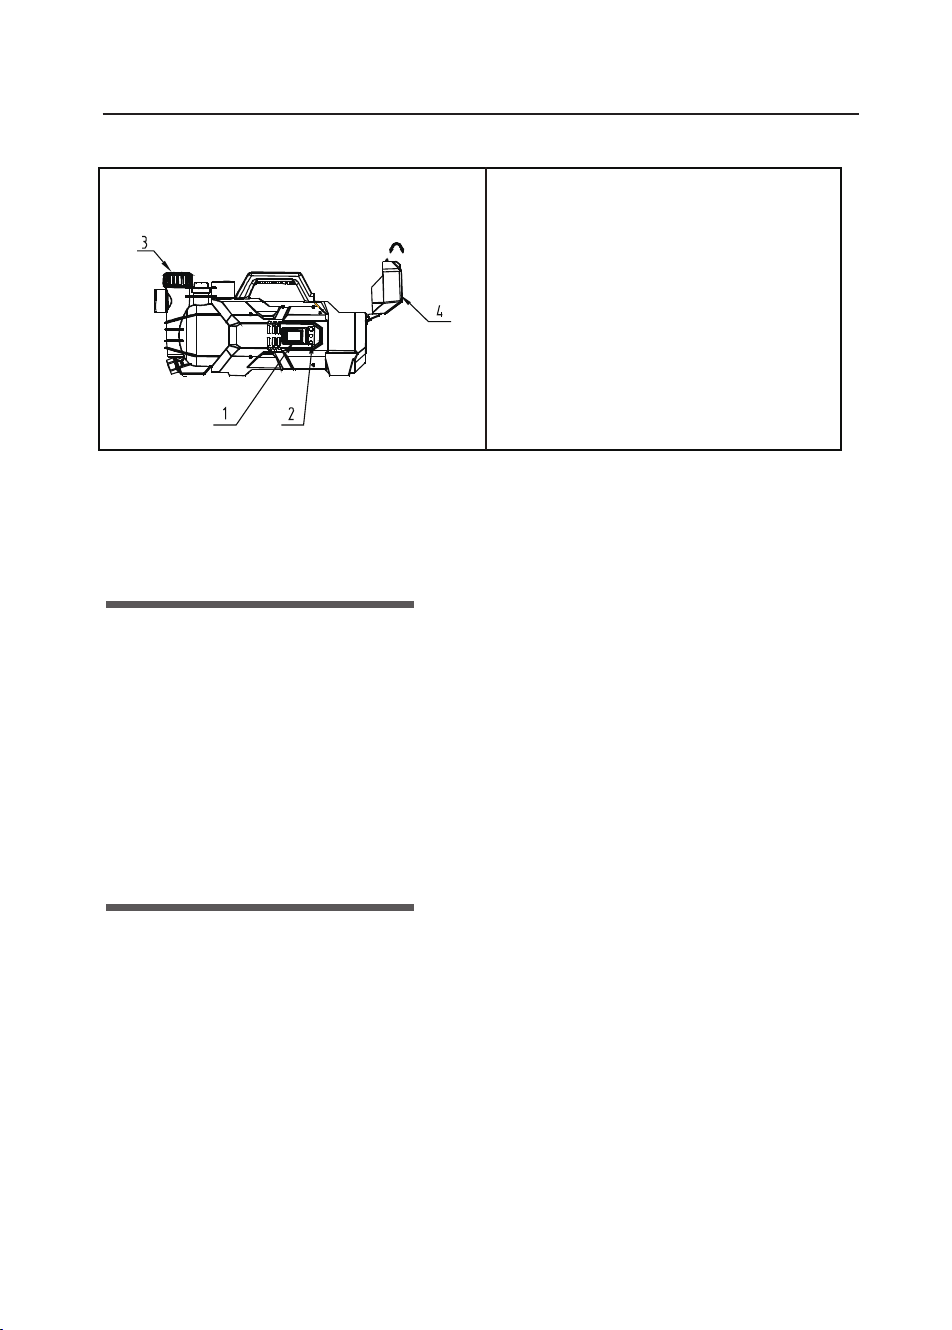
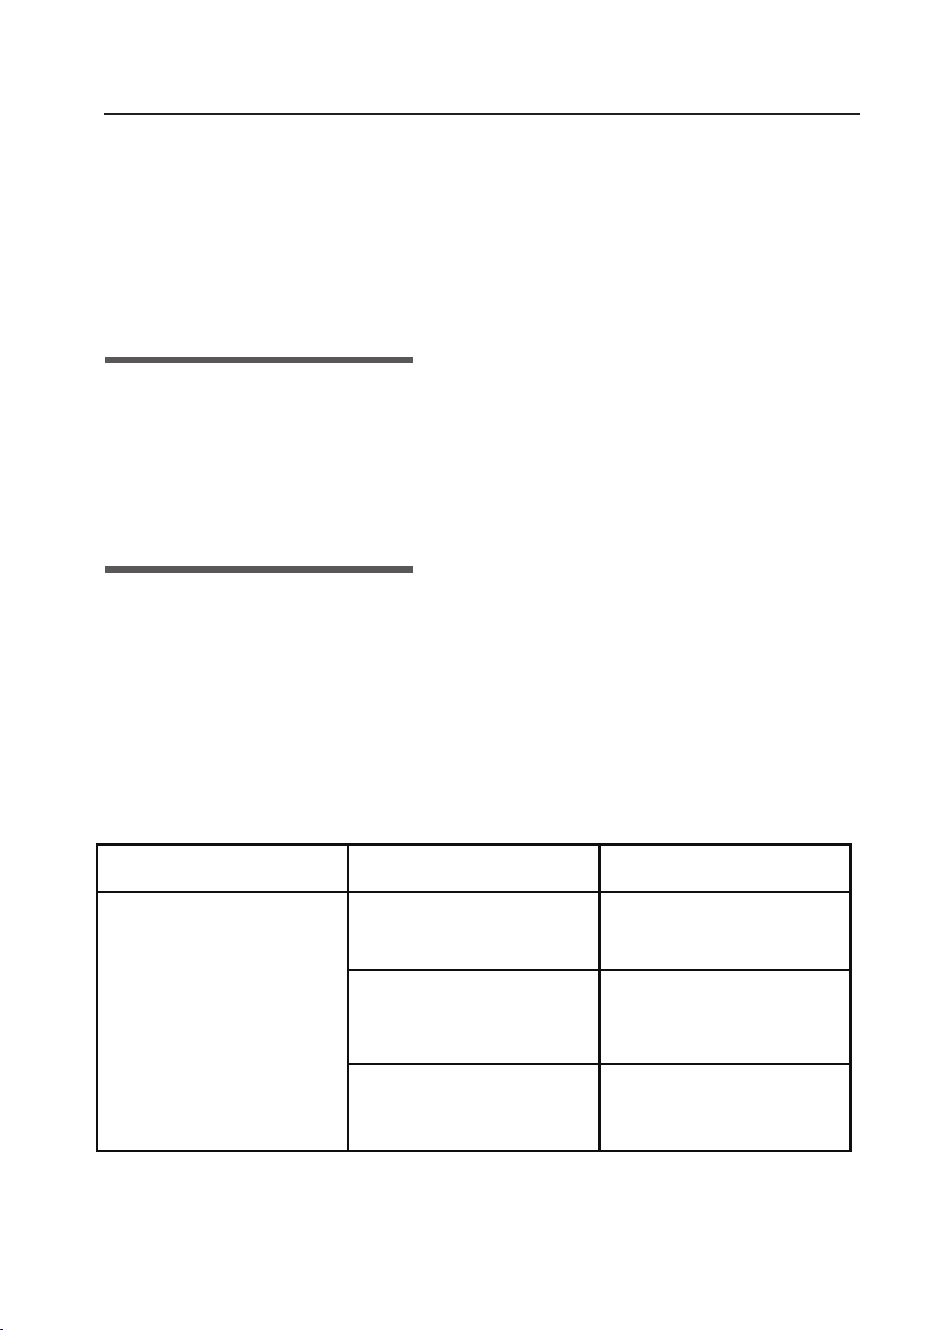
Description
3
1.Rocket switch
2.Indicator lamp
3.Transparent filler cap
4.Battery pack cover
MFGP001
Durability
• The maximum temperature of the medium to be pumped in
continuous operation should not exceed +35°C.
• This pump is not to be used to pump combustible, gaseous
or explosive fluids.
• The pumping of aggressive fluids (acids, alkalis, silo
seepage etc.) and abrasive substances (sand) should also be
avoided.
Applications
Areas of use:
• For irrigating and watering parks, vegetable patches and
gardens
• For operating lawn sprinklers
• With a pre-filter, for drawing water from ponds, streams,
rain-butts, rain-water cisterns and wells.
Media which can be pumped:
• For the pumping of clear water (fresh water), rain water.
Remark:The image shown here is indicative only. If there is
inconsistency between the image and the actual product, the
actual product shall govern
EN
4
Operating instructions
Operating instructions
• Basically, we recommend the use of a pre-filter and an intake
set with an intake hose, an intake strainer and check valve in
order to prevent long repairing times and any unnecessary
damage to the pump caused by stones and hard foreign
bodies.
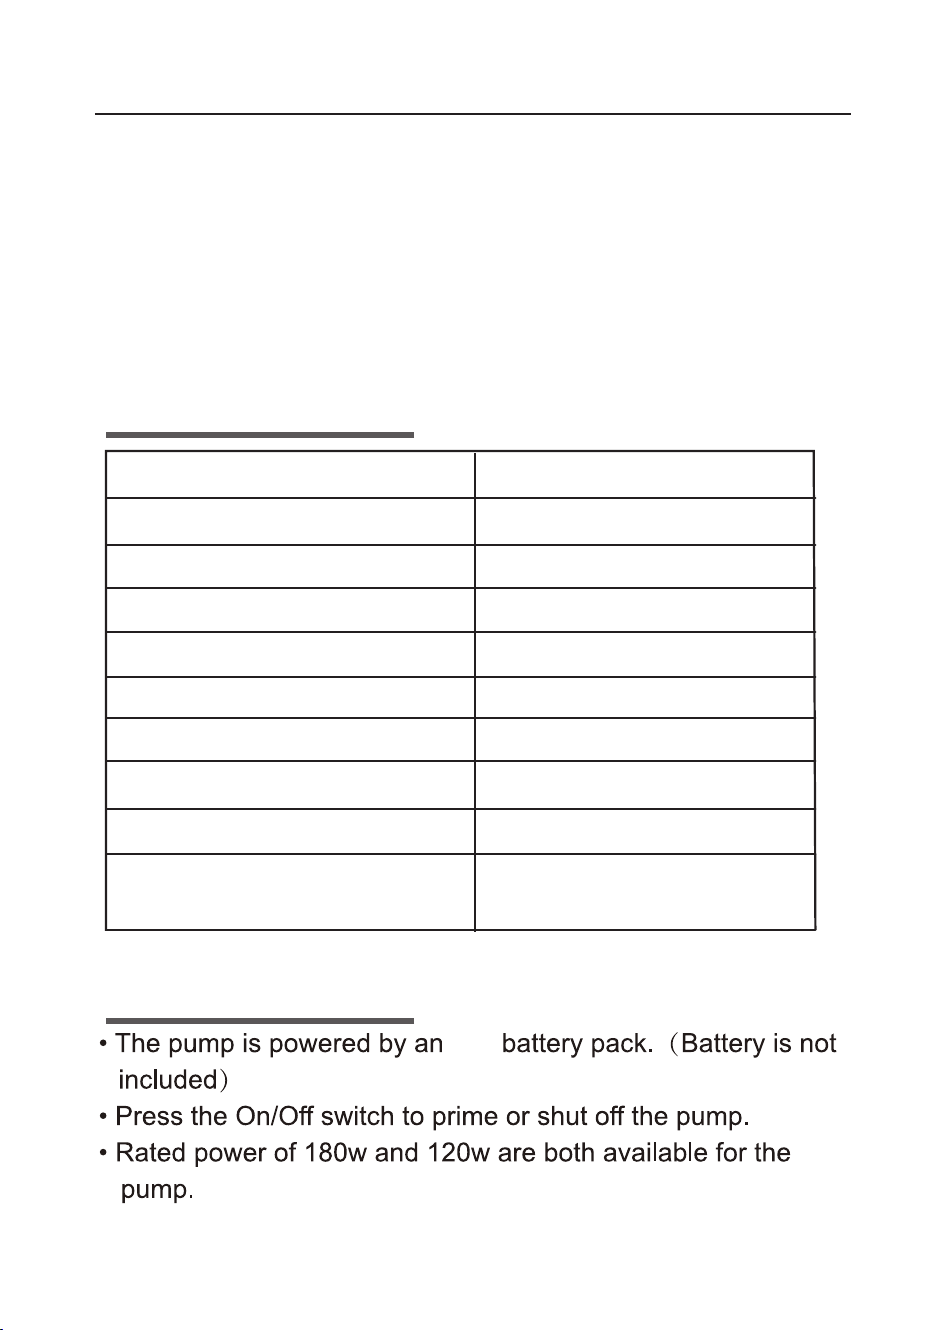
Technical data
Model
Mains supply
Power rating
Max. head
Max.delivery rate
Max.Suction height
Max. Grain size
Max.water temperature
Moisture protection
MFGP003
DC 18V
180W
22m
2800l/h
6m
<0.5mm
35℃
IPX4
NPT1”
Electrical connections
Pressure pipe diameter
Pipe connection
18V
EN

• Position the pump on flat and firm site.
• Connect the suction hose tothesuctionside.
• Screw a suction hose onto the connector on the suction side
of the pump (G1”), tighten the screw by hand (wrap the screw
thread with Teflon tape to prevent air leakage at the joint if
necessary).
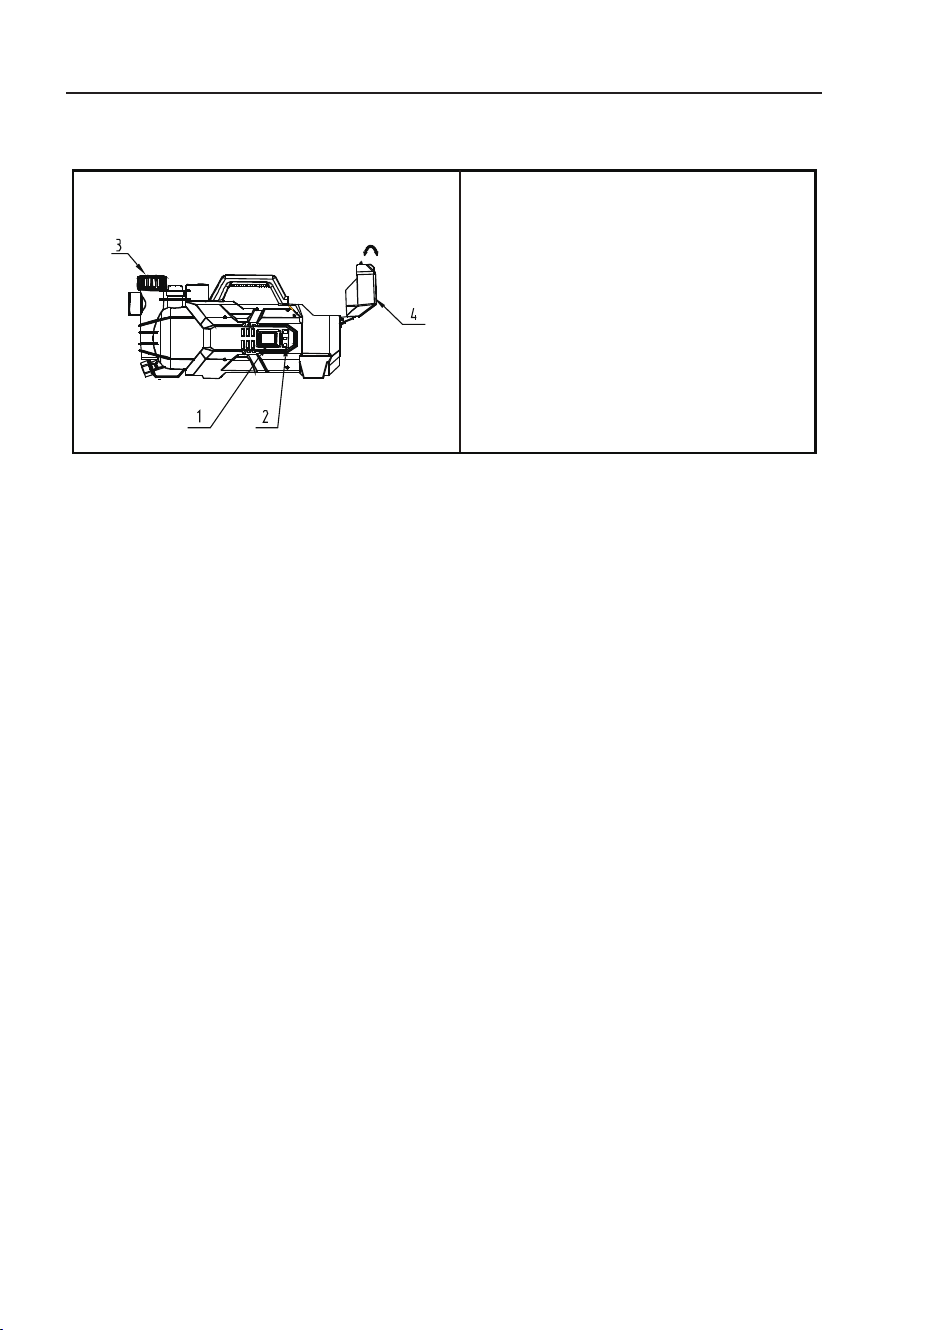
Note:
In order to reduce the suction time, it is advisable to fill the
suction hose with liquid before connecting it to the pump. (As
shown in picture A)
A thread is reinforcing vacuum-resistant suction hose which is at
least 3/4" must be used.
Use a suction hose with backflow preventer to avoid automatic
5
Initial Operation
A
C
D
B
EN

• Position the pump on flat and firm site.
• Connect the suction hose tothesuctionside.
• Screw a suction hose onto the connector on the suction side
of the pump (G1”), tighten the screw by hand (wrap the screw
thread with Teflon tape to prevent air leakage at the joint if
necessary).
Note:
In order to reduce the suction time, it is advisable to fill the
suction hose with liquid before connecting it to the pump. (As
shown in picture A)
A thread is reinforcing vacuum-resistant suction hose which is at
least 3/4" must be used.
Use a suction hose with backflow preventer to avoid automatic
ElectricalConnections
draining of the suction hose after the pump is shut off.
It is strongly advisable to use a pump filter for pumping sandy
liquids.
The suction hose should be airtight in case of air in the hose will
block the suction action of the liquid.
The inlet of the suction hose should always be submerged into
the liquid in order to avoid dry-running of the pump when the
liquid level falls.
Any mechanical twisting and pulling shall be avoided while
connecting the suction hose and the pressure hose.
Connect the suction hose to the pump in the liquid, do not lift
hose to above the pump, otherwise bubbles formed in the hose
might block the flow. (As shown in picture C)
• Connect the pressure hose tothe deliveryside.
Note:
The pressure hose should be able to withstand the maximum
delivery capacity of the pump.
The 1/2” pressure hose may also be connected to the suitable
bolt, but the output flow might be reduced.
• Insert the power plug.
• Open any shut-off valves in the pressure hose (injection
nozzle, valves, etc.). (As shown in picture B)
• Fill the pump via the filler neck with the liquid until it overflows.
(As shown in picture D)
• Block the outlet of the pump.
6
EN
• Insert the battery pack.
• Start the pump by pressing the On/Off switch.
Note:
Lift the pressure hose to at least 1m above the pump in order to
reduce the suction time. (As shown in picture C)
AfterOperation
• Shut off the pump by pressing the On/Off switch.
• Pull out the battery pack.
• Drain remaining water in the pump through the water outlet.
• Put the pump into storage after having been flushed through.
Troubleshooting
Caution:
In order to avoid hazards, all the maintenance and components
replacement or repair should only be performed by authorized
customer service staff. Make sure the pump has been shut
down before doing any troubleshooting.
Operation
Problem Possible cause Remedy
Power off
Replace the battery
pack.
Battery pack
damaged
Other defects
Pull out the battery
pack and charge.
Send the pump to
one of our service
centers.
The pump doesn't
start or suddenly
stops.
7
EN

Troubleshooting
Problem Possible cause Remedy
Insufficient flow/no
flow. (or the
self-priming
suction action
doesn’t take place)
The pump canonly
run for a short time.
Dirty liquid and liquid
with other abrasive
substances in it may
reduce the pumping
capacity.
Clean the filter, replace
the damaged parts
(the worn impeller etc.)
Hose/Pipe/
Filter Clogged
Dredge the hose/
Clean the filter.
Hose/Piping system
damaged
Replace the hose/
piping system.
The suction hose is too
soft that it turns out to
be too flat to pump
during the suction action.
Charge it to a
harder hose.
The air in the pump
chamber. The pump
was not filled with
the liquid.
Fill up the pump.
The inlet of the suction
hose was not 10cm
deep down into the liquid.
Check if there is
enough liquid and put
the inlet of suction at
least 10cm under the
liquid.
The joints of the suction
hose are not sealed.
Replace joints and
make sure the
connections are
securely sealed.
The circuit breaker has
switched off the power
because of overheating.
The circuit breaker has
switched off the power
because the ambient
temperature or the liquid
temperature is too high.
The blockage caused
by impeller damage.
Clean the clogged
parts and ensure
sufficient cooling
before pumping again.
Drop the temperature
to below 35℃
before pumping again.
Send it to one of
our service centers.
8
EN

Disposal
This marking indicates that this product should not be
disposed with other household wastes throughout the EU. To
prevent possible harm to the environment or human health from
uncontrolled waste disposal, recycle it responsibly to promote
the sustainable reuse of material resources. To return your used
device, please use the return and collection systems or contact
the retailer where the product was purchased. They can take
this product for environmental safe recycling.
Maintenance instructions
Maintenance instructions
• The pump is basically maintenance free. To ensure a long
service life, however, we recommend regular checks and care.
• Warning! Before every servicing, switch off the pump and
remove the plug from the socket.
• If the pump is not going to be used for a long time or has to
be removed for the winter months, rinse it out with water,
empty it completely and allow it to dry.
• If there is a risk of frost, the pump must be emptied com-
pletely.
• After long stoppages, make sure the rotor turns correctly by
briefly switching the pump on and off.
• If the pump becomes blocked, connect the pressure line to
the water line and remove the intake hose. Open the water
line, Switch on the pump several times for approx. 2 seconds.
Most blockages can be removed in this way.
• Warning! The pump must never be allowed to run dry!
9
EN

10
Sicherheitsinformationen
Sicherheitsinformationen
1.Bitte lesen Sie die Gebrauchsanweisung sehr sorgfältig durch
und beachten Sie die darin enthaltenen Hinweise. Machen Sie
sich anhand dieser Anleitung mit dem Gerät vertraut, lernen Sie
die korrekte Verwendung und beachten Sie die erforderlichen
Sicherheitsmaßnahmen.
2.Ergreifen Sie geeignete Maßnahmen, um sicherzustellen, dass
Kinder keinen Zugang zum Gerät haben.
3.Der Benutzer des Geräts ist für alle Personen im Arbeitsbereich
verantwortlich.
4.Vor der ersten Inbetriebnahme muss ein Elektriker überprüfen,
ob die erforderlichen elektrischen Schutzmaßnahmen getroffen
wurden.
Vorsicht!
1.Die Pumpe darf nicht betrieben werden, wenn sich Personen im
Wasser befinden.
2.Dieses Gerät kann von Kindern ab 8 Jahren sowie von Per-
sonen mit eingeschränkten physischen, sensorischen oder
geistigen Fähigkeiten oder mangelnder Erfahrung und Wissen
verwendet werden, sofern sie beaufsichtigt oder in die sichere
Verwendung des Geräts eingewiesen wurden und die damit
verbundenen Gefahren verstehen. Kinder dürfen nicht mit dem
Gerät spielen. Reinigung und Wartung dürfen durch Kinder nur
unter Aufsicht erfolgen.
3.Der Akku darf nur in Innenräumen aufgeladen werden.
4.Bitte kontaktieren Sie Ihren Elektriker!
5.Überprüfen Sie das Gerät vor jeder Benutzung. Verwenden Sie
das Gerät nicht, wenn Sicherheitsvorrichtungen beschädigt
oder abgenutzt sind. Schalten Sie Sicherheitsvorrichtungen
niemals aus.
GE

11
6.Verwenden Sie das Gerät nur für die in dieser Gebrauchsan-
weisung beschriebenen Zwecke.
7.Sie sind für die Sicherheit im Arbeitsbereich verantwortlich.
8.Der Akku muss der auf dem Typenschild angegebenen Gle-
ichspannung entsprechen.
9.Entfernen Sie den Akku immer aus der Pumpe, bevor Sie Arbeit-
en an der Pumpe durchführen.
10.Vermeiden Sie, die Pumpe direkt mit einem Wasserstrahl zu
bespritzen.
11.Der Betreiber ist für alle lokalen Sicherheits- und Installations-
vorschriften verantwortlich (fragen Sie Ihren Elektriker).
12.Schließen Sie indirekte Schäden durch Überflutung infolge
eines Pumpenausfalls durch geeignete Maßnahmen aus (z. B.
Installation eines Alarmsystems, einer Ersatzpumpe o. Ä.).
13.Im Falle eines Pumpenausfalls dürfen Reparaturen auss-
chließlich von einem Elektriker durchgeführt werden.
14.Lassen Sie die Pumpe niemals trockenlaufen und betreiben
Sie sie nicht bei vollständig geschlossener Wasserzufuhr. Die
Herstellergarantie erlischt, wenn die Pumpe durch Trockenlauf
beschädigt wird.
15.Die Pumpe darf nicht zum Betrieb von Schwimmbecken
verwendet werden.
16.Die Pumpe darf nicht in Trinkwasserleitungen installiert
werden.
Sicherheitsinformationen
GE
12
Beschreibung
Modell: MFGP001
1.Rocket switch
2.Indicator lamp
3.Transparent filler cap
4.Battery pack cover
Hinweis: Das hier gezeigte Bild dient nur zur Veranschauli-
chung. Bei Abweichungen zwischen Abbildung und tatsäch-
lichem Produkt gilt das tatsächliche Produkt.
Haltbarkeit
• Die maximale Temperatur des Fördermediums im Dauer-
betrieb darf +35 °C nicht überschreiten.
• Die Pumpe darf nicht zum Fördern von brennbaren,
gasförmigen oder explosiven Flüssigkeiten verwendet
werden.
• Die Förderung aggressiver Flüssigkeiten (Säuren,
Laugen, Silosickerwasser etc.) sowie abrasiver Stoffe
(z. B. Sand) ist ebenfalls zu vermeiden.
Anwendungen
Einsatzbereiche:
• Zur Bewässerung von Parks, Gemüsegärten und Grün-
flächen
• Für den Betrieb von Rasensprengern
• In Kombination mit einem Vorfilter zum Ansaugen von
GE

13
Beschreibung
Wasser aus Teichen, Bächen, Regentonnen, Regenwas-
serzisternen und Brunnen
Förderbare Medien:
Klarwasser (Frischwasser), Regenwasser
• Grundsätzlich empfehlen wir die Verwendung eines
Vorfilters sowie eines Ansaugsets mit Ansaugschlauch,
Saugkorb und Rückschlagventil, um lange Reparaturzeit-
en und Schäden durch Steine und harte Fremdkörper zu
vermeiden.
Elektrischer Anschluss
• Die Pumpe wird mit einem 18V-Akku betrieben (Akku
nicht im Lieferumfang enthalten).
• Drücken Sie den Ein-/Ausschalter, um die Pumpe zu
starten oder abzuschalten.
• Die Pumpe ist mit einer Nennleistung von 180 W und
120 W erhältlich.
Modell
Stromversorgung
Leistungsaufnahme
Maximale Förderhöhe
Maximale Fördermenge
Maximale Saughöhe
Maximale Korngröße
Maximale Wassertemperatur
Feuchtigkeitsschutzklasse
Druckleitungsdurchmesser
Rohranschluss
MFGP003
DC 18V
180W
22M
2800 Liter/H
6M
<0.5mm
35℃
IPX4
NPT1”
Technische Daten
GE
14
Erste Inbetriebnahme
• Stellen Sie die Pumpe auf eine ebene und feste Fläche.
• Schließen Sie den Saugschlauch an die Saugseite an.
• Schrauben Sie den Saugschlauch auf den Anschluss der
Saugseite der Pumpe (G1“) und ziehen Sie ihn handfest
an (um Luftleckagen zu vermeiden, kann das Gewinde
ggf. mit Teflonband umwickelt werden).
Hinweis:
Um die Ansaugzeit zu verkürzen, empfiehlt es sich, den
Saugschlauch vor dem Anschluss an die Pumpe mit Flüs-
sigkeit zu füllen (siehe Abbildung A).
Es muss ein vakuumfester Saugschlauch mit Gewebeein-
lage und einem Mindestdurchmesser von 3/4" verwendet
werden.
Verwenden Sie einen Saugschlauch mit Rückschlagventil,
um ein automatisches Entleeren des Saugschlauchs nach
dem Abschalten der Pumpe zu vermeiden.
A
C
D
B
GE

15
Erste Inbetriebnahme
Für sandhaltige Flüssigkeiten wird dringend ein Pumpenfil-
ter empfohlen.
Der Saugschlauch muss luftdicht sein, da Luft im Schlauch
den Saugvorgang blockieren kann.
Das Ende des Saugschlauchs muss stets in die Flüssigkeit
eingetaucht sein, um Trockenlauf der Pumpe bei sinkendem
Wasserstand zu verhindern.
Mechanisches Verdrehen und Ziehen ist beim Anschluss
von Saug- und Druckschläuchen zu vermeiden.
Schließen Sie den Saugschlauch im Wasser an die Pumpe
an und heben Sie ihn nicht über die Pumpe an, da sich
sonst Luftblasen im Schlauch bilden können, die den Durch-
fluss behindern (siehe Abbildung C).
Schließen Sie den Druckschlauch an die Druckseite an.
Hinweis:
Der Druckschlauch muss für die maximale Förderleistung
der Pumpe geeignet sein.
Ein 1/2"-Druckschlauch kann ebenfalls an einen geeigneten
Anschluss angeschlossen werden, allerdings kann sich
dadurch die Förderleistung verringern.
• Stecken Sie den Netzstecker ein.
• Öffnen Sie alle Absperrventile im Druckschlauch
(Spritzdüsen, Ventile usw.) (siehe Abbildung B).
• Füllen Sie die Pumpe über die Einfüllöffnung mit Flüs-
sigkeit, bis sie überläuft (siehe Abbildung D).
• Verschließen Sie den Auslass der Pumpe.
GE

16
Betrieb
• Setzen Sie den Akku ein.
• Starten Sie die Pumpe, indem Sie den Ein-/Ausschalter
drücken.
Hinweis:
Heben Sie den Druckschlauch mindestens 1 m über die
Pumpe an, um die Ansaugzeit zu verkürzen (siehe Abbil-
dung C)
Nach dem Betrieb
• Schalten Sie die Pumpe über den Ein-/Ausschalter aus.
• Entnehmen Sie den Akku.
• Lassen Sie das Restwasser über den Ablassanschluss
aus der Pumpe ab.
• Spülen Sie die Pumpe durch und lagern Sie sie
anschließend trocken.
Fehlerbehebung
Achtung:
Um Gefahren zu vermeiden, dürfen Wartungsarbeiten,
Komponentenwechsel und Reparaturen nur durch autoris-
iertes Kundendienstpersonal durchgeführt werden.
Stellen Sie sicher, dass die Pumpe vor jeder Fehlerdiag-
nose abgeschaltet ist.
GE

17
Wartungshinweise
Problem
Die Pumpe startet
nicht oder stoppt
plötzlich
Unzureichender
Durchfluss/kein
Durchfluss/keine
Selbstansaugung
Die Pumpe läuft
nur für kurze Zeit
Mögliche Ursache
Strom aus
Akku beschädigt
Andere Defekte
Schmutziges Wasser oder
abrasive Partikel verrin-
gern die Leistung
Schlauch-/Rohr-/Filter
verstopft
Schlauch-/Rohrsystem
beschädigt
Der Ansaugschlauch ist zu
weich und wird beim
Ansaugen platt gedrückt
Luft in der Pumpe, Pumpe
wurde nicht mit Wasser
befüllt
Der Ansaugschlauch war
nicht mindestens 10 cm tief
im Wasser
Verbindungen des
Ansaugschlauchs undicht
Überhitzung hat den
Schutzschalter ausgelöst
Temperatur zu hoch
(Umgebung oder Flüs-
sigkeit)
Verstopfung durch
beschädigtes Laufrad
Abhilfe
Akku entnehmen und
aufladen
Akku ersetzen
Pumpe an unser
Servicezentrum senden
Filter reinigen, beschädigte
Teile (z. B. Laufrad) erset-
zen
Schlauch reinigen/Filter
säubern
Schlauch-/Rohrsystem
ersetzen
Einen härteren Schlauch
verwenden
Pumpe vollständig mit
Wasser füllen
Überprüfen und sicherstel-
len, dass der Schlauch tief
genug eintaucht
Verbindungen nachziehen
und abdichten
Verstopfte Teile reinigen,
ausreichend kühlen lassen
Temperatur unter 35 °C
senken
Temperatur unter 35 °C
senken
GE

18
Wartungshinweise
• Die Pumpe ist im Wesentlichen wartungsfrei. Um jedoch
eine lange Lebensdauer zu gewährleisten, empfehlen wir
regelmäßige Überprüfungen und Pflege.
• Warnung! Vor jeder Wartung die Pumpe ausschalten und
den Netzstecker ziehen.
• Wenn die Pumpe längere Zeit nicht verwendet wird oder
für die Wintermonate demontiert werden soll, spülen Sie
sie mit klarem Wasser durch, entleeren Sie sie vollstän-
dig und lassen Sie sie trocknen.
• Bei Frostgefahr muss die Pumpe vollständig entleert
werden.
• Nach längerer Stillstandzeit stellen Sie sicher, dass sich
der Rotor ordnungsgemäß dreht, indem Sie die Pumpe
kurz ein- und wieder ausschalten.
• Sollte die Pumpe verstopft sein, schließen Sie die Druck-
leitung an eine Wasserleitung an und entfernen Sie den
Saugschlauch. Öffnen Sie die Wasserleitung und
schalten Sie die Pumpe mehrmals für ca. 2 Sekunden
ein. Die meisten Verstopfungen lassen sich auf diese
Weise beseitigen.
• Warnung! Die Pumpe darf niemals trocken laufen!
Entsorgung
Dieses Symbol weist darauf hin, dass dieses Produkt in der
gesamten EU nicht über den Hausmüll entsorgt werden
darf.
GE

19
Um mögliche Umweltschäden oder Gesundheitsrisiken
durch unkontrollierte Abfallentsorgung zu vermeiden, führen
Sie das Produkt einer verantwortungsvollen Wiederverwer-
tung zu und fördern Sie damit die nachhaltige Nutzung von
Rohstoffen.
Zur Rückgabe Ihres Altgeräts nutzen Sie bitte die Rück-
gabe- und Sammelsysteme oder wenden Sie sich an den
Händler, bei dem das Produkt erworben wurde. Dieser kann
das Gerät einer umweltgerechten Entsorgung zuführen.
GE
