
I
�
us
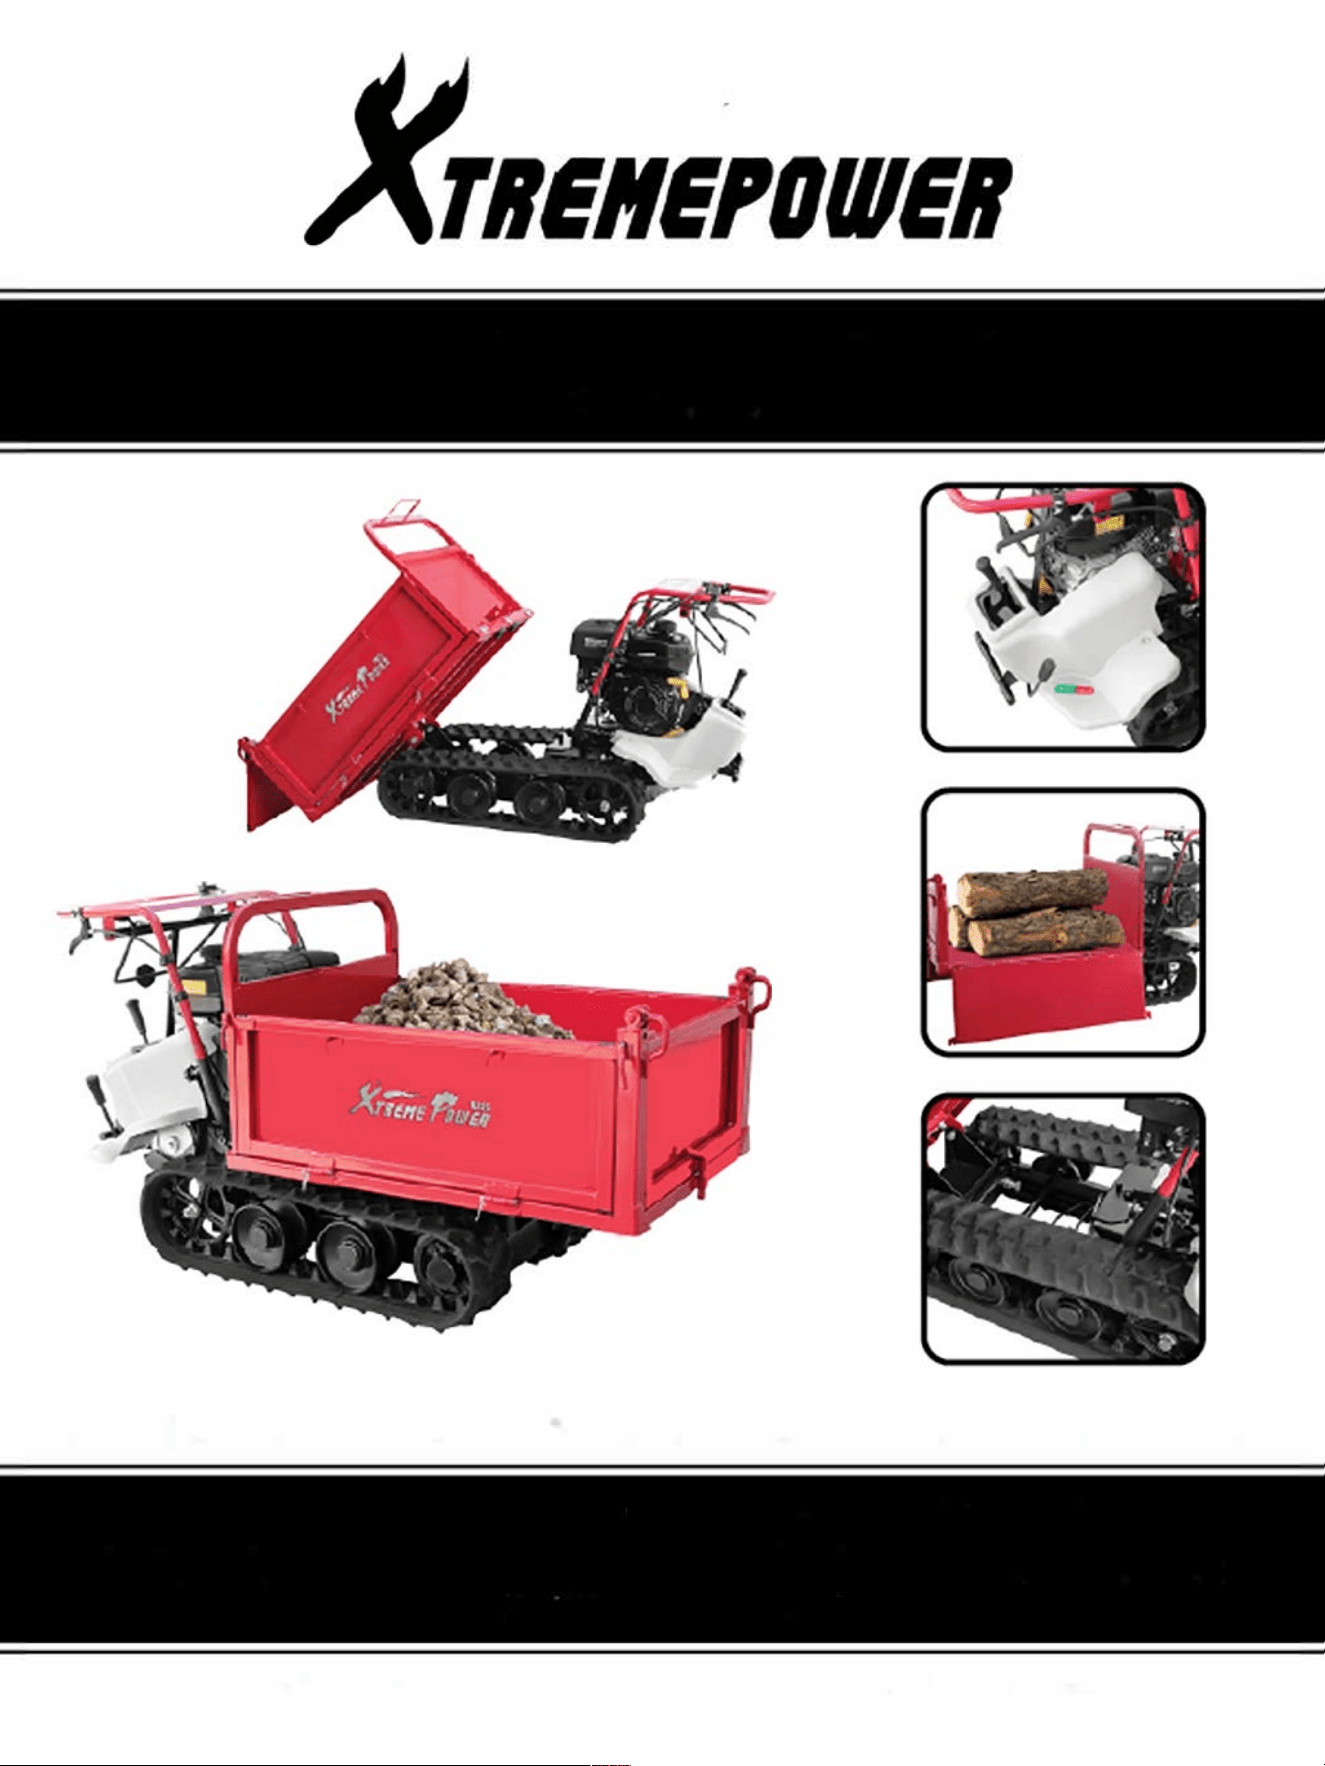
ALL-TERRAIN POWER CART
ITEM# 61034
OWNER'S MANUAL AND SAFETY INSTRUCTIONS
SAVE THIS MANUAL KEEP THIS MANUAL FOR SAFETY WARNINGS. PRECAUTIONS. ASSEMBLY.
OPERATION. INSPECTION. MAINTENANCE AND CLEANING PROCEDURES. WRITE THE PRODUCT'S
SERIAL NUMBER ON THE BACK OF THE MANUAL OR THE MONTH AND YEAR OF PURCHASE IF
PRODUCT HAS NO SERIAL NUMBER
FOR QUESTIONS, PLEASE CALL CUSTOMER SERVICE: 909.628.0880

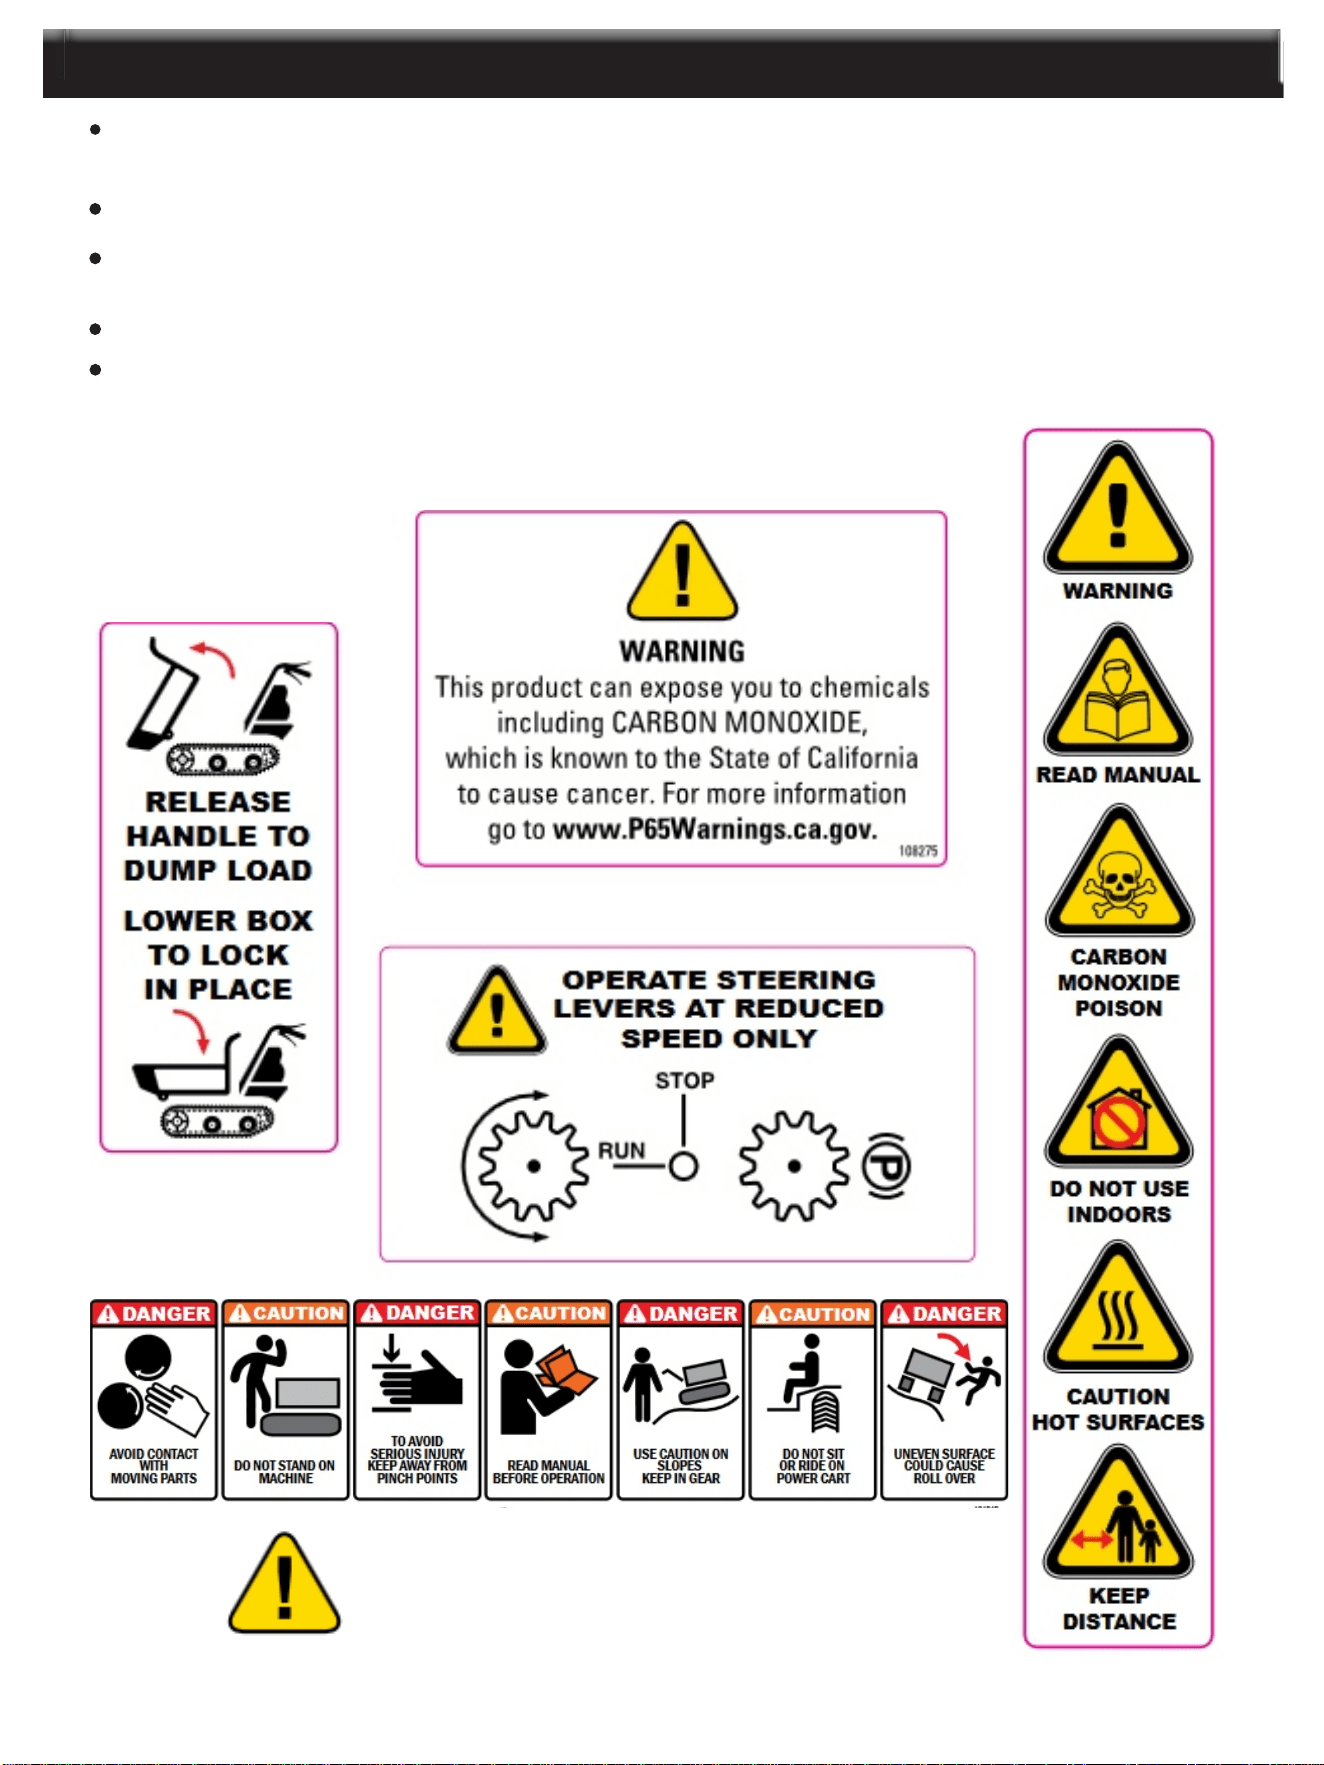
SAFETY
1
IMPORTANT SAFETY INFORMATION
Read and thoroughly understand all instructions and safety information before assembling or operating
this All Terrain Power Cart. Failure to do so may cause serious injury or death. DO NOT allow anyone to
operate this equipment who has not read this manual. As with all power equipment, an All Terrain Power
Cart can be dangerous if assembled or used improperly. DO NOT operate this equipment if you have
doubts or questions concerning safe operation.
DO NOT Use the Power Cart for any purpose other than for which it was designed. Any other use is
unauthorized and may result in serious injury or death.
When operating this Power Cart it is essential that you wear safety gear including goggles or safety
glasses, adequate clothing and tight fitting gloves (no loose cuffs or draw strings). Always wear ear plugs
or sound deafening headphones to protect against hearing loss when operating this Power Cart. Always
wear sturdy footwear. Never wear sandals, sneakers or open shoes, and never operate the Power Cart
with bare feet. DO NOT wear loose clothing that might get caught in moving parts.
Whenever you leave the operating position to unload or make adjustments always shut off the engine
and wait five (5) minutes to allow parts to cool. Remove the key or disconnect the spark plug wire and
keep the wire away from the spark plug to prevent accidental starting.
CALIFORNIA PROPOSITION 65 WARNING Engine exhaust, some of its constituents and certain
product components contain or emit chemicals known to the state of California to cause cancer and birth
defects or other reproductive harm.
DO NOT permit children to operate this equipment at any time.
DO NOT permit others that have not read and understood the complete Operation Manual to operate
this equipment
Keep all people and pets away from the work area when operating the Power Cart.
DO NOT operate the Power Cart when under the influence of alcohol, drugs or medication.
DO NOT allow a person who is tired or otherwise impaired or not completely alert to operate the Power
Cart.
CAREFULLY INSPECT THE AREA TO BE TRIMMED AND REMOVE ALL FOREIGN OBJECTS.
ALWAYS operate the Power Cart from the control panel.
NEVER stand or sit on the machine with engine running.
ALWAYS turn the engine off when unloading.
NEVER , under any conditions, remove, bend, cut, fit, weld, or otherwise alter standard parts on the
Power Cart.
Use caution when operating on slopes.
DO NOT operate on slopes greater than 20 degrees.
Be cautious when using the Power Cart around obstacles such as fencing, wires, ropes, or other
material that can become entangled within the Power Cart’s tracks.
DO NOT exceed the recommended load limit of 705 lbs.
2
IMPORTANT SAFETY INFORMATION
SAVE THESE SAFETY WARNINGS!
NEVER run the engine in an enclosed area or without proper ventilation as the exhaust from the engine
contains carbon monoxide, which is an odorless, tasteless, and deadly poisonous gas.
Fill the gasoline tank outdoors with the engine off and allow the engine to cool completely.
The muffler and engine become very hot with use and can cause a severe burn; DO NOT touch. Allow
the engine to cool before refuelling, doing maintenance, or making adjustments.
DO NOT make sudden or sharp turns when operating the cart.
At 15-20 degree bevelled level, the loading capacity should control within 150KG. When at 20-25, should
bear nothing to drive. DO NOT drive while the level is over 25 degrees. DO NOT to shift while overloading
or at bevelled level.
3
PRODUCT INFORMATION
FILLING WITH GASOLINE AND OIL: ADD OIL BEFORE STARTING THE ENGINE The Power
Cart is shipped without fluids installed.
Keep the caps on the fuel and oil fills until you are ready to pour either gasoline
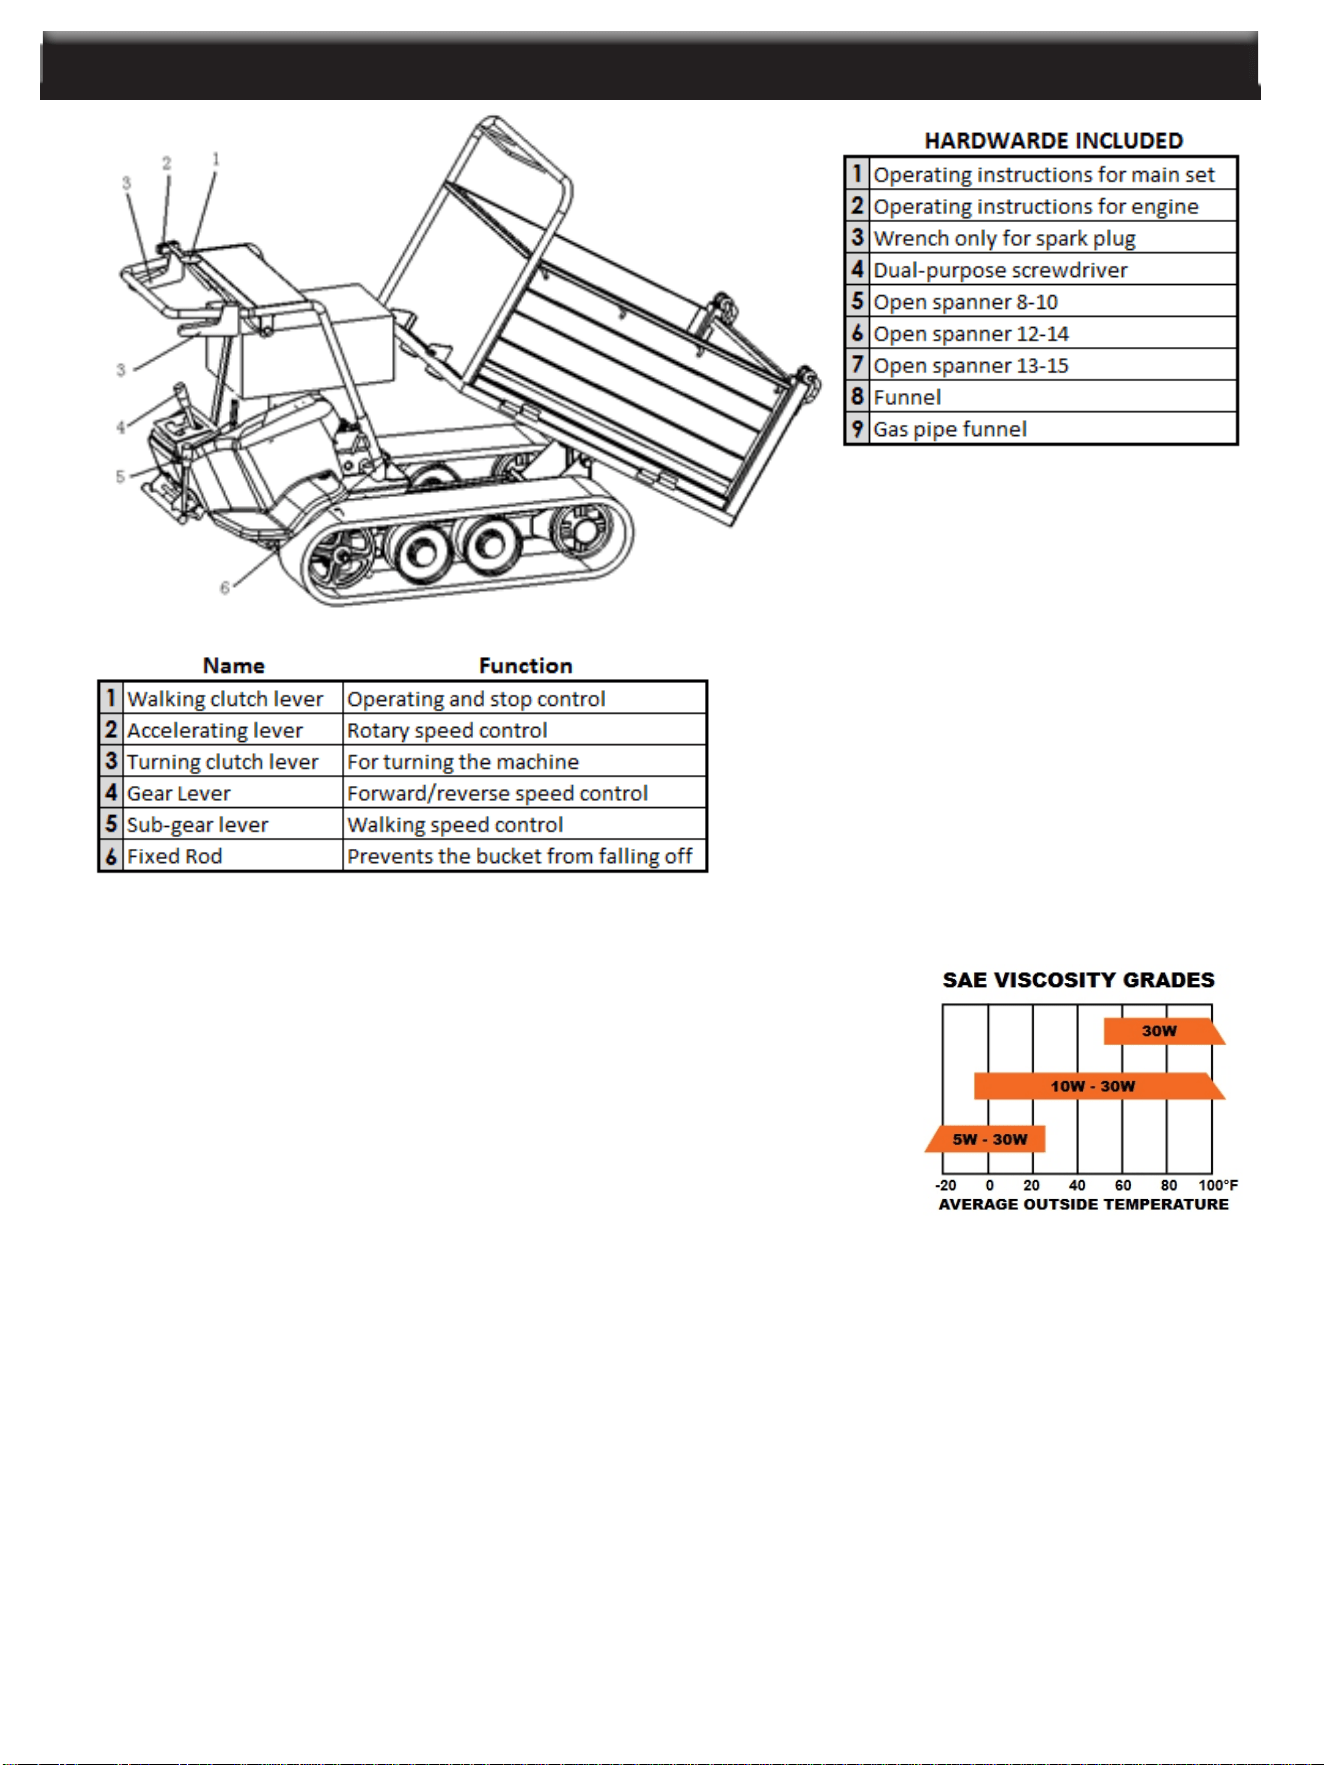
or oil into the correct fill. Oil capacity: 3.6L of SAE 10W30 engine oil.
1. Place the machine on a level surface and initially add 1/2 of the SAE 10W30
high detergent oil into the oil fill and wait one minute for the oil to settle.
2. Check the dipstick and continue adding a few ounces of oil at a time,
rechecking the dipstick until the oil reaches the fill mark. Be careful not to
overfill.
3. Fill the fuel tank with fresh, unleaded gas (85+ Octane), to 1/2” from the top of the fill neck to allow for
expansion. Be careful not to overfill and reinstall the cap before starting the engine.
Allow the engine to cool for at least two minutes before removing the fuel cap. Use caution as engine oil,
muffler and other components may be hot to the touch. To avoid fire danger never add fuel to a hot engine.
Before performing any adjustments to the Power Cart or any maintenance, stop the engine, wait five minutes
to allow parts to cool. Disconnect the spark plug wire, keeping it away from the spark plug. Contact with internal
rotating parts may cause serious personal injury. Never put hands or feet on or between the track rollers.
FUEL (ANYTIME): 93 UNLEADED 3.6L CAPACITY
ENGINE OIL: FIRST TIME 50HRS, AFTER EVERY 100HRS: SAE10W-30 0.6L CAPACITY
GEAR BOX OIL: FIRST TIME 50HRS, AFTER EVERY 500HRS: GL-4, 1.5L CAPACITY
4
OPERATION
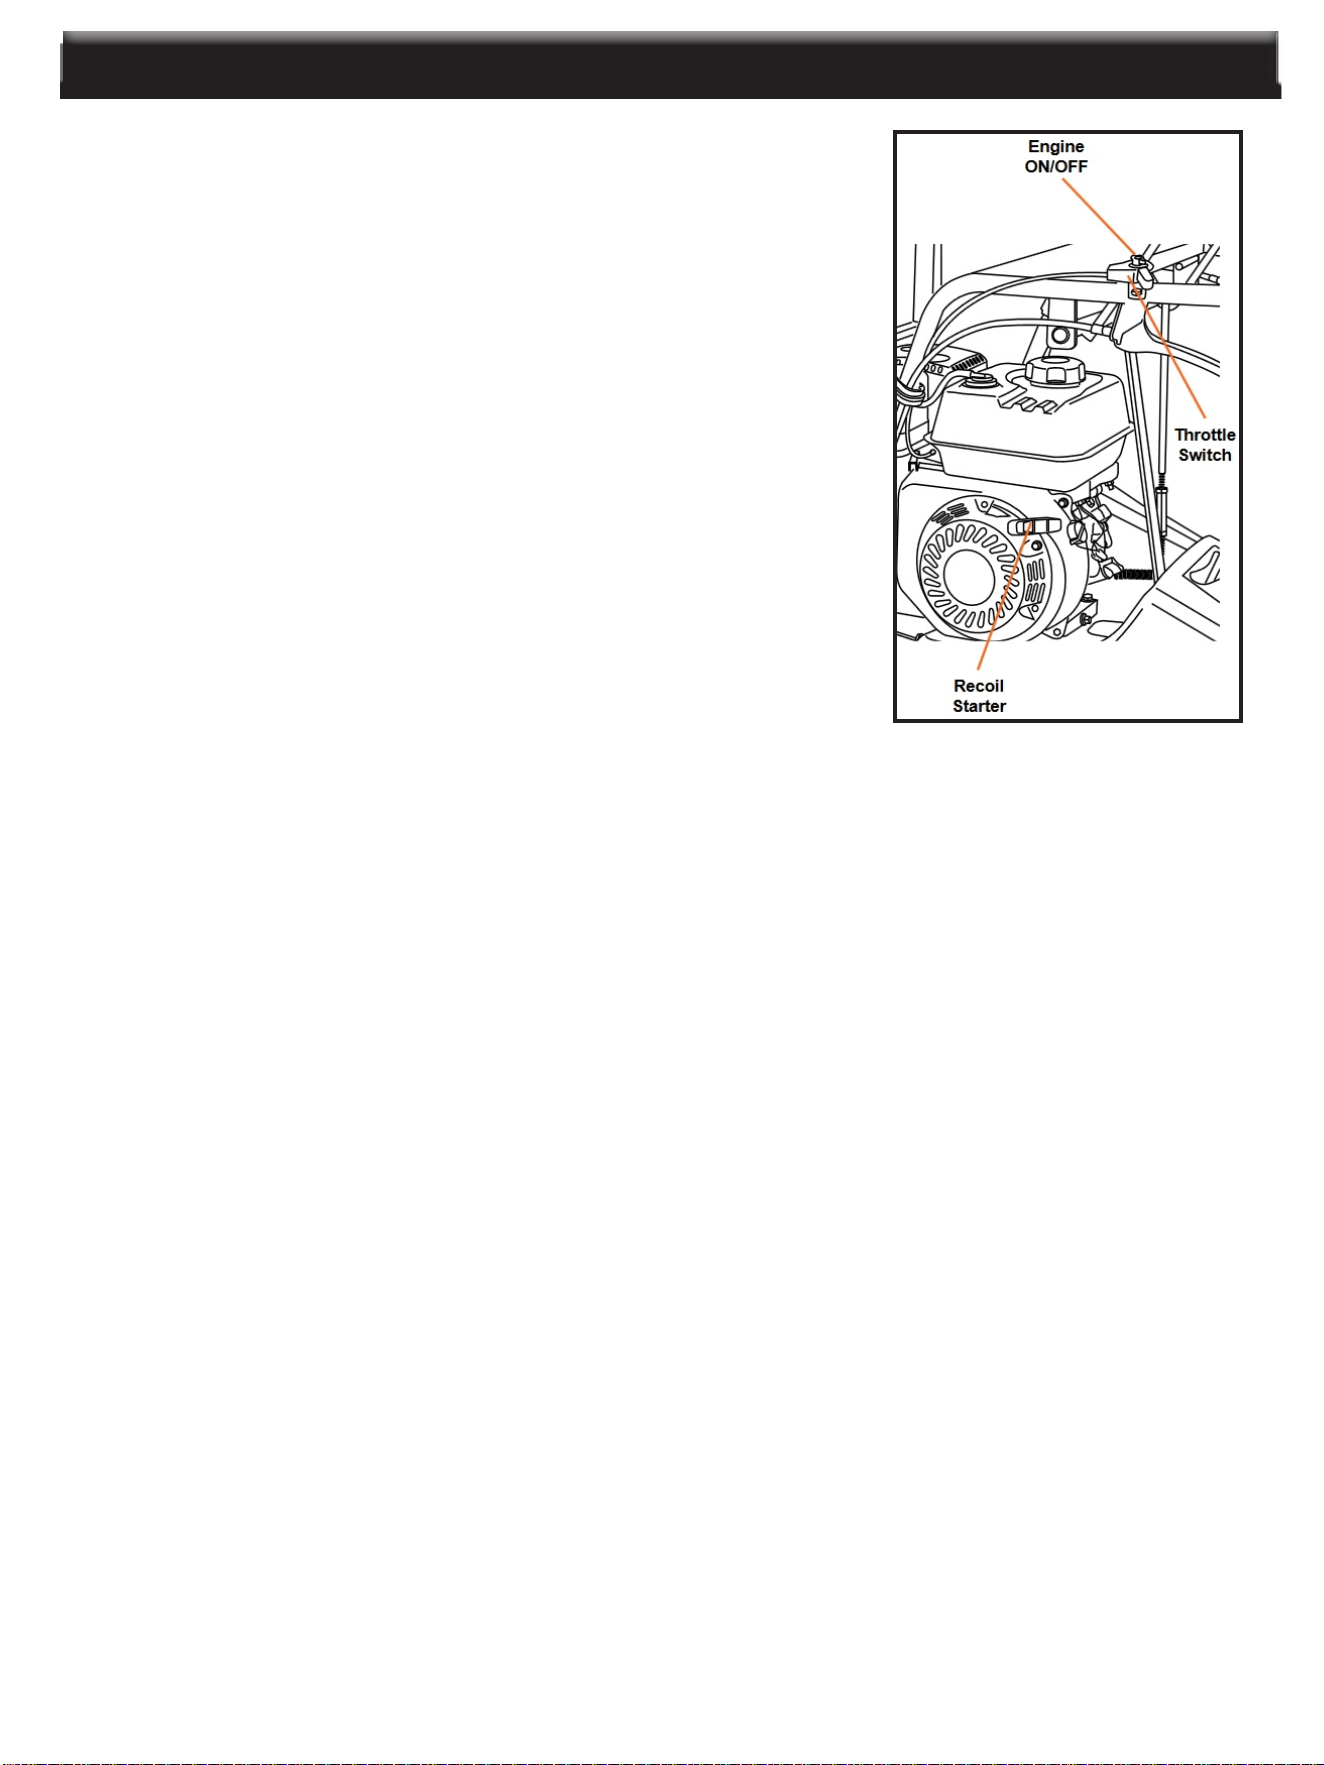
STARTING THE ENGINE:
FOLLOW THE PROCEDURE BELOW FOR COLD STARTS:
1. Turn choke lever on the engine to the CLOSED position.
2. Set the throttle lever on the handlebar at halfway position
3. Turn the engine switch on.
4. Pull the starting rope slowly several times to allow the gasoline to flow
into the engine’s carburetor. Then hold the start handle firmly and pull
rope out a short distance until you feel some resistance. Then pull the
rope smoothly and briskly, and allow rope to return gently. Do not let the
rope snap back. If necessary, pull the rope several times until the engine
starts.
5. Allow the engine to run for several seconds to warm up. Then, gradually
move choke lever to “OPEN ” position
To stop the engine in an emergency, simply turn the engine switch to the OFF position. Under normal
conditions, use the following procedure.
1. Move the throttle lever to the SLOW position.
2. Let the engine idle for one-two minutes.
3. Turn the engine switch to the OFF position.
4. Turn the fuel valve lever to the OFF position
Restarting a warm engine does not require use of the choke, so follow the
STOPPING THE ENGINE::
CAUTION: DO NOT move the choke control to stop the engine. This may result in engine backfire or
damage to the engine may occur.
After engine warms up, pull throttle lever to accelerate engine speed. Engage the required gear and slowly
squeeze the clutch control lever. If the gear does not engage right away, slowly release the clutch lever and
try again.
CHANGING DIRECTIONS:
1. To turn left, pull the left steering lever upwards. 2. To turn right, pull the right steering lever upwards.
The sensitivity of the steering increases in proportion to the speed of the machine and that with an empty
machine, a light pressure on the lever is all that is needed to turn. When the machine is loaded, more pressure
is required. It is recommended that the operator practice driving the Power Cart with the dumper empty to
become familiar with the equipment’s operation before attempting to move a load.
LOADING AND UNLOADING:
1. Position the Power Cart into the desired position for dumping the load.
2. Turn off the engine and put the clutch lever into the STOP position.
3. Pull the tipping handle up to release the dump box’s locking device and raise the dump box.
4. Raise the dump box manually to dump the load.
5. Pull the tipping handle down to its original position. When the dump box is lowered, the locking mechanism
operates, locking the dump box.
5
MAINTENANCE
Adjusting the Tracks: With use, tracks tend to loosen on the drive wheels. Operating with loose tracks can
cause them to slip over the driving wheel causing it to jump its housing and cause damage.
TURN OFF ENGINE AND DETACH SPARK PLUG WIRE. Allow engine to cool before performing
maintenance.
Check the Power Cart for loose screws, misalignment or binding of moving parts, cracked or broken
parts, and any condition that may affect safe operation. Remove debris and other materials that may
have accumulated in and around the tracks. Clean after each use. Use a premium lightweight machine
oil to lubricate moving parts.
DO NOT use a “pressure washer” to clean the Power Cart. Water can penetrate the machine and its
transmission case and cause damage to spindles, gears, bearings or the engine.
Transmission: The gearbox is pre-lubricated
and sealed at the factory. Check oil level every 50
hours of working. Use portable tool lithium #0
grease such as Lubriplate 6300AA , Lubriplate
GR-132, or Multifak,e.g. EP-O.
Adjusting the Clutch Lever: As the clutch wears
out, the lever could have a wider opening, making
it difficult to use. Adjust the cable, setting the clutch
lever to its original position using the adjustment
device and counter-nut.
Changing the Engine Oil: Oil should be changed
when warm by unscrewing filler cap and draining
into a suitable container for disposal. When oil is
completely drained, replace filler cap and fill with
standard SAE10W30 engine oil
Adjusting the Steering Lever: If steering the
unit becomes difficult, adjust the steering levers with
the special adjusters. Loosen the locknut and
unscrew the adjuster to eliminate the play in the
cable, which can occur with normal wear. Be careful
not to unscrew the adjusters too much because this
can create the loss of traction. Tighten the locknut
when finished.
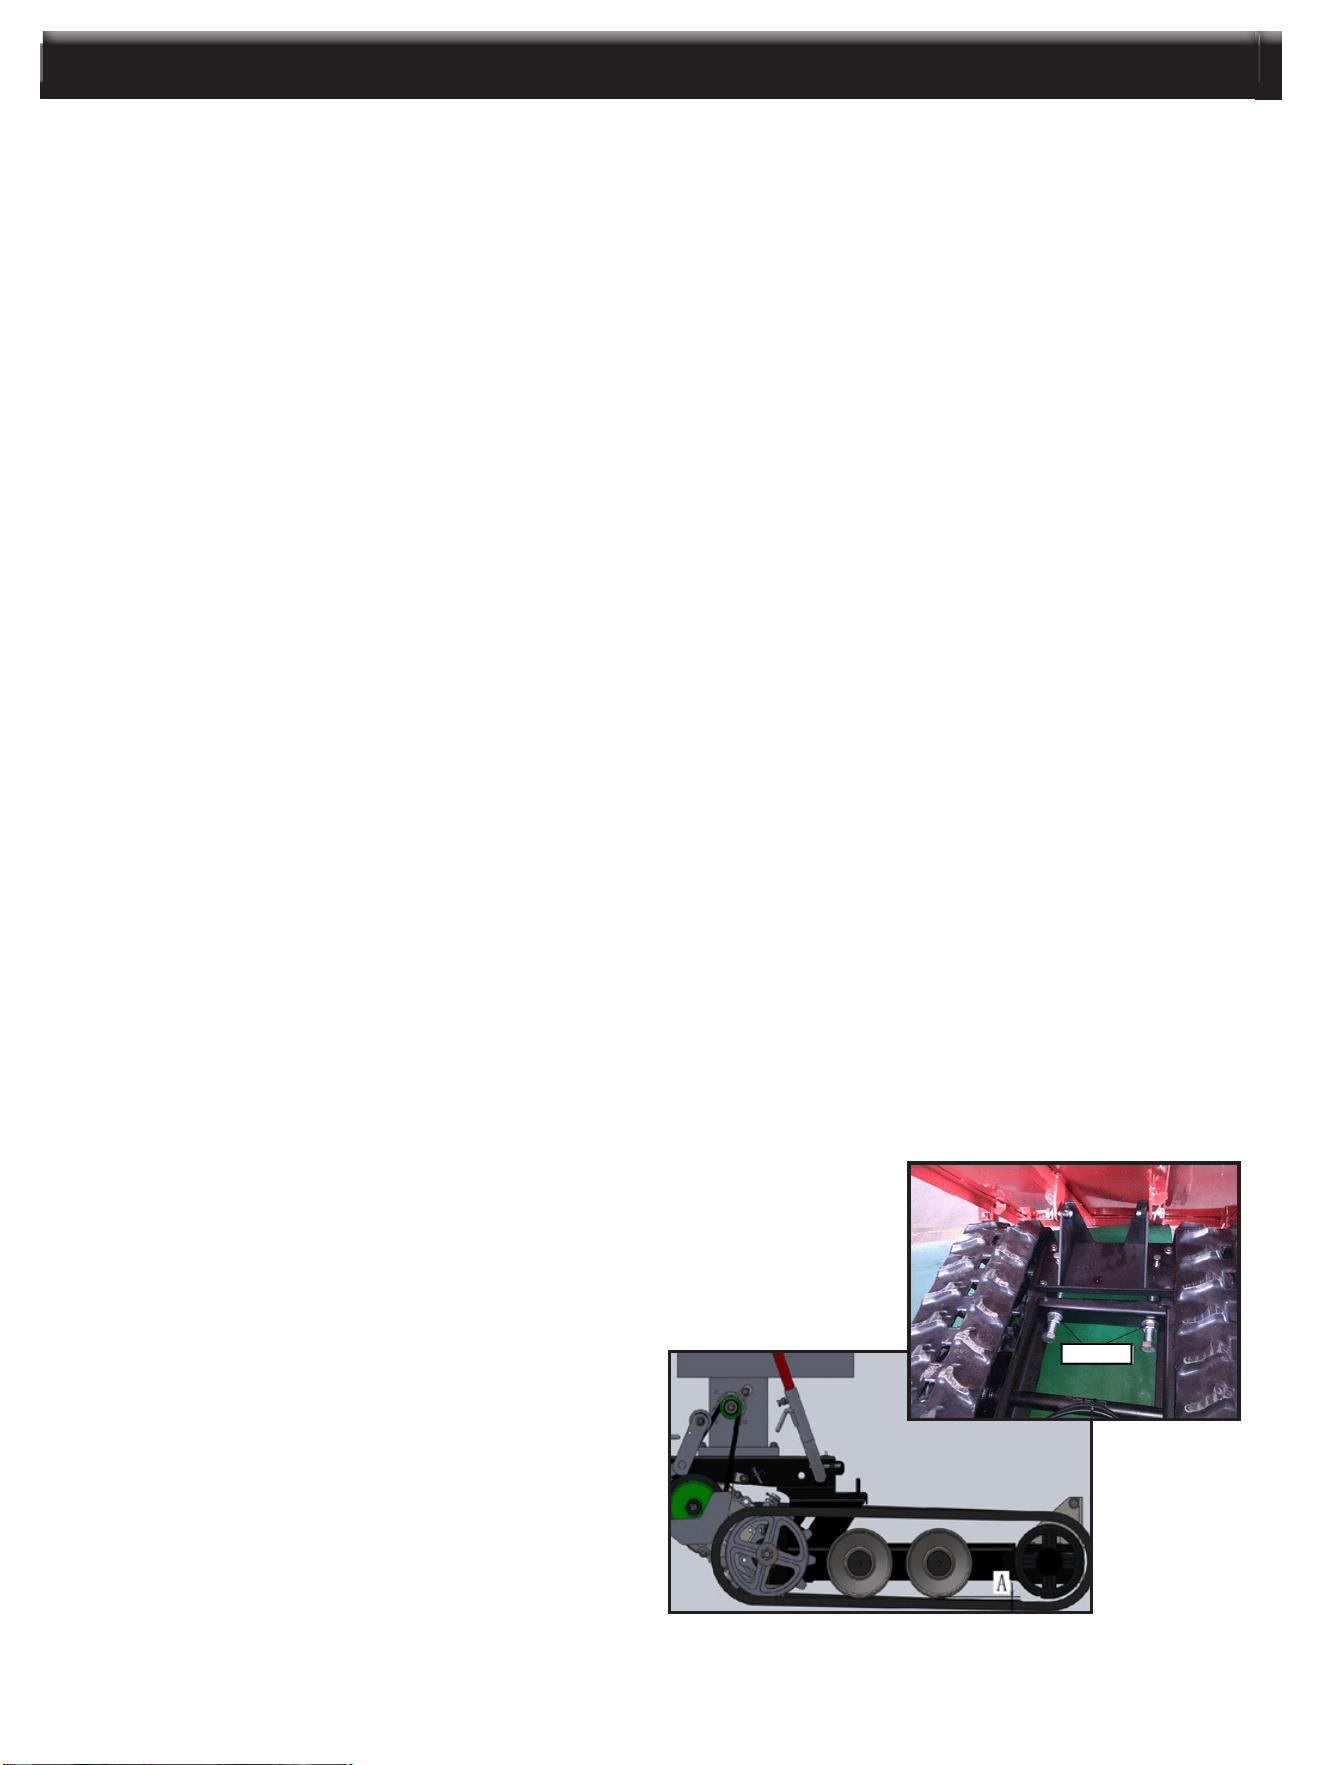
1. To check track tightness set the Power Cart on a flat, compact surface. Lift the machine and set it on blocks or
supports so that the tracks are approximately 4” (100mm) off of the ground.
2. Measure the sag in the tracks, by measuring the height from the ground to the middle of the top track.
Compare this with measuring the distance from the ground to the top of the track on the top of the wheel. The
difference in the distance should not exceed 0.4” - 0.6” (10 - 15mm). If the distance is greater, use the tipping
handle to tip the dump box and set it on blocks that support the weight of the Power Cart.
3. Loosen locknut A. Tighten bolt B until the correct tightness is restored. Secure bolt B by tightening locknut A
thoroughly. Return the dump box to its original position.
Replacing the Tracks: Check the condition of the tracks
periodically. If a track is cracked or frayed, it should be replaced as
soon as convenient.
1. Loosen the locknut A and bolt B shown in Adjusting
the Tracks, to allow the tracks to be loose enough.
2. Slip the old tracks off and install the new tracks
3. Adjust bolt B to assure correct tightness.
4. Secure bolt B by tightening locknut A thoroughly.
MAINTENANCE
The belt is not separated completely, tensioning position please V belt adjustment. Removed bolt belt wheel
cover, belt tensioner in the parking position does not contact the V belt, do not rotate in [walk] and position.
Then tighten the bolts, tighten the nuts.
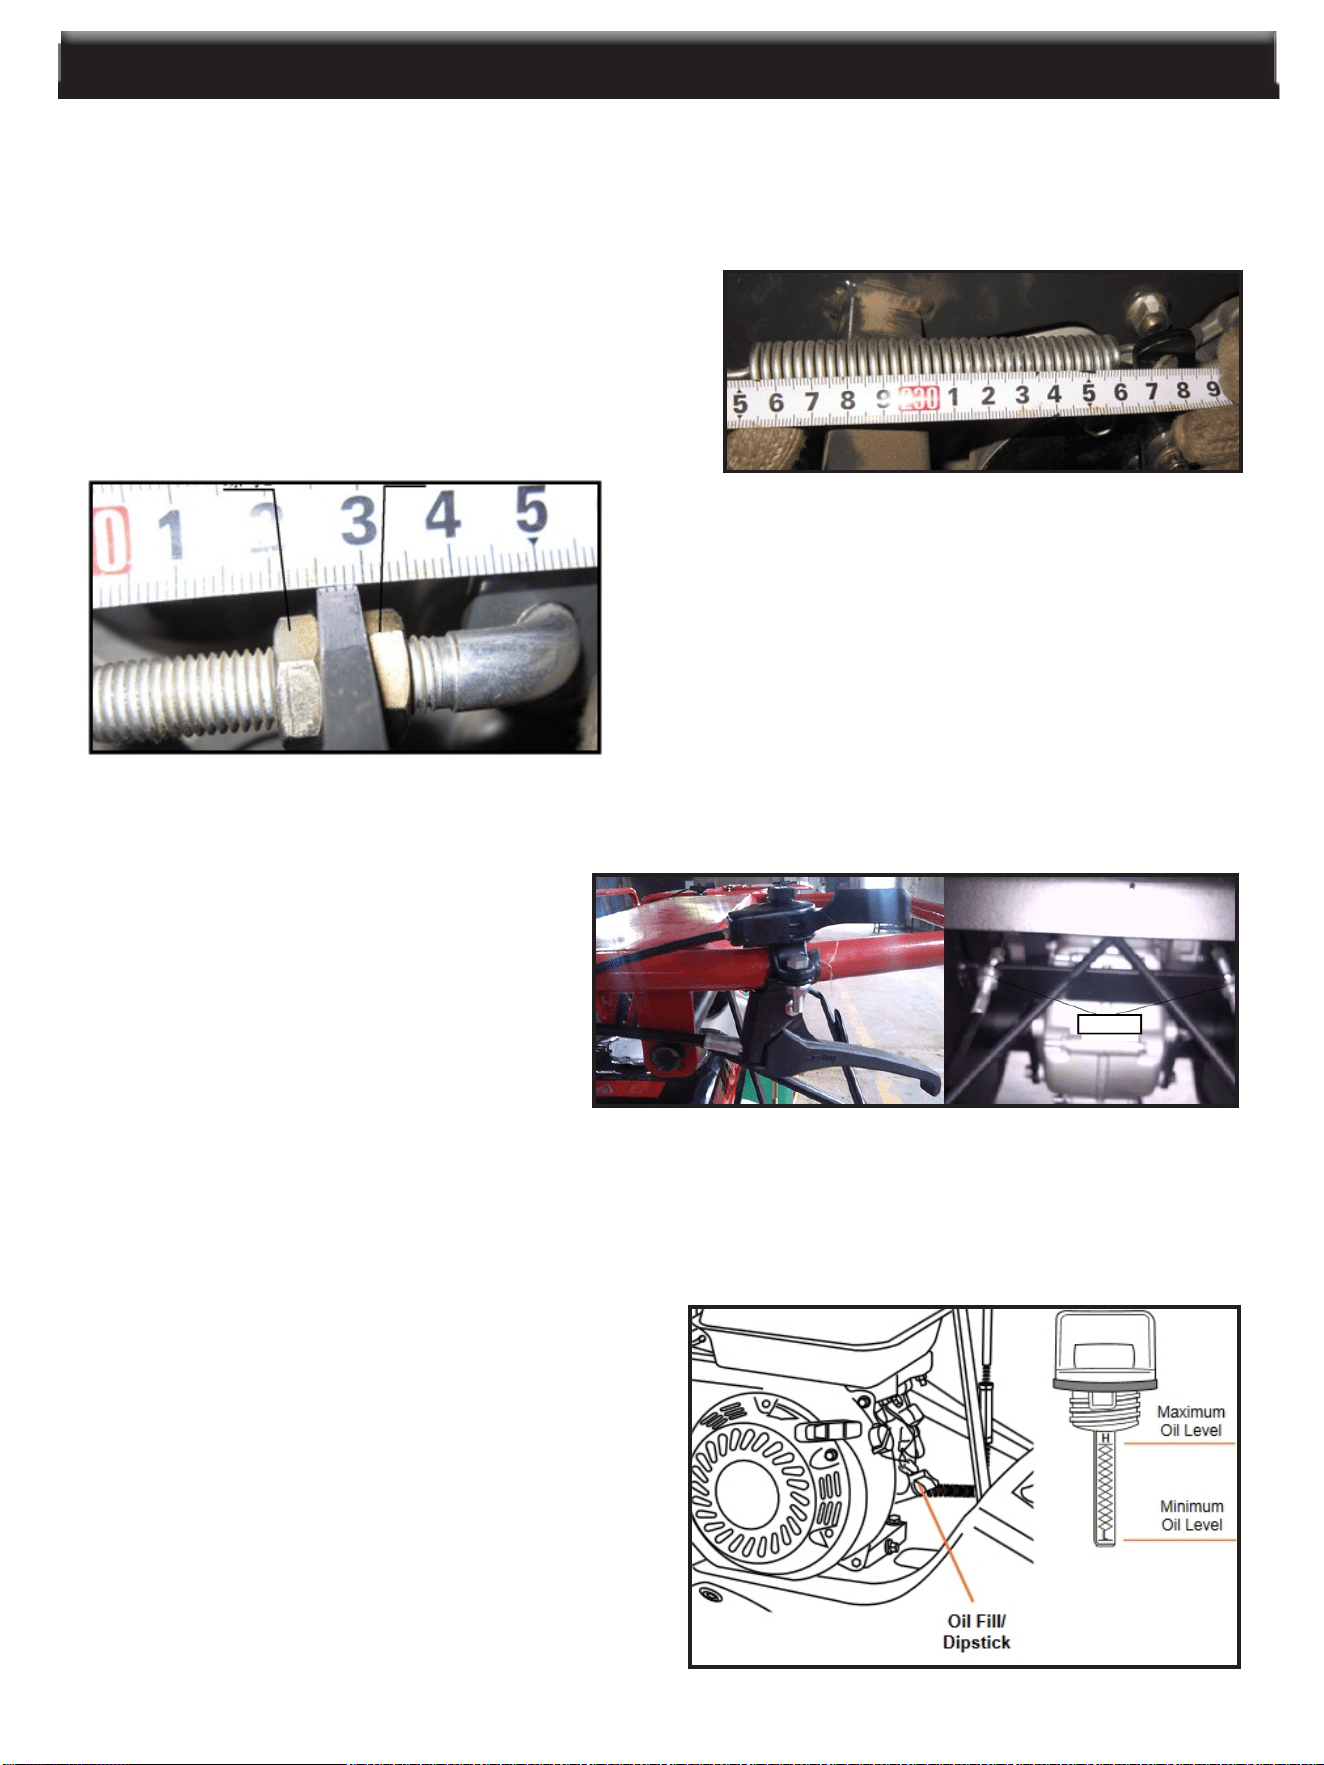
Checking and Adjusting the Brakes:
1. Take off the plastic cover
2. Put the walking clutch rod to Stop the machine position
3. Make sure the spring length A is between 185-190mm,
adjust if there is any inappropriate.
4. Put on the plastic cover
1. Take off the plastic cover
2. Loosen the nut
3. Put clutch rod to Stop the machine position.
4. Adjust nut 1 to make sure the spring length A is between
185-190mm.
5. Tighten the nut 1, then loosen nut 2
6. Put walking clutch rod to Walking position, and adjust adjusting nut 2 to cancel brake condition.
7. Tighten nut 2 then put the plastic cover back on.
Turning Clutch Adjustment:
1. Take the cargo container, and fix it with the
supporting frame.
2. Adjust the adjusting nut, and make turning
clutch handle to have 1-5mm empty space.
3. Put off the cargo container.
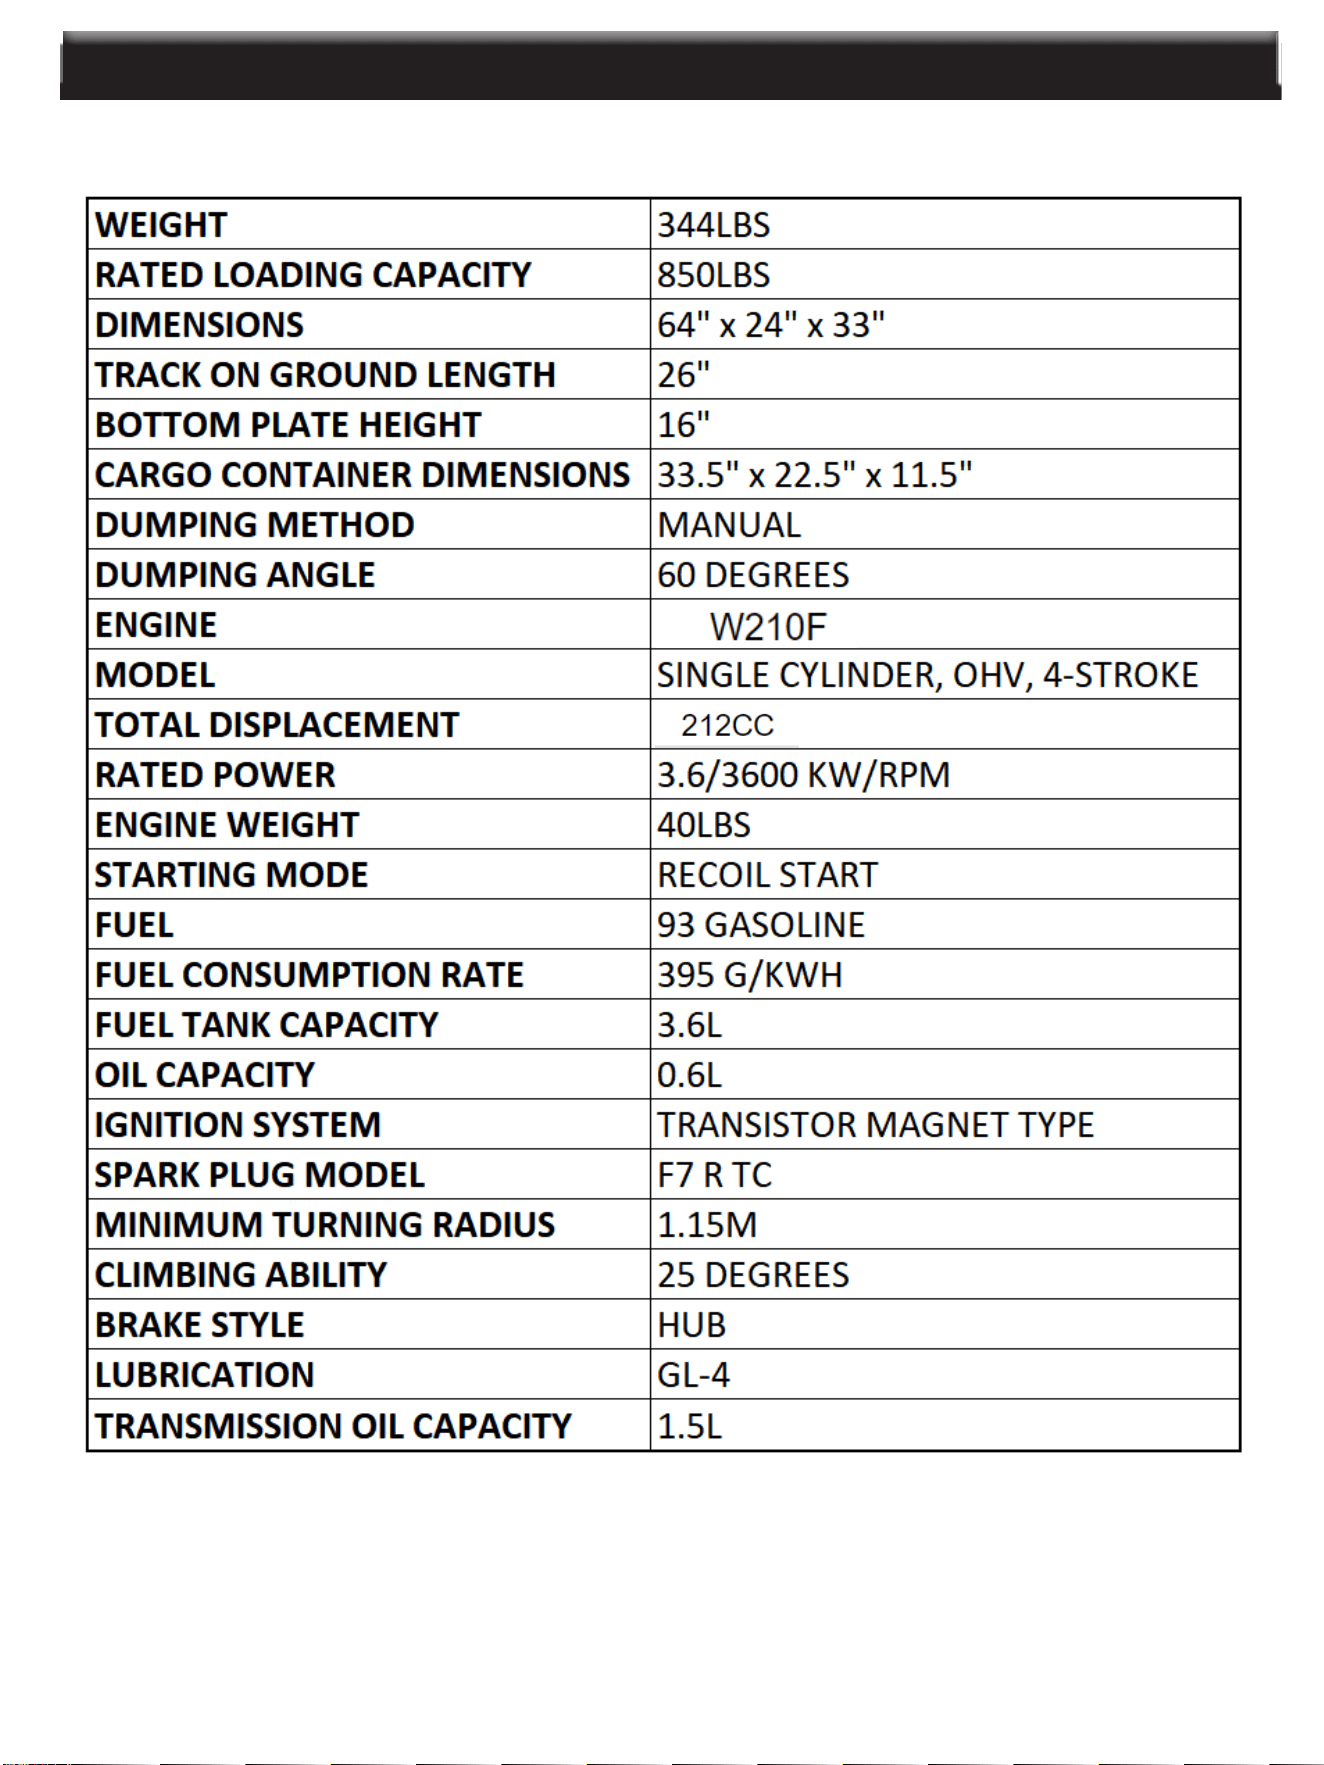
Engine Maintenance:
1. Check oil level before each use and after 8 hours of operation.
2. Change oil after first 5-8 hours of operation. Change oil while engine is warm. Refill with new oil of
recommended grade.
3. Check spark plug yearly or every 100 hours of
operation
4. Service the air cleaner.
5. Keep the engine and parts clean
6. Check the engine and equipment often for loose
nuts and bolts.
6

TROUBLESHOOTING
7
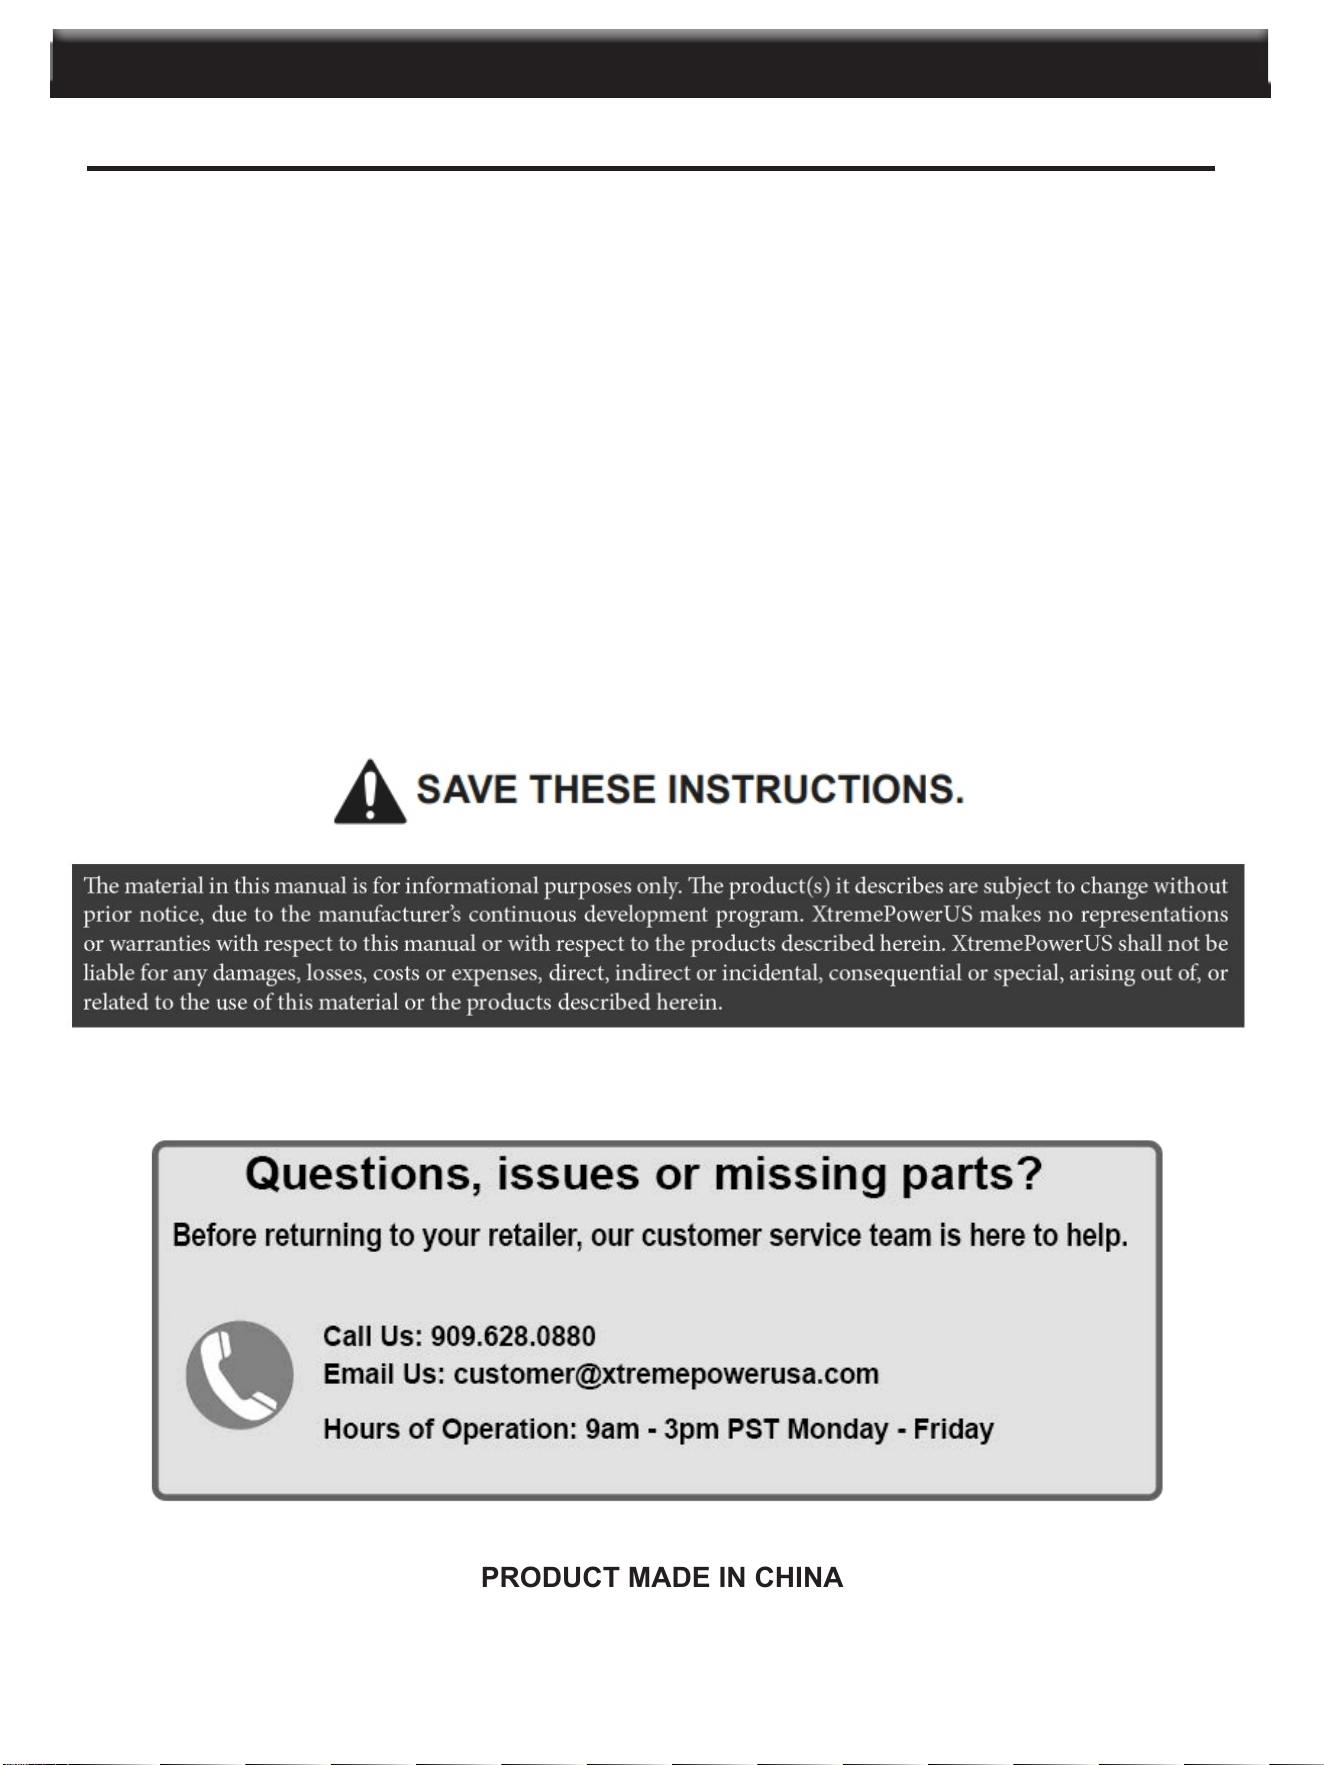
SPECIFICATIONS
8
9
THE MANUFACTURER AND/OR DISTRIBUTOR HAS PROVIDED THE PARTS LIST AND
ASSEMBLY DIAGRAM IN THIS MANUAL AS A REFERENCE TOOL ONLY. NEITHER THE
MANUFACTURER OR DISTRIBUTOR MAKES ANY REPRESENTATION OR WARRANTY OF ANY
KIND TO THE BUYER THAT HE OR SHE IS QUALIFIED TO MAKE ANY REPAIRS TO THE
PRODUCT, OR THAT HE OR SHE IS QUALIFIED TO REPLACE ANY PARTS OF THE PRODUCT.
IN FACT, THE MANUFACTURER AND/OR DISTRIBUTOR EXPRESSLY STATES THAT ALL
REPAIRS AND PARTS REPLACEMENTS SHOULD BE UNDERTAKEN BY CERTIFIED AND
LICENSED TECHNICIANS, AND NOT BY THE BUYER. THE BUYER ASSUMES ALL RISK AND
LIABILITY ARISING OUT OF HIS OR HER REPAIRS TO THE ORIGINAL PRODUCT OR
REPLACEMENT PARTS THERETO, OR ARISING OUT OF HIS OR HER INSTALLATION
OF REPLACEMENT PARTS THERETO.
XTREMEPOWERUS® 2-YEAR WARRANTY EMISSIONS RELATED COMPONENTS
XTREMEPOWERUS® tools are warranted for 2 years for all emission related components.
Components covered in this emission warranty include: 1) Fuel metering system, 2) Air induction
system, 3) Ignition system and 4) items used in the above systems.
PLEASE READ THE FOLLOWING CAREFULLY
WARRANTY
PRODUCT MADE IN CHINA
