To reduce the risk of fire, electric shock or injury to persons using this freezer, read all instructions and follow
basic safety precautions before using the unit, including the following:
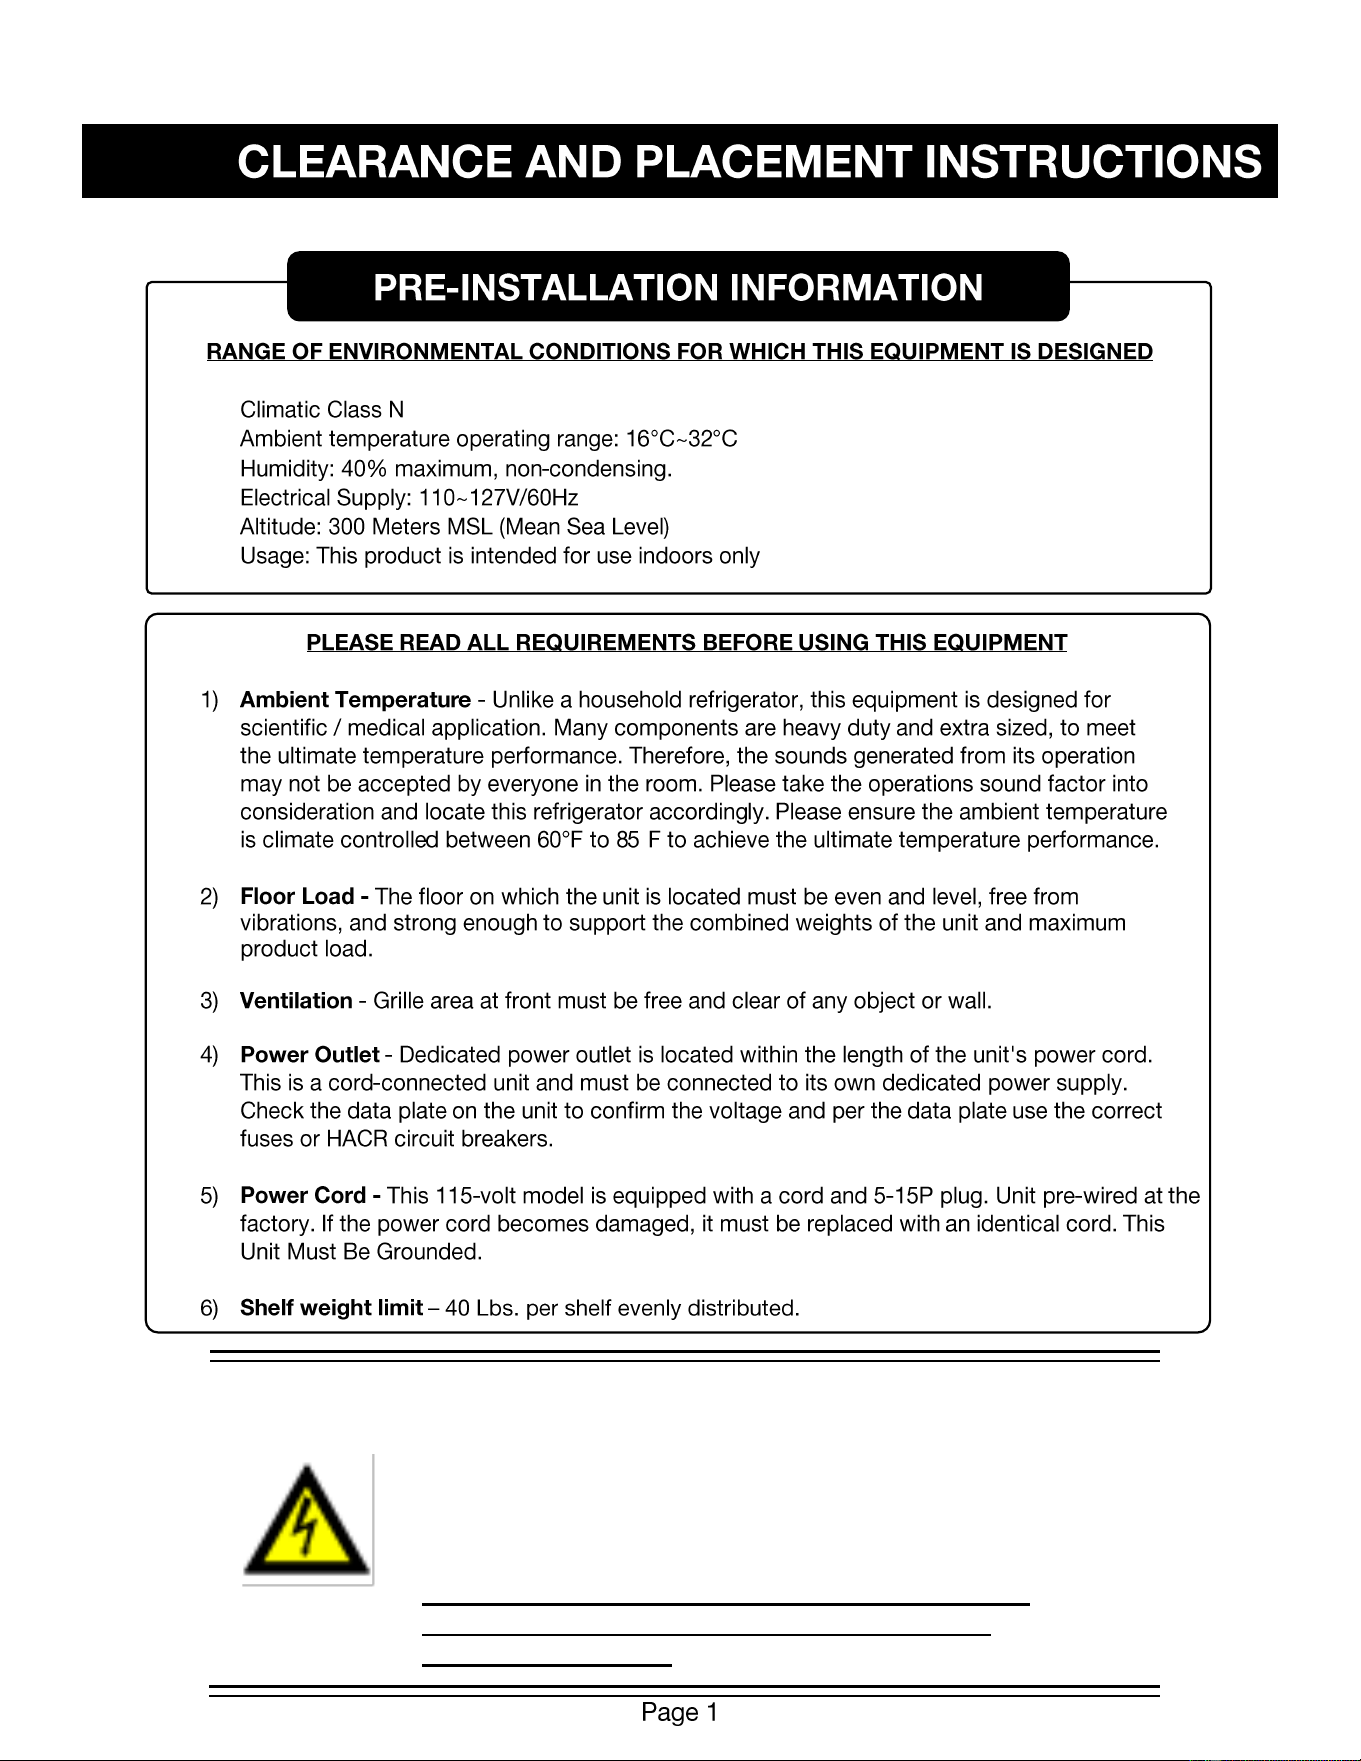
Do not modify the plug provided with the unit. If it will not fit the outlet,
have a proper outlet installed by a qualified electrician.
Do not position equipment so it is difficult to disconnect from the power supply.
While under warranty, do not attempt to repair or replace any part of the
freezer for servicing without first contacting the Service Department.
BEFORE CALLING THE MANUFACTURER’S TECHNICAL SUPPORT DEPARTMENT
Please have the model number of the unit, box identification number, and serial number ready as
well as the problem description. The model, serial number and box id number can be found on
the serial tag, which is located on the interior left upper wall, or back of the unit.
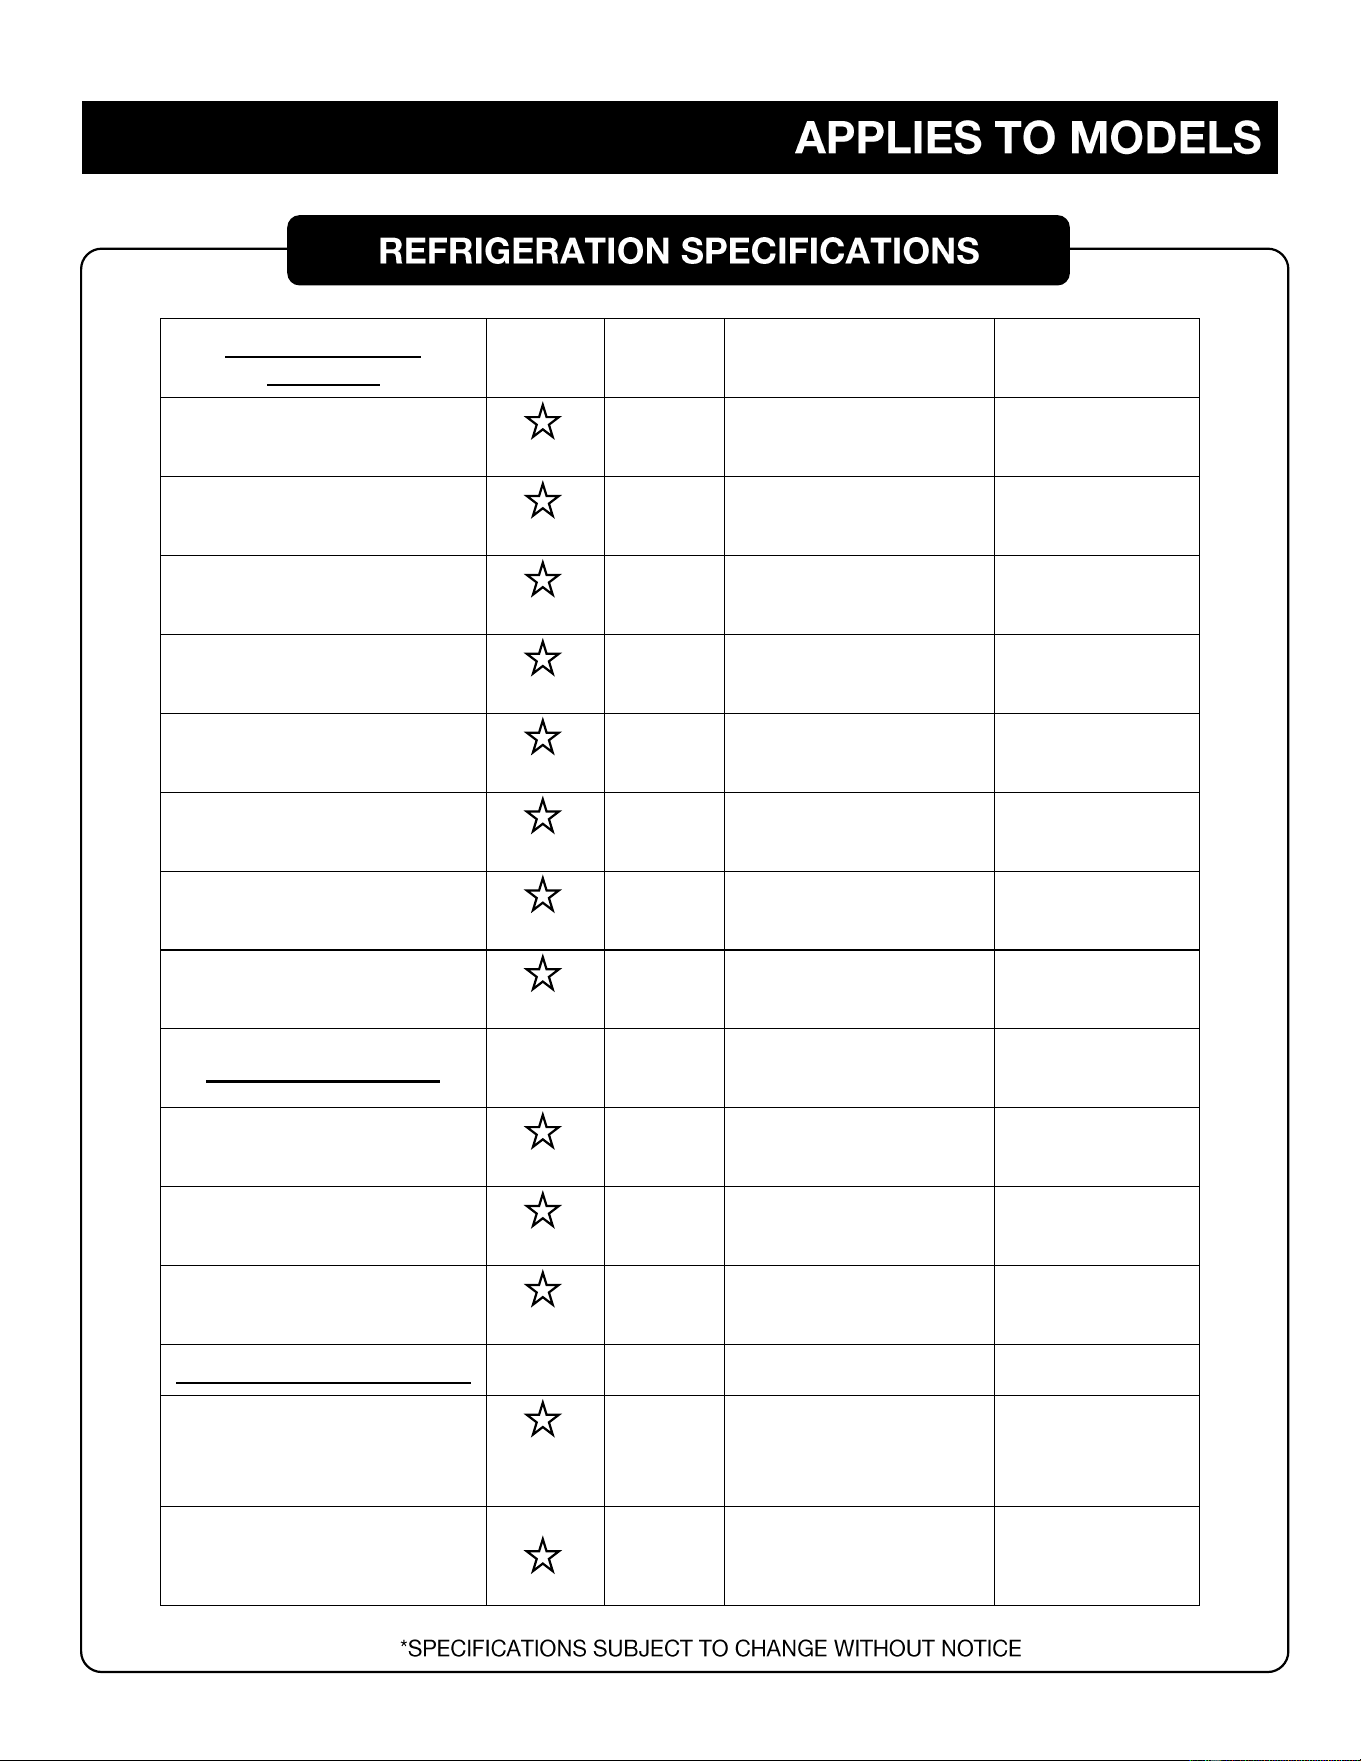
REFRIGERATOR
MODELS:
ENERGY
STAR
RATED
RATED
AMPS
SETPOINT
TEMPERATURE
RANGE
REFRIGERANT
TYPE
MV4-2UCRDA
.95A
2°C TO 8°C
R600A – 0.63 OZ.
MV4-2UCRGDDA
1.24A
2°C TO 8°C
R290 – 0.63 OZ
MV4-6UCRDA
1.66A
2°C TO 8°C
R290 – 0.92 OZ.
MV4-6UCRGDDA
2.28A
2°C TO 8°C
R290 – 0.92OZ
DHK4-10GD
3.83A
2°C TO 8°C
R290 – 2.12 OZ.
DHK4-14SD
3.77A
2°C TO 8°C
R290 – 2.12 OZ.
DHK4-23GD
5.77A
2°C TO 8°C
R290 – 3.88 OZ.
DHK4-49GD
10.55A
2°C TO 8°C
R290 – 5.29 OZ.
FREEZER MODELS:
MV30-4UCF
1.66A
-10°C TO -25°C
R600A – 1.94 OZ.
MV40-4UCF
4.19A
-20°C TO -40°C
R290 – 1.59 OZ.
DHK25-10SD
2.51A
-10°C TO -25°C
R600A – 3.42 OZ.
COMBINATION MODELS:
DHK-10RFC
3.55A
REF: 2°C TO 8°C
FRE: -10°C TO -25°C
R600A
REF: 0.71 OZ.
FRE: 1.59 OZ.
DHK-20RFC
3.39A
REF: 2°C TO 8°C
FRE: -10°C TO -25°C
R290
REF:1.09 OZ.
FRE:2.12 OZ.
DO NOT LOAD PRODUCT INTO
THE UNIT UNTIL
THE SETPOINT TEMPERATURE HAS BEEN REACHED.
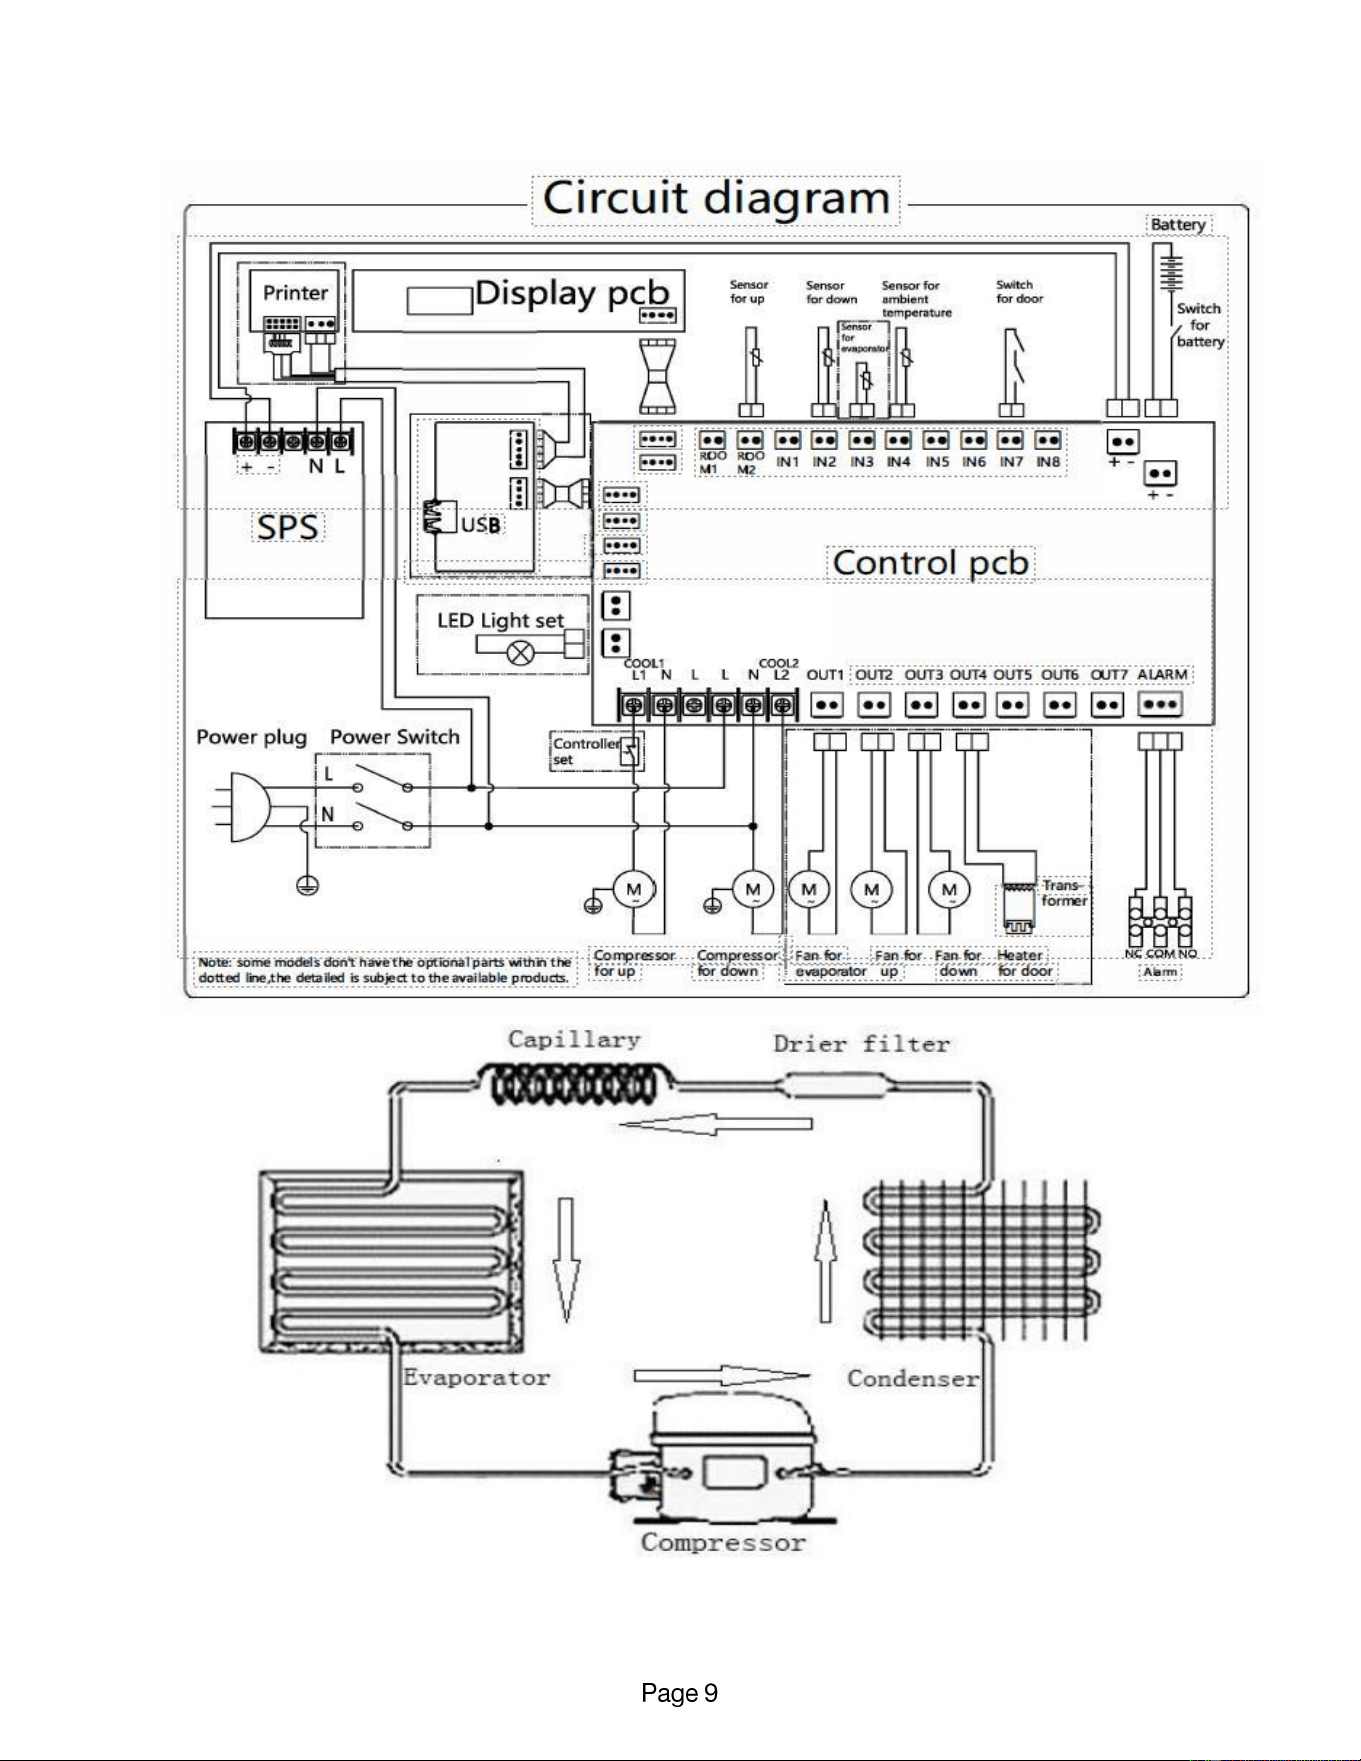
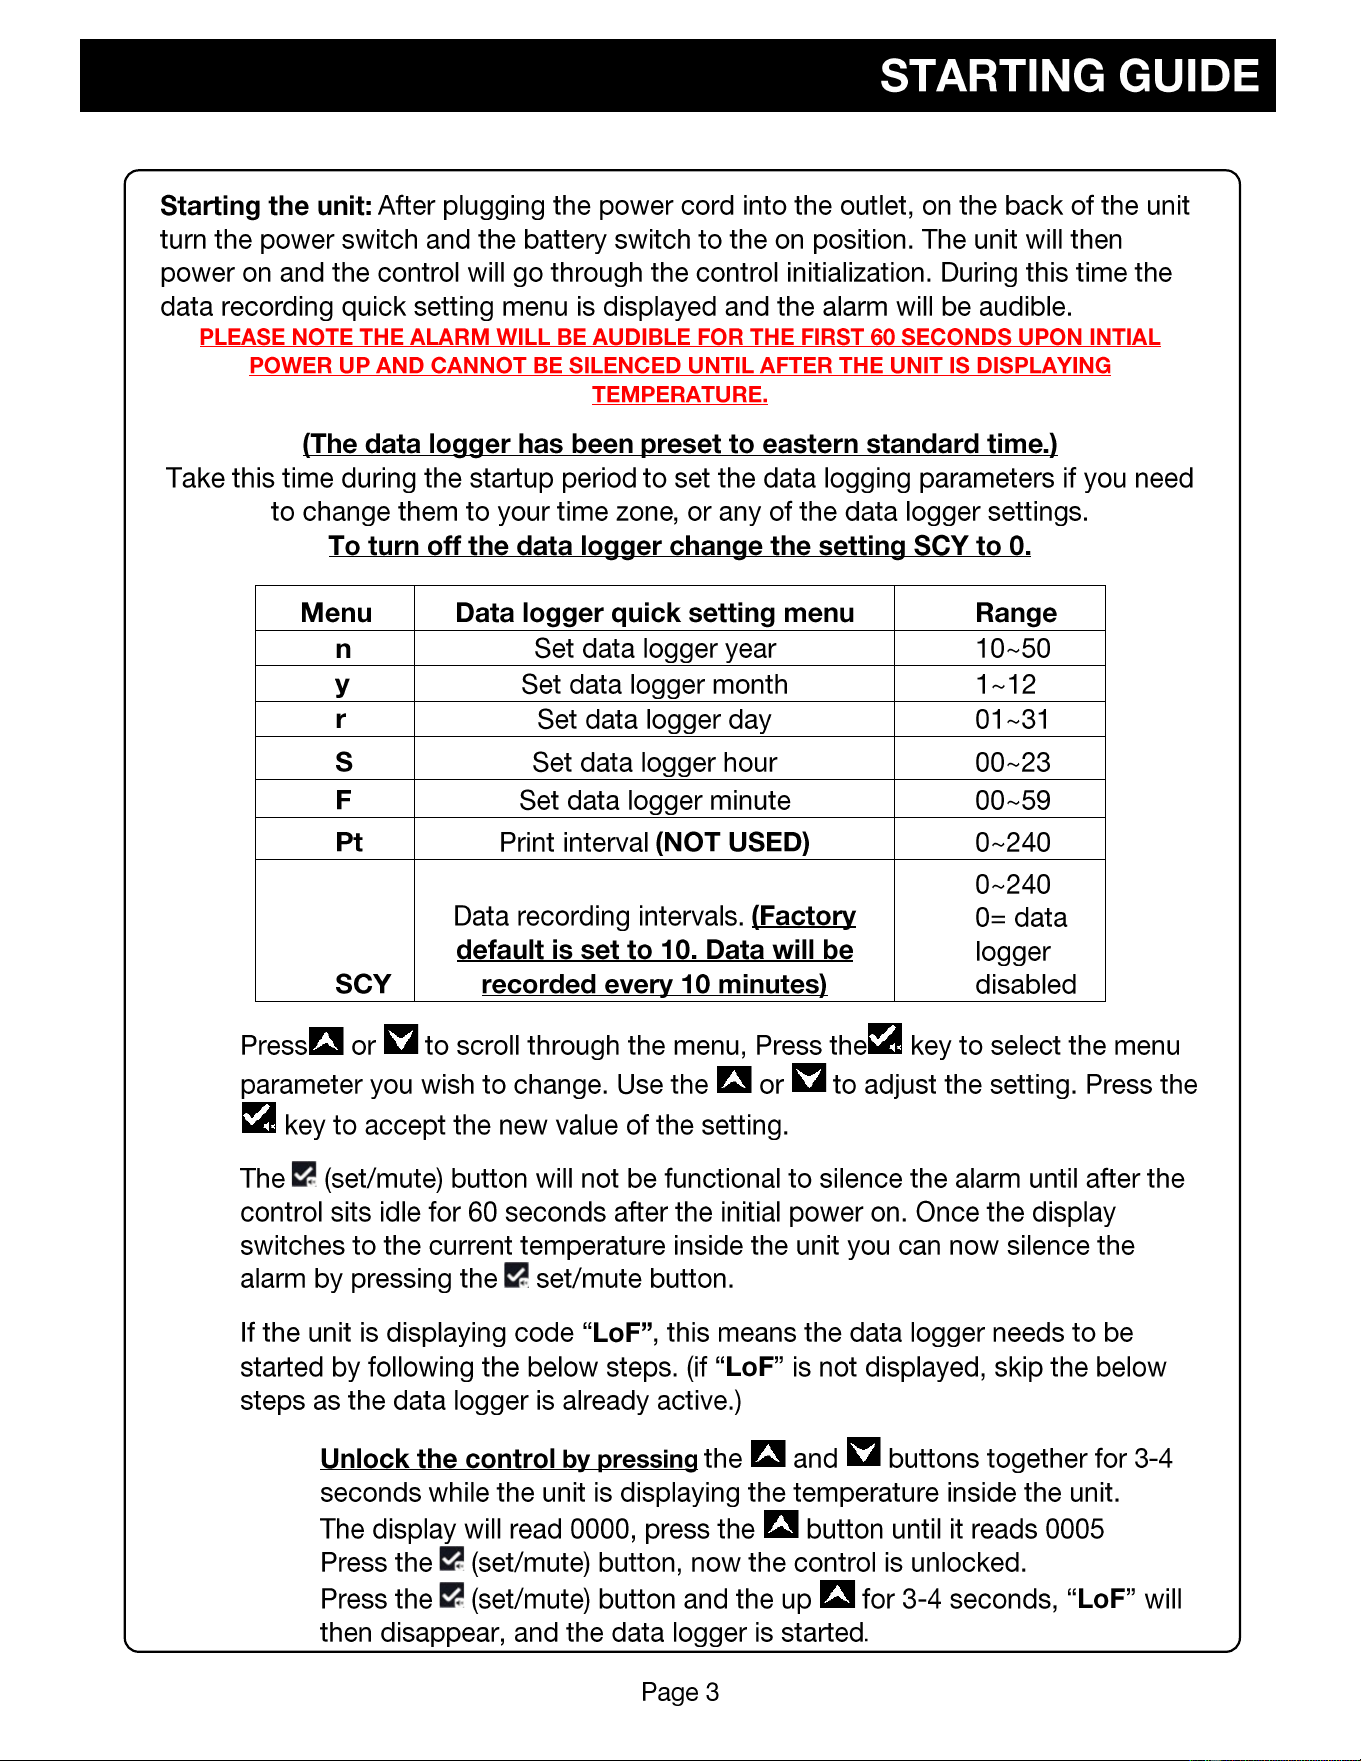
Starting the unit: After plugging the power cord into the outlet, on the back of the unit turn the power
switch and the battery switch to the on position. The unit will then power on and the control will go through
the control initialization. During this time the data recording quick setting menu is displayed and the alarm
will be audible. Take this time to set the data logging parameters. (If the display is flashing the alarm code
“PF” this stands for power failure. Check that the unit is plugged into the outlet and that the power switch in the back of the
unit is turned to the on position)
Menu
Data logger quick setting menu
Range
n
Set data logger year
10~50
y
Set data logger month
1~12
r
Set data logger day
01~31
S
Set data logger hour
00~23
F
Set data logger minute
00~59
Pt
Print interval (NOT USED)
0~240
SCY
Data recording intervals. (Factory
default is set to 10. Data will be
recorded every 10 minutes)
0~240
0= data logger
disabled
Press or to scroll through the menu, Press the key to select the menu parameter you wish to
change. Use the or to adjust the setting. Press the key to accept the new value of the setting.
The (set/mute) button will not be functional to silence the alarm until after the data logging parameters
are set and the control sits untouched for 60 seconds after the initial power on. Once the display switches to
the current temperature inside the unit you can now silence the alarm by pressing the set/mute button.
If the unit is displaying code “LoF”, this means the data logger needs to be started by following the below
steps. (if “LoF” is not displayed, skip the below steps as the data logger is already active.)
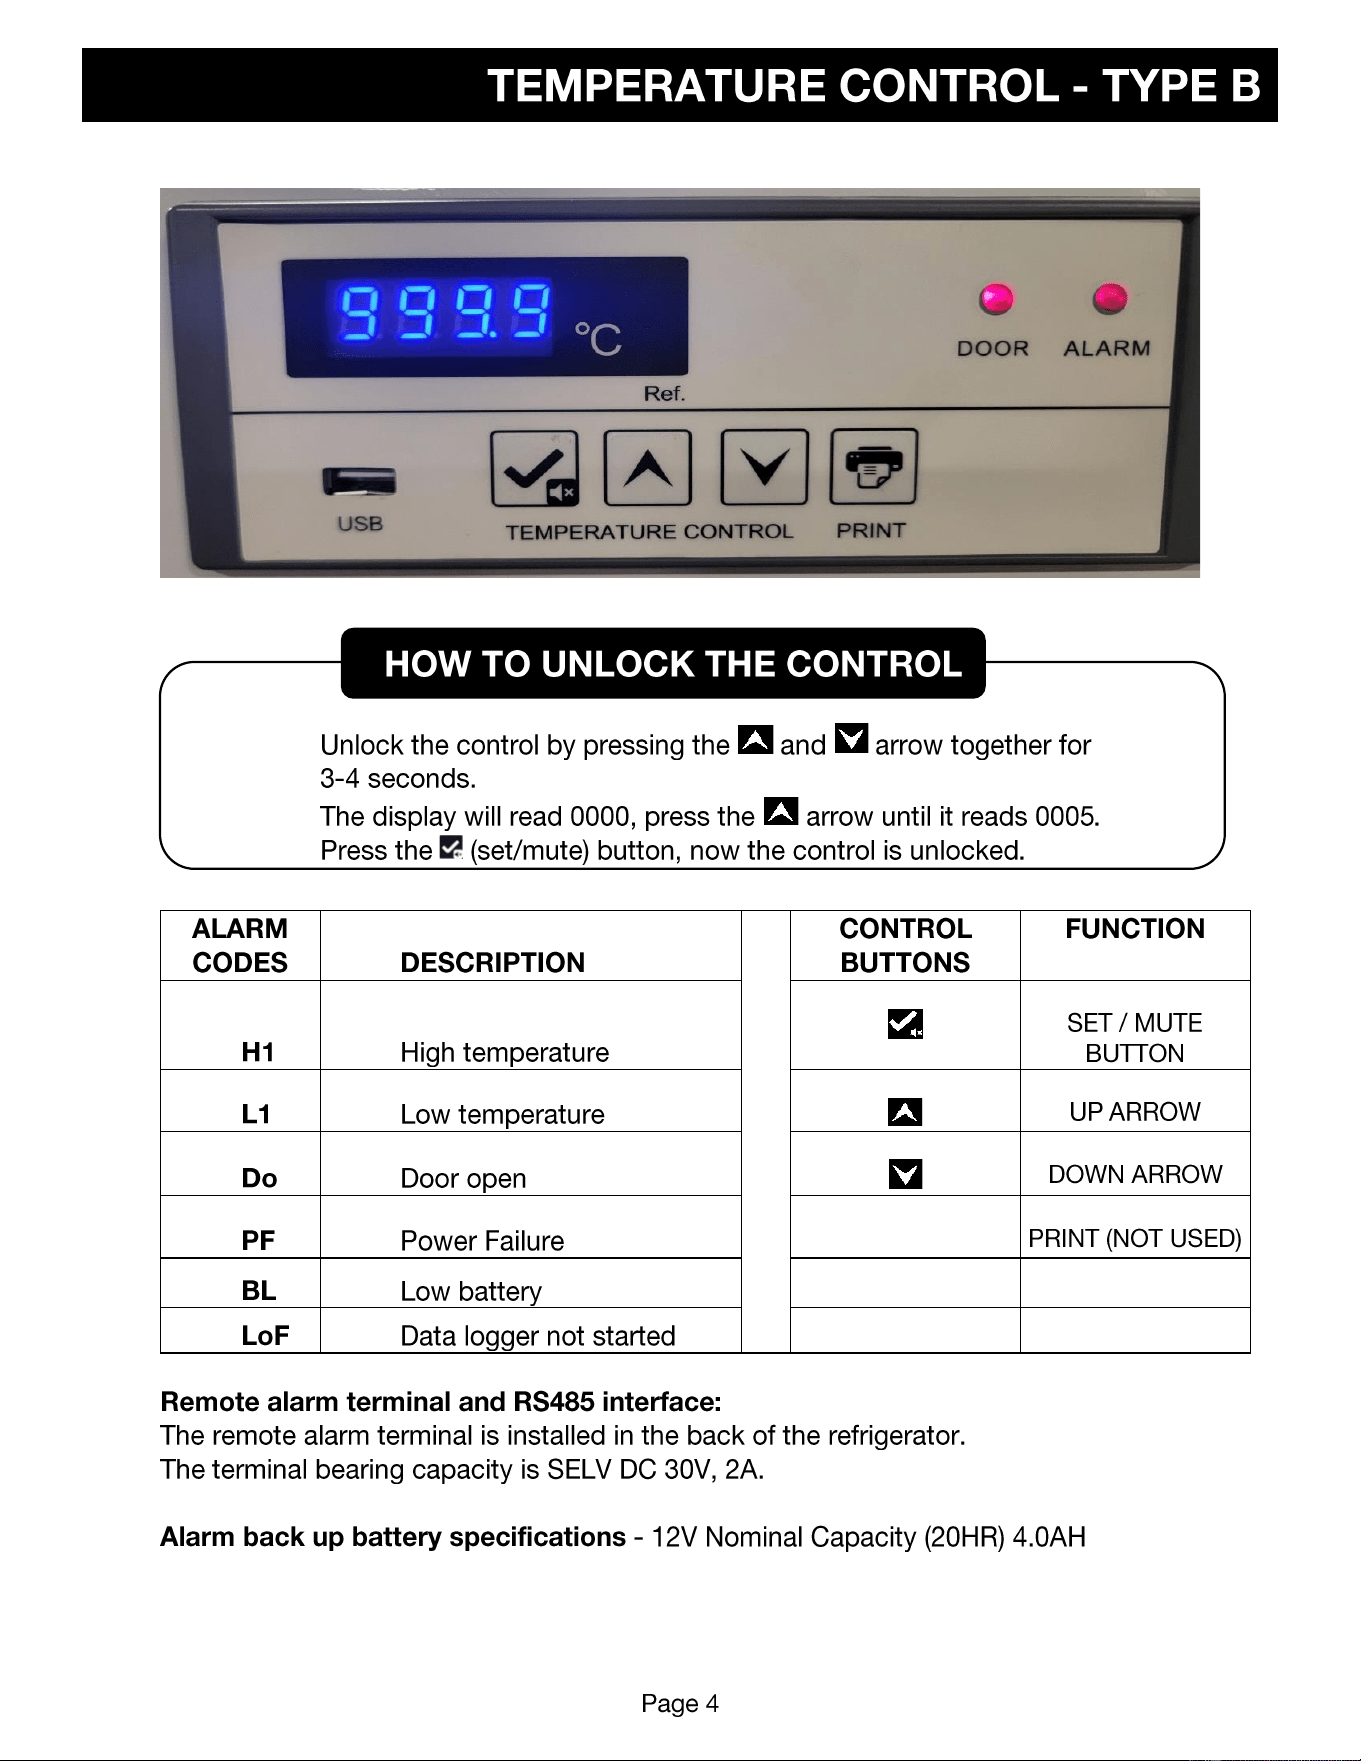
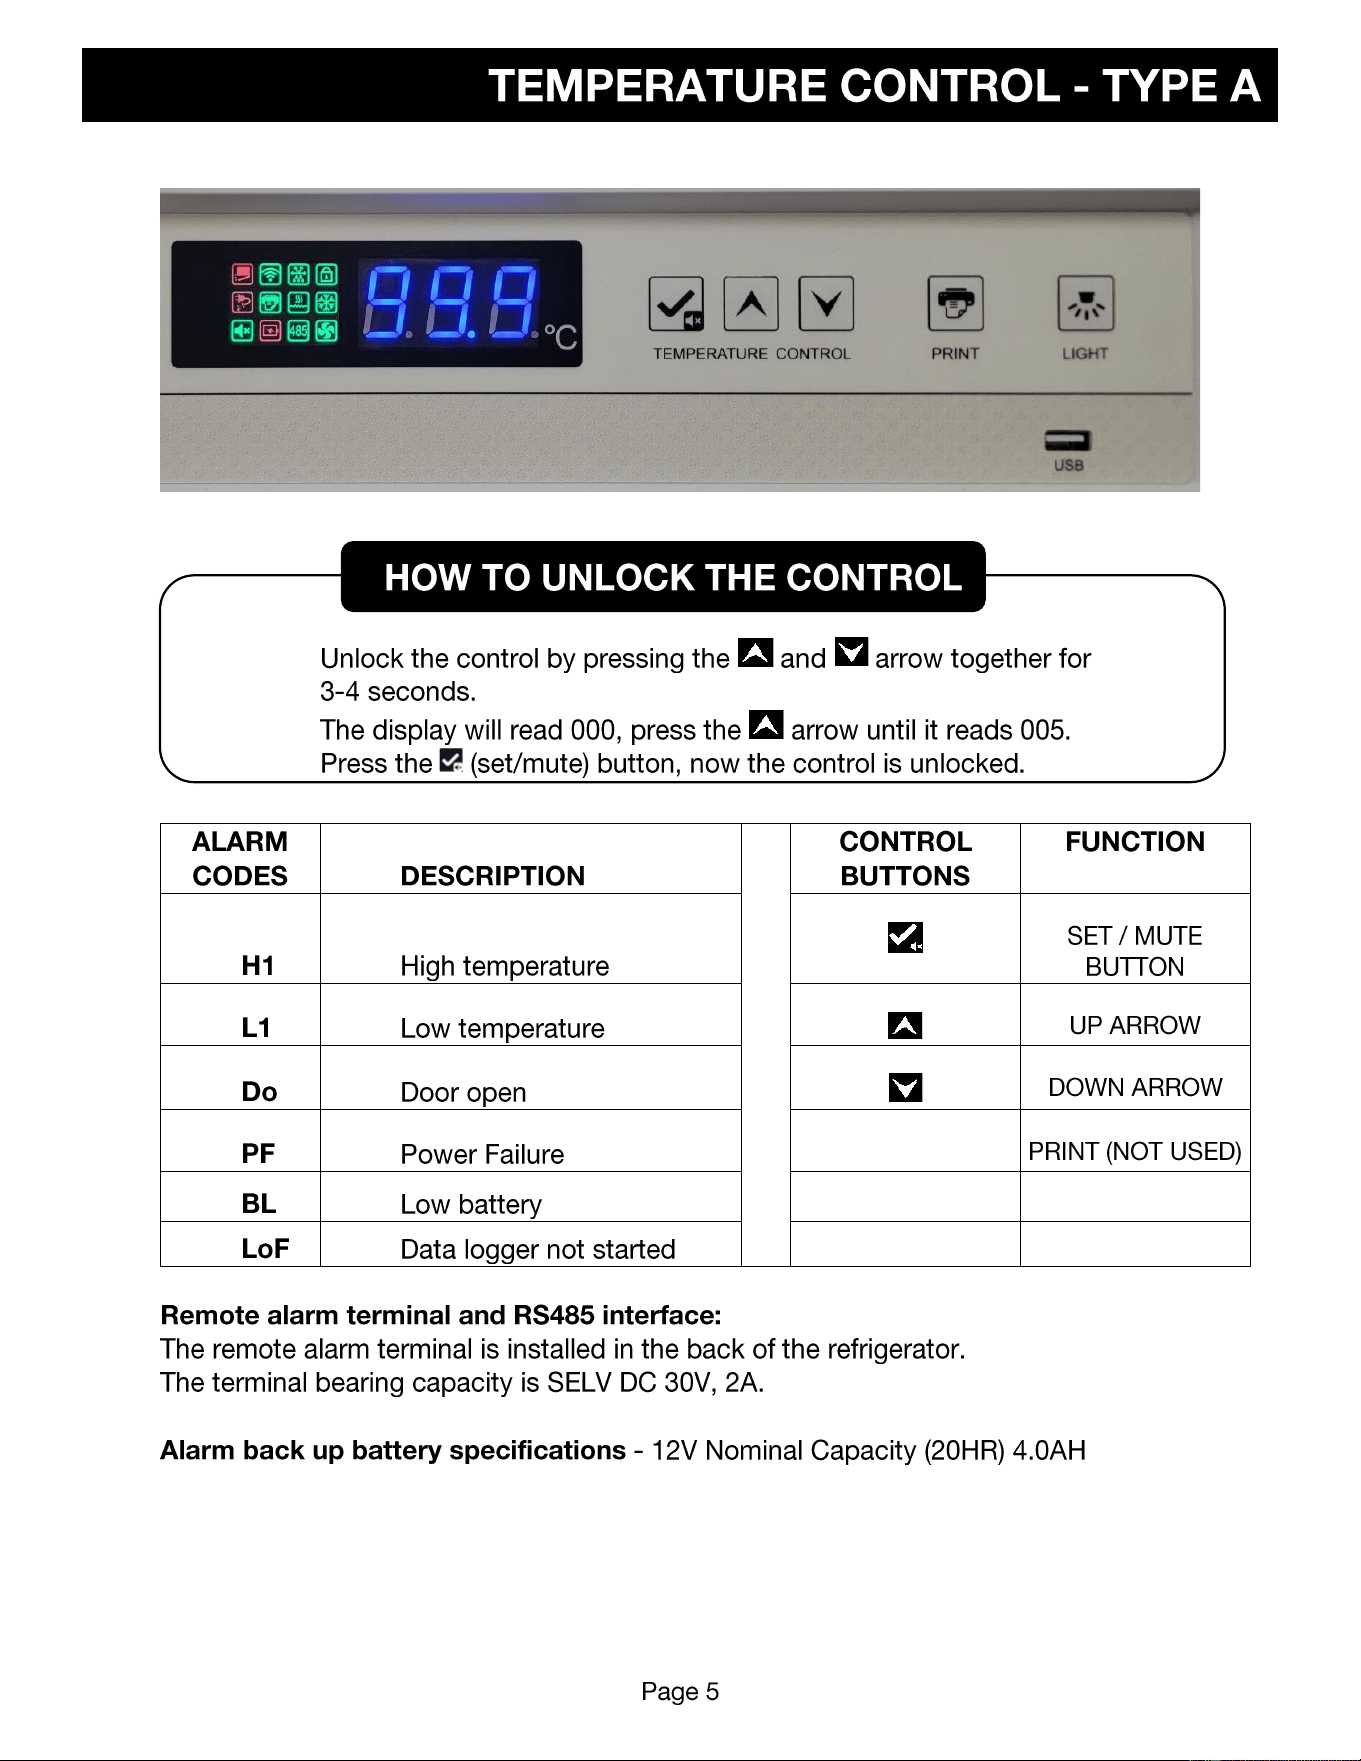
1. Unlock the control by pressing the up and down arrow together for 3-4 seconds.
2. The display will read 0000, press the arrow until it reads 0005
3. Press the (set/mute) button, now the control is unlocked.
4. Press the (set/mute) button and the up for 3-4 seconds, “LoF” will then disappear,
and the data logger is started.
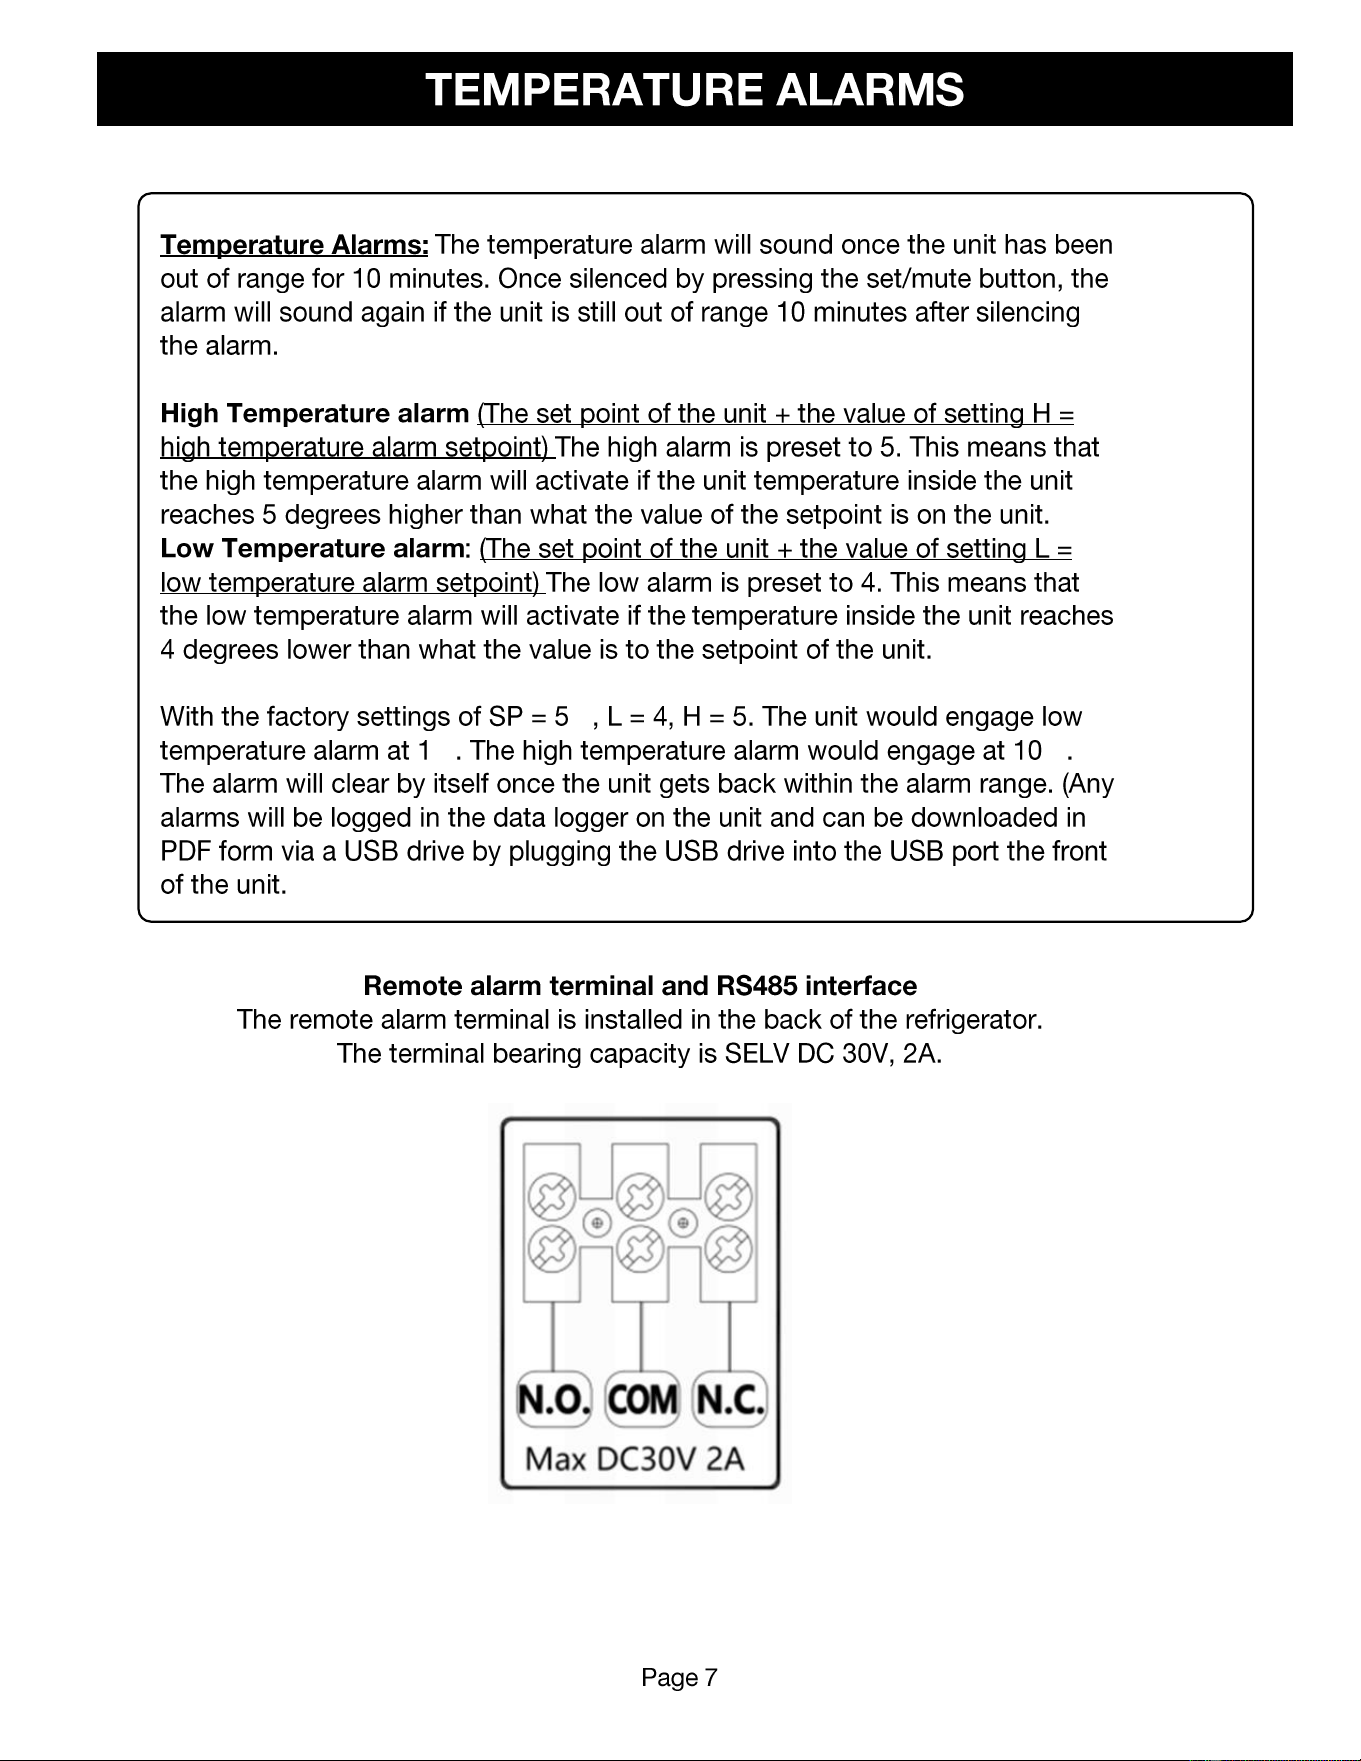
Temperature Alarms: The temperature alarm will sound once the unit has been out of range for 10 minutes. Once
silenced by pressing the set/mute button, the alarm will sound again if the unit is still out of range 10 minutes after
silencing the alarm.
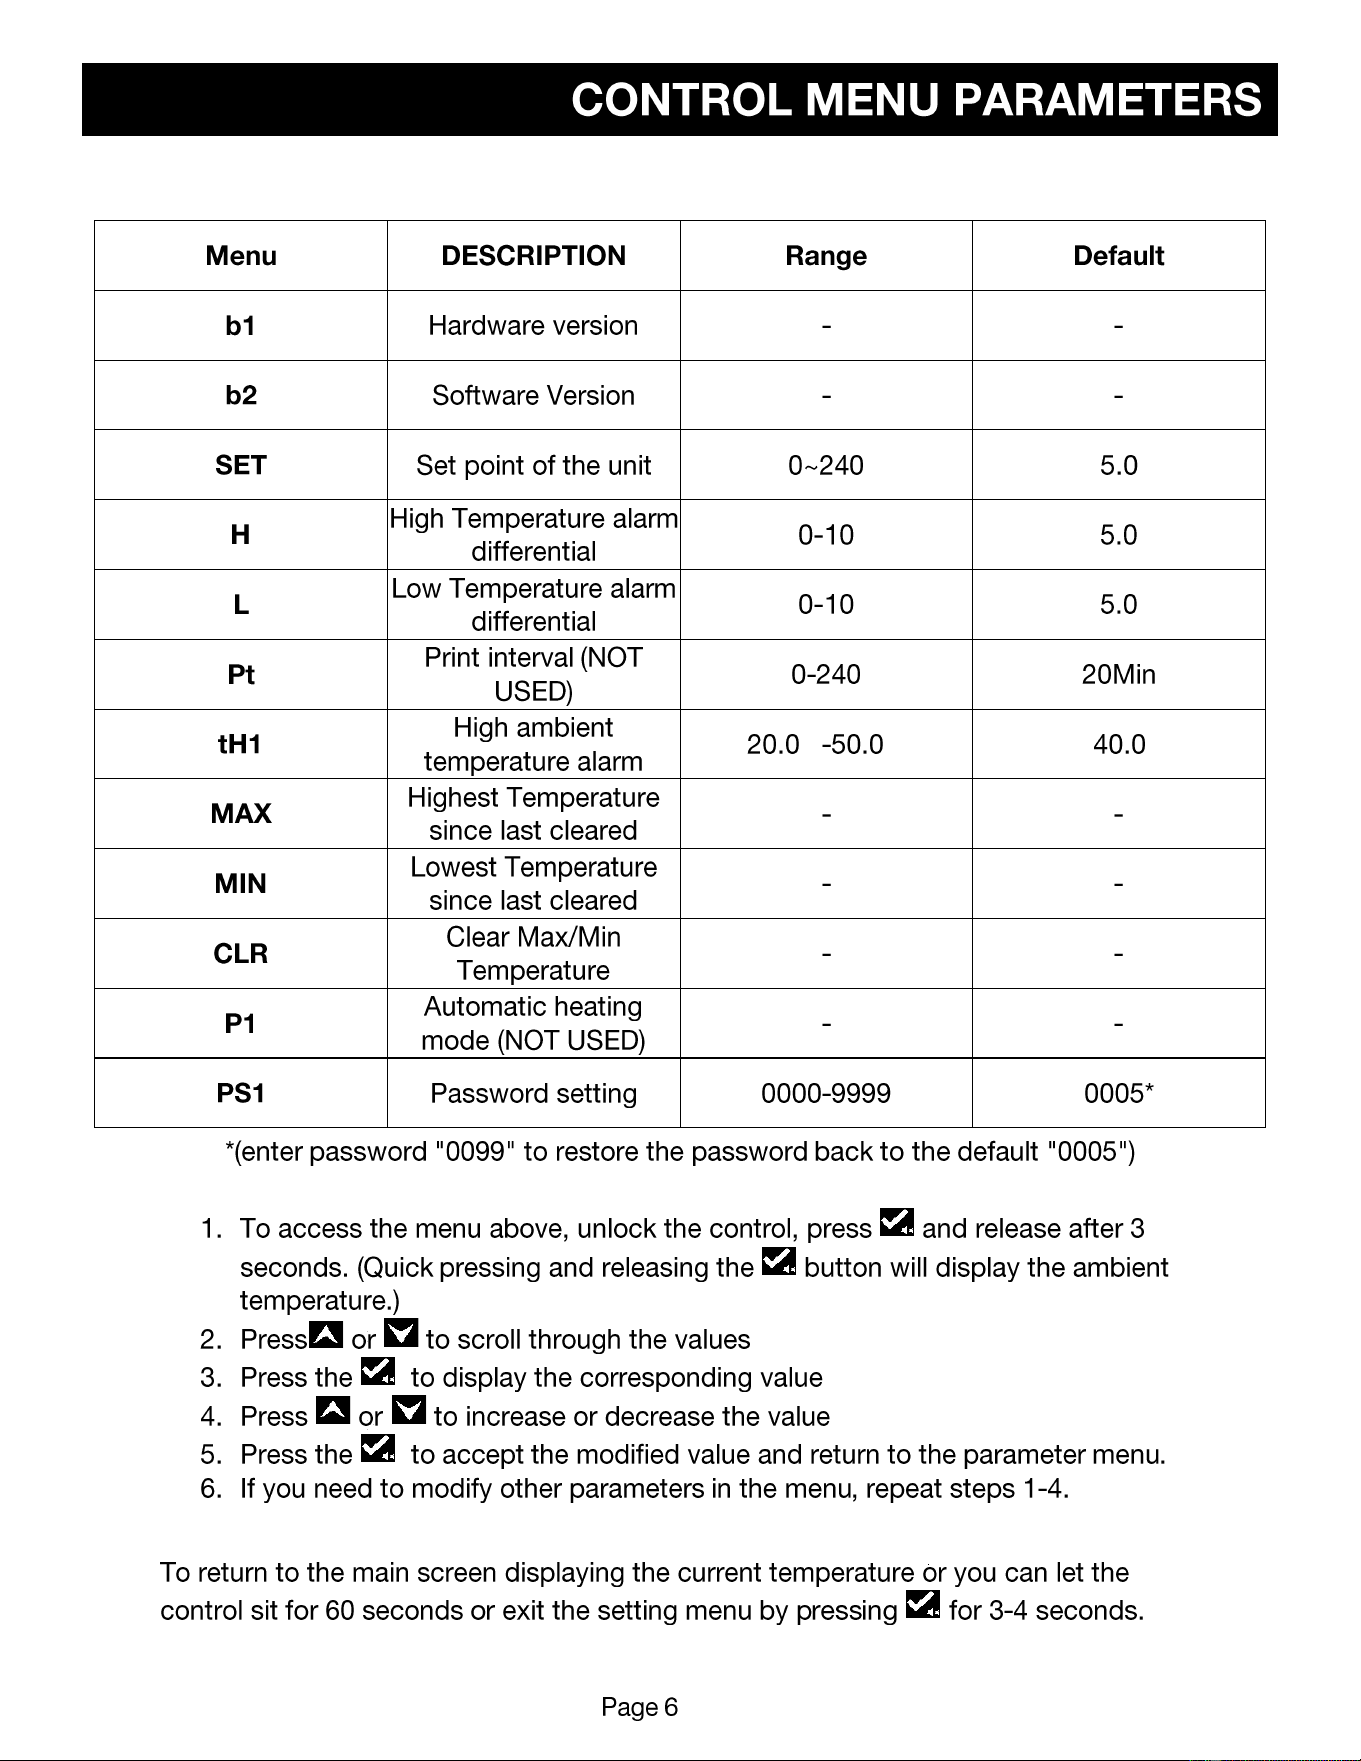
1. High Temperature alarm (The set point of the unit + the value of setting H = high temperature
alarm setpoint) The high alarm is preset to 5. This means that the high temperature alarm will
activate if the unit temperature inside the unit reaches 5 degrees higher than what the value of the
setpoint is on the unit.
2. Low Temperature alarm: (The set point of the unit + the value of setting L = low temperature
alarm setpoint) The low alarm is preset to 4. This means that the low temperature alarm will
activate if the temperature inside the unit reaches 4 degrees lower than what the value is to the
setpoint of the unit.
• With the factory settings of SP = 5℃, L = 4, H = 5. The unit would engage low temperature alarm at
1℃. The high temperature alarm would engage at 10℃. The alarm will clear by itself once the unit
gets back within the alarm range. (Any alarms will be logged in the data logger on the unit and can
be downloaded in PDF form via a USB drive by plugging the USB drive into the USB port the front
of the unit. Further instruction can be found in the manual)
Exporng the USB data from the unit:
Automac export of data from the USB: Connect the USB to the USB interface on the control, the data
of this month and last month will generate automacally to a PDF le that is downloaded to your USB,
the unit will beep once aer the data transmission is completed.
Manually exporng data from the USB: make sure the keypad is unlocked, connect the USB, wait for
the unit to beep, on will briey appear on the screen followed by end. Aer the unit starts to display the
temperature again, press the up buon for 3 seconds, the display should read “d01”, Press the up buon
or down buon to adjust the month for which you wish to download the data (d01- d12, d01 being
January). Press the set buon once you have selected the download period, The USB will generate a PDF
le that is saved to your USB. If the display is changed to (d00) this generates the data recorded for the
previous 12 months.
In seng mode, move to the previous parameter or decrease the value of the parameter. (Long
press the key to quickly decrease the value of the parameter.)
In seng mode, move to the next parameter or increase the value of the parameter.
(Long press the key to quickly increase the value of the parameter.)
is the buon for set/mute, when there is no alarm displayed and the keypad is locked, press
, this will display ambient temperature for 5 seconds then return to normal display.
If the keypad is unlocked, press for 3 seconds to enter the user menu.
When the alarm becomes audible with the keypad locked in the locked, press to silence the alarm.
(the unit will connue to alarm if another alarm occurs) When the keypad is unlocked, the buon
is used as the set buon. With the keypad unlocked and, in the parameter, seng mode, press this key
to display the value of the parameter on the screen. To save a new parameter seng, press the set
buon, the seng is now saved.

•
•
•
•
•
•
°
CAUTION
DO NOT CONNECT TO GFI / GFCI OUTLETS. CONNECTION
TO THAT TYPE OF OUTLET CAN RESULT IN PRODUCT LOSS
DUE TO UNSAFE CABINET TEMPERATURE WHEN GFI
DEVICE TRIPS FROM MOISTURE.
DO NOT USE EXTENSION CORDS AND DO NOT
DISABLE OR BY-PASS GROUND PRONG ON
ELECTRICAL PLUG
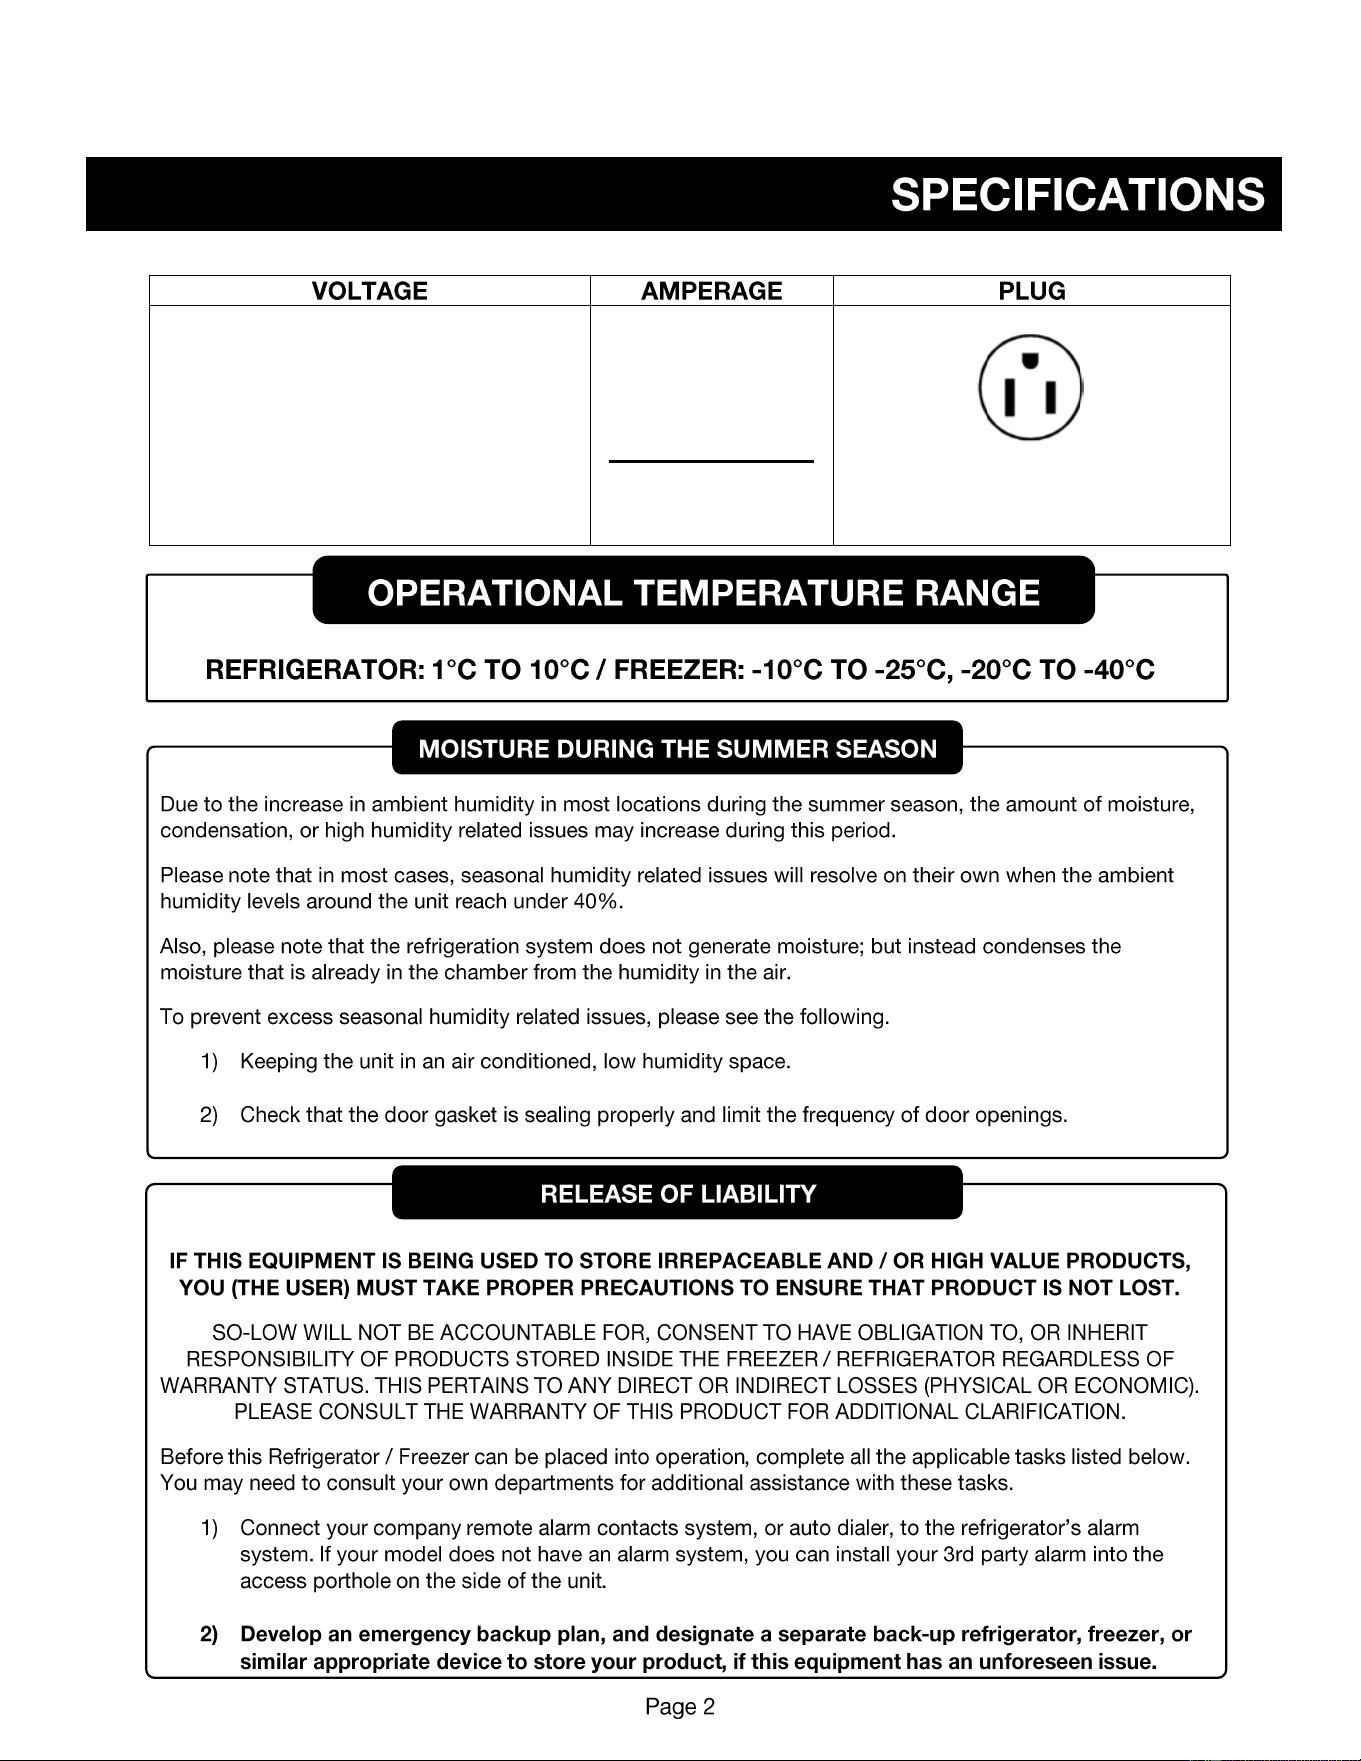
115 VOLTS
60 HERTZ
1 PHASE
(SUPPLY VOLTAGE SHOULD NOT VARY
MORE THAN 5% FROM SERIAL PLATE
RATINGS.)
15 AMP
DEDICATED LINE
NEMA 5-15
UNIT IS PRE-WIRED AT FACTORY
1.
2.
3.
4.
1.
2.
3.
1.
2.
3.
℃ ℃
℃
℃ ℃
CAUTION
DISCONNECT THIS UNIT FROM THE POWER SUPPLY
BEFORE PERFORMING MAINTENANCE ON THE UNIT.
•
•