
SAVE THIS MANUAL: KEEP THIS MANUAL FOR SAFETY WARNINGS, PRECAUTIONS, ASSEMBLY,
OPERATING, INSPECTION, MAINTENANCE AND CLEANING PROCEDURES. WRITE THE PRODUCT’S
SERIAL NUMBER ON THE BACK OF THE MANUAL NEAR THE ASSEMBLY DIAGRAM (OR MONTH
AND YEAR OF PURCHASE IF PRODUCT HAS NO NUMBER).
OWNER’S MANUAL AND SAFETY INSTRUCTIONS
FOR QUESTIONS PLEASE CALL OUR CUSTOMER SUPPORT: (909) 628 0880 MON-FRI 9AM TO 3PM PST

1
1
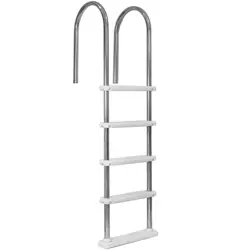
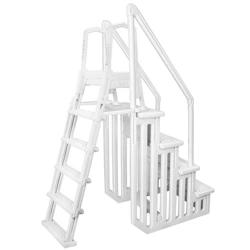
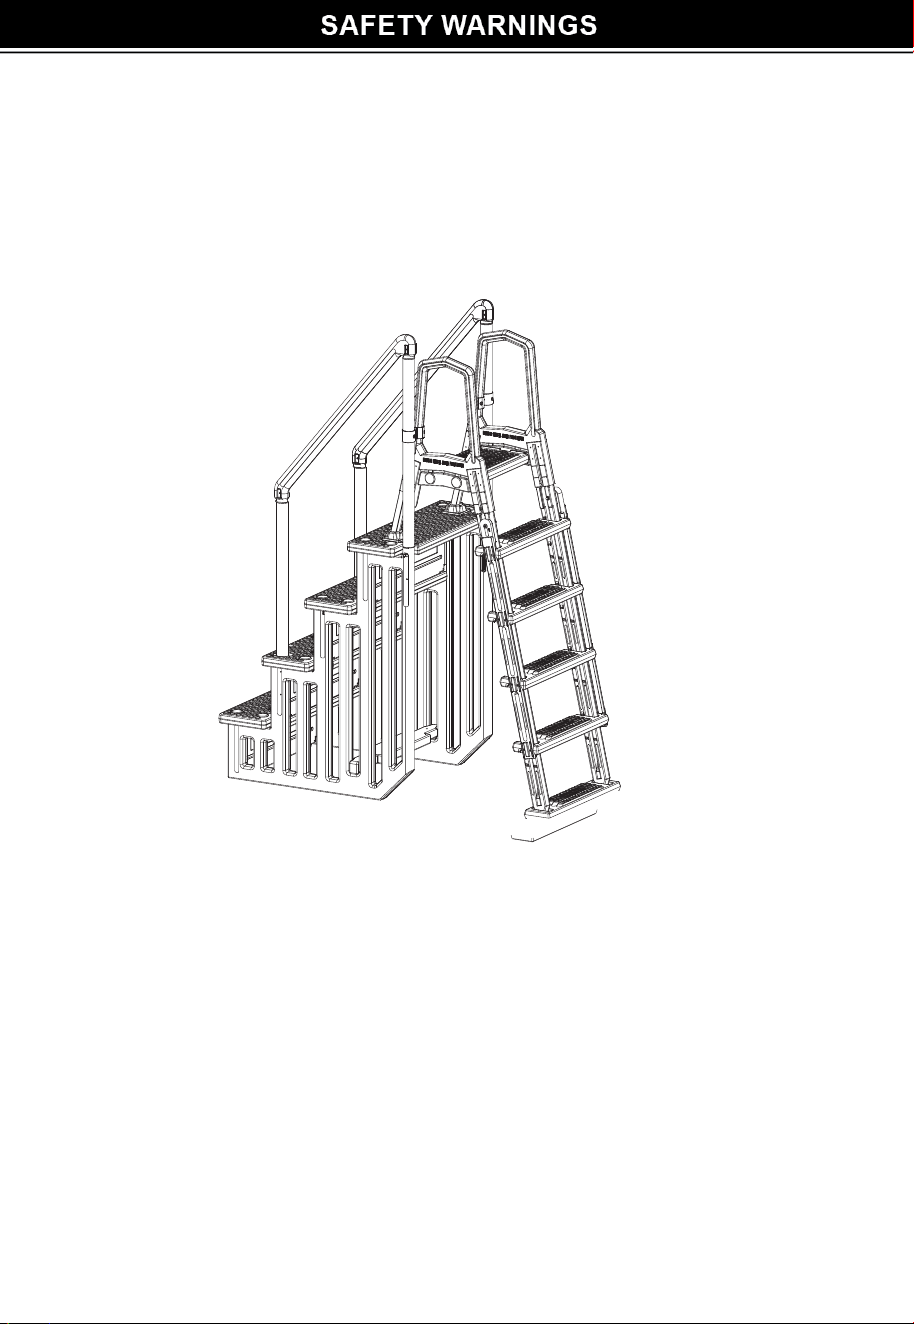
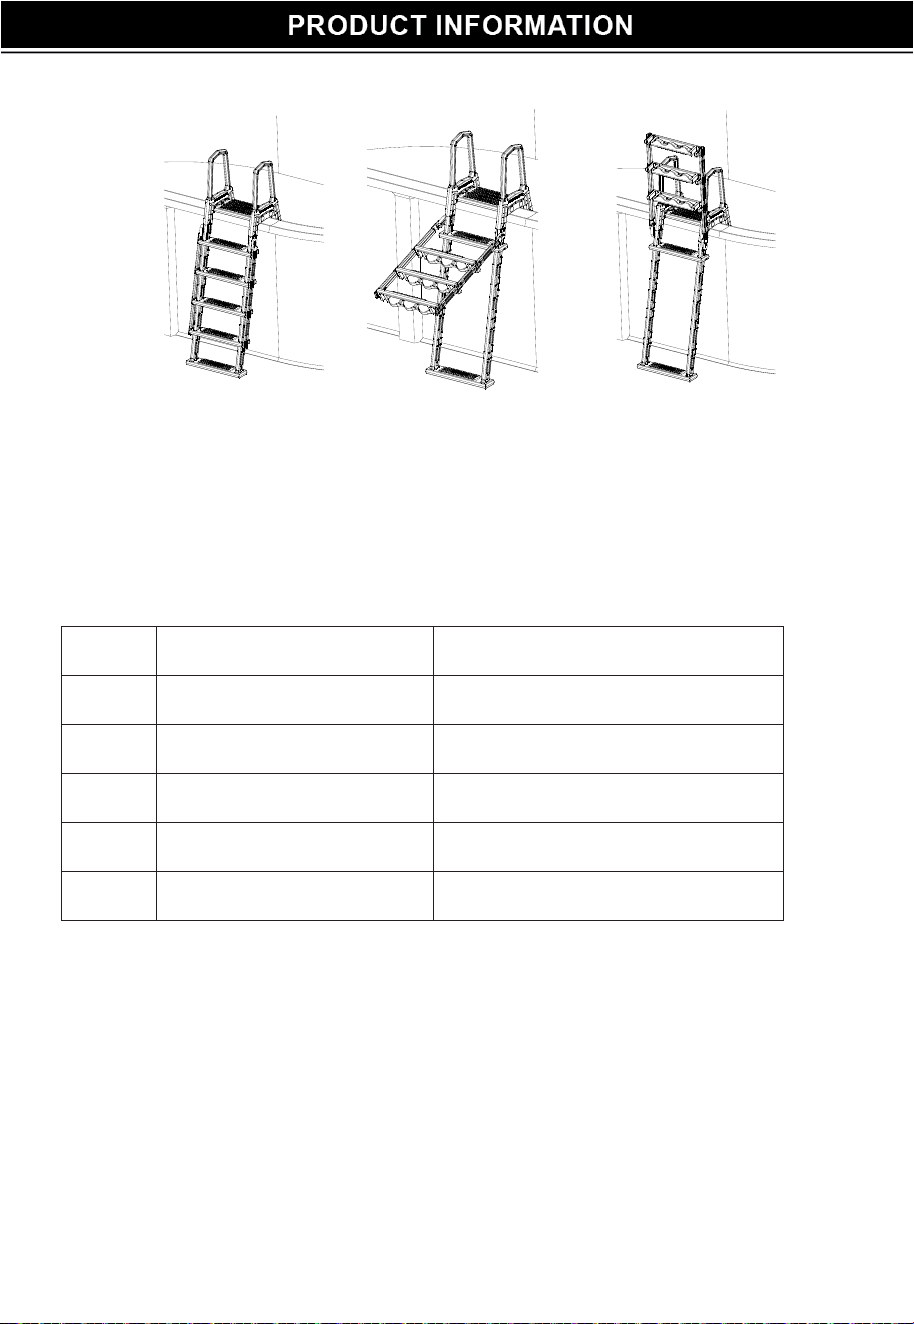
The A-Frame external ladder adopts a blow molding process and polyethylene material, which has a strong
corrosion resistance features. The entire ladder has been polished to ensure a smooth surface. The treads
has round embodiments which effectively prevents slipping. Reinforced thick material assures safety,
stability, and durability. This external ladder must to be installed on the tread of Item 75136. The external
ladder is designed to be swung up, and suitable for above-ground pool with max height of 54". When the
swimming pool is not in use, the external ladder can be swung up and fixed to prevent children from
accidentally entering.
Warning and Cautions
a) Locate ladder on a solid base.
b) One person on the
ladder at a time.
c) Ladder MUST be installed and used per manufacturer!s instructions.
d) Face ladder when entering and leaving pool. DANGER: No Jumping or Diving from ladder.
e) Do not let children play with the ladder
f) In order to avoid injury during the installation and handling of heavy objects, it is recommended to carry them together by
two people.
g) To prevent entrapment or drowning DO NOT swim through, behind or around ladder. DO NOT install the ladder at the
suction point.
h) Weight limit - 250 lbs maximum Warning: Exceeding the maximum weight restriction may cause the ladder to fail.
i) When ladder is not in use, lock up outer treads
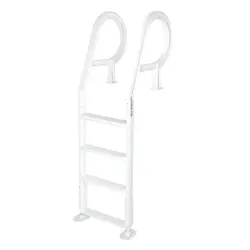
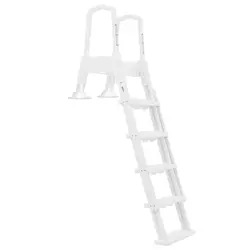
75136 Internal Ladder
(sold seperately)
75129 External Ladder
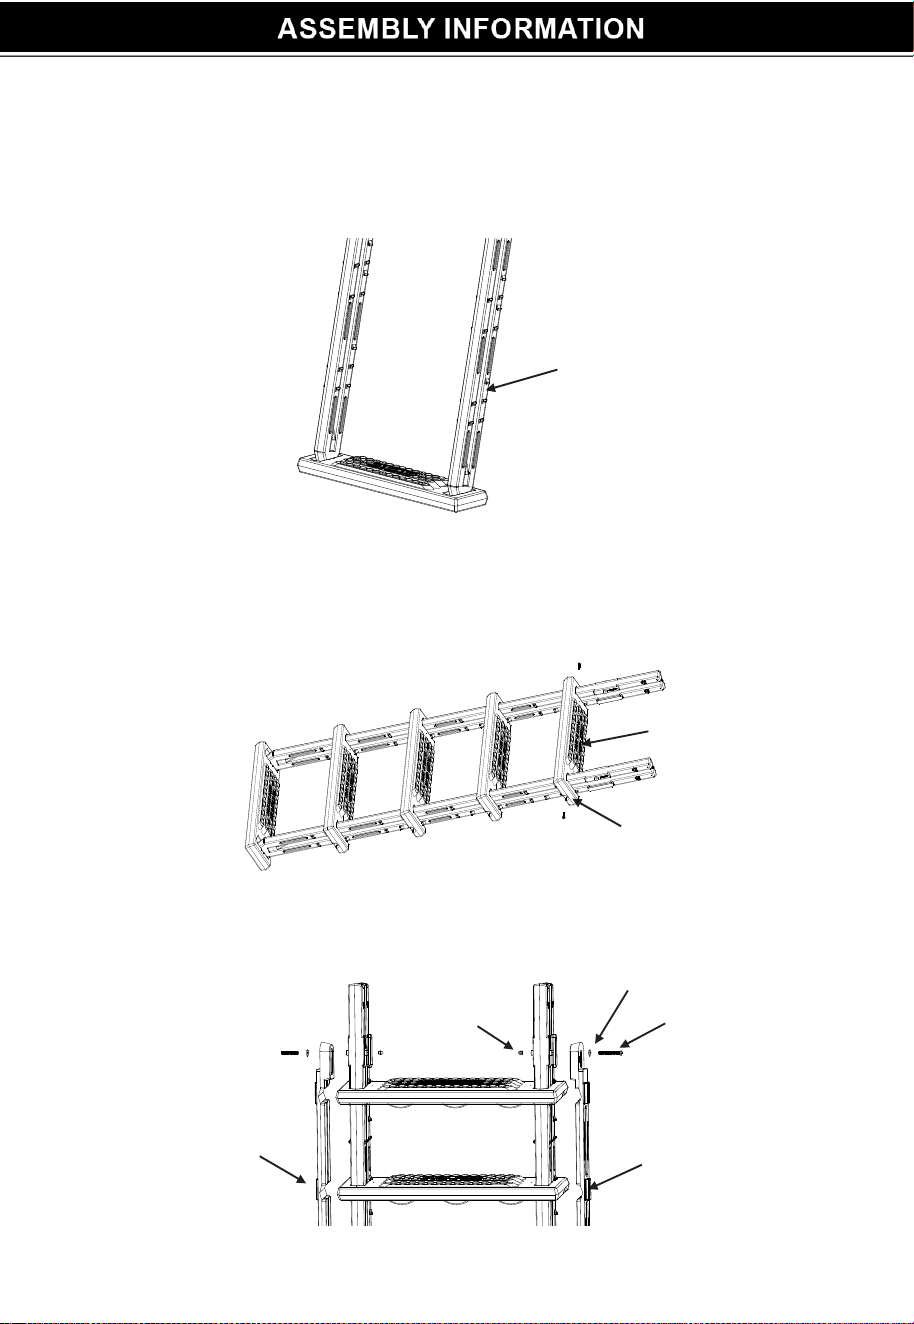
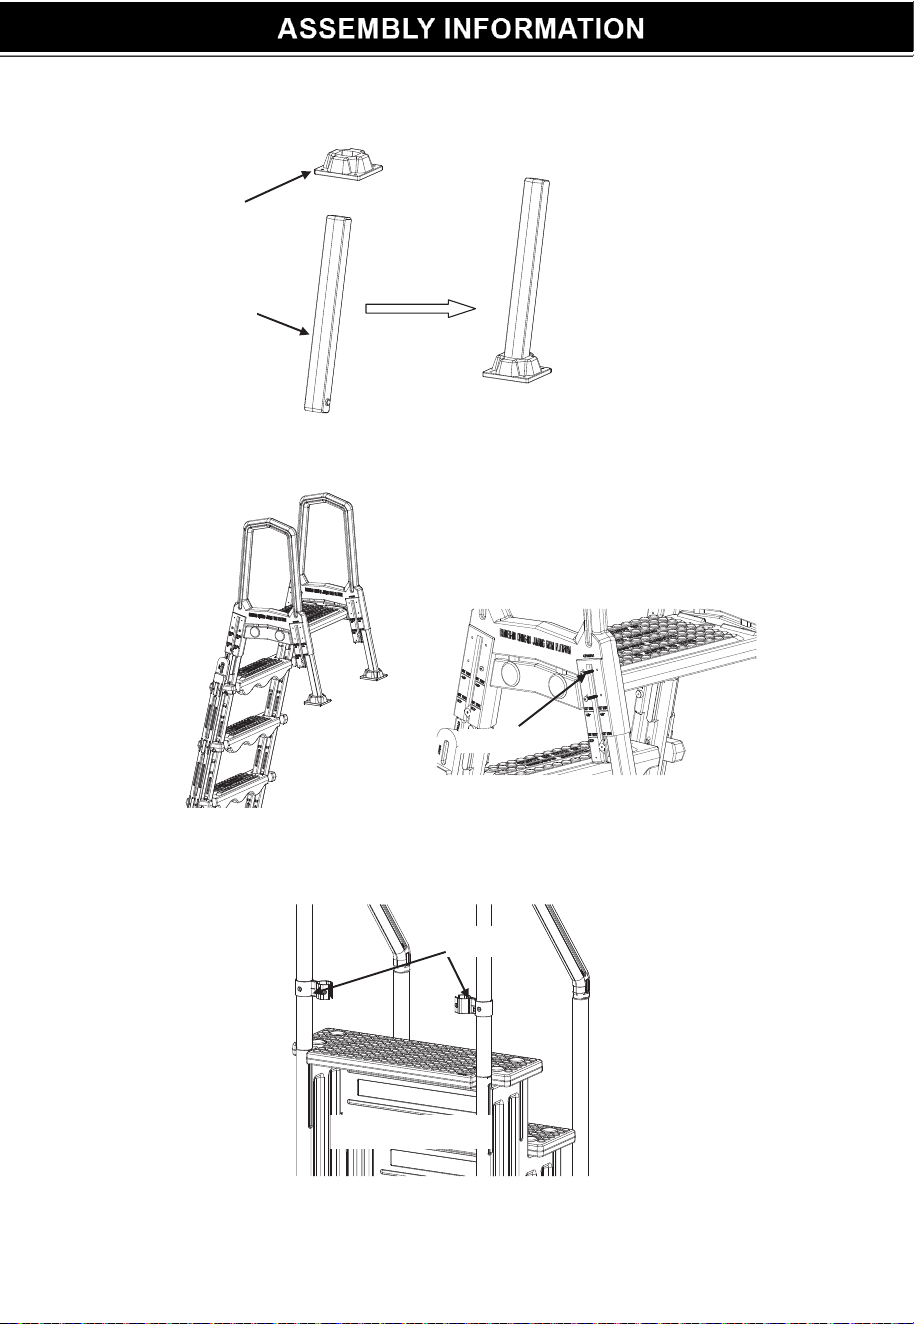
1. Remove the A-Frame ladder and its accessories from
the box and check whether all the accessories are
complete.
2. First place the boom tread on a flat surface with the grooved side facing up; then snap the two holders
into the groove. Note: The two holders need to be snapped into the groove in the same direction.
3.
Install four treads to the holder, see the picture as below. Fix the top tread to the holder by #10 x 1-1/4
screws.
4.
Fix the left and right fixing strips with bolt & gasket (M6), and nut M6*85. Do not over- tighten
Tighten with screws for
both
right and left sides
Bolt
Gasket
Nut
Holder
Right Fixing StripLeft Fixing Strip
Need to be fixed by screw
2
5. Use # 10x1-1 / 4 screws to fix other three treads. Then put aside for later.
6. Assemble handrails to the platform, center cover cap opening on side of handrail where platform was
just attached. Using a rubber mallet/hammer, tap on cap until the cap is flush with handrail.
7. Aach handrails by pushing them down over the holders.
8. Secure handrails to the legs with #10 1-1/4 screws
Fix the treads to the left and
right fixing strips with screws.
Pushing them down
over the holders
Step 7
Screw
Tighten with two screws for
both sides
Cover Cap
Deck Platform
Handrail
Step 8
3
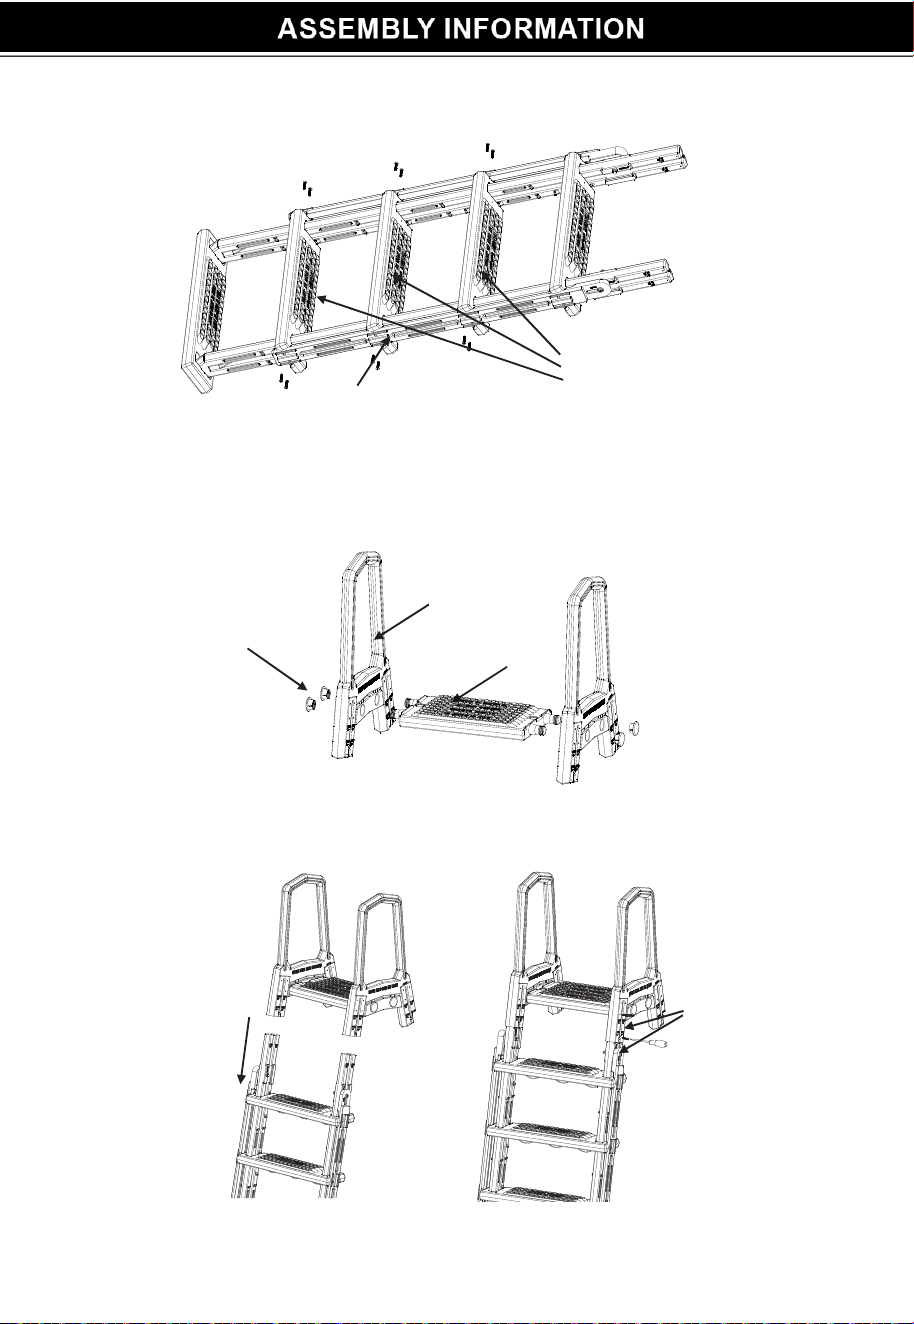
9. Slip mounting block all the way down over the nubs on the tube.
10. Fix the adjustable tube sets to the deck platform handrail with 10x1-1/4#
11. Put the connector to the handrails of the 75136 internal ladder
12. Fix the assembly to the top tread of the A Frame 75136, fix the connector by
Mounting Block
Adjustable Tube
Screw
Connector
75136 Internal Ladder
4
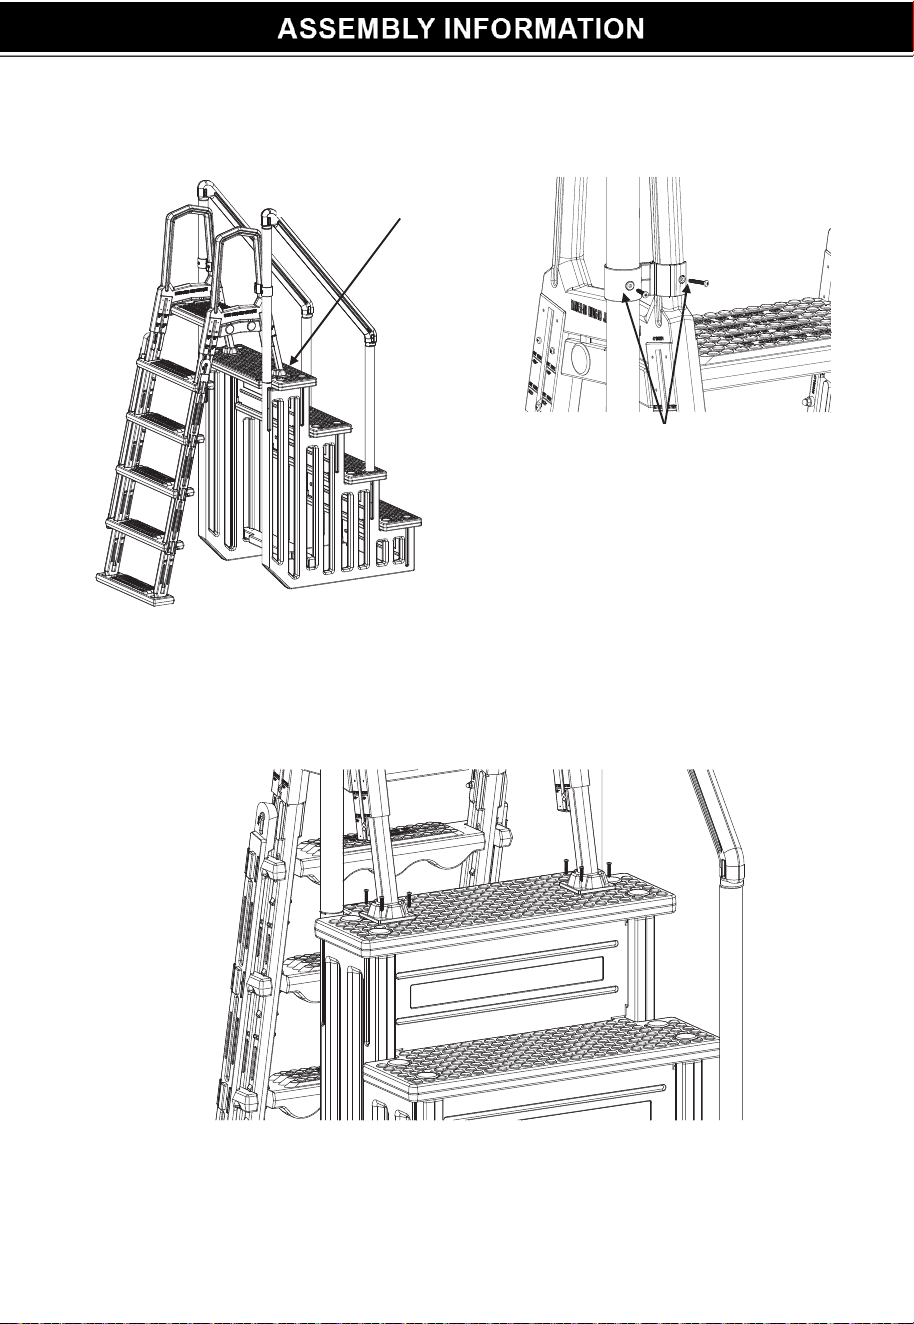
#10x1-1/4 screw as well.
13. Fix the mounting block to the top tread by #10x1-1/4 screws
Routine Maintenance
When the swimming pool is not in use, it is recommended to flip the outer ladder upwards, then
push it down and fix it.
Screw
Fix the assembly to the top tread
5
Winterization
1. In winter, the ladder must be removed.
2. When removing the ladder, it is recommended to wash the ladder with fresh water to remove the
chemicals on the surface.
3. Store the ladder in a warm and dry place
for reuse in the next year.
4. Parameter List
No. Description Specificaon
1 Application Max 54" height above ground pool
2 Weight limit 250 lbs
3 Material Polythene
4 Products Size 32.5*25.5*77.5 IN
5 Package Size 22.5*7*59 IN
6
5.
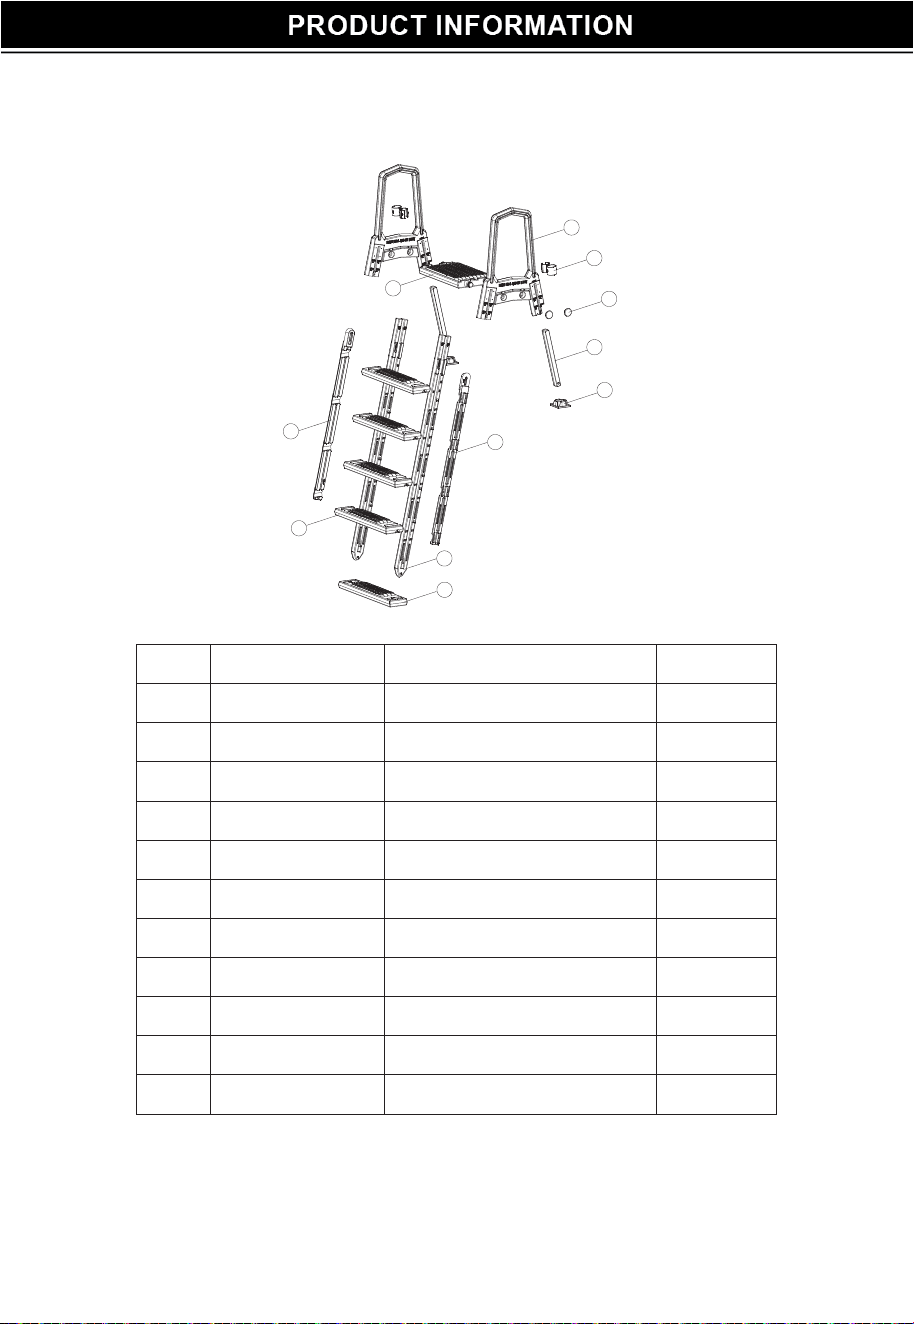
Product Explosion Diagram and Accessaries
No. Part Number Description Qty
1 71550 1 Handrail 2
2 47155012 Connector 2
3 48850112 Cover Cap 5
4 48850202 Tube 2
5 48850201 Mounting Block 2
6 47155011 Deck Platform 1
7 47155007 Right Fixing Strip 1
8 47155005 Holder 2
9 47155008 Boom Tread 1
10 47155002 Tread 4
11 47155006 Left Fixing Strip 1
1
2
3
4
5
7
9
11
10
6
8
0
7
8