Welcome to the RAINPOINT family! Please read the manual before
use to learn about the features and functions.
USER MANUAL
Sma Soil Moisture Sensor
Model No. HCS026FRF

Contents
01
02
02
02
03
04
04
05
07
10
13
13
13
14
15
1. Contents in the box
2. Introduction
2.1 Product Oveiew
2.2 Specications
2.3 Functions
3. Installation & Pairing
3.1 Installing the batte
3.2 Pairing the soil meter with WiFi hub
4. MoistureAleSetting
5. Share With Family Members
6. Troubleshooting
7. Precautions
8. Warranty Policy
9. FCC Statement
10. Customer Suppo
EN
-01-
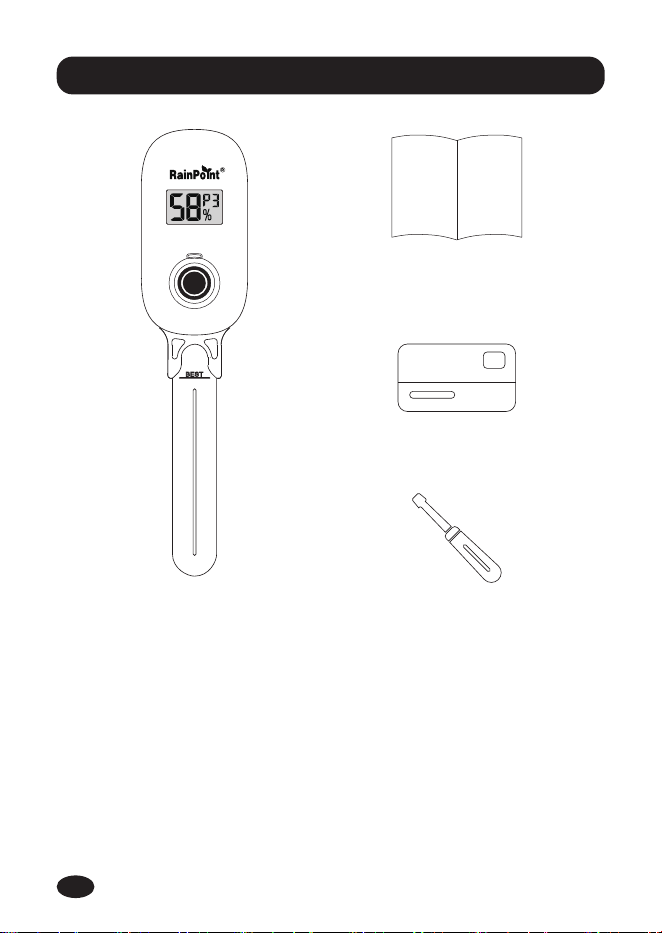
1. Contents in the box
HCS026FRF Sma Soil Moisture Meter
User Manual
Warranty Card
PhillipsScrewdriver
1.
2.
3.
4.
1
2
4
3
EN
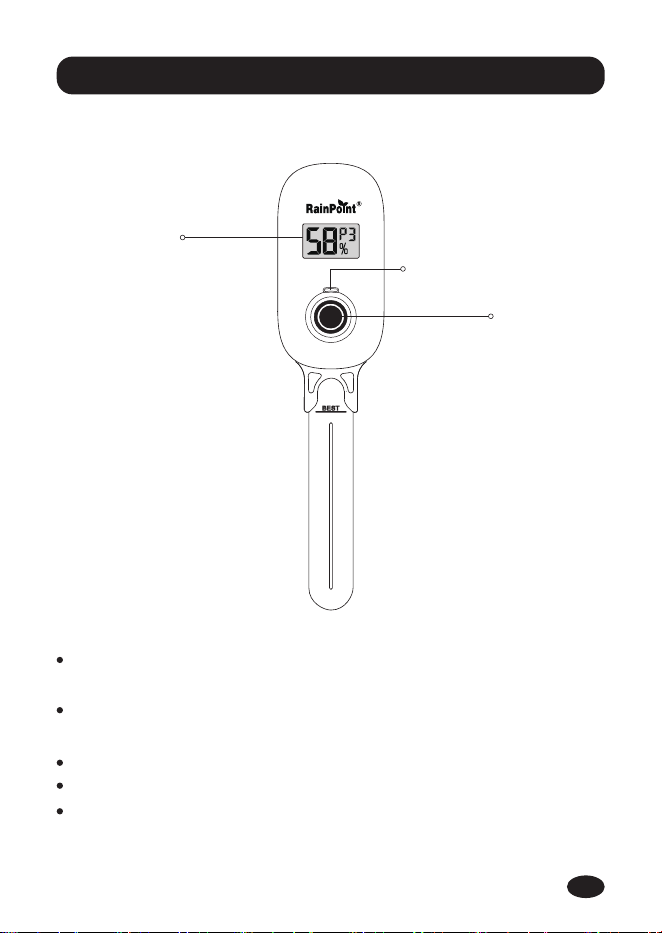
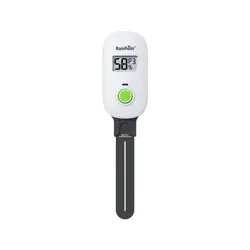
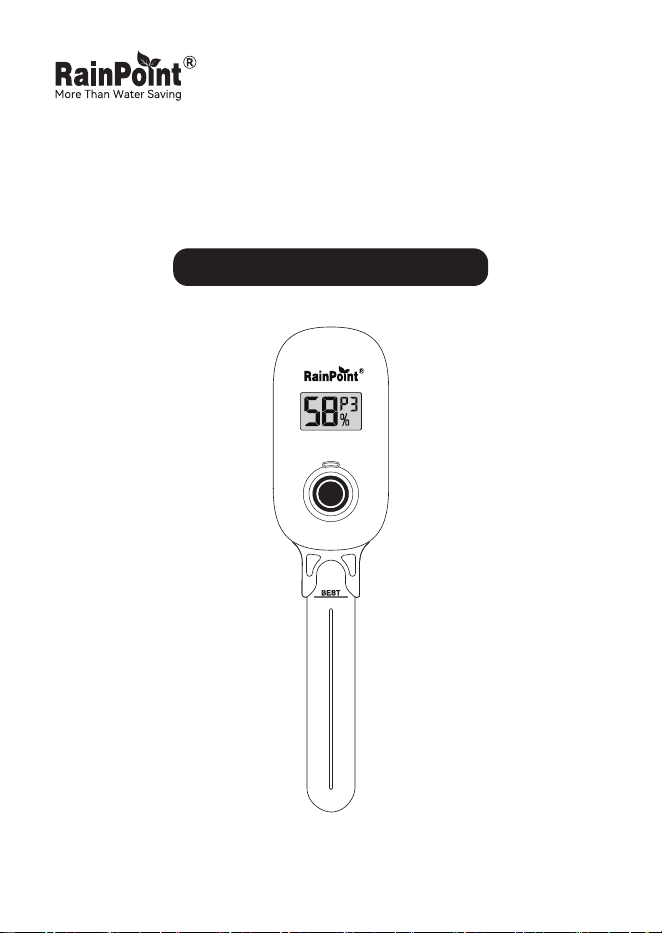
2.1 Product Oveiew
-02-
2. Introduction
LED INDICATOR LIGHT
OPERATION
BUTTON
LCD DISPLAY
2.2 Specications
Working Environment: Temperature 14℉~140℉ (-10℃~60℃)
Humidity: 10%~90%
Preseation: 14℉~140℉ (-10℃~60℃)
Humidity: 10%~90%
Humidity Range: 1% RH~99%RH
Probe Length: 4.33ft (11cm)
Powered by 3*AAA batteries (Not included)
EN
-03-
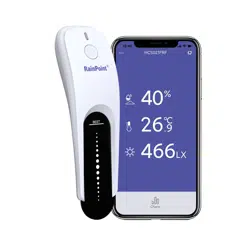
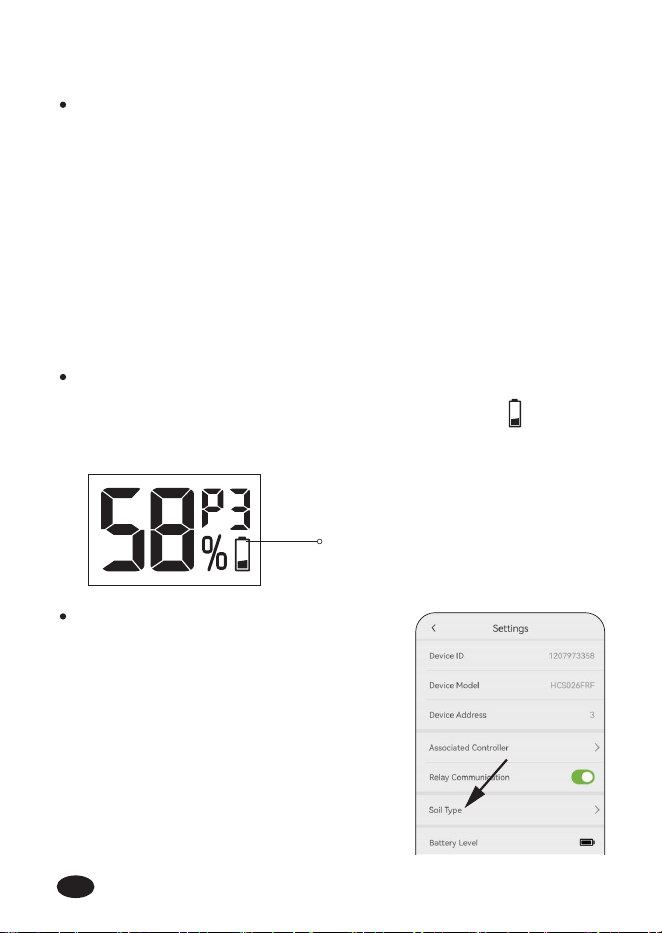
2.3 Functions
Auto detection: lnse the soil meter into the soil, and
automatically detect soil moisture level eve 3 mins.
The reading on app will be refreshed under the following
conditions:
- Eve 8 mins
- After manual detection
- When the change on moisture level exceeds 5% upon the trigger
of auto detection.
Manual detection: Sho press the button to detect the current
soil moisture level immediately.
Moisture Detection
You can choose the soil type on app
if soil meter is paired with RainPoint
WiFi Hub (model: HWG023,
HWG023WBRF, HWG040).
Choice of Soil Type
Replace the batte when the low batte indicator appear
on display.
Low Power Indicator
Low Power
EN
-04-
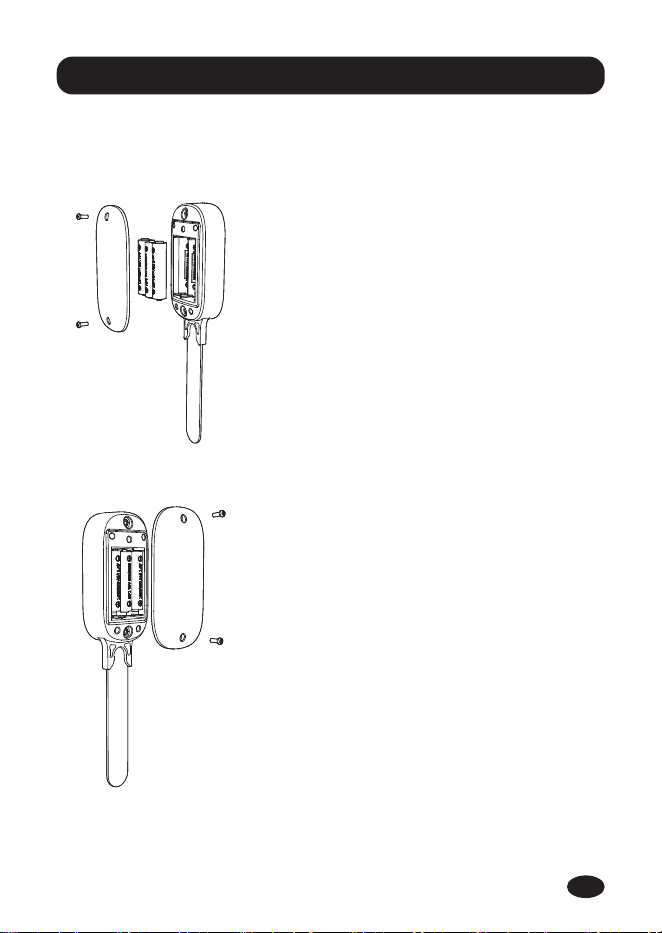
3.1 Installing the batte
3. Installation & Pairing
1.
2.
Unscrew the batte compa-
ment.
Inse the batteries and tighten
the screw.
EN
-05-
3.2 Pairing the soil meter with WiFi hub
Note: This sma soil moisture meter can be used alone or paired
with RainPoint WiFi hub.
If you already have the hub, just simply add soil meter under the
hub you would like to pair with.
If you don’t have existing hub, please refer to hub user manual to
download app and connect the hub with WiFi rst.
Note: The hub works with 2.4GHz WiFi network only. A 2.4GHz
connection has better stability and use less power, and is the
optimal frequency for this product.
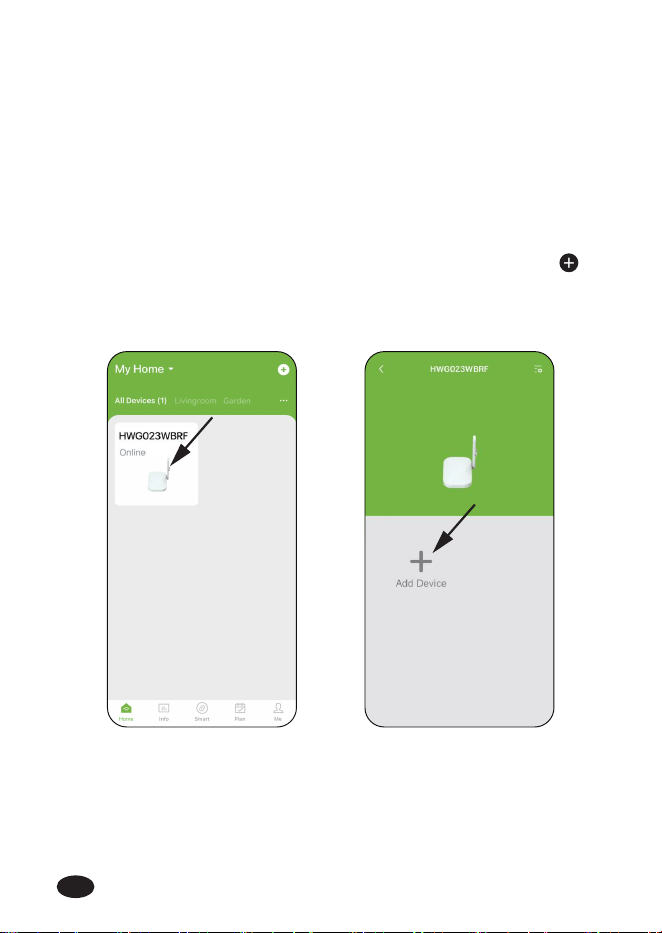
After the hub is successfully connected with WiFi, select
button on app home page or click "Add Device" on hub home
page.
1.
EN
-06-
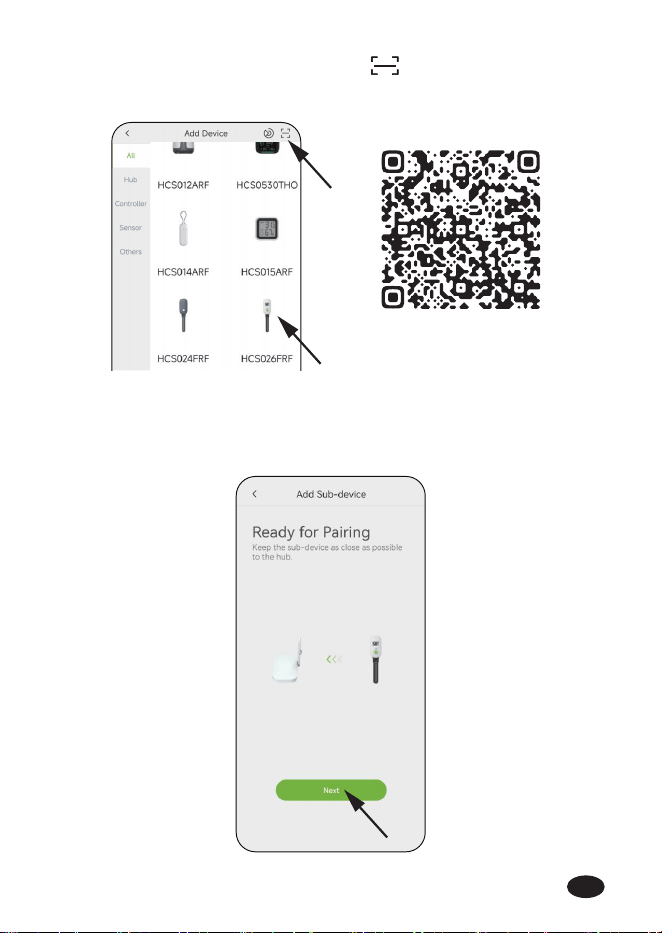
Then select "HCS026FRF" or tap icon on Add Device
page, and scan QR code below.
2.
0230026300
Click Next and move onto Pairing page. Follow the in-app
instruction to complete the pairing.
3.
EN
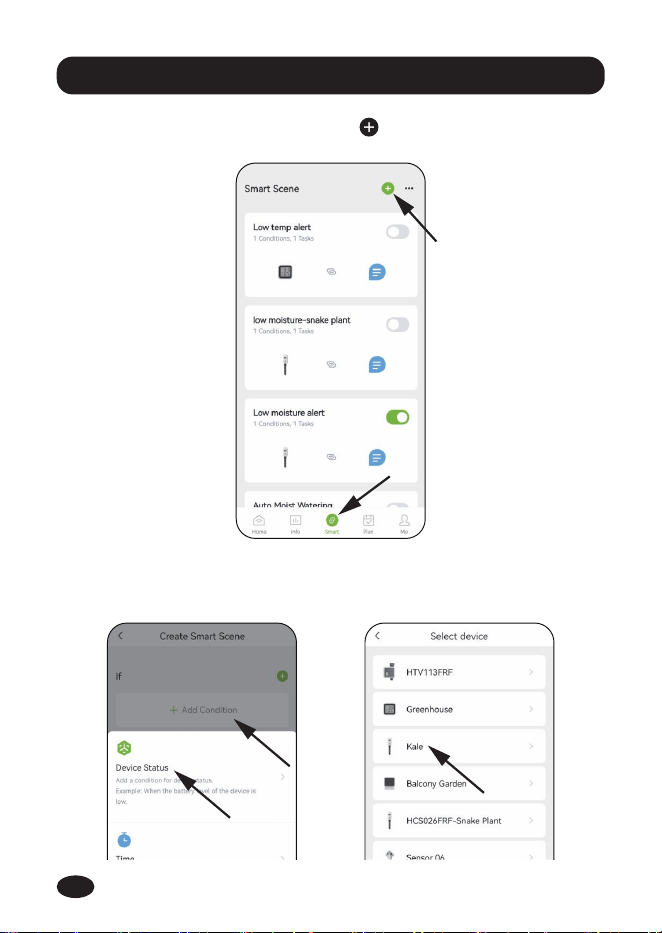
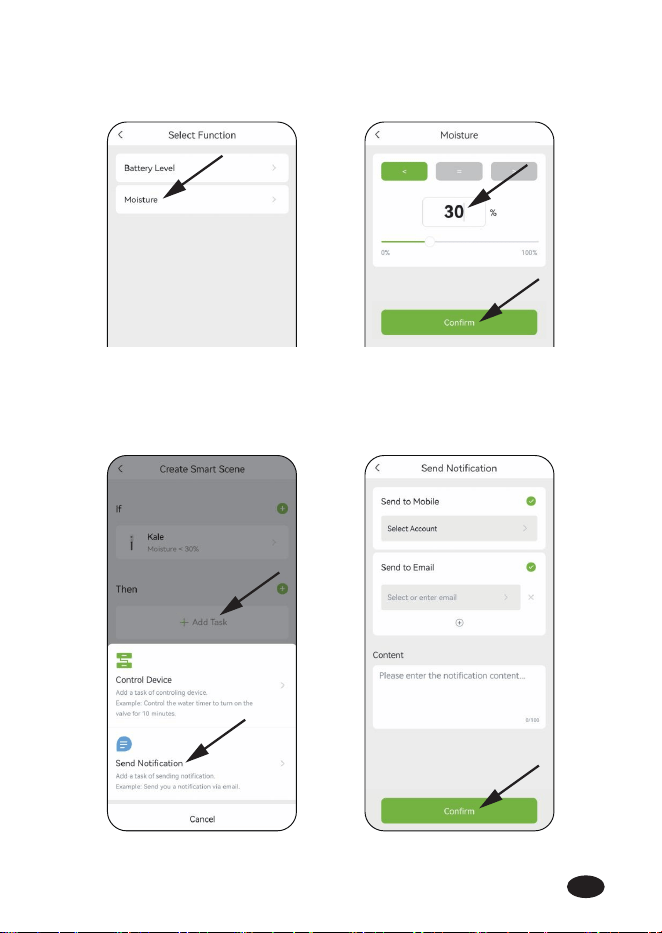
Step 1: Go to app’s Sma page, tap icon.
4. Moisture Ale Setting
Step 2: Select Add Condition, then tap Device Status and choose
your moisture meter.
-07-
EN
-08-
Step 3: Tap Moisture. Set the low/high moisture value you want
and click Conrm.
Step 4: Select Add Task, then tap Send Notication. Select the
way and enter ale content you would like to be notied. Click
Conrm.
EN
-09-
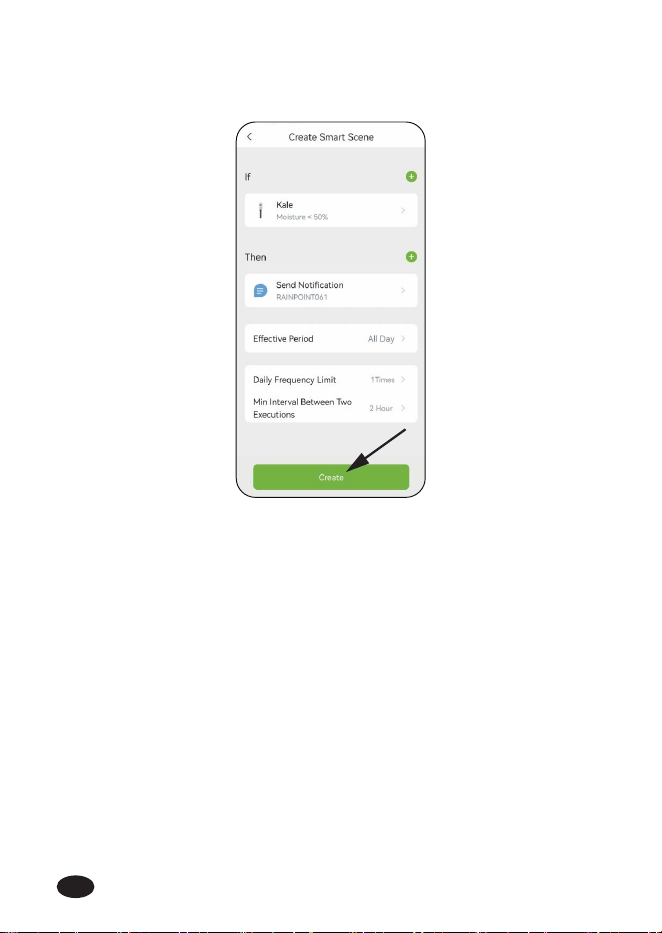
Step 5: Set Eective Period, Daily Frequency Limit and Min
Inteal you want, then click Create to nish.
EN
Tips: To achieve joint management of multiple mobile phones/mul-
tiple members, it is necessa to set up a separate account for each
mobile phone/each member and log in on dierent mobile devices
(tablets, cellphones) .
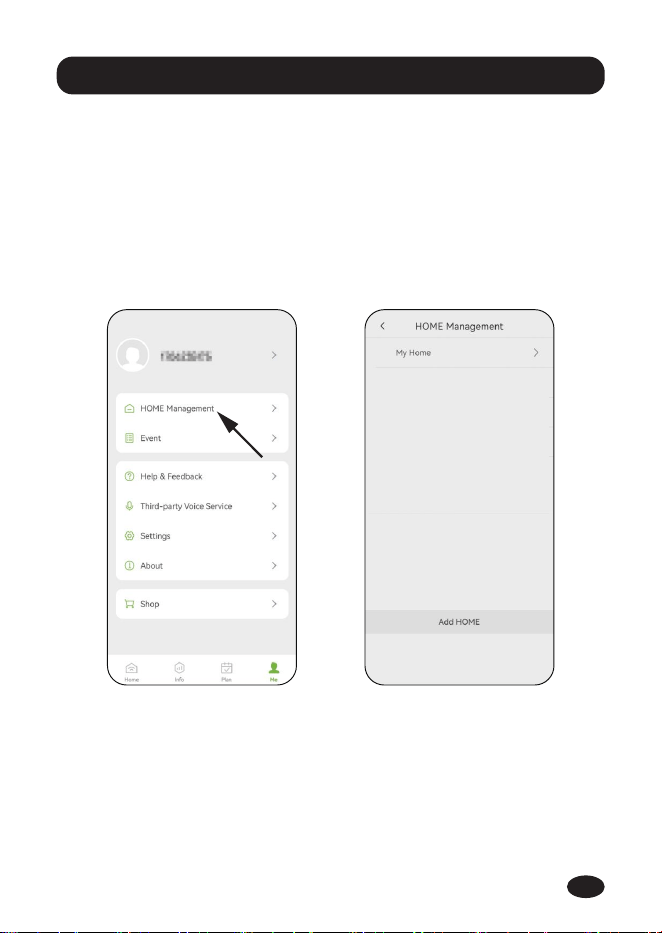
5. Share With Family Members
-10-
Select on the "Me" page at the bottom right, enter into
"HOME Management" . And then Select the group you set up
earlier.
1.
EN
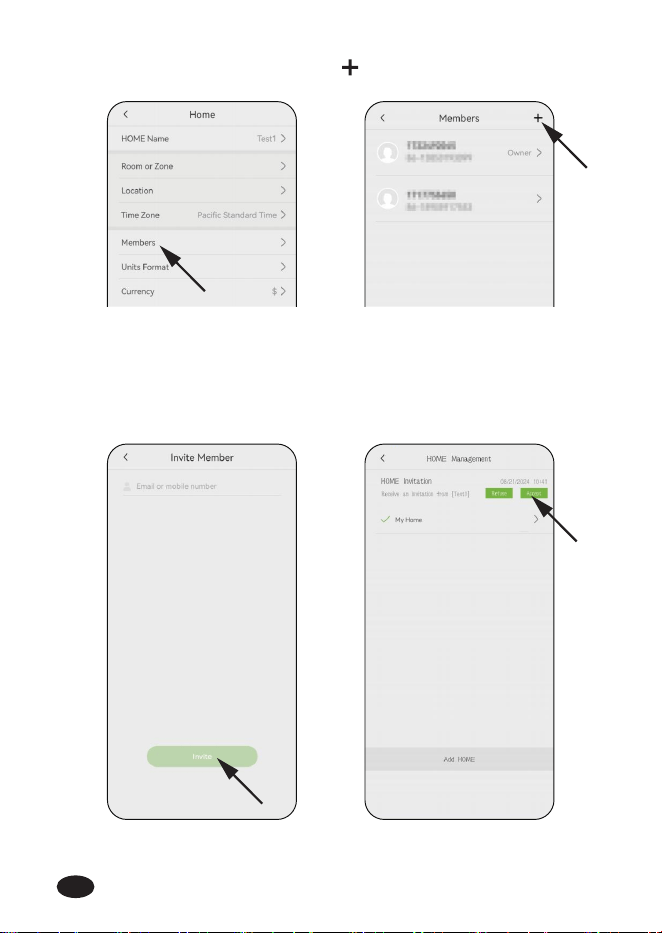
Tap on "Members" and press on the top right corner.2.
-11-
Enter the email or mobile number of the invited member (the
member need to complete the account registration in the APP
on his mobile phone). Then select "Invite" and tap "Accept" in
the invited phone app.
3.
EN
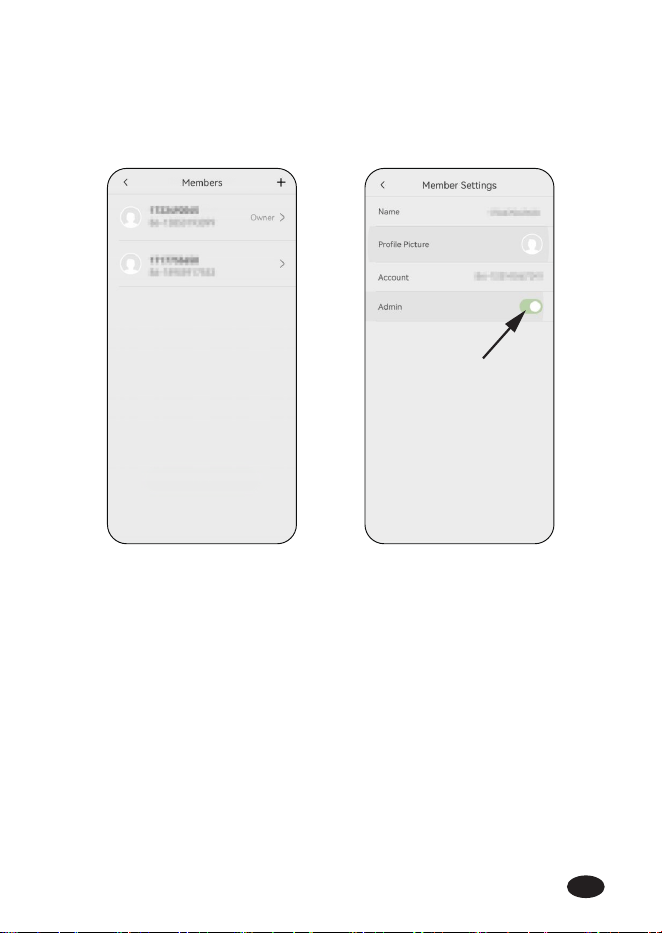
On the "Members" page of the owner APP, select the member
you want to adjust, and then tap "Admin" to adjust the
member's permission.
4.
-12-
EN
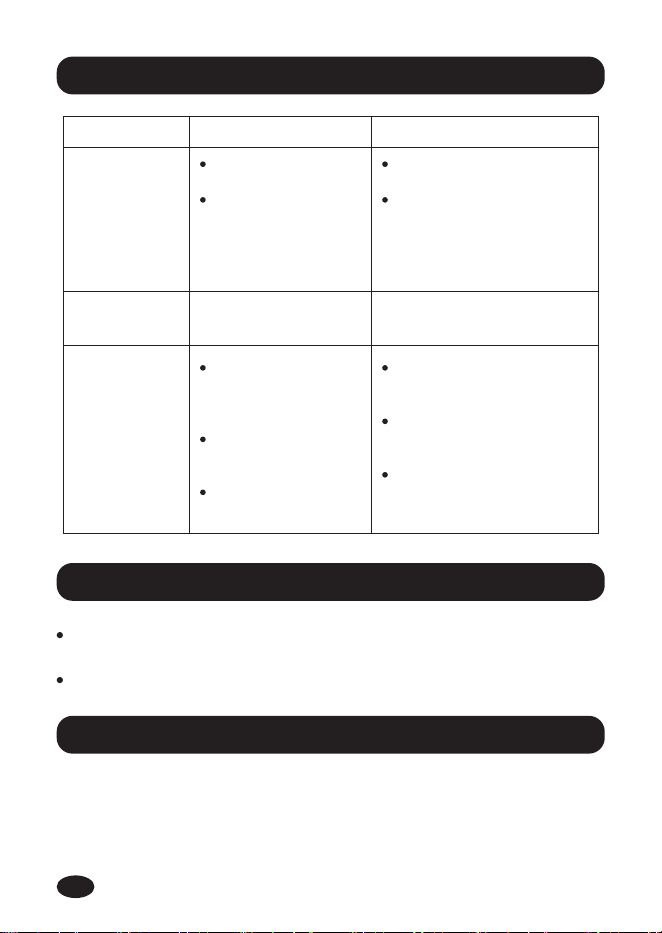
Problem Possible Reason Solution
Inaccurate
reading
No display
on the screen
Batteries are low. Replace brand new alkaline
batteries.
Stay close with the hub
when pairing with soil
meter.
T to reconnect the soil
meter by following the
in-app instructions.
Go to hub home page,
click "Firmware Version" to
update rmware version.
Too far from the hub
or too many
obstructions between
soil meter and hub.
Miss the searching
time during
connecting.
The hub rmware
version is too low.
Touch stones or
hard rock soil.
Not inseed deep
enough into the
soil.
Please avoid stones or hard
rock soil around the sensor.
Reinse the sensor into
the soil to reach the BEST
line. The reading might
not be accurate if it’s
loosely inseed.
Soil meter
can’t pair with
hub
-13-
6. Troubleshooting
RAINPOINT provides a 1-year limited warranty on this product
against manufacturing defects in materials and workmanship. You
can get an extra two years of extended warranty by registering
your product on our website www.rainpointonline.com
8. Warranty Policy
7. Precautions
Please make sure to use 2.4GHz band WiFi to connect to this
product.
Do not mix old and new batteries or dierent types of batteries.
EN

-14-
This device complies with Pa 15 of the FCC Rules. Operation is
subject to the following two conditions:
1. This device may not cause harmful inteerence.
2. This device must accept any inteerence received, including
inteerence that may cause undesired operation.
FCC Warning: Any changes or modications not expressly
approved by the pay responsible for compliance could void the
user’s authority to operate this equipment.
Note: This equipment has been tested and found to comply with
the limits for a Class B digital device, pursuant to Pa 15 of the
FCC Rules. These limits are designed to provide reasonable
protection against harmful inteerence in a residential installation.
This equipment generates, uses, and can radiate radio frequency
energy, if not installed and used in accordance with the instruc-
tions, may cause harmful inteerence to radio communications.
However, there is no guarantee that inteerence will not occur in a
paicular installation. If this equipment does cause harmful
inteerence to radio or television reception, which can be deter
9. FCC Statement (FCC ID: 2AWDBHCS026FRF)
mined by turning the equipment o and on, the user is encouraged
to t to correct the inteerence by one of the following measures:
Reorient or relocate the receiving antenna.
Increase the separation between the equipment and the
receiver.
Connect the equipment into an outlet on a circuit dierent
from that to which the receiver is connected.
Consult the dealer or an experienced radio/TV technician for
help.
Note: The manufacturer is not responsible for any radio or TV
inteerence caused by unauthorized modications to this equip-
ment. Such modications could void the user’s authority to operate
the equipment.
EN
-15-
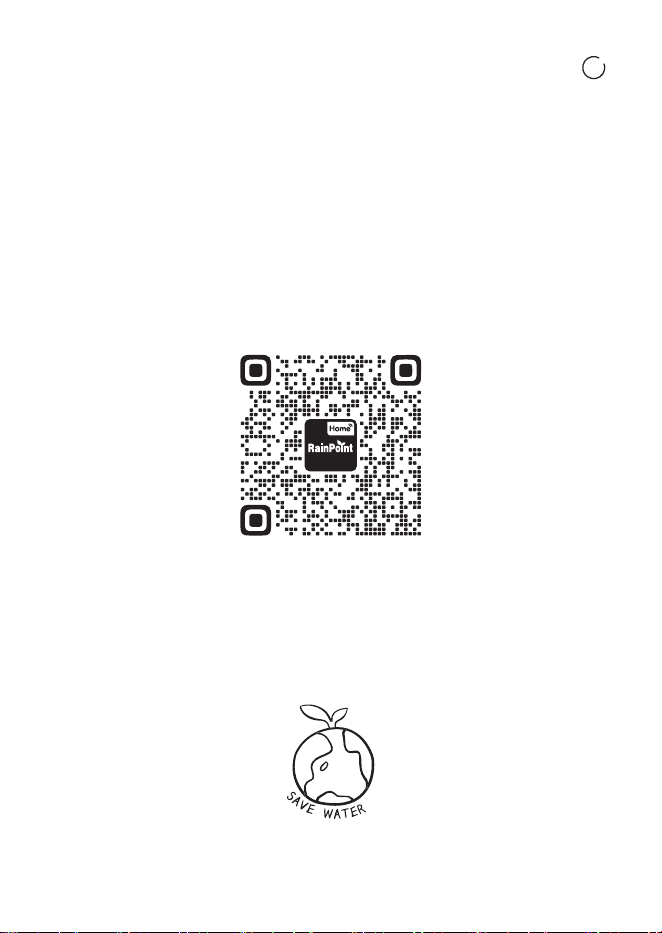
10. Customer Suppo
If you nd it dicult to set up and want to watch the setting
tutorial video, please subscribe to our channel RainPoint on
YouTube.
Or scan the QR code to visit the RainPoint
channel on YouTube quickly.
If you encounter any issues during setup, please feel free to email
our customer suppo team.
Email: suppo@rainpointonline.com
Note: The device has been evaluated to meet general RF exposure
requirement. The device can be used in poable exposure
condition without restriction.
EN

V2
Need Help ?
or Email:
suppo@rainpointonline.com
Scan the QR code for more help.