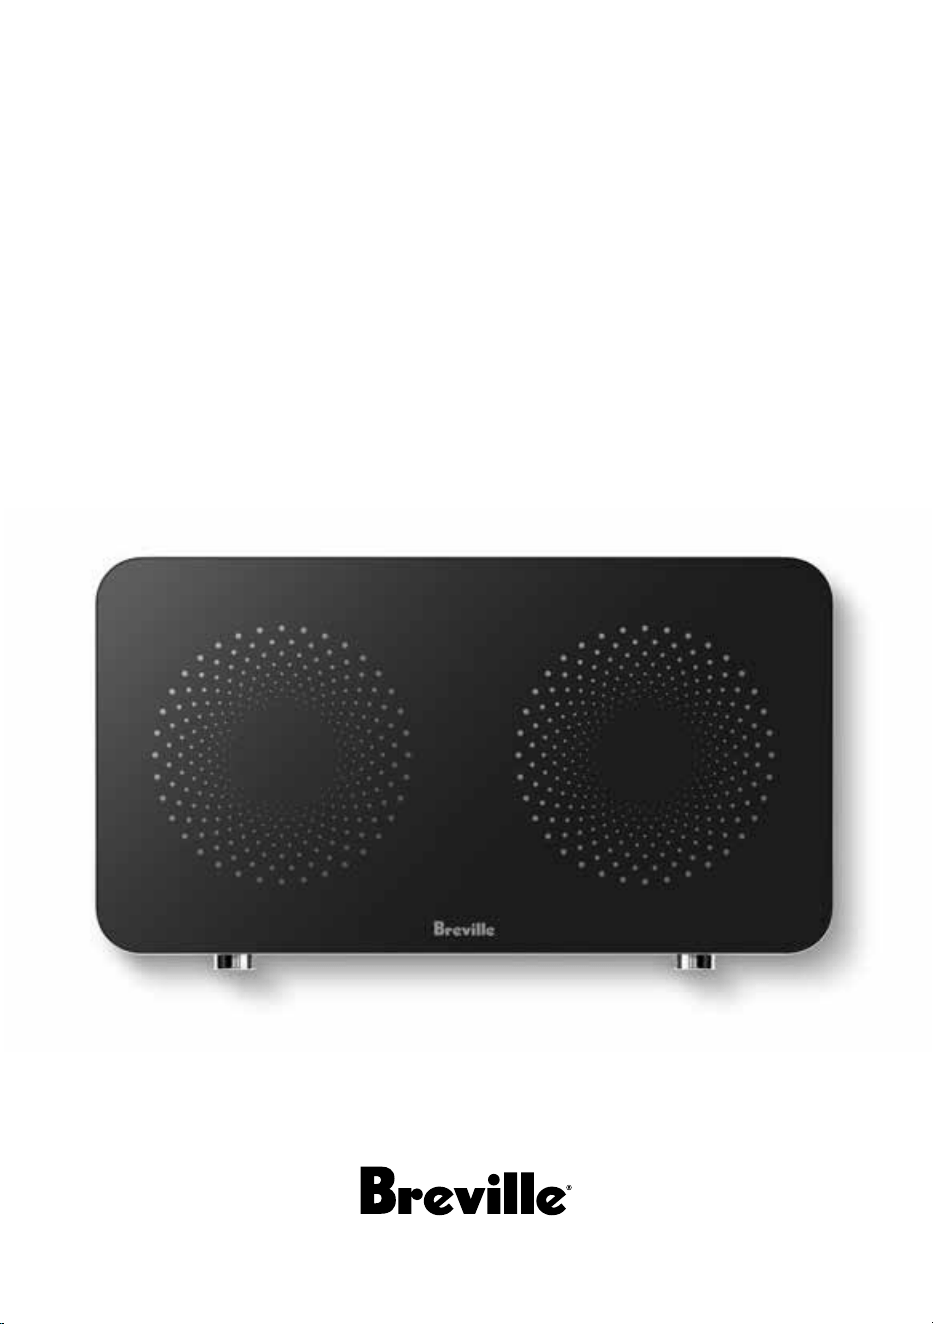
the Quick Cook™ Dual Zone
Instruction Book - LIC700

2
BREVILLE
RECOMMENDS
SAFETY FIRST
At Breville we are very safety
conscious. We design and
manufacture consumer
products with the safety of you,
our valued customer, foremost
in mind.
In addition we ask that you
exercise a degree of care when
using any electrical appliance
and adhere to the following
precautions.
IMPORTANT
SAFEGUARDS
READ ALL INSTRUCTIONS
BEFORE USE AND SAVE
FOR FUTURE REFERENCE
• Carefully read all
instructions before
operating the induction
cooker and save for future
reference.
• Remove and safely discard
any packaging material
and promotional labels
before using the induction
cooker for the first time.
• If there is a protective
cover fitted to the power
2 Breville Recommends Safety First
9 Components
10 Operation
13 Care, Cleaning & Storage
14 Troubleshooting
Contents
QR149
Limited Product
Warranty
Breville's warranty for this product
covers the repair or replacement if
it’s found to be defective due to faulty
materials, workmanship, or function
within the warranty period. All legal
warranty rights under applicable
national legislation will be respected and
will not be impaired by our warranty. For
details on length of warranty, to obtain
a printed copy or to read full terms and
conditions please scan the QR code or
visit www.breville.com
Alternatively, call the
Breville Service Centre
(see back cover for
contact details).

3
plug of the induction
cooker, remove and safely
discard to eliminate a
choking hazard for young
children.
• Do not place the induction
cooker near the edge of a
bench top, counter or table
during operation.
• Ensure that the surface is
level, clean and free of
water and other
substances.
• Do not place the induction
cooker on any metal
surface, a hot gas or
electric burner, or where it
could touch a heated oven.
• Position the induction
cooker with at least 20cm
free space around the
induction cooker to
prevent overheating.
• Always operate the
induction cooker on a dry,
stable and heat resistant
surface. Do not use on a
cloth-covered surface, near
curtains or other
flammable materials.
• Position the induction
cooker at a minimum
distance of 20cm away
from curtains, cloths and
other heat sensitive
materials when in use.
This will allow for
adequate air circulation
and also help prevent the
possibility of curtains and
cloths discoloration due to
radiated heat.
• Do not use the induction
cooker on a sink drain
board.
• Do not leave the induction
cooker unattended when
in use.
• If the induction cooker is
not in use for an extended
period, disconnect from
the power outlet.
• Do not move the induction
cooker during cooking or
while the cookware
remains on the
induction cooker.
• Do not operate the
induction cooker in the
vicinity of magnetically
sensitive objects (e.g.
magnetic cards).

4
• The induction cooker is
not intended to be
operated by means of an
external timer or separate
remote-control system.
• The induction cooker
is marked with a hot
surface symbol. The
temperature of accessible
surfaces will be high when
the induction cooker is
operating and for some
time after use.
• Do not place anything on
top of the induction cooker
surface (except induction-
compatible cookware)
when in use.
• Do not place metallic
utensils, non-induction
cookware, lids, knives,
forks, spoons or other
metallic objects on the
induction cooker glass
ceramic plate, as these may
become hot when the
induction cooker is
switched on.
• Do not insert any objects
into the ventilation system.
• To avoid overheating, do
not place any aluminium
foil or metal plates on the
induction cooker.
• Do not touch the hot
surface of the glass
ceramic plate. The
induction cooker itself
does not heat up during
cooking, but the
temperature of the
cookware will heat up the
glass ceramic plate.
• Do not heat any opened or
unopened cans on the
induction cooker.
• Always switch o the
induction cooker at the
power outlet, then unplug
the power cord and cool
completely, when the
induction cooker is not in
use, before cleaning, before
attempting to move the
induction cooker, and
when storing the induction
cooker.
• Do not place anything
between the cookware and
the induction cooker
cooking plate.

5
• Do not put heavy objects
on the induction cooker.
Maximum weight of
cookware and content
should not exceed 6kg per
cooktop side and 10kg
combined.
• Beware of hot steam that
comes out of the cookware
during cooking or when
you remove the lid.
• Do not lift and move the
induction cooker while it is
operating.
• Never put empty cookware
on the switched on
induction cooker as this
could cause the cookware
to become distorted or the
heating coil to become
damaged.
• Do not store flammable
materials and liquids near
or on the induction cooker.
• Avoid hard contact
between the cookware or
other objects and the
ceramic glass cooking
plate.
• Always place the cookware
within the designated
cooking zone printed on the
ceramic glass cooking plate
during cooking.
• Only use flat bottom,
induction-compatible
cookware to provide full
contact with the cooking
zone on the glass surface
during cooking to avoid the
heating coil becoming
damaged.
• Always use cookware with a
bottom diameter between
12cm to 21cm.
• Do not place the induction
cooker in direct sunlight.
Colour fading and
discolouration may occur
when the induction cooker
is consistently exposed to
UV light.
• Keep the induction cooker
clean. Follow the cleaning
instructions provided in this
book.
• Do not use induction
adapter plate to cook with
non-induction cookware.
• If water or other liquid boils
over or settles on the surface

6
of the induction cooker,
pause cooking, dry the
surface with a cloth and
continue cooking. Avoid
contact with ceramic glass
as it may be hot during
cooking.
WARNING
• If the glass ceramic plate
surface is cracked, switch
o the induction cooker to
avoid the possibility of
electric shock. Return the
appliance to the nearest
authorised Breville Service
Centre for repair.
• Before use, people with
electronic implants such
as pacemakers, etc., and or
other health issues should
consult their doctor, as the
induction cooker
generates a magnetic field.
• Always be mindful that
after being turned o and
for some time after
cooking, the induction
cooker will continue to
radiate residual heat on
the glass ceramic plate
heating surface.
• Do not use this induction
cooker within reach of
young children.
IMPORTANT SAFEGUARDS
FOR ALL ELECTRICAL
APPLIANCES
• Fully unwind the power
cord before use.
• Connect only to 230V or
240V power outlet.
• Do not let the power cord
hang over the edge of a
bench or table, touch hot
surfaces or become
knotted.
• To protect against electric
shock, do not immerse the
power cord, power plug or
induction cooker in water
or any other liquid.
• The induction cooker is
not intended for use by
persons (including
children) with reduced
physical, sensory or
mental capabilities, or lack
of experience and
knowledge, unless they
have been given
supervision or instruction

7
concerning use of the
induction cooker, by a
person responsible for
their safety.
• Children should be
supervised to ensure that
they do not play with the
induction cooker.
• It is recommended to
inspect the induction
cooker regularly. Do not
use the induction cooker if
the power supply cord,
plug, connector or
induction cooker becomes
damaged in anyway.
• Return the entire
induction cooker to the
nearest authorised Breville
Service Centre for
examination and/or repair.
• Any maintenance other
than cleaning should be
performed at an
authorised Breville Service
Centre.
• This induction cooker is
for household use only. Do
not use this induction
cooker for other than its
intended use. Do not use in
moving vehicles or boats.
Do not use outdoors.
Misuse may cause injury.
• The installation of a residual
current device (safety switch)
is recommended to provide
additional safety protection
when using the induction
cooker. It is advisable that a
safety switch with a rated
residual operating current not
exceeding 30mA be installed
in the electrical circuit
supplying the induction
cooker. See your electrician
for professional advice.
• During electrical storms, the
induction cooker should be
disconnected from the
power source at the wall
socket to prevent any
electrical surges that may
arise during the storm and
which may inadvertently
cause damage to the
induction cooker and its
electronic componentry.

8
• Always turn the induction
cooker to the OFF position,
switch o at the power
outlet and unplug at the
power outlet when the
induction cooker is not in
use.
• Before cleaning, always
turn the induction cooker
to the OFF position, switch
o at the power outlet,
unplug at the power outlet
and remove the power
cord, if detachable, from
the induction cooker and
allow all parts to cool.
• Do not place this
induction cooker on or
near a heat source, such as
hot plate, oven or heaters.
FOR HOUSEHOLD USE ONLY
SAVE THESE INSTRUCTIONS
• Position the induction
cooker at a minimum
distance of 20cm away
from walls, curtains and
other heat or steam
sensitive materials and
provide adequate space
above and on all sides for
air circulation.
9
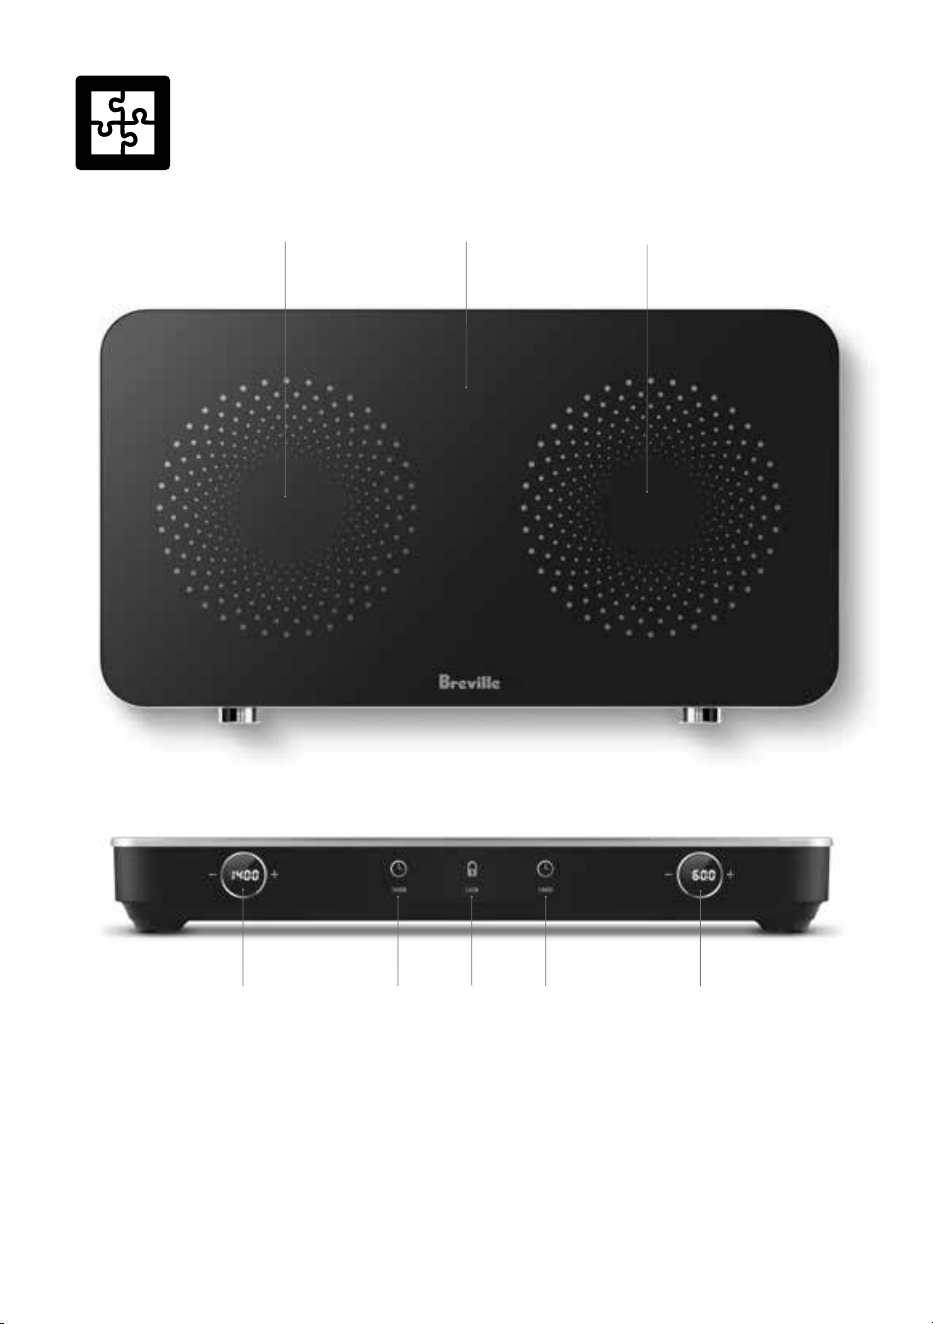
Components
54 43
1. Ceramic Glass Cooktop
2. Dual Cooking Zones
3. Control Dials with LED Display Screen
4. Timer Button
5. Child Lock Button
Not Shown:
• Non-slip Feet
• Power Cord
3
2 1
2
10
Operation
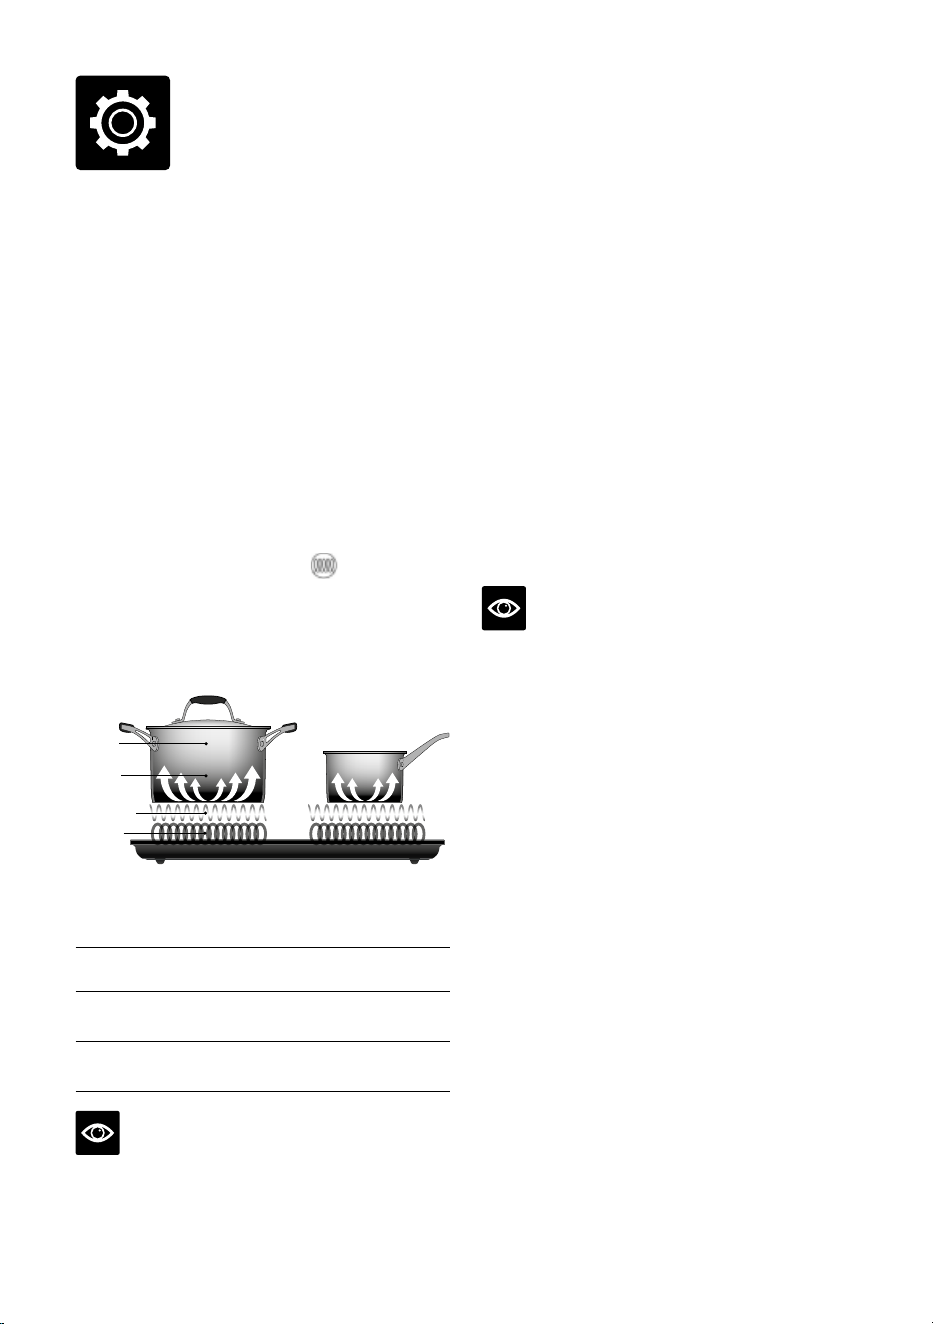
WHAT IS INDUCTION COOKING?
An induction cooker creates an
electromagnetic field to heat induction-
compatible cookware. The majority of the heat
is absorbed by the cookware, so the cooking
surface remains cooler to the touch than most
traditional cooktops, making cooking faster,
safer, and more energy-ecient.
WHY DO YOU NEED TO USE
INDUCTION-COMPATIBLE
COOKWARE?
Cookware used on induction cooktops must
have a flat magnetic base for the heat to
transfer. Often, induction-compatible cookware
will be marked with a symbol
on the base,
however, if you are unsure if your cookware is
induction-compatible, place a magnet on the
base—if the magnet sticks, it should be suitable
for induction cooking.
Induction
Cookware
Heat is
Generated
in the Pot
Magnetic Field
Power Coil
Induction
Cookware
Heat is
Generated
in the Pot
Magnetic Field
Power Coil
RECOMMENDED TYPES AND
SIZES OF COOKWARE
Material
Base made from iron or magnetic stainless
steel.
Shape
Cookware with a flat bottom.
Size
Diameter of 12-21cm depending on type of
cooking.
NOTE
Noise emanating from the induction cooker
when turned on with cookware in place is
normal.
BEFORE FIRST USE
1. Remove and safely discard all packaging
materials and promotional labels.
2. Wipe the ceramic glass cooktop with a soft
damp cloth and dry thoroughly.
HOW TO USE YOUR QUICK COOK™
DUAL ZONE
1. Place the induction cooker on a dry, stable,
and level surface.
2. Ensure there is at least 20cm free space
around the induction cooker to prevent
overheating.
3. Insert the power plug into a 230V or 240V
grounded outlet and switch on at the power
outlet. A beep will sound , and the digital
display on the dials will show "OFF". The
induction cooker is now on standby mode.
NOTE
To achieve maximum eciency, it is essential
to use the correct type of cookware. Refer to the
cookware manufacturer to confirm suitability
for induction cooking.
4. Place your induction-compatible pot or pan
in the centre of the circular design on the
ceramic glass cooktop, which marks the
eective induction zones.
5. To wake the unit from standby mode, press
the dial for the induction zone being used
once. The dial display will change from
“OFF” to “ON” to indicate the unit is now
ready to use.
6. Rotate the dial to select the desired wattage
(300-1800W). The digital display on the
dial will indicate the chosen wattage, such
as "1800".
7. Once the wattage has been selected, the
display will flash three times, and the
corresponding cooktop will begin heating.

11
WATTAGE DISTRIBUTION FOR
COOKING ZONES
The induction cooker optimises power usage
across its dual cooking zones. The wattage
distribution varies depending on whether one
or both cooking zones are in use. The following
guide outlines how power is allocated in
dierent cooking situations.
NOTE
When both cooking zones are in use, users
may notice slightly reduced performance when
compared with the same wattage setting when
using a single cooking zone. This is normal
as the appliance will dynamically adjust the
power wattage shared across both zones to
optimise power usage.
1. Single Zone Cooking
When using a single cooking zone, the
maximum available power is 1800W. The
other zone remains o.
Example:
1800W | OFF
1800
8888
OFF
2. Dual Zone Cooking
When both cooking zones are in use, the
maximum combined wattage is 2400W.
The power can be distributed between the
two zones as follows:
Example: dierent wattage on each zone
with total maximum combined 2400W
1800W | 600W
1800 600
Example: equal wattage on each zone with
maximum combined 2400W
1200W | 1200W
1200 1200
TIMER
The countdown TIMER can be set once the
induction cooktop commences heating.
1. Press the
button to enable the timer
function. For the relevant cooking zone,
"000" will display on the corresponding
control dial.
2. Rotate the dial to adjust the timer within the
following ranges and increments:
• 0 to 15 minutes: Adjust in 1-minute
increments.
• 15 to 55 minutes: Adjust in 5-minute
increments.
• 1 hour to 10 hours: Adjust in 1-hour
increments.
3. After setting the timer, wait for 3 seconds for
the unit to automatically start. The digital
display will alternate between showing the
wattage and the timer countdown.
4. Once the cooking time elapses, the unit
will emit three beeps, and "000" will
be displayed on the LED screen of the
corresponding dial. At this point, the
cooktop associated with that timer will stop
heating.
NOTE
To cancel the timer during operation, press the
timer button once. When the timer is cancelled,
"000" will be displayed on the LED screen of
the corresponding dial.

12
CHILD LOCK
The CHILD LOCK mode can be activated at
any time, even during cooking, and will disable
all the buttons and dials, except for turning
ON/OFF.
1. Long-press the child lock button for 3
seconds to activate child lock. The digital
display will show “LOC.”
2. During operation, the display will alternate
between the wattage, countdown timer, and
“LOC.”
3. Long-press the child lock button for 3
seconds to exit child lock mode.
NOTE
Operation of the induction cooker can be
stopped by pushing the ON/OFF dial, even
when CHILD LOCK mode is activated.
NOTE
If the unit is turned o or timer has elapsed
while CHILD LOCK is still activated, “LOC”
will flash on the dial.
To turn the unit back on, press and hold the
child lock button for 3 seconds to deactivate
child lock, or switch o at the power outlet,
then switch back on.

13
Care, Cleaning
& Storage
1. Before cleaning, check that “OFF” is
displayed on the control dial, indicating that
it is in standby mode, the fan has stopped
operating, and the ceramic glass cooktop
has returned to room temperature.
2. Switch o at the power outlet and unplug
the power cord from the outlet.
NOTE
Ensure the induction cooker has completely
cooled down before cleaning and storing.
3. Wipe all external surfaces with a slightly
damp, soft cloth and allow to dry
thoroughly. To clean any food residue
o the ceramic glass cooktop, wipe with
a slightly damp, soft cloth, using a mild
detergent, then dry thoroughly.
4. Do not place any part of the induction
cooker in the dishwasher.
NOTE
Do not use abrasives, harsh cleaning solutions
or metal scourer pads as these may scratch the
ceramic glass cooktop and make subsequent
cleaning more dicult.
WARNING
To prevent damage to the induction cooker,
do not use alkaline cleaning agents when
cleaning, use a soft cloth and mild detergent.
WARNING
Exposure to cooking oils and cleaning
chemicals may cause colour fading and
discolouration to the induction cooker. If
the induction cooker is exposed to oils or
chemicals, turn o and unplug the induction
cooker, allow to cool and use a damp soft cloth
to clean the surface of the induction cooker.
Dry thoroughly before use.
WARNING
To protect against electric shock, do not
immerse the induction cooker, power cord or
power plug in water or any other liquid. Do not
operate on a wet surface.
STORAGE
Ensure the induction cooker is completely
cool, clean and dry following the cleaning
instructions provided.
Store the induction cooker flat on the bench or
in a convenient cupboard.
Do not place anything on top of the induction
cooker during storage.

14
Troubleshooting
Problem/Error Code
Displayed on Screen
Possible Causes What to Do
No beep sound or lights
displayed on dials after
plugging unit into power
outlet.
•
Improper connection
between the plug and
the outlet.
•
Check the connection and ensure the outlet is
working.
•
Malfunctioning power
outlet
•
Verify the presence of electrical power within the
household. If there is power, check if the power
outlet where the induction cooker is plugged in
is functioning properly. Try plugging another
device into the same outlet to confirm if it is
supplying power.
•
If the problem persists after performing these
checks, contact the Breville Customer Service
Centre.
•
There is no power in the
house
•
Verify the presence of electrical power within the
house-hold. If power is absent, switch the unit o
and wait for the power to return before turning
the unit back on.
•
If the problem persists, contact the Breville
Customer Service Centre.
Cookware is not heating
up despite the cooling
fan working, and wattage
displayed on the dial
indicates that the unit is
operational.
•
Cookware incorrectly
positioned on the
cooktop surface.
•
Ensure that cookware is placed on the centre
of the eective induction zone marked by the
circular design on the cooktop.
Heating suddenly stops
during operation.
•
Cooking timer has
completed, or cookware
moved.
•
Check the timer, cookware position, and ensure
vents are not blocked.
Power setting is not
functioning as expected.
•
Incorrect settings or
cookware.
•
Verify settings and use flat-bottom induction
compatible cookware.

15
Troubleshooting
Problem/Error Code
Displayed on Screen
Possible Causes What to Do
E0
•
No cookware detected,
or cookware is not
compatible with
induction cooking
•
Place induction-compatible cookware on the unit.
E1
•
Internal temperature
too high.
•
Consult the Breville customer service centre.
E2
•
IGBT has overheated.
•
Consult the Breville customer service centre.
E3
•
Voltage is too low.
•
The input voltage is too low.
E4
•
Voltage is too high.
•
The input voltage is too high.
EC
•
Synchronising circuit
failure or damaged coil.
•
Consult the Breville customer service centre.

Quick Cook and Breville are trademarks of Breville Pty. Ltd. A.B.N. 98 000 092 928.
Copyright Breville Pty. Ltd. 2024.
Due to continued product improvement, the products illustrated/photographed
in this brochure may vary slightly from the actual product.
LIC700 – B24
New Zealand Customers
Phone:
0800 273 845
Web: www.breville.co.nz
Breville Customer Service Centre
Australian Customers
Phone: 1300 139 798
Web: www.breville.com.au