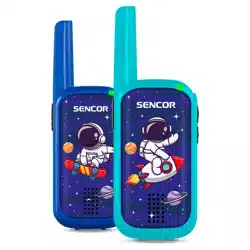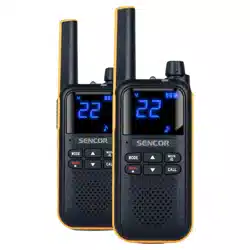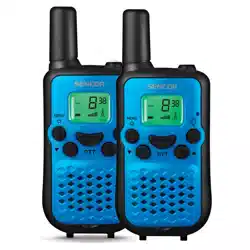
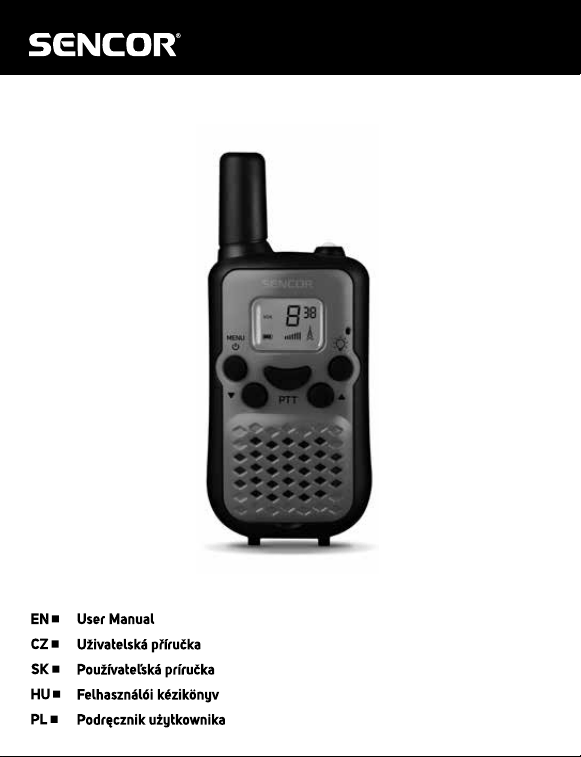
SMR 114
Walkie-Talkie
Vysílačka
Vysielačka
Adó-vevő
Krótkofalówka

EN - 2
1. INSTRUCTION FOR USE
This set includes 2 PACK walkie-talkie: there are communication devices which operate
on mobile radio frequencies. They come with 8 channels as well as back-lit LCD
screen, enabling you to communicate over several kilometers free-of –charge(up to 6
Km in open areas).
Note:
Please read the user manual carefully before using the equipment and retain for
future consultation!
Specic Recommendations
If you carry any kind of personal medical device, please consult a doctor before use.
To avoid the risk of burns, do not use the device if the aerial is damage in any way.
Don not use the device in a potentially explosive setting(e.g. Around pumps, on the
lower deck of a boat or around a fuel-storage installation or chemical products.
Switchothedeviceifonanairplaneorinahospital.
Never use the device in close proximity to a radio that avoid to interference.
Remove the batteries if the device is not use for an extended period of time. Never
mix used and new batteries.
Position the transmitter and antenna at least 5cm from your face.
Direct the antenna upwards and speak normally.
Clean the device with a damp cloth. Don’t use agents and solvent for cleaning.
Do not modify the device in any way. In the event of damage occurring, ensure that
thedeviceuscheckedbyaqualiedprofessional.
The device cannot be used to contact the emergency services.
EN - 3
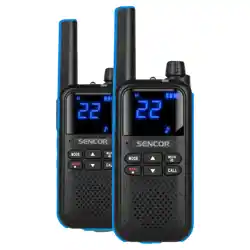
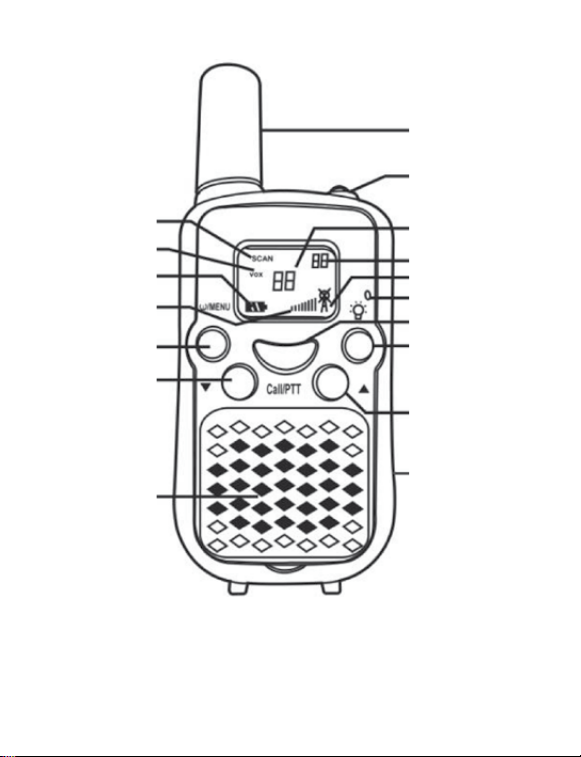
PIC 01
1 Antenna
16 Lampitem
13 Channel/Menuitey
14 CTCSS/Menuoption
2 Tx/Rx Icon
8 Microphone
9 Call/PTT Button
15 Lamp Button
4 Up Button
21 USB-C port
12 Scanning
11 Vox
10 Battery Level
3 Volume
6Poweron/o/MENV
Button
5 Down Button
7 Speaker
EN - 4
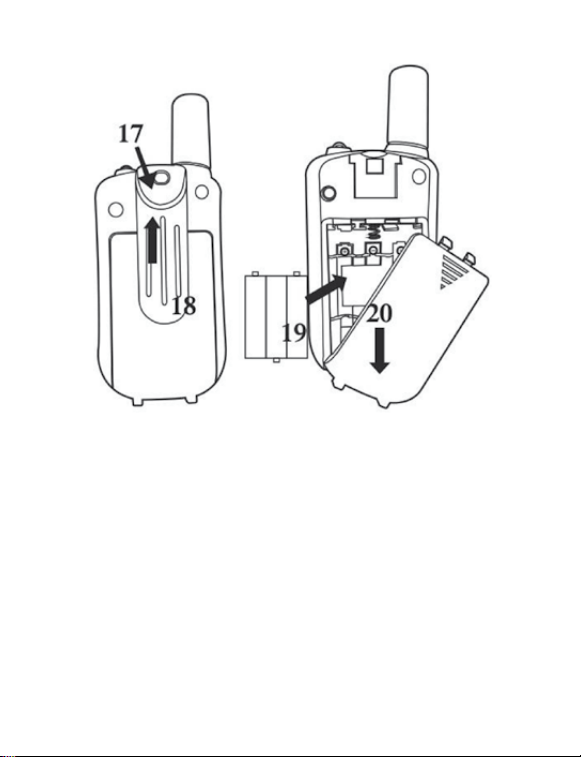
PIC 02

EN - 5
2. KEY DESCRIPTION(PIC01, 02)
1. Antenna
2. RX icon-Displayed when receiving
TX icon-Display when transmitting
3. Volume level indicator
4. Adjust button Up
5. Adjust button Down
6. Power On/O/MENU button
7. Loud speaker
8. Microphone
9. Call Button
10. Battery level indicator
11. VOX indication
12. Scanning indication: Displayed during scan mode
13. Channel/MENU item indication
14. CTCSS/MENU option
15. Lamp button
16. Lamp
17. Belt attachment clip
18. Belt attachment
19. Batteries(not included)
20. Battery compartment
21. USB-C port
3. BEFORE USE THE DEVICE
3.1 Removing the belt clip
Beforeinsertbatteriesintothedevice,rstremovethebeltcliplatchawayfromthe
device.
3.2 Installing the Batteries and Charging
1, Slid down the battery compartment cover.
2, Insert 3* AAA Rechargeable battery(not included) to each device.
3, Position the batteries according to the polarity making on the battery compartment.
4, After placing batteries into correct positions, replace the battery cover.
5, Connecting the device with Type C cable to wall charger, PC or power bank(not
included),thebatterylevelwillbeashedthenthedeviceisinchargingmode.The
fully charging time is about 6~8 hours.

EN - 6
4. USING THE DEVICE
4.1 Turning the device on/o
Switch on the device: Press and hold on the 2 seconds then you will hear a beep
sound.
Switchothedevice:Pressandholdonthe 3 seconds then you will hear a beep
sound.
4.2 Adjusting the volume
Toincreasethevolume,presstheUp▲button.AndpresstheDown▼buttonto
decrease the volume.
Note: The volume level is display on the screen.
4.3 Low Battery Indication
The device can detect the low battery level when the battery voltage goes low. When
batteryvoltageislow,thebatteryiconwillashandabeepwillbeheardtoindicatethat
you should charge the device.
4.4 Receiving/transmitting communications:
The devices are in “Reception” mode when it is turned ON and no transmitting. When
a signal is received on the current channel, the LCD will display in reception.
When you press the PTT (push to talk) button, the devices switches to “Transmission”
mode.
Hold the device in a vertical position with the Mic(microphone) 3-5cm away from your
mouth. While holding the PTT button, speak into the microphone in a normal tone of
voice.
ReleasethePTTbuttonwhenyouhavenishedtransmitting.
For others to receive your transmission, they must be on the same channel with you.
Note:
1, The talking range will depend on your surroundings and environment. It will be
aectedbyobstructionssuchashillsorbuildings.
2, Don’t try to use two devices which are less than 1.5m (5 feet) apart. Otherwise,
you may experience interference.

EN - 7
4.5 Changing Channels
PresstheMENUbuttononetime,thechannelnumberwillashonthedisplay.
Presstheup▲/down▼buttontochangethechannel.
PressthePTTbuttontoconrmandreturntostand-bymode.
Note:
If no button is pressed within 3 seconds during setting, the device will return to
stand-by mode.
4.6 CTCSS (Continues Tone Coded Squelch System)
PresstheMENUbuttontwice,thecurrentCTCSScodewillashonthedisplay.Press
theup▲/down▼buttontochangethe38availablecodes.
PressthePTTbuttontoconrmandreturntostand-bymode..
License free radio’s operating on the 400-470MHZ frequency band, the device has 8
available radio channels. If there are many device users near you, there is a chance
that some of the users are operating on the same radio channel.
When using CTCSS, a low frequency tone (between 67-250Hz) will be transmitted
along with the voice signal. There are 38 available tones to choose form.
Youarefreetochooseoneofthe38availablesub-channels.Duetoltering,these
sub-channels will generally not be audible so they will note disturb the communication.
4.7 VOX (Hands free function)
PresstheMENUbuttonthreetimes,thecurrentVOXsettingwillashonthedisplay
and the VOX icon will display,
PressUP▲buttontosettheVOXsensitivitylevelbetween1and3level(level3isthe
high sensitive level).
Pressdown▼buttonuntil“OF”appearsonthedisplaytoturnVOXOFF.
PressthePTTbuttontoconrmandreturntostand-bymode.
In VOX mode, the radio will transmit a signal when it is activated by your voice or other
sound around you.
VOX Operation is not recommended if you plan to use your device in a noisy or windy
environment.
Note: VOX mode will be over ride when you press the PTT button.
4.8 Setting the Call tones
The device has 10 call tones.
Press the MENU button four times, “CA” is displayed and on the current call tone.
PresstheUP▲/Down▼buttontochangeanothercalltones.
PressthePTTbuttontoconrmandreturntostand-bymode.

EN - 8
4.9 Key Tone On/O
Youcanon/othekeytonewhenpressthebuttons.
PresstheMENUbuttonvetimes,“KO”willbedisplayed.
PresstheUP▲/Down▼buttondisablethekeytoneON/OFF.
PressThePTTbuttontoconrmyourselectionandreturntothestand-bymode.
4.10 Roger Beep On/O
AfterthePTTbuttonreleased,thedevicewillsendoutarogerbeeptoconrmthat
have stopped talking.
Press the MENU button six times, “RO” will be displayed.
PresstheUP▲/Down▼buttondisabletherogerbeepON/OFF.
PressThePTTbuttontoconrmyourselectionandreturntothestand-bymode.
4.11 Scanning for an active radio channel
PressandholdtheUP▲button2seconds:The“SCAN”functionindicatorwillappear
on the display and the channel will scan continuously from 1 to 8. Once an active
channel is found, the scanning will stop and you can listen to the transmission.
When the transmission is on the found channel stop, the scanning will resume
automatically.
Note: If you press PTT button while listening to a found channel, the device will go back
to stand-by mode on the found channel.
4.12 Monitor
You can use the monitor feature to check for weaker signals in the current channel.
PressandholdtheDOWN▼buttonabout3secondstoactivemonitor.
ReleasetheDOWN▼buttonreturntostandbymode.
4.13 Sending a call tone
Press the PTT button one time quickly, the call tone will be transmitted on the setting
channel.
4.14 Battery saving function
When the device has not been used for 3 seconds, the economy mode is automatically
activated.Thisdoesnotaectthereceptionoftransmissionandthestandbymodeis
automatically re-activated as soon as a signal is detected.
4.15 Built-in Flash light
Yourdevicehasabuilt-inashlightthatcanbeusedinsendinglightsignalsorforour
lighting needs.

EN - 9
5. TECHNICAL SPECIFICATIONS
Frequency.............................................................................446.00625~446.09375 MHZ
Channel number .............................................................................................. 8 channels
Sub-code ..........................................................................................................CTCSS 38
Transmission Power .........................................................................................< 0.5Watts
Range ........................................................................................Upto6Kminopenelds
Modulation type ....................................................................................................FM-F3E
6. CHANNEL AND FREQUENCY (MHZ)
Europe(8CH)
Ch. Frequency Ch. Frequency Ch. Frequency
1 446.00625
2 446.01875
3 446.03125
4 446.04375
5 446.05625
6 446.06875
7 446.08125
8 446.09375
EN - 10
INSTRUCTIONS AND INFORMATION ON THE DISPOSAL OF PACKAGING
MATERIALS
Take the packaging to a collection centre for recycling.
DISPOSAL OF DISCARDED ELECTRICAL AND ELECTRONIC EQUIPMENT
This symbol on the product, accessory or packaging means that the
product must not be disposed of in normal household waste. Please
dispose of this product in a collection yard designated for the recycling
of electrical and electronic equipment. In some EU countries or other
European countries, you can return the old product to your local retailer
when you buy a new equivalent product. Proper disposal of this product
helps to conserve valuable natural resources and prevent potential
negative impacts on the environment and human health that could
result from improper disposal. For more information, contact your local
authorities or the nearest collection centre. You may be fined by law for
improper disposal of this type of waste.
For companies in the EU
If you need to dispose of electrical or electronic equipment, ask your
dealer or supplier for the necessary information.
Disposal in Countries Outside the European Union
Ask your local authorities or your dealer for information on proper
disposal.
This product meets the EU requirements.
FASTČR,a.s.herebydeclaresthatthetypeofradioequipmentSMR114complieswith
the Directive 2014/53/EU. The full text of the EU Declaration of Conformity is available
at the following web address: www.sencor.com.
Text, design and technical data are subject to change without notice; we reserve the
right to make such changes.
The original version is in Czech.
Manufacturer:FASTČR,a.s.,USanitasu1621,Říčany25101,CzechRepublic
info@sencor.com
EN
Warranty conditions
Warranty card is not apart of the device packaging.
This product is warranted for the period of 24 months from the date of purchase to the end-user. Warranty
is limited to the following conditions. Warranty is referred only to the customer goods using for common
domestic use. The claim for service can be applied either at dealer’sshop where the product was bought, or
at below mentioned authorized service shops. The end-user is obligated to set up aclaim immediately when
the defects appeared but only till the end of warranty period. The end user is obligated to cooperate to certify
the claiming defects. Only completed and clean (according to hygienic standards) product will be accepted.
In case of eligible warranty claim the warranty period will be prolonged by the period from the date of claim
application till the date of taking over the product by end-user, or the date the end-user is obligated to take it
over. To obtain the service under this warranty, end-user is obligated to certify his claim with duly completed
following documents: receipt, certificate of warranty, certificate of installation.
This warranty is void especially if apply as follows:
Defects which were put on sale.
Wear-out or damage caused by common use.
The product was damaged by unprofessional or wrong installation, used in contrary to the applicable
instruction manual, used in contrary to legal enactment and common process of use or used for another
purpose which has been designed for.
The product was damaged by uncared-for or insufficient maintenance.
The product was damaged by dirt, accident of force majeure (natural disaster, fire, and flood).
Defects on functionality caused by low duality of signal, electromagnetic field interference etc.
The product was mechanically damaged (e.g. broken button, fall).
Damage caused by use of unsuitable media, fillings, expendable supplies (batteries) or by unsuitable
working conditions (e.g. high temperatures, high humidity, quakes).
Repair, modification or other failure action to the product by unauthorized person.
End-user did not prove enough his right to claim (time and place of purchase).
Data on presented documents differs from data on products.
Cases when the claiming product cannot be indentified according to the presented documents (e.g. the
serial number or the warranty seal has been damaged).
Manufacturer:
FAST ČR, a.s., U Sanitasu 1621, Říčany 251 01, Czech Republic
info@sencor.com
Authorized service centers:
Visit www.sencor.com for detailed information about authorized service centers.
The original version of the instructions is in the Czech language, other language versions are made by the
appropriate translation.

EN - 11
EN
Warranty conditions
Warranty card is not apart of the device packaging.
This product is warranted for the period of 24 months from the date of purchase to the end-user. Warranty
is limited to the following conditions. Warranty is referred only to the customer goods using for common
domestic use. The claim for service can be applied either at dealer’sshop where the product was bought, or
at below mentioned authorized service shops. The end-user is obligated to set up aclaim immediately when
the defects appeared but only till the end of warranty period. The end user is obligated to cooperate to certify
the claiming defects. Only completed and clean (according to hygienic standards) product will be accepted.
In case of eligible warranty claim the warranty period will be prolonged by the period from the date of claim
application till the date of taking over the product by end-user, or the date the end-user is obligated to take it
over. To obtain the service under this warranty, end-user is obligated to certify his claim with duly completed
following documents: receipt, certificate of warranty, certificate of installation.
This warranty is void especially if apply as follows:
Defects which were put on sale.
Wear-out or damage caused by common use.
The product was damaged by unprofessional or wrong installation, used in contrary to the applicable
instruction manual, used in contrary to legal enactment and common process of use or used for another
purpose which has been designed for.
The product was damaged by uncared-for or insufficient maintenance.
The product was damaged by dirt, accident of force majeure (natural disaster, fire, and flood).
Defects on functionality caused by low duality of signal, electromagnetic field interference etc.
The product was mechanically damaged (e.g. broken button, fall).
Damage caused by use of unsuitable media, fillings, expendable supplies (batteries) or by unsuitable
working conditions (e.g. high temperatures, high humidity, quakes).
Repair, modification or other failure action to the product by unauthorized person.
End-user did not prove enough his right to claim (time and place of purchase).
Data on presented documents differs from data on products.
Cases when the claiming product cannot be indentified according to the presented documents (e.g. the
serial number or the warranty seal has been damaged).
Manufacturer:
FAST ČR, a.s., U Sanitasu 1621, Říčany 251 01, Czech Republic
info@sencor.com
Authorized service centers:
Visit www.sencor.com for detailed information about authorized service centers.
The original version of the instructions is in the Czech language, other language versions are made by the
appropriate translation.