P/N 232095A
At Rain Bird, we believe it is our
responsibility to develop products and
technologies that use water eciently .
Our commitment also extends to
education, training and services for our
industry and our communities.
The need to conserve water has never
been greater. We want to do even
more, and with your help, we can. Visit
www.rainbird.com for more information
about The Intelligent Use of Water.
™
The Intelligent Use of Water.
™
LEADERSHIP • EDUCATION • PARTNERSHIPS • PRODUCTS
Rain Bird Corporation
6991 E. Southpoint Road
Tucson, AZ 85706
Phone: (520) 741-6100
Fax: (520) 741-6522
www.rainbird.com
Rain Bird Corporation
970 West Sierra Madre Avenue
Azusa, CA 91702
Phone: (626) 812-3400
Fax: (626) 812-3411
®
Registered Trademark of Rain Bird Corporation
© 2022 Rain Bird Corporation 2/22
300-BPES Valve
Installation and Operation Guide
Flow Globe Angle
gpm
psi psi
60 6.6 6.8
80 5.1 5.9
100 3.2 3.5
120 1.8 1.8
140 1.8 2.1
160 2.0 2.1
180 2.2 2.0
200 2.7 2.5
250 4.0 3.4
300 4.9 4.5
Flow Flow Globe Angle
m3⁄h l/m bar bar
13,6 227 0,46 0,47
24 400 0,19 0,21
36 600 0,14 0,14
48 800 0,21 0,19
60 1000 0,29 0,26
68 1136 0,34 0,31
BPES 3" Valve Pressure Loss
Notes
1. Loss values are with flow control fully open
2. PRS-D pressure-regulating module recommended for all
flow rates.
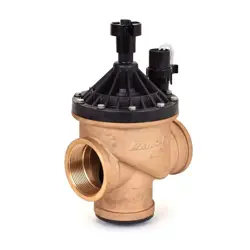
Thank you for purchasing a Rain Bird 300BPES
valve for your irrigation system. This rugged
valve combines a robust GFN bonnet with a
strong red-brass body to provide a high quality
product at a value price.
To use this guide, fold out the back page for
visual reference then turn to the appropriate
language. Follow the alphanumeric references
for installation, adjustment, troubleshooting
and replacement parts.
NOTES
1. Product is shipped configured for globe
installation. For angle installation, use a
closed-end wrench to remove the bottom
plug
●
H
(avoid stripping the plastic bolt).
Thread plug into the side inlet, which is
opposite the side with the solenoid.
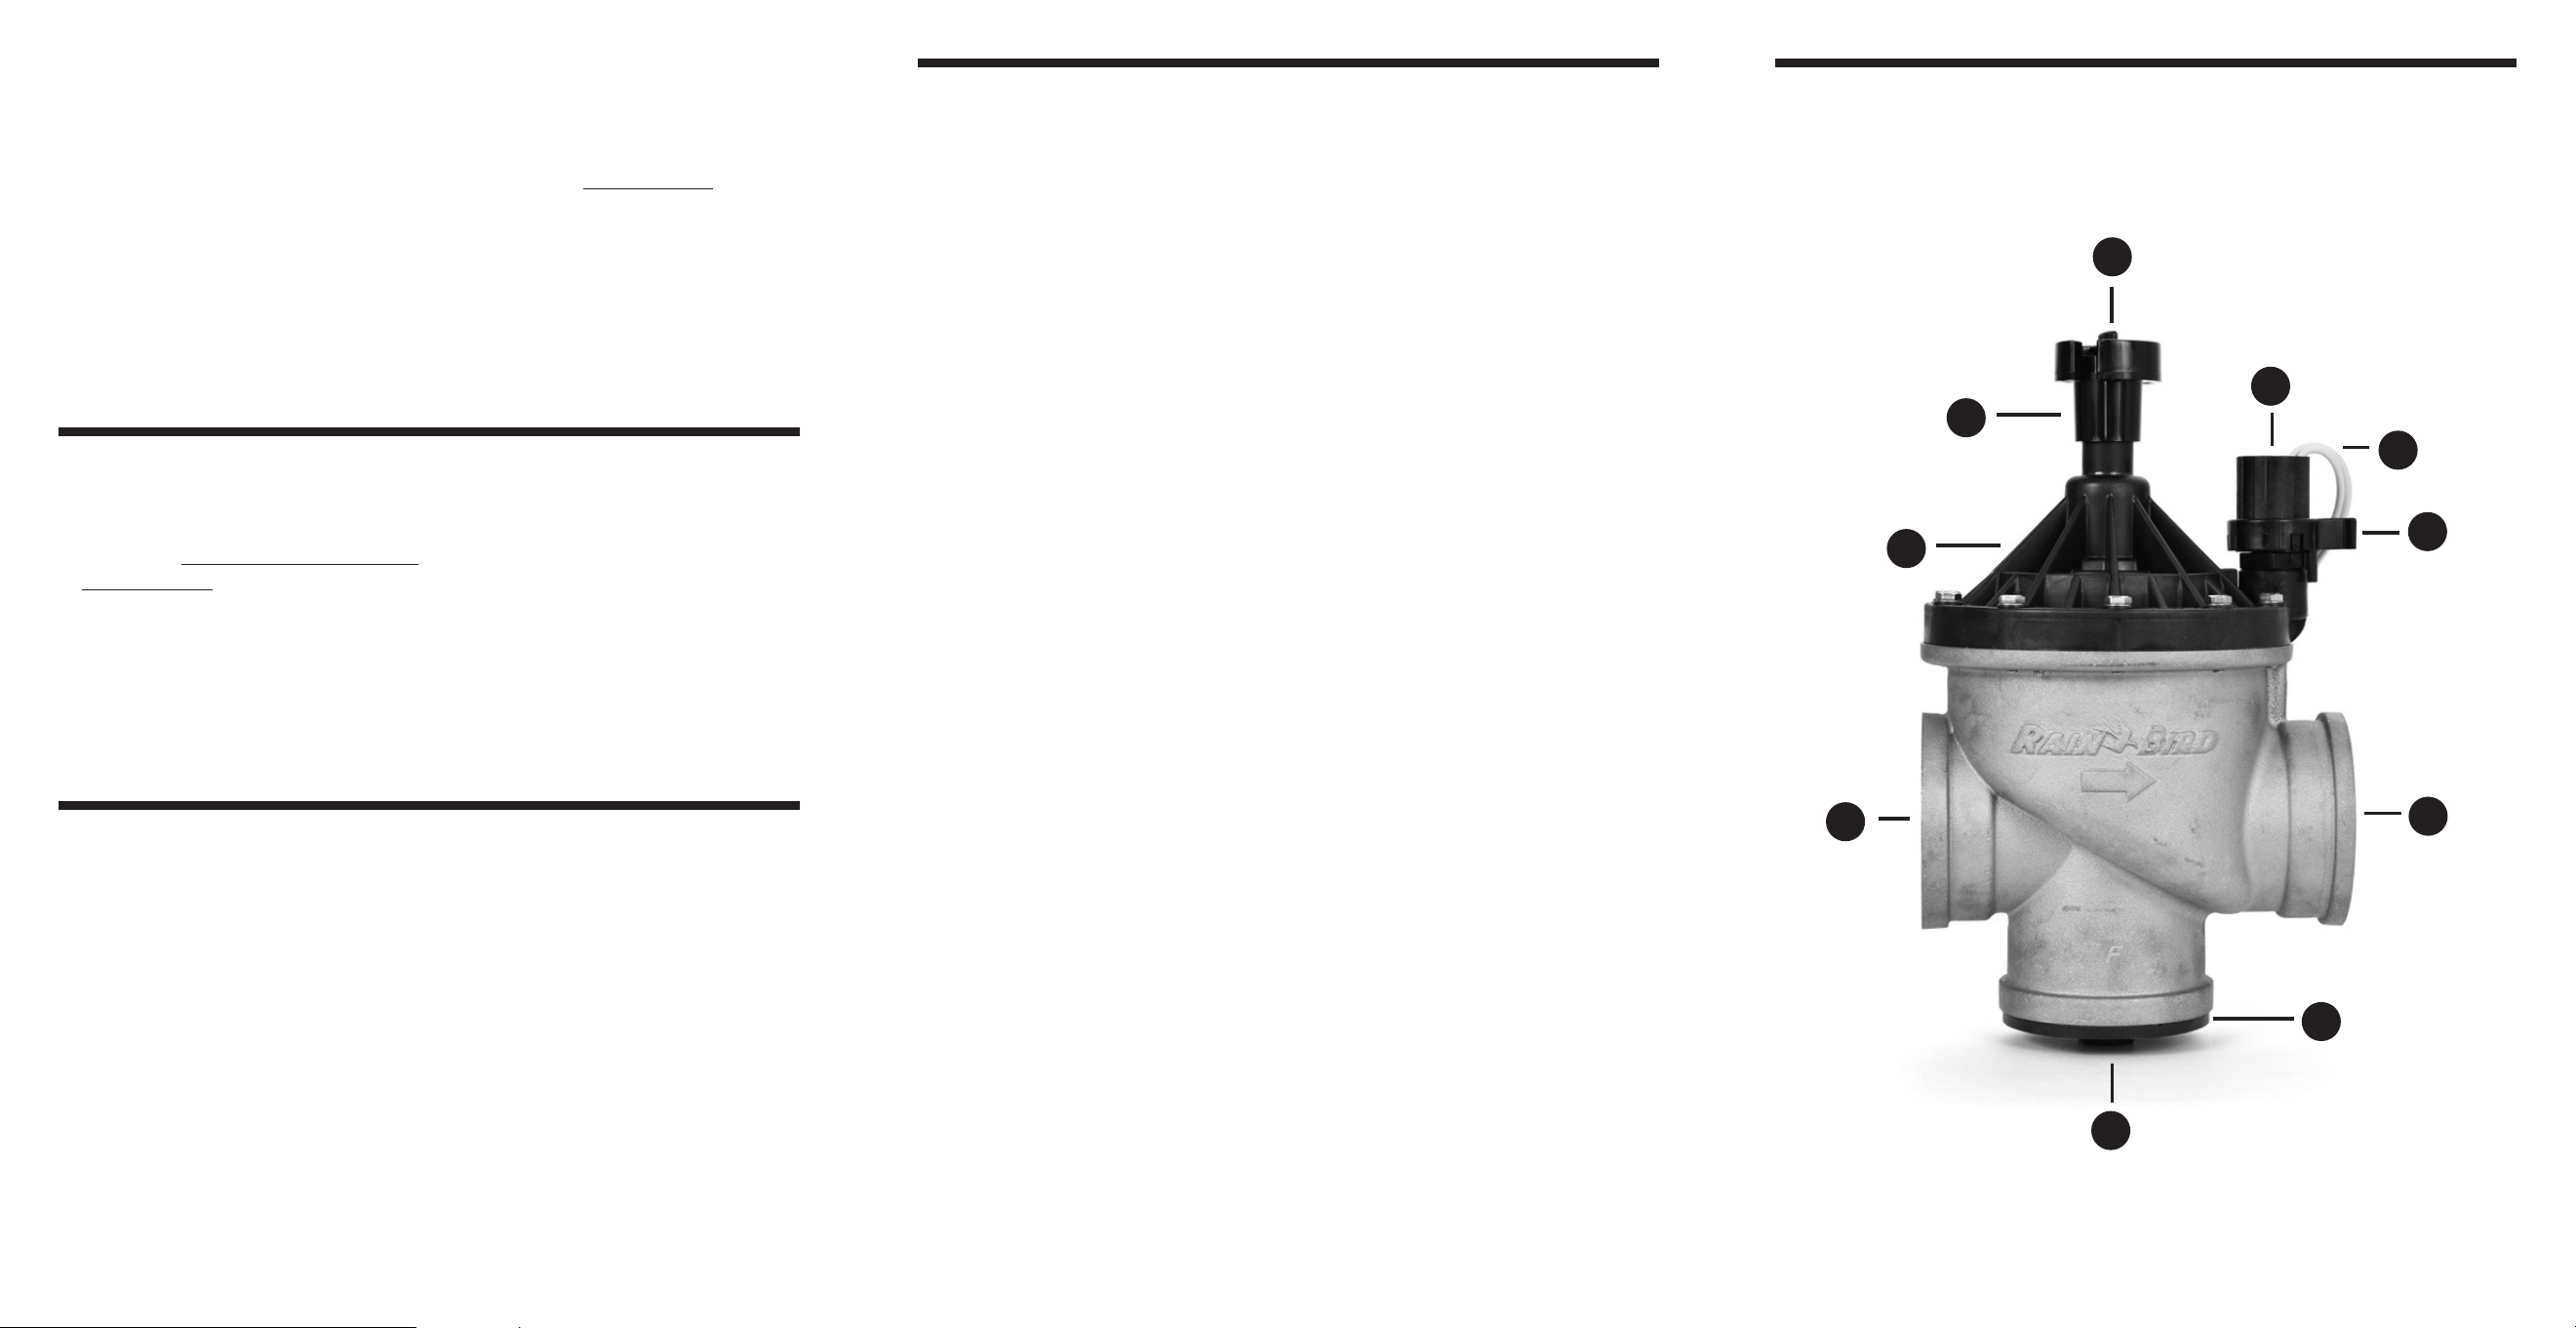
Installation Refer to F1.
1. Apply two wraps of Teflon tape as a lubricant
along the full length of the inlet and outlet
pipe threads. Never apply pipe thread or pipe
dope compound.
2. Thread main line into globe or angle valve
inlet
●
A
and lateral line into valve outlet
●
B
until hand tight plus one to two more turns.
Reference directional flow arrows located on
the bonnet and body. Solenoid
●
C
is always
above the outlet.
3. Connect one solenoid wire
●
D
to the
controller common wire and the other sole-
noid wire
●
D
to the controller power wire.
Tighten and protect using only approved
watertight connectors.
4. Before system pressurization, open external
bleed
●
E
to properly vent debris from clog-
ging internal ports. Slowly open water supply
to prevent water hammer. After one minute,
close external bleed.
A
A
B
H
E
G
I
300-BPE and 300-BPES Valves
Accessories
Adjustment Refer to F1.
1. Using a 1
1
⁄2” or adjustable wrench, open
the internal bleed feature by counter-
clockwise loosening the solenoid adapt-
er
●
F one turn.
2. To optimize performance, use the flow
control handle
●
G to adjust the amount
of water flowing through the valve.
Counter-clockwise fully open the flow
control. Clockwise turn the handle to
decrease flow until resistance is felt, then
counter-clockwise open one turn.
3. Close internal bleed by clockwise tight-
ening the solenoid adapter.
●
F
4. Refer to the controller operating instruc-
tion when programming the controller
to automatically open and close the
valve.
Troubleshooting
Valve will not open
1. Ensure main water supply is on. Ensure
upstream valves are open. Ensure flow
control stem
●
G is not closed.
2. If valve only opens with manual bleed,
ensure controller is
programmed to activate the proper zone
valve. Test controller power
output and service if necessary.
Test solenoid
●
C power input.
a) If controller and solenoid power are
detected, there may be debris in the
solenoid assembly.
b) Persistent problem may be an obstruc-
tion lodged in main pipe.
c) If power is detected at the controller and
not the solenoid, inspect and repair
damaged lead wires.
Valve will not close
1. Ensure controller is not operating the
valve automatically. Ensure manual
internal bleed is off by clockwise tight-
ening the solenoid adapter.
●
F Ensure
manual external bleed is off by clock-
wise tightening the bleed screw.
●
E
2. Turn off water supply and swap
solenoid
●
C from an operational valve;
replace solenoid if necessary.
3. Turn off water supply and verify that the
solenoid adapter
●
F o-ring is not dam-
aged; replace if necessary. Check for
debris in solenoid bowl preventing
plunger from creating a positive seal.
4. Check overall system water-pressure
requirements and ensure that multiple
zone valves are not operating simultane-
ously. Disallowing one zone valve to
close before another opens can reduce
the amount of backpressure needed to
close the diaphragm.
5. Turn off water supply and remove bon-
net
●
I for possible debris or damage
causing the diaphragm to stick open.
Leakage
1. Disassemble parts and inspect o-rings/
sealing surfaces for damage.
Accessories or persistent problems
1. Outside the US, please refer to the back
page for contact information.
2. Always visit us at www.rainbird.com.
PRS-Dial
TBOS™ DC Latching Solenoid
C
D
F
