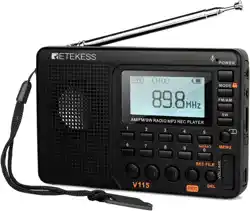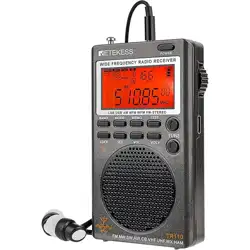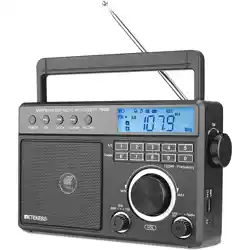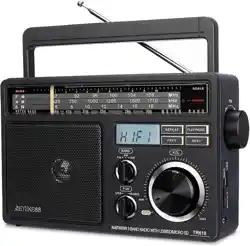
TR113 wideband full-band radio manual
Bluetooth TF card AUX-in plays Recording

1: Overview of the product
TR113 radio is a wide-band full-band radio that supports APP intelligent remote control and DSP digital
display . This product is a wide-band multi-function receiver: it can not only receive FM, medium wave, short
wave, VHF very high frequency (VHF-NFM & VHF-WFM), multi-band broadcast reception of North American
weather bands, but also supports Bluetooth and TF cards. Multimedia music playback, high-fidelity sound quality.
It also supports the APP -SOS alarm emergency function. It is an emergency product that can be prepared at
home and can be carried when playing outdoors. If you want to know more, please read this operating guide and
keep this manual properly.
2: Brief description of product features:
2.1: This product uses programming software to achieve wide-band reception and supports reception of the
following frequency bands:
FM frequency modulation, MW medium wave, SW short wave , USB upper sideband, LSB lower sideband,
LW long wave, VHF very high frequency, UHF ultra high frequency , AIR aviation band, CB city band.
Multi-band broadcast reception on the WB North American national weather band.
Adjustable DEMOD demodulation mode, BW bandwidth value, LOCAL short-range, DX long-range, dual
shuttle speed tuning radio, supports medium and short wave magnetic rod antenna reception, supports
DIY medium and short wave loop antenna..., the product is extremely playable high.
2.2: This product supports multiple channel adjustment methods:
Digital key frequency, shuttle fine-tuning, shuttle quick tuning, push-button fine-tuning, push-button
automatic station search, fully automatic search and storage of stations.
2.3: This product uses two display screens, one main screen (displaying various working status, etc.) and one
secondary screen (marquee/time/signal strength indication, etc.).
The main screen uses a FSTN full-view screen, and the small screen uses VA color. It brings better visual
effects to users.
The main screen uses a large 3.54-inch display: (displayable window size: 82.9mmx45.2mm)
Displayable window of secondary screen: 47.5x35.56mm
2.4: This product supports mobile APP smart remote control. Within a range of less than 20 meters,
intelligent short-range remote control radios can be realized.
2.5: This product uses high-tech audio technology and can be connected to Bluetooth wireless music
transmission and playback.
2.6: This product supports TF card music playback, up to 256G, and supports MP3, WMA, WAV, APE, and
FLAC playback formats.
2.7: This product uses a polymer lithium battery with a capacity of 3600mAh, which has a long battery life.
The battery is rechargeable to extend product life.
2.8: This product is designed with 5 meter waves in the AIR aviation band, 15 meter waves in the SW short
wave, 8 meter waves in the VHF very high frequency, and 8 meter waves in the UHF UHF, making it easy
and quick to switch frequencies. . Find the target station quickly.
2.9: The product has 3 options in the FM (frequency modulation) frequency range; there are two options in
the AM (medium wave) frequency range:
1): FM1: 87.5-108MHZ
FM2: 76.0-108MHZ
FM3: 64.0-108MHZ
2): AM receiving frequency range: 522-1710KHZ (step value: 9KHZ);
AM:520-1710KHZ (step value: 10KHZ) optional.
2.:10: When this product is playing music, it can turn on the marquee and lead you into the wonderful music
melody.
2.11: This product has BASS bass sound quality and a 3-inch full-band 20W high-power speaker. It also
supports listening with headphones, which is suitable for the needs of the majority of users.
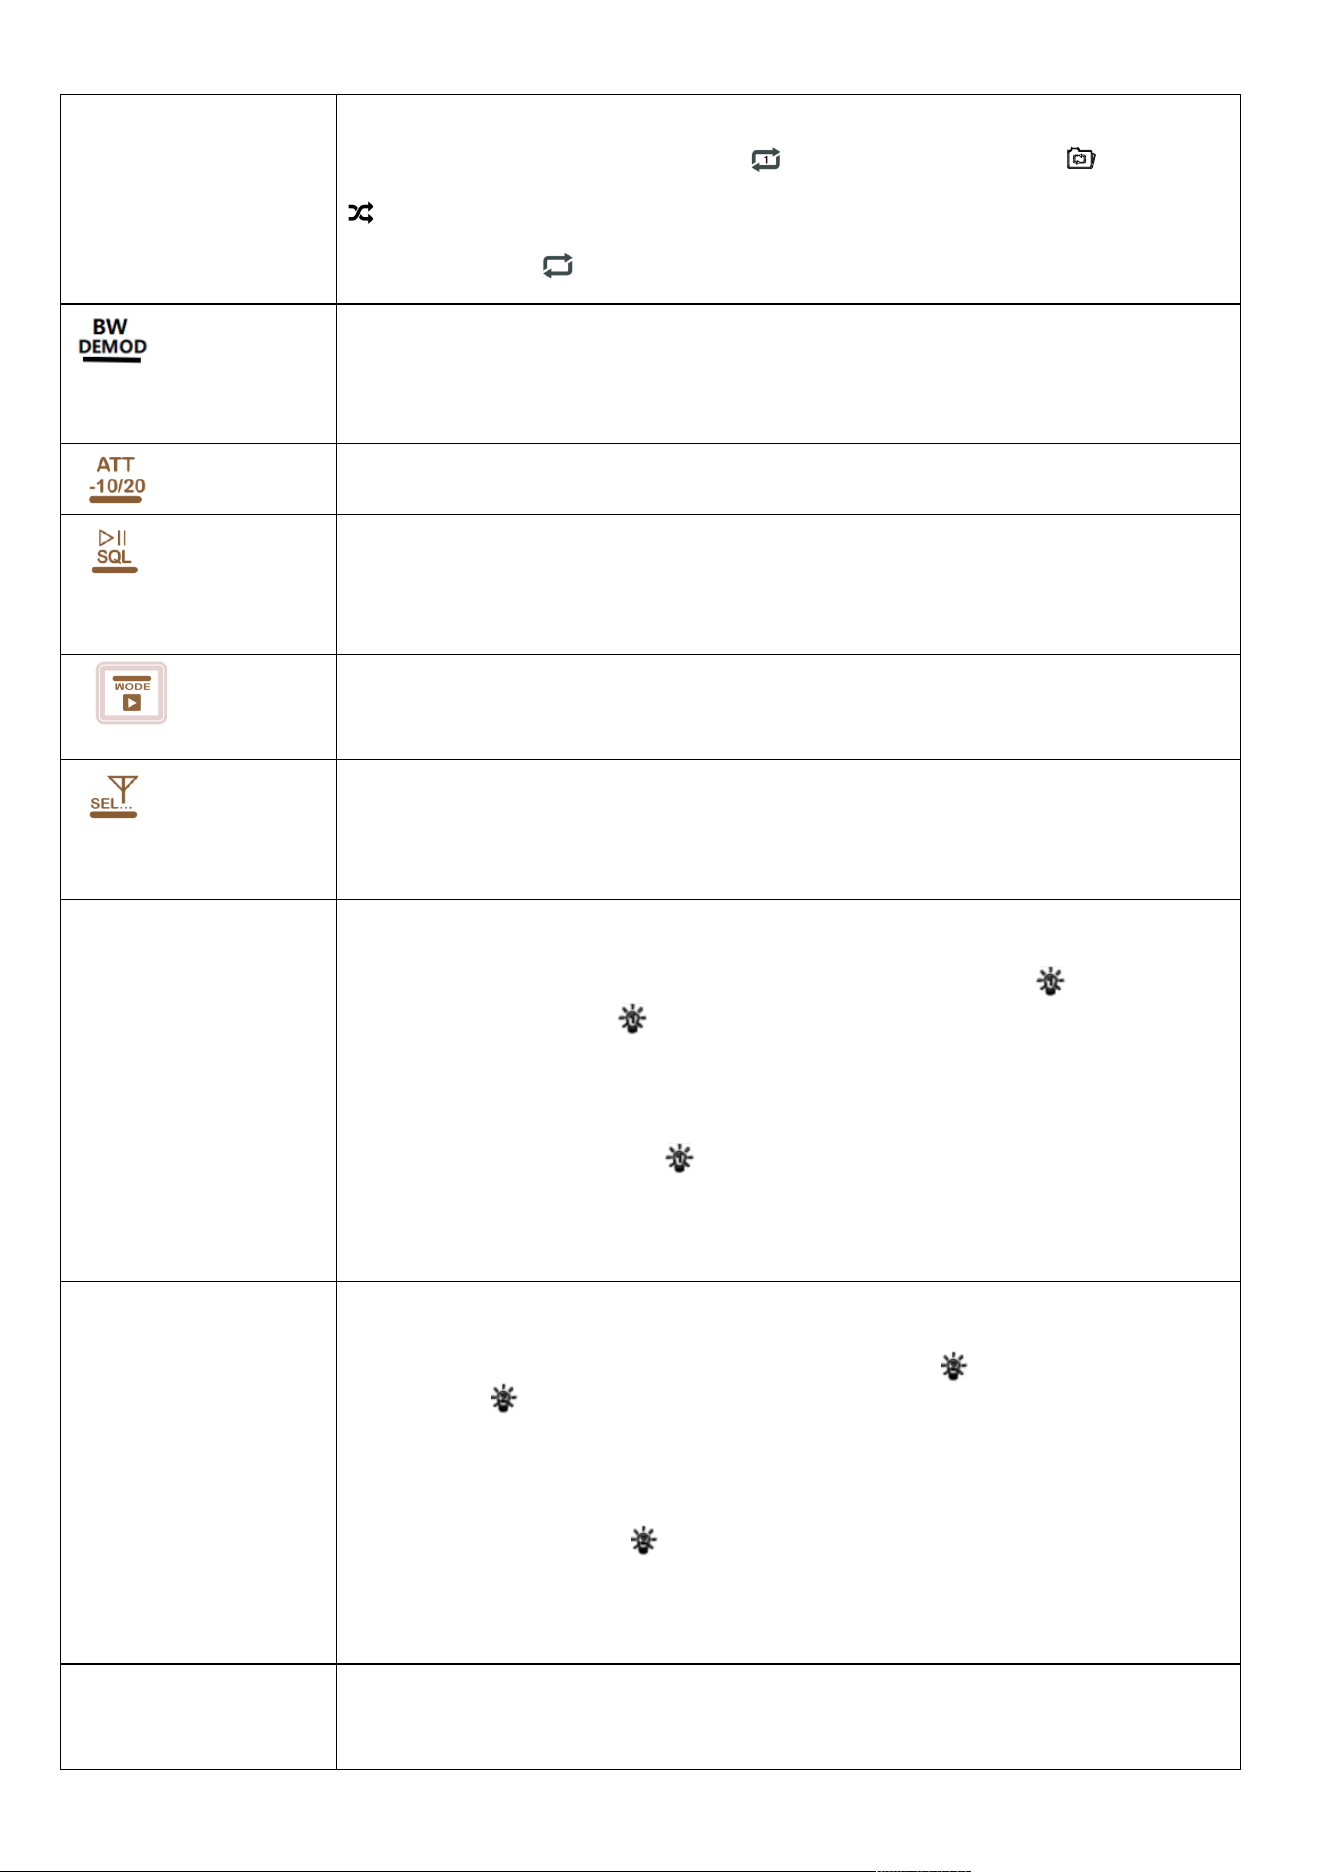
2.12: This product can choose four types of playback in the TF card playback state:
: (sequential playback: repeat all), : (single loop: repeat one),
: (repeat songs in the current folder: repeat file), : (randomly play: random)
2.13: This product supports enabling the locking function to facilitate locking each button;
2.14: This product can set the sleep shutdown time, and you can set sleep cycles of different lengths such as
90/80/70/60/50/40/30/20/10 minutes.
2.15: This product can be set to two modes: scheduled power on/scheduled alarm clock , and two groups of
scheduled power on/scheduled alarm times can be set.
2.16: After selecting the scheduled power on, you can set the scheduled time after the scheduled power on.
2.17: This product is equipped with backlight display/button lighting function, which is convenient for users
to use in the dark.
2.18: In radio mode, this product has a large memory capacity and can store 1,600 radio stations
(FM/MW/Shortwave/VHF/UHF/Longwave/Urban Band/Aviation. Each band can store 200).
2.19: This product can adjust a variety of EQ sound effects.
2.20: The product can display temperature, time, and adjustable perpetual calendar.
2.21: Adjustable display color, multiple lighting times, multiple alarm options..., humanized design, increased
playability
2.22: The product supports restoring factory settings.
3: Packing list
Name
Quantity
TR113 high performance full band radio
1
Strap
1
Polymer lithium battery, 3600mah 3.7V
2 (locked inside the product)
USB TYPE-C data charging cable
1
Operating Instructions
2 (product operating instructions/APP
operating instructions)
Screwdriver
1
Cleaning sweep
1
Packaging box
1
4: APP related content description
Mobile APP download process instructions (for detailed APP operation process, please refer to the
APP manual):
1: The first step : turn on the TR113 radio, and at the same time, turn on the user's own mobile phone.
2: Step 2: Download the APP (if you already have our APP software Radio-C, you do not need to
re-download it, you can click to connect to the product named " Retekess-TR113 " and then connect),
the specific steps are as follows :
A: For Android and Hongmeng system phones, please scan the following QR code to install the
APP
Android and Hongmeng system phones support "scanning" this QR code with the browser on the
phone to install the APP. For detailed operations, please refer to 2.1.
Android and Hongmeng system phones support APP installation using the "WeChat scan" QR
code on the phone. For detailed operations, please refer to 2.2.
B: To install on Apple system mobile phones, please go to the "APP Store " and search for the name
"Radio-CT " to download.
You can also scan the QR code below to enter the APP Store inter face to download.
5: Function description of each radio button:
1: On/off: Press any key to turn on the time display first. In the time state, press lightly to turn
on; in the radio on state, press and hold to turn off.
See description in 7.1.1 for details.
2: In the time display state, press and hold to enter the setting of sleep shutdown time
(display operation on the secondary screen). For details, see 7.1.2 operation description .
Power on state: Tap to switch between FM (frequency modulation); MW (medium wave); LW
(long wave); SW (short wave) bands .
Power on state: Tap to enter VHF/UHF/AIR/CB/WB band switching selection.
1: In FM/AM working state: Tap Yes to select the FM&AM receiving frequency range. For
details, see 7.3.2/7.3.3 operation description
2: In SW / UHF / VHF / AIR working state: tap to switch between SW&UHF&VHF&AIR meters
(please see 7.3.5 operation description).
3: TF card working mode:
Tap to enter: sequential play , single loop , repeat current folder songs , random play
selection.
4: Insert the TF card and after recording the radio, press and hold to enter the recording
folder.
1: Set the bandwidth value in each radio band working mode. For details, see Operation
Guide: 7.3.14
2: FM (frequency modulation)/ SW (short wave) working mode: long press to enter the
setting demodulation mode. For details, see the operation introduction: 7.3.11
In radio FM/SW/UHF/VHF/AIR/CB working mode: select LOCAL and DX mode
1: Radio/AUX-IN/PC working mode: Tap to turn on/off mute.
2: Bluetooth/TF card working mode: tap to pause/play switch
3: In VHF/UHF/AIR/CB/SW working mode: press and hold for 2 seconds to turn on/off SQ
(squelch).
1: Power-on working mode: switch between Bluetooth/TF/PC; press and hold to disconnect
the Bluetooth connection.
2: Shutdown clock display mode: Long press to disconnect from the APP.
1: Tap to select the antenna method
2: Long press the setting button to enter the selection of antenna attenuation (according to
the 10/20d attenuation entered into the setting, see: 7.3.10 Operation Introduction for
details)
TIME/SET
1: Set the time function, see point 12 for details.
2: In the menu setting, the main screen of the radio is on for 5 seconds to 30 seconds [see
Operation Point 14 for details; A-LCD SETTING Operation Introduction]. Tap [TIME/SET]
to enable the backlight to stay on, and the " " symbol will be displayed in the lower left
corner of the home screen. Tap [TIME/SET] again to turn off the continuous lighting. The
" " symbol will disappear and the set backlight screen time will be restored.
3: When the menu is set, the main screen of the radio is always on (FULL is selected). For
details, please refer to Operation Point 14; A-LCD SETTING Operation Introduction], the
lower left corner of the main screen displays the " " symbol. Press the [TIME/SET] button
lightly to quickly turn the backlight on for 30 seconds and then turn off the screen. Press
the [TIME/SET] key again to switch to the steady state.
ALARM
1: Set the alarm clock function. For details, see point 13 for the operation introduction.
2: In the menu settings, the radio secondary screen is on for 5 seconds to 30 seconds [see
Operation Point 14 for details; B-LCD SETTING Operation Introduction]. Tap [ALARM] to
enable the backlight to stay on, and the " " symbol will be displayed in the lower left
corner of the home screen. Tap [[ ALARM ] again to turn off the constant lighting. The " "
symbol will disappear, and the set backlight screen time will be restored.
3: When the menu is set, the radio secondary screen is always on (FULL is selected). For
details, please refer to Operation Point 14; B-LCD SETTING Operation Introduction]. The " "
symbol is displayed in the lower left corner of the main screen. Press the [ALARM] button
lightly to quickly turn the backlight on for 30 seconds and then turn off the screen. Press the
[ALARM] key again to switch to the steady state.
DISPLAY
1: Clock mode/Bluetooth & TF card playback mode: Tap to view the time set by the alarm
clock.
2: Radio working mode: Tap to display the time/radio reception signal strength.
Power on state: light press/long press: volume increases.
Power on state: light press/long press: the volume decreases.
1: Radio mode (except WB) mode: Press and hold for 2 seconds to enter fully automatic
station search/store.
2: VHF/UHF/AIR/CB/LSB/USB playback mode: Press this button lightly to enter the automatic
scanning and search radio mode (SCAN-FREQ mode), and scan for radio stations with
signals; if no valid signal radio is scanned, the While searching; until you tap the key again to
exit scan mode.
3: WB playback mode: Press and hold for 2 seconds to turn on/off automatic search for
North American weather radio stations.
1: Enter the menu settings in power-on mode. See 7.3.10 Operation Introduction for details.
2: Time display enters the menu setting. Details are explained in point 14.
1: In radio mode, enter the station retrieval mode: long press for 2 seconds to delete the
station.
2: After internal recording, enter the TF card playback mode, select the recording file to be
deleted, press and hold for 2 seconds, after the main screen displays the del character, tap
again to confirm deletion.
3: When you enter the wrong number for the radio number frequency/the wrong number for
the TF card number to select the song, tap to remove the wrong number.
1: Press and hold for 2 seconds to enter the station saving mode, tap again to confirm saving
the station.
2: Tap to enter the channel retrieval mode;
1: Radio working mode: Press lightly: The frequency increases according to the minimum
step value of each band. Press and hold for 2 seconds to enter the upward automatic search
station.
2: TF card playback mode: tap to enter the next song; long press to fast forward playback.
3: Bluetooth playback mode: Tap to enter the next song.
1: Radio working mode: Press lightly: the frequency decreases according to the minimum
step value of each band. Press and hold for 2 seconds to enter the automatic search station
downwards.
2: TF card playback mode: tap to return to the previous song; press and hold to rewind
playback.
3: Bluetooth playback mode: Tap to return to the previous song.
Small and
large shuttle button
: Radio working mode: Turn the inner and outer shuttle knob to select the radio point.
2: Press the inner wheel button lightly , and the STEP value changes. Press the button
each time to select the required step value, and rotate the large shuttle button to
increase or decrease the frequency.
3: Rotate the inner wheel knob , the last number of the frequency flashes, turn the inner
wheel knob to quickly adjust to the target frequency.
4: When playing the TF card, you can rotate the inner and outer pulleys to select songs, and
press the button to confirm the final selection .
5: When setting time/alarm clock/menu settings, select settings according to the task
command.
【 number key 】
1: Radio mode:
1-1: Frequency click: non-channel mode, press the [EN] key lightly to enter the numeric key
frequency click, press the [EN] key to confirm.
1-2: Retrieve the station: After saving the radio station, enter the valid station address
number and press the [EN] key to directly retrieve the station.
You can also press the [PRESET] key to enter the station retrieval mode, press the numeric
keys to retrieve the valid radio station address number, and press the [EN] key to confirm.
1-3: Select the station number for manual station saving: long press the [PRESET] key to
enter the manual station saving mode, press the numeric keys to select the station address
number, and lightly press the [PRESET] button to confirm.
2: TF card mode: After lightly pressing the number keys to select a song, lightly press the [EN]
key to select the track to play.
EN
1: Radio working mode: After lightly pressing the [EN] key, enable the digital key to click the
frequency. After clicking the frequency, press the [EN] key again to confirm.
2: TF card playback mode: After selecting a song directly with the numeric keys, tap [EN] to
confirm the selected song for playback.
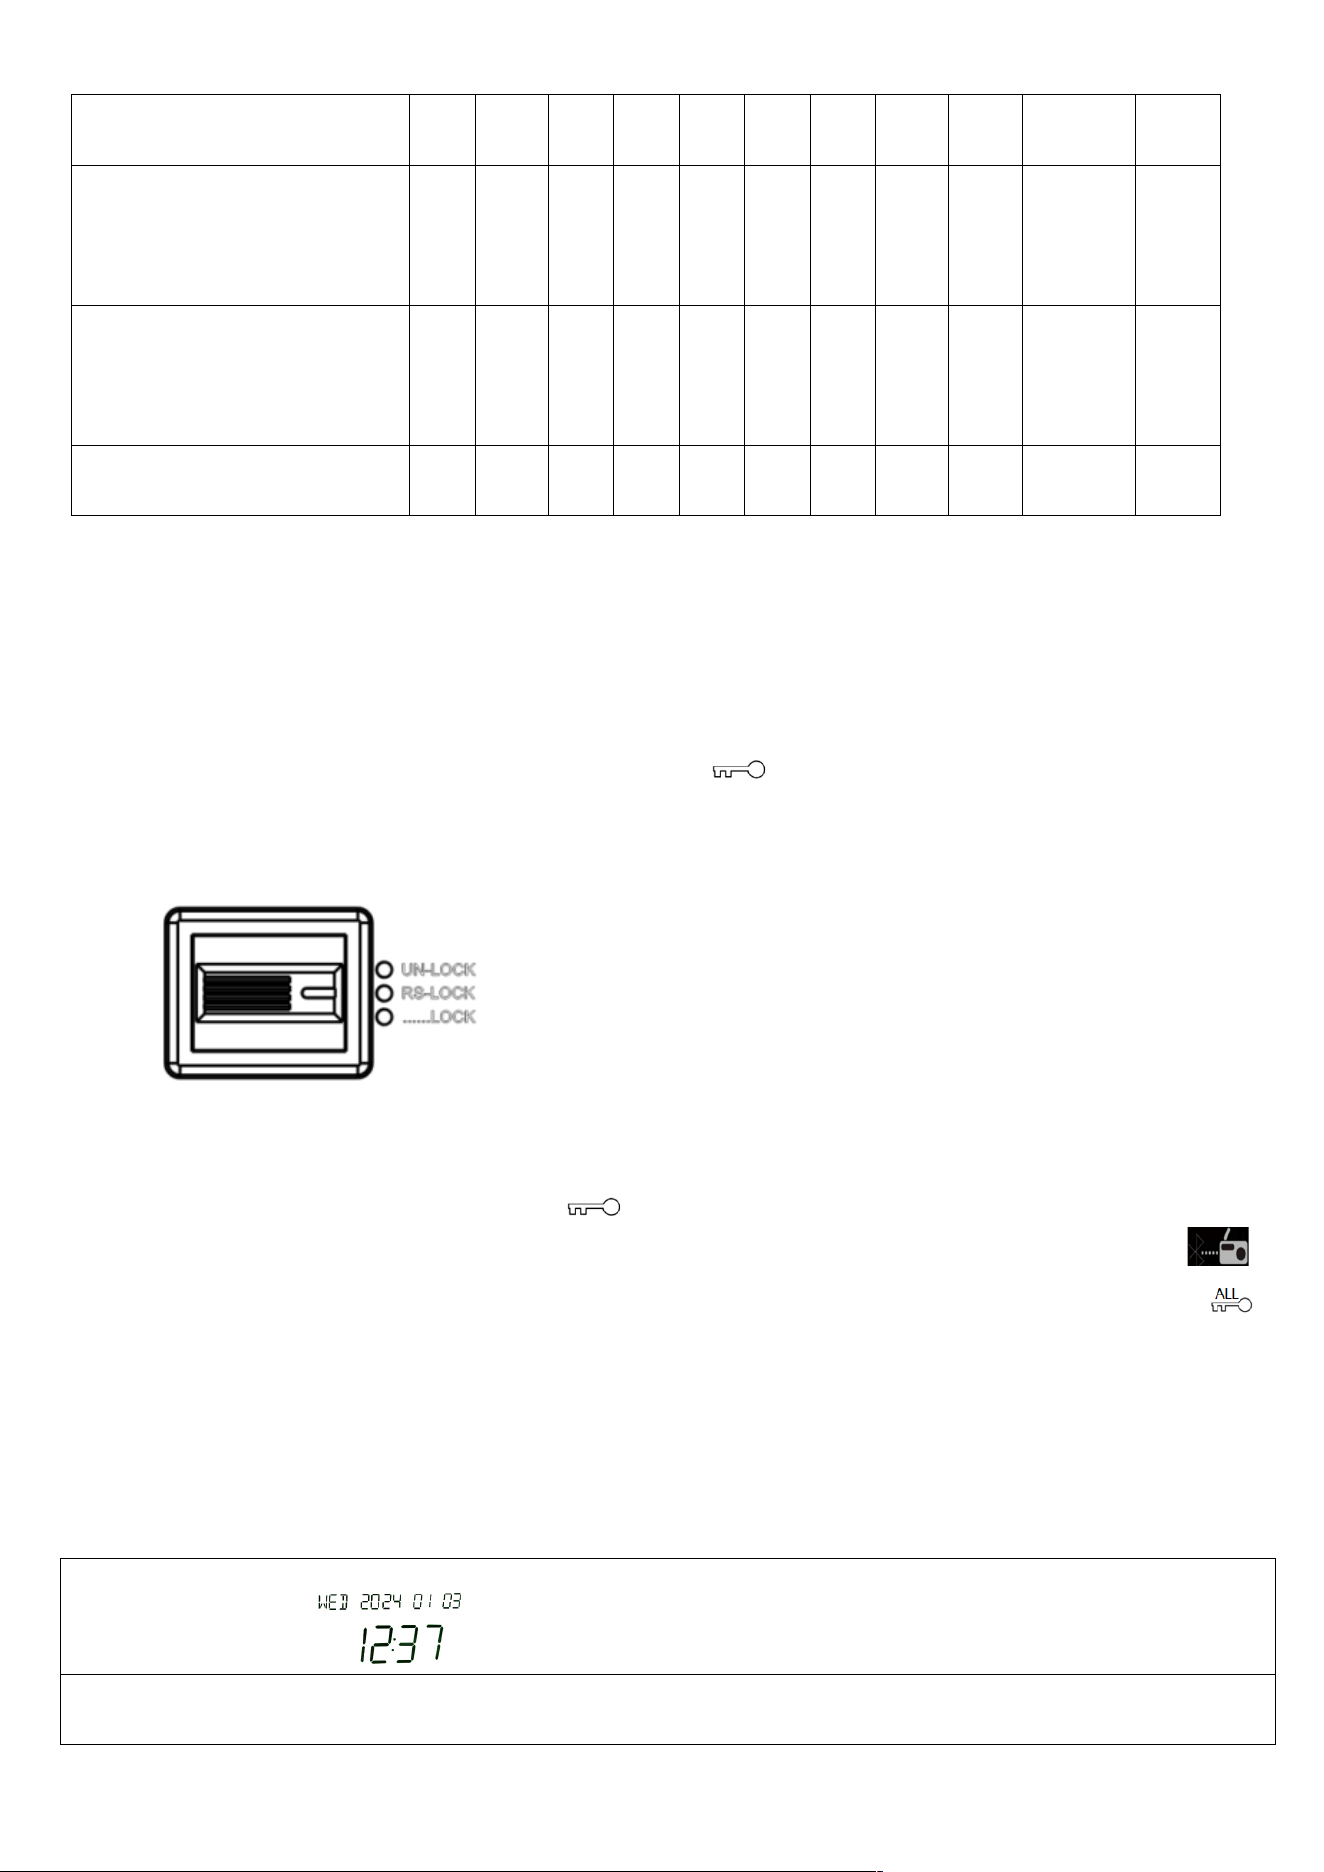
【Push lock】
1: Pull the switch to the "UN " position and the key will not be locked.
2: Pull the switch to the "RS-LOCK " position and lock the pulley rotating knob.
3: Pull the switch to the "...LOCK" position, and all buttons and rotating knobs are locked
(locked state).
Power-on state: Tap EQ Sound quality: NORMAL, POP, ROCK, JAZZ, CLASSIC, COUNTRY,
NEWS, VOICE ), analog output (DAC-ANALOG) switching, CW (filter)
【 TF card jack】
Power-on working mode: Insert the TF card and automatically play TF card songs first.
[ Headphone output ]
Power-on working mode: Plug in 3.5MM headphones to listen to the program, cut off the
external sound,
【Audio input】
Power-on working mode: Plug in the 3.5mm external audio source input, and the external
audio source music will be automatically played first.
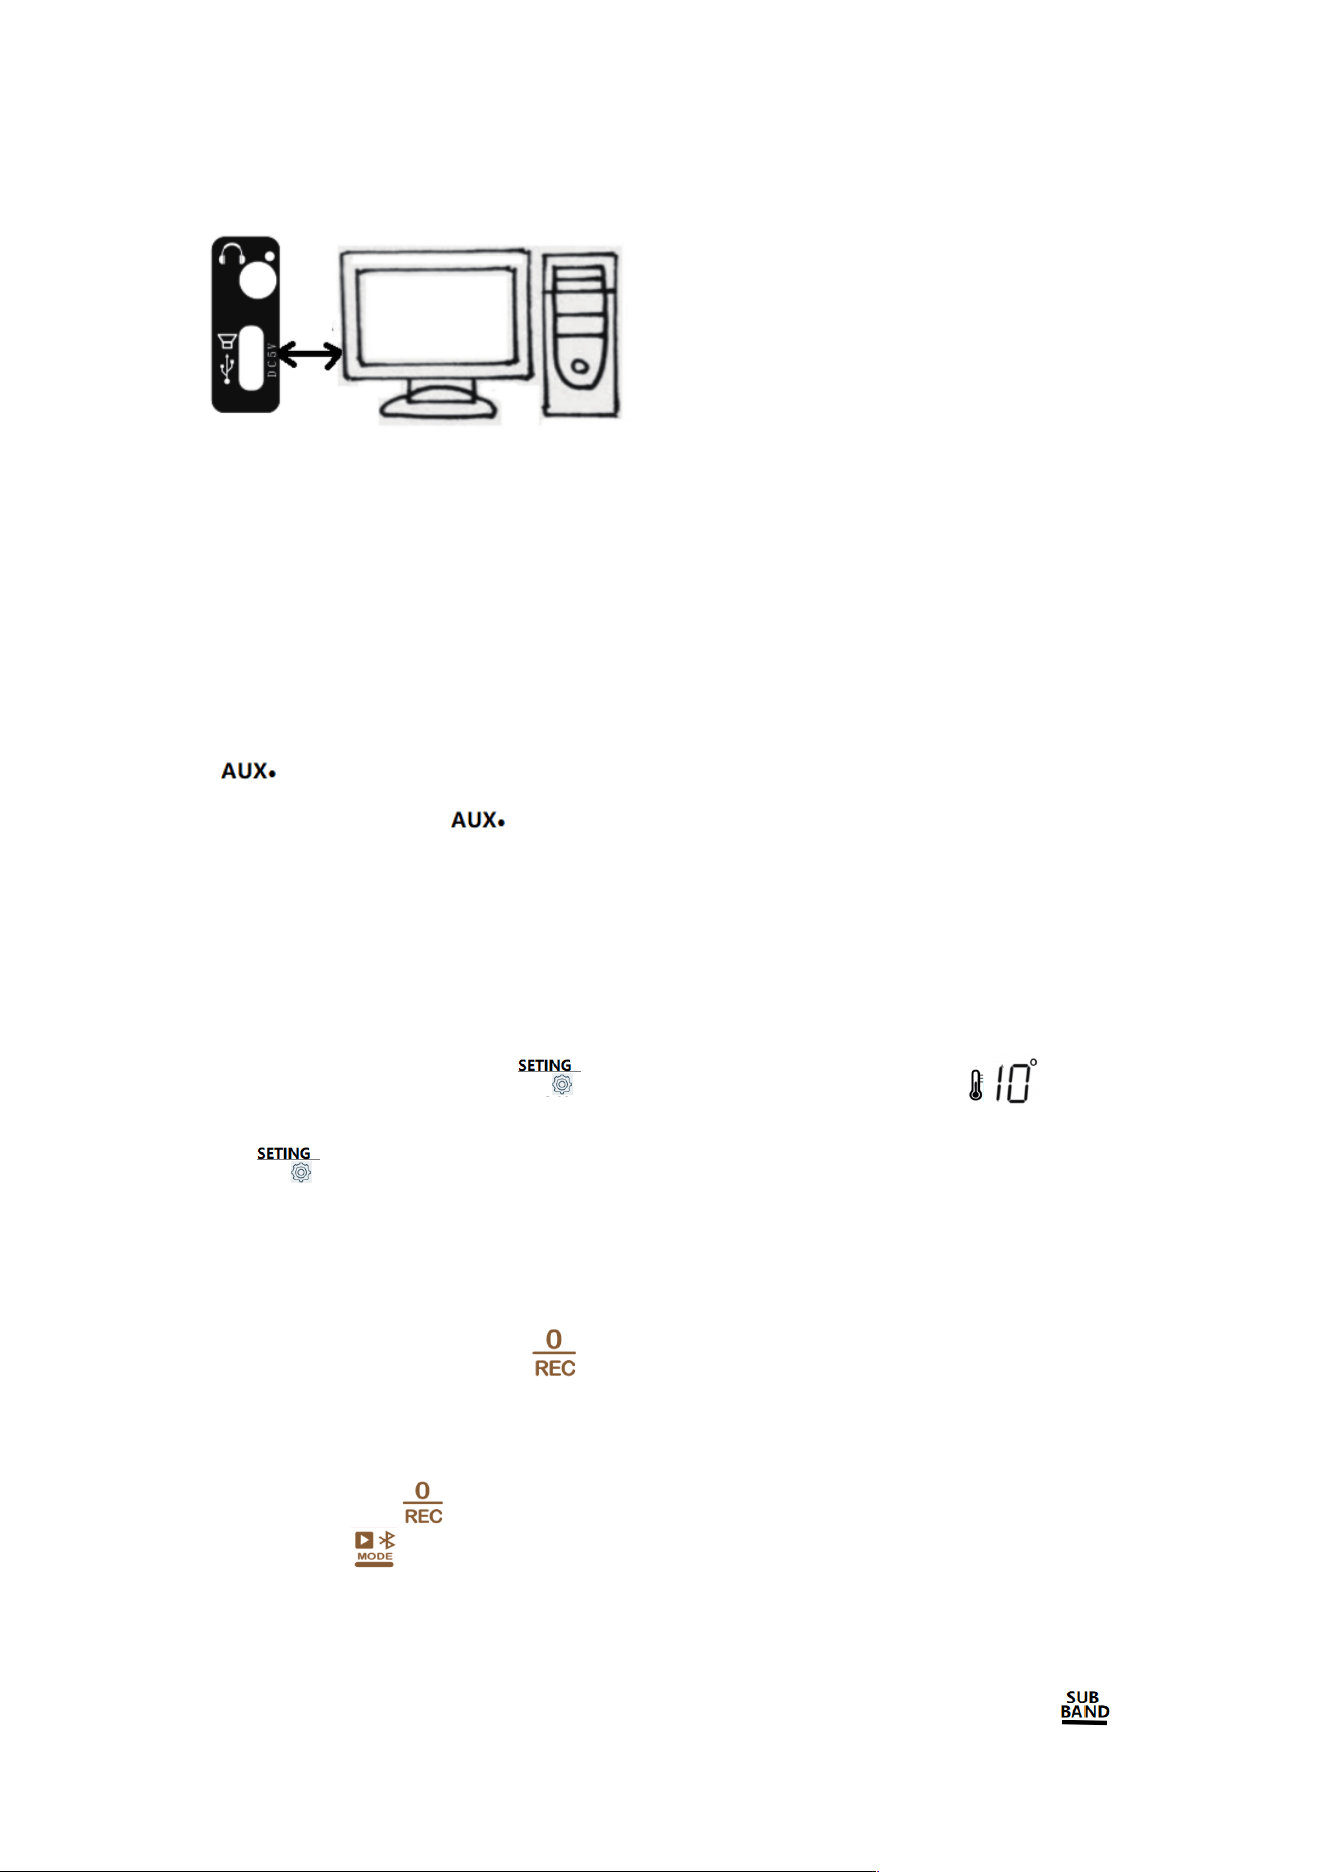
[TYPE-C hole]
1: Charging hole ( external DC 5V power supply for charging )
AUX-IN ) on the computer
3: Connect the computer with a data cable and use it as a TF card reader
【Right】
Medium wave, short wave, when connecting an external T-shaped antenna, adjust the
signal-to-noise ratio and antenna field strength. The higher the RSSI and SNR values, the
better.
6: LCD display content description
6.1 Main screen content description:
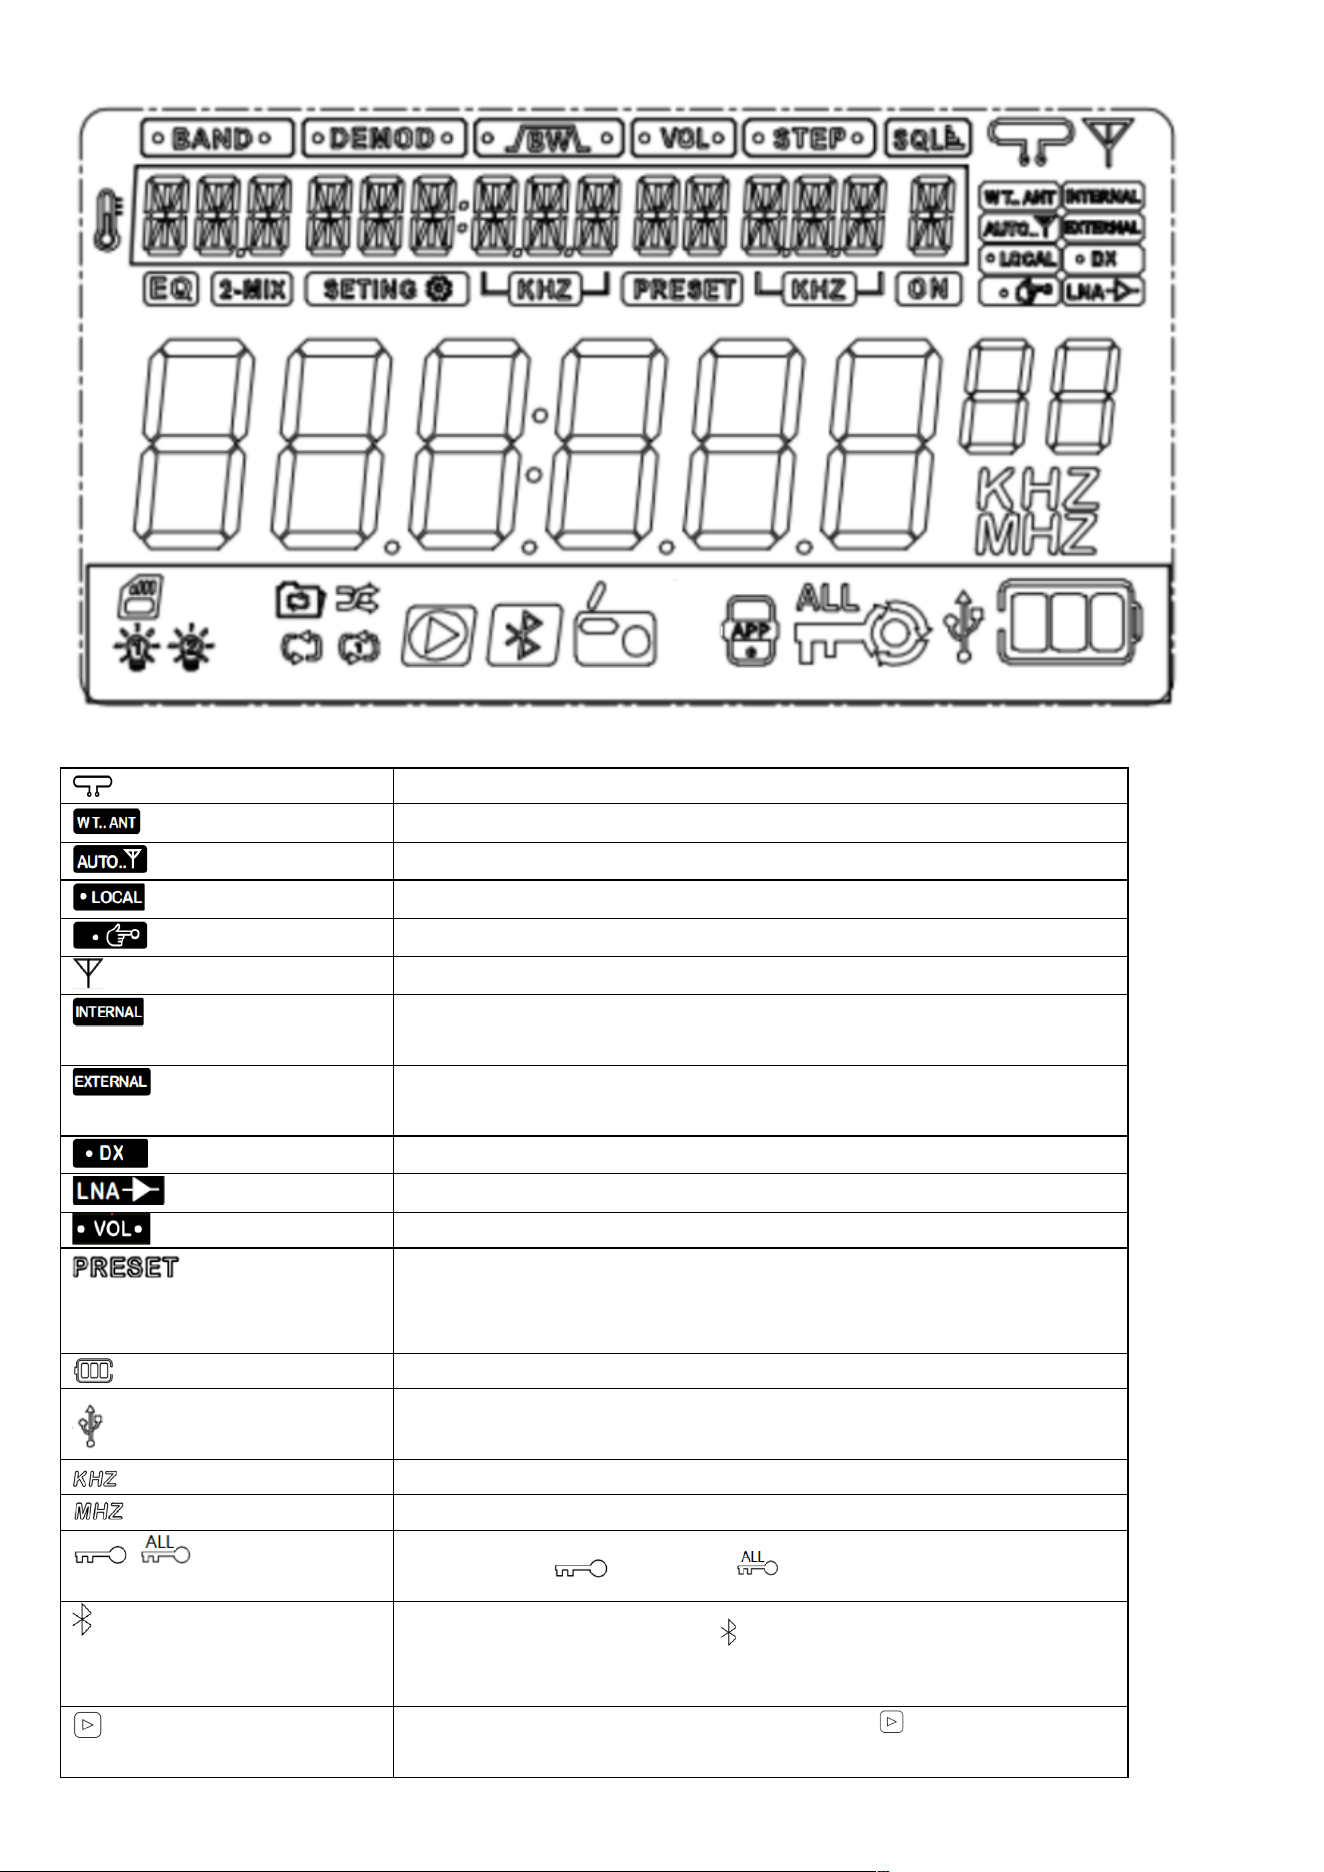
Loop antenna usage mark (magnetic rod loop antenna)
Intercom SMA socket input markings
Auto antenna mode
Short-range reception (antenna attenuation 10/20dB)
Manual antenna tuning markers
Telescopic antenna (including external antenna)
Built-in antenna (including telescopic antenna/magnetic rod)
receiving mark
External antenna (including WT.ANT, external earplug antenna
input) reception mark
Remote reception (default)
LNA1 usage flags (or settings)
Vo l u m e i n d i c a t o r
Enter fully automatic radio station search
Enter manual station saving mode (characters flashing state)
Enter the channel removal mode (characters are always displayed)
Battery indicator
connection indication display symbol
unit symbol
unit symbol
Lock symbol ( lock shuttle; all locked)
Bluetooth connection symbol (“ ” flashes to indicate that the connection
is pending; the constant display indicates that the connection is successful)
Bluetooth & TF card playback display symbol ( flashing means pause;
constant display means playback)
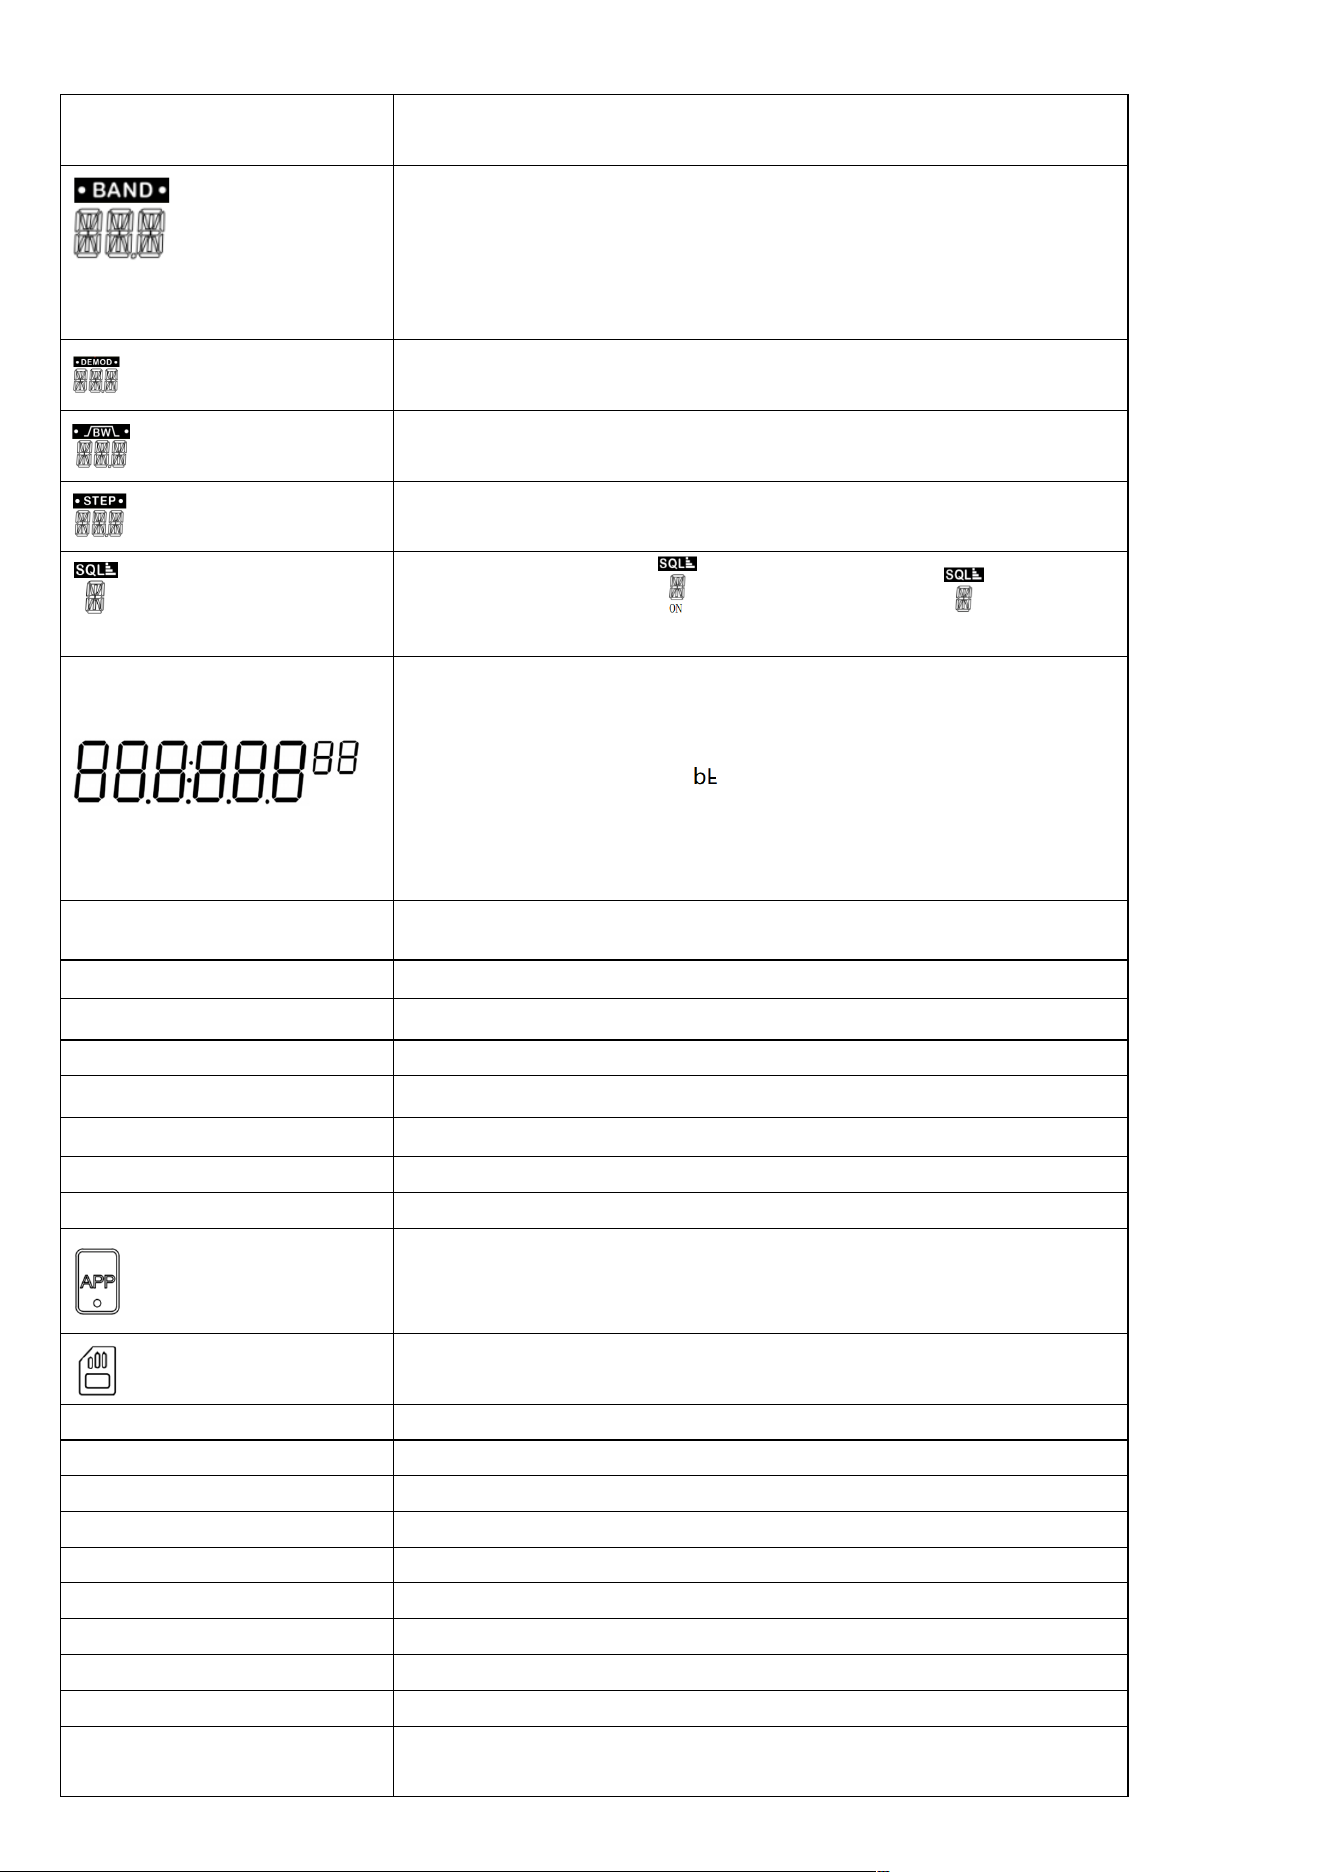
ALE
North American National Weather Band Enables Early Warning Indicator
Symbols
MW: medium wave receiving mode; LW long wave receiving mode; FM:
frequency modulation receiving mode;
SW: shortwave mode; AIR: aviation band; VHF: very high frequency
receiving mode; UHF ultra high frequency receiving mode; CB: urban
band; WB: North American weather band.
Demodulation mode display
Bandwidth display
Step value display
Squelch/level display ( “ ” opens the squelch; “ ” closes the
squelch)
Standby time: display time
Working status: Radio mode: display frequency point/save station/retrieve
station address number
Bluetooth mode: Display Bluetooth status
TF card working status: display playback time
Plug in the 3.5mm audio cable: AUX displays external audio input
playback
A-LCD SETTING
Enter the home screen lighting time/backlight color settings
B-LCD SETTING
Enter the secondary screen lighting time setting
C-KE Y SETTING
Enter button lighting time setting
APP ENABLE
Can connect to APP
APP DISABLE
Can't connect to APP
TIMER DISPLAY
Enter the clock display or turn off the clock display on the home screen
SYSTEM RESET
Enter settings to restore factory settings
VETSION-*-*
version number
This product has been successfully connected to the mobile APP.
Display of the TF card inserted into the machine
ATT-SETING
Antenna multiple reception settings
ANT-CHANNLE
Antenna channel selection
ANT-KEEP-PASS
Antenna channel pass-through
ANT-LNA1-GAIN
LNA1 antenna channel gain selection
ANT-LNA1-GAIN - L
LNA1 antenna channel low gain
ANT-LNA1-GAIN - H
LNA1 antenna channel high gain
ANT-LNA2-GAIN
LNA2 antenna channel gain selection
ANT-LNA2-GAIN - L
LNA2 antenna channel low gain
ANT-LNA2-GAIN - H
LNA2 antenna channel high gain
ATT-GAIN antenna attenuation
selection
ANT-10DB: Antenna attenuation 10DB ; ANT-20DB: Antenna attenuation
20DB

ANT-LNA1: Antenna LNA1
channel
ANT-LPF: Antenna LPF channel ; ANT-HPF: Antenna HPF channel
Home screen always-on symbol
Secondary screen always-on symbol
Loop the current folder
Shuffle Playback
play in order
Single cycle
6.2 Secondary screen content:
SNR
signal-to-noise ratio
Remark
RSSI
Antenna field strength
Timing 1 symbol (displayed on
the left side of the screen)
Timing 2 symbol (displayed on
the right side of the screen)
Shutdown symbol with sleep
(displayed on the right side of
the screen)
7: Function introduction
7.1 key function description:
7.1.1: On/off function :
Lightly press any key to turn on the time display, lightly press the [ ] key to turn on the
machine.
In the power-on working state, press and hold the key for 2 seconds to shut down the
machine.
Before using it for the first time , it is recommended to fully charge the battery of the machine
before using it.
7.1.2: Set sleep time: In the clock display state, press and hold the key for 2 seconds to start
setting the sleep time. The character [90] will be displayed on the secondary screen. Within
2 seconds, lightly press the [ ] key to select automatic sleep shutdown. Time:
90.80.70.60.50.40.30.20.10 minutes.
After selecting automatic shutdown during sleep, the secondary screen LCD displays the symbol:
character.
Tip: The light of the power button will have different colors in different working states. The actual
product shall prevail.
7.2: Volume adjustment key function description:
In the working state, lightly press or long press the [ & ] key to adjust the volume. The
volume level can be appropriately adjusted between "00-32" according to needs.
7.3: Listen to RADIO broadcast function description:
7.3.1 : The bands received by this product are as follows. Tap the [ ] & [ ] keys to select the
band you want to use to listen.
,
7.3.2: The FM
receiving frequency range of this product can be adjusted according to needs. There are three
receiving ranges:
In the FM working state, lightly press the [ ] button , and the main screen will display: 64.0MHZ.
Press the [ ] button continuously, and you will see the three numbers 64MHZ , 76MHZ, and 87.5
FM: 64-108MHZ (demodulation mode supports ST/WFM selection)
MW:520-1710KHZ
SW: 2.3-30.0MHZ (demodulation mode supports AM/LSB/USB selection) .
For details, please refer to the following operations: 7.3.11
LW:153-522KHZ
VHF: 20-250.00MHZ
UHF: 250-999.00MHZ
AIR:118-138MHZ
CB: 25-28MHZ
WB:162.4-162.55MHZ
MHZ changing in rotation on the main screen. If you select 64MHZ, it means that the selected
receiving frequency band is 64-108MHZ, and so on.
After stopping the operation, it will automatically exit the settings and
automatically default to the last selected frequency band settings.
7.3.3: The MW step value of this product, 9KHZ/10KHZ, can be adjusted according to needs.
In the MW working state, lightly press the [ ] button, and the main screen will display 520KHZ.
Press the [ ] button continuously, and you will see the two values of 520KHZ and 522KHZ
changing in rotation on the main screen.
Select the AM
frequency range you need and stop the operation. It will automatically exit the settings and automatically default
to the last selected frequency setting value.
Note: In North American and South American countries such as the United States, Canada, and
Mexico, the AM step value is adjusted to 10KHZ, and in other countries it is adjusted to 9KHZ.
7:3.4 : Multiple channel search methods are supported:
Push-button manual tuning, push-button automatic search for stations , push-button fully automatic
search and storage of stations , and rotary shuttle button for frequency selection.
7.3.4.1: Push-button manual channel adjustment :
Press the [ or ] key lightly to increase or decrease the default value of each band.
FM frequency modulation minimum step value: 0.1MHZ, VHF very high frequency minimum step
value: 0.0125MHZ
MW medium wave minimum step value: 9KHZ / 10KHZ UHF ultra high frequency minimum step
value: 0.0125MHZ
LW long wave minimum step value: 9KHZ AIR aviation band maximum step value: 0.025MHZ
Home screen display value
The default working
frequency band is
64MHZ
FM1: 64-108MHZ
76MHZ
FM2: 76-108MHZ
87.5MHZ
FM3: 87.5-108MHZ
Home screen display
value
The default working
frequency band is
The medium wave step
value defaults to
522KHZ
522-1710KHZ
9KHZ
520KHZ
520-1710KHZ
10KHZ
CB city band minimum step value: 0.005MHZ
When the demodulation mode of SW short wave is AM, the minimum step value is: 0.005MHZ
When the demodulation mode of SW short wave is LSB, the minimum step value is: 0.001MHZ
When the demodulation mode of SW short wave is USB, the minimum step value is: 0.001MHZ
7.3.4.2: Push-button automatic search for radio stations :
Press and hold the [ or ] key for 2 seconds, and each band will quickly search for
radio stations according to the default step value. If a radio station with a signal is found, it will stop
searching and play.
7.3.4.3 : Button-type automatic search for radio stations:
In the radio mode, press and hold the [ ] key for 2 seconds to enter the fully automatic scanning
station search and automatically save the station.
During the fully automatic scanning and search process, the main LCD screen displays the characters
"PRESET" and flashes to search for radio stations with signals. The main LCD screen displays the
characters "CH***", which represents the address number of the station.
After completing a round of search, the search will automatically stop and the first frequency program
stored will be played.
The number of stations that can be stored in each band: 200, the total number of stations that can be
stored: 1600 (except for the WB North American weather band)
Warm reminder: The amount of money stored in the radio station depends on the strength of the local
signal.
7.3.4.4: Rotate the shuttle button to select frequency:
In the radio working mode, the station can be selected by rotating the inner and outer buttons of the front
pulley of the machine.
----Enable the small and large shuttle button to select channels according to the step value. The steps
are as follows:
Press the inner wheel button lightly , and the STEP value changes. Press the button each time to
select the required step value, rotate the large shuttle button [ ] , and press the selected step
value clockwise or counterclockwise to select the required frequency point.
The STEP values that can be adjusted in each band are as follows:
Radio operating band
Selectable STEP step value
Default step value
FM
10KHZ, 50KHZ, 100KHZ
100KHZ
SW(AM/LSB/USB)
0.01KHZ, 0.02KHZ, 0.1KHZ, 1KHZ, 5KHZ
5KHZ
When the MW step
value is 9KHZ
3KHZ, 9KHZ
9KHZ or 10KHZ
When the MW step
value is 10KHZ
5KHZ, 10KHZ,
LW
3KHZ, 9KHZ
9KHZ
VHF
1KHZ, 5.0KHZ, 6.2KHZ, 7.5KHZ, 12.5KHZ, 25KHZ
12.5KHZ
UHF
1KHZ, 5.0KHZ, 6.2KHZ, 7.5KHZ, 12.5KHZ, 25KHZ
12.5KHZ
AIR
8.3KHZ, 12.5KHZ, 25KHZ
25KHZ
CB
0.01KHZ, 0.02KHZ, 0.1KHZ, 1KHZ, 5KHZ
5KHZ
WB
25KHZ
25KHZ
---Enable the shuttle to quickly adjust the target frequency:
Rotate the small fly button , the frequency number flashes, lightly press the inner wheel button .
The flashing number is shifted. If the number needs to be changed, you can rotate the small shuttle
button at this time, and the flashing position of the number will change rapidly until the target frequency
is adjusted.
7.3.5: About [ ] band quick switching:
SW short wave ● VHF very high frequency ● UHF ultra high frequency ● AIR aviation bands all have
meter bands, the details are as follows:
Working frequency
Meepo
The demodulation mode of SW
shortwave is in AM
2.3MHZ, 3.2MHZ, 3.75MHZ, 3.9MHZ, 4.75MHZ, 5.73MHZ,
7.1MHZ, 9.25MHZ, 11.5MHZ, 13.57MHZ, 15.03MHZ,
17.48MHZ, 18.9MHZ, 21.45MHZ, 25.67MHZ (15 pcs)
SW shortwave demodulation
mode is LSB/USB
2.3MHZ, 3.5MHZ, 5.3510MHZ, 7.0MHZ, 10.10MHZ,
14.0MHZ, 18.068MHZ, 21.0MHZ, 24.89MHZ, 28.0MHZ,
VHF very high frequency
30.0MHZ, 42.0MHZ, 55.0MHZ, 68.0MHZ, 100.0MHZ,
136.0MHZ, 218.0MHZ, 250.0MHZ (8 pieces)
UHF ultra high frequency
250.0MHZ, 320.0MHZ, 460.0MHZ, 580.0MHZ, 620.0MHZ,
730.0MHZ, 800.0MHZ, 999.0MHZ (8 pieces)
Each time you press the [ ] key, press [ or ] or the shuttle key together, you can quickly
call out the required frequency point.
7.3.6: Manually save the station:
---In the radio receiving mode, use the above 7:3.4 search methods to find the target frequency. Press and
hold the [ ] button for 2 seconds to enter the station storage mode. The main screen LCD
displays "PRESET ***" characters flashing. Press the [ ] button again to confirm.
---Press and hold the [ ] button for 2 seconds. The main screen LCD displays PRESET *** "characters
flashing. Press the [ or ] button lightly to select the station address number (or the station
number to be replaced), and tap the [ ] button again. confirm.
---Press and hold the [ ] key for 2 seconds, the "PRESET ***" character on the main screen LCD is
flashing, tap the [ ] numeric key, enter the digital storage address number, tap the [ ] key again
to confirm , and complete the manual storage operation .
7.3.7: About taking the channel
According to the [ 7.3.4.3 Fully automatic search and save radio stations] method / [7.3.6 Manual radio
station save] operation method, the station saving operation is completed.
---Press the [ ] key to enter the channel retrieval mode. When the main screen LCD displays "PRESET
CH ***", lightly press the [ or ] key to select the station retrieval address number.
---After saving a station, you can also directly enter the valid representative number of the saved station
number on the numeric key [ ], and press the [ EN ] key again to confirm the station address number
and frequency.
If the selected number is not a valid station number, the main screen LCD displays the character [null].
AIR aviation band
118MHZ, 123MHZ, 128MHZ, 133MHZ, 138MHZ (5 pieces)
Exit the channel removal mode : Press the [PRESET] button lightly, and the [PRESET] character on the
main screen LCD disappears. Indicates exiting the channel retrieval mode.
7.3.8: Delete radio station:
According to 7.3.7 station retrieval operation introduction, select the unwanted radio station, long press
the [ ] key , the main screen LCD displays the " " character, indicating that the radio station has been
deleted.
7.3.9: About the North American WB weather band:
Lightly press the [ ] key to switch to the WB weather band. Lightly press the [ or ] key
or rotate the large and small shuttle [ ] buttons to select the weather frequency points to be received.
The receiving frequency points are:
1-162.400MHZ, 2-162.425MHZ, 3-162.450MHZ: 4-162.475MHZ,
5-162.500MHZ, 6-162.525MHZ, 7-162.550MHZ
7.3.9.1: Automatically search for North American weather radio stations : In WB working mode, press and
hold the [ ] key for 2 seconds to enter the automatic search for weather radio stations. The
LCD displays the "ALE" character. In the automatic search for "ALE" state, when no weather radio
station is found , you need to press and hold the [ ] key again for 2 seconds to exit the "ALE"
automatic search mode.
(Note that after entering the automatic search mode, pressing any key has no effect. You must press
the [ ] key for 2 seconds to release the automatic search mode before you can use other radio
functions)
7.3.10: When the radio is working in each band, enter the setting function
In the radio working mode, press and hold the [ ] key to enter the setting function. After entering
the main menu
Select the main menu by rotating the shuttle button [ ] clockwise or counterclockwise.
Press the shuttle button [ ] to confirm entering the submenu selection.
by rotating the shuttle button [ ] clockwise or counterclockwise. After selecting, press the
shuttle button [ ] to confirm.
After confirmation, the main screen LCD displays: SETTING OK .
Exit settings : In submenu mode, if you are exiting: tap the [ ] key to exit, or leave it alone for about
10 seconds, the system will automatically exit.
receiving
frequency
band
The main screen displays
the main menu and 6
tasks are displayed.
Submenu selection operation instructions
FM
ANT-KEEP-PASS
Antenna channel
pass-through
Press the shuttle button [ ] lightly, SETTING OK is displayed,
indicating that the setting is completed.
ANT-CHANNLE
Antenna channel selection
Press the shuttle button [ ] lightly to enter the submenu and
select:
ANT- HPF ( HPF filter)
ANT-LNA1 (LNA1 channel)
After selecting, lightly press the shuttle button [ ] to confirm,
and SETTING OK will be displayed, indicating that the setting is
completed.
ANT-LNA1-GAIN
LNA1 antenna channel gain
selection
Press the shuttle button [ ] lightly to enter the submenu, and
rotate the shuttle button [ ] to select:
ANT- LNA1 -GAIN-L ( LNA1 antenna channel low gain )
ANT-LNA1-GAIN-H ( LNA1 antenna channel high gain )
After selecting, lightly press the shuttle button [ ] to confirm,
and SETTING OK will be displayed, indicating that the setting is
completed.
ANT-LNA2-GAIN
LNA2 antenna channel gain
selection
Press the shuttle button [ ] lightly to enter the submenu, and
rotate the shuttle button [ ] to select:
A NT- LNA 2-GAIN-L ( LNA 2 antenna channel low gain )
ANT-LNA2-GAIN-H ( LNA 2 antenna channel high gain )
After selecting, lightly press the shuttle button [ ] to confirm,
and SETTING OK will be displayed, indicating that the setting is
completed.
ATT-GAIN
Antenna attenuation
selection
Press the shuttle button [ ] lightly to enter the submenu, and
rotate the shuttle button [ ] to select:
ANT-10DB: Antenna attenuation 10DB
ANT-20DB: Antenna attenuation 20DB
After selecting, lightly press the shuttle button [ ] to confirm,
and SETTING OK will be displayed, indicating that the setting is
completed.
ANT-DEFAULT
Default antenna
Press the shuttle button [ ] lightly, SETTING OK is displayed,
indicating that the setting is completed.
Receiving
frequency
band
Main screen displays
main menu and 7 task
displays
Submenu selection operation instructions
the SW
demodulation
mode is
AM/CB two
working
modes
ANT-KEEP-PASS
Antenna channel
pass-through
Press the shuttle button [ ] lightly, SETTING OK is displayed,
indicating that the setting is completed.
ANT-CHANNLE
Antenna channel selection
Press the shuttle button [ ] lightly to enter the submenu and
select :
ANT-LPF (HPF filter)
ANT-LNA1 (LNA1 channel)
After selecting, lightly press the shuttle button [ ] to confirm,
and SETTING OK will be displayed, indicating that the setting is
completed.
ANT-LNA1-GAIN
LNA1 antenna channel gain
selection
Press the shuttle button [ ] lightly to enter the submenu, and
rotate the shuttle button [ ] to select:
ANT- LNA1 -GAIN-L ( LNA1 antenna channel low gain )
ANT-LNA1-GAIN-H ( LNA1 antenna channel high gain )
After selecting, lightly press the shuttle button [ ] to confirm,
and SETTING OK will be displayed, indicating that the setting is
completed.
ANT-LNA2-GAIN
LNA2 antenna channel gain
selection
Press the shuttle button [ ] lightly to enter the submenu, and
rotate the shuttle button [ ] to select:
ANT- LNA 2-GAIN-L ( LNA 2 antenna channel low gain )
ANT-LNA2-GAIN-H ( LNA 2 antenna channel high gain )
After selecting, lightly press the shuttle button [ ] to confirm,
and SETTING OK will be displayed, indicating that the setting is
completed.
ATT-GAIN
Antenna attenuation
selection
Press the shuttle button [ ] lightly to enter the submenu, and
rotate the shuttle button [ ] to select:
ANT-10DB: Antenna attenuation 10DB
ANT-20DB: Antenna attenuation 20DB
After selecting, lightly press the shuttle button [ ] to confirm,
and SETTING OK will be displayed, indicating that the setting is
completed.
SQL-LEVEL
Press the shuttle button [ ] lightly to enter the submenu, and
rotate the shuttle button [ ] to select:
SQL-LEVEL 00-01-02-03-04-05-06-07-08-09 (9-level squelch
selection)
After selecting, lightly press the shuttle button [ ] to confirm, and
SETTING OK will be displayed, indicating that the setting is completed.
WT-SCAN-MODE
Press the shuttle button [ ] lightly to enter the submenu, and
rotate the shuttle button [ ] to select:
WT-SCAN-MODE-FREQ frequency scan mode
WT-SCAN-MODE-PRESET Prestored radio station scanning
mode
After selecting, lightly press the shuttle button [ ] to confirm, and
SETTING OK will be displayed, indicating that the setting is completed.
ANT-DEFAULT Default
Press the shuttle button [ ] lightly, SETTING OK is displayed,
antenna
indicating that the setting is completed.
receiving
frequency
band
Main screen display main
menu 3 kinds of task
display
Submenu selection operation instructions
SW
demodulation
mode in LSB,
USB working
mode
VHF/UHF
band
ATT-GAIN
Antenna attenuation
selection
Press the shuttle button [ ] lightly to enter the submenu, and
rotate the shuttle button [ ] to select:
ANT-10DB: Antenna attenuation 10DB
ANT-20DB: Antenna attenuation 20DB
After selecting, lightly press the shuttle button [ ] to confirm,
and SETTING OK will be displayed, indicating that the setting is
completed.
SQL-LEVEL
Press the shuttle button [ ] lightly to enter the submenu, and
rotate the shuttle button [ ] to select:
SQL-LEVEL 00-01-02-03-04-05-06-07-08-09 (9-level squelch selection)
After selecting, lightly press the shuttle button [ ] to confirm, and
SETTING OK will be displayed, indicating that the setting is completed.
WT-SCAN-MODE
Press the shuttle button [ ] lightly to enter the submenu, and
rotate the shuttle button [ ] to select:
WT-SCAN-MODE-FREQ Frequency scanning mode (press the
SCAN button to scan for a signal station before stopping the
search, press the SCAN button again to stop scanning for signals)
WT-SCAN-MODE-PRESET Prestored radio station scanning mode
After selecting, lightly press the shuttle button [ ] to confirm, and
SETTING OK will be displayed, indicating that the setting is completed.
receiving
The main screen displays
Submenu selection operation instructions
frequency
band
the main menu and 8
tasks are displayed.
AIR
working
mode
ANT-KEEP-PASS
Antenna channel
pass-through
Press the shuttle button [ ] lightly, SETTING OK is displayed,
indicating that the setting is completed.
ANT-CHANNLE
Antenna channel selection
Press the shuttle button [ ] lightly to enter the submenu and
select:
ANT-LPF (HPF filter)
ANT-LNA1 (LNA1 channel)
After selecting, lightly press the shuttle button [ ] to confirm,
and SETTING OK will be displayed, indicating that the setting is
completed.
ANT-LNA1-GAIN
LNA1 antenna channel gain
selection
Press the shuttle button [ ] lightly to enter the submenu, and
rotate the shuttle button [ ] to select:
ANT- LNA1 -GAIN-L ( LNA1 antenna channel low gain )
ANT-LNA1-GAIN-H ( LNA1 antenna channel high gain )
After selecting, lightly press the shuttle button [ ] to confirm,
and SETTING OK will be displayed, indicating that the setting is
completed.
ANT-LNA2-GAIN
LNA2 antenna channel gain
selection
Press the shuttle button [ ] lightly to enter the submenu, and
rotate the shuttle button [ ] to select:
ANT- LNA 2-GAIN-L ( LNA 2 antenna channel low gain )
ANT-LNA2-GAIN-H ( LNA 2 antenna channel high gain )
After selecting, lightly press the shuttle button [ ] to confirm,
and SETTING OK will be displayed, indicating that the setting is
completed.
ATT-GAIN
Antenna attenuation
selection
Press the shuttle button [ ] lightly to enter the submenu, and
rotate the shuttle button [ ] to select:
ANT-10DB: Antenna attenuation 10DB
Note: If the SQ squelch function is turned on, you can directly press and hold the [ ] key for 2 seconds
to turn off the squelch function. The main screen displays a value of 0.
If you press and hold the [ ] key again for 2 seconds, the LCD “ ” will display the currently set
squelch level and restore the set SQ level.
7.3.11 : About the demodulation method of SW short wave
This product is in SW shortwave receiving mode and supports selection:
There are three demodulation methods: AM (normal receiving mode), LSB (lower sideband), and
USB (upper sideband). The specific operations are as follows :
In SW shortwave working mode, long press the [ ] key for 2 seconds, the main screen will
display the "AM" character flashing. Press the [ ] key lightly within 2 seconds , the "USB"
ANT-20DB: Antenna attenuation 20DB
After selecting, lightly press the shuttle button [ ] to confirm,
and SETTING OK will be displayed, indicating that the setting is
completed.
SQL-LEVEL
Press the shuttle button [ ] lightly to enter the submenu, and
rotate the shuttle button [ ] to select:
SQL-LEVEL 00-01-02-03-04-05-06-07-08-09 (9-level squelch selection)
After selecting, lightly press the shuttle button [ ] to confirm, and
SETTING OK will be displayed, indicating that the setting is completed.
WT-SCAN-MODE
Press the shuttle button [ ] lightly to enter the submenu, and
rotate the shuttle button [ ] to select:
WT-SCAN-MODE-FREQ Frequency scanning mode (press the SCAN
button to scan for a signal station before stopping the search, press
the SCAN button again to stop scanning for signals)
WT-SCAN-MODE-PRESET Prestored radio station scanning mode
After selecting, lightly press the shuttle button [ ] to confirm, and
SETTING OK will be displayed, indicating that the setting is completed.
ANT-DEFAULT Default
antenna
Press the shuttle button [ ] lightly, SETTING OK is displayed,
indicating that the setting is completed.
symbol will be displayed flashing, and the " " symbol will be scrolling for search; after about
2 seconds, Enter the USB sideband.
In the "USB" upper sideband mode, long press the [ ] key for 2 seconds and the "USB"
character will flash. Press the [ ] key again to switch to the "LSB" lower sideband.
In the "LSB" receiving mode, long press the [ ] key for 2 seconds and the "LSB" character will
flash. Press the [ ] key again to switch to the "AM" normal receiving mode.
7.3.13: Demodulation methods of other bands
In the radio working mode, you can long press the [ ] key, the [ ] character on the main screen
LCD is flashing, lightly press the [ ] key to select the demodulation mode you need to use (SW
selects the demodulation mode, as described in 7.3.11 operation)
The details of the demodulation methods of each band are as follows:
FM mode
MW
mode
SW mode
LW mode
WB mode
CB mode
AIR mode
VHF
mode
UHF
mode
WFM
AM
AM
AM
NFM
AM
AM
NFM
NFM
ST
USB
LSB
7.3.14: Regarding the selection of BW bandwidth value for each band:
In the radio working mode, you can tap [ ] to select the BW bandwidth value for each band.
Press the [ ] key lightly, the LCD BW value on the main screen flashes, press the [ ] key lightly,
the value rotates. After selecting, wait for 2 seconds and the final selection will be made by default.
BW values can be selected as shown in the following table:
FM mode
MW
mode
SW mode
LW mode
WB mode
CB mode
AIR mode
VHF
mode
UHF
mode
110KHZ
84KHZ
60kHz
40kHz
1.0KHZ
1.8 kHz
2.0KHZ
2.5KHZ
3.0KHZ
4.0KHZ
6.0KHZ
1.0KHZ
1.8KHZ
2.0KHZ
2.5KHZ
3.0KHZ
4.0KHZ
6.0KHZ
1.0KHZ
1.8KHZ
2.0KHZ
2.5KHZ
3.0KHZ
4.0KHZ
6.0KHZ
3.0KHZ
1.0KHZ
1.8KHZ
2.0KHZ
2.5KHZ
3.0KHZ
4.0KHZ
6.0KHZ
1.0KHZ
1.8KHZ
2.0KHZ
2.5KHZ
3.0KHZ
4.0KHZ
6.0KHZ
1.7KHZ
2.0KHZ
2.5KHZ
3.0KHZ
3.75KHZ
4.0KHZ
4.25KHZ
1.7KHZ
2.0KHZ
2.5KHZ
3.0KHZ
3.75KHZ
4.0KHZ
4.25KHZ
4.50KHZ
4.50KHZ
8: Bluetooth function mode description:
---Bluetooth name of this product: " Retekess-TR113 "
---In the power-on working state, lightly press the [ ] key to switch to " " mode.
---The Bluetooth [ ] character is flashing, indicating that it is waiting to connect to the Bluetooth
settings.
---Open the Bluetooth device and find HRD-C919 to connect. After the connection is successful, the
Bluetooth [ ] character is always displayed, and the [ ] playback symbol is flashing. Open the
music player on your mobile phone and connect to play via Bluetooth.
---Tap the [ ] key to enter the next song, and tap the [ ] key to return to the previous song.
---Tap the [ ] key to switch between pause/play, or operate the mobile phone for corresponding control.
---Disconnect Bluetooth connection : Bluetooth connection mode: long press the [ ] key to exit Bluetooth
connection.
9: TF card playback function description:
---Insert TF card: Please insert the TF card slot correctly according to the direction of this " " icon. Press
lightly to insert, then press lightly again to remove the TF card.
---In any boot mode, insert the TF card and automatically play TF songs first, and the screen will display the "
TF card icon;
---If in other working modes, tap the [ ] button to switch to TF card mode to play songs; tap the [ ] button to
switch between pause/play.
---Tap the [ ] key to enter the next song, tap the [ ] key to return to the previous song, long
press the [ ] key to fast forward playback, long press the [ ] key
button to rewind playback.
---When playing the TF card, you can rotate the small and large shuttle knob to select a song, and tap the
[ ] button to confirm the last selected song.
---You can also directly enter a valid track number on the numeric keyboard and tap the [EN] key to enter
playback
---When playing TF card, you can choose the playback mode, and the operation is as follows:
Press the [ ] key lightly, the main screen LCD displays the characters of the current playback mode
“ ” or “ ” or “ ” or “ ”.
Press the [ ] key lightly and the four symbols will change in turn.
Each of them represents the following functions:
(Sequential play: repeat all), (Single loop: repeat one),
(Repeat the song in the current folder: repeat file), : (Play randomly: random)
---TF card supports up to 256G
---TF card supports MP3, WMA, WAV, APE, FLAC, format song playback
---Maximum number of files supported by TF card: 65535
Kind tips:
When playing TF card music, please adjust the volume if the sound vibrates due to the source of the
downloaded songs.
During radio & Bluetooth work, the TF card cannot be inserted and played, and "0000" is displayed. This
may be due to the downloaded song source, or the TF card is broken. Please replace it with a normal TF
card.
10: Instructions on setting EQ sound effects in each band of the radio,
Bluetooth, and TF card mode:
In the working mode, lightly press the [ ] key to select the EQ sound effect:
Operating mode
FM
MW
SW
LW
WB
CB
AIR
VHF
UHF
BT
blueto
oth
TF
card
EQ
EQ-NORMAL(natural)
▅
▅
▅
▅
▅
▅
▅
▅
▅
▅
▅
EQ-POP (pop music)
▅
▅
▅
▅
EQ-ROCK (rock music)
▅
▅
▅
▅
EQ-JAZZ (Jazz)
▅
▅
▅
▅
EQ-CLASSIC (classical
music)
▅
▅
▅
▅
EQ-COUNTRY
(countryside)
▅
▅
▅
▅
EQ-NEWS (news sound
▅
▅
▅
▅
▅
▅
▅
▅
▅
effects)
EQ-VOICE (Voice of the
Earth)
▅
▅
▅
▅
▅
▅
▅
▅
▅
DAC-ANALOG (analog
output)
▅
▅
▅
▅
▅
▅
▅
▅
▅
EQ-CW (Filter)
▅
▅
▅
▅
▅
▅
■ ] symbol above indicates the EQ sound effects that can be selected in this working mode.
Note: NEWS filter description: Audio filter: 150-4000HZ range
VOICE filter description: Audio filter: 250-2500HZ range
CW filter description: Audio filter: 500-1100HZ range
11: Function description of LOCK/Lock [ ] key:
The right side lock of the machine has three gears to turn on. The functions represented by the three
gears are:
Dial to the [UN-LOCK] position, which means it will not be locked/unlocked.
Dial to the [RS-LOCK] position, which means that only the small and large shuttle pulley buttons are
locked, and the main screen LCD displays a flashing " " symbol.
Dial to [...LOCK], which means locking all the keys (do not lock the APP to enter the "connection "
"operation). The main screen LCD displays the " ALL" flashing prompt with the " "
symbol. At this time, all keys have been locked.
12: Instructions on the running time setting method :
In the time display state, press and hold the [TIME/SET] key for 2 seconds to start setting the running
time/date. The specific steps are as follows
Step 1: Time display status
Step 2: Long press the [TIME/SET] key
Step 3: The hour numbers [ ] are flashing
Step 4: Turn the large/small shuttle button [ ] to adjust the hour
Step 5: Tap the [TIME/SET] button
Step 6: The minute number [ ] is flashing
Step 7: Turn the large/small shuttle button [ ] to adjust the minutes
Step 8: Tap the [TIME/SET] button
Step 9: Year [ ] flashes
Step 10: Turn the large/small shuttle button [ ] to adjust the year
Step 11: Tap the [TIME/SET] button
Step 12: Month [ ] flashes
Step 13: Turn the large/small shuttle button [ ] to adjust the month
Step 14: Tap the [TIME/SET] key
Step 15: Date [ ] flashes
Step 16: Rotate the large/small shuttle button [ ] to adjust the date
Step 17: Tap the [TIME/SET] key to confirm
Note: MON (Monday); TUE (Tuesday); WED (Wednesday); THU (Thursday) TRI (Friday); SAT (Saturday); SUN
(Sunday) As the date is updated, the week will be automatically updated.
13: Instructions for setting the alarm time:
According to the above 12-point operation introduction, after setting the current running time, in the
time display state, press and hold the [ALARM] button for 2 seconds to enter the setting of alarm clock
ringing/automatic startup (two sets of alarm clock times can be set).
The specific steps are as follows:
Step 1 : Time display status
Step 2 : Press and hold the [ALARM] key
Step 3: The characters [ALARM 1 ON] are displayed in the upper left corner of the main screen, and the number 1
is flashing
Rotate the large/small shuttle button [ ] to choose to set the first group of alarm clocks or the second group of
alarm clocks
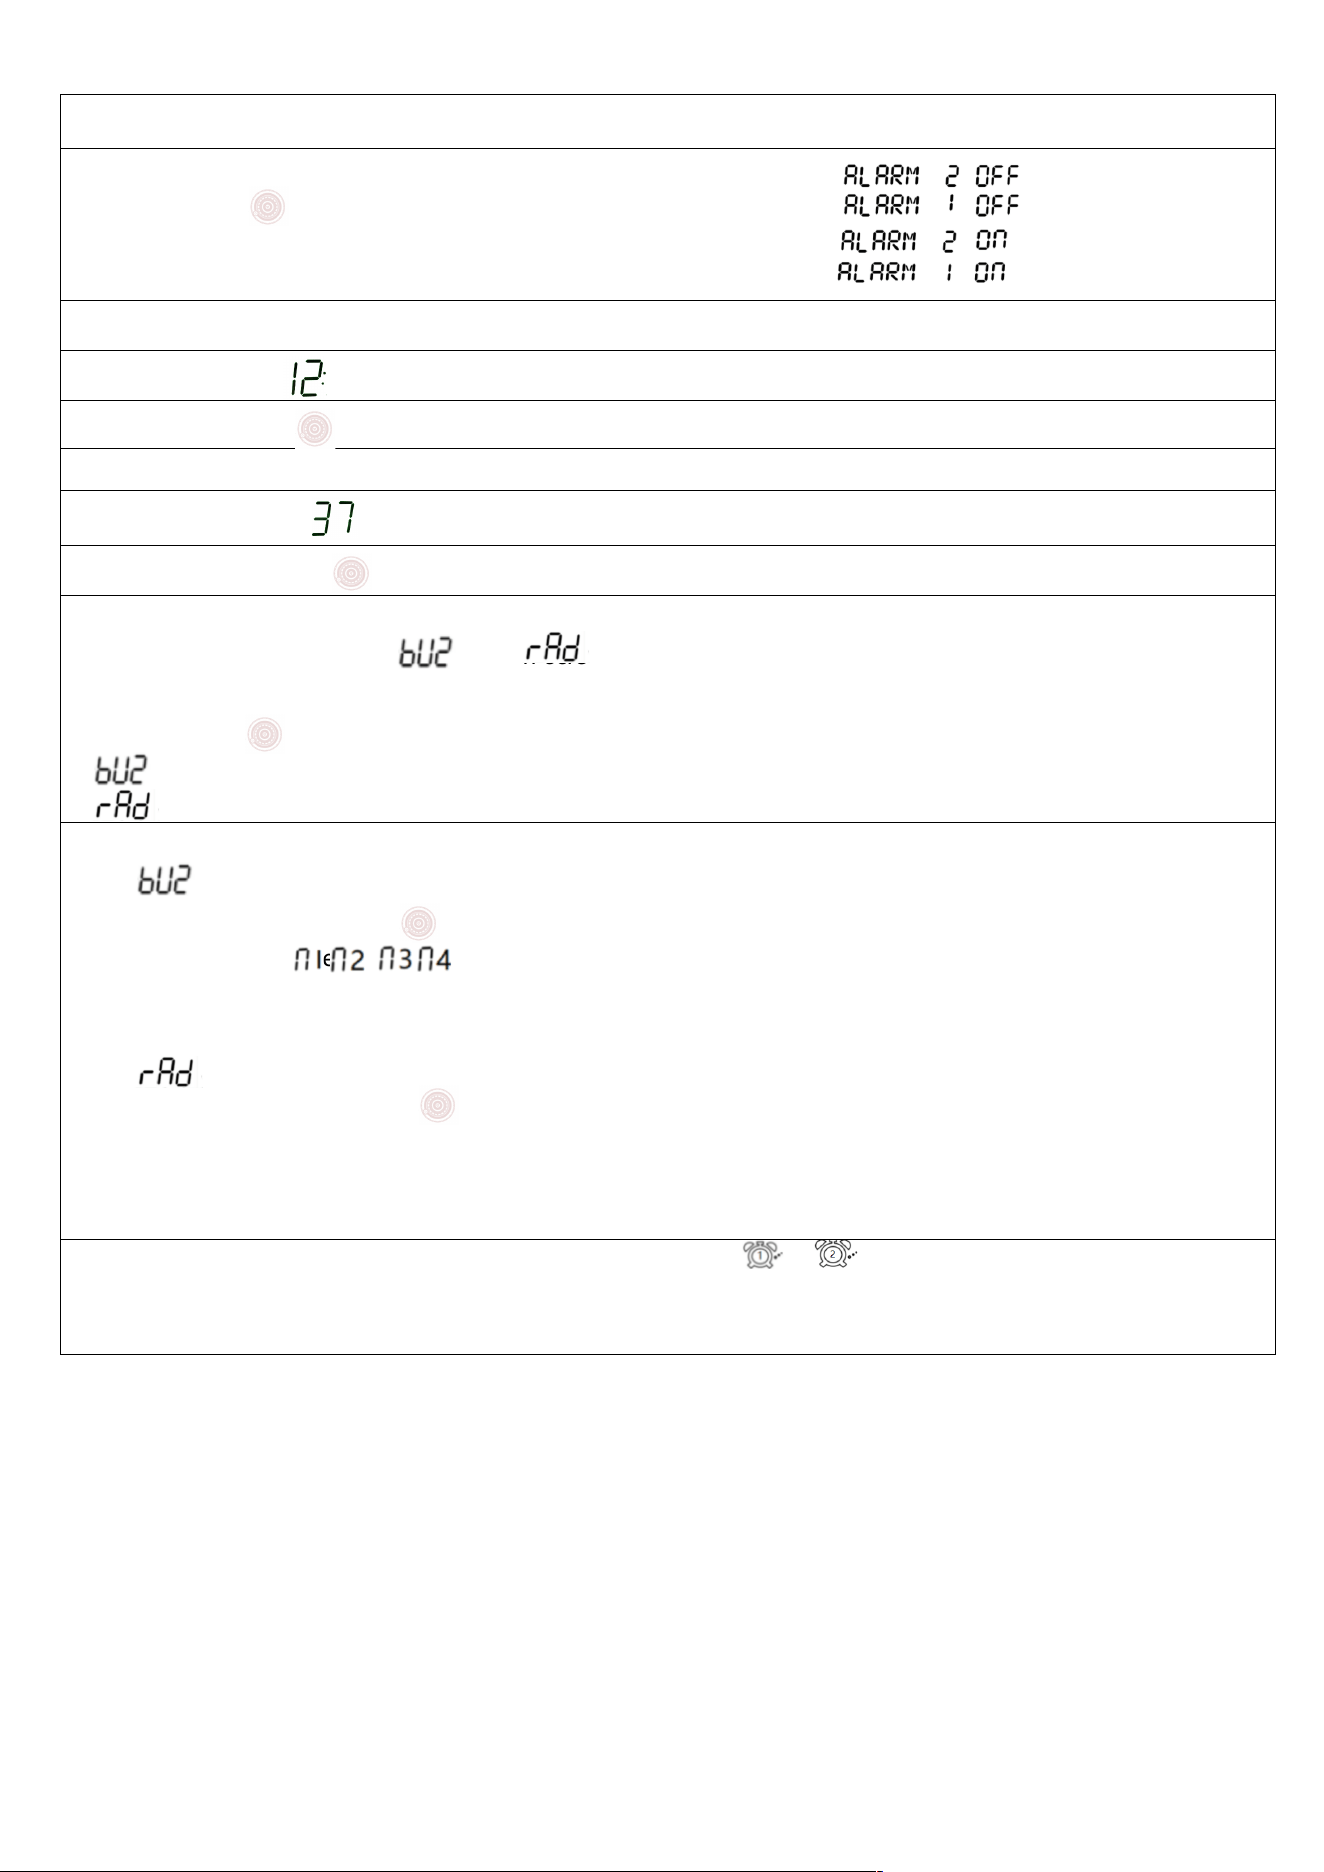
Step 4: Press the [ALARM] key lightly
Step 5: The main screen displays ON/OFF flashing
Rotate the large/small shuttle button [ ] to choose to turn on or turn off the alarm clock
[ON] means choosing to turn on the alarm clock.
[OFF] means choosing to turn off the alarm clock.
Step 6: After selecting [ON], lightly press the [Alarm] key
Step 7: The alarm clock hour number [ ] is flashing
Step 8: Rotate the large/small shuttle [ ] to adjust the alarm hour.
Step 9: Tap the [Alarm] key
Step 10: The alarm minute number [ ] is flashing
Step 11: Rotate the large/small shuttle button [ ] to adjust the alarm minute
Step 12:
Press the [Alarm] key lightly, and the main screen will display [ ] or [ ]. Choose whether to enable the [Alarm
Sound] method or the [Set Automatic Power On] method.
Rotate the large/small shuttle button [ ] to select any one
[ ] indicates choosing to enable the alarm mode
[ ] means setting the automatic power-on time mode.
Step 13:
Select [ ] ] to enable alarm mode
Press the [Alarm] key lightly and rotate the large/small shuttle button [ ] to select.
Four ringtones can be selected [ ].
After selecting, tap the [Alarm] key to confirm.
Select [ ] to enable the automatic startup method of the shrinking machine
Press the [Alarm] button lightly and rotate the large/small shuttle button [ ] to select the time for automatic
power-on and automatic power-off.
You can choose: 10-20-30-40-50-60-70-80-90-FULL (unit: minutes)
If you select FULL (meaning it will not automatically shut down after automatic startup)
After setting the alarm clock function, the alarm clock symbol [ / ] is displayed on the secondary screen.
If one set of alarm clocks is set, one alarm clock symbol is displayed. If two sets of alarm clocks are set, two alarm
clock symbols are displayed on the secondary screen.
Turn off the alarm clock: Follow the above instructions and select 1 OFF/2 OFF.
After selecting the OFF state, the alarm clock symbol displayed on the secondary screen
disappears.
Note: If [ ] is selected for scheduled power on, and the 10-20-30-40-50-60-70-80-90 minute automatic
shutdown task is selected, the radio will be powered off at a scheduled time after being powered on,
and the secondary screen LCD will display Sleep symbol: . The " " symbol disappears after
automatic shutdown
※ After setting the scheduled power on and alarm time, turn on the phone or in the time display state,
lightly press the [DISPLAY] button to view the time set by " " & " ".
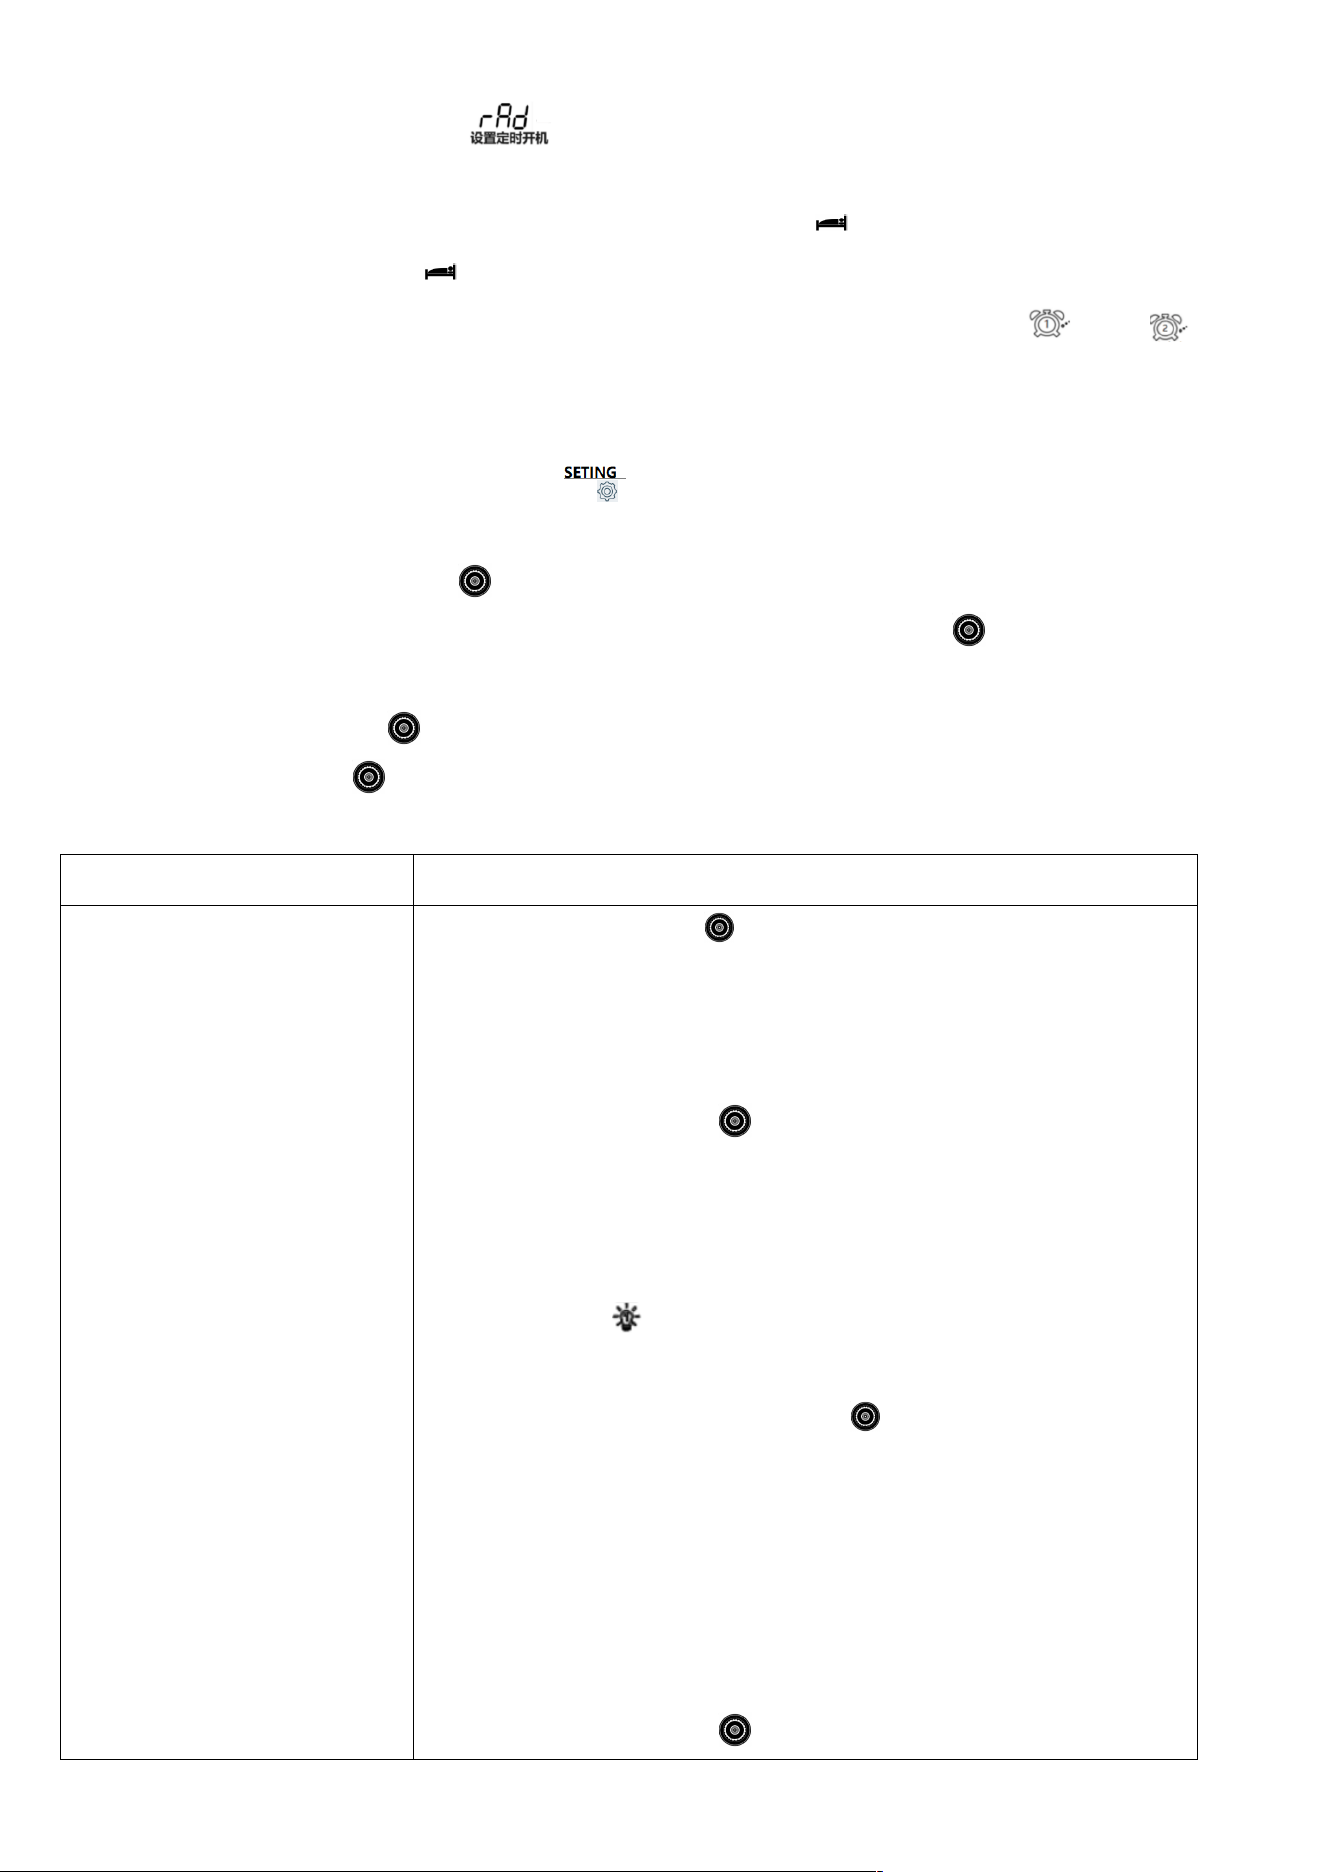
14: In time mode, operating instructions for setting the menu keys:
In the time display state, long press the [ ] key to enter the setting function. After entering the main
menu, the main menu has options as shown in the table below.
by rotating the shuttle button [ ] clockwise/counterclockwise.
After selecting the main menu task to be set, lightly press the shuttle button [ ] to confirm entering the
submenu selection.
Select the submenu task by rotating the shuttle button [ ] clockwise or counterclockwise. After selecting,
press the shuttle button [ ] to confirm.
main menu
Submenu selection operation guide
A-LCD SETTING
( Set the home screen
backlight color/lighting time)
Press the shuttle button [ ] to enter the submenu and set the home
screen off time. The time unit is "seconds (S) "
1: The main screen displays “TIME SET 05-S/06-S/07-S/08-S……
30-S/FULL”
Rotate the shuttle button [ ] to select the screen off time from 5
seconds to 30 seconds.
If you select the character [FULL], it means the backlight of the main
screen is always on.
After selection, " " will be displayed in the lower left corner of the
home screen
After selection, tap the shuttle button [ ] to enter the setting of the
backlight color of the home screen:
2: COLOR SET 1......7
There are 7 colors to choose from:
1): Fresh grass green, 2): Elegant brown, 3): Gentle blue,
4): light green, 5): blue, 6): noble color,
7): light blue
Rotate the shuttle button [ ] to select the main screen LCD backlight
display color
After selection, if there is no operation within 10 seconds, the last
selection will be automatically confirmed and the recovery time will be
displayed .
B-LCD SETTING
(Set the secondary screen
lighting time)
Press the shuttle button [ ] lightly to enter the submenu and set the
secondary screen off time, the time unit is "second (S) "
1:TIME SET 05-S/06-S/07-S/08-S......30-S/FULL
Rotate the shuttle button [ ] to select the time
If you select the character [FULL], it means the backlight of the
secondary screen is always on. Does not turn off the screen.
After selection, " " will be displayed in the lower left corner of the
home screen
After selection, if no operation is performed within 10 seconds, the final
selection will be automatically confirmed and the recovery time will be
displayed.
C-KEY SETTING
(Set the lighting time of the
working status button)
Press the shuttle button [ ] lightly to enter the submenu and set the
button lighting time in the working state. The time unit is "second (S) "
1:TIME SET 05-S/06-S/07-S/08-S......30-S/FULL
Rotate the shuttle button [ ] to select the time
If you select the character [FULL], it means the button light is always on.
Does not turn off the screen.
After selection, if no operation is performed within 10 seconds, the final
selection will be automatically confirmed and the recovery time will be
displayed.
APP ENABLE
(Open/close APP connection)
Press the shuttle button [ ] lightly to enter the submenu and enter
settings.
Rotate the shuttle button [ ] to select
APP DISABLE----means to turn off the APP function. (Conducive to
saving power and reducing interference)
APP ENABLE----Indicates that the APP is in normal use
After selection, if no operation is performed within 10 seconds, the final
selection will be automatically confirmed and the recovery time will be
displayed.
TIMER OFF
(Home screen time display
Press the shuttle button [ ] lightly to enter the submenu and enter
settings.
on/off)
Rotate the shuttle button [ ] to select
TIMER DISPLAY---indicates the main screen display time is always
displayed
TIMER OFF--------Indicates that the time displayed on the main screen
is turned off
After selection, if no operation is performed within 10 seconds, the final
selection will be automatically confirmed and the recovery time will be
displayed.
SYSTEM RESET
Press the shuttle button [ ] lightly to enter the submenu and enter
settings.
Rotate the shuttle button [ ] to select
YES---means to restore original factory settings
NO---means to give up and restore the original factory settings.
After selection, if no operation is performed within 10 seconds, the final
selection will be automatically confirmed and the recovery time will be
displayed.
VERSION-***
version number
15: Instructions for TYPE-C USB charging:
During charging, this product has overvoltage protection function, and the charging voltage is ≦ 6.2V.
It is recommended to use a charging device with an output voltage of DC5V⎓1A~3A for charging.
If the product is not used for a long time, it is recommended to charge it once a month to maintain the
lithium battery.
Plug in the USB charging cable, the main screen will display the " " character, and the charging
indicator " " symbol will flash, indicating that it is in charging status. When fully charged, the "
" character will display full grid and stop flashing. The charging time is about 5-7 hours.
16: Instructions for using the card reader:
When inserting the TF card into the radio, use the data cable to connect the radio to the computer,
which can be used for file transfer and deletion of TF card files.
17: Function description of external audio source (AUX) playback:
In the power-on state, plug a 3.5MM audio source device (such as a mobile phone, computer, etc.) into
the [ ] jack on the right side of the radio with a 3.5MM audio cable. The main screen LCD displays
the "AUX" character, and " " plays the audio first.
(Note, this unit does not come with an audio cable when shipped from the factory)
18: Operating instructions for temperature display
In the time display state or power-on state, tap the [ ] key, and the temperature value will be displayed in
the upper left corner of the main screen. like:
Press the [ ] key again to exit the thermometer display.
19: Instructions for using the recording function
Insert the TF card and when the radio is working, press and hold the [ ] key to enter the radio internal
recording. When recording, the main screen LCD displays the characters [RECORDING] and flashes, and
the secondary screen LCD displays the recording time.
After completing the recording, press and hold the [ ] key again to exit recording.
Take out th e recordi ng file: Press the [ ] key to enter the TF card playback mode, and se lect the track on the TF
card.
Note: If no valid TF card is inserted or no TF card is inserted, em characters will be displayed on the secondary
screen.
Operation steps for deleting recordings: In TF card playback mode, long press the [ ] key to switch
recording file playback, lightly press the [ or ] key or rotate the
large/small shuttle button, press the [ ] key to select the recording file to be
deleted, and long Press the [DEL] key, the character "del " will be displayed on the
main screen . Press the [DEL] key again to confirm the deletion.
20: Instructions for using the antenna:
When listening to FM, VHF, UHF, SW, AIR, CB, WB bands, pull out the antenna and change the antenna
length and search direction. Find the best reception location.
*Tip: If there is strong radio interference, resulting in cross-channel interference, the telescopic antenna
can be shortened.
Listening to AM & LW broadcasts This unit uses a built-in magnetic antenna to receive medium waves.
The magnetic antenna has a certain directionality when receiving signals. Therefore, when listening to
medium wave & long wave, you can appropriately rotate the body to find the best listening position.
Radio working mode: Press the [DISPLAY] button to turn on or off the signal-to-noise ratio "SNR " and
antenna reception strength "RSSI" display.
For details on how to connect an external antenna, see the attached page.
21. Main specifications of the radio
band
Frequency Range
Demodulation
method
Receive
sensitivity
Band description
FM
64-108MHZ
WFM/ST
2uV
FM BAND FM
SW
2.30-30.00MHZ
AM/USB/LSB
20uV
SW BAND shortwave/upper
sideband/lower sideband
MW
520-1710KHZ
AM
1mV/m
MW BAND medium wave
LW
153-522KHZ
AM
1mV/m
LW BAND long wave
AIR
118-138MHZ
AM
1uV
AIR BAND aviation band
CB
25-28MHZ
AM
10dBuV
CITY BAND city band
VHF
20-250MHZ
NFM
-9dBuV
very high frequency
UHF
250-999MHZ
NFM
-9dBuV
UHF
WB
162.4-162.55MHZ
NFM
-9dBuV
North American National
Weather Band
Speaker: Ф 3 inches 3 Ω 20W
Number of stations stored in radio mode: 1600
Bluetooth version: V5.0 (frequency range 2400-2483.5MHz)
Bluetooth receiving distance ≤ 20 meters ( to avoid the impact of intermediate blockage, etc. )
Minimum operating voltage: 3.5V
External input voltage: DC5V
Lithium battery: 3.7v 3600mAh (non-removable)
TF card playback format supports MP3, WMA, WAV, APE, FLAC, playback formats
Maximum supported capacity of TF card : 256G
Product size: 1 78x184.5x92.5 mm
Product net weight: 1090g (including battery)
22、Precautions:
Before use, you need to make sure to comply with the following basic safety tips to
ensure safe and reliable use of the product:
◆Read and understand all safety instructions and usage information.
◆When the battery " " character space is used , or the battery " " character frame
flashes, it means that the battery power is low. Please charge the machine to avoid
affecting normal use.
◆It is recommended to use charging equipment with an output voltage of DC5V
⎓
1A~3A
for charging to avoid damage to the lithium battery or equipment.
◆If the machine is not used for a long time, please make sure to charge it once a month.
◆Do not let this product be exposed to rain, moisture, dripping or splashing of any liquid.
◆Do not allow this product to be close to high-temperature heat sources, and do not grill
or bake at high temperatures.
◆Do not leave it under direct sunlight for a long time.
◆Do not let this product fall, be hit, or put heavy pressure on it.

Attachment 1:
The following is the reception of shortwave single sideband communication signals
(SSB)
Some commonly used frequencies for shortwave single sideband communication (KHZ)
(unspecified frequencies are USB)
Guangzhou Coast Station: 8716 8782 13107 13149 13182 17398 19772 19793 22735
Tianjin Coast Station: 13092
Shanghai Coast Station: 8773
Yantai Coast Station: 4381 8764 13077 17332
Zhanjiang Coast Station: 2182 6200 6501
Zhoushan Haixiang Shipping Company: 12408
Xiamen Coast Station: 4314 8453 12876
US Army Radio Hawaii Guam: 10320 13362 (day) 5765 6350 (night)
Manila Airport, Philippines: 8942
Iceland Radio: 13855
East Asia Pacific Aviation Weather Station: 8828
Ministry of Agriculture Nanhai District Fishery Port Supervision and Administration Bureau 12215
Guangdong Zhanjiang Ocean and Fisheries Bureau 4925

Guangxi Beihai Fisheries Bureau 6230
Hainan Sanya Ocean and Fisheries Bureau 8210
Guangdong Lianjiang City Ocean and Fishery Bureau 4378
Guangxi Fangchenggang Aquaculture and Animal Husbandry Bureau 6300
Ocean and Fisheries Bureau, Danzhou City, Hainan 13250
Hainan Lingao County Marine Fisheries Bureau 7735
International maritime communication band: 8195-8815 12330-13200
Frequencies commonly used by amateur radio stations:
Japan Meteorology: 9970 13597
Japanese newspapers: 12745
Tai wan weather : 1390 0
Southeast Asian languages, English coast station strong signal frequency band: 16590-16860
80 meters 3500-3900
40 meters 7000-7100 (LSB)
20 meters 14000-14350
15 meters 21000-21450
10 meters 28000-29700
Philippines: 6765
Amateur Radio: 14180
Ham Radio: 14270
LSB Japan Amateur Radio: 3569
Telegraph station: 12967
Aviation: 13281 13284
The above frequencies are for reference only.
Civilian intercom free channels:
China free channels:
1: 409.7500 2: 409.7625
3: 409.7750 4: 409.7875
5: 409.8000 6: 409.8125
7: 409.8250 8: 409.8375
9: 409.8500 10: 409.8625
11: 409.8750 12: 409.8875
13: 409.9000 14: 409.9125
15: 409.9250 16: 409.9375
17: 409.9500 18: 409.9625
19:409.9750 20:409.9875
European public walkie-talkie standard frequency ( unit: MHZ)
1: 446.00625 2: 446.01875
3: 446.03125 4: 446.04375
5: 446.05625 6: 446.06875
7: 446.08125 8: 446.9375
Free home radio frequencies in the United States:
1: 462.5625 2: 462.5875
3: 462.6125 4: 462.6375
5: 462.6625 6: 462.6875
7: 462.7125 8: 467.5625
9: 467.5875 10: 467.6125
11: 467.6375 12: 467.6625
13: 467.6875 14: 467.7125
Attachment 2:
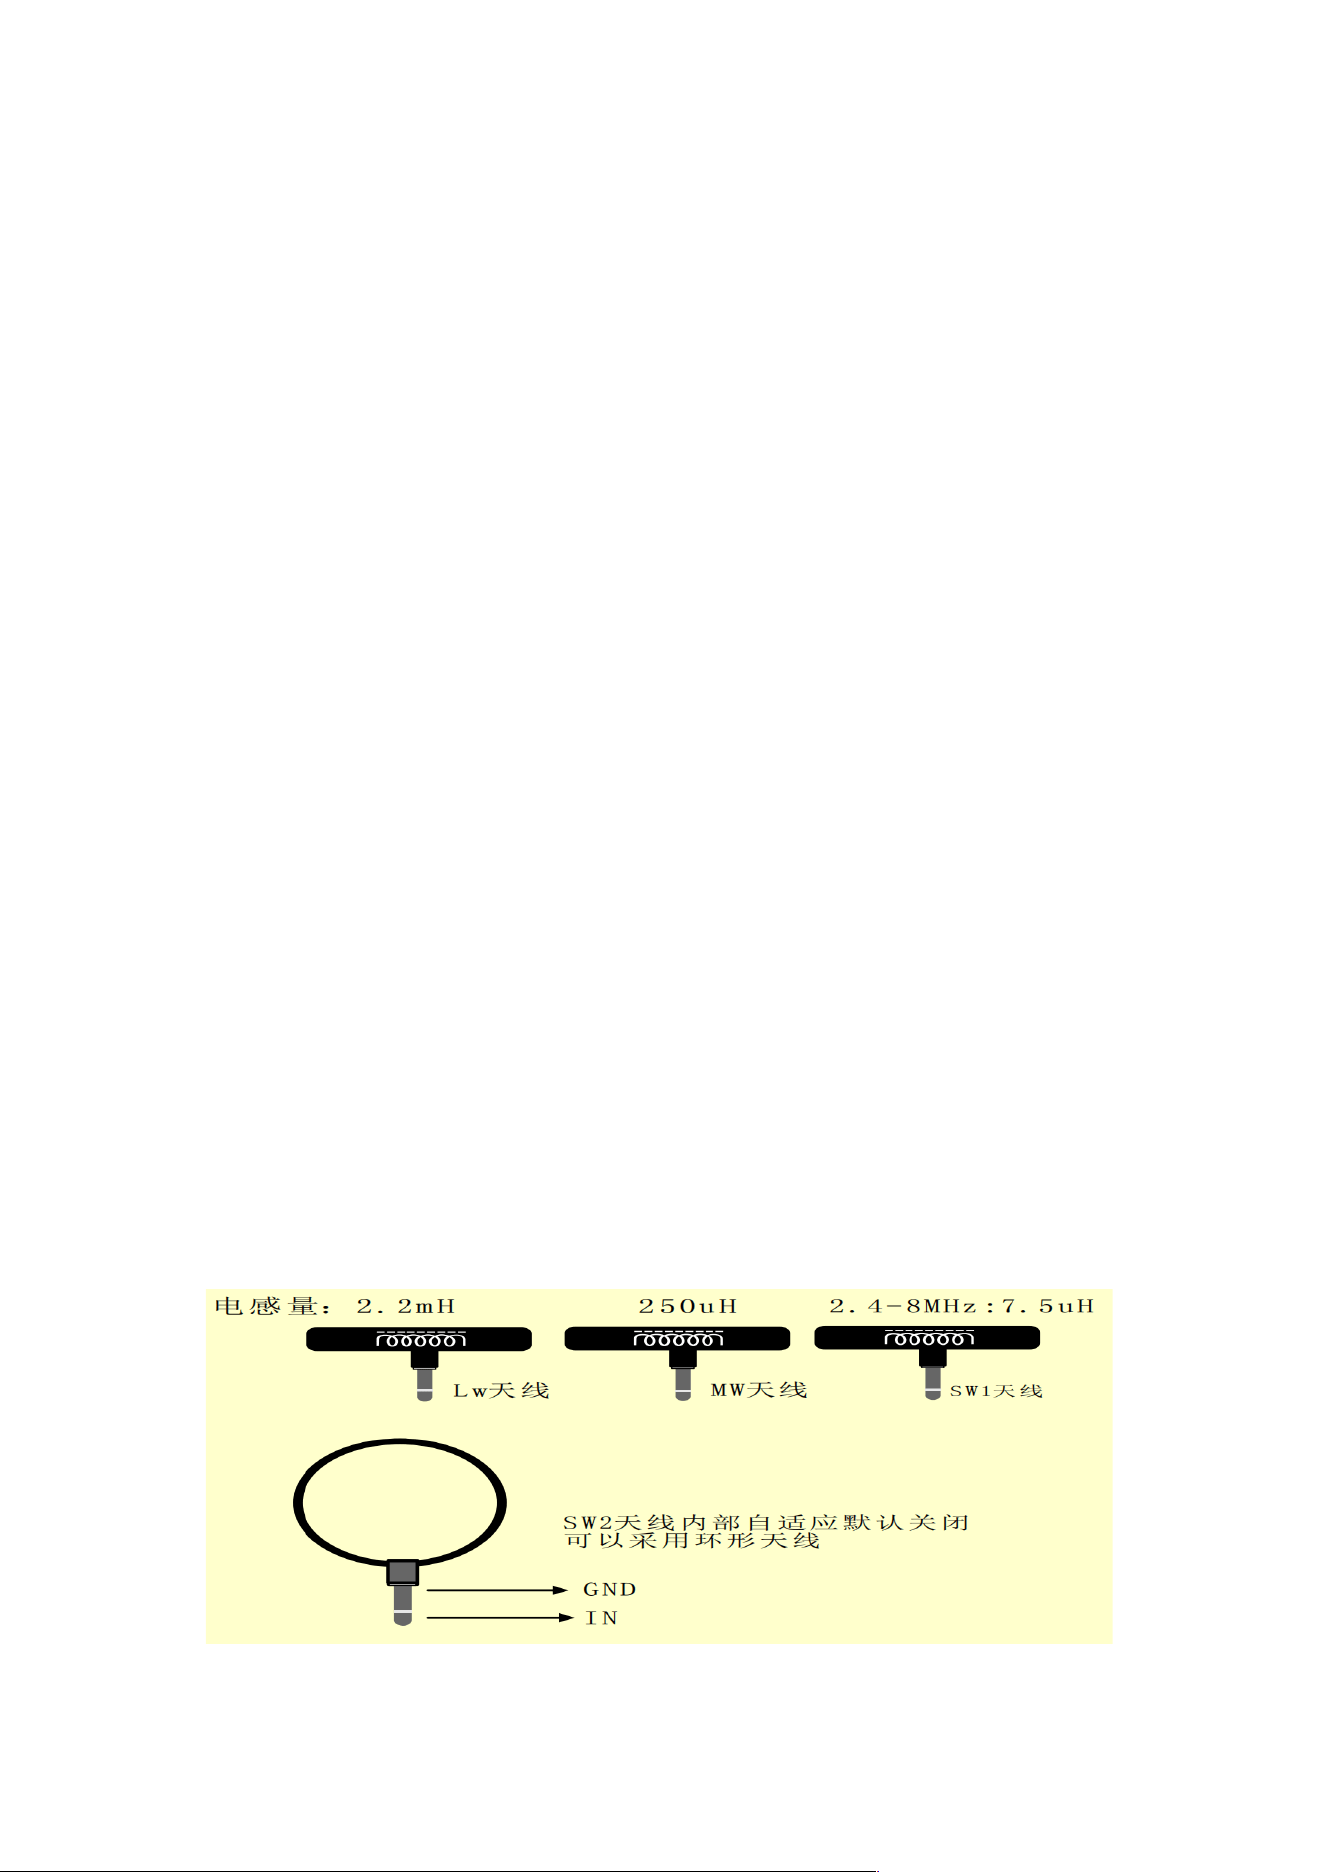
Instructions for using the shortwave RF channel in the top input
This machine adds an external input channel for medium wave, short wave 1 , and short wave 2 , providing users with hands-on ability
to use self-winding receiving antennas to improve the reception effect.
At the same time, the product's internal MW, SW1, already has its own adaptive tuning function, and SW2 has this function turned
off by default. (The antenna inductance needs to be within a roughly accurate range)
External loop antenna parameters open to users:
Instructions:
1. Turn the top switch to "ON";

2. Manually press the ANT-SEL button to select the "Loop Antenna" icon;
Note: During the process of connecting an external antenna, static electricity often occurs, causing damage to the antenna and other
abnormalities. If such problems occur, we will not be responsible for free repairs.
(This input channel has three built-in ESD devices, but damage caused by static electricity and high-power signals cannot be absolutely
avoided)
How to use manual medium wave, SW1, and SW2 antenna tuning:
MW manual tuning range: 510-1720Khz
SW1 manual tuning range: 5-15Mhz
SW2 manual tuning range: 13-30Mhz
Medium wave use: We recommend turning off this manual tuning function at SW1 and SW2 by default. After setting
the switch to the MW position, adjust the knob on the side
Just observe the RSSI/SNR value to the highest value. The exact position of manual tuning can be judged by
the sound clarity.
Shortwave use: Select the manual tuning channel through the ANT-SEL button. Turn the switch to SW1 or SW2 position,
then adjust the side knob, and observe
Just set the RSSI/SNR value to the highest value; you can also judge the exact position of manual tuning by
the sound clarity.
Note: The manual antenna tuning function of shortwave 1 and shortwave 2 can improve the receiving performance
to a certain extent (but it requires
When used correctly). If the tuning is incorrect, reception may be worse than if it were not used.

※※※※本资料版权归深圳锐特威斯科技有限公司所有,未经授权,禁止抄袭或传播※※※※
1.CAUTION
EN
:
RF ENERGY EXPOSURE AND PRODUCT SAFETY GUIDE
EN
:
Before using this device, please read this guide which contains important operating instructions for safe usage, control information and operational
instructions for compliance with RF Energy Exposure limits in applicable national and international standards.
EN:User’ instructions should accompany the device when transferred to other users.
2. Unauthorized modification and adjustment
Changes or modifications not expressly approved by the party responsible for compliance may void the user’s authority granted by the local government radio
management departments to operate this radio and should not be made. To comply with the corresponding requirements, transmitter adjustments should be made only
by or under the supervision of a person certified as technically qualified to perform transmitter maintenance and repairs in the private land mobile and fixed services
as certified by an organization representative of the user of those services. Replacement of any transmitter component (crystal, semiconductor, etc.) not authorized by
the local government radio management departments equipment authorization for this radio could violate the rules.
3.1 FCC
3.1.2 This device complies with part 15 of the FCC Rules. Operation is subject to the following two conditions:
(1) This device may not cause harmful interference.
(2) This device must accept any interference received, including interference that may cause undesired operation.
3.1.3 Note: This equipment has been tested and found to comply with the limits for a Class B digital device. These limits are designed to provide reasonable protection
against harmful interference in a residential installation. This equipment generates, uses and can radiate radio frequency energy and, if not installed and used in
accordance with the instructions, may cause harmful interference to radio communications. However, there is no guarantee that interference will not occur in a
particular installation. If this equipment does cause harmful interference to radio or television reception, which can be determined by turning the equipment off and
on, the user is encouraged to try to correct the interference by one or more of the following measures:
—Reorient or relocate the receiving antenna.
—Increase the separation between the equipment and receiver.
—Connect the equipment into an outlet on a circuit different from that to which the receiver is connected.
—Consult the dealer or an experienced radio/TV technician for help.
3.2 IC
3.2.1 Licence-exempt radio apparatus
EN:This device contains licence-exempt transmitter(s)/receiver(s) that comply with Innovation, Science and Economic Development Canada’s licence-exempt
RSS(s). Operation is subject to the following two conditions:
(1) This device may not cause interference.
(2) This device must accept any interference, including interference that may cause undesired operation of the device.
4 CE
4.1 (Simple EU declaration of conformity)
•HENAN ESHOW ELECTRONIC COMMERCE CO., LTD declares that the radio equipment type is in compliance with the essential requirements and other relevant
provisions of RED Directive 2014/53/EU and the ROHS Directive 2011/65/EU and the WEEE Directive 2012/19/EU; the full text of the EU declaration of conformity
is available at the following internet address: www.retekess.com.
5.1 Disposal

※※※※本资料版权归深圳锐特威斯科技有限公司所有,未经授权,禁止抄袭或传播※※※※
The crossed-out wheeled-bin symbol on your product, literature, or packaging reminds you that all electrical and electronic products, batteries, or accumulators must
be taken to designated collection locations at the end of their working life. Do not dispose of these products as unsorted municipal waste. Dispose of them according
to the laws and rules in your area.Iug
5.2
(1) Batterien und Akkus
Besitzer von Altgeräten haben Altbatterien und Altakkumulatoren, die nicht vom Altgerät umschlossen sind, im Regelfall vor der Abgabe an einer Erfassungsstelle
von diesem zu trennen. Dies gilt nicht, soweit die Altgeräte bei öffentlich-rechtlichen Entsorgungsträgern abgegeben und dort zum Zwecke der Vorbereitung zur
Wiederverwendung von anderen Altgeräten separiert werden.
a) Batterien können nach Gebrauch unentgeltlich in der Verkaufsstelle zurückgegeben werden.
b) Der Nutzer ist zur Rückgabe gebrauchter Batterien gesetzlich verpflichtet.
(2) Getrennte Erfassung von Altgeräten
Elektro- und Elektronikgeräte, die zu Abfall geworden sind, werden als Altgeräte bezeichnet. Besitzer von Altgeräten haben diese einer vom unsortierten
Siedlungsabfall getrennten Erfassung zuzuführen. Altgeräte gehören insbesondere nicht in den Hausmüll, sondern in spezielle Sammel- und Rückgabesysteme.
(3) Möglichkeiten der Rückgabe von Altgeräten
Besitzer von Altgeräten aus privaten Haushalten können diese bei den Sammelstellen der öffentlich-rechtlichen Entsorgungsträger oder bei den von Herstellern oder
Vert re ib er n im S in ne d es E lekt ro G ei ng er ichte te n Rücknahmestellen abgeben. Ein Onlineverzeichnis der Sammel- und Rücknahmestellen finden Sie hier:
https://www.ear-system.de/ear-verzeichnis/sammel-und-ruecknahmestellen.jsf
(4) Datenschutz-Hinweis
Altgeräte enthalten häufig sensible personenbezogene Daten. Dies gilt insbesondere für Geräte der Informationsund Telekommunikationstechnik wie Computer und
Smartphones. Bitte beachten Sie in Ihrem eigenen Interesse,dass für die Löschung der Daten auf den zu entsorgenden Altgeräten jeder Endnutzer selbst verantwortlich
ist.
(5) Hersteller-Registrierungsnummer
Als Hersteller im Sinne des ElektroG sind wir bei der zuständigen Stiftung Elektro-Altgeräte Register (BennoStrauß-Str. 1, 90763 Fürth) unter der folgenden
Registrierungsnummer registriert: DE 83916430
6.1
This two-way radio uses electromagnetic energy in the radio frequency (RF) spectrum to provide communications between two or more users over a distance. RF
energy, which when used improperly, can cause biological damage. Please refer to the following websites for more information on what RF energy exposure is and
how to control your exposure to assure compliance with established RF exposure limits: http://www.who.int/en/
Keeping the radio at a proper distance is important as RF exposure decreases with increasing distance from the proper antenna. A proper antenna is an antenna supplied
with this radio by the manufacturer or specifically authorized by the local authority for use with this radio. This radio can only be operated by use of an antenna of a
type and maximum (or lesser) gain approved for the transmitter under regulations and rules. This transmitter must operate with the antenna(s) documented and in
Push-to-Talk and body-worn configurations as documented. Using authorized accessories is important because the use of Non-Retekess accessories may result in
exposure levels, which exceed the IEEE/ICNIRP RF exposure limits.
Transmit no more than the rated duty factor 50% of the time. Transmitting necessary information or less, is important because the radio generates measurable RF
energy exposure only when transmitting in terms of measuring for standards compliance. For users who wish to further reduce their exposure, some effective measures
to reduce RF exposure include:
Ø Reduce the amount of time spent using your wireless device.
Ø Use a speakerphone, earpiece, headset, or other hands-free accessory to reduce proximity to the head (and thus head exposure). While wired earpieces may
conduct some energy to the head and wireless earpieces also emit a small amount of RF energy, both wired and wireless earpieces remove the greatest source
of RF energy (handheld device) from proximity to the head and thus can greatly reduce total exposure to the head.
Ø Increase the distance between wireless devices and your body.

※※※※本资料版权归深圳锐特威斯科技有限公司所有,未经授权,禁止抄袭或传播※※※※
ü
6.2
This radio is designed for and classified as “General population/uncontrolled use”. General population/uncontrolled environments are defined as locations where there
is exposure of individuals who have no knowledge or control of RF exposure level.
7.1 Electromagnetic Interference/Compatibility
Nearly every electronic device is susceptible to electromagnetic interference (EMI) if inadequately shielded, designed, or otherwise configured for electromagnetic
compatibility. During transmissions, your radio generates RF energy that can possibly cause interference with other devices or systems. To avoid such interference,
turn off the radio in areas where signs are posted to do so, such as hospitals or healthcare facilities.
9.1 Protect your hearing
•
Use the lowest volume necessary to do your job. Turn up the volume only if you are in noisy surroundings.
• Limit the amount of time you use headsets or earpieces at high volume.
• When using the radio without a headset or earpiece, do not place the radio's speaker directly against your ear.
• Use carefully with the earphone maybe possible excessive sound pressure from earphones and headphones can cause hearing loss.
CAUTION: Exposure to loud noises from any source for extended periods of time may temporarily or permanently affect your hearing. The louder the radio's volume,
the less time is required before your hearing could be affected. Hearing damage from loud noise is sometimes undetectable at first and can have a cumulative effect.
10.1 Batteries Safety
•In the event of a battery leaking, do not allow the liquid to come into contact with the skin or eyes. If contact has been made, wash the affected area with copious
amounts of water and seek medical advice immediately.
•If a radio or a battery has been submerged in water, please dry and clean it before use. Do not dry the radio or battery with an appliance or heat source, such as a hair
dryer or microwave oven. If the radio has been submersed in a corrosive substance (e.g. saltwater), rinse the radio and battery in fresh water, then dry them.
10.4
•Turn off your radio before charging.
•Batteries shall be charged at 10℃~40℃ environment temperature specified. If the environment temperature is lower than 0℃, the charge shall be prohibited.
•Rechargeable batteries are only to be charged by adults or by children at least 8 years old under adult supervision.

※※※※本资料版权归深圳锐特威斯科技有限公司所有,未经授权,禁止抄袭或传播※※※※
11.1
WARI NI NG :CHOK IN G HA ZA RD-Small Parts. Not suitable for children under 3 years old.
12.1 Adapter
The power delivered by the charger must be between min [4.5] Watts and max [5.5] Watts required by the radio equipment in order to achieve the maximum charging
speed.
13.1 Authorized Accessories List
•Contact Retekess for assistance regarding repairs and service.
•For a list of Retekess-approved accessories for your radio model, visit the website http://www.retekess.com

FCC Warnning:
This equipment has been tested and found to comply with the limits for a Class B digital device,
pursuant to part 15 of the FCC Rules. These limits are designed to provide
reasonable
protection againstharmful interference in a residential installation. This equipment generates,
uses and can radiateradio
frequency
energy
and,
if
not
installed
and
used
in
accordance
with
the
instructions,
maycause
harmful
interference
to
radio
communications.
However,
there
is
no
guarantee
thatinterference
will
not
occur
in
a
particular
installation.
If
this
equipment
does
cause
harmfulinterference to radio or television reception, which can be
determined by turning the equipmentoff
and
on,
the
user
is
encouraged
to
try
to
correct
the
interference
by
one
or
more
of
thefollowing measures:
•
Reorient or relocate the receiving antenna.
•
Increase the separation between the equipment and receiver.
•
Connect the equipment into an outlet on a circuit different from that to which the receiver is
connected.
• Consult the dealer or an experienced radio/TV technician for help.
Caution:
Any
changes
or
modifications
to
this
device
not
explicitly
approved
by
manufacturer
could void your authority to operate this equipment.
This
device
complies
with
part
15
of
the
FCC
Rules.
Operation
is
subject
to
the
following
two
conditions:
(1)This
device
may
not
cause
harmful
interference,
and
(2)
this
device
must
accept
any
interference received, including interference that may cause undesired operation.
This
equipment
complies
with
FCC
radiation
exposure
limits
set
forth
for
an
uncontrolled
environment.
This
equipment
should
be
installed
and
operated
with
minimum
distance
0cm
between the radiator and your body.