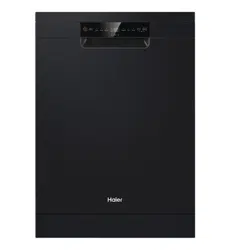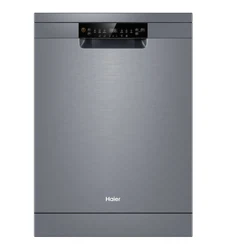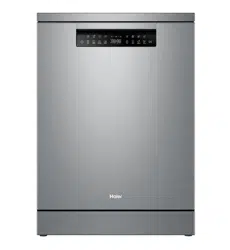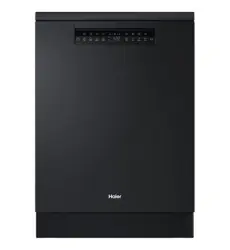

HDW15F4S1, HDW15F4B1
Freestanding Dishwasher
USER GUIDE NZ AU


3
CONTENTS
Safety and warnings ................................................................................6
First use .................................................................................................7
Loading suggestions ............................................................................. 10
Wash programs . . . . . . . . . . . . . . . . . . . . . . . . . . . . . . . . . . . . . . . . . . . . . . . . . . . . . . . . . . . . . . . . . . . . . . . . . . . . . . . . . . . . . 12
Wash modifiers ..................................................................................... 13
Setting a wash ...................................................................................... 14
Wi-Fi connection & Remote.................................................................... 16
Settings ............................................................................................... 17
Detergent ............................................................................................ 20
Rinse aid............................................................................................... 22
Racking features ................................................................................... 23
Care & Cleaning .................................................................................... 26
Troubleshooting.................................................................................... 30
Fault codes ........................................................................................... 32
Manufacturer's warranty........................................................................ 33
Customer service.................................................................................. 35
Standards test information .................................................................... 35

4

5
READ AND SAVE THIS GUIDE
Please read these instructions carefully before using this appliance. The instructions
contain important information which will help you get the best out of the appliance
and ensure safe and proper installation, use and maintenance. Keep this manual in
a convenient place so you can always refer to it for the safe and proper use of the
appliance. If you sell the appliance, give it away, or leave it behind when you move
house, make sure you also pass on this manual so that the new owner can become
familiar with the appliance and safety warnings.
Intended Use
z
The appliance is designed for domestic use inside the house or in similar applications such as staff
kitchen areas in working environments, farm houses, by clients in hotels, motels or other residential
environments, and bed and breakfast environments. It is not intended for commercial or industrial
use. Do not use it for purposes other than that for which it was designed.
z
Changes or modifications to the device are not allowed. Unintended use may cause hazards and loss
of warranty claims.
Standards and Directives
z
This product meets the requirements of all applicable EC directives with the corresponding
harmonised standards, which provide for CE marking.
Before Switching on the Appliance for the First Time
Do…
z
make sure all packaging is removed and is kept out of children’s reach.
z
make sure that the electrical information on the rating plate agrees with the power supply. If it does
not, contact an electrician.
z
use a separate earthed socket for the power supply. The appliance must be earthed.
z
make sure the plug is easy accessible.
z
make sure only the delivered electric cable and hose set are used.
z
hold the plug and not the electric cable when unplugging the power supply.
z
make sure not to damage the electric cable and the plug. If dam aged, have it replaced by an
electrician.
z
make sure the hose joints and connections are firm and there is no leakage.
Do not…
z
install or use the appliance where the temperature is below 5 °C.
z
use multi-plug adapters and extension cables.
z
let persons, children included, with reduced physical sensory,reduced mental functions or lack of
experience and knowledge use the appliance if not supervised by a person responsible for their safety.
z
put flammable products or items that are wet with flammable products in, near, or on the appliance.
During Daily Use
Do…
z
supervise children to prevent them playing with the appliance.
z
put sharp pointed objects (e.g. knives) in a way that there is no danger of injury
SAFETY AND WARNINGS

6
SAFETY AND WARNINGS
Do not…
z
open the door while a programme operates. The appliance can release hot steam.
z
keep the appliance door open without supervision to prevent tripping and falling.
z
let children or pets come close to the appliance when the door is open.
z
sit or place heavy items on the open door.
z
remove the dishes from the appliance until the programme is completed. There can still be detergent
on the dishes.
z
drink the water in the appliance. The water may be contaminated with detergent residues.
z
cover any ventilation openings in the base by a carpet or similar object.
z
use water spray or steam to clean the appliance.
z
let the children make the cleaning and user maintenance without supervision.
WARNING:
z
Some dishwasher detergents are strongly alkaline. They can be extremely dangerous if swallowed.
Avoid contact with the skin and eyes and keep children away from the dishwasher when the door is
open. Check that the detergent receptacle is empty after completion of the wash cycle.
z
Check that the door is not left in the open position since this could present a tripping hazard.
z
Warning: Knives and other utensils with sharp points must be loaded in the basket with their points
down or placed in a horizontal position.
z
Only use the hose-set provided by the manufacturer, old hose-set cannot be reused.
Disposal
z
Help protect the environment and human health. Put the packaging in applicable containers to recycle
it. Help to recycle waste of electrical and electronic appliances. Do not dispose of this appliance with
the household waste. Return the product to your local recycling facility or contact your municipal
office.
z
WARNING: Risk of injury or suffocation! Disconnect the appliance from the mains supply. Cut off the
mains cable and dispose of it. Remove the door catch to prevent children and pets to get closed in the
appliance.
7
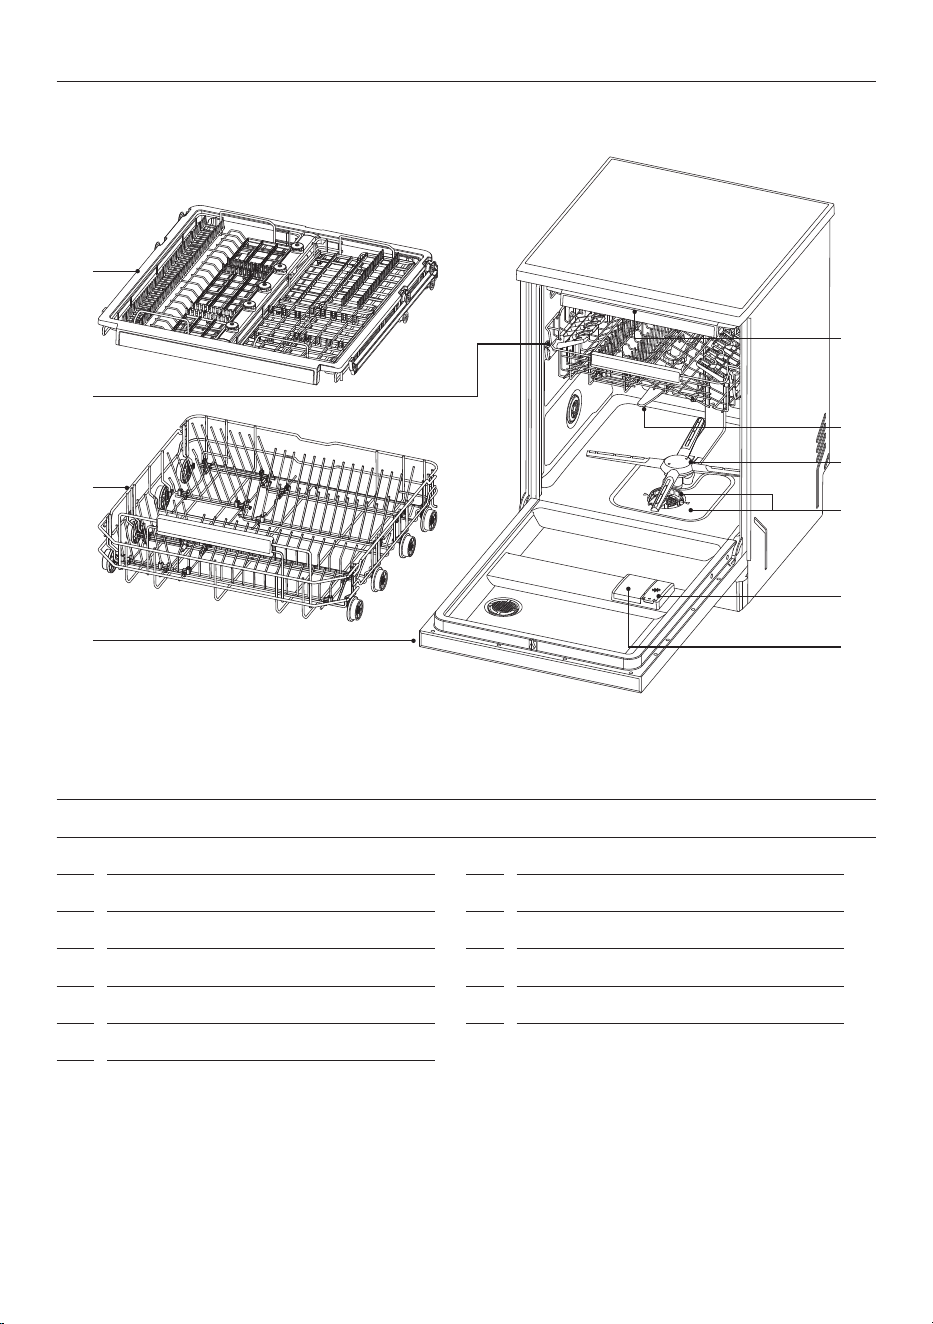
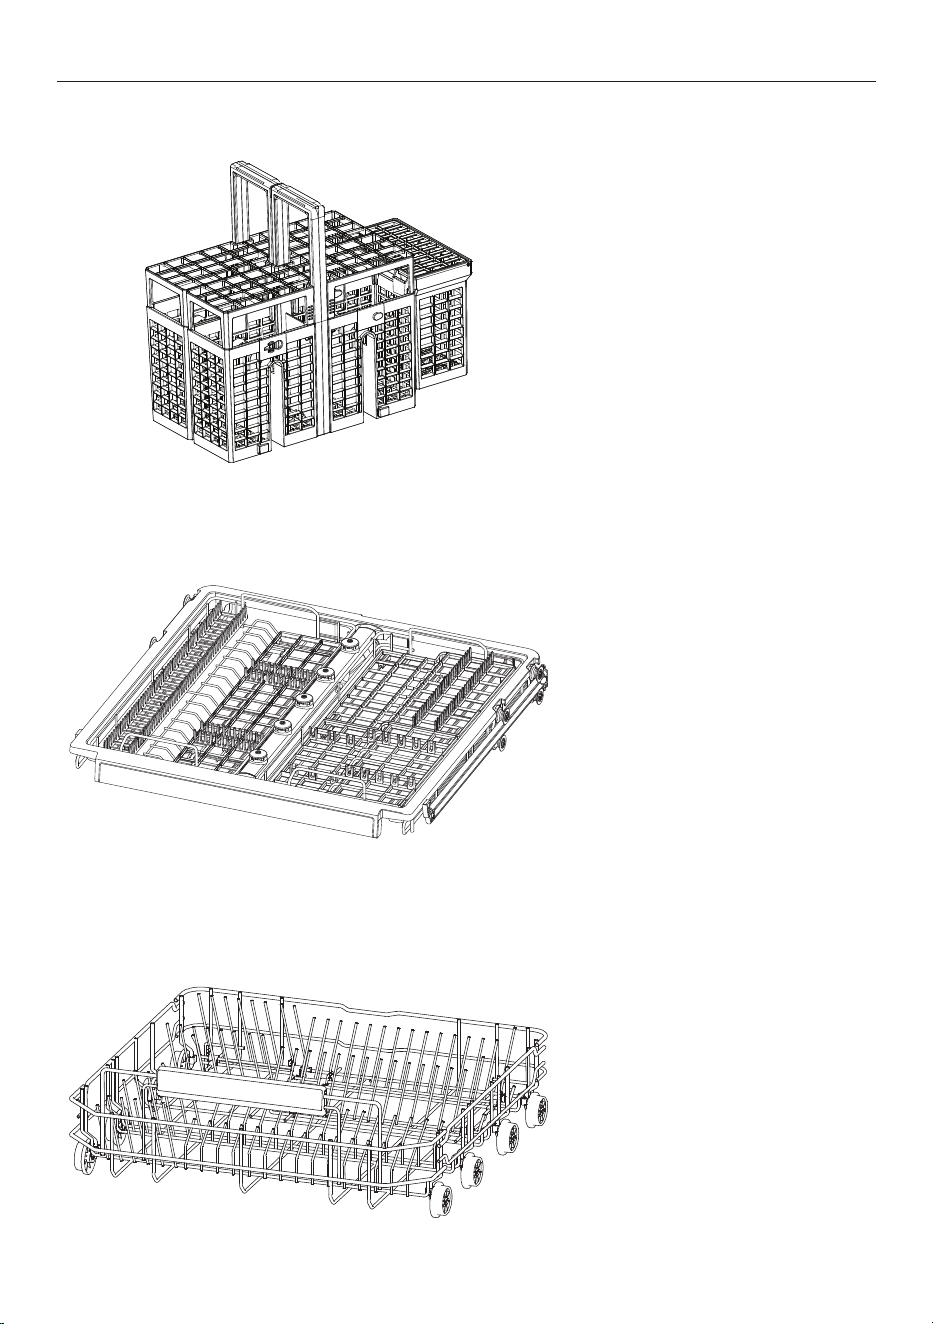
FEATURES AND ACCESSORIES
1
Upper spray arm
2
Lower spray arm
3
Top spray arm
4
Filter
5
Rinse aid dispenser
6
Detergent dispenser
7
Rating label
8
Lower basket
9
Upper basket (adjustable height)
10
Cutlery/Utensil Tray
Cutlery Basket
FIRST USE
1
3
2
4
5
6
7
8
!0
9
8
FIRST USE
4
4
1
23
9 5
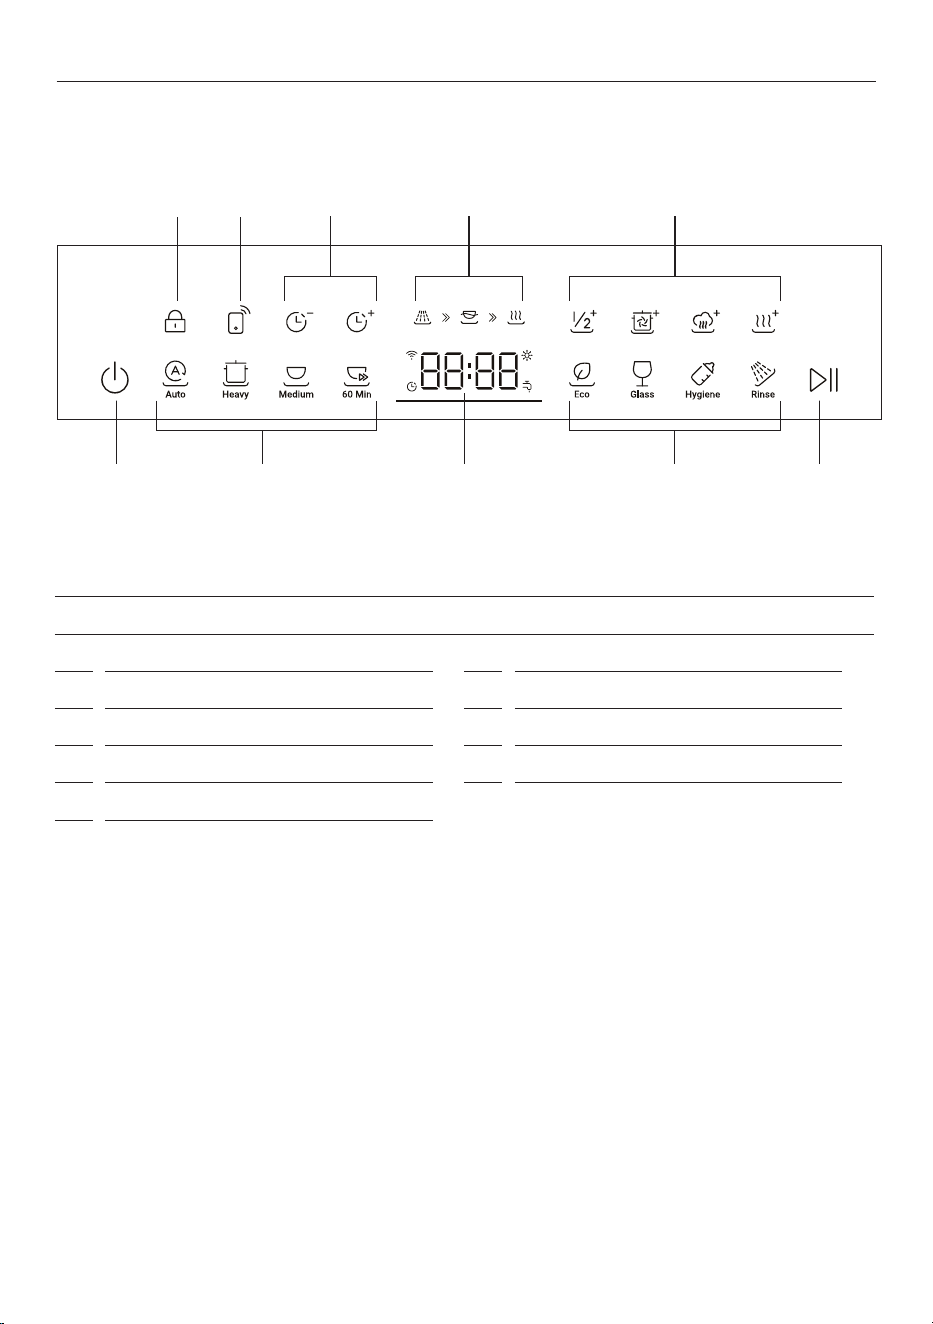
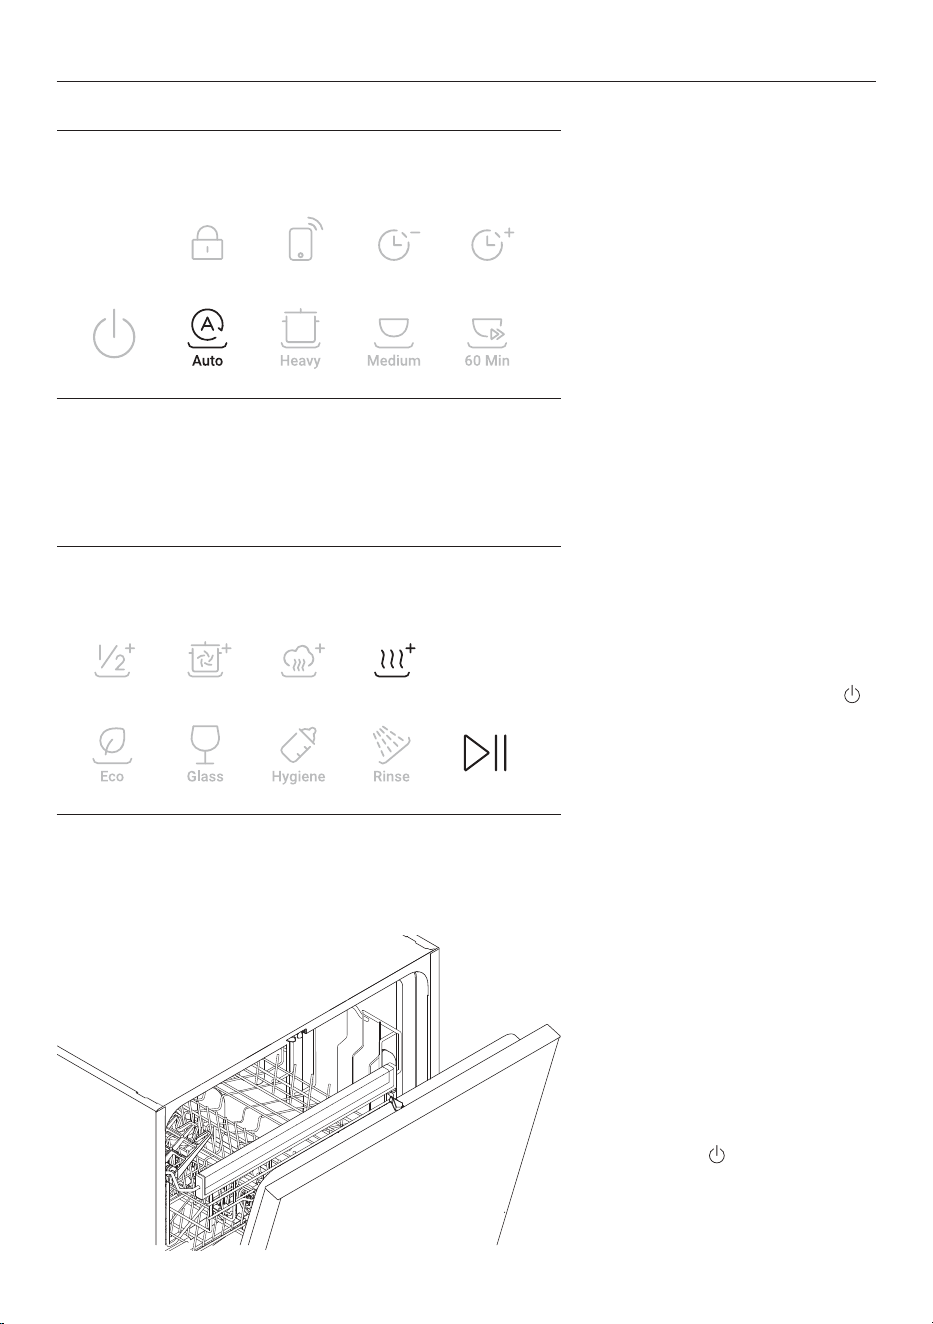
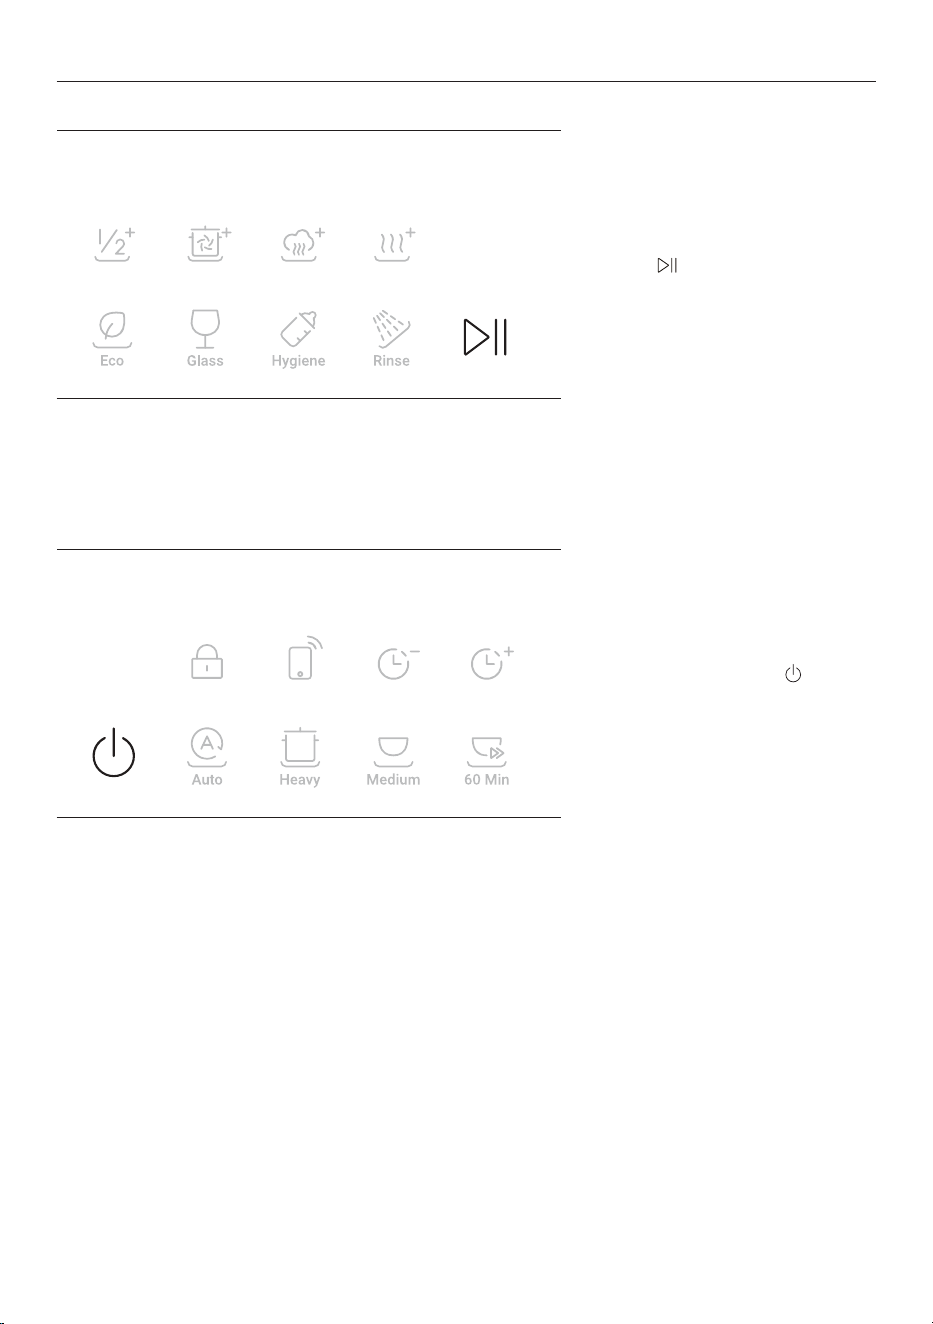
CONTROL PANEL
1
On/O
2
Start/Pause
3
Display screen
4
Wash programs
5
Wash modiers
6
Child Lock
7
Remote Mode
8
Delayed Start
9
Status indicators
86 7
9
FIRST USE
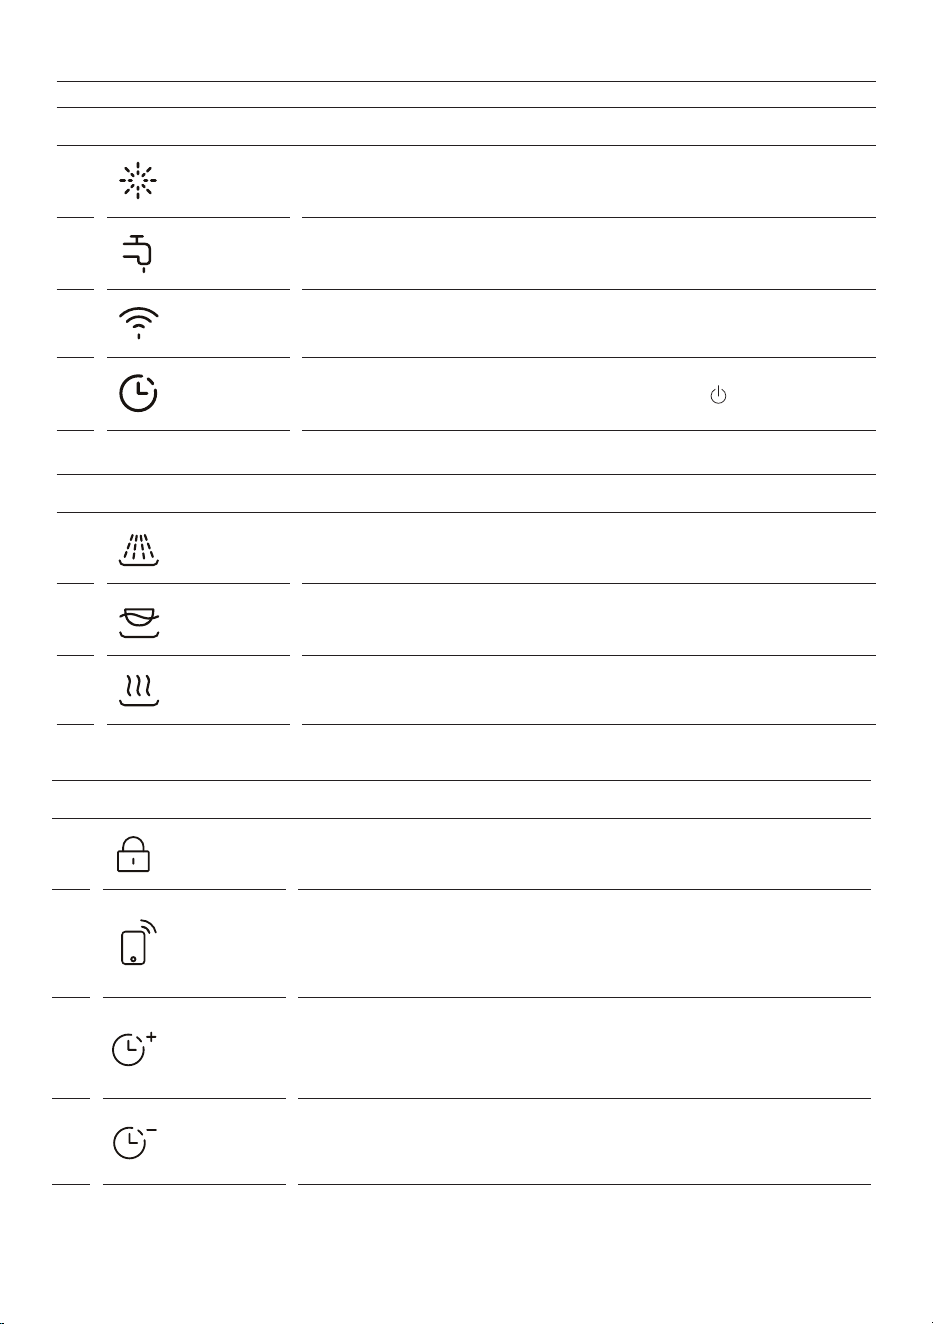
DISPLAY SCREEN INDICATORS
1
Rinse aid Rinse aid is empty. Rell the rinse aid dispenser. Refer to 'Rinse aid'
2
Water tap The dishwasher is not lling with water. Refer to 'Troubleshooting'.
3
Wi-Fi The dishwasher is connected to Wi-Fi.
4
Delay
Delayed start has been set. To cancel, press and hold
for 1 second.
STATUS INDICATORS
1
Wash The dishwasher is in the washing stage of the cycle.
2
Rinse The dishwasher is in the rinsing stage of the cycle.
3
Dry The dishwasher is in the drying stage of the cycle.
EXTRA FEATURES
1
Child Lock
Locks the dishwasher controls for cleaning or to prevent unintended use.
Press and hold to turn Child Lock on/o
2
Remote*
Your dishwasher may be connected to your home wireless network and
operated remotely using the app. Your dishwasher must be connected to
Wi-Fi to use Remote.
Press to turn Remote on/o.
3
Delayed start
(increase time)
Set your dishwasher to start later in the day and run a selected wash
program.
Press to set Delayed start. Each press will increase the set time by 1 hour,
up to 24 hours.
4
Delayed start
(decrease time)
Set your dishwasher to start later in the day and run a selected wash
program.
Press to set Delayed start. Each press will decrease the set time by 1 hour.

10
LOADING SUGGESTIONS
Cutlery & silverware
Rinse cutlery and silverware immediately after
use to prevent tarnishing. We recommend using
the Rinse cycle. Silver should not come into
contact with stainless steel, mixing these can
cause staining. Remove silver cutlery from the
dishwasher and hand dry immediately.
Aluminium
Aluminium can be dulled by detergent. The
degree of change depends on the quality of the
detergent or aluminium.
Other metals
Iron and cast iron can rust and stain other items.
Copper, pewter and brass tend to stain.
Woodware
Woodware is generally sensitive to heat and
water. Regular use in the dishwasher may cause
deterioration over time.
Glassware
Most glassware is dishwasher safe. Crystal, very
fine and antique glassware may etch and develop
a cloudy appearance.
Plastics
Some plastics may change shape or colour with
hot water. Refer to the manufacturer’s guide.
Dishwasher safe plastic should be weighed
down so it does not flip and fill with water or fall
through the base rack during the wash.
Decorated items
Most modern china patterns are dishwasher safe.
Antique items, those with a pattern painted over
the glaze, gold rims or hand painted china may be
more sensitive to machine washing.
Glued items
Certain adhesives are softened or dissolved in
machine washing.
Dishware
The combination of high temperatures and dishwasher detergent may cause damage to some items. Refer
to the manufacturer's guidance or wash by hand if in doubt.
Water hardness
Hard water is water with a high concentration of minerals such as calcium and magnesium. It can be
detrimental to the performance of your dishwasher and parts can fail over time. Glassware washed in
hard water will become cloudy over time and dishes will become spotted or covered in a white film. Water
hardness varies by geographical location.
If you live in a hard water area, we recommend fitting a water softener to the household water supply.
If your home has hard water
z
Refer to 'Powdered detergent quantity recommendations'.
z
Use rinse aid. We recommend you raise the rinse aid setting to 6 to help improve wash performance.
Refer to 'Settings' for details.
Use a dishwasher cleaner/descaler regularly, or whenever you notice a build-up of limescale deposits in
your dishwasher.
If your home has soft or softened water
Avoid using too much detergent.
11
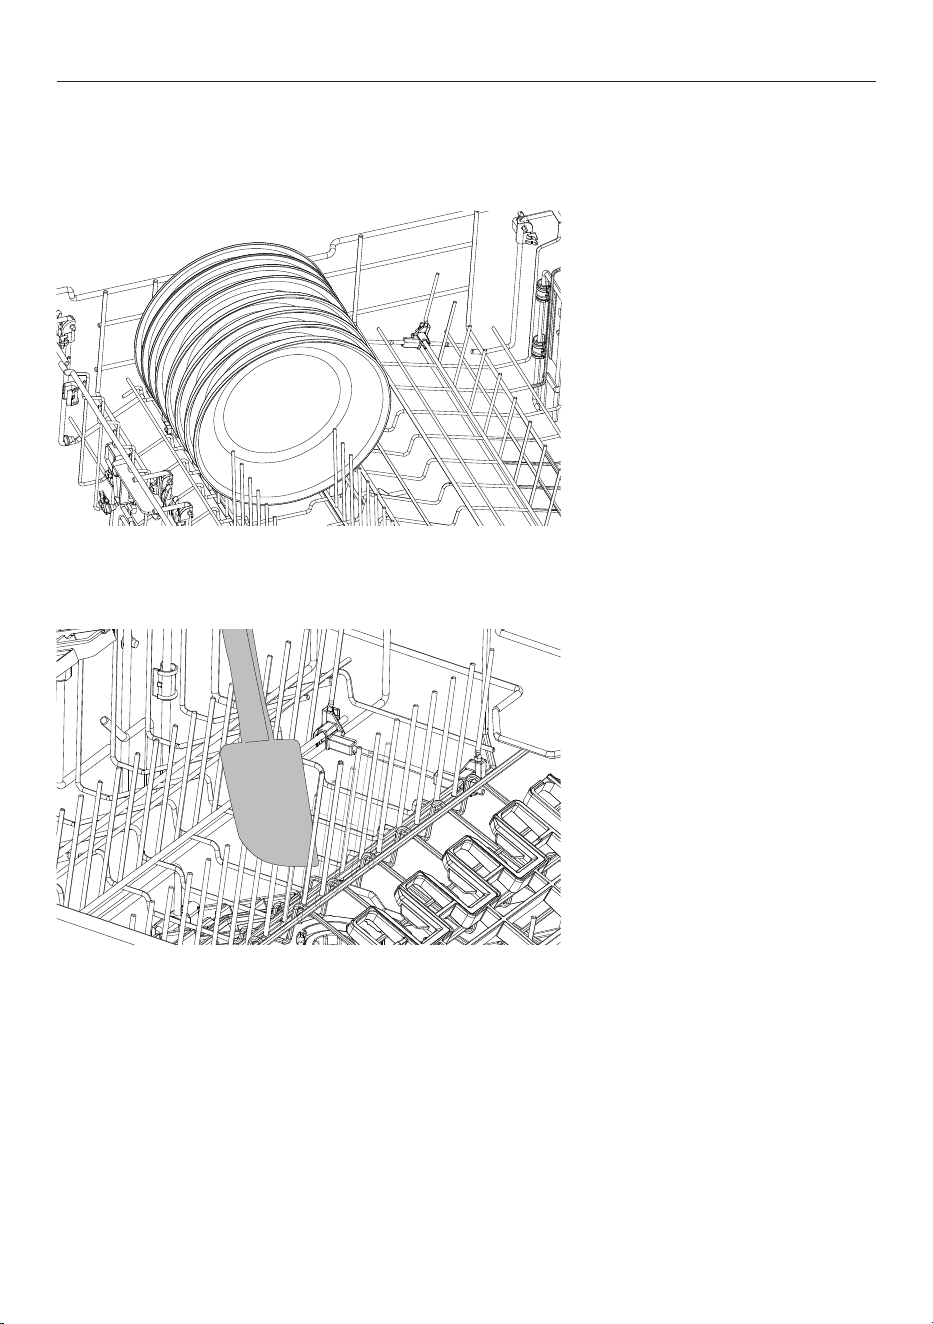
LOADING SUGGESTIONS
When loading your Dishwasher ensure items are placed so water coming from the rotating spray arm below
can reach all areas. Wash performance will be reduced if it can't.
Ensure
z
All spray arms can rotate freely.
z
Tall items do no obstruct the
upper spray arm.
z
Glass and other fragile
items are stable.
z
All dish openings are
facing downwards.
z
Plates are evenly spaced.
z
All sharp objects are located
securely to avoid injury or
damage to the product.
Avoid
z
Overcrowding.
z
Any protrusions below the racks
and basket that may prevent
spray arm rotation.
z
Any protrusions at the front of
the dishwasher.
z
Blocking water from any items on
the foldaway cup racks.
12
WASH PROGRAMS
WASH PROGRAMS
1
Auto
Suitable for any type of load. The dishwasher automatically selects the
optimum wash program
2
Heavy Designed for heavily soiled pots, pans and dishes.
3
Medium
Best for dishes that are quite heavily soiled or to remove food soils that
have been left to dry overnight
4
60 min
Use for dishes that are quite heavily soiled or food soils that have been left
to dry overnight.
5
Eco For normally soiled dishes for optimum water and energy usage.
6
Glass
For lightly soiled and heat sensitive crockery and glassware such as wine
glasses.
7
Hygiene Designed to sanitise your dishes.
8
Rinse
Prevents odours and soils from drying on dishes. Detergent is not required
for this program.
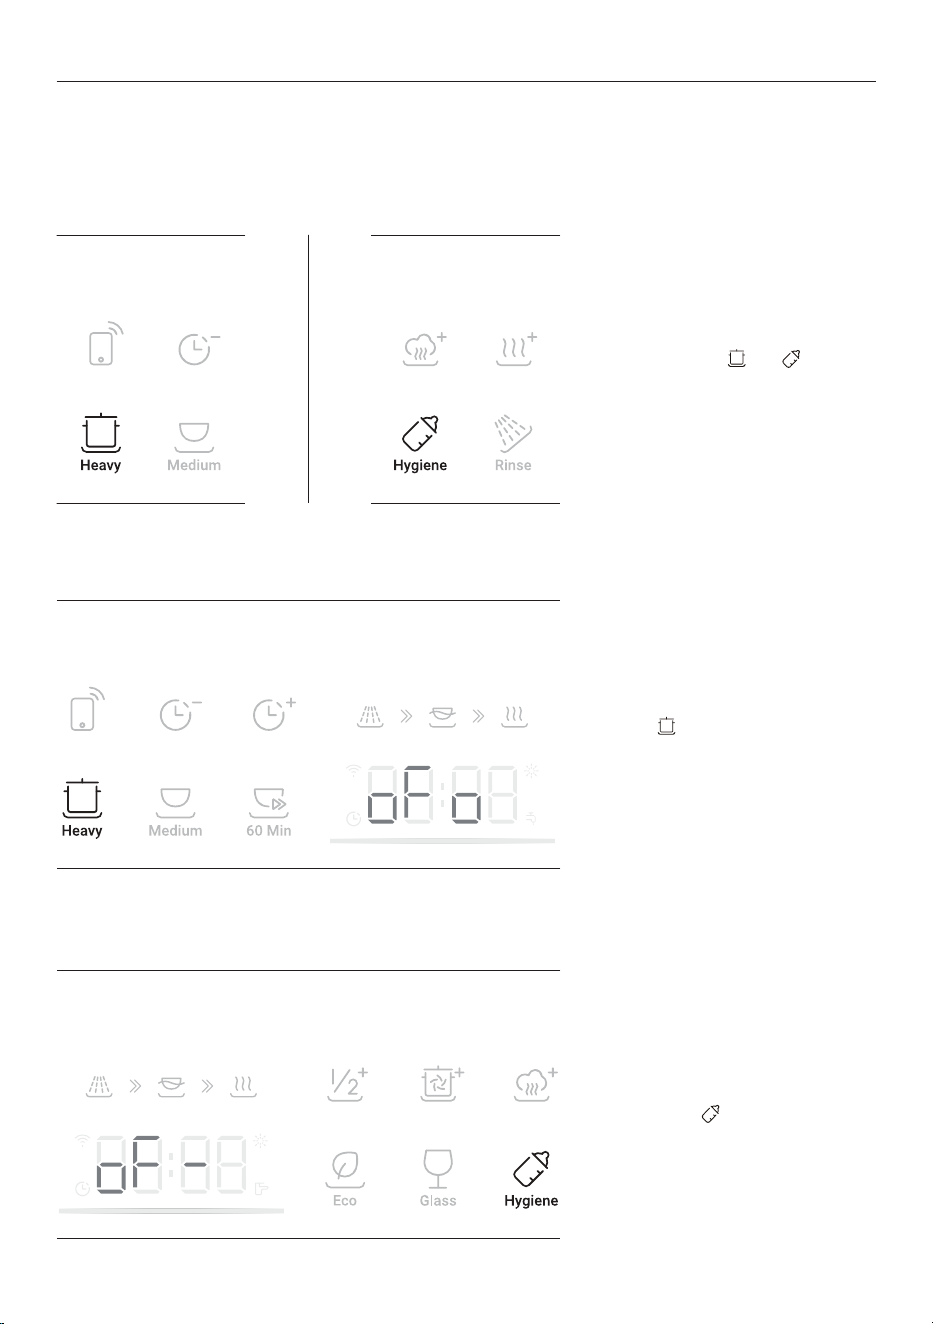
Your dishwasher has a number of wash programs designed to suit your needs. Selecting the most
appropriate cycle for each load will help ensure the best wash results.
13
WASH MODIFIERS
WASH MODIFIERS
1
Half Load Adjusts the wash program to more eciently wash smaller loads.
2
Intensive +
Increases the water pressure in the lower rack for heavily soiled pots and
pans.
3
Steam + Raises the water temperature during the rinse phase to sanitize.
4
Dry + Increases the nal rinse temperature and the length of the drying phase.
After setting a wash program, you can also select a wash modifier. Not all modifiers can be combined with
all wash programs. 1/2 LOAD can be used in combination with the other modifiers.
WASH PROGRAM MODIFIER AVAILABLE
Auto Dry +
Heavy Steam +, Dry +, Intensive +, Half load
Medium Steam +, Dry +, Intensive +, Half load
60 min Dry +, Intensive +, Half load
Eco -
Glass Dry +, Half load
Hygiene Dry +, Intensive +, Half load
Rinse -
14
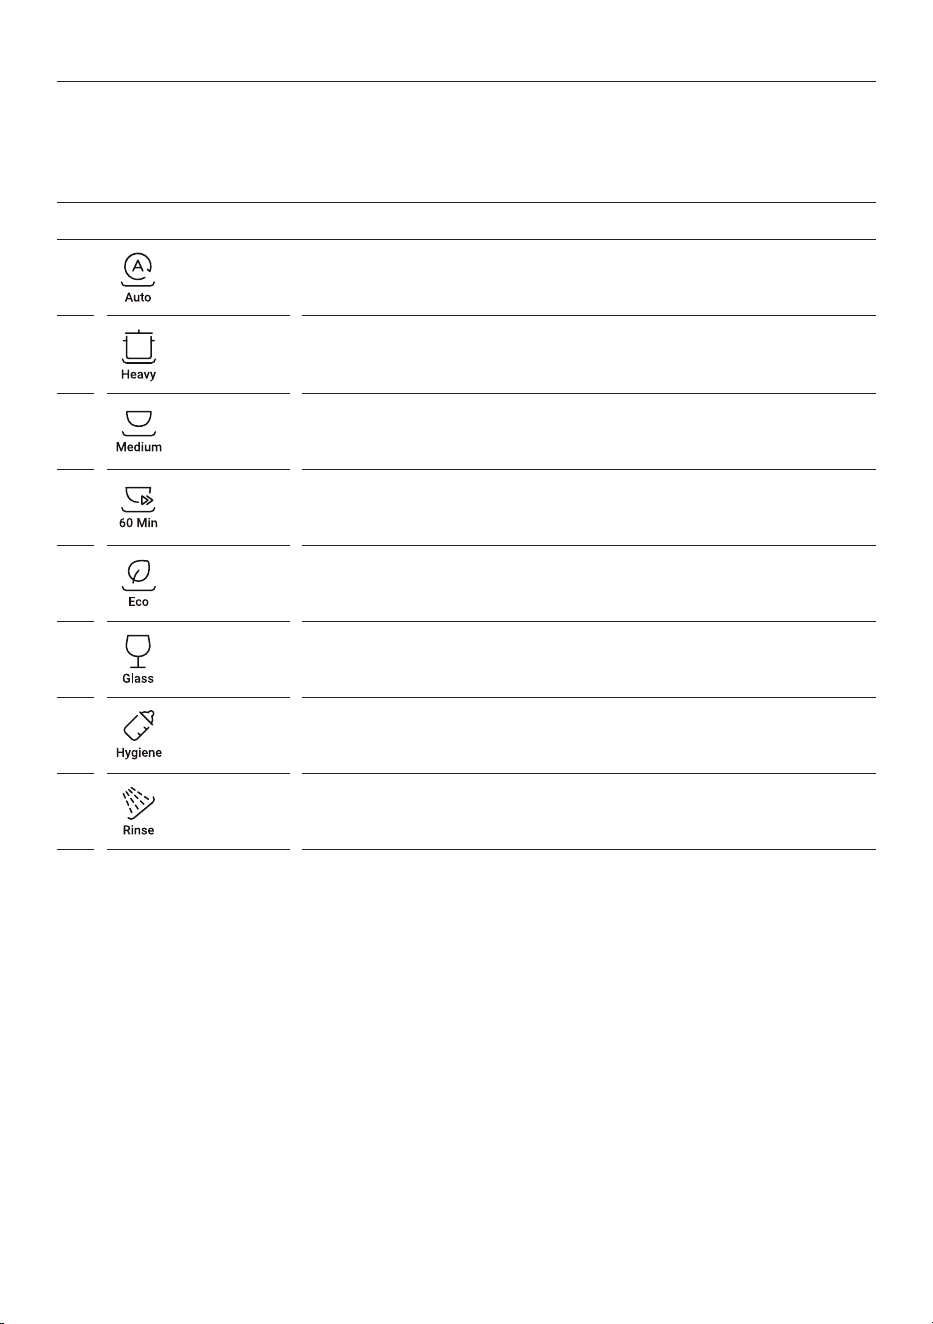
1. Remove all food scraps from
dishware before carefully loading
into the dishwasher. Ensure the
spray arms are free from any
obstructions and rotate freely
2. If the rinse aid indicator is
illuminated, fill the rinse aid
dispenser. Refer to 'Rinse aid' for
additional guidance.
3. Add detergent to the dispenser
and close the cover. Tablets can be
placed in the detergent dispenser or
in the cutlery basket.
SETTING A WASH
15
4. Select a wash program.
5. Select a wash modifier if desired.
Press >|| to start the wash.
To cancel a cycle, press and hold
for 1 second.
6. After the wash the door will
automatically open slightly to assist
with drying.* For best results, unload
dishes once cooled.
To cancel a cycle
Press and hold
for 1 second.
SETTING A WASH
*To disable, refer to settings.
16
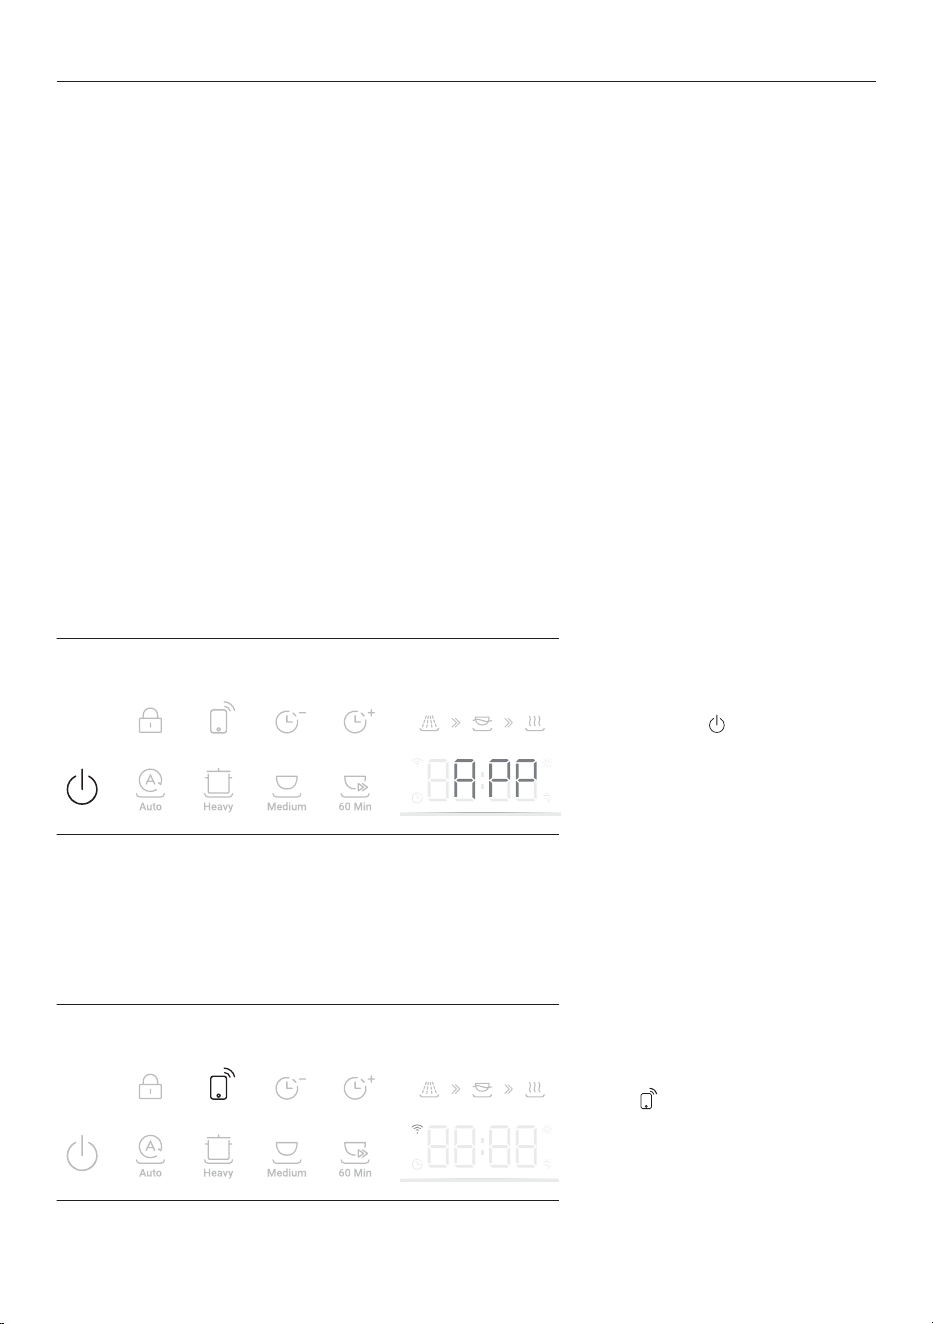
Your appliance may be connected to your home wireless network and operated remotely using the app.
Getting started
z
Ensure your home Wi-Fi network is turned on.
z
You will be given step by step guidance on both your appliance and mobile device.
z
It may take up to 10 minutes to connect your appliance.
z
For further guidance and troubleshooting, please refer to the app.
On your mobile device:
1. Download the app from:
z
Australia https://www.haier.com.au/smart
z
New Zealand https://www.haier.co.nz/smart
2. Register and create an account.
3. Add your appliance and set up the Wi-Fi connection.
Ensure the dishwasher is in standby
with the display off.
Press and hold
for 5 seconds until
APP appears on the display.
Follow the prompts in the app to
complete set-up.
Ensure your dishwasher is
connected to your Wi-Fi network.
Press to enable.
Remote can only be enabled before
starting a wash.
WI-FI CONNECTION & REMOTE
Connecting to your home Wi-Fi
Enabling Remote Mode
17
SETTINGS
You can adjust any of the below settings prior to starting a wash cycle.
OPTION DESCRIPTION DEFAULT SETTINGS DISPLAY
Rinse aid
Controls the amount of
rinse aid dispensed. Refer
to 'Rinse aid' for further
details.
d-
Off
d-
Max: 6
d6
Sound
Adjusts tone settings.
When set to OFF all tones
will be silenced except
fault alerts.
b1
On
b1
Off
bo
Auto door open
Enables or disables
automatic door opening
at the end of the wash.
oFo
On
oFo
Off
oF-
Lighting
Enables or disables the
interior light.
CLo
On
CLo
Off
CL-
18
Changing the settings
Ensure there is no wash in progress.
1. Press and hold
and together
for 3 seconds to enter the menu.
2. Press to scroll through the
settings.
3. When you get to the setting you
require, press
to adjust.
SETTINGS
19
4. Press to save the new setting.
5. To exit, press and hold
for 1
second.
SETTINGS
20
WARNING: Dishwasher detergents are strongly alkaline. They can be extremely dangerous if
swallowed. Avoid contact with the skin and eyes and keep children and infirm persons away from the
dishwasher when it is open. Check the powdered detergent dispenser is empty after each wash.
Unsuitable detergents
These types of detergent are not suitable and may damage your dishwasher or lead to a service call that is
not covered by warranty:
z
Liquid detergents
z
Laundry detergents
z
Hand washing liquids
z
Soaps
z
Disinfectants
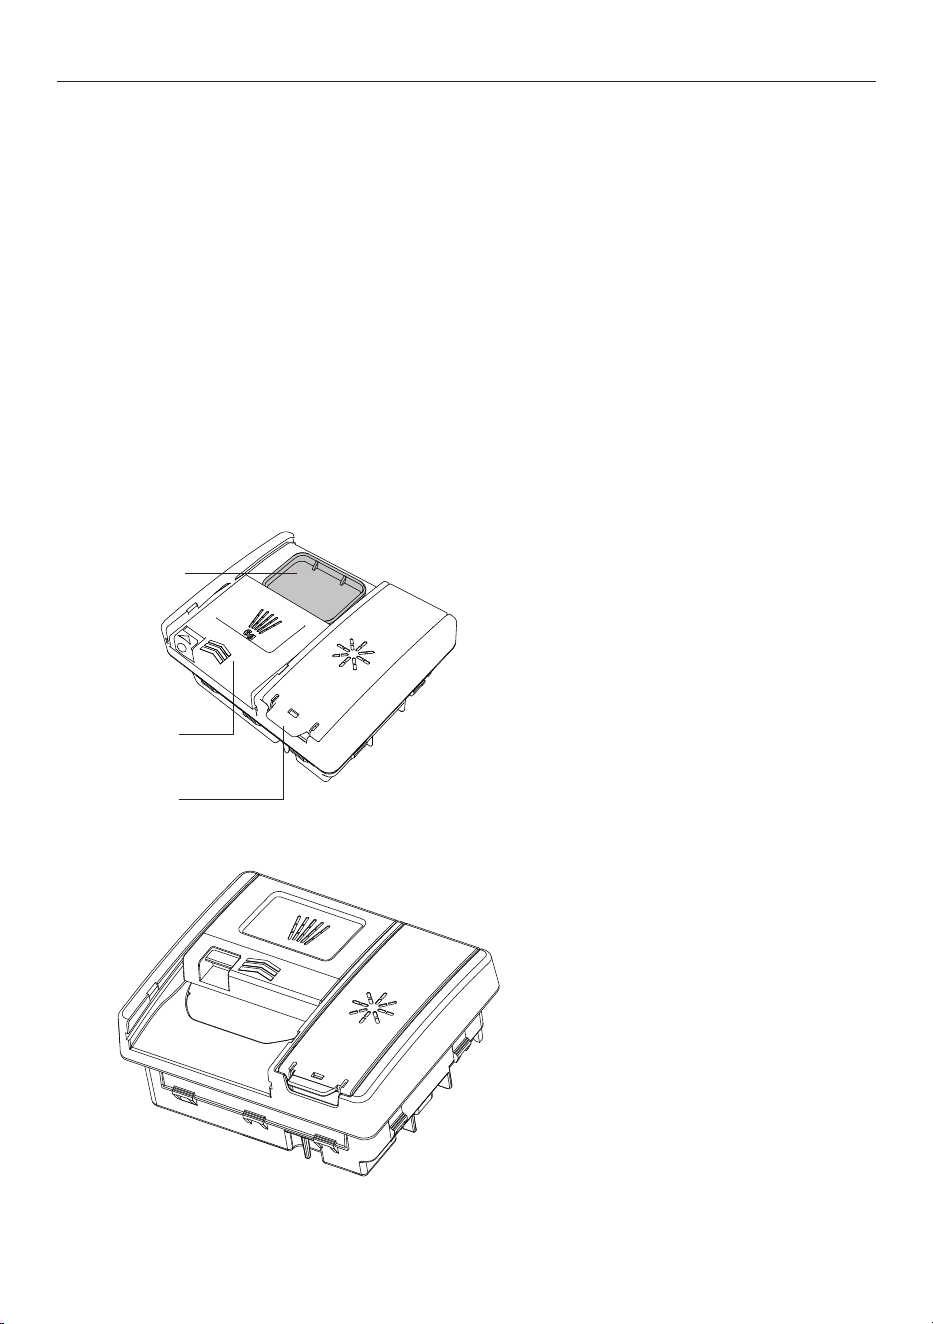
Adding detergent
1. Check that the dispenser is empty
and dry. Add powdered detergent or
tablets to the detergent dispenser
2. Remove any excess detergent
then slide the cover closed. It will
click into place. If required, add
additional detergent to the pre-
wash compartment on top of the
dispenser.
DETERGENT
Main wash compartment
Rinse aid compartment
Pre-wash compartment
21
DETERGENT
Powdered detergent quantity recommendations
z
Use the table below to determine the optimal powdered detergent quantity for each wash program.
z
If you have hard water in your area, more detergent may be required. Refer to 'Water hardness'
for more details.
z
When washing heavily soiled dishware in hard water, more detergent may be required.
z
No detergent is needed for Rinse.
WASH PROGRAM PRE WASH COMPARTMENT MAIN WASH COMPARTMENT
Auto None 1/2 – 2/3
Heavy Full 2/3
Medium Full 2/3
60 min None 1/2
Eco Full 2/3
Glass Full 2/3
Hygiene* None 1/2
Rinse n/a n/a
*tablets are not recommended for the Hygiene cycle.
22
Using rinse aid
Rinse aid provides a streak-free finish to glass and dishware as well as preventing metal from tarnishing. We
recommend using a liquid rinse aid regularly for optimal drying results.
The amount of rinse aid dispensed in each wash may need to be adjusted to suit your water conditions.
Refer to 'Settings' and 'Water hardness' for guidance. If using detergent tablets that contain rinse aid,
adjust the rinse aid setting lower or turn off.
The rinse aid dispenser is located on the inside of the door next to the detergent dispenser. When the rinse
aid level is low, the rinse aid indicator on the control panel will light up to remind you to refill the dispenser.
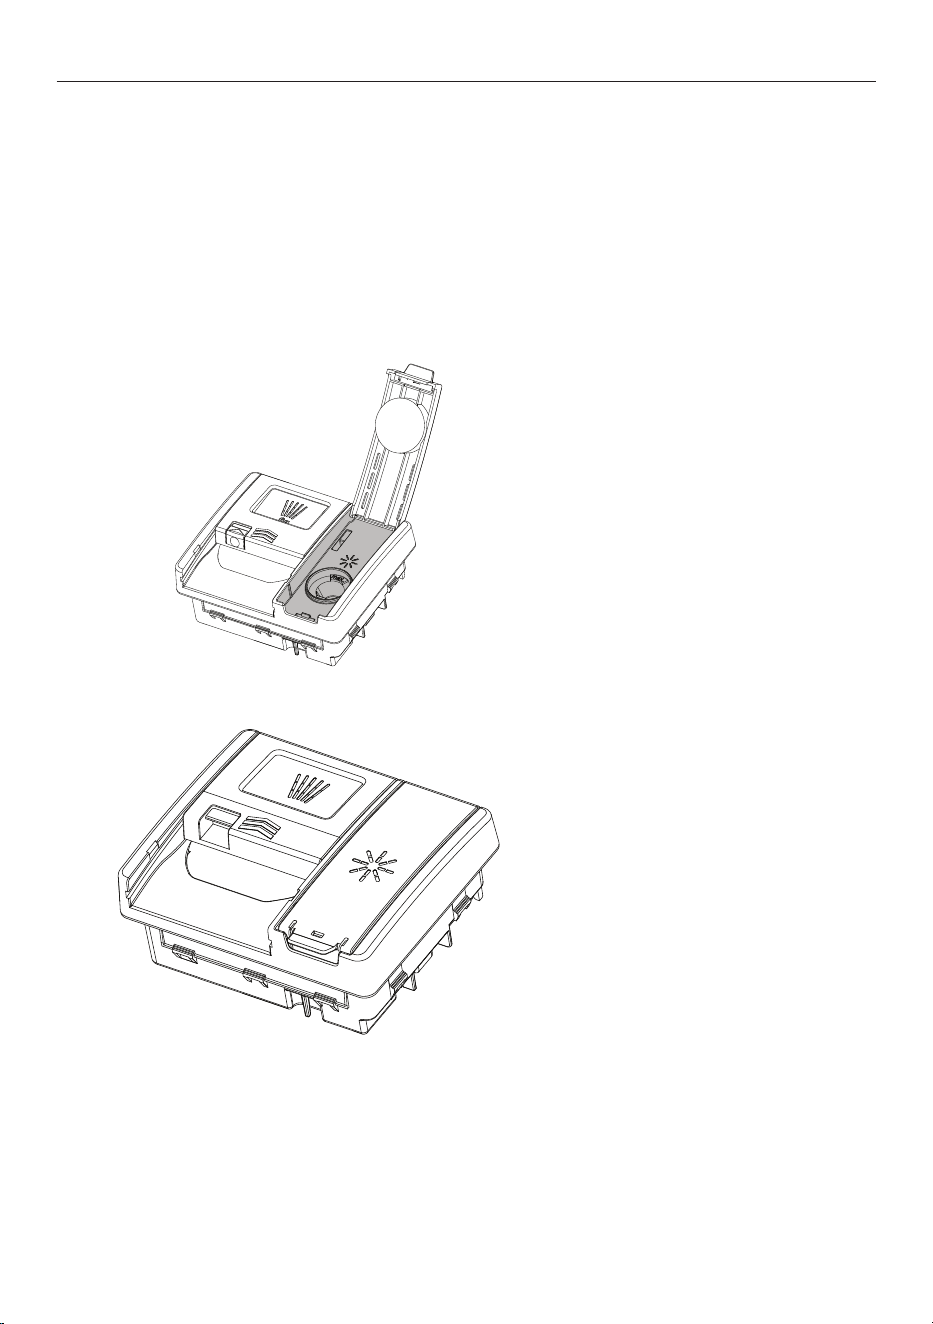
1. Lift the cover open and pour rinse
aid into the opening. Do not fill past
the MAX line. Take care not to spill
any onto the door or detergent
bucket.
2. Close the cover, ensuring it clicks
shut.
RINSE AID
23
Cutlery basket
To reduce the risk of injury, load
knives and sharp utensils with
handles facing up.
Mix spoons, knives and forks within
each section to stop cutlery nesting
together and to ensure the water
circulates freely.
Use the tray to secure cutlery and
utensils.
Place cutlery into the notches to
secure. Place larger items in the
deeper portion of the rack on the
righthand side of the tray.
Trays can be removed but must be
returned to the same position and
orientation.
For best results, place heavily soiled
items (like pots and pans or dinner
plates) in the bottom basket.
RACKING FEATURES
Cutlery/Utensil tray
Lower basket
24
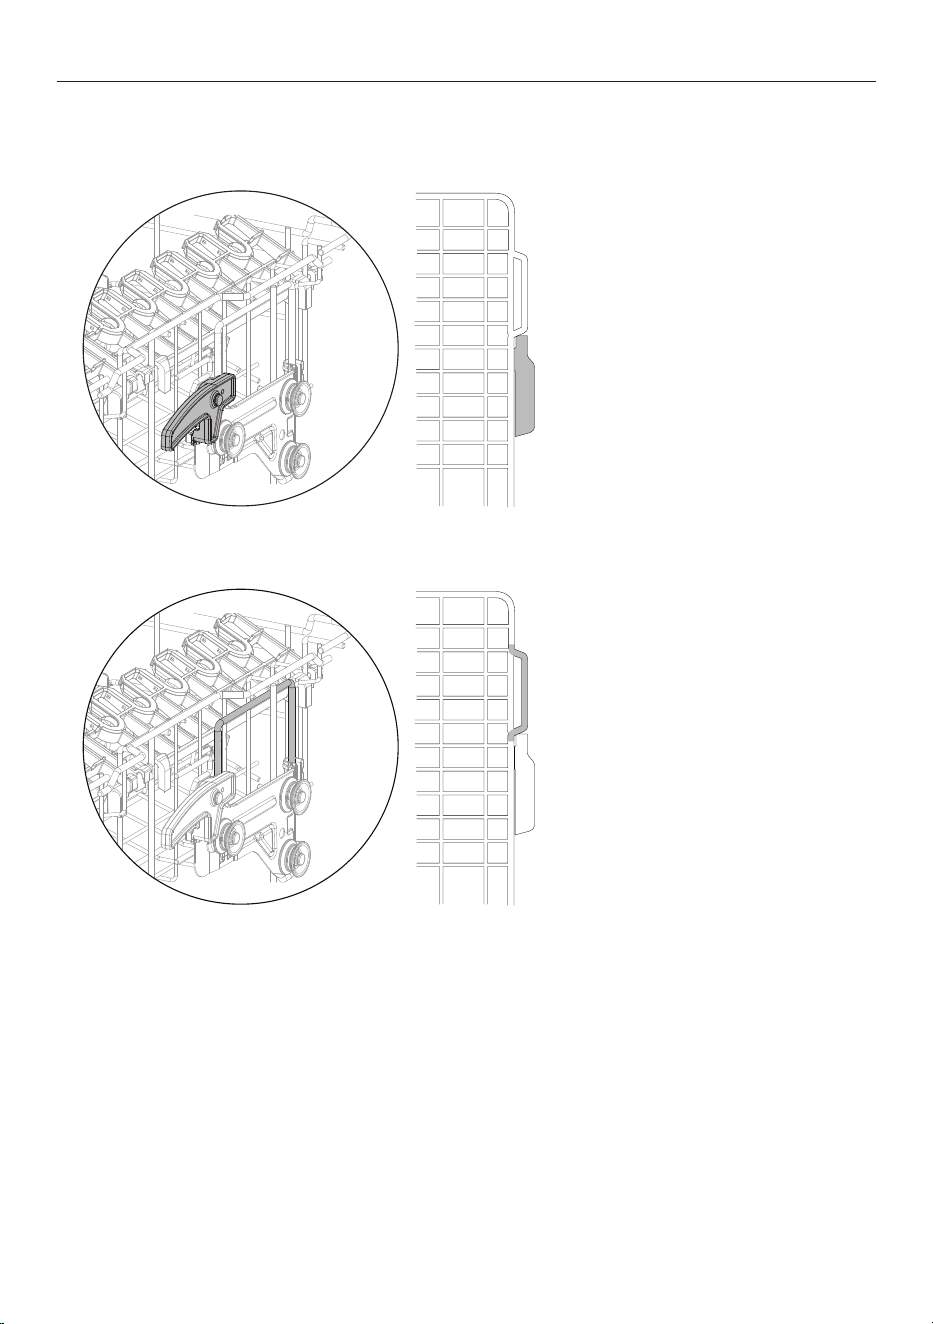
Upper basket
The upper basket is designed to hold items like glasses, cups, saucers, plates, small bowls and shallow pans.
To raise:
Grip these handles both sides and
lift basket upwards until it clicks in
place.
To lower:
Pull the levers up on both sides and
carefully lower the basket.
RACKING FEATURES
25
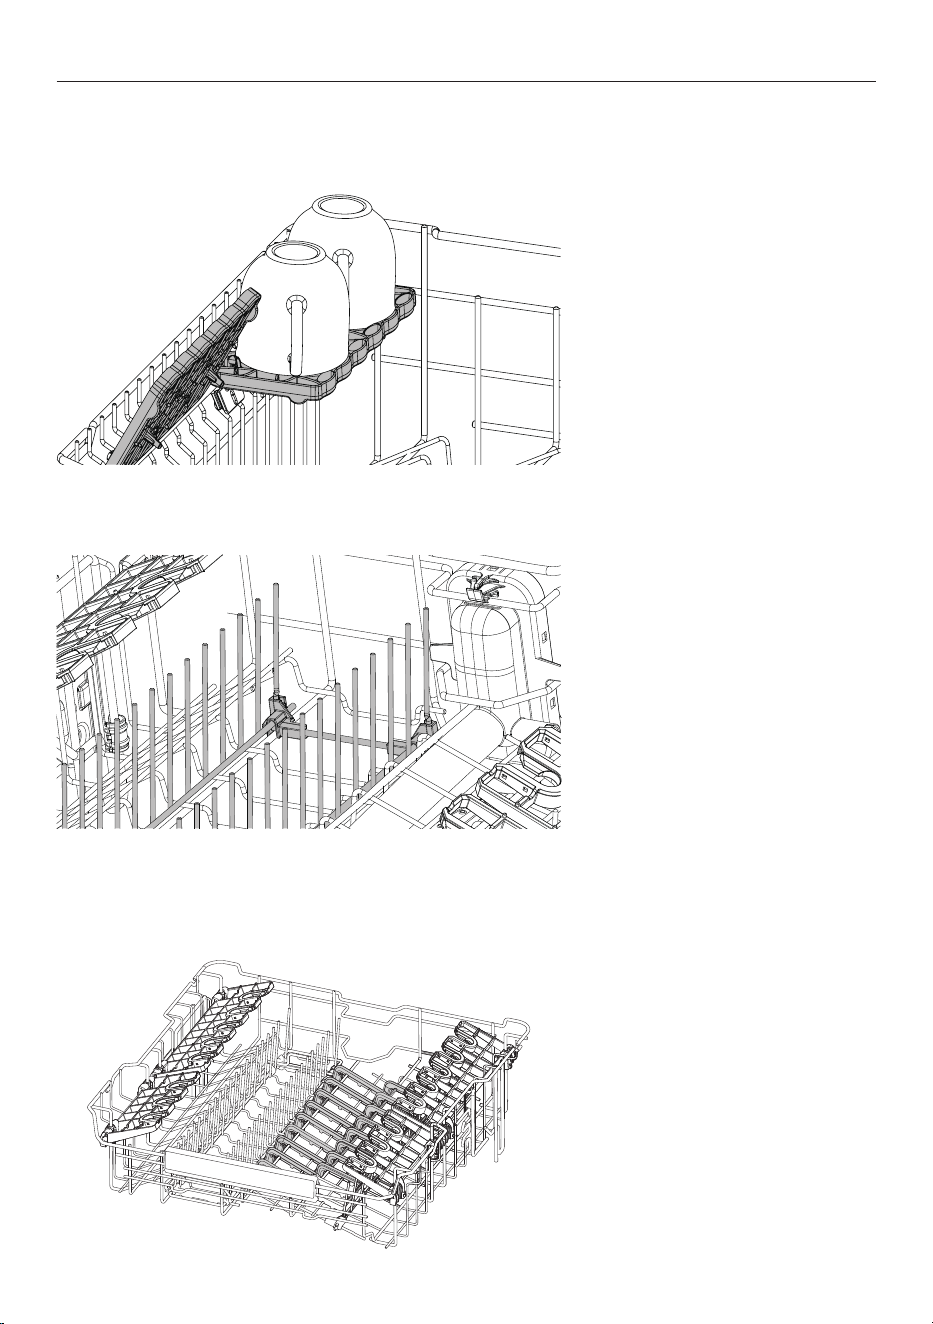
Foldable cup racks
Adjust the height to suit or fold out of the way to make space for other items. Use the notches to support
To adjust height:
1. Fold up to unlock.
2. Adjust the height to suit by sliding
up or down.
3. Fold back down to lock in position.
Some tines can be folded down as
needed to make space for other
items.
Both GlassGrip inserts can be lifted
out and removed to be cleaned or
to create space for larger items if
required.
RACKING FEATURES
Foldable tines
GlassGrip
Keeps glassware and cups secure during the wash cycle.

26
CARE & CLEANING
Disconnect the dishwasher from the power supply and allow it to cool before undertaking any cleaning or
maintenance.
Cleaning surfaces
Wipe with a damp cloth and dry using a lint-free cloth. We do not recommend using the following cleaning
aids as they may damage the surfaces:
z
Plastic or stainless steel scouring pads
z
Abrasive, solvent, household cleaners
z
Acid or alkaline cleaners
z
Hand washing liquids or soap
z
Stainless steel cleaners or polishes
z
Laundry detergents or disinfectants
Cleaning the filter, spray arms and filter plate
We recommend that the drain filter and filter plate are removed and cleaned once a month
or whenever there is evidence of food particles. The spray arms in normal use should
require cleaning less frequently. Lower and middle spray arms can be shaken to remove any
foreign material, cleaned in hot water, then rinsed in clean water.
The dishwasher must be used with the filter plate, drain filter and spray arms correctly in
place. If using a dishwasher cleaner or descaler, refer to manufacturer instructions.
Extended periods of disuse
If your dishwasher is not going to be used for some time we recommend turning off the
power and water supply, leaving it clean and empty with the door ajar. When using your
dishwasher for the first time after a long period away, we recommend pouring 3 cups of
water into the dishwasher before use. This helps lubricate components that may have dried
out during disuse.
27
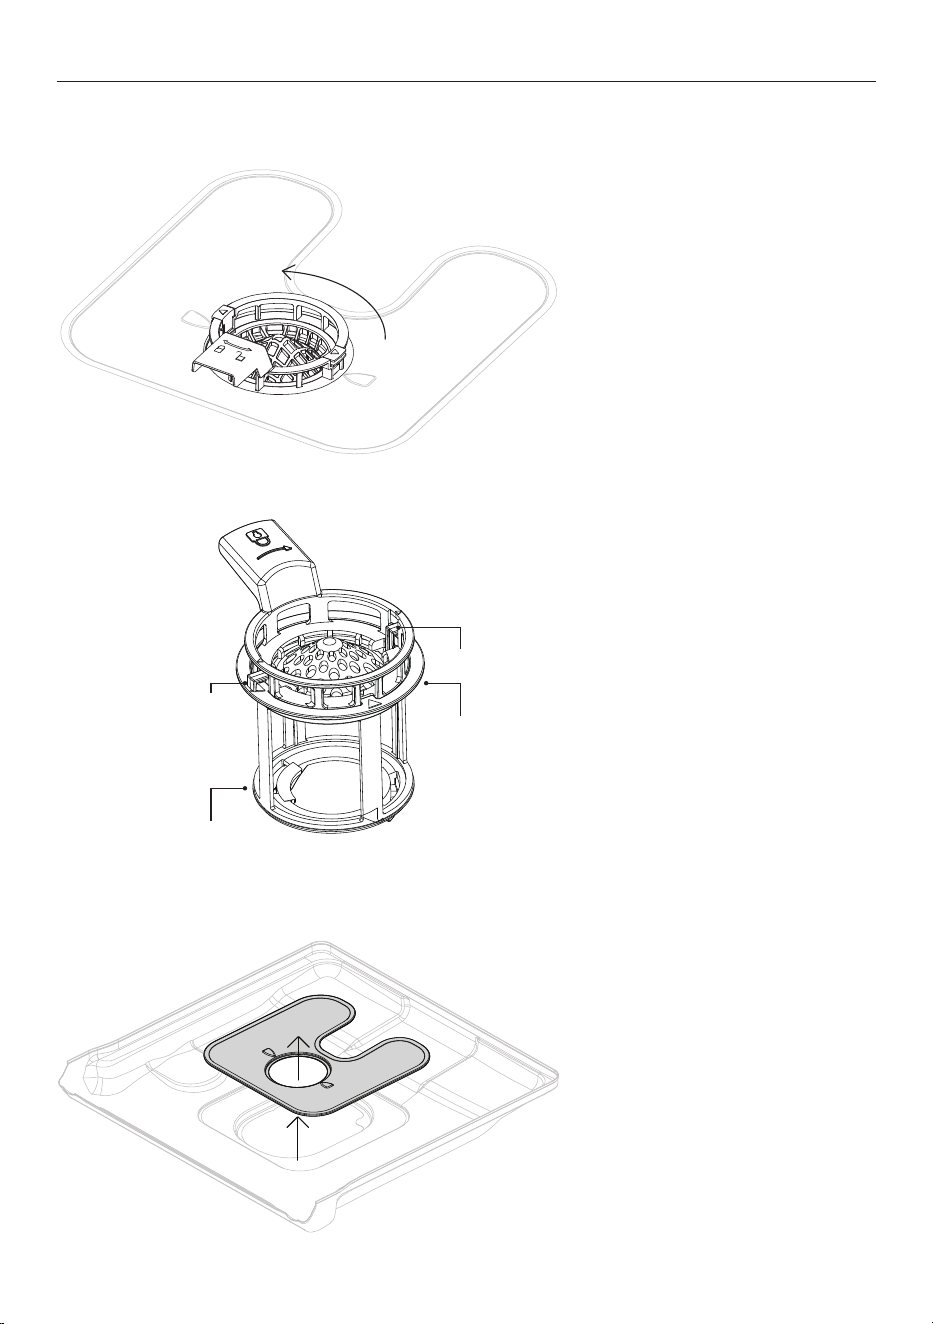
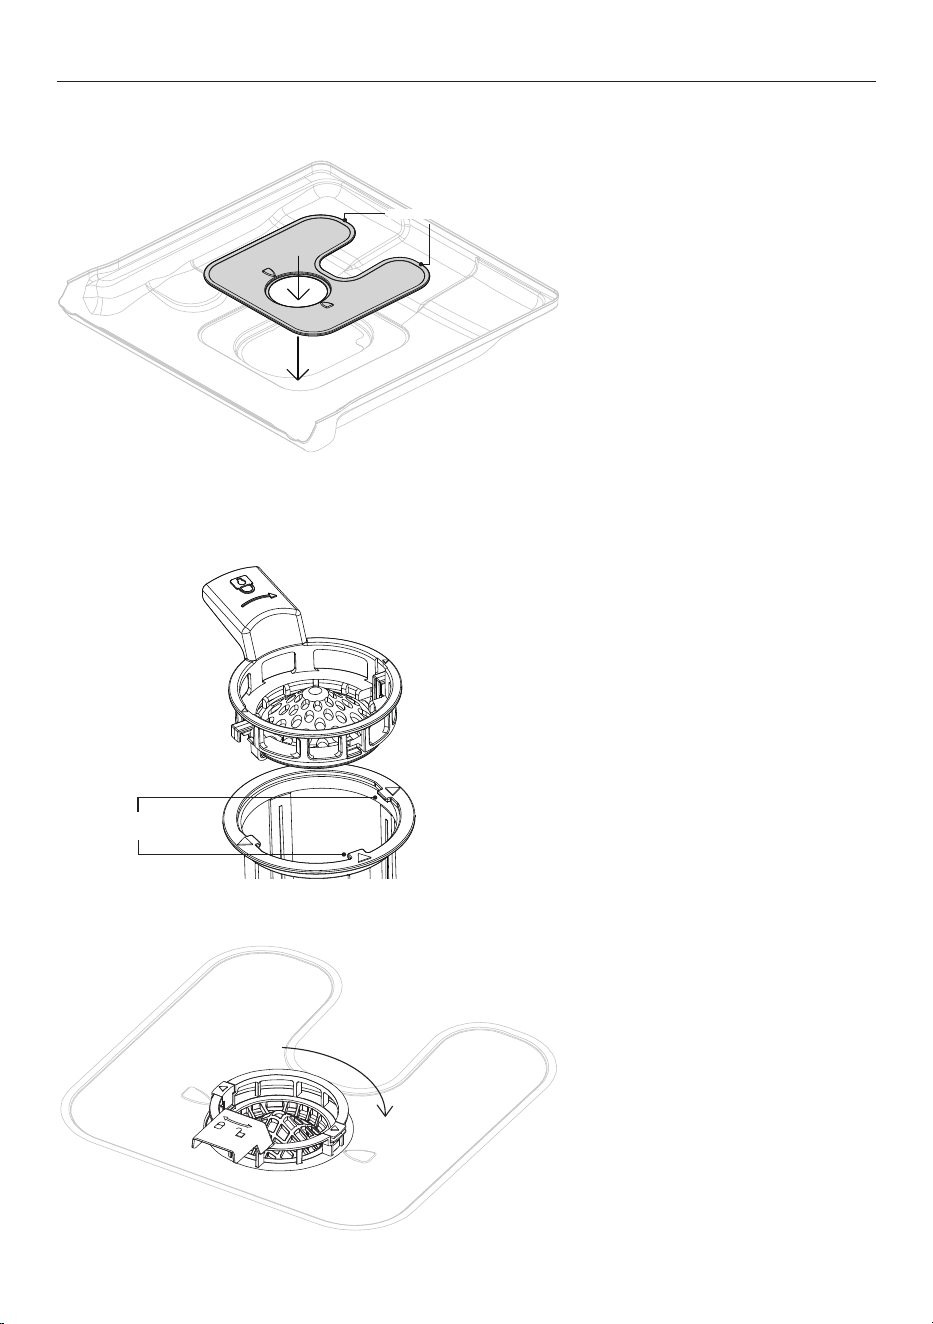
Removing and cleaning the filter
1. Twist the filter anti-clockwise to
release. Lift to remove.
2. Separate the filter cap from the
base by pressing the release tabs
and lifting.
Do not attempt to remove the filter
by force as this may cause damage.
Clean under hot water and a soft
bristled brush before rinsing
thoroughly.
CARE & CLEANING
Removing and cleaning the filter plate
With the filter removed, carefully lift
the filter plate up and out.
Clean under hot water and rinse
thoroughly.
base
tab
tab
cap
cap
28
Replacing the filter
1. Align the filter cap with the notch
on the filter base for one side. Press
the button to settle the filter cap on
the filter base for the other side.
2. Place the drain filter back into the
dishwasher base. Rotate clockwise
to click into place.
CARE & CLEANING
Slot the filter plate under the
locating clips at the rear of the drain
and push firmly back into place.
Ensure the filter plate is flush with
the dishwasher base.
Replacing the filter plate
notches
locating clips
29
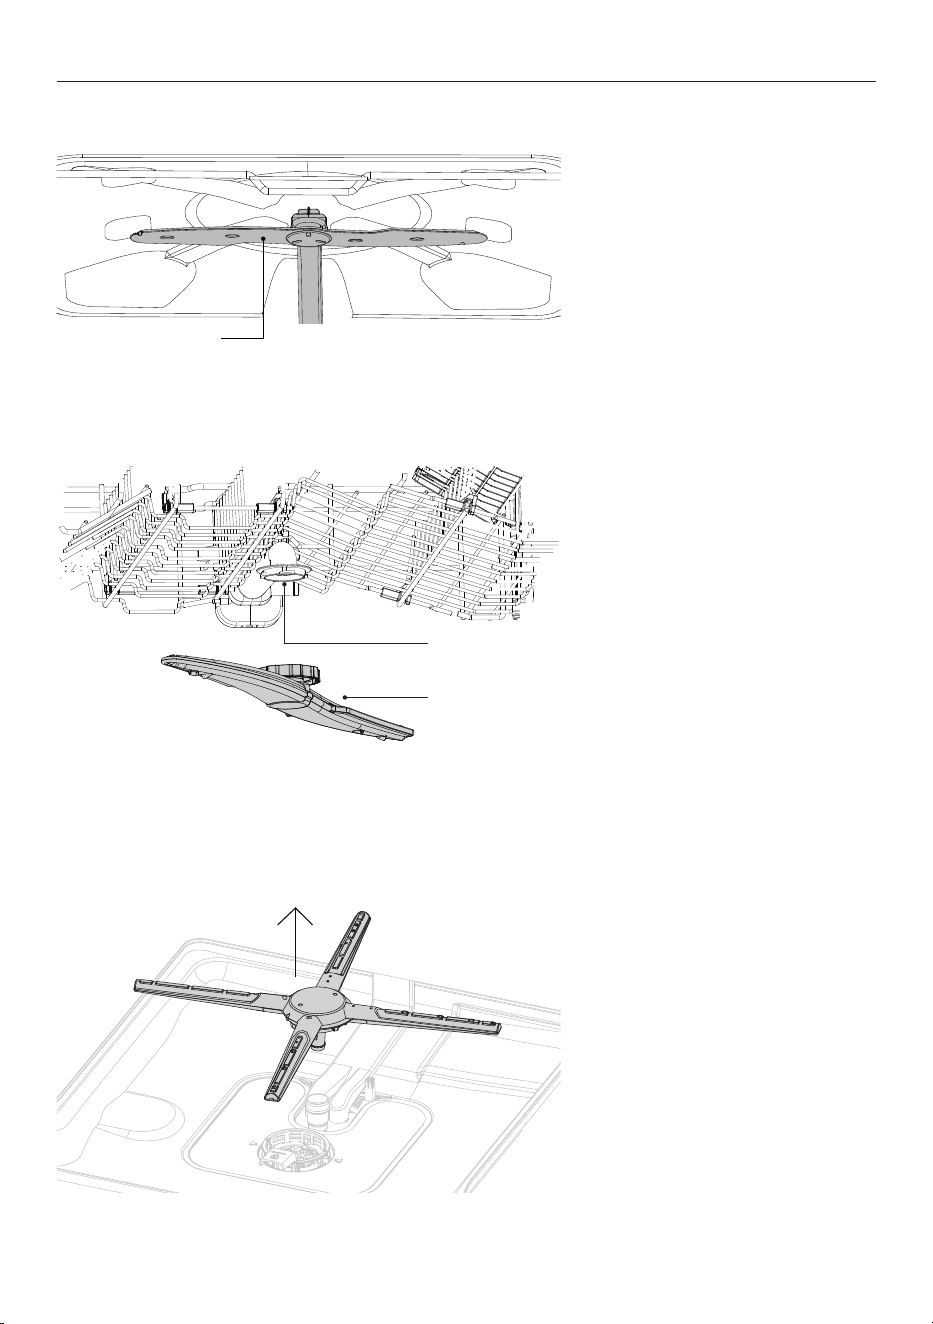
Cleaning the top spray arm
Do not remove the top spray arm for
cleaning.
Clean with a small, plastic-bristled
brush.
If heavily soiled or blocked use a
dishwasher cleaner/descaler. Follow
the manufacturer’s instructions.
To remove the upper spray arm, turn
the locking nut clockwise to release.
Rinse the spray arm thoroughly
under
running water, then refit.
To remove the lower spray arm, lift it
from the base of the dishwasher.
Rinse the spray arm thoroughly
under running water, then refit.
Ensure the arm rotates freely when
refitted.
CARE & CLEANING
Cleaning the upper spray arm
upper spray arm
locking nut
Cleaning the lower spray arm
upper spray arm
30
TROUBLESHOOTING
PROBLEM POSSIBLE CAUSES WHAT TO DO
Dishwasher will
not start
No power. Ensure the dishwasher is plugged in and the
power supply is turned on at the wall.
The door is not
properly closed.
Close the door.
has not been
pressed.
Press .
Water tap not turned
on.
Ensure water is connected and turned on.
Blocked strainer in
water inlet hose.
Check the strainer and clean if necessary – it is
located where the water inlet hose screws into
the tap.
The rinse aid
indicator is lit.
The rinse aid dispenser is
empty.
Rell the rinse aid dispenser.
Dishes are not clean. Filters are clogged. Clean the lters.
Filters are not correctly
assembled and installed.
Make sure that the lters are correctly assembled and
installed.
Spray arms are clogged. Remove remaining food remnants with a thin pointed
object.
Unsuitable wash program
selected.
Make sure that the program is applicable for the type of
load and food remnants.
Incorrect position of the
items in the baskets. Water
could not wash all items.
Make sure that the position of the items in the baskets
is correct and that the water can easily wash all items.
Spray arms could not turn
freely.
Make sure that the position of the items in the baskets
is correct and does not cause the blockage of the spray
arms.
No detergent or insucient
quantity of detergent in the
detergent dispenser
Make sure that you add the correct quantity detergent
in the dispenser before you start a programme.
The wash cycle was
interrupted by a long break
Do not open the door or cut power supply during the
wash cycle.
Whitish streaks,
stains or bluish
layers on glasses and
dishes.
Rinse aid dosage too high. Decrease rinse aid dosage. Refer to 'Rinse aid.'
Quantity of detergent was
too much.
Make sure that you add the correct quantity of
detergent in the dispenser before you start a
programme.
Detergent tablets used with
a short wash program might
not fully dissolve.
Select a longer program when using detergent tablets.

31
TROUBLESHOOTING
PROBLEM POSSIBLE CAUSES WHAT TO DO
Water marks left on
glasses and cutlery
Rinse aid dosage is too low. Increase rinse aid dosage. Refer to section 'Settings'
Quality of rinse aid or tablets. Cleaning product too old, change the product.
The dishes are
wet.
Selected wash program had
no drying phase.
Open the door slightly and leave it ajar (about 100 mm)
to help the drying process.
Selected wash program had
a low temperature drying
phase.
Glasses have a dull
appearance.
Rinse aid dispenser is empty. Rell the rinse aid dispenser.
Quality of rinse aid or tablets. Cleaning product too old, change the product.

32
FAULT CODES
How do I know if there is a fault?
Your dishwasher will beep continuously and a fault code will flash in the display. There are two types of fault
codes – ‘F’ and ‘A’.
To fix a fault
First try to fix the issue and clear the code according to the steps in the following tables. If the problem
persists:
1 Note down the fault code.
2 Contact Customer Care for support or to organize a visit by a service technician. Refer to the Service
and Warranty booklet for contact details.
'F' fault codes
You may be able to clear the fault by resetting the dishwasher. Follow the steps below
3 Press and hold CANCEL to stop the beeping, then again to clear the fault code.
4 Wait a few seconds, then press to turn the dishwasher back on.
If the fault code has disappeared, the fault has been reset and you can continue to use your dishwasher.
'A' fault codes
Your dishwasher will beep continuously and a fault code will flash in the display. There are two types of fault
codes – ‘F’ and ‘A’.
PROBLEM POSSIBLE CAUSES WHAT TO DO
Display shows A10
fault and an alarm is
sounding.
The appliance does
not fill with water.
Water tap is closed. Open the water tap. To reset the fault turn the
dishwasher on and o and restart the program.
Water inlet hose has a kink or
a bend.
Make sure that the position of the hose is correct.
Filter in the water inlet hose
is clogged.
Clean the lter at the inlet hose connections at tap and
the rear of the appliance.
Water inlet is clogged. Check water ow from tap
Water pressure is too low. Contact your local water authority.
Display shows F30
fault and an alarm is
sounding.
Anti-flood device
is on.
There is a leak in the
dishwasher.
Close the water tap.
Disconnect the appliance.
Contact service.
The water inlet valve is open
and blocked.
The drain is blocked

33
MANUFACTURER'S WARRANTY
Please read this warranty carefully. Attach your purchase receipt to this warranty and keep in a safe place.
You must produce both warranty and proof of purchase in the event of a warranty repair being required.
When you purchase any new Haier Product you automatically receive a two year Manufacturer's Warranty
covering parts and labour for servicing.
The Manufacturer undertakes to:
Repair or, at its option, replace without cost to the owner either for material or labour any part of the
Product, the serial number of which appears on the Product, which is found to be defective within TWO
YEARS from the date of purchase.
This warranty DOES NOT cover:
A Service calls which are not related to any defect in the Product. The cost of a service call will be charged
if the problem is not found to be a Product related fault. For example:
1 Correct the installation of the product.
2 Provide Instruction on use of the product or change the setup of the product.
3 Replace house fuses or correct house wiring.
4 Correcting faults) caused by the user.
5 Noise or vibration that is considered normal.
6 Water on the floor due to incorrect loading or excessive suds.
7 Blocked pumps, removal of foreign objects/substances from the machine, including the pump and
inlet house filters.
8 Correcting damage caused by pests, eg. rats, cockroaches etc.
9 Correct corrosion or discolouration due to chemical attack.
!0 Power outages or surges.
B Defects caused by factors other than:
1 Normal domestic use or
2 Use in accordance with the Product's User Guide.
C Defects to the Product caused by accident, neglect, misuse or 'Act of God'.
D The cost of repairs carried out by non-authorised repairers or the cost of correcting such
unauthorised repairs.
E Normal recommended maintenance as set out in the Product's User Guide.
F Repairs when the appliance has been dismantled, repaired or serviced by other than an AUTHORISED
CUSTOMER SERVICE CENTRE or the selling dealer.
G Pick up and delivery.
H Transportation or travelling costs involved in the repair when the product is installed outside the
AUTHORISED CUSTOMER SERVICE CENTRE'S normal service area.
This product has been designed for use in a normal domestic environment. It is not intended for
commercial use. Doing so may affect product warranty.
Service under this warranty must be provided by an Authorised Service Repairer (refer to the Customer
Care section for contact details). Such service shall be provided during normal business hours. This
warranty certificate should be shown when making any claim.

34
MANUFACTURER'S WARRANTY
Note:
This Warranty is an extra benefit and does not affect your legal rights and applies only to product
purchased in New Zealand and Australia. Please keep this Warranty Card in a safe place.
For Australian customers:
Our goods come with guarantees that cannot be excluded under the Australian Consumer Law. You are
entitled to a replacement or refund for a major failure and for compensation for any other reasonably
foreseeable loss or damage. You are also entitled to have the goods repaired or replaced if the goods fail to
be of acceptable quality and the failure does not amount to a major failure.

35
CUSTOMER SERVICE
Complete and keep for safe reference:
We recommend our Haier Customer Service and the use of original spare parts.
If you have a problem with your appliance, please first check TROUBLESHOOTING. If you cannot find a
solution there, please contact:
z
Your local dealer.
z
The Service & Support area at
www.haier.com.au or
www.haier.co.nz
where you can activate the service claim and also find FAQs.
To contact our Service, ensure that you have the following data available.
The information can be found on the rating plate at the door.
Model
Serial No.
Standards test information Standards test information can be viewed online by going to www.haier.com.au
or www.haier.co.nz and searching your model code.
Model
Serial No.
Purchase Date
Purchaser
Dealer
Suburb
To w n
Country

432892A 04.25
条形码尺寸40*8mm,由厂家生成。
WWW.HAIER.COM.AU
WWW.HAIER.CO.NZ