
USER MANUAL

Read me first
◆ Please read this manual before operating your mobile phone, and keep it for future reference.
◆ The descriptions in this manual are based on the default settings.
◆ Images and screenshots used in this manual may differ from the actual product.
◆ Available features and additional services may vary by device, software or service provider.
◆ Our company is not liable for performance issues caused by third-party applications.

Contents
Assembling................................................................................................................................... - 1 -
Unpack ................................................................................................................................. - 1 -
Charge the battery ............................................................................................................... - 1 -
Install the SIM card ............................................................................................................... - 1 -
Install the memory card ....................................................................................................... - 1 -
Begin ............................................................................................................................................ - 1 -
Turn on devices, restart and shut down ............................................................................. - 2 -
Switch to airplane mode ....................................................................................................... - 2 -
Home screen ......................................................................................................................... - 2 -
Task bar ................................................................................................................................ - 2 -
Notification panel ................................................................................................................. - 3 -
Customize your device ......................................................................................................... - 5 -
Auto rotation ........................................................................................................................ - 5 -
Wallpaper&style ................................................................................................................... - 5 -
Display size .......................................................................................................................... - 6 -
Lock and unlock the screen .................................................................................................. - 6 -
Manage applications ............................................................................................................ - 6 -
Language and input method ................................................................................................ - 7 -
Virtual keyreturn .................................................................................................................. - 7 -
◆ Privacy security ...................................................................................................... - 7 -
Application Notification Permissions ................................................................................... - 8 -
Security ................................................................................................................................ - 9 -
Set up the Face ..................................................................................................................... - 9 -
Set up the fingerprint .......................................................................................................... - 10 -
Reset your phone ................................................................................................................ - 10 -
Communication ........................................................................................................................ - 10 -
Phone.................................................................................................................................. - 10 -
Contacts .............................................................................................................................. - 12 -
Messages ............................................................................................................................ - 13 -
Email .................................................................................................................................. - 14 -
Google Account.................................................................................................................. - 15 -
Web ............................................................................................................................................ - 16 -
Browser .............................................................................................................................. - 16 -
Entertainment .......................................................................................................................... - 16 -
Camera ............................................................................................................................... - 16 -
FM Radio ........................................................................................................................... - 18 -
Tools........................................................................................................................................... - 19 -
Calendar ............................................................................................................................. - 19 -
Alarm clock ........................................................................................................................ - 19 -
File Manager ...................................................................................................................... - 19 -
Recorder ............................................................................................................................. - 20 -
Calculator ........................................................................................................................... - 20 -
Find Devices ................................................................................................................... - 20 -

Safety................................................................................................................................ - 20 -
Connectivity .............................................................................................................................. - 20 -
USB Connection ................................................................................................................ - 20 -
Wi-Fi .................................................................................................................................. - 21 -
Bluetooth ............................................................................................................................ - 21 -
Safety precautions .................................................................................................................... - 22 -
Data security information ................................................................................................ - 22 -
Equipment safety .............................................................................................................. - 22 -
Care & maintenance ................................................................................................................ - 23 -
Warnings ................................................................................................................................... - 23 -

- 1 -
Assembling
Unpack
Check your product box for the following items.
⚫ Mobile phone
⚫ User manual
⚫ Adapter
You can purchase additional accessories from your local retailer.
Charge the battery
Before using the device for the first time, you must charge the battery.
1. You can charge the device with a travel adapter or by connecting the device to a PC with a USB
cable.
2. Battery full icon is shown when finished if your device is off.
Warning:Use only original batteries and chargers. Unapproved chargers or cables can cause
batteries to explode or damage your device.
Install the SIM card
You need to insert a SIM card to use the Phone function. To install the SIM card, follow the
instructions below.
1. Make sure that the card’s gold contacts face into the device.
2. Push the SIM card into the slot.
Install the memory card
Begin
When you turn on or off the device, you can see Powered by Android™ on the device
interface, which is about the operating system of the device.
- 2 -
Turn on devices, restart and shut down
To turn on your device when your phone is turned off, press and hold the power key for about 5
seconds, then release your finger when the screen lights up [make sure your phone has enough
battery].
To restart the device, hold down the power button for about 1 second, and then select Restart.
Alternatively, pull down the status bar to the bottom, click the close button in the bottom right corner
of the page, select the close button, and then click restart.
To turn off the device, hold down the power button for about 1 second, and then select Turn Off.
Alternatively, pull down the status bar to the bottom, click the close button in the bottom right
corner of the page, select the close button, and then click shut down.
Switch to airplane mode
To use only the device's non-network services, switch to airplane mode. Follow the instructions
below to turn on Airplane Mode:
1. From the list of applications tap Settings Network and Internet Airplane Mode to turn on
Airplane Mode.
2. Drop down the status bar Airplane Mode shortcut button and click to open Airplane Mode
Home screen
The Home screen has multiple panels. Scroll left or right to the panel on the home screen where you
can view indicator icons, widgets, shortcuts to apps, and other items.
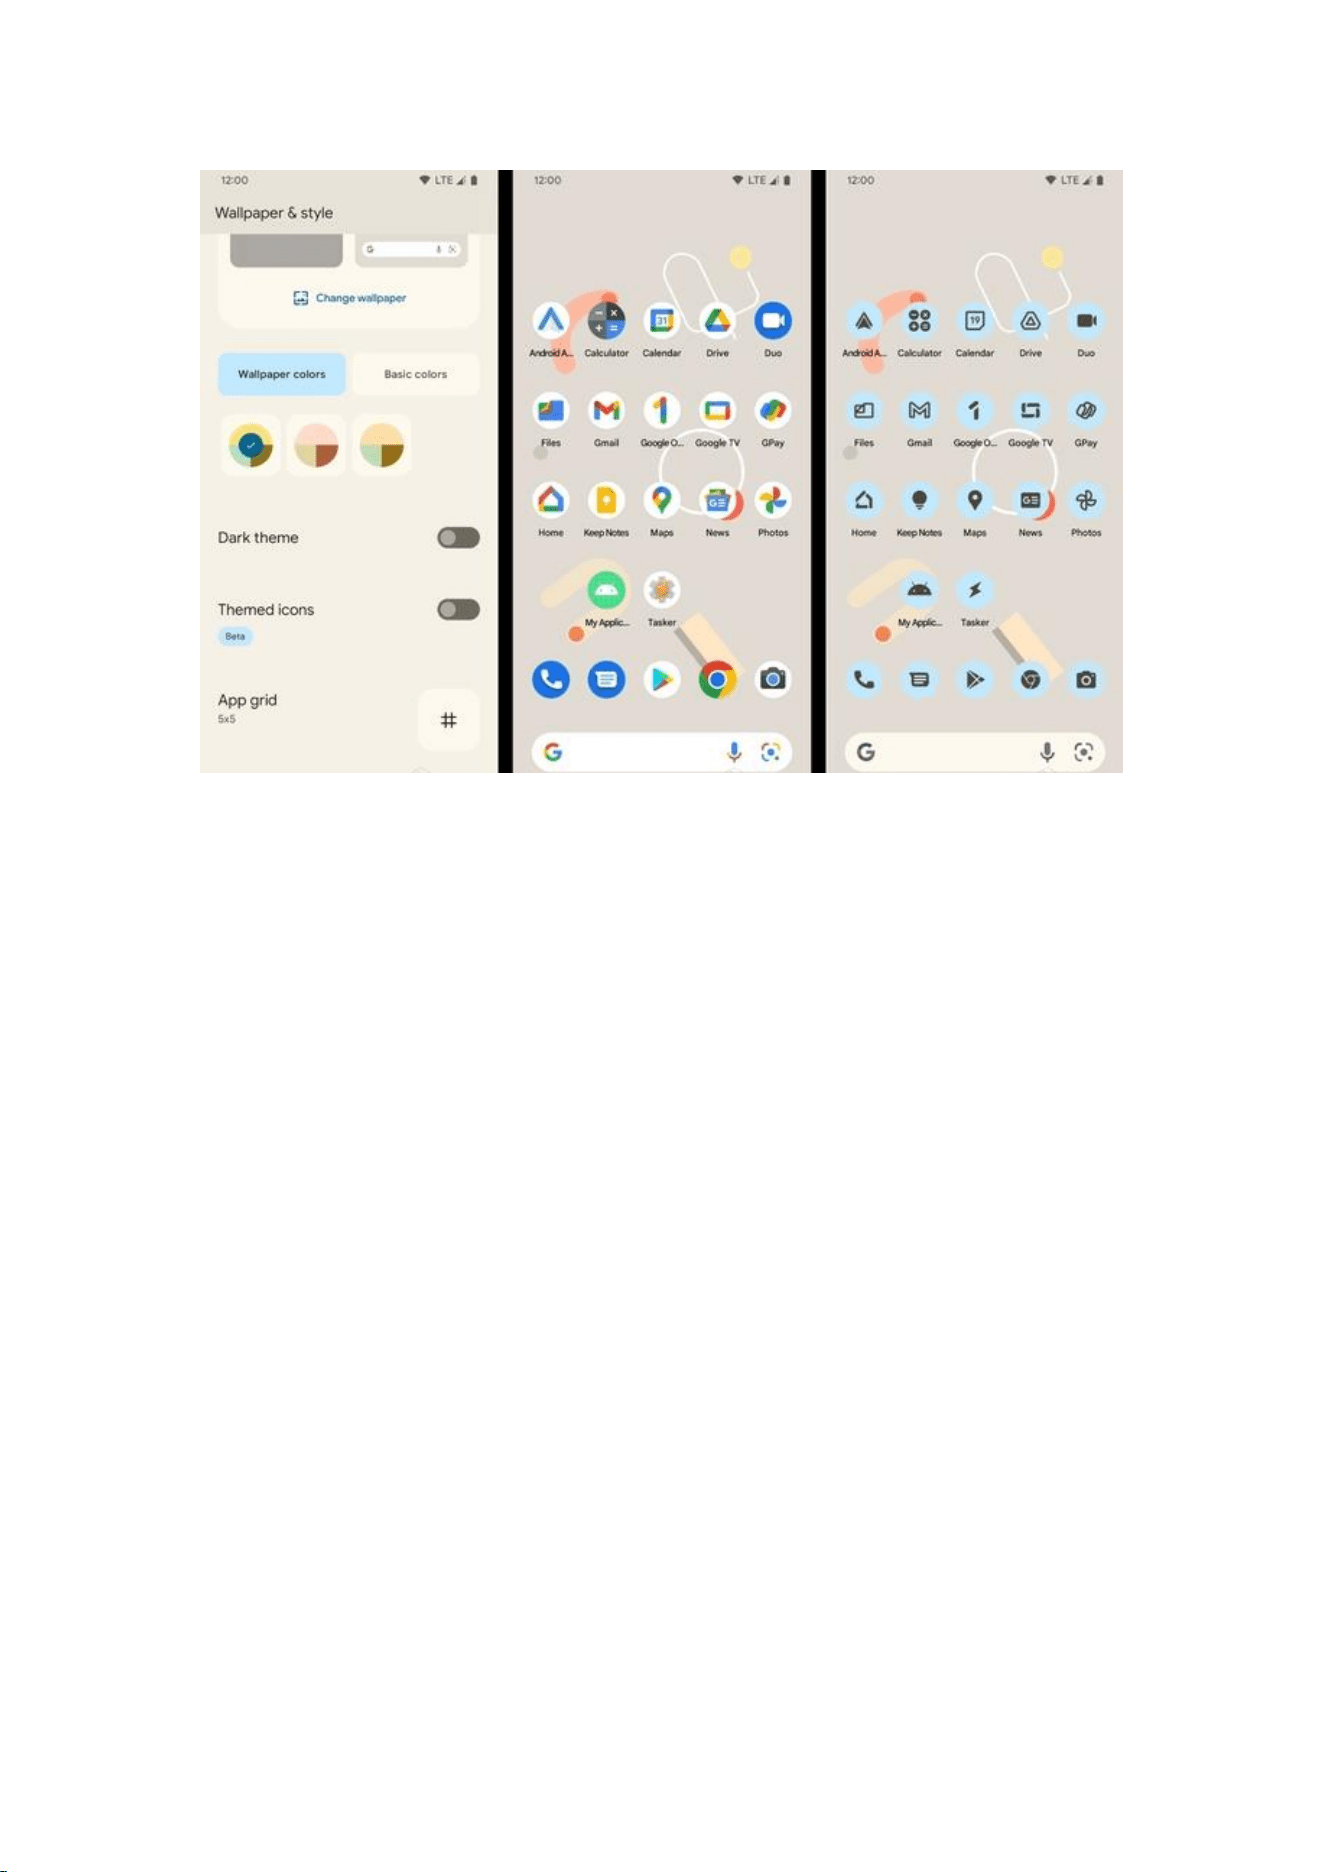
Long press the screen, click the wallpaper and style in the pop-up window, and change the dark
theme or icon with dark theme.
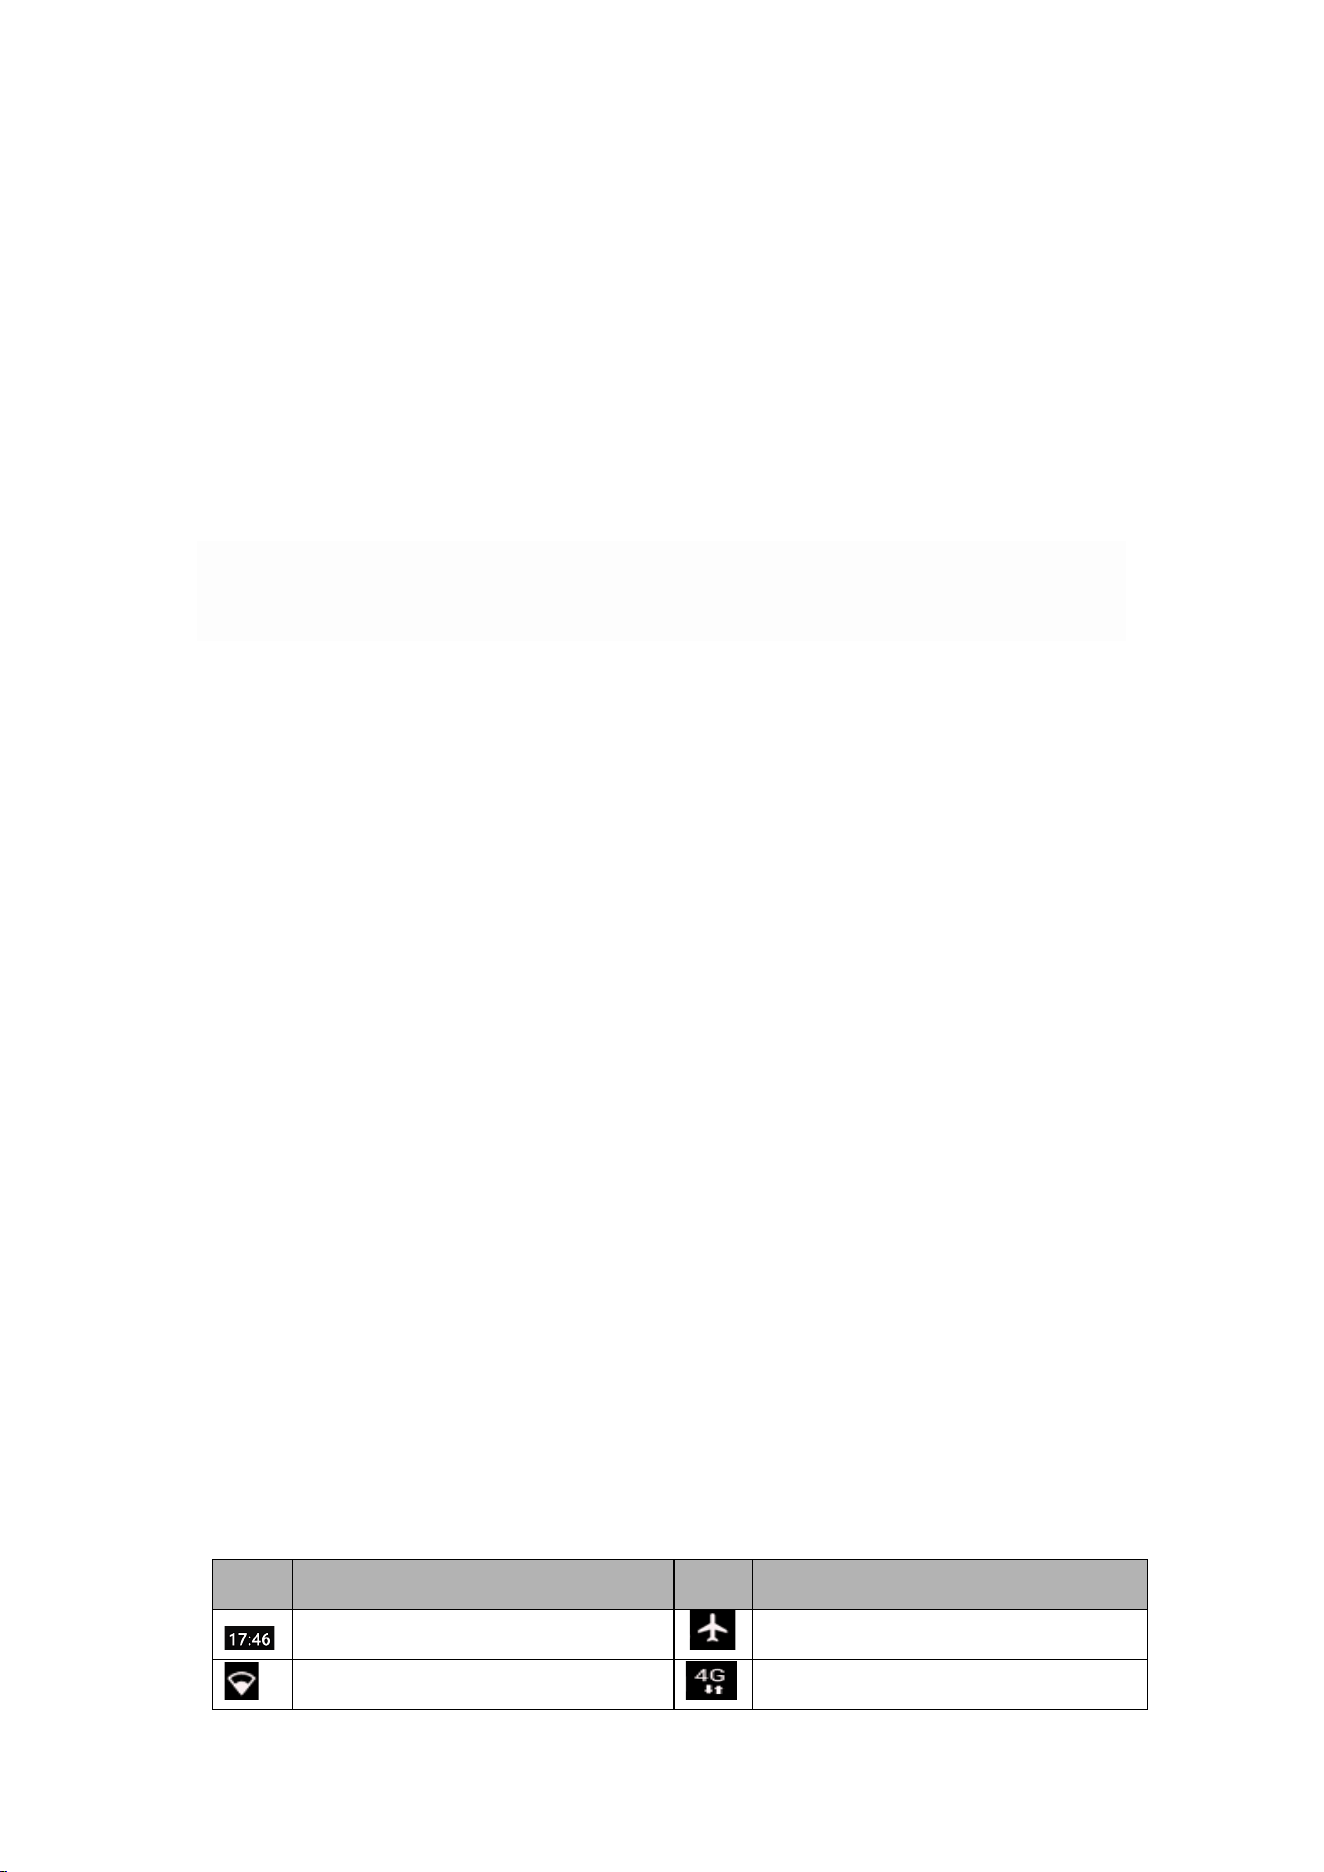
Task bar
The taskbar appears at the top of the screen. It displays commonly used option buttons, battery level
indicator, current time, and other indicator icons.
Indicator icon
icon
definition
icon
definition
Time display
Airplane mode is activated
Wi-Fi connection
Mobile networks
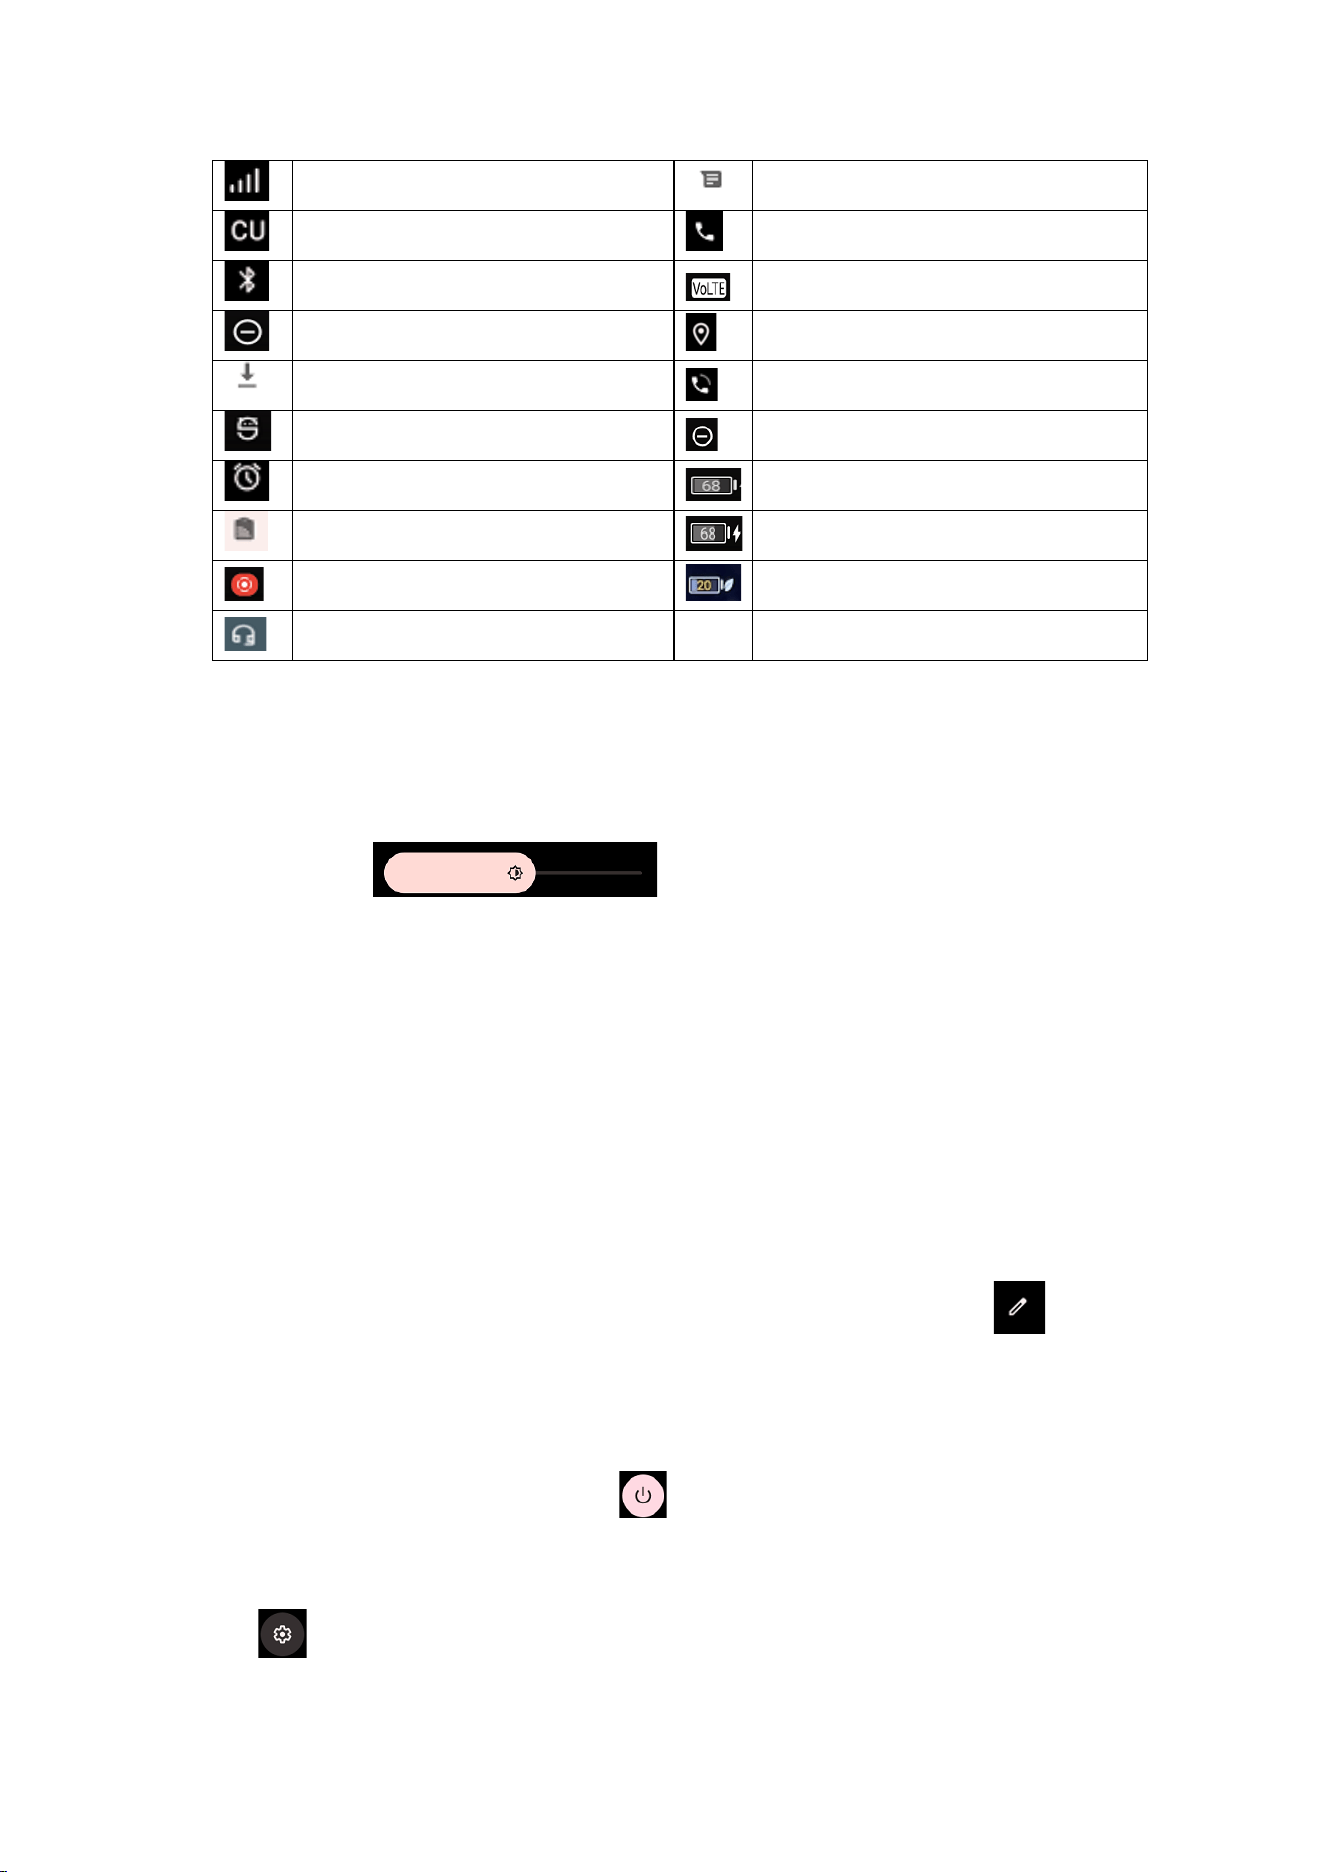
- 3 -
Signal strength
New text or MMS messages
SIM card operator
Calling in progress
Bluetooth connection
Video calling is turned on
Do not disturb
location
Download the data
On the call
Connected to your PC
Do not disturb
The alarm is activated
Battery level
NFC is activated
Charging in progress
Screen recording
Power-saving mode
Plug in your headphones
Notification panel
There is a horizontal sliding box above the notification bar, for the brightness adjustment of the
prototype screen, slide to the left, the brightness of the prototype is
reduced, slide to the right, the brightness of the prototype increases, (adjust the brightness according
to your own needs, you can also set to automatically adjust the brightness according to the
environmental conditions, Note: the brightness increases The power consumption will theoretically
increase)
Drop down to open the top of the notification bar, display 11 shortcut switches commonly used by
users, support click switch, and long press to enter the corresponding settings. If you continue to
drop down the notification bar to show all the quick toggles;
Quick Toggle displays an Edit button in the lower-left corner of the page, click the Add Remove
Custom Shortcut switch, or drag to sort.
Quick Toggle will display a shutdown button in the middle of the page, click to quickly make an
emergency call, shut down, restart operation.
Quick Toggle will display a shutdown button in the lower right corner of the page, click to quickly
enter the settings interface.

- 4 -
Tap the icon to activate or disable wireless connectivity and other settings.
Wi-Fi: Click WIFI to quickly open WIFI, and change or perform other operations on the connected
Wifi.
Bluetooth: Activates or disables a Bluetooth connection.
Do Not Disturb: Activate or disable Do Not Disturb mode to receive notifications only from
important contacts and important apps. 。
Flashlight: Activates or disables the flashlight.
Auto - rotate: Activates or disables auto-rotate.
Battery Saver: Activates or disables power saving mode.
Airplane mode:Turn off the wireless signal and telephone communication functions of the mobile
phone, such as WIFI, data stream, mobile signal reception and transmission, Bluetooth, etc. When
the mobile phone is turned on, you can continue to use other functions, such as viewing the phone
book, enjoying articles, movies, playing games, calculators, etc. (applications that do not require
data or wifi functions).
Night Light:Click to turn night mode on and off。
Scan QR code:Click to quickly enter the scanning QR code mode。
Cast:The Cast function on the phone will actively search for nearby Cast devices and display them
on the phone for users to choose from. Users can connect to the device by clicking on its name
Alarm: click to quickly enter the Alarm interface.
Screen record:Click to record the screen as required (you can select to record audio and display
the touch screen position)。
Mic access:Activates or disables Micphone
Camera access:Activates or disables camera
Quick Share:Click to turn on the nearby sharing function (WLAN and Bluetooth need to be
turned on temporarily when this function is turned on)。
Night Light:Click to turn night mode on and off。
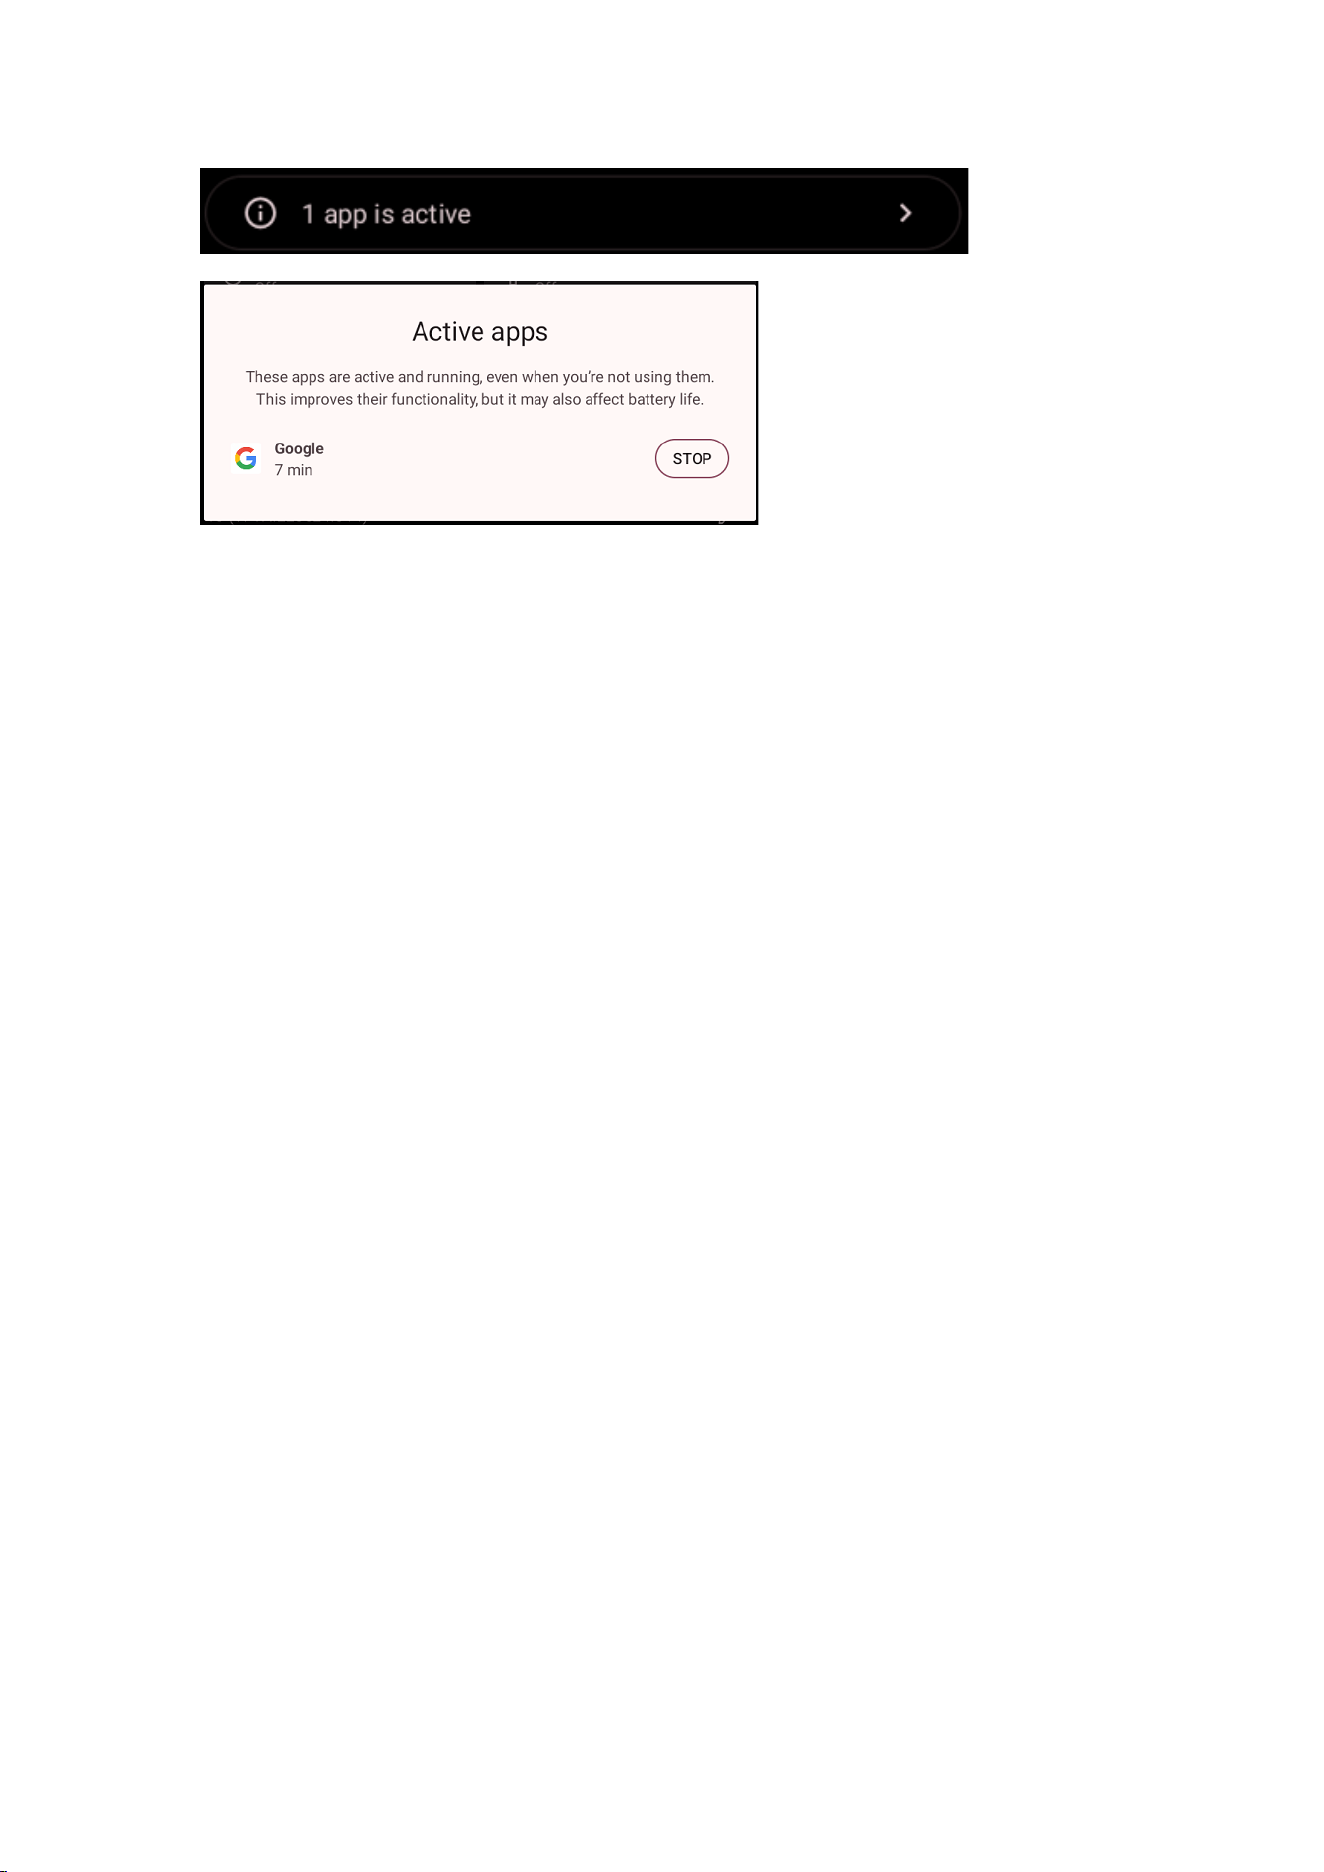
Quickly stop applications in the service.
You can complete the workflow through the drawer notification bar to stop the application with
continuous foreground services (as shown in the following figure).
- 5 -
Customize your device
To customize your device based on your preferences, tap Settings in the app list or notification
panel.
Auto rotation
If you rotate your device while using certain features, the interface will also rotate automatically. To
prevent the interface from spinning, open the notification panel and select Rotate Screen
Automatically, then tap it To Close.
Or set the Display Advanced Auto Rotate Screen toggle.
Wallpaper&style
You can press and hold the blank space of the screen to pop up the wallpaper and style settings pop-
up window, update the wallpaper, and switch between dark themes or icons with themes.
- 6 -
Display size
You can set it to Display Advanced font size
You can change the font size by sliding the lower square point as needed.
Lock and unlock the screen
Swipe to your lock screen.
To lock the screen manually, press the Power key.
Manage applications
To manage the apps installed on your device, tap Settings apps.
1. To uninstall an app, select an item, press and hold the app icon, pop up app info click Uninstall,
click OK to confirm.
2. To stop or change an app's settings, tap the Settings app to locate the app and select
the appropriate option.
- 7 -
Language and input method
1. Language and input method:
You can modify the system language and input method settings according to your usage habits
(the path is as follows: Settings - System - Language and input method application language)
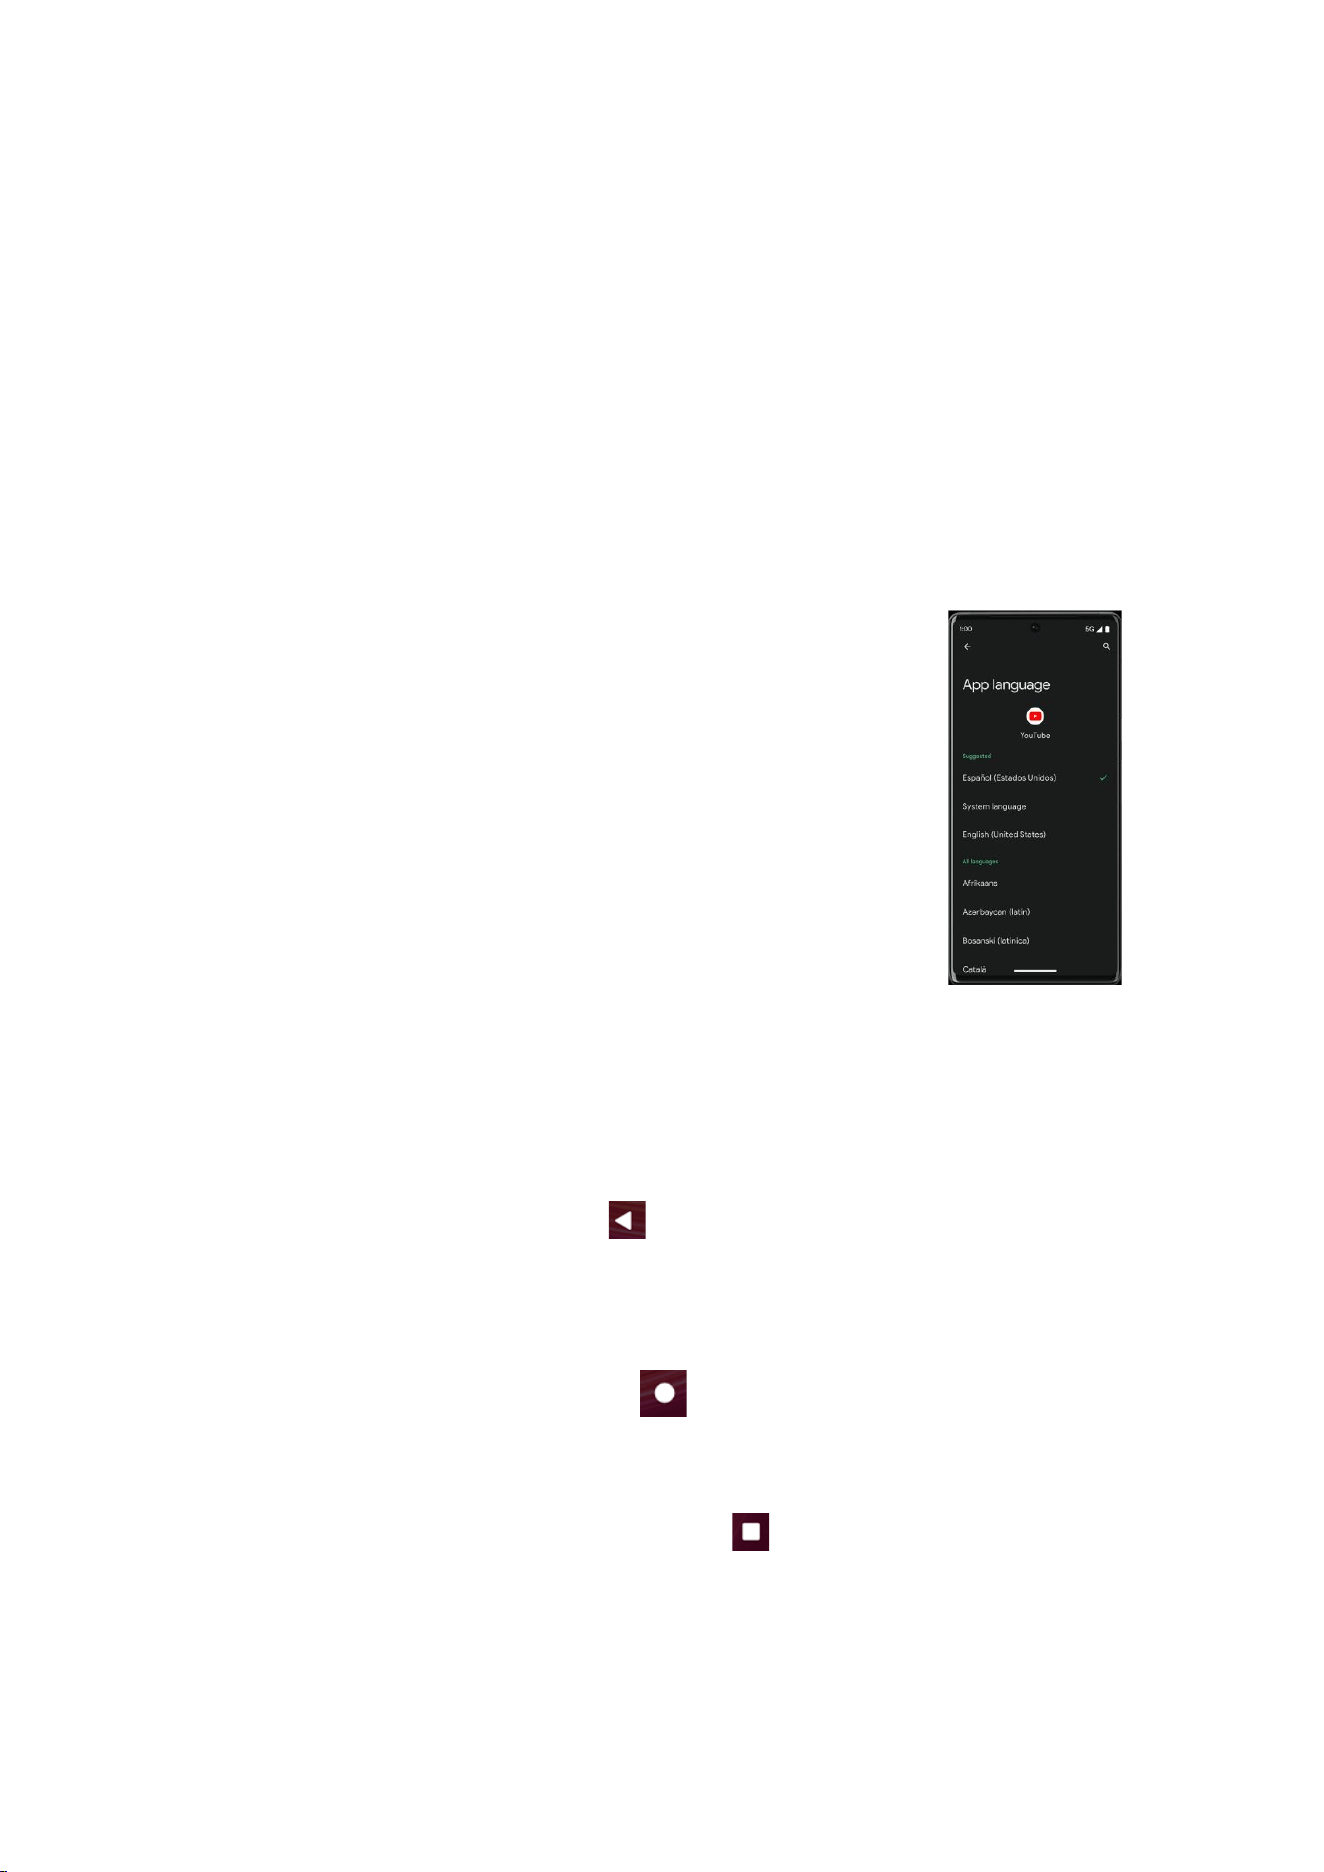
2. App language (as shown in the right figure):
In many cases, multilingual users will set their system language to a certain language (such as
English), but want to choose another language (such as Dutch, Chinese or Hindi) for a specific
application. To help applications provide better experience for these
users, Android 15 introduces the following functions for applications that
support multiple languages:
The user can select the preferred language for each application in this
centralized location (the path is as follows: Settings - System - Language
and Input Method Application Language - Application Language).
Applications that do not support multiple languages are not affected by these
changes.
Virtual keyreturn
Return
1. You just need to double-click the "Back" button to return to the previous page or the previous
operation interface.
Quickly return to the main interface
1. You only need the stand-alone home button to return to the main interface of the device.
Switch application
1. All you need to do is double-click the "Recent" button and swipe left and right to switch apps
◆ Privacy security

- 8 -
To protect your privacy, when you open APK for the first time, the relevant permissions that
APK will call will pop up. You can choose to allow only when using the application, allow only
at this time, and not allow to set these three options.
In addition, you can directly check the usage of various permissions in the past 24 hours at most
in the Settings Privacy Privacy Information Center. The usage of permissions, including system
applications, can be seen here in minutes.
Hide sensitive content from clipboard
If your app allows users to copy sensitive content (such as passwords or credit card information)
to the clipboard, you can prevent sensitive content from appearing in the content preview.
Video and picture privacy protection
You want to share a group of photos or videos with your friends in some chat software, but you
don't want to grant the software access to all photos or videos on your phone. At this time, the
newly added photo selector can manually select the photo or video content you want to share,
and only grant access to the photo or video you select to the chat application to minimize the risk
of privacy disclosure.
Application Notification Permissions
Any APP that wants to send notifications must be manually approved by the user.

- 9 -
Security
You can protect your device and data by setting up a screen lock or encrypting your phone.
⚫ Set the screen lock
To set a screen lock, tap Set Secure Screen Lock from the list of apps.
⚫ None: Disables screen lock.
⚫ Swipe: Swipe to unlock the screen.
⚫ Pattern: Draw the pattern you want to unlock. Follow the instructions to draw the
lock mode. When prompted, draw a pattern to unlock the screen.
⚫ PIN: Enter the numeric PIN you want to unlock. When prompted, enter a PIN to
unlock the screen.
⚫ Password: Enter the password to unlock. When prompted, enter the password to
unlock the screen.
⚫ The screen times out
Select Settings Display Advanced Screen timeout from application list, you can set
the time before the screen times out and goes into lock mode. ( you have not entered any
characters or made other selections).
Set up the Face
Unlock your phone through your face, authorize purchase transactions and or log in to the app.
You need:
⚫ 1 .Set the standby screen locking mode;
⚫ 2.Click the start button to set face recognition.
⚫ 3.Put your face space in the center of the circle and wait for the face information registration
to complete.
Note:
Visual inspection of the phone may cause the phone to unlock accidentally. If someone puts the
phone in your face, the phone may unlock.
You can set in settings that you must open your eyes to unlock the phone.
The data recorded by the face unlocking function will be safely stored on your mobile phone and
will never be leaked. You can delete your data in the settings at any time
You can register up to one face recognition information

- 10 -
Set up the fingerprint
Fingerprint: you can use fingerprint to unlock your phone or verify your identity, such as when
logging in to the app or approving a purchase transaction.
You need:
⚫ 1. Set the standby screen locking mode;
⚫ 2.Add fingerprints according to the prompts;
Note: in addition to using fingerprint to unlock your own device, you can also set the pattern that
users need to unlock before starting the device to further protect the device. Start the device, answer
the phone, receive messages or notifications (including alarm clock). This protects the data on the
device after it is lost or stolen. Add up to 5 different fingerprints.
Reset your phone
You can reset the system and desktop settings to their original values (please select as needed) by
following these steps:
1. Set the system from the list of applications to reset options.
2. Reset WLAN, Mobile Data, and Bluetooth Settings: This action resets all network settings,
including WLAN, Mobile Data, Bluetooth.
3. Reset app preferences: This will reset app preferences and you won't lose any app data.
4. Delete private space:This will delete your private space
5. Erase all data (factory reset): This action will erase all data in your phone's internal storage
space, including your Google Account, system and app data and settings, downloaded apps,
music, photos, and other user data, so choose carefully.
Communication
Phone
⚫ To use the calling feature, tap Phone in the list of apps.
⚫ Phone
Favorite Contacts: Displays your favorite contacts (you need to add contacts manually).
Recent calls: Calls you made appear here.
Contacts: Here you can create contacts.

- 11 -
⚫ Dial number
To make a call, you can use one of four ways:
⚫ Use the virtual numeric keypad on the screen to enter the mobile phone number of
the person you want to call.
⚫ Make a call from the call log.
⚫ Make a call from a contact.
⚫ Other apps invoke the phone function.
⚫ Answer the phone
To answer an incoming call, swipe the screen up.
Or click the Answer button (notification bar pop-up).
⚫ Reject or end the call
To reject an incoming call, swipe down the screen.
To end an in-progress call , click the red button.
Or click the hang up button (pop-up in the notification bar).
⚫ Call settings
To change the call settings, click the Settings Options button in the upper-right corner of the dialing
interface.
1. volume
You can adjust the volume in different situations (media volume, call volume, ring and
notification volume, alarm volume). Set the sound to adjust as needed, slide the volume
progress bar to adjust to the appropriate position (Note: Too much volume affects yourself and
others).
2. Ringtones and vibrations
⚫ You can set different ringtones for included calls. Set sound selection ringtone to
open the ringtone list, select the ringtone you want, and then select OK to confirm.
⚫ Set up sound Select incoming call vibration to turn on vibration, and phone vibration
to notify you when a call comes in.
3. Dial pad touch tone
Set the sound dial keypad tone You can turn the dial pad touch tone on or off.
4. Screen lock tone
Set the sound screen lock tone You can turn the screen lock tone on or off.

- 12 -
5. Charging sounds and vibrations
Set sound charge tone and vibration You can turn charging tone and vibration on or
off.
6. Touch tone
Set sound Touch tone You can turn touch tone on or off.
7. Touch the vibration
Set sound touch vibration You can turn on or off tactile feedback for actions such as
clicking, pressing keys, and so on.
8. Voicemail
With the Call Forwarding Network service, you can direct incoming calls to voicemail.
Phone Settings Voicemail Tap Services in Advanced Settings to set up your voice mail
service provider.
⚫ Tap Settings in Advanced Settings to set your voicemail number.
9. Fixed dialing number
If FDN mode is activated, your device will restrict outgoing calls except for numbers stored in
the FDN list .
10. Quick reply
Quick Reply is a feature that uses a predetermined message to reject a call.
Tap one of the pre-written messages that you want to appear when you reject a call, then tap
OK.
11. call forwarding
Call forwarding is a network feature that sends incoming calls to another number that you
specify.
12. call waiting
If call waiting is activated, the network notifies you of a new incoming call when you have a
call in progress, or you can make a new call during the call.
Contacts
Tap contacts in the app list to access contacts.
⚫ All Accounts: Lists all contacts saved in the device's memory and SIM card.
⚫ Favorites: Lists contacts that have been set up as favorites or contacts to whom
messages have been sent or dialed.

- 13 -
⚫ Add a new contact
1. Access Contact Number.
2. click
3. Enter the necessary contact name, mobile phone number, and other relevant information.
4. Click Save.
⚫ Modify a contact
1. To modify a contact, select a wait, and then click The contact that you want to change.
2. Click the edit icon in the upper-right corner.
3. Change the required fields.
4. Click✓ .
⚫ Import/export contacts
1. Import from SIM card
To import contacts from your SIM card, click the option button in the upper-left corner, then
select Settings Import S Select USIM C, click OK Select Contacts Click✓ .
2. Import from memory card
To import a contact s file (in vcf format) from memory, click on the options button in the
upper left corner and select the "Import S" option. vcf file C lick OK S selected .vcf
file and then import contacts to your device.
⚫ Search for a contact
1. Find the information you need in the Search Contact input box, and then your device will
display the results.
Messages
Learn how to create and send text or MMS messages, and view or manage messages that have been
sent or received.
⚫ View the message
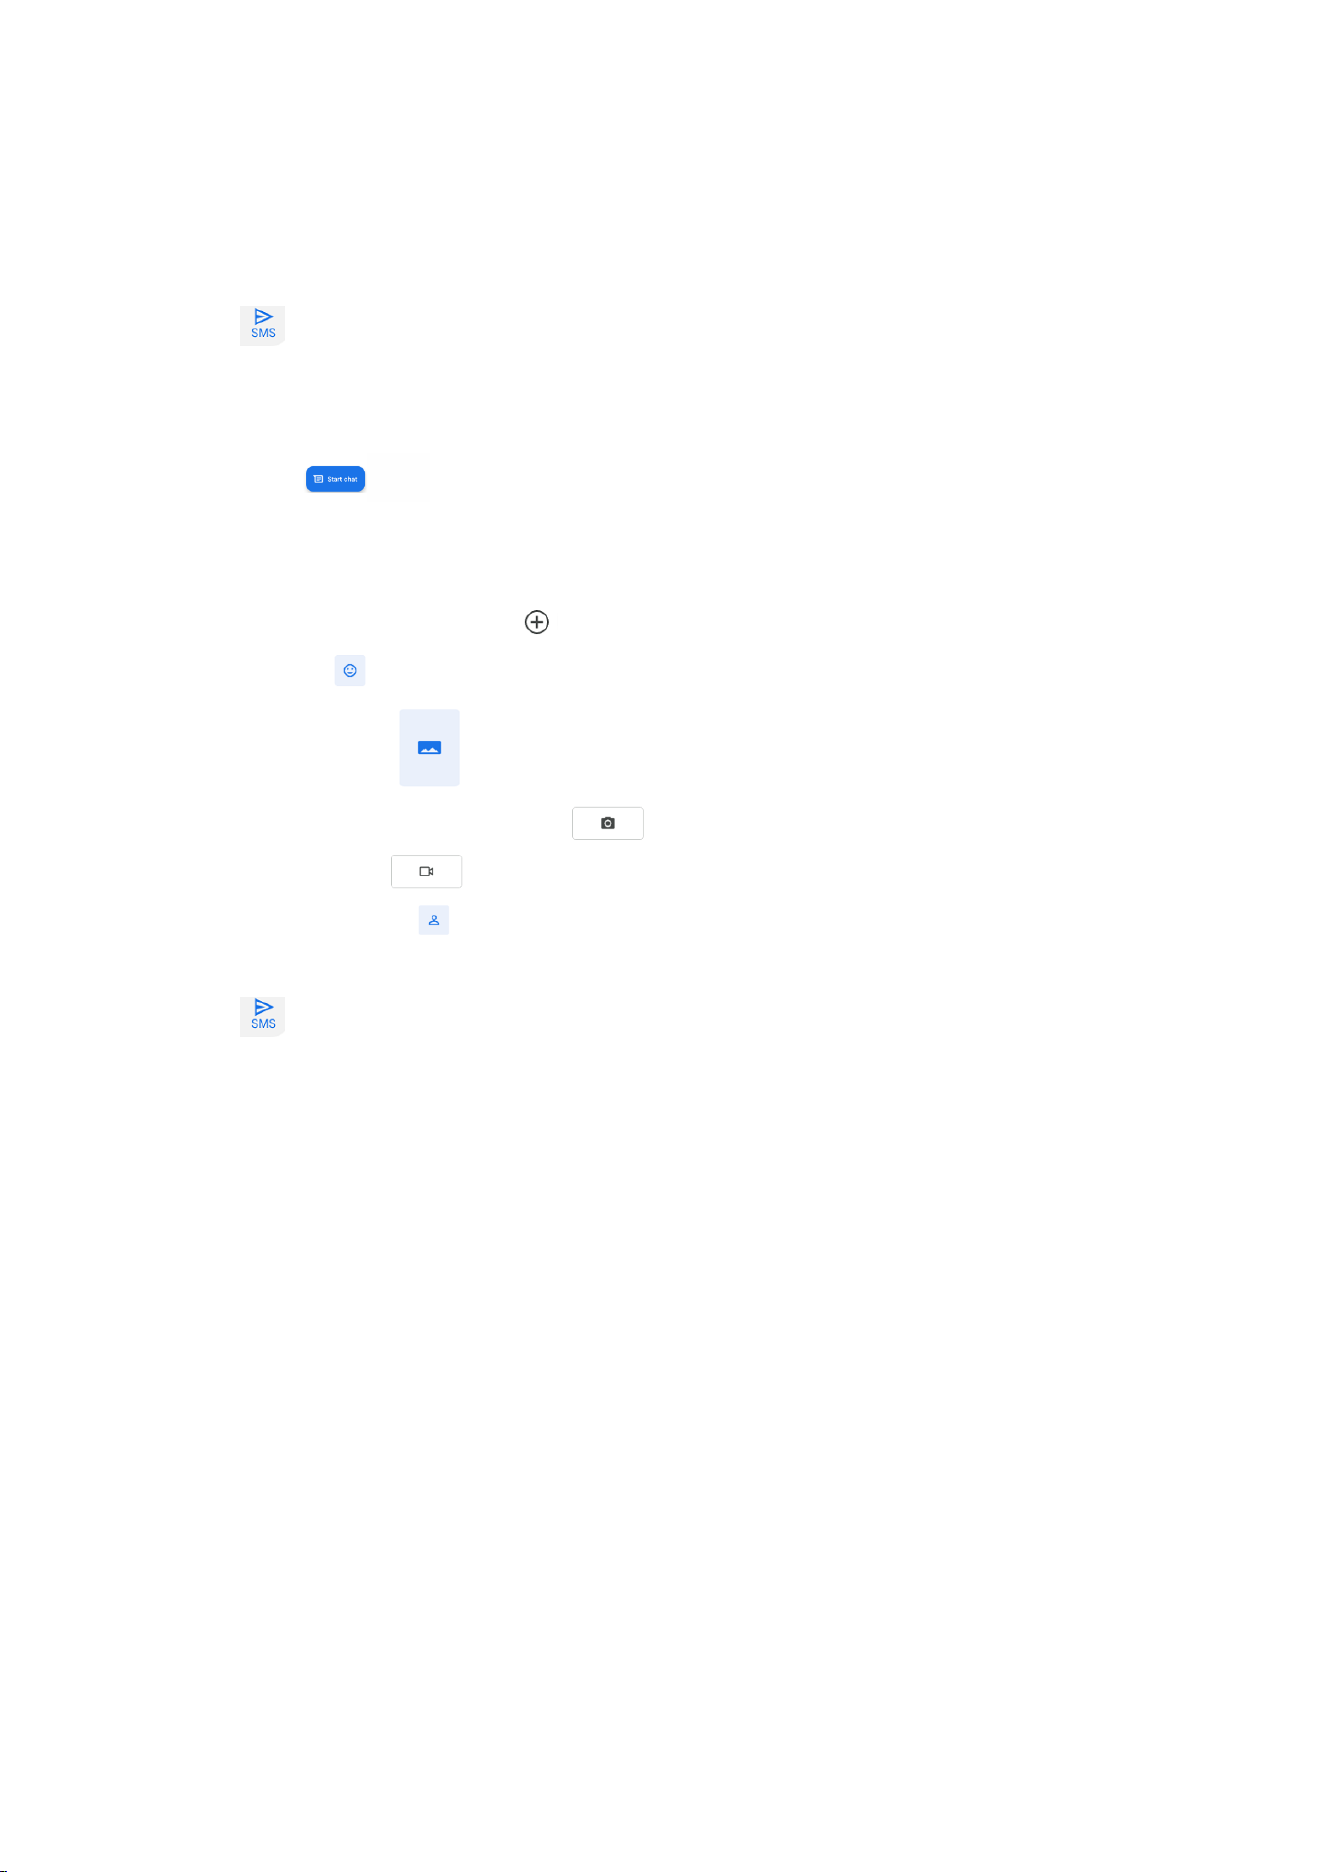
1. Click Send message from the list of applications.
2. Click the message to view the details.
⚫ Create and send text messages
1. Click Enter New Message.
- 14 -
2. In the Type Name or Number field, manually enter the recipient's mobile phone number.
If you enter multiple numbers, separate them with commas .
3. In the Text message field, enter the text of the message.
4. Click Send to send the text message.
⚫ Create and send MMS messages
MMS messages can include pictures, sounds, and text.
1. Click Enter New Message.
2. In the Type name or number field, manually enter the recipient's mobile phone number.
If you enter multiple numbers, separate them with commas.
3. Click the plus sign on the left "Attach" to select one of the following items.
⚫ Emoticons: Insert emoticons.
⚫ Picture : Inserts an image.
⚫ Capture Captured Picture : Captures a new picture and inserts a picture.
⚫ Video : Inserts a video clip.
⚫ Contacts : Inserts a contact
4. In the Type test message field, enter the text of the message.
5. Click Send to send the MMS message.
Email
To receive and send messages, you must have the Remote Mailbox service. This service may be
provided by a service provider. Your device complies with the applicable Internet standards for
POP3/IMAP/Switching.
Before you can send or receive mail on your device, you need to set up your email account and
define your email settings correctly. You can define multiple mailboxes.
⚫ Set up your email
1. Click email from the application list
2. Link network.
3. You need to select the corresponding email address according to the actual situation, enter
the account number and password, and click Next until it is completed.
4. If you need to add another email account, please click the Add other email address option
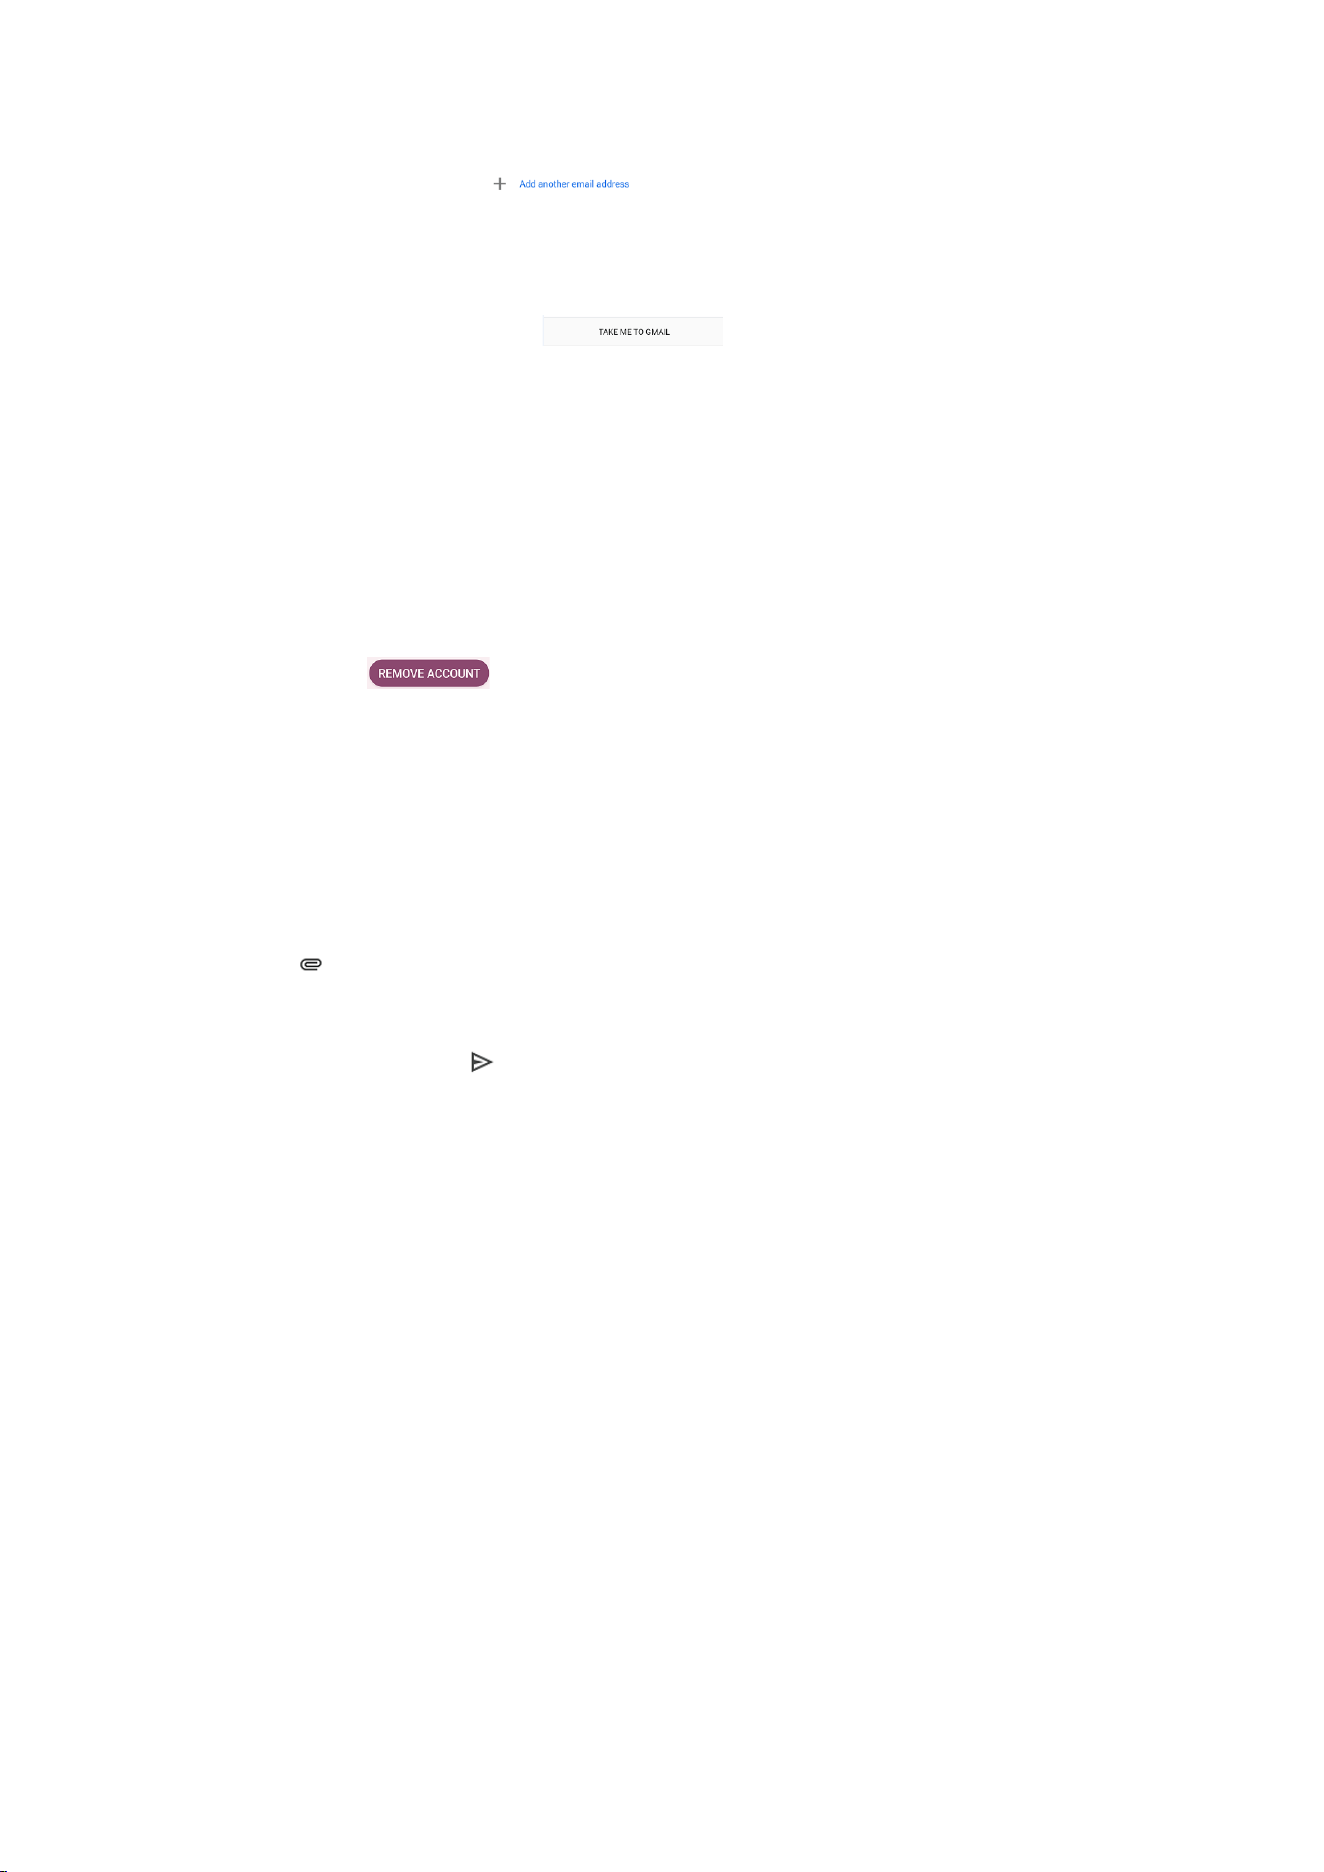
- 15 -
in the middle of the screen , then you need to select the corresponding
email address according to the actual situation, enter the account number and password,
click Next, until it is completed.
5. Click Go to Email to get started.
Once you've finished setting up your email account, the email will be downloaded to your
device. If you've created more than two accounts, you can switch between email accounts.
Select the account picture in the upper-right corner of the screen, and then select the account
name from which you want to retrieve messages.
⚫ Delete your email account
Click Settings users and accounts in the list of applications Click the email
address click the button
⚫ Create and send emails
1. Open the Email application.
2. Click the Write to Compare button.
3. In the To field, manually enter the recipient's email address, separated by commas. Add more
recipients by clicking Cc/Bcc.
4. Click to select the attachment you want to insert.
5. Enter a subject and text.
6. Click the Send button to send the email.
Google Account
You can add your Google Account for a series of operations, using Google related services, such as
setting up Google applications, etc
1. You need to open a network connection.
2. Click Settings - Google to add a Google Account.
3. You can add your Google Account for a series of operations, using Google related services, such
as setting up Google applications, etc
4. After successful login, you can manage your account and use related services.

- 16 -
Web
Browser
Tap browser in the list of applications to access the web.
⚫ Browser web pages
1. Select Browser to launch the specified home page.
2. To access a specific Web page, select the URL Entry field, enter the Web address of the
Web page, and then choose Go.
⚫ Set to homepage
1. Click the Options button in the upper right corner .
2. Select Settings Advanced Home Page.
3. Enter the URL of the desired page .
⚫ Add bookmarks
While browsing the website, click "" to save the bookmark and easily access it later.
⚫ View bookmarks and history
Click the options button on the top right corner and select "Bookmarks" to open the
bookmark list and recent history. Click a bookmark or any entry to display the webpage.
⚫ Customize your browser
To make adjustments in your browser settings, click the options button in the upper-right corner
, and then select Settings.
Entertainment
Camera
With the camera feature, you can take photos and take videos.
⚫ Take a photo
1. Open the list of applications and select Camera.
2. Before taking a photo, you need to know some settings.
Place two fingers on the screen and spread them apart, or bring the device closer to zoom in or
out.
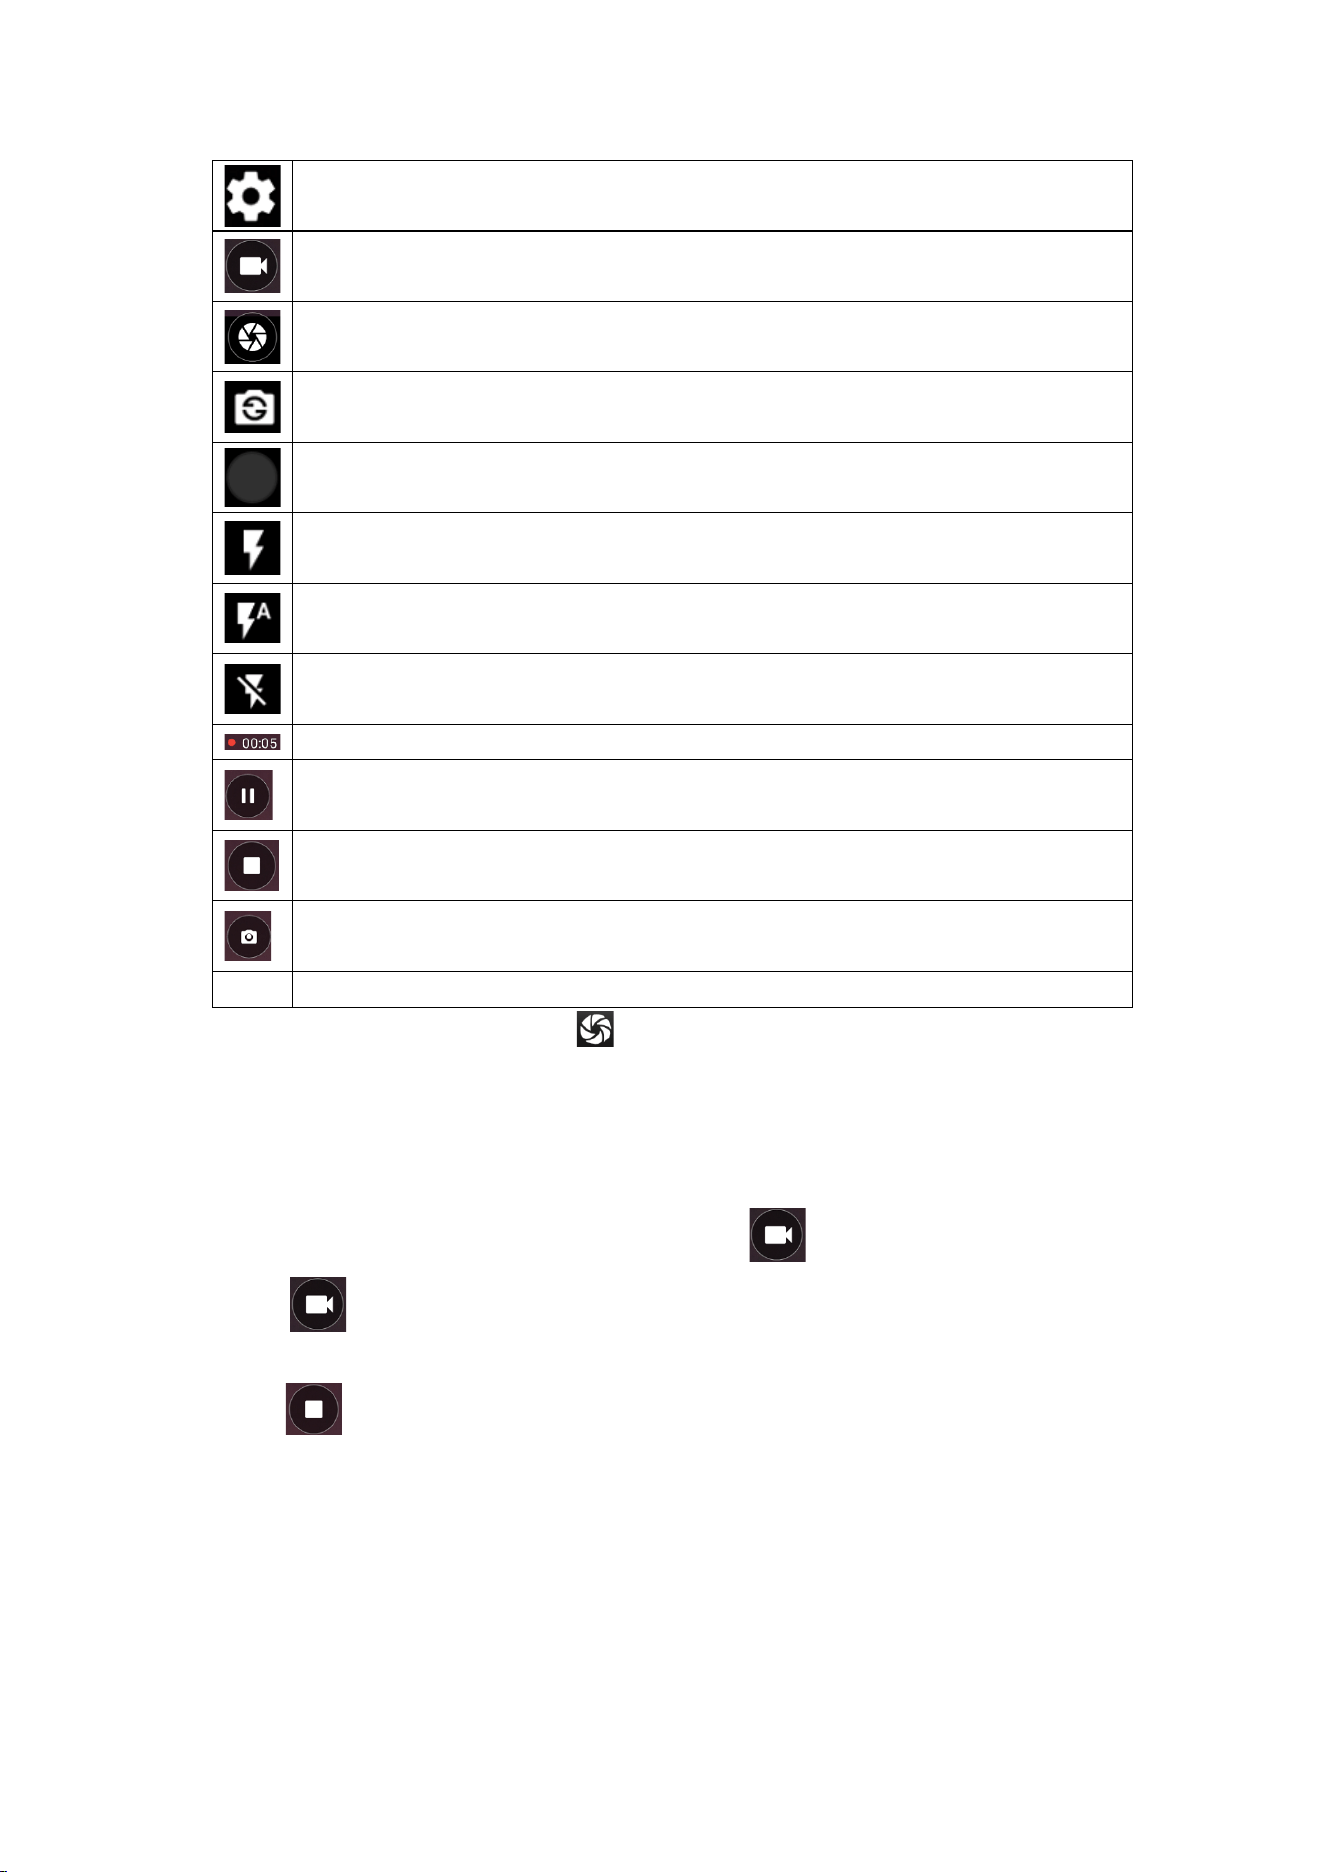
icon
definition
- 17 -
Set up
Change to video mode.
photograph
Tap to switch between front and rear camera lenses
Gallery preview
Flash on.
Flash auto.
Flash off.
Recording time.
Pause recording.
End the recording.
Capture images in a video.
3. Point the lens at the subject and tap to take a picture. The photos are automatically
saved to the DCIM folder.
4. Select the image viewer icon in the lower-left corner to view the picture.
⚫ Record a video
1. Open the list of applications and select Camera. Click To change to video mode.
2. Click Start Recording. The length of the video recording is limited by the space
available on the storage.
3. Tap to stop recording. The video is automatically saved to the DCIM folder.
4. After recording the video, select the ima ge viewer icon at the bottom left corner to view
the recorded video.
◆ QR
The convenient button for scanning QR code is added. Users can turn on the scanning
function in the camera to scan QR code faster
- 18 -
Grant partial access to photos and videos
Android 15 introduces Selected Photos Access, which allows users to grant apps access to specific
images and videos in their library, rather than granting access to all media of a given type.
If you don't use the photo picker yet, we recommend implementing it in your app to provide a
consistent experience for selecting images and videos that also enhances user privacy without
having to request any storage permissions.
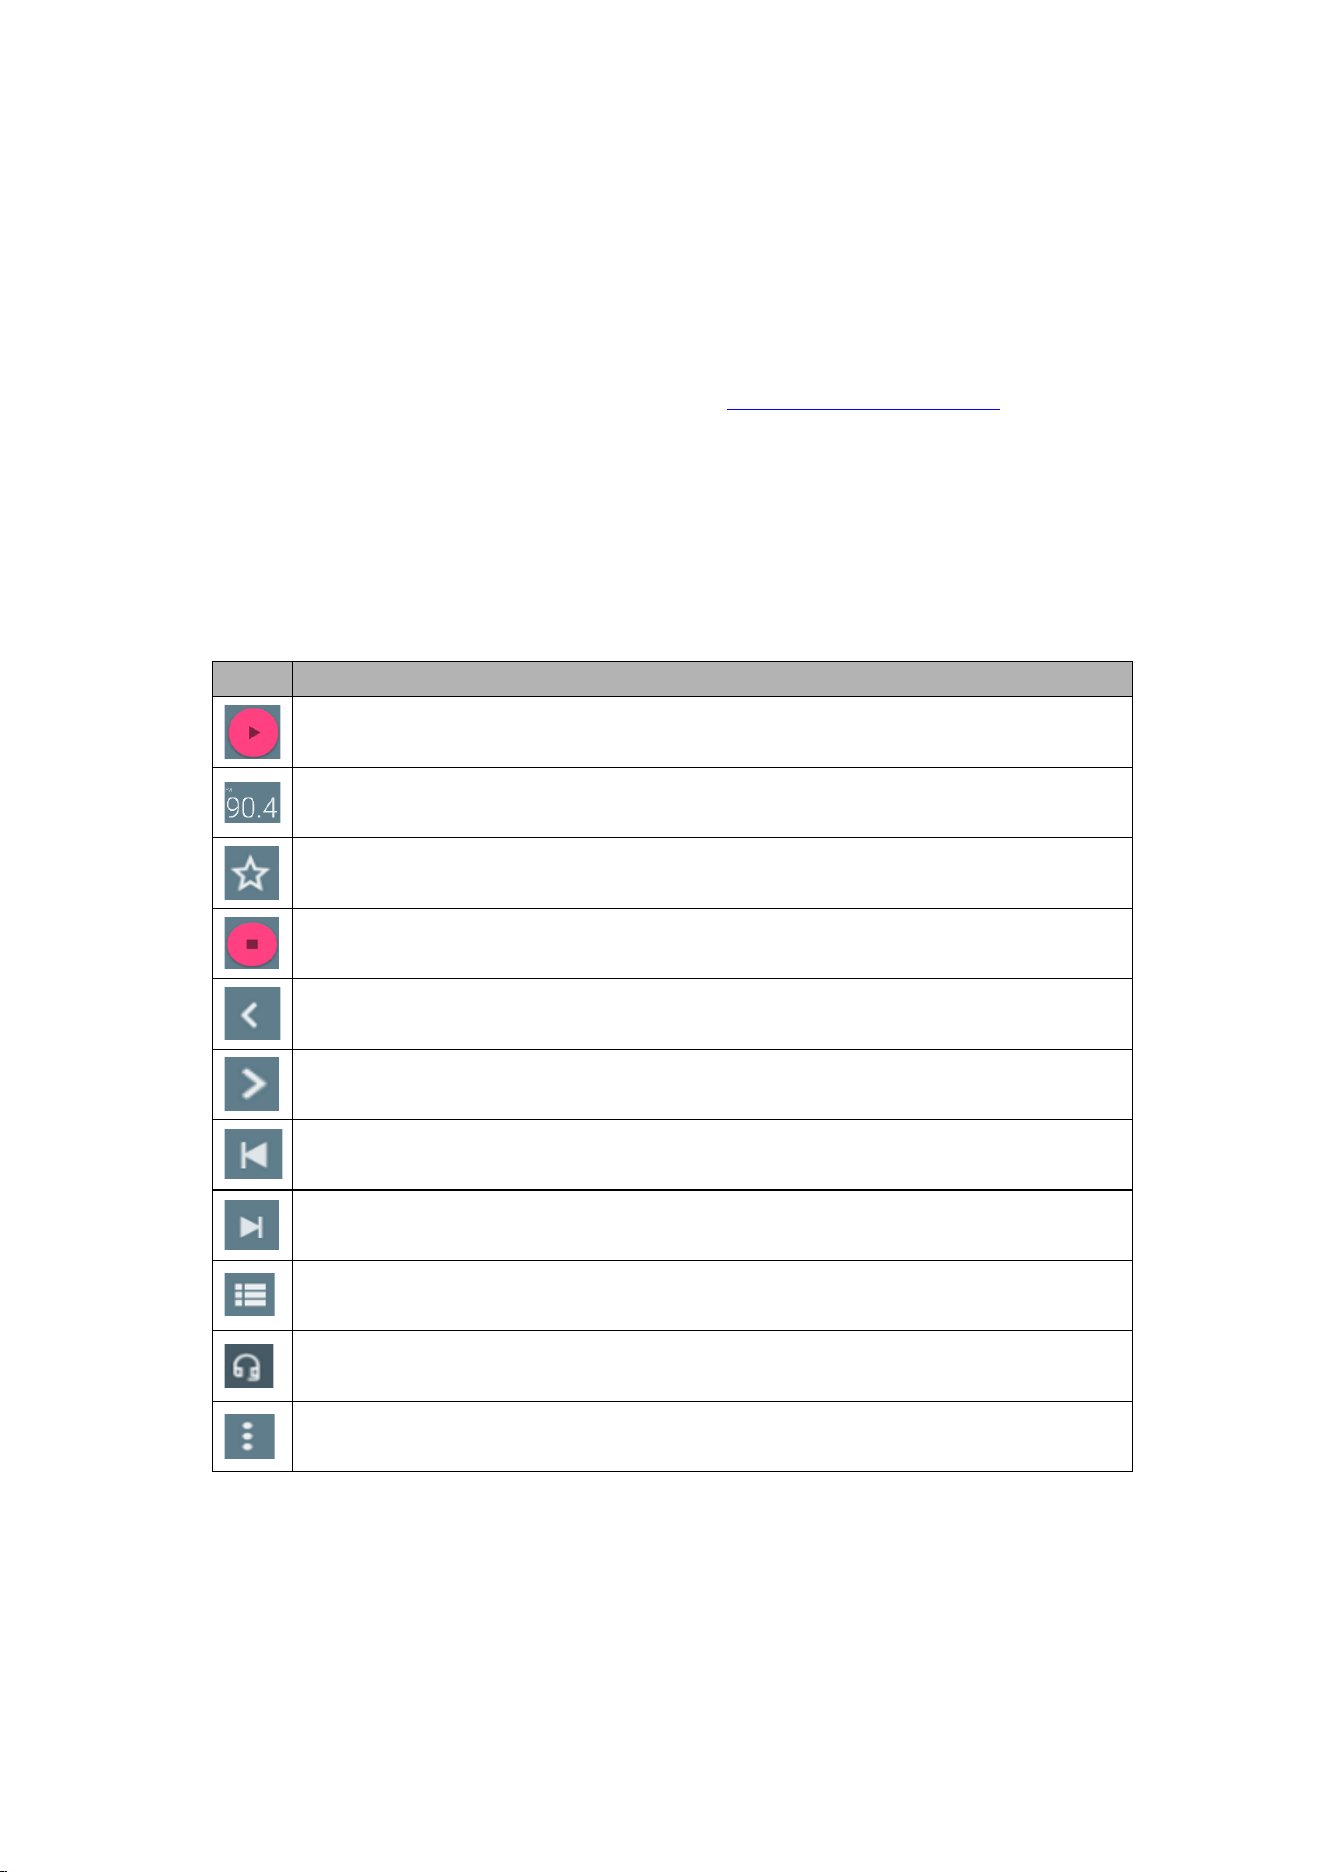
FM Radio
You can use the FM radio to listen to the radio.
1. Plug in your headphones if necessary.
icon
definition
Play
Displays the band in which the broadcast is playing
Favorite the band of this broadcast
Stop playback
Fine-tune the frequency band to the left
Fine-tune the frequency band to the left
Previous channel
Next channel
Broadcast list
Headphone mode, tap to select to switch to speaker mode.
FM settings, you can tap the recording option to record.
- 19 -
Tools
Calendar
With the calendar feature, you can review your calendar by day, week, or month, create events, and
set alarms as reminders if necessary.
To access calendars, tap Calendars in the list of apps.
1. To create an event, click the Add button in the lower-right corner, and then select New
Event.
⚫ Fill in the fields and set information like title, date, time, and location notifications.
⚫ When you're done, choose Save.
2. You can view the calendar in different rental views, days, weeks, months and all.
3. To delete an entry, tap the event to open it, tap the options button in the upper-right
corner , then select Delete, select OK.
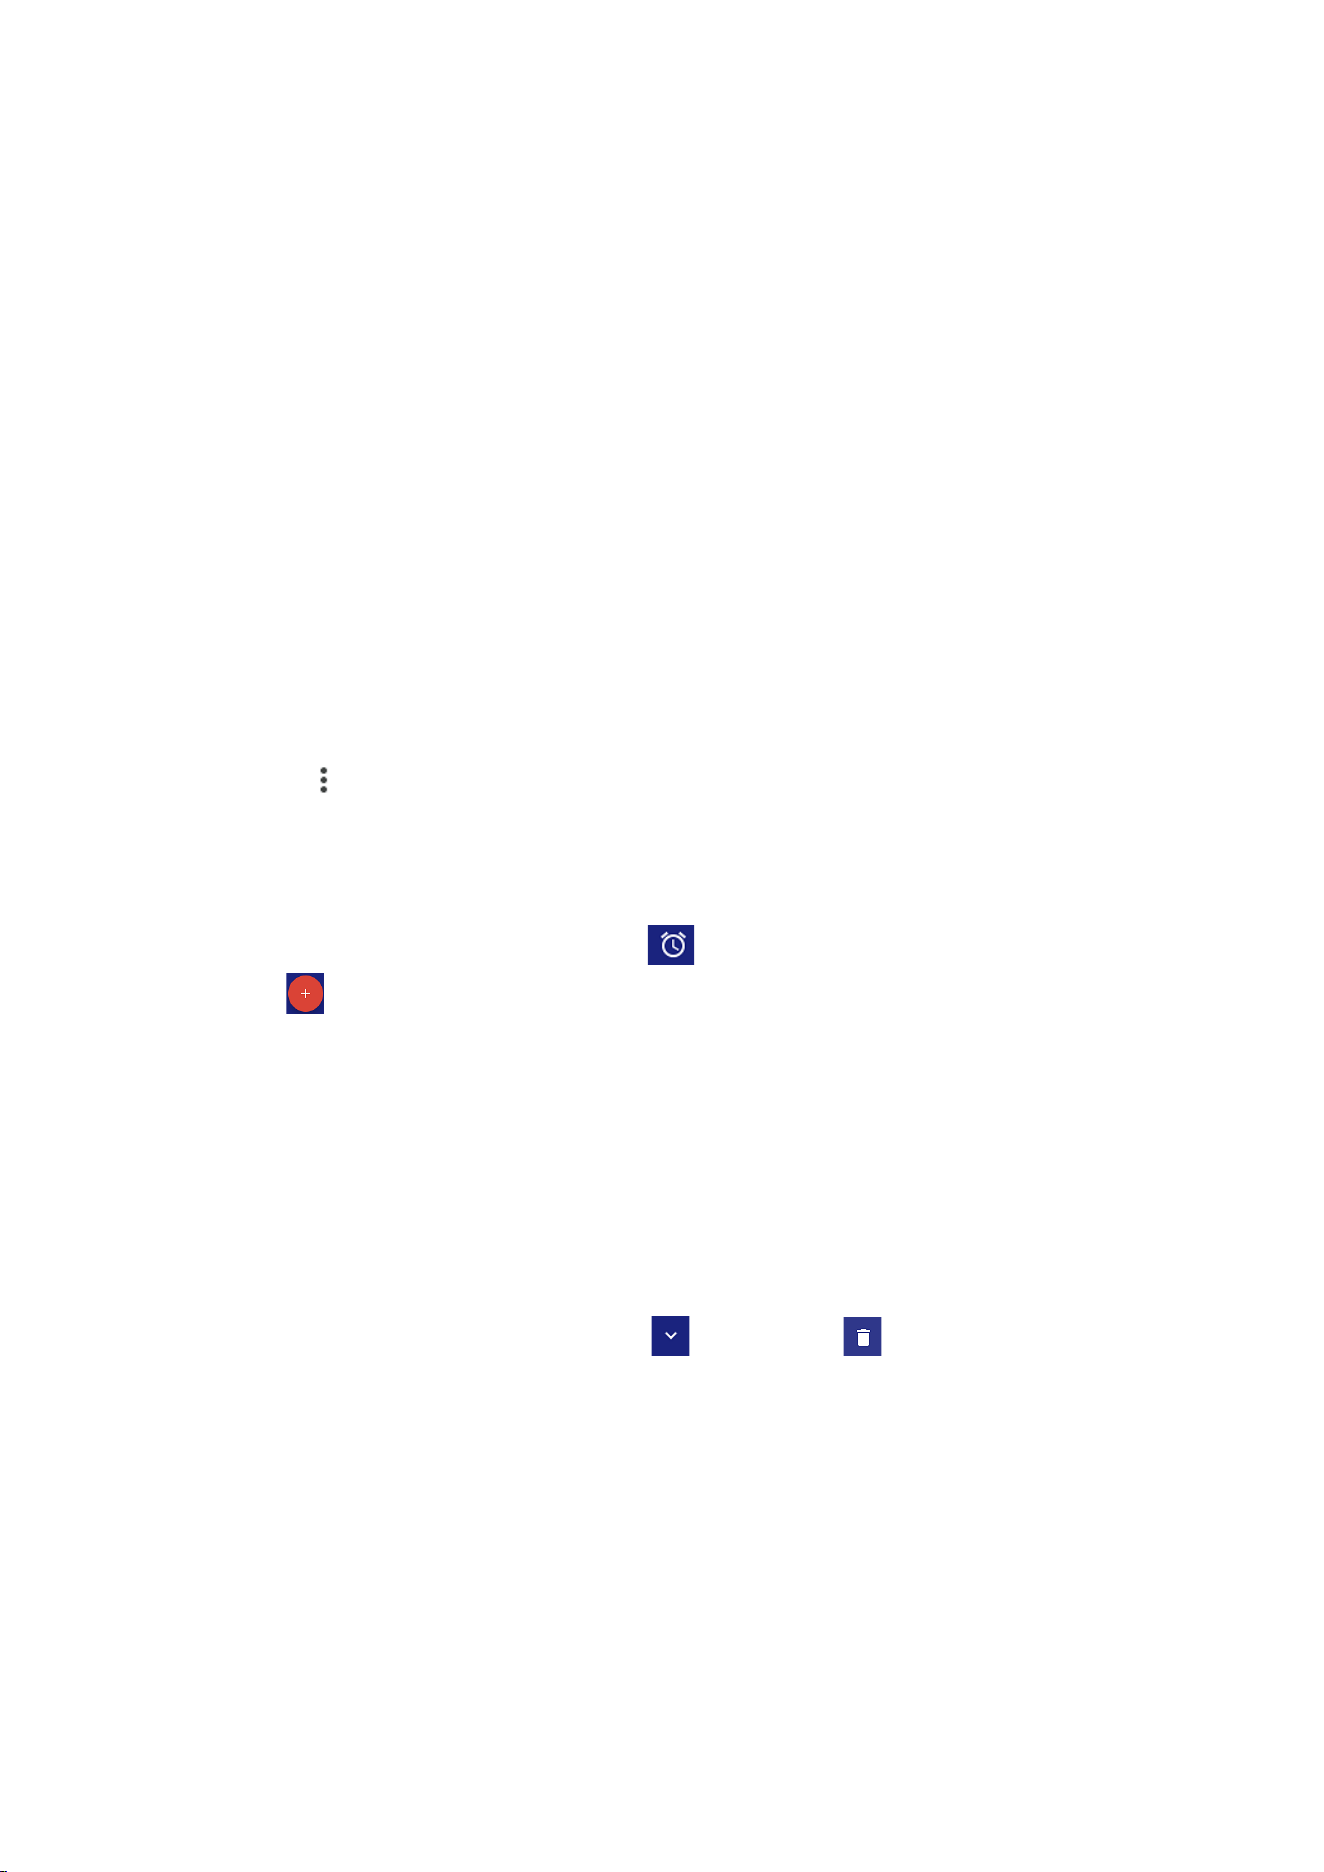
Alarm clock
From the list of apps, tap Clock, and then select .
1. Tap to add an alarm.
⚫ Tap the numeric keypad to set the alarm time, then select AM or PM, when you're
done, click OK.
⚫ Tap time to change the alarm time.
2. Set the recurrence, alarm ringtone, vibrate and edit the tag message, click OK when done.
3. Tap "Close" to close the alarm, then tap "Snooze", and then the alarm will stop ringing for
a few minutes.
4. Tap the arrow button for an alarm to expand , and then click to delete the alarm.
File Manager
Many features of the device, such as downloaded files, pictures, videos, audios, documents and
other files, applications, all use memory to store data. With File Manager, you can store and browse
files and folders in your device, or edit, move, copy files; You can also send files to compatible
devices.
Note:
1. Some file formats are not supported depending on the device's software.

- 20 -
2. Some files may not play properly depending on how they are encoded.
Recorder
With Audio Recorder, you can record voice memos. From the list of applications, tap Audio
Recorder.
1. To record a voice memo, tap .
2. To pause recording, tap .
3. To end recording, tap .
4. To listen to the recording you just recorded, tap .
Calculator
With this feature, you can use the device as a calculator. The calculator provides basic arithmetic
functions. Click the Virtual Numbers and Calculate keys to perform the calculation.
Find Devices
After logging in to the Google Account, you can associate your device and run functions such as
searching your device.
Safety
Personal safety
Quickly connect to the correct help through emergency sharing, security check and other functions.
1. Add emergency contacts (they will be used for personal security functions. In order to help in
an emergency, people can view and call these contacts without unlocking the device)
2. Add medical information (to provide help in an emergency, users can view this information
without unlocking the device): including: Name, Blood type, Allergy, Medications, Address,
Medical notes, Organ donor, etc.
Note: The privacy clause may be involved. This information is only saved on your device.
Connectivity
USB Connection
You can connect your device to your PC and use it as a removable disk, allowing you to access the
file directory.

- 21 -
1. If you want to transfer files from your device or transfer files to your device, insert the
memory card into your device.
2. Connect your device to your PC using a USB cable.
3. Open the notification panel and transfer files using USB.
4. Open the folder to view the files.
5. Copy files from PC to device memory or memory card.
Wi-Fi
With Wi-Fi, you can connect to a wireless network or other network device when an access point or
wireless hotspot is available.
⚫ Activate the wireless network feature
1. From the list of applications, tap “Set up Internet and Internet”Open it Wi-Fi
Function.
⚫ Find and connect to a wireless network
1. When the Wi-Fi feature is activated, the device automatically searches for an available Wi-Fi
connection.
2. Select a network.
3. Enter the password for the network, if necessary.
4. Choose Connect.
Bluetooth
With Bluetooth, you can share music, pictures, videos, contacts with another phone. You can use
Bluetooth headset phone or listen to music.
⚫ Activate the Bluetooth function
1. From the list of apps, tap Settings connected device to pair with the new device new
settings.
⚫ Scan and connect to other Bluetooth devices
1. The device automatically searches for other Bluetooth devices.
2. Select a device and pair it.

- 22 -
Safety precautions
Data security information
To enhance user privacy, Android 15 increases the number of places where the system shows the
information you have declared in the Play Console form. Currently, users can view this information
in the Data safety section on your app's listing in Google Play.
Equipment safety
Read these simple guides before using your device. Not following them can be dangerous or illegal.
◆ plane
Turn off on the aircraft and follow the y limit. Wireless devices can cause interference to the
aircraft.
◆ vehicle
Never use your device while driving. Keep it in a safe place.
Place the device within easy reach. Ability to access your device without taking your eyes off
the road.
◆ It is electronic
In some cases, your device may cause interference with other devices.
◆ Potentially explosive atmospheres
Turn off the device in any area with a potentially explosive atmosphere and follow all signs and
instructions. Sparks in these areas can cause explosions or fires, resulting in personal injury or
even death.
◆ Pacemakers and other medical devices
Pacemaker manufacturers recommend maintaining a space of at least 8 inches between wireless
devices and pacemakers to avoid potential interference with pacemakers.
The operation of any radio transmitting device, including wireless telephones, may interfere
with the functionality of inadequately protected medical devices. Consult with your doctor or
manufacturer of medical devices to determine if they are adequately shielded from external RF
energy or if you have any problems.
When any regulations issued in these areas instruct you to turn off devices in health care
facilities, turn off those devices.
◆ Operating environment
When connecting to other devices, read their user guide for detailed safety instructions. Do
not connect incompatible products.
Do not place the device in the airbag spread area.
Use the device only in the normal working locations described in the product documentation.
Always turn off the device when it is prohibited or may cause interference and danger.
◆ The region where the regulation has been published

- 23 -
When any regulations issued in these areas instruct you to do so, turn off your device.
Care & maintenance
◆ Use only accessories approved by the manufacturer. The use of general accessories may shorten
the life of the equipment or cause it to malfunction.
◆ Keep the device dry. Humidity and all types of liquids can damage device components or
electronic circuits.
◆ Do not use or store your device in dusty, dirty places.
◆ Do not store your device in a hot or cold place.
◆ Do not store the device near a magnetic field.
◆ Do not store your device with metal items such as coins, keys, and necklaces.
◆ Do not discard or cause damage to the device.
Warnings
◆ FCC RF Exposure Information:
◆ Warn!! Please read this information before using your phone
◆ In August 1986, the Federal Communications Commission (FCC) acted in the report
and Inhouse FCC 96-326 to pass human exposure to radio frequency (RF) emitted
by FCC-regulated transmitters Updated safety standards for electromagnetic
energy. These guidelines are consistent with safety standards previously developed
by the United States and international standards bodies. The phone is designed to
comply with FCC guidelines and these international standards. Use only included
or approved antennas. Unauthorized antenna modifications or accessories can
impair call quality, damage the phone, or violate FCC regulations. Do not use a
damaged phone with an antenna. If the damaged antenna comes into contact with
the skin , it may cause minor burns. Please contact your local dealer to replace the
antenna.
◆ Wearable operation:
◆ The device is tested for typical body wear operations, with the back/front of the phone
maintained 0.5 cm from the body. To comply with FCC RF exposure requirements, a
minimum distance of 0.5 cm must be maintained between the user's body and the
back/front of the audio network (including antennas). 。 Third-party belt clips, holsters

- 24 -
and similar accessories containing metal parts must not be used. Accessories for
the go
◆ Failure to maintain a 0.5 cm spacing between the user's body and the back/front of the
ping-pong and having not been tested for typical body wear operations may not meet
the FCC RF exposure limits and should be avoided.
◆ For more information about RF exposure, visit the FCC website www.fcc.gov
◆ Your wireless handheld portable phone is a low-power radio transmitter and
receiver. When it is turned on, it receives and transmits radio frequency (RF)
signals. In August 1996, the Federal Communications Commission (FCC) approved
RF exposure guidelines, which have a security level of handheld wireless telephony.
These guidelines are consistent with safety standards previously developed by the
United States and international standards bodies:
◆ <ANSIC95.1> (1992) / <NCRP Report 86> (1986) / <ICNIRP>
(1999)
◆ These criteria are based on a comprehensive and item-by-item assessment of the
relevant scientific literature. For example, more than 120 scientists, engineers and
physicians from universities, government health agencies and industry reviewed the existing
research system that developed the ANSI standard (C95.1). Nevertheless, we
recommend that you use a hands-free kit on your phone, such as a handset or
headphones, to avoid potential exposure to RF energy. The phone is designed to
comply with FCC guidelines (and these standards).
◆ Use only included or approved replacement antennas. Unauthorized antennas,
modifications, or accessories can damage your phone and may violate FCC
regulations.
◆ Normal Position:
◆ Hold the phone like any other phone with the antenna facing up and on your
shoulder.
◆ RF Exposure Information:
◆ This product meets FCC RF exposure requirements, please refer to the FCC
website https://apps.fcc.gov/oetcf/eas/reports/GenericSearch.cfm Search for FCC
ID: 2BTUES16PRO for more information including SAR values.
◆ This device complies with Part 15 of the FCC Rules. The operation is subject to two
conditions:
◆ (1) This equipment shall not cause harmful interference, as well
◆ (2) The Device must accept any interference received, including interference that
may lead to accidental operation.
◆ Note: The manufacturer is not responsible for any radio or television interference
caused by unauthorized modifications to this device. Such modifications may

- 25 -
invalidate the user's permission to operate the device.
◆ Note: This device has been tested to meet the limitations of Class B digital devices
in accordance with Part 15 of the FCC Rules. These restrictions are intended to
provide reasonable protection against harmful interference in residential
installations. This device is useful and may radiate radio frequency energy, which
may cause harmful interference to radio communications if not installed and used
as directed. However, there is no guarantee that interference will not occur in a particular
installation. If the device does cause harmful interference to radio or television
reception, which can be determined by turning the device off and on, the user is
encouraged to correct the interference by one or more of the following measures:
◆ - Redirect or reposition the receiving antenna.
◆ - Increase the distance between the device and the receiver.
◆ - Connect the device to an outlet on a circuit that is different from the circuit to which the
receiver is connected.
◆ -Please consult your dealer or experienced radio/TV technician for assistance
◆ Do not use the device in environments below -10°C or above the maximum 50°C, as
the device may not function properly.
◆ Changes or modifications to the Device without the prior approval of the Party
responsible for compliance may void the User's authority to operate the Device.
◆ Peer-to-peer functionality is supported, but cannot be run on non-US frequencies.
Google, Android, and Google Play are trademarks of Google LLC.

- 26 -
Federal Communication Commission Interference Statement
FCC ID: 2BTUES16PRO
This device complies with Part 15 of the FCC Rules. Operation is subject to the
following two conditions: (1) This device may not cause harmful interference, and (2)
this device must accept any interference received, including interference that may cause
undesired operation.
This equipment has been tested and found to comply with the limits for a Class B digital
device, pursuant to Part 15 of the FCC Rules. These limits are designed to provide
reasonable protection against harmful interference in a residential installation. This
equipment generates, uses and can radiate radio frequency energy and, if not installed
and used in accordance with the instructions, may cause harmful interference to radio
communications. However, there is no guarantee that interference will not occur in a
particular installation. If this equipment does cause harmful interference to radio or
television reception, which can be determined by turning the equipment off and on, the
user is encouraged to try to correct the interference by one of the following measures:
-Reorient or relocate the receiving antenna.
-Increase the separation between the equipment and receiver.
-Connect the equipment into an outlet on a circuit different from that to which the
receiver is connected.
-Consult the dealer or an experienced radio/TV technician for help.
FCC Caution: Any changes or modifications not expressly approved by the party
responsible for compliance could void the user's authority to operate this equipment.
Radiation Exposure Statement:
This device meets the government’s requirements for exposure to radio waves.
This device is designed and manufactured not to exceed the emission limits for
exposure to radio frequency (RF) energy set by the Federal Communications
Commission of the U.S. Government.
The exposure standard for wireless device employs a unit of measurement known as
the Specific Absorption Rate, or SAR. The SAR limit set by the FCC is 1.6W/kg. Tests
for SAR are conducted using standard operating positions (10mm) accepted by the FCC
with the device transmitting at its highest certified power level in all tested frequency
bands.
The use of holsters and similar accessories should not contain metallic components in
its assembly, the use of accessories that do not satisfy these requirements may not
comply with FCC RF exposure requirements, and should be avoided.