EN
Quick Start Guide
Projector ,T1SP,T-1MVT
Contents
01
Dear customer,
Thank you for choosing Yaber Projector. Please kindly read this QSG carefully before using the projector.
ScantheQRcodeonthenextpagetogetthedetailedproductusermanualandvideoguideline.
We understand that using a projector can sometimes be confusing, however, leaving a review on the
product page doesn't help for your perfect experience :( Please let us help you! We really hope to get your
kind feedback, and we'll surely serve you with a quick & satisfying solution as soon as possible!
Many common problems canusuallybesolvedwithappropriatesettingadjustments. suchasbattery
issues,instabilityofauto focusorkeystone,Dolbysoundissues,WiFiorBluetoothconnection.
If you have any questions, please send your order No. and problem in mail subject, e.g.[US+Model No.
+000-0000000-0000000+your problem] to our mailbox,faster solved if you kindly send videos or pictures
in the same time. Ourserviceteamwillserve youwithin 24 hours as soon as possible.
Our R&D Team dedicating themselves to bringing you a wonderful & warm watching experience with your
families & friends. Our QC Team set a strict full inspection process and well package before shipment to
ensure good quality and functionality for every Yaber Projector.
If you encounter any problems, please give us a chance to serve you and know more about Yaber
Projector. :)
We're committing to provide you with the most satisfactory solution. Thanks for your kind understanding
and patience in advance.
Yaber Projector Consumer Service Team
English
PDF user manual
Scan and download
Video Guideline
Scan to learn more
@yaber.projector@yaberofficial
www.yaber.com
Where to Get More Help
The terms HDMI, HDMI High-Definition Multimedia Interface, HDMI trade
dress and the HDMI Logos are trademarks or registered trademarks of
HDMI Licensing Administrator, Inc.
01
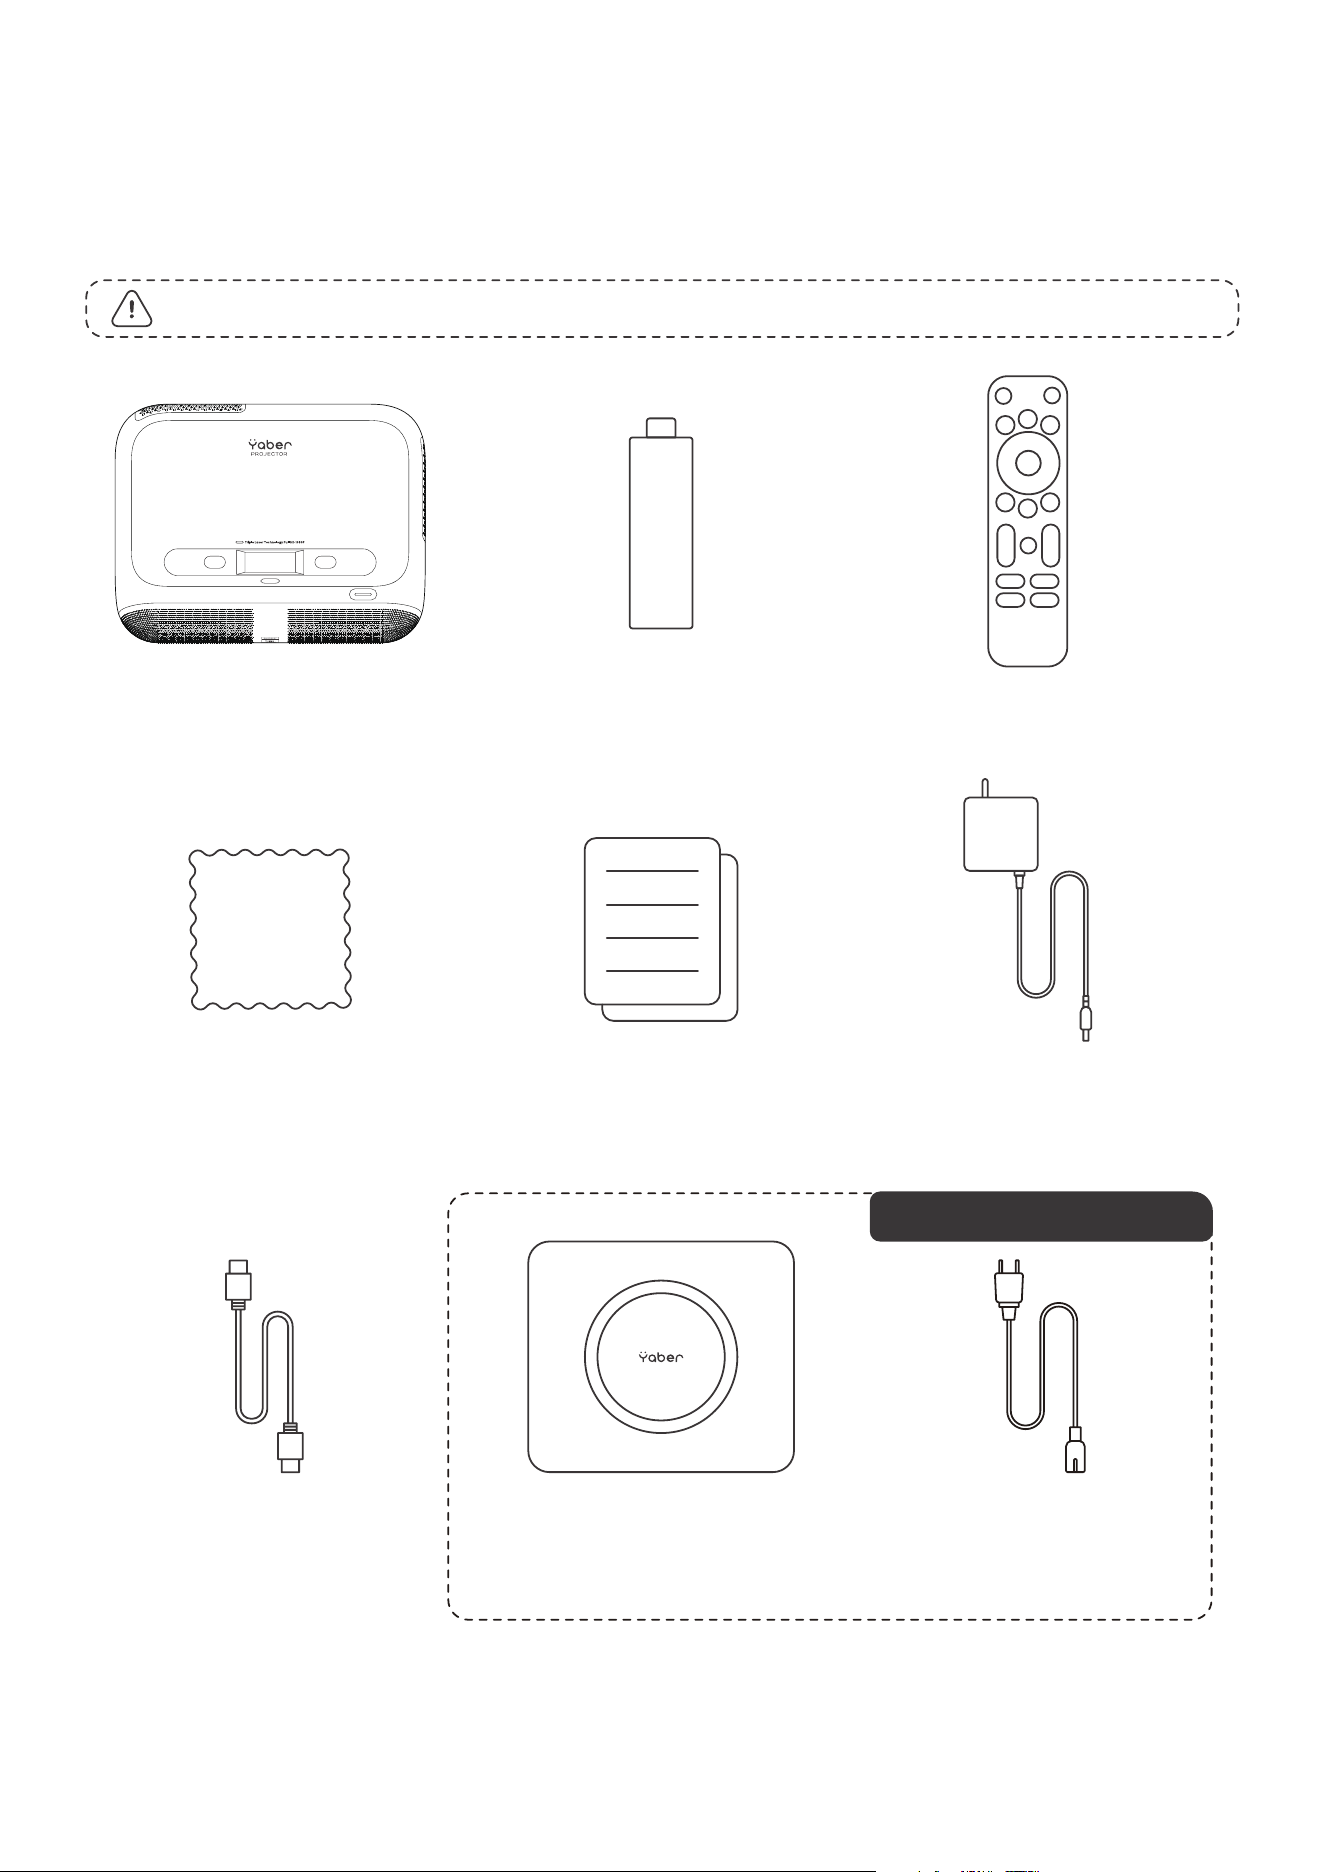
Package Contents
HDMI Cable Subwoofer
Subwoofer
Power Cable
QSG & FAQ
Cleaning Cloth
TV DongleK300s Projector
Attention: The Dongle is already built into the projector.
K300s Power Cord
Remote Control
02
Special for K300s Pro
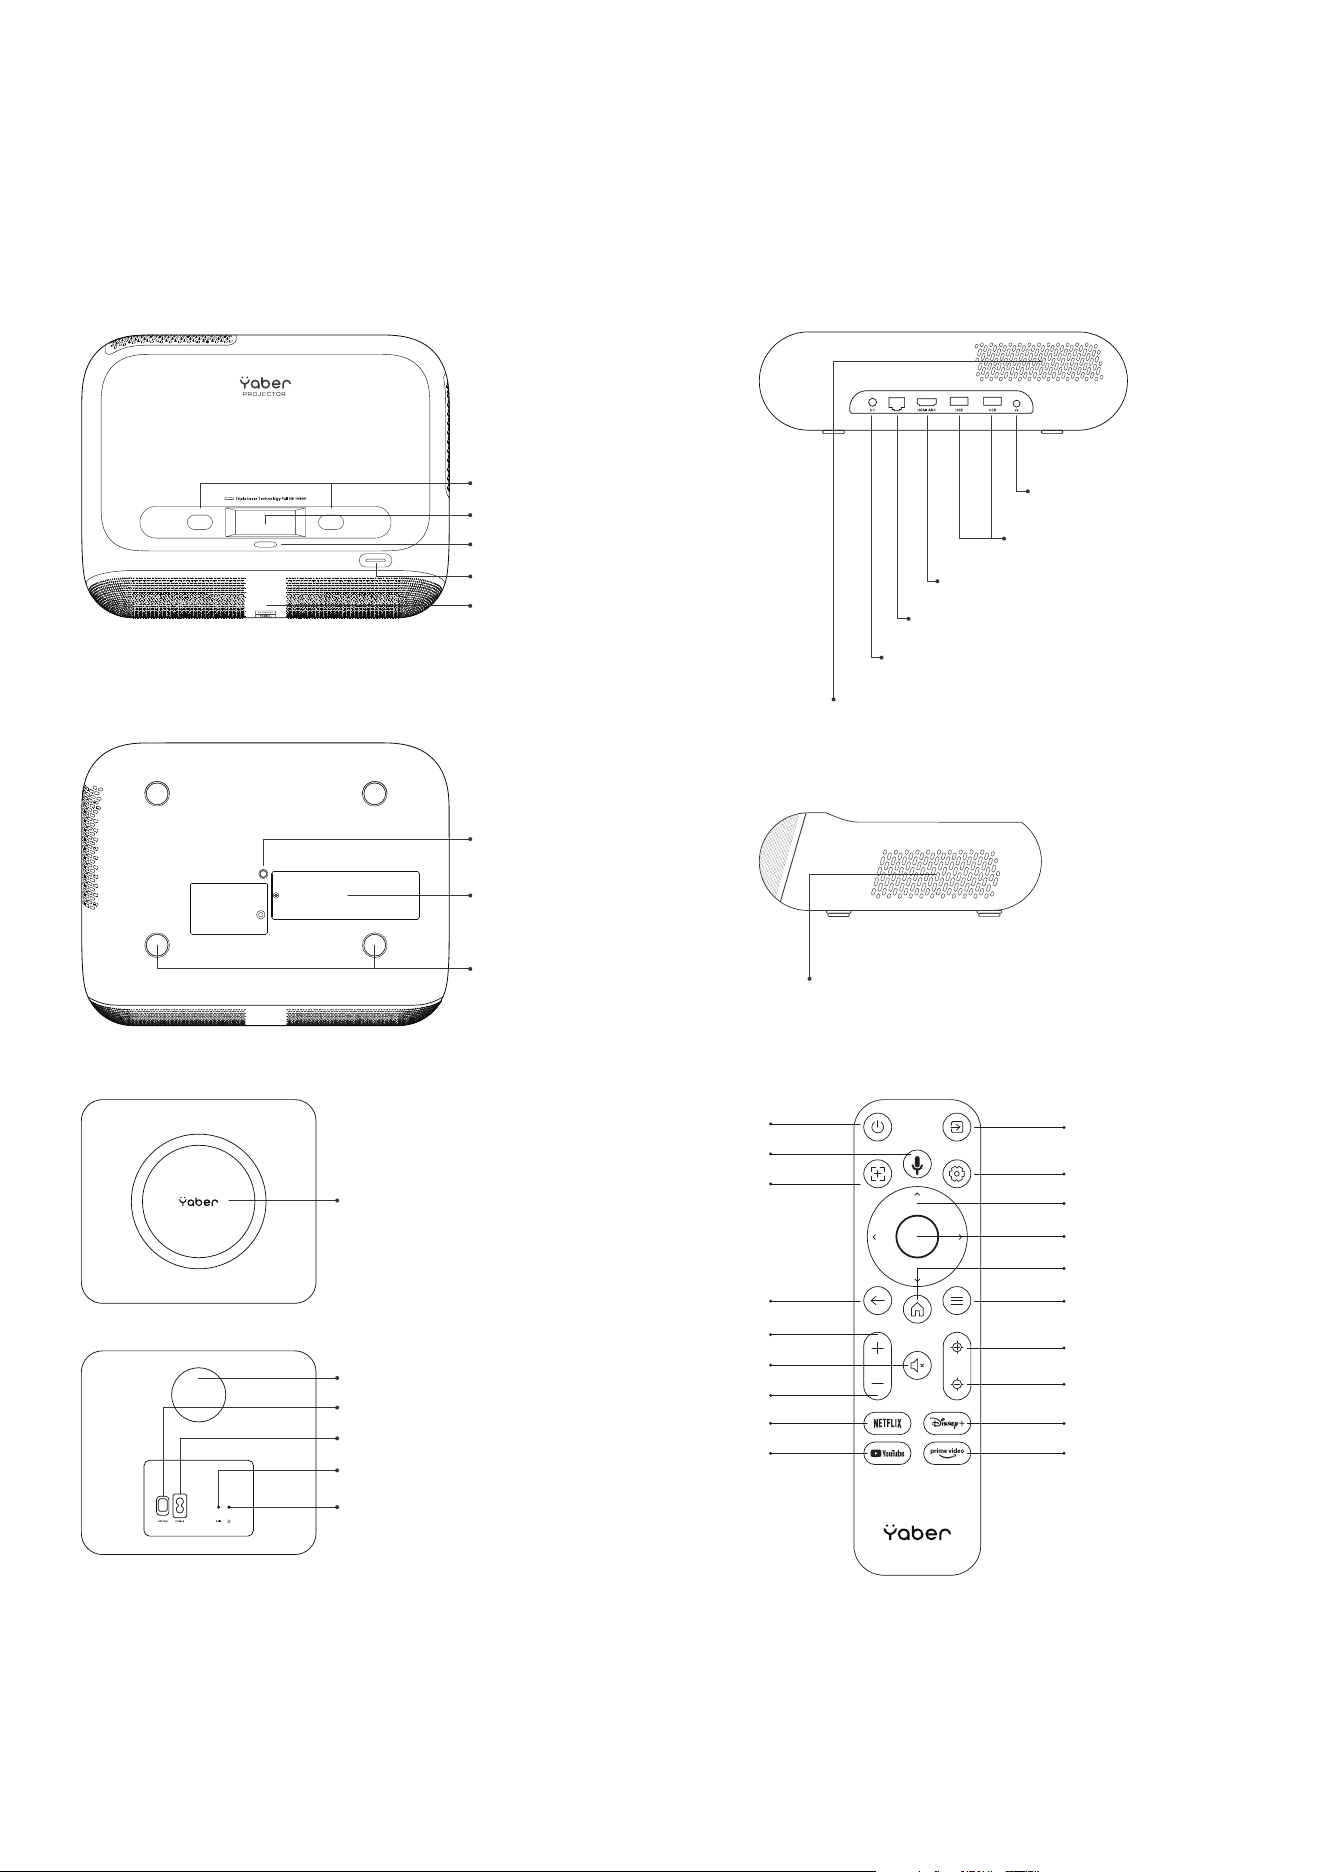
Product Overview
03
Power Button
TOF
Eye-Protection Sensors
Lens
Infrared Receiver
Audio Output
Port
USB Ports
HDMI ARC Port
Ethernet Port
DC power port
Air Outlet
(do not cover during use)
Ventilation port
(do not cover during use)
Adjustable Foot screw
Acoustically
Transparent Fabric
Mount hole
TV Dongle
Compartment
Video Source
Arrow Key
Confirm
Home
Menu
Focus +
Focus -
Disney+
Prime Video
Power
Voice Search
Auto Focus
Back
Volume UP
Mute
Volume Down
Netflix
YouTube
Settings
Indicator Light
Pair
Power Port
Power ON/OFF
Bass reflex port
04
Basic Setup
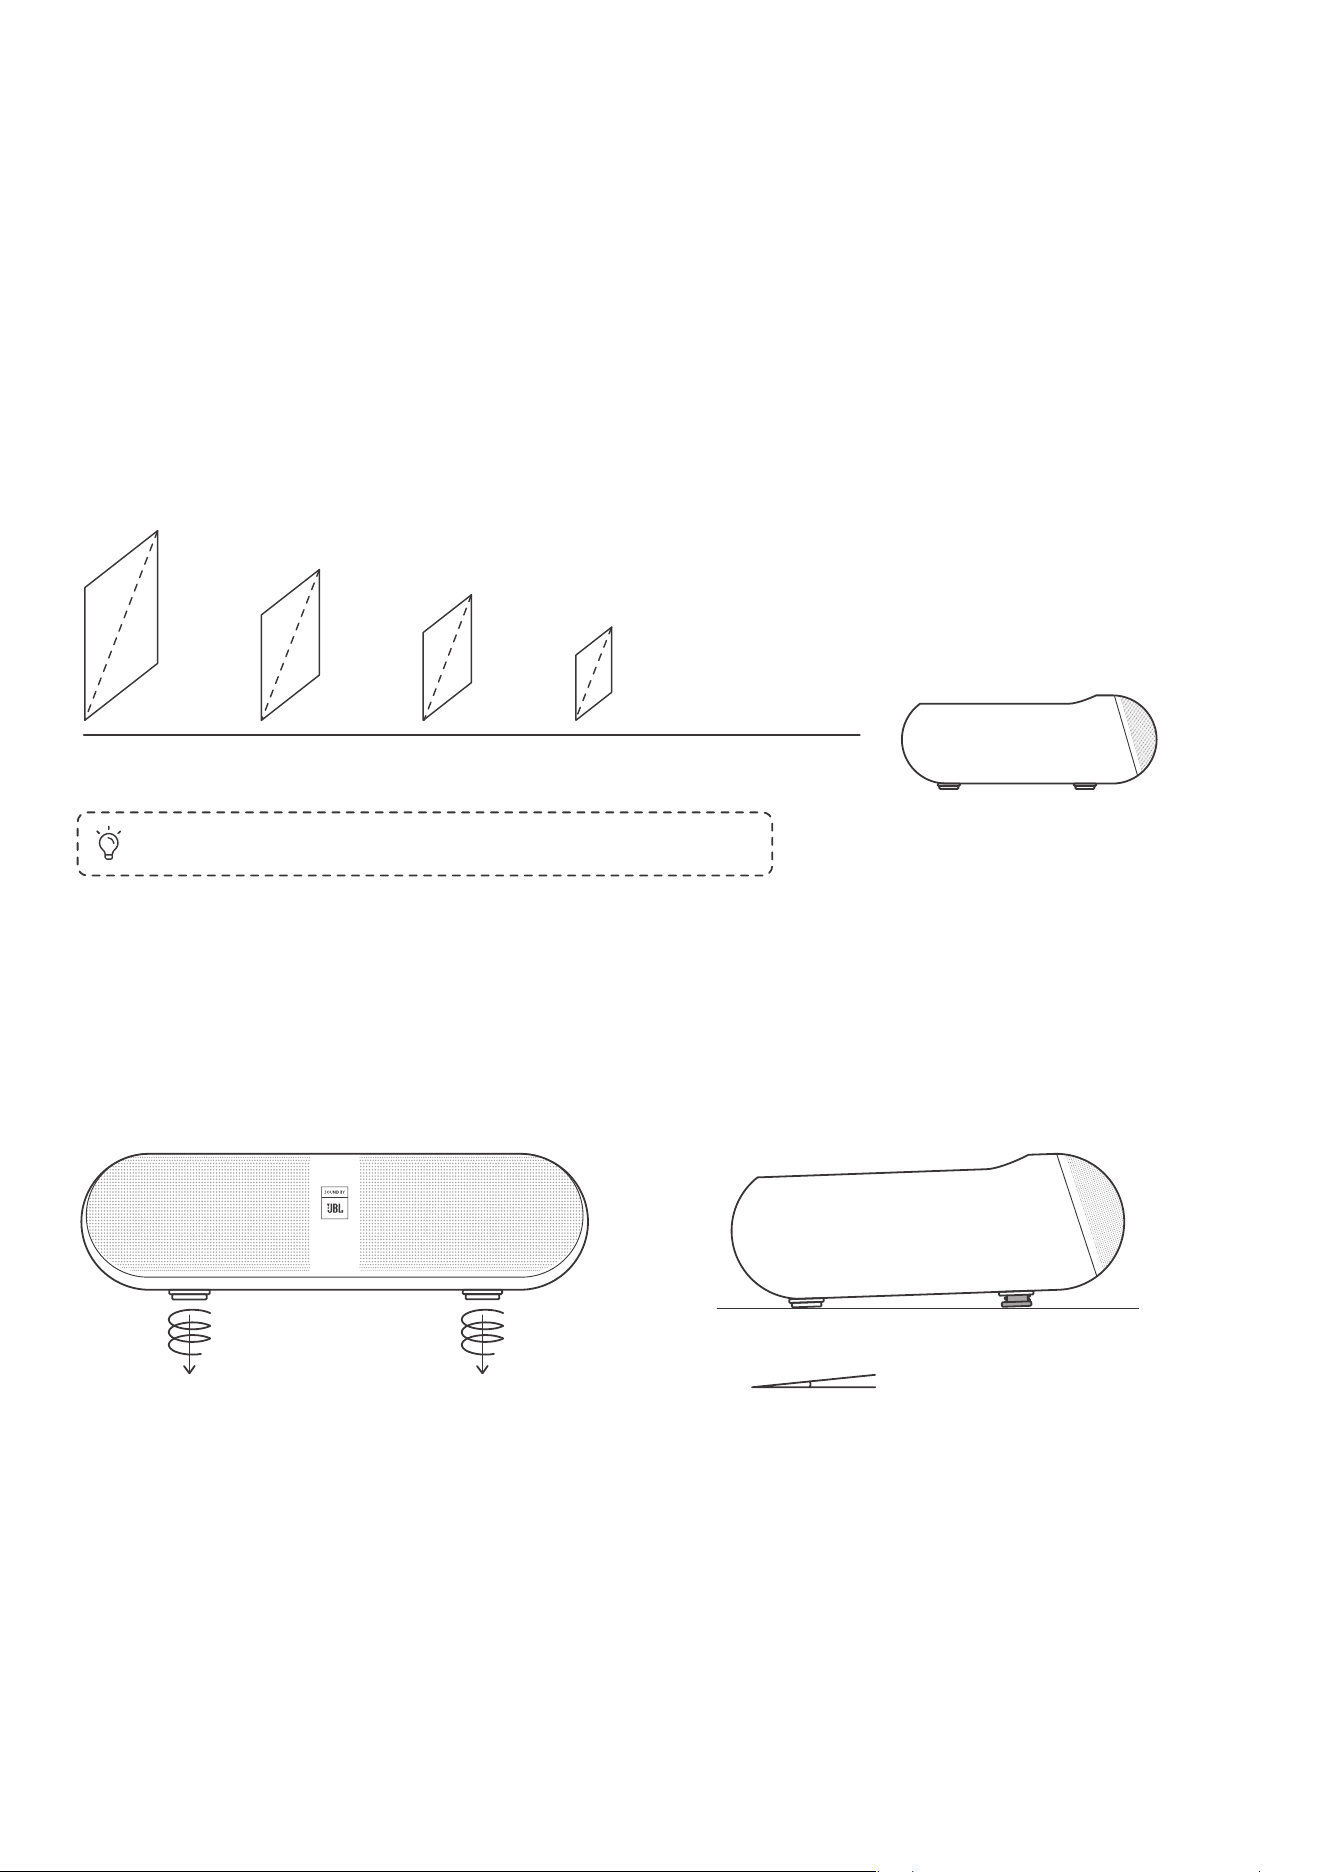
Projection Ratio and Distance
For optimal image quality, place the projector on a flat and stable surface.
To adjust the vertical angle, use the adjustable foot screw at the bottom of
the projector.
You can adjust the image by 50% using the [Projector Settings] - [Zoom].
If needed, rotate these screws to slightly adjust the projection angle max
degree:2°
centimeter16.924.832.844.8
150"
120"
100"
80"
0.60.81.11.5 feet
Tip: The recommended Screen size is 80 inches.
Max degree: 2°
05
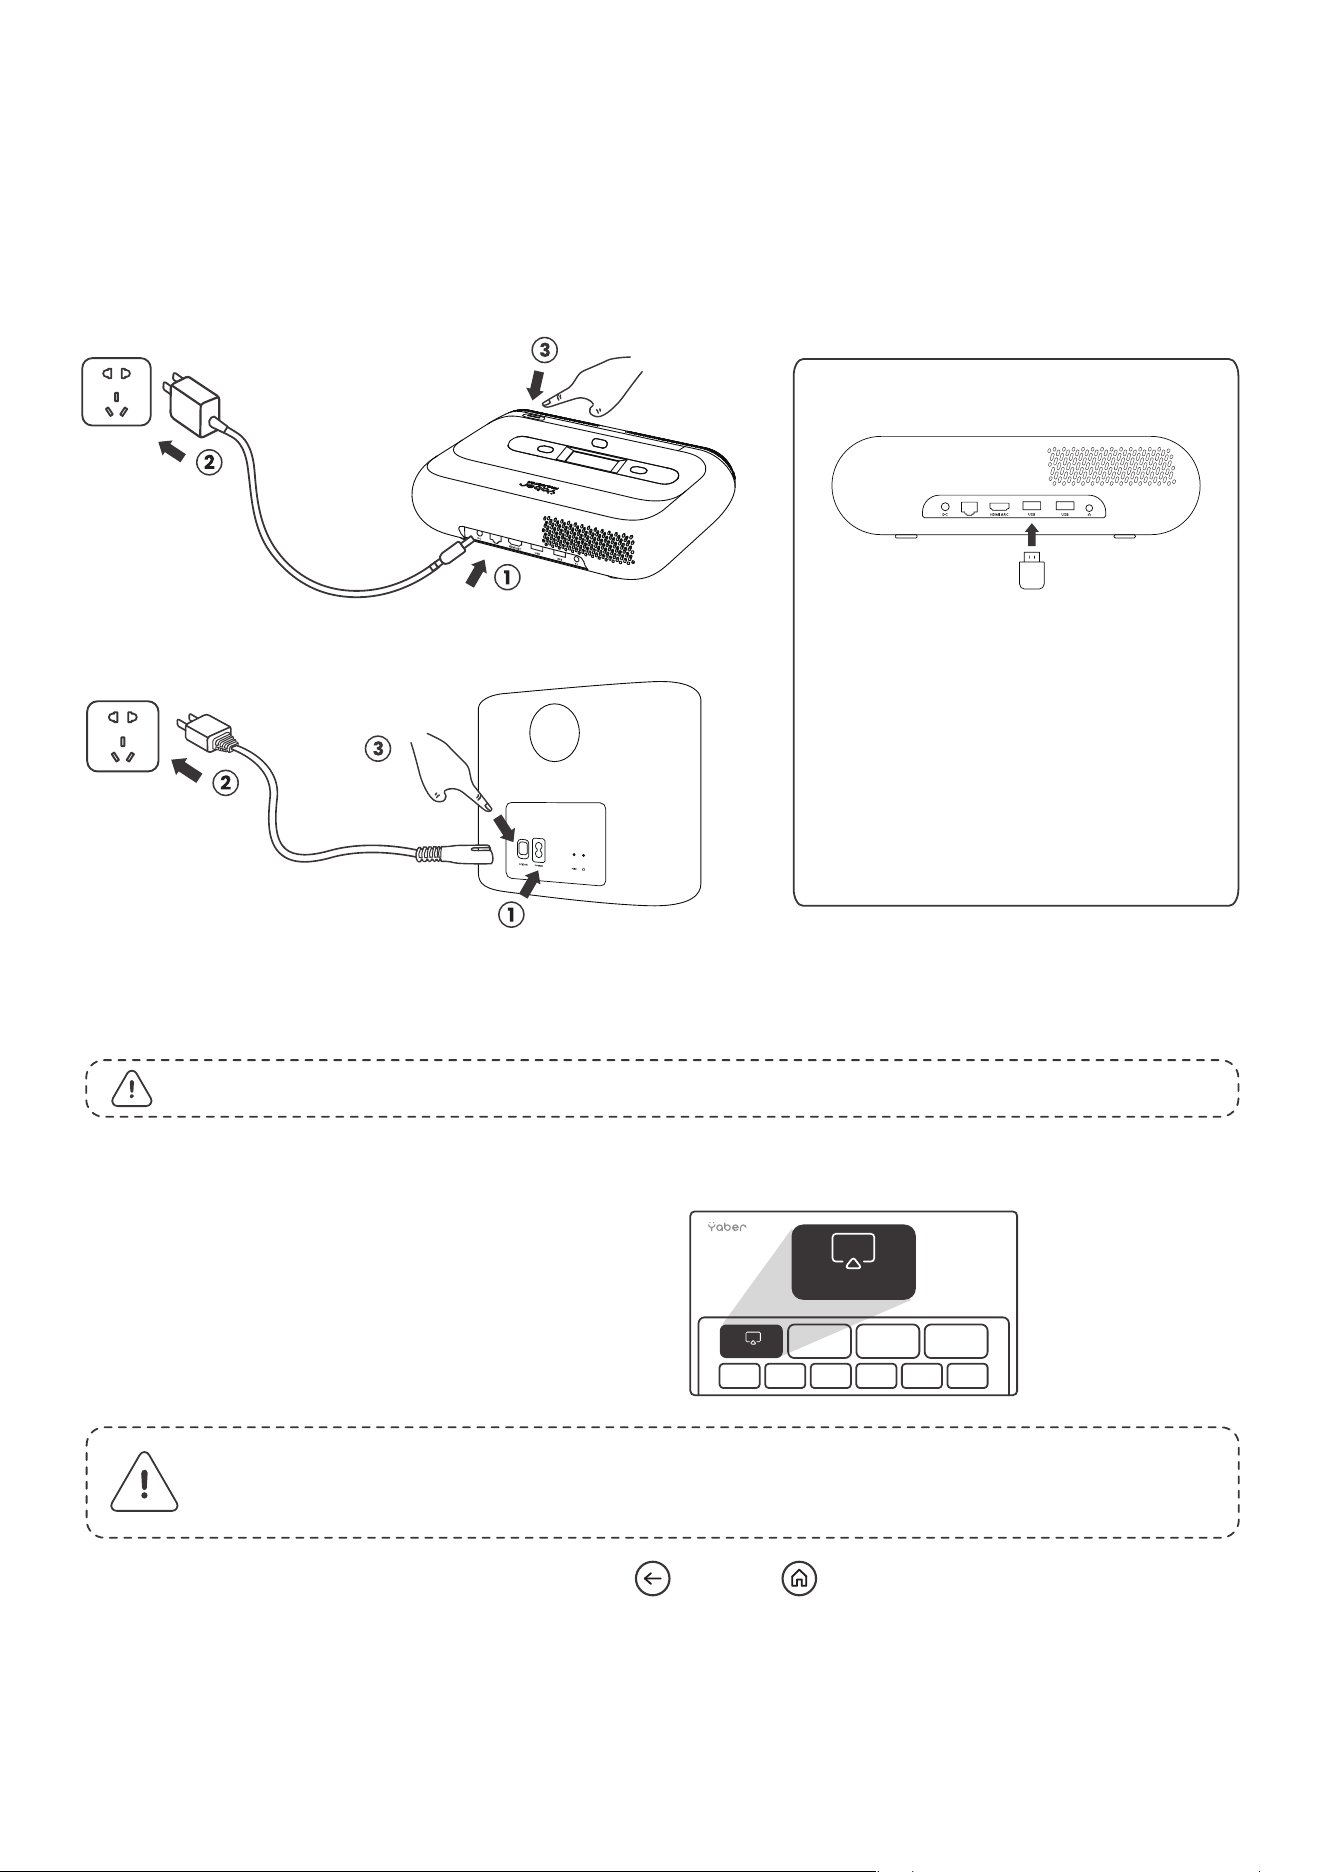
Connecting the Power Cable
How to Use the Dongle
How to Use TV
Click on TV to enter the system on the
home page.
To pair, hold down the pairing button and for a longer duration.
Attention: When using TV for the first time, follow the screen prompts
for remote control pairing and other settings.
Attention: The Dongle is already built into the machine!
TV
TV
Plug the USB Dongle into the USB
port of the projector. when the white
power light blinks, click the pair
button on the subwoofer.
When the light blinks fast,it enters
the pairing mode.
06
How to Remove the Dongle
If the remote is lost:
1. You can use the remote control function of the Google TV app on your
smartphone as a temporary solution to control the TV interface.
2. You can use the remote control function of the Yaber app on your
smartphone as a temporary solution to control the TV interface.
3. Contact the after-sales team to obtain a new remote control.
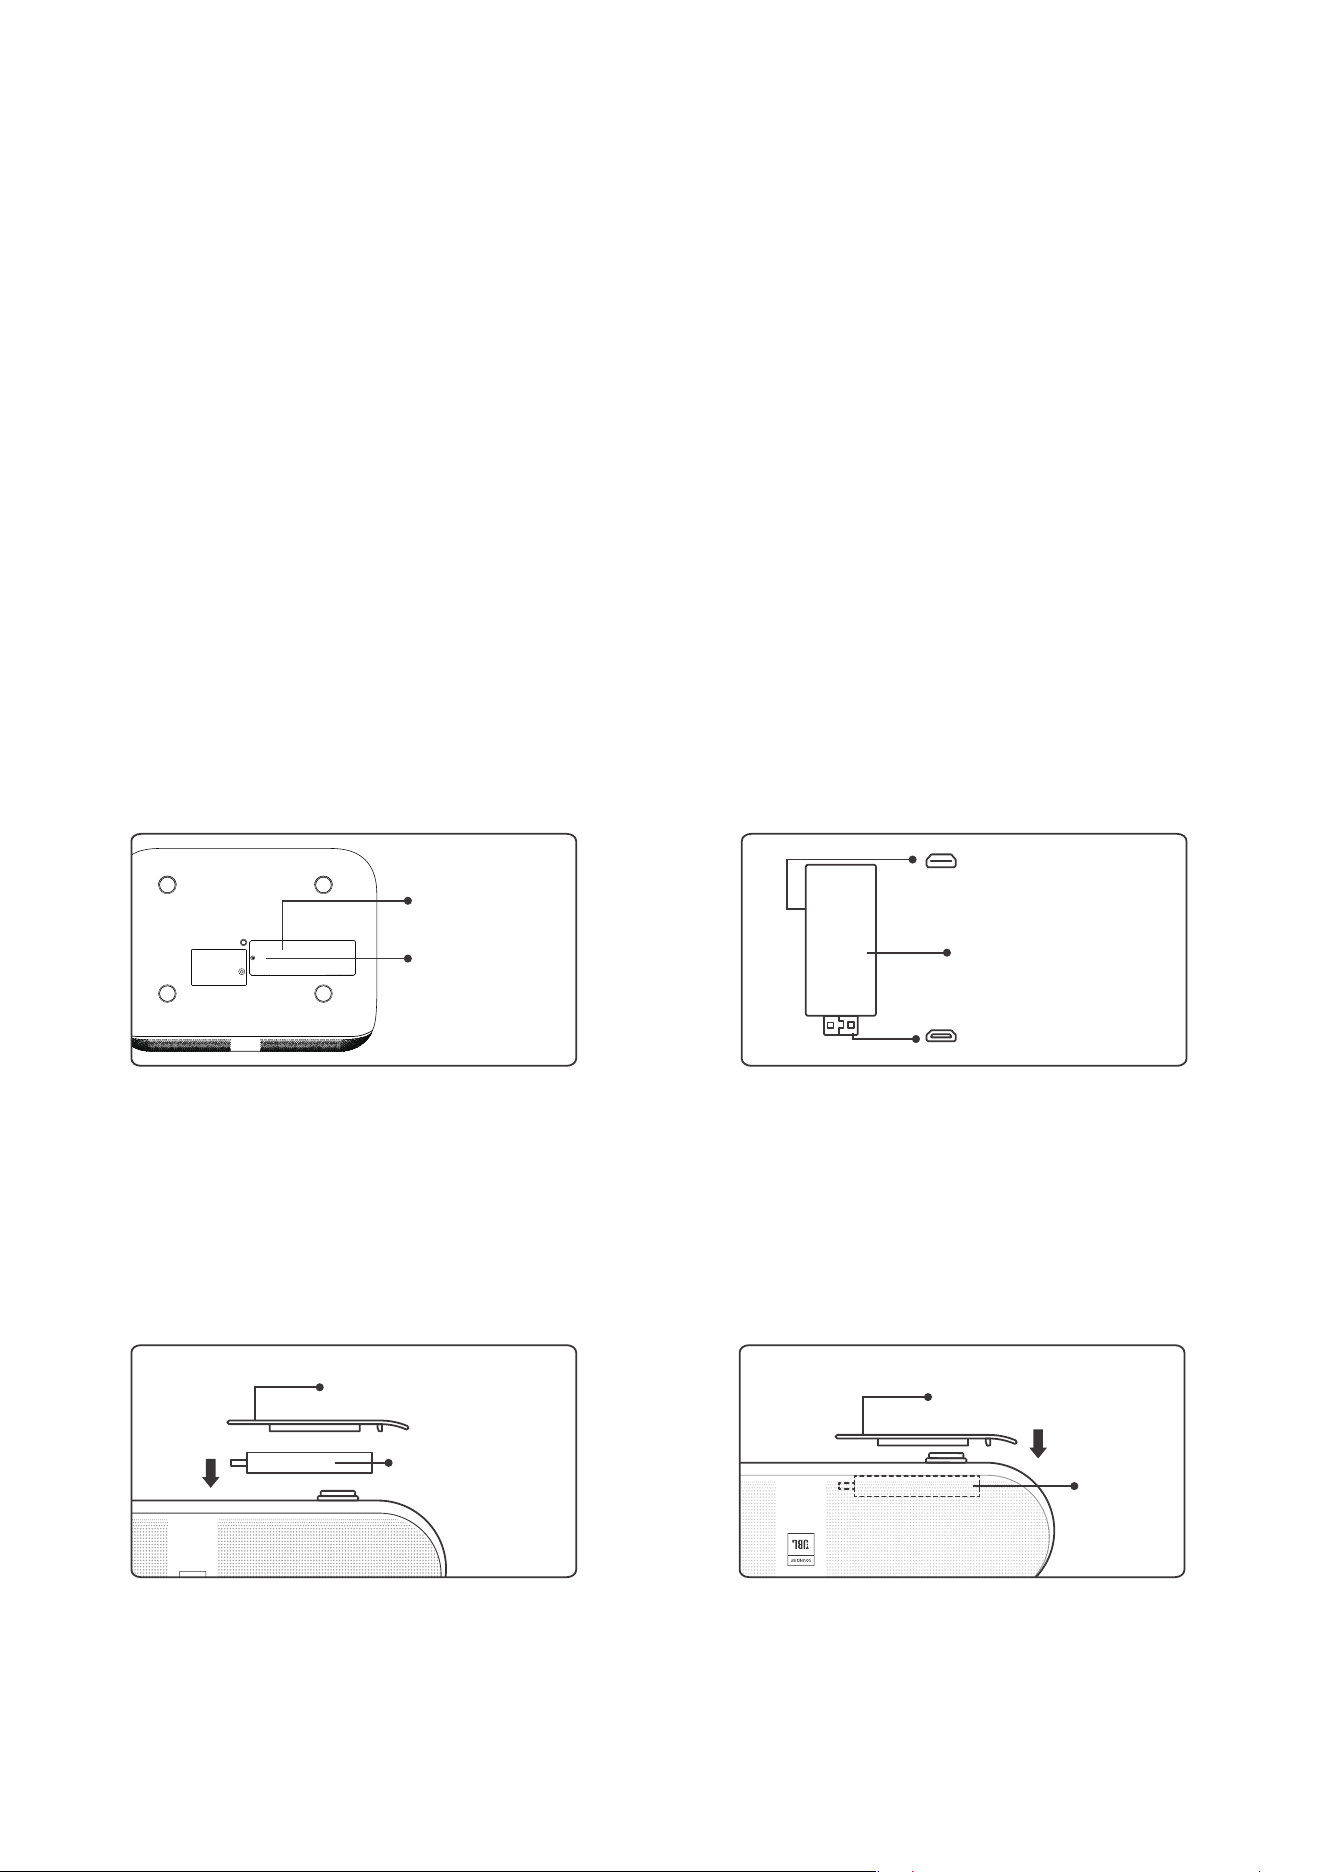
1. Use a screwdriver to remove the
screws on the cover of the Dongle
compartment. (Screw size:
ST2.3×6mm)
2. Install the Dongle into its compart-
ment (make sure the dongle is firmly
inserted to ensure it is recognized)
3. Insert the Dongle into its compart-
ment. (Make sure the Dongle is firmly
inserted to be recognized.)
4. Restore the cover of the Dongle
compartment.
Micro USB port
HDMI port
Mounted TV Dongle
Screws
Dongle
Lid
Lid
Dongle
Lid
07
Screen Settings
Auto Keystone Correction
Manual Keystone Correction
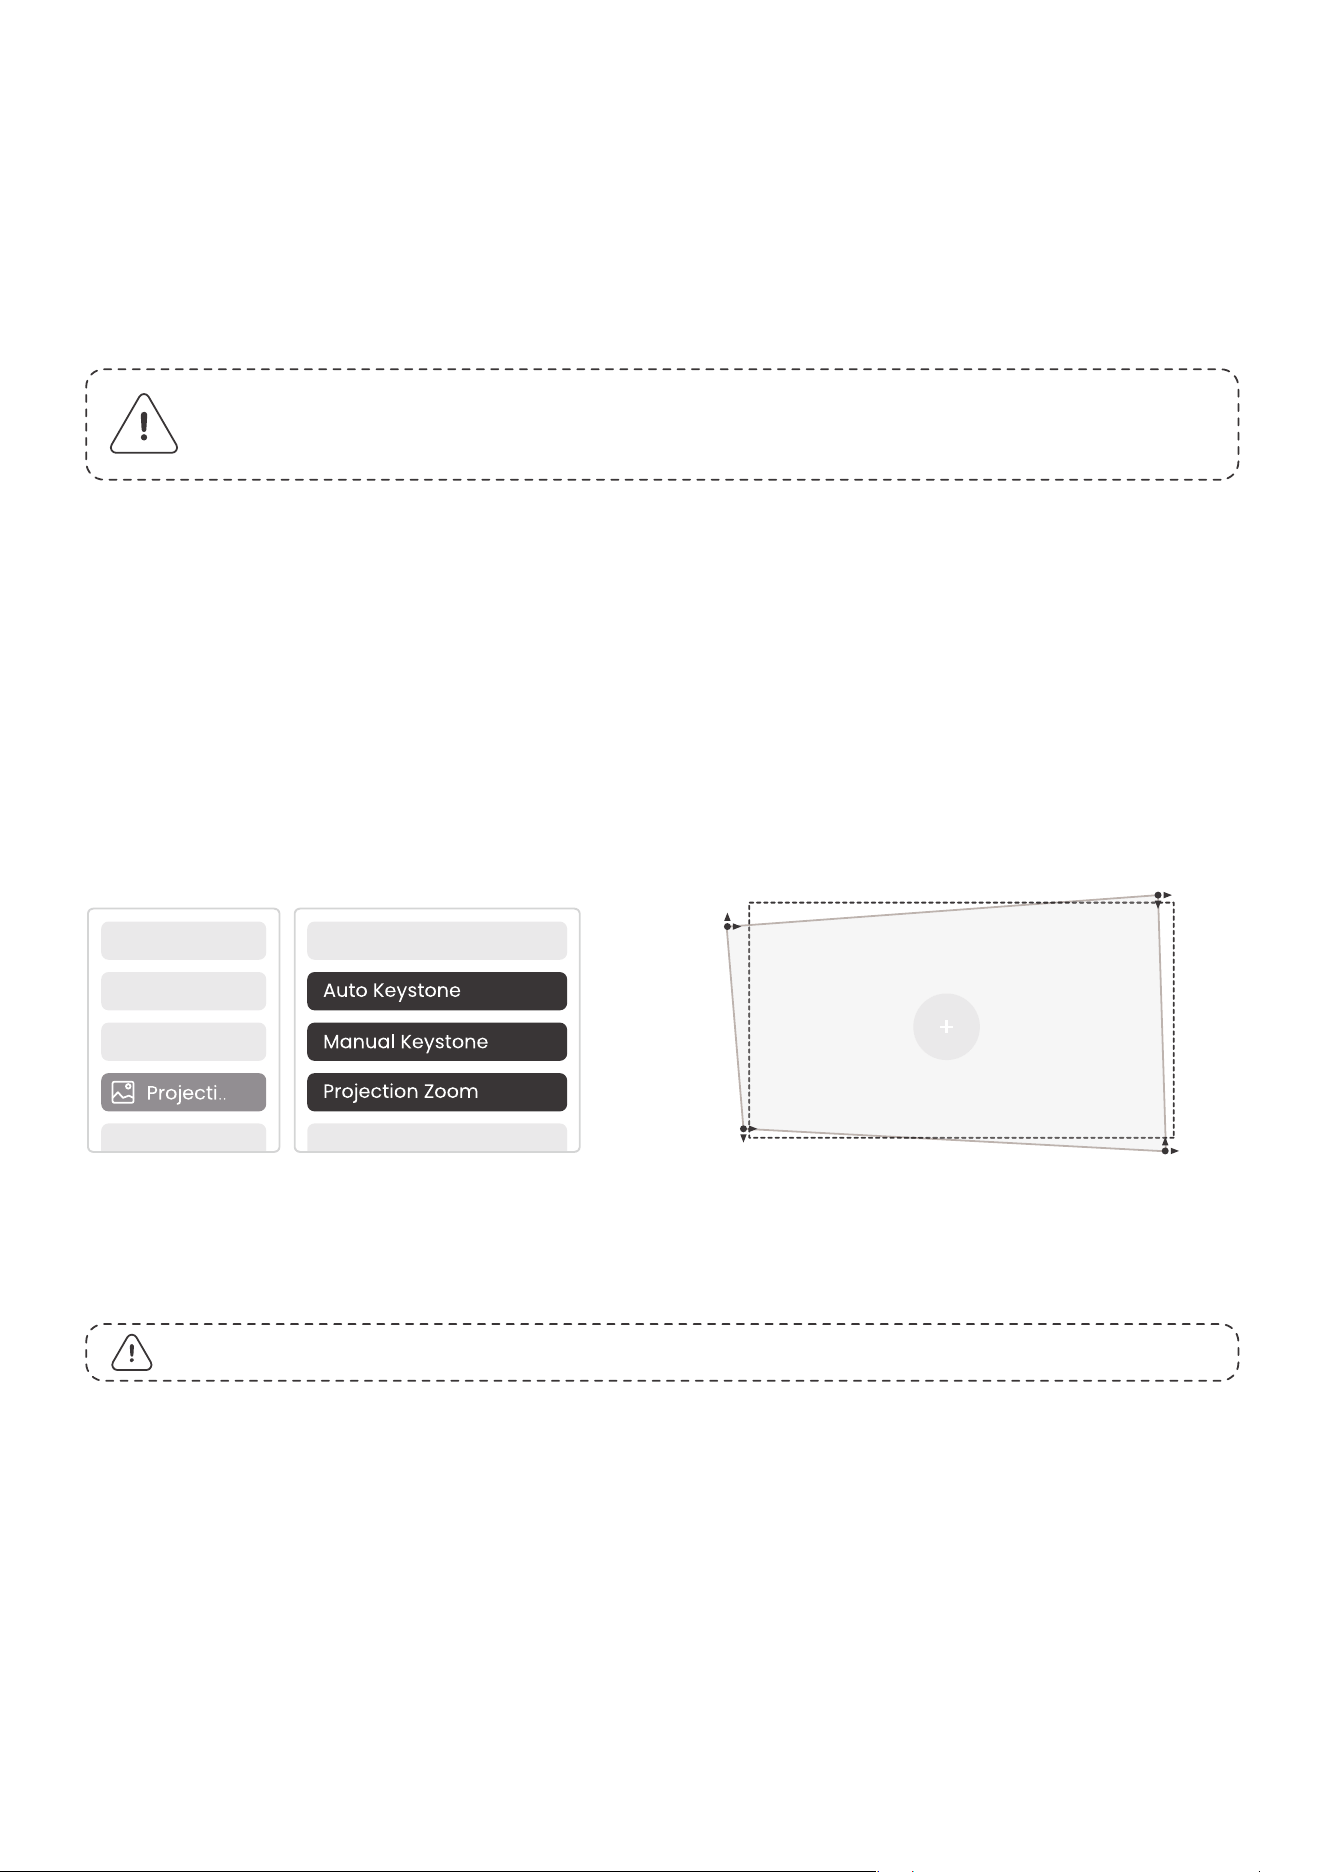
Auto keystone is enabled by default. If you need to disable this feature,
navigate through [Home] - [Settings] - [Projection Mode] - [Auto Keystone].
If further screen adjustments are needed, please select [Manual Keystone] in
[Projection Mode] and adjust the screen by dragging the arrows.
Auto Focus
Auto-focus is enabled by default and will refocus each time the machine is
moved.
Attention: The range for auto keystone correction is ±5° degrees
horizontally and vertically.
Attention: Slight and slow movements may not trigger auto-focus.
08
Tip: Hold the menu button on the remote to access settings while playing videos
or images. Besides, color adjustments only take effect during these activities.
Attention: The projector and Dongle need to be connected to Wi-Fi separately.
Attention, if the image is uneven, please try the following suggestions:
1. find a smooth and even wall to project the image
2. Adjust the projection size by moving the projector till the uneven image is invisible
3. If above suggestions still cannot work, try buy a fixed frame projection screen
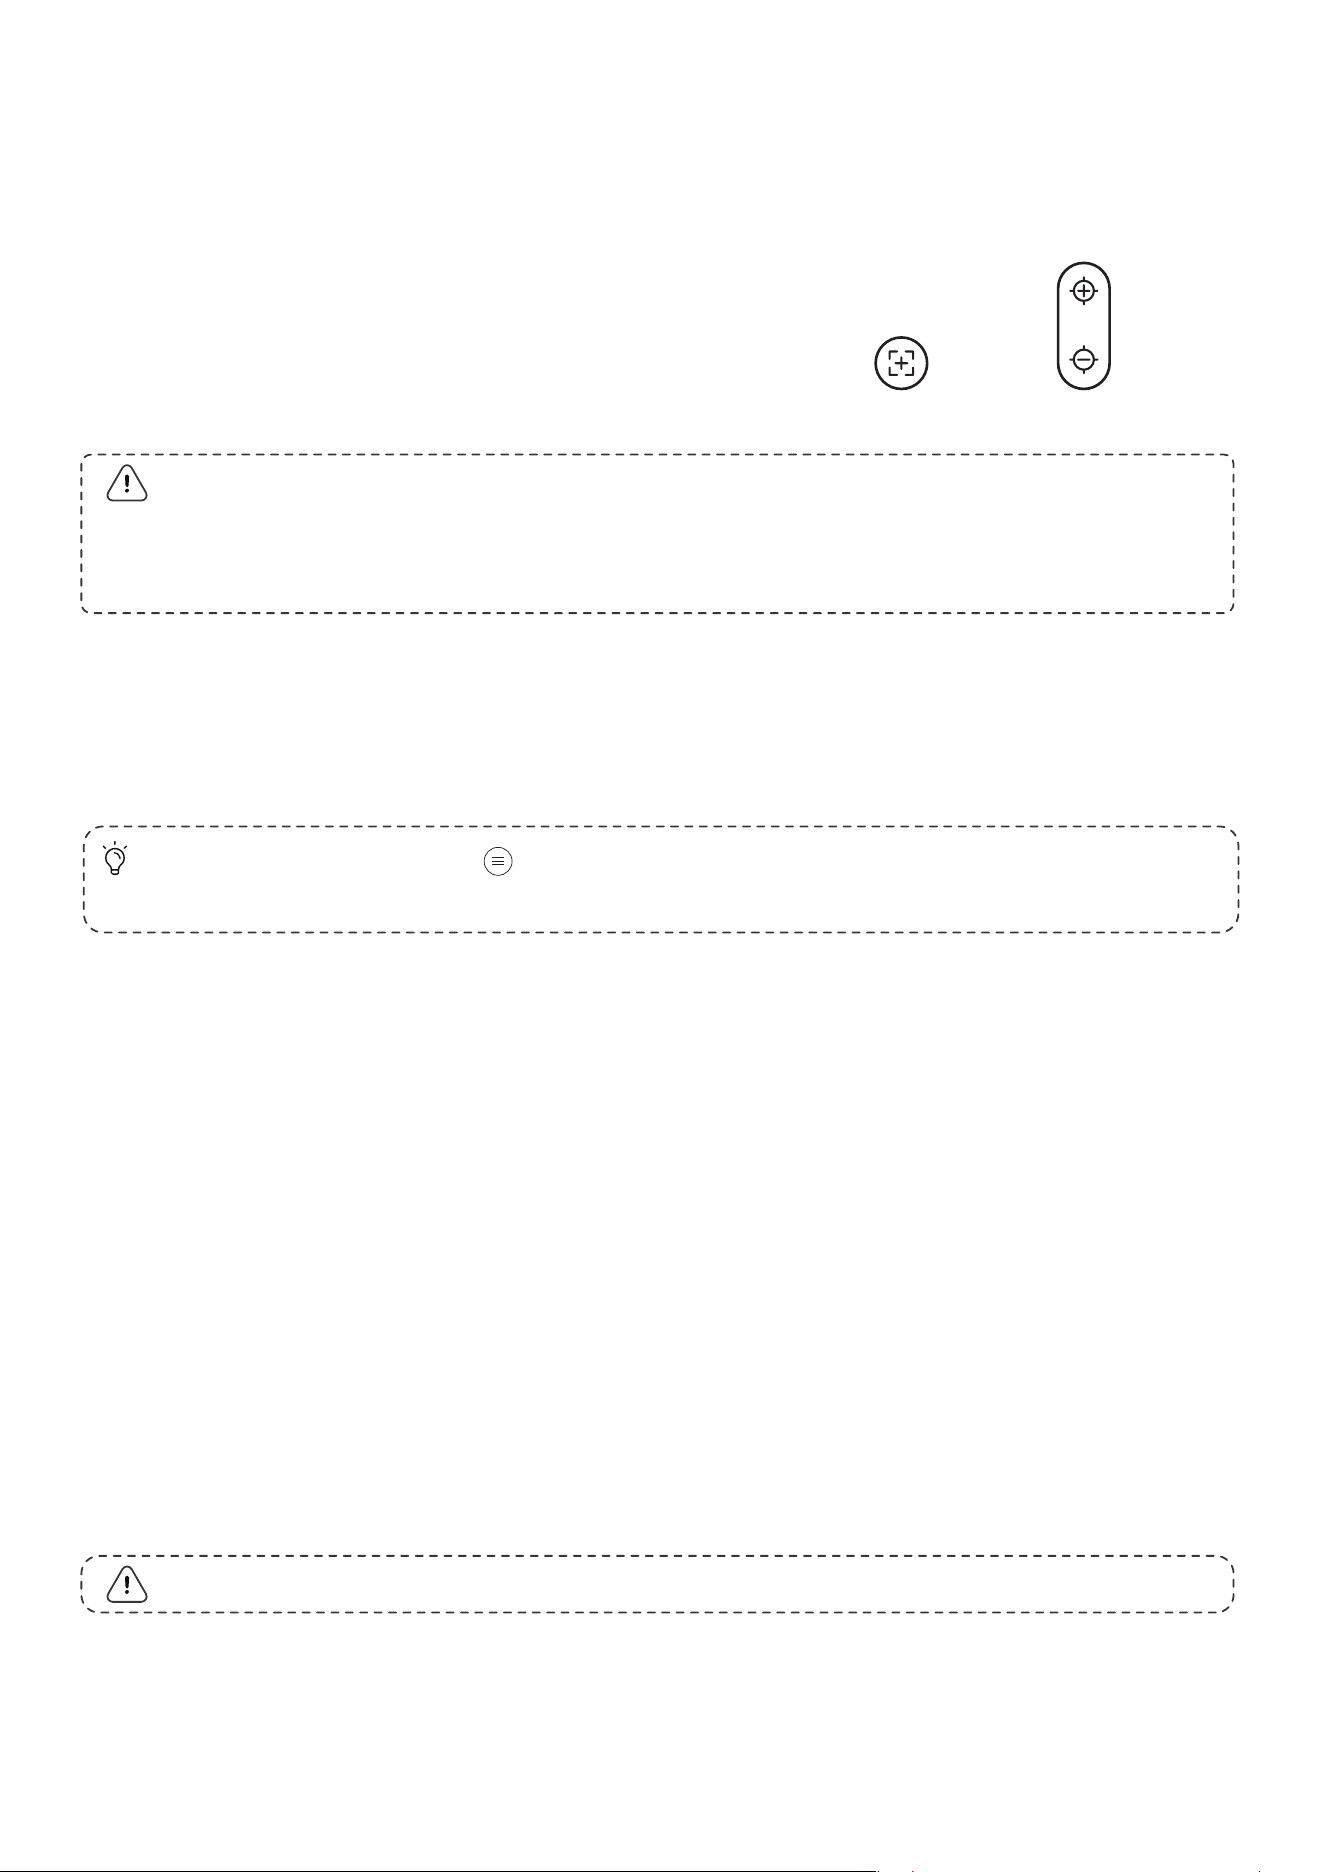
Manual Focus
If further focus adjustments are necessary,
use the focus button on the remote control to
achieve the desired image.
Image Brightness Settings
Adjust the screen brightness through [Home] - [Settings] - [Image Quality] -
[Brightness Setting].
Image Color
Adjust the image color through [Home] - [Settings] - [Image Quality] -[Picture
Mode].
Wi-Fi:
Image Settings
Auto Screen Fite and Auto Obstacle Avoidance
Connection
Network
Manual FocusAuto Focus
09
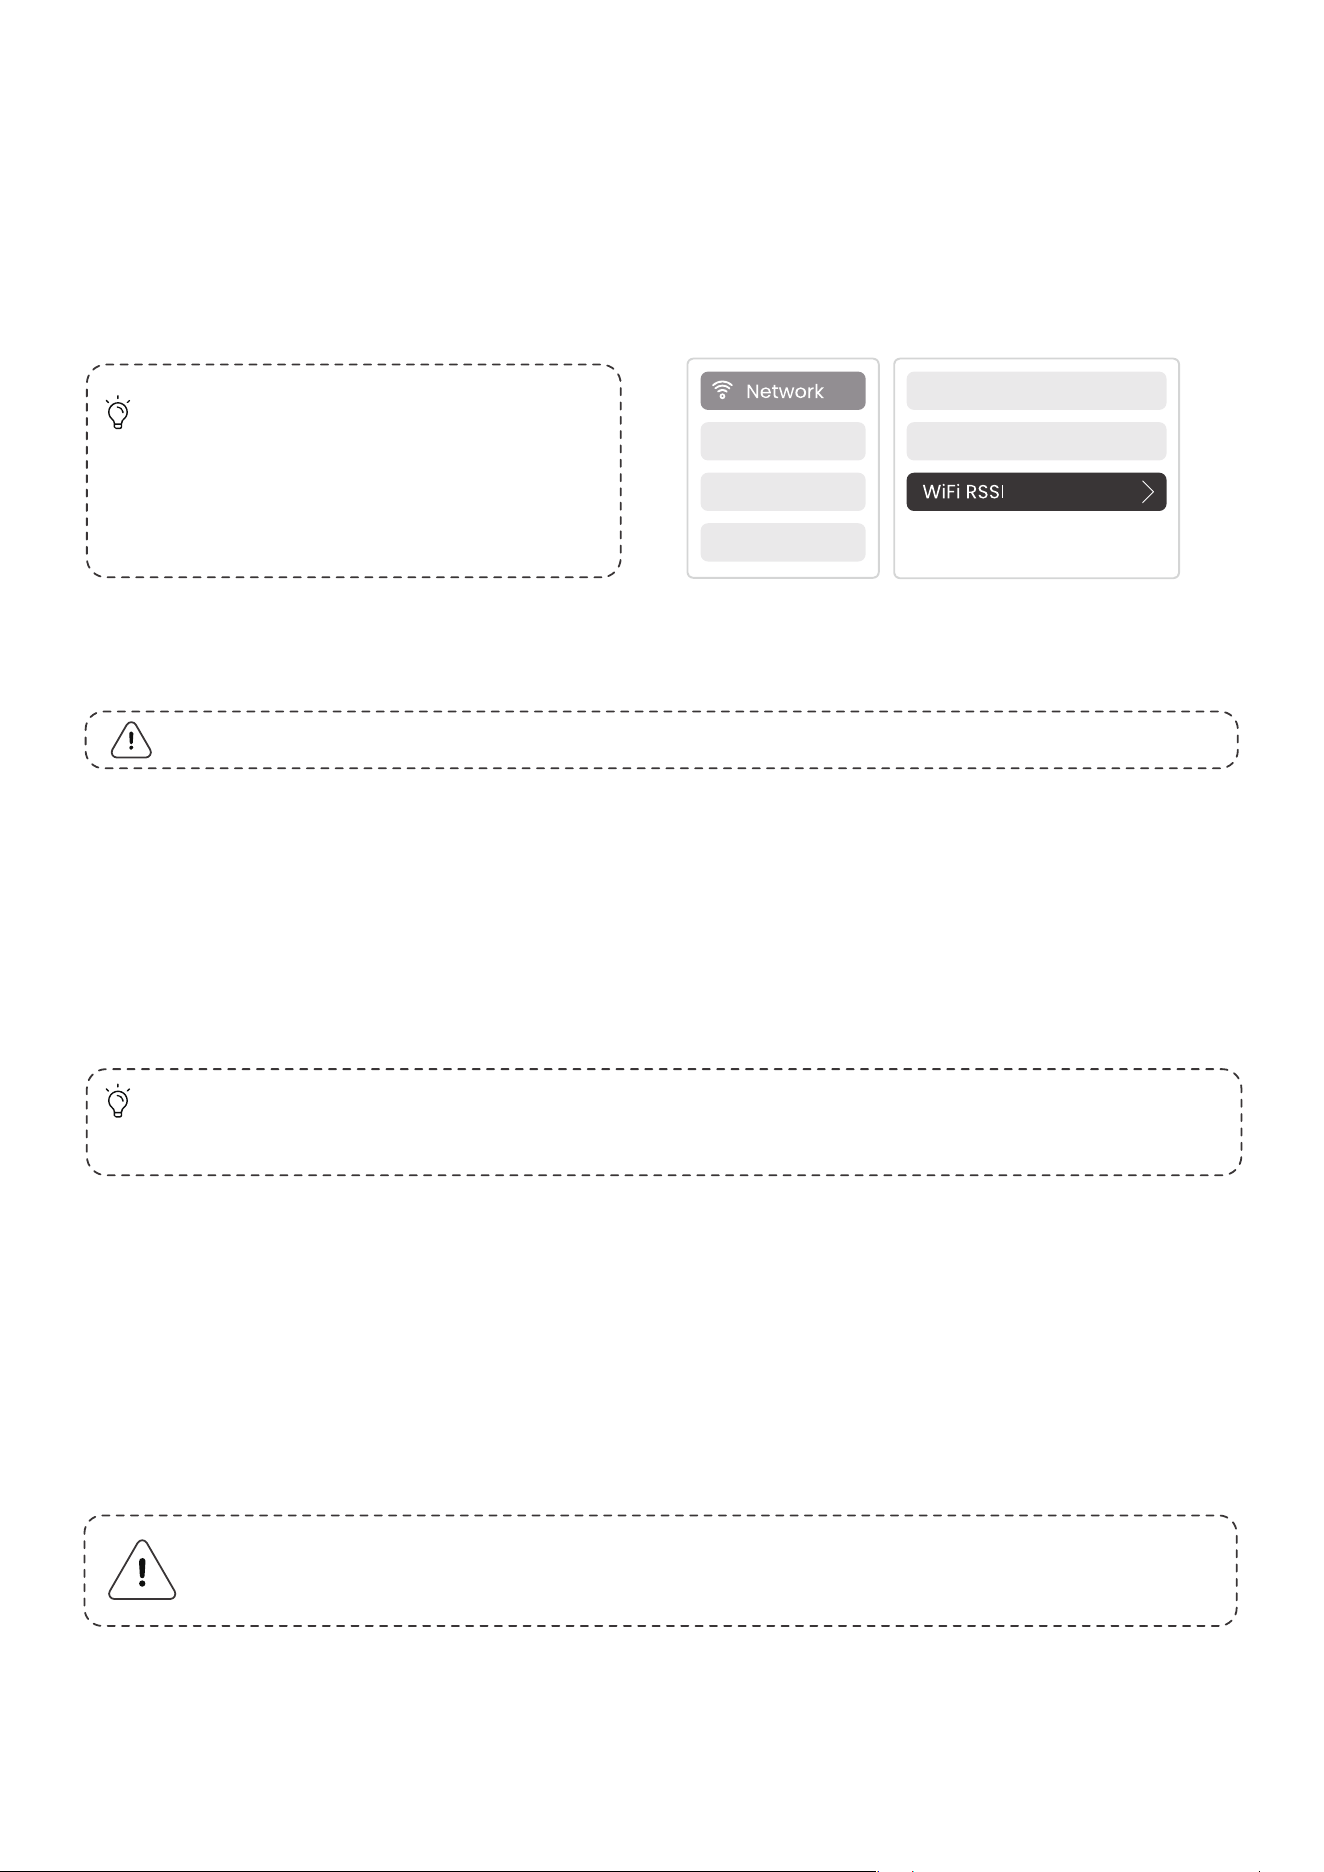
Tip: If you experience network lag,
check the stability of the network
signal first through [Settings] -
[Connected Wi-Fi] - [RSSI].
Tip: To enhance your experience during screen sharing, download the [Yaber] app
from the Apple App Store or Google Play Store.
Attention: The projector and Dongle need to be connected to Wi-Fi separately.
1. Projector connection steps: [Settings] - [Wi-Fi], connect to the desired Wi-Fi.
2. Dongle connection steps: Go to [TV] on the home page, then [Settings] -
[Wi-Fi] to connect to the desired Wi-Fi.
If the projector is connected to a wired network, and your phone is on the same
local network, you can share your phone screen. Read the next section for
sharing instructions.
1. Ensure your phone and the projector are connected to the same Wi-Fi network.
2. In the Yaber app, tap [Connect Device] and select the device named
[Yaber_K300series_xxxx] to connect.
3. Once connected, select the screen mirroring option in the Yaber app to share
your phone screen with the projector.
4. When you wish to end the screen share, go to your phone's control center,
select the device, and stop sharing.
Wired Network:
Screen Share
Attention: If you need to share the screen from streaming apps like
Netflix, Disney, or Prime Video, enter the Dongle system to share.
10
Tip: If you prefer not to use the Yaber APP, please follow these steps: (Only the step 2
is different)
1. Ensure your phone and the projector are connected to the same Wi-Fi network.
2. In the screen mirroring settings on your smartphone, select the device named
[Yaber_K300series_xxxx] to connect.
3. Ensure your phone and the projector are connected to the same Wi-Fi network.
Other Connections
HDMI Compatibility
HDMI 1.4 (HDMI CEC/HDMI ARC supported )
After connecting an external device via HDMI,
select [HDMI] from the home page to switch to
the corresponding input source.
Bluetooth (Connection Steps)
Connecting External Devices to the Projector (Using the Projector as a
Bluetooth Speaker)
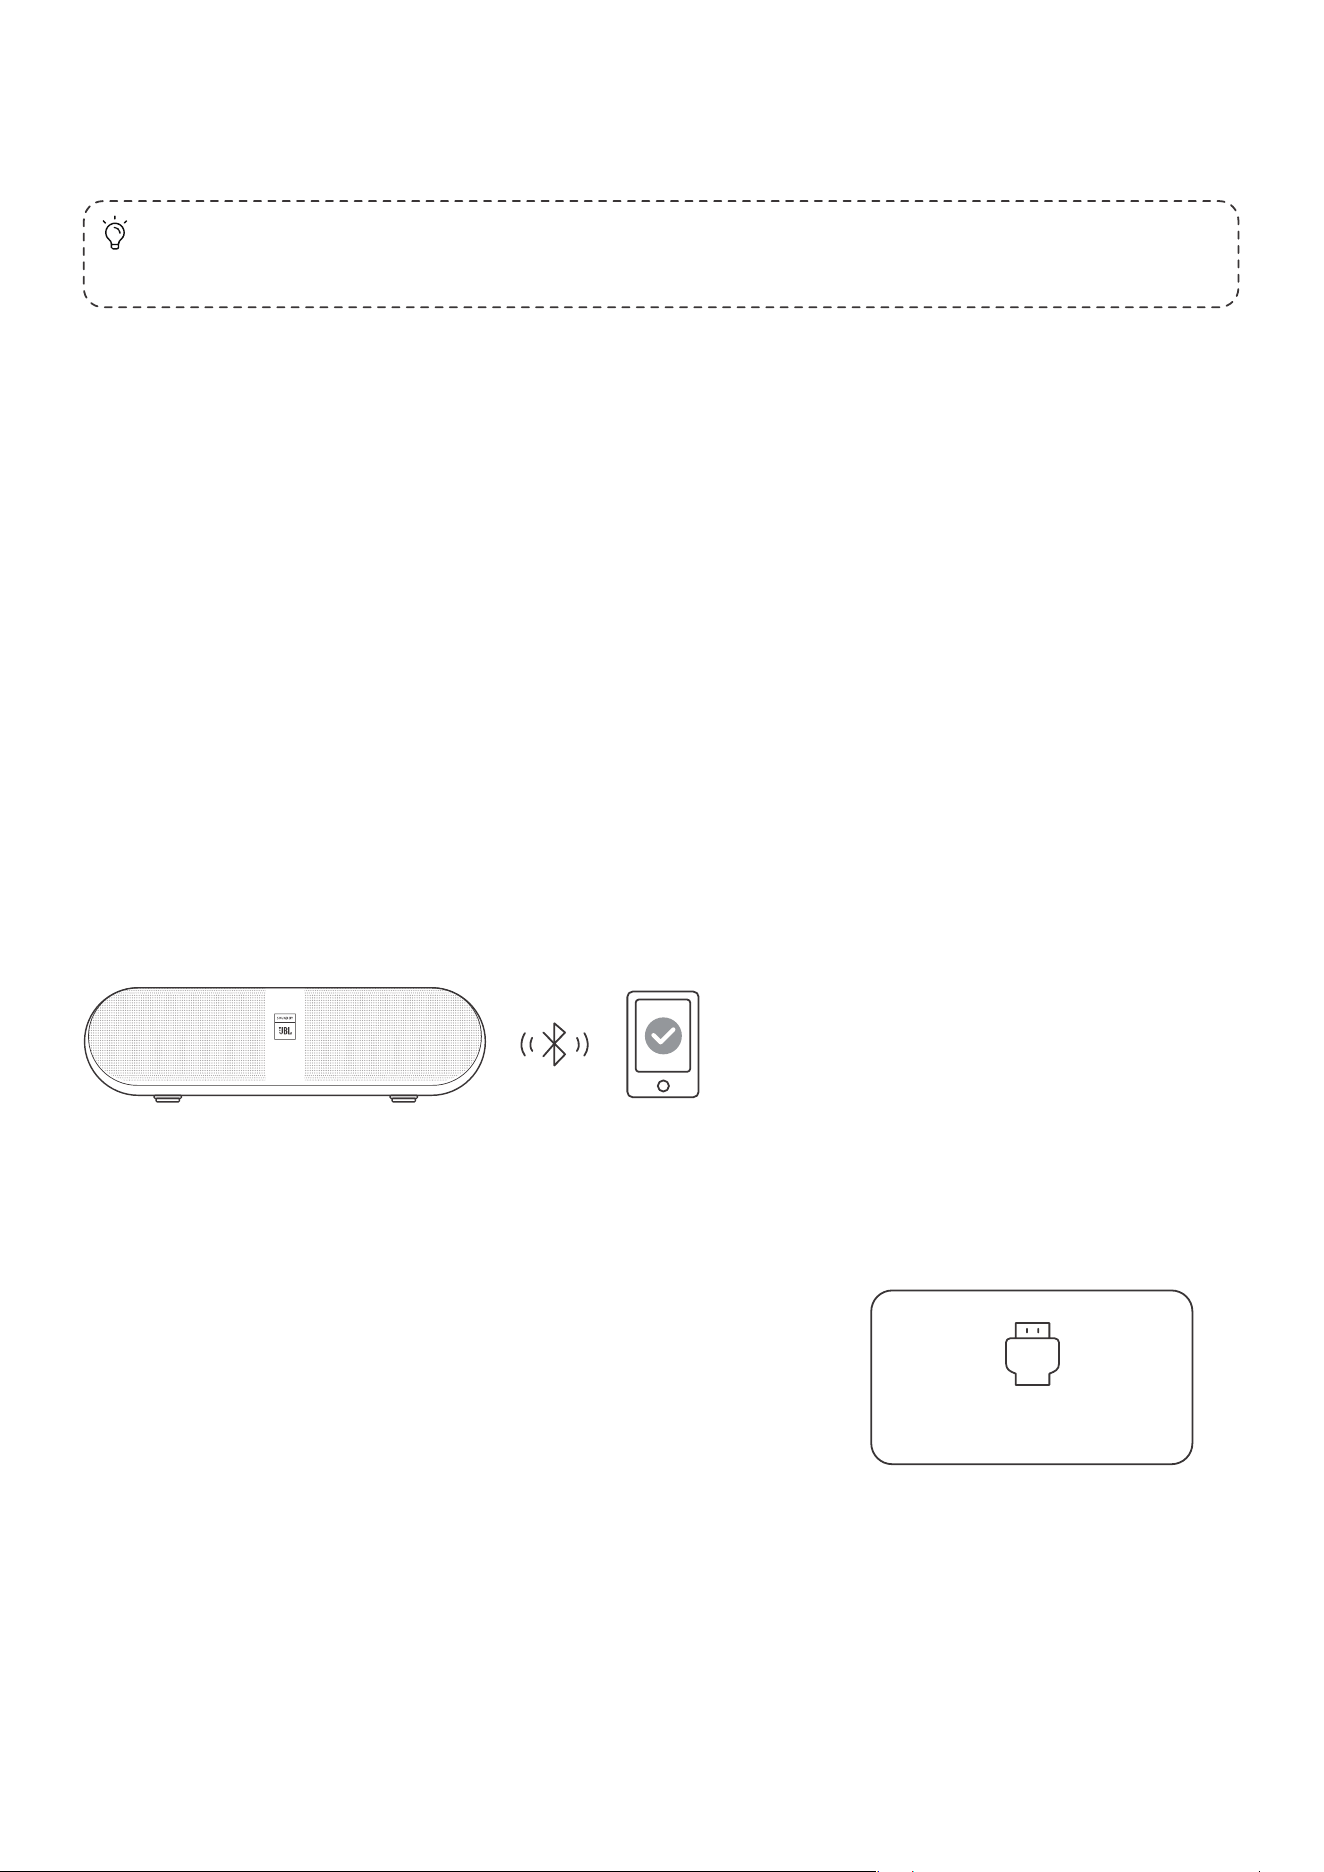
Find the projector named [Yaber_K300series_xxxx] in the Bluetooth list of your
external device and connect.
Connecting the Projector to External Speakers/Headphones
Navigate through [Home] - [Settings] - [Bluetooth] on the projector, find your
device, and connect.
HDMI
11
In game mode, the projector will reduce hdmi latency time to bring you a more
comfortable gaming experience.
Game Mode
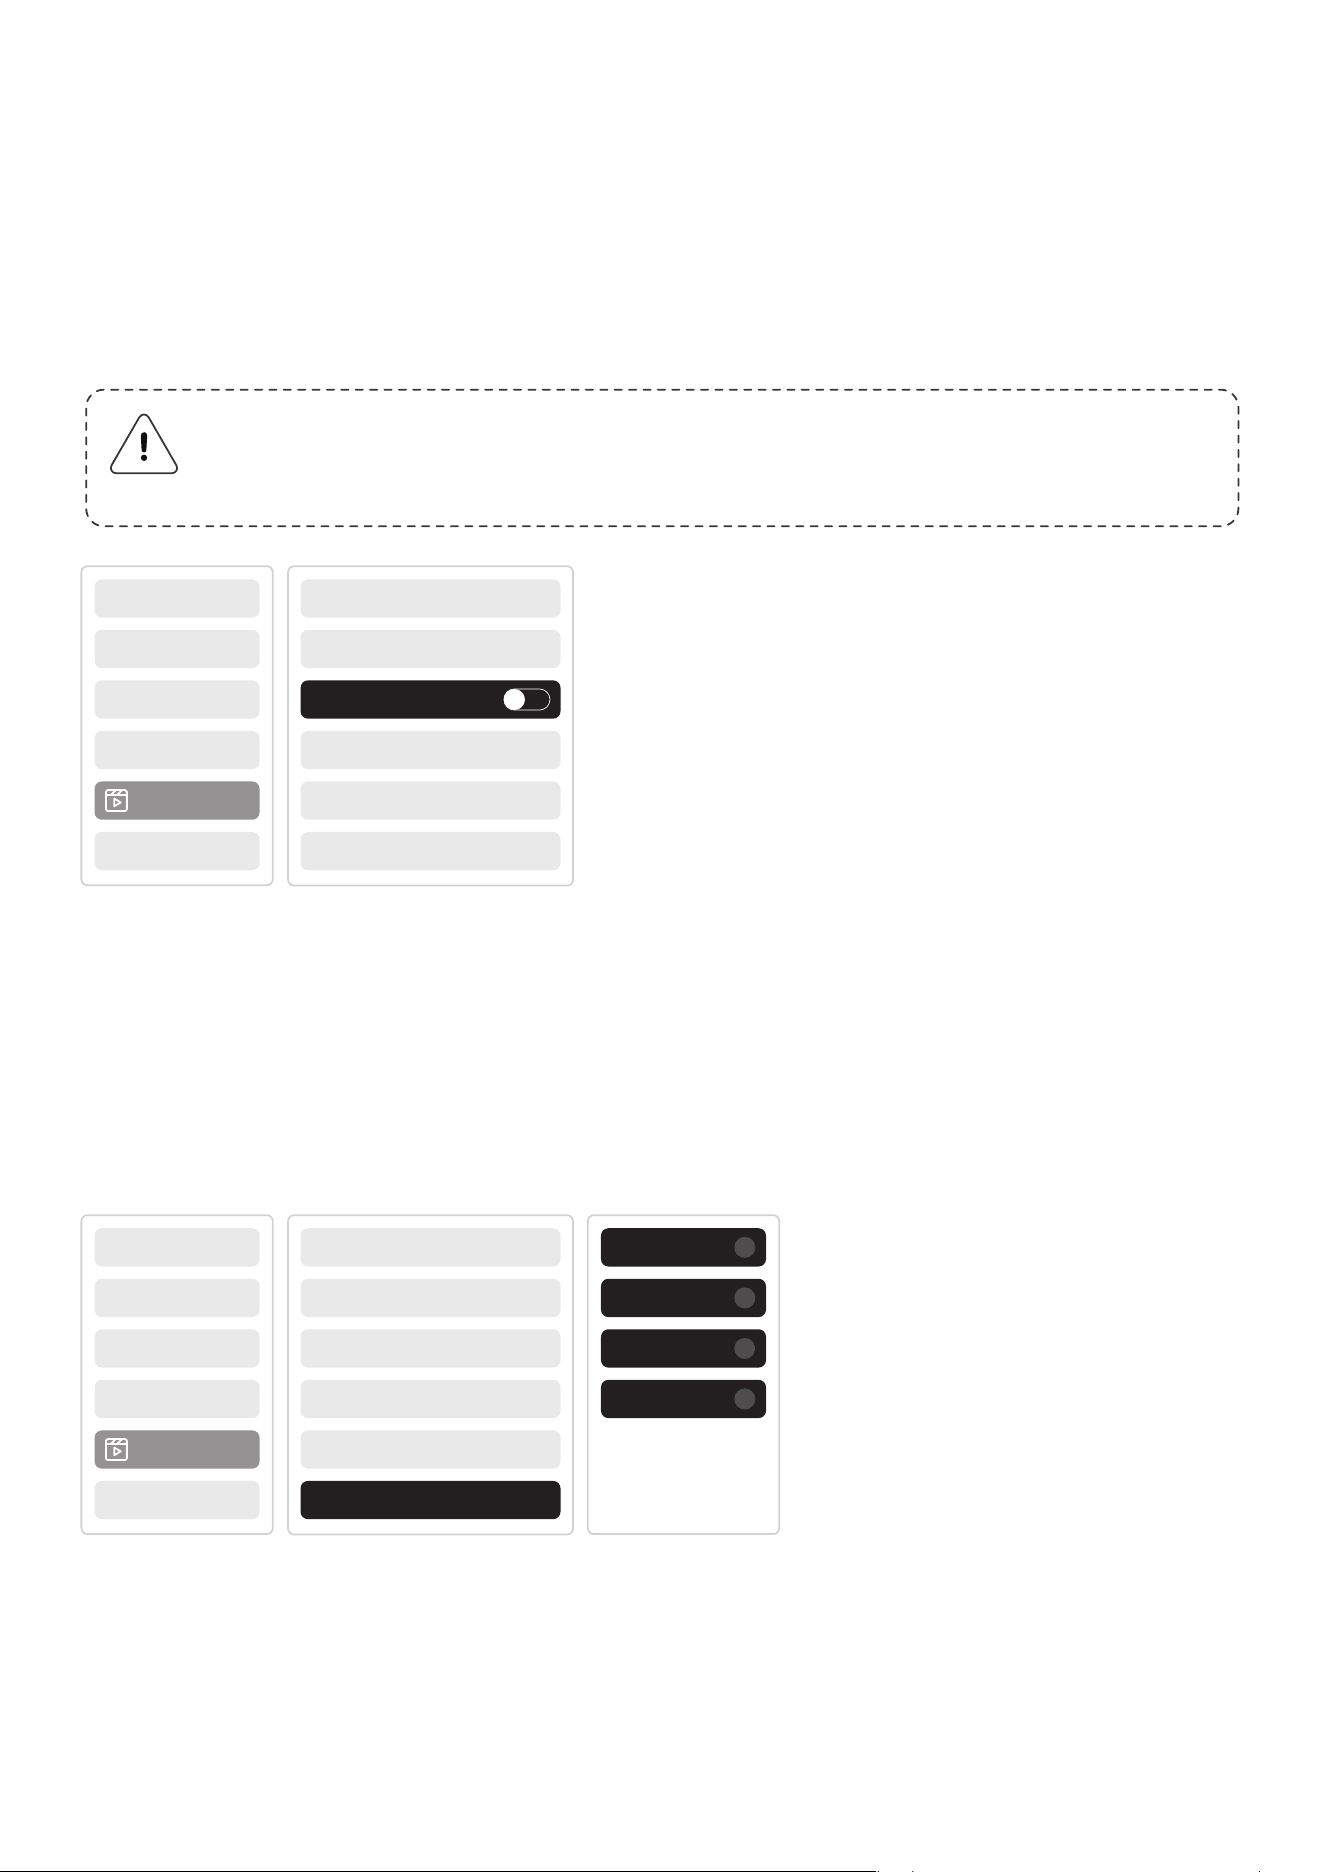
K300s support MEMC(Motion Estimation and Motion Compensation)feature, this
feature can make fast-moving images smoother without dragging shadows.
Click on Settings - Image Quality - MEMC to open.
Motion Estimation and Motion Compensation
Attention: After switching to the game mode, the screen will return to its default
shape. You can manually move the projector to the proper shape. Also, adjusting
the screen size, shape, position is not supported.
Image q...
Sound
OFF
LOW
MID
HIGH
MEMC
Image q...
Game Mode

12
Please use the device properly:
• Do not block the air inlets/outlets to avoid damage to internal electronics due
to improper cooling.
• Do not clean the lens directly with paper, cloth, or other cleaning tools to avoid
lens damage.
• Do not clean the product with chemical reagents, detergents, or any liquids to
avoid corrosion of the circuit board by rainwater or mineral-laden moist liquids.
• Keep the device and its components and accessories out of reach of children.
• Ensure the device is used in a dry and well-ventilated environment.
• Do not store the device in overly hot or cold places, as extreme temperatures
can shorten the lifespan of electronic devices.
• Do not place the device in any heating equipment (such as dryers and
microwaves) to dry.
• Do not forcefully squeeze the device or place obstacles on top of or behind it to
avoid damage.
• Do not throw, hit, or shake the device violently to avoid damaging internal
circuit boards.
• Do not attempt to disassemble and reassemble the device yourself. If any
issues arise, contact Yaber after-sales service.
Attention Precautions

FCC Caution
This device complies with part 15 of the FCC Rules. Operation is subject to the
following two conditions: (1) This device may not cause harmful interference, and (2)
this device must accept any interference received, including interference that may
cause undesired operation.
Any Changes or modifications not expressly approved by the party responsible for
compliance could void the user's authority to operate the equipment.
Note: This equipment has been tested and found to comply with the limits for a Class
B digital device, pursuant to part 15 of the FCC Rules. These limits are designed to
provide reasonable protection against harmful interference in a residential installation.
This equipment generates uses and can radiate radio frequency energy and, if not
installed and used in accordance with the instructions, may cause harmful interference
to radio communications. However, there is no guarantee that interference will not
occur in a particular installation. If this equipment does cause harmful interference to
radio or television reception, which can be determined by turning the equipment off
and on, the user is encouraged to try to correct the interference by one or more of the
following measures:
-Reorient or relocate the receiving antenna.
-Increase the separation between the equipment and receiver.
-Connect the equipment into an outlet on a circuit different from that to which the
receiver is connected.
-Consult the dealer or an experienced radio/TV technician for help.
This equipment complies with FCC radiation exposure limits set forth for an
uncontrolled environment. This equipment should be installed and operated with
minimum distance 20cm between the radiator & your body.

IC Caution:
dŚŝƐĚĞǀŝĐĞĐŽŶƚĂŝŶƐůŝĐĞŶĐĞͲĞdžĞŵƉƚƚƌĂŶƐŵŝƚƚĞƌ;ƐͿƌĞĐĞŝǀĞƌ;ƐͿƚŚĂƚĐŽŵƉůLJǁŝƚŚ
/ŶŶŽǀĂƚŝŽŶ^ĐŝĞŶĐĞĂŶĚĐŽŶŽŵŝĐĞǀĞůŽƉŵĞŶƚĂŶĂĚĂΖƐůŝĐĞŶĐĞͲĞdžĞŵƉƚZ^^;ƐͿ
KƉĞƌĂƚŝŽŶŝƐƐƵďũĞĐƚƚŽƚŚĞůĨŽůůŽǁŝŶŐƚǁŽĐŽŶĚŝƚŽŶƐ
;ϭͿ This device may not cause interference; and
;ϮͿ This device must accept any interference, including interference that may cause
undesiredoperation of the device.
To maintain compliance with RF exposure guidelines, this equipment shouldbe
installed and operated with a minimum distance of 20cm between the radiator and your
body.
ĞƚĂƉƉĂƌĞŝůĐŽŶƚŝĞŶƚĚĞƐĠŵĞƚƚĞƵƌƐƌĠĐĞƉƚĞƵƌƐĞdžĞŵƉƚĠƐĚĞůŝĐĞŶĐĞƋƵŝƐŽŶƚ
ĐŽŶĨŽƌŵĞƐ
ĂƵdžZ^^ĞdžĞŵƉƚĠƐĚĞůŝĐĞŶĐĞĚŝŶŶŽǀĂƚŝŽŶƐĐŝĞŶĐĞƐĞƚĚĠǀĞůŽƉƉĞŵĞŶƚĠĐŽŶŽŵŝƋƵĞ
ĂŶĂĚĂ>ŽƉĠƌĂƚŝŽŶĞƐƚƐŽƵŵŝƐĞĂƵdžĚĞƵdžĐŽŶĚŝƚŝŽŶƐƐƵŝǀĂŶƚĞƐ
;ϭͿ l'appareil ne doit pas produire de brouillage, et
;ϮͿ l'utilisateur de l'appareil doit accepter tout brouillage radiolectrique subi,
mme si lebrouillage est susceptible d'en compromettre le fonctionnement.
Pour maintenir la conformit aux directives d'exposition aux radiofrquences, cet
quipement doit tre install et utilis avec une distance minimale de 20 cm entre le
radiateur et votre corps.