We Are Here For You !
GABLE WALL-MOUNTED FAN
INSTRUCTION >>
BT-WM15P070S0
Model:
Email: [email protected]
°C/°F
Safety Precautions
Product Description
Installation
Oprerating Instructions
Remote Control Usage Instructions
Q&A
Warranty
Product Catalog
01
03
03
05
06
07
08
08
CONTENTS
SAFETY PRECAUTIONS
WARNING
Disconnect the fan when moving from one location to another.
Do not use a power supply that does not meet the rated voltage.
The use of non compliant power supplies can cause fire or electric shock.
If the supply cord isdamaged, it must be replaced by the manufacturer, its service agent
or similarly qualified persons inorder to avoid a hazard.
If the machine emits smoke, odor, motor noise and other abnormal conditions,Please do
not use it. It may cause fire or electric shock.
Do not damage or arbitrarily change the original power cord, and do not bend, forcibly
pull, bind or press the power cord under heavy objects.This will damage the power cord,
causing electric leakage fire or electric shock.
If the machine is not used for a long time, please unplug the power cord from the sock-
et.
The connection socket must be installed with leakage protection switch device.
Read all safety warnings, instructions, illustrations and specifications provided with this
electrical appliances. Failure to follow all instructions listed below may result in electric
shock, fire and/or serious injury.
Save all warnings and instructions for future reference.
Improper operation may cause personal injury.
Improper operation may cause damage to the machine.
Improper operation may cause others object damage.
- 01 -
The symbol indicates that the user should pay high attention to and pay attention to the
drawing shows the situation to be noted, and the left figure shows "Be careful of electric
shock"
Do not disassemble, repair or rectify the machine during use. Doing so may result in fire
or electric shock and personal injury.
Never insert fingers, pencils, or any other object through the guard when fan is running.
When the power cord is unplugged from the socket, the plug should be unplugged. Do
not pull the power cord to forcibly pull the wire, which may cause damage to the wire -
and lead to leakage or electric shock.
This product is to be used in doors.
This appliance is not intended for use by persons(including children) with reduced phys-
ical.sensory or mental capabilities,or lack of experience and knowledge,unless they have
been given supervision or instruction concerning use of the appliance by a person resp-
onsible for their safety.
Changes or modifications not expressly approved by the party responsible for compliance could
void the user's authority to operate the equipment. This equipment has been tested and found
to comply with the limits for a Class B digital device, pursuant to Part 15 of the FCC Rules. These
limits are designed to provide reasonable protection against harmful interference in a residential
installation. This equipment generates, uses, and can radiate radio frequency energy and, if not
installed and used in accordance with the instructions, may cause harmful interference to radio
communications. However, there is no guarantee that interference will not occur in a particular
installation. If this equipment does cause harmful interference to radio or television reception,
which can be determined by turning the equipment off and on, the user is encouraged to try to
correct the interference by one or more of the following measures:
- Reorient or relocate the receiving antenna.
- Increase the separation between the equipment and receiver.
- Connect the equipment into an outlet on a circuit different from that to which the receiver is
connected.
- Consult the dealer or an experienced radio/TV technician for help.
This device complies with part 15 of the FCC Rules. Operation is subject to the following two
conditions:
(1) This device may not cause harmful interference, and
(2) this device must accept any interference received, including interference that may cause
undesired operation.
FCC Warning Statement:
- 02 -
To reduce the risk of injury to persons, please observe the following. In the United
States, OSHA compliant guards are required when fan is installed with in 7 feet of the
floor or working level. In Canada, CSA compliant guards are required when fan is
installed below 2.5 meters(8.2 feet) above the floor or grade level.
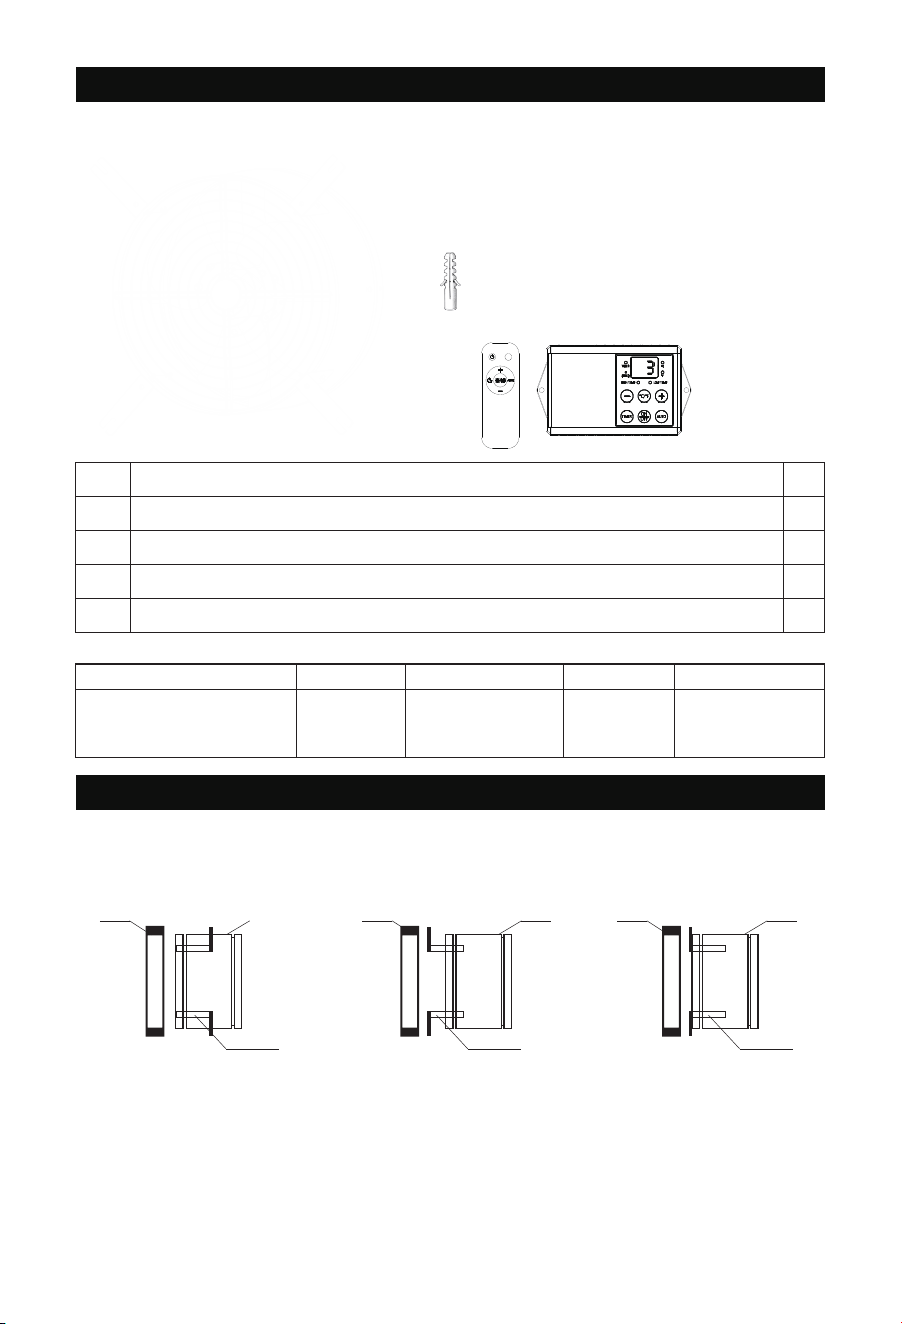
PRODUCT STRUCTURE DIAGRAM
PRODUCT DESCRIPTION
- 03 -
INSTALLATION
TIPS! Prepare tools in advance:
Cross screwdriver, Small wrench, Hammer, Electric drill
Step1:Select the installation type based on your installation requirements.
°C/°F
①
①
②
②
③
③
④
④
⑤
⑤
×4 ×8
×8×8
×1
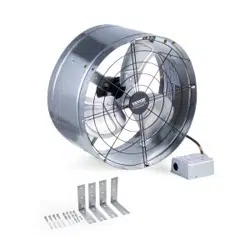
Gable fan
Model
BT-WM15P070S0 70W 120VAC 60Hz 3
Auto Temperature
control
Power Voltage Speeds Features
Specification
1
4
8
8
8
Mounting bracket
Flat-head screws for bracket
Plastic expansion tubes for Solid Brick Wall
Self-tapping screws for fixed products
The first type
First type
The third typeThe second type
Second type Third type
MOUNTING
WALL DRUM
MOUNTING
MOUNTING
WALL DRUMWALL DRUM
- 04 -
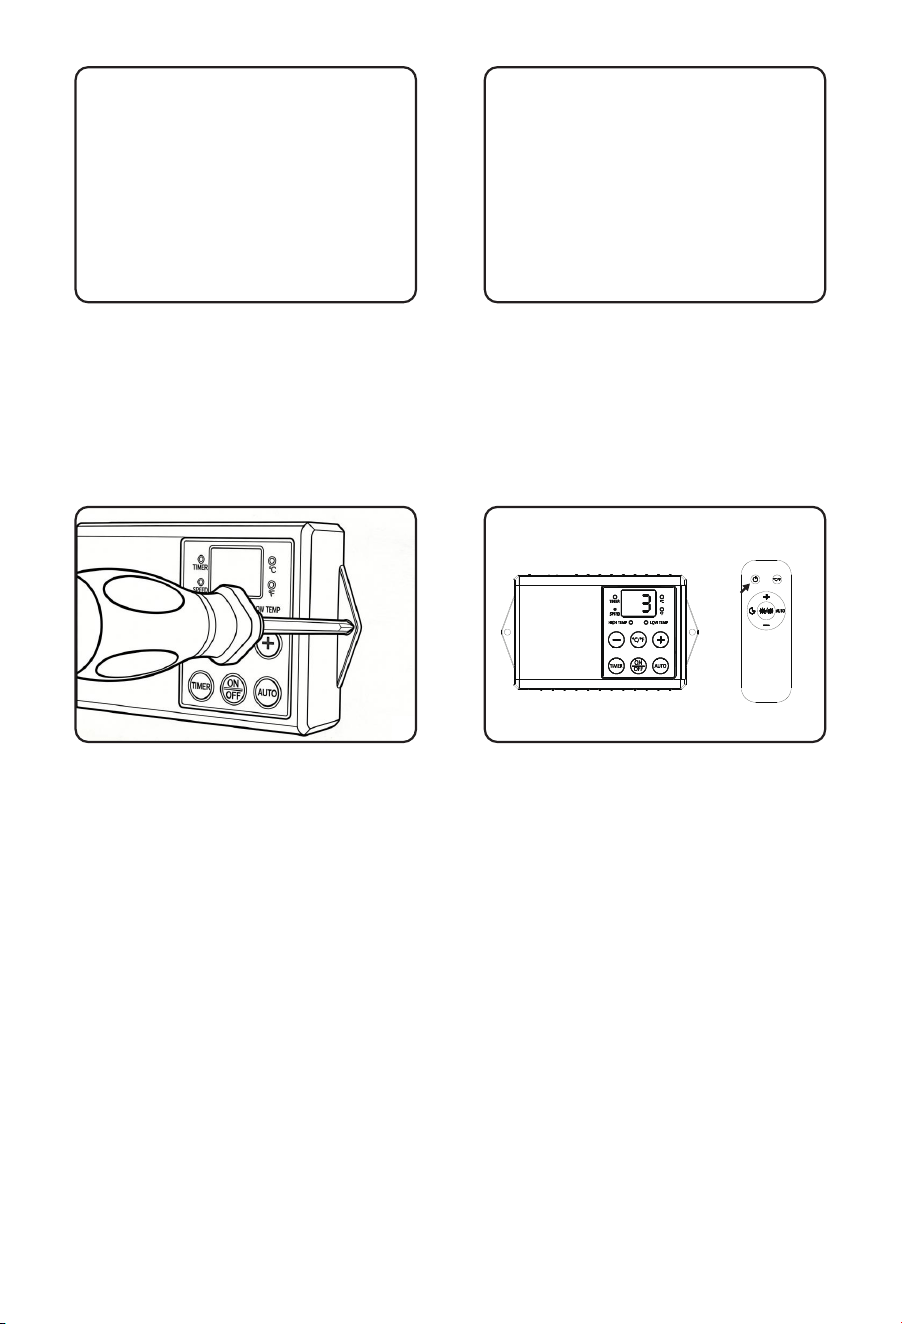
Step2: Lock the 4pcs mounting bracket ②
to the Product housing ① with 8pcs large
flat head screw ③.
Step4:Install the control box at the
desired location. Then plug it in to use.
Step5. Install 2 AAA batteries to the remote
(Batteries are not included).
Press and hold the power button for 5s to
pair(within 15s of plug in) with control box.
If more than 15s after plug in, unplug the
power and restart again to pair.
A ‘Beep’ sound if successfully paired.
Step3.
For Cement or Solid Brick Walls:
Drill the mounting holes into the wall,
then insert the included anchors into the
mounting holes and secure all screws.
For Wooden Walls:
Secure the top panel to the wall with
Self-tapping screws ⑤
①
③
②
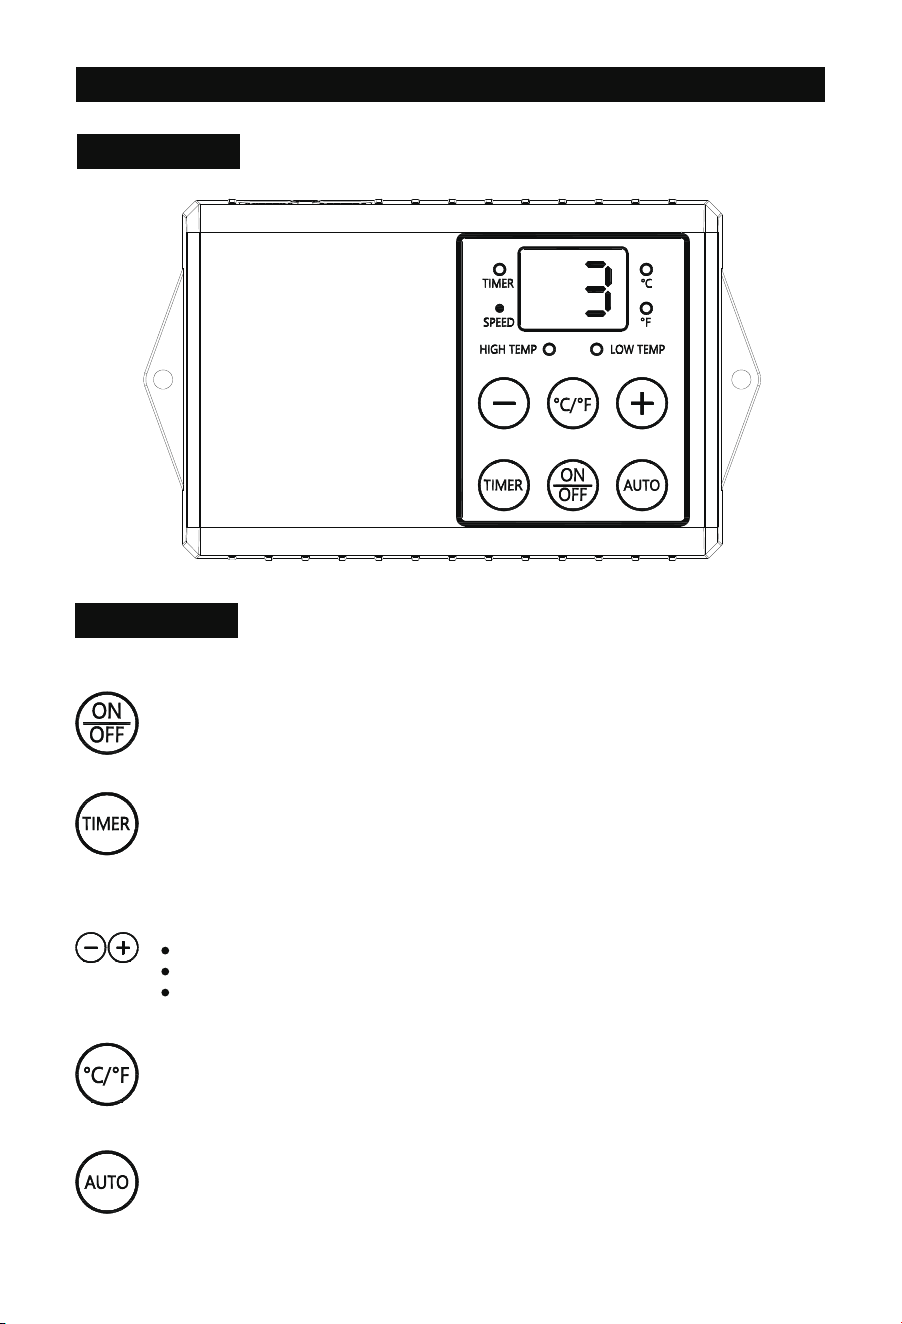
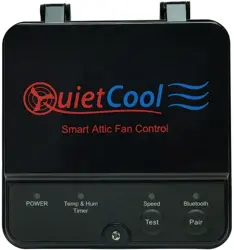
OPRERATING INSTRUCTIONS
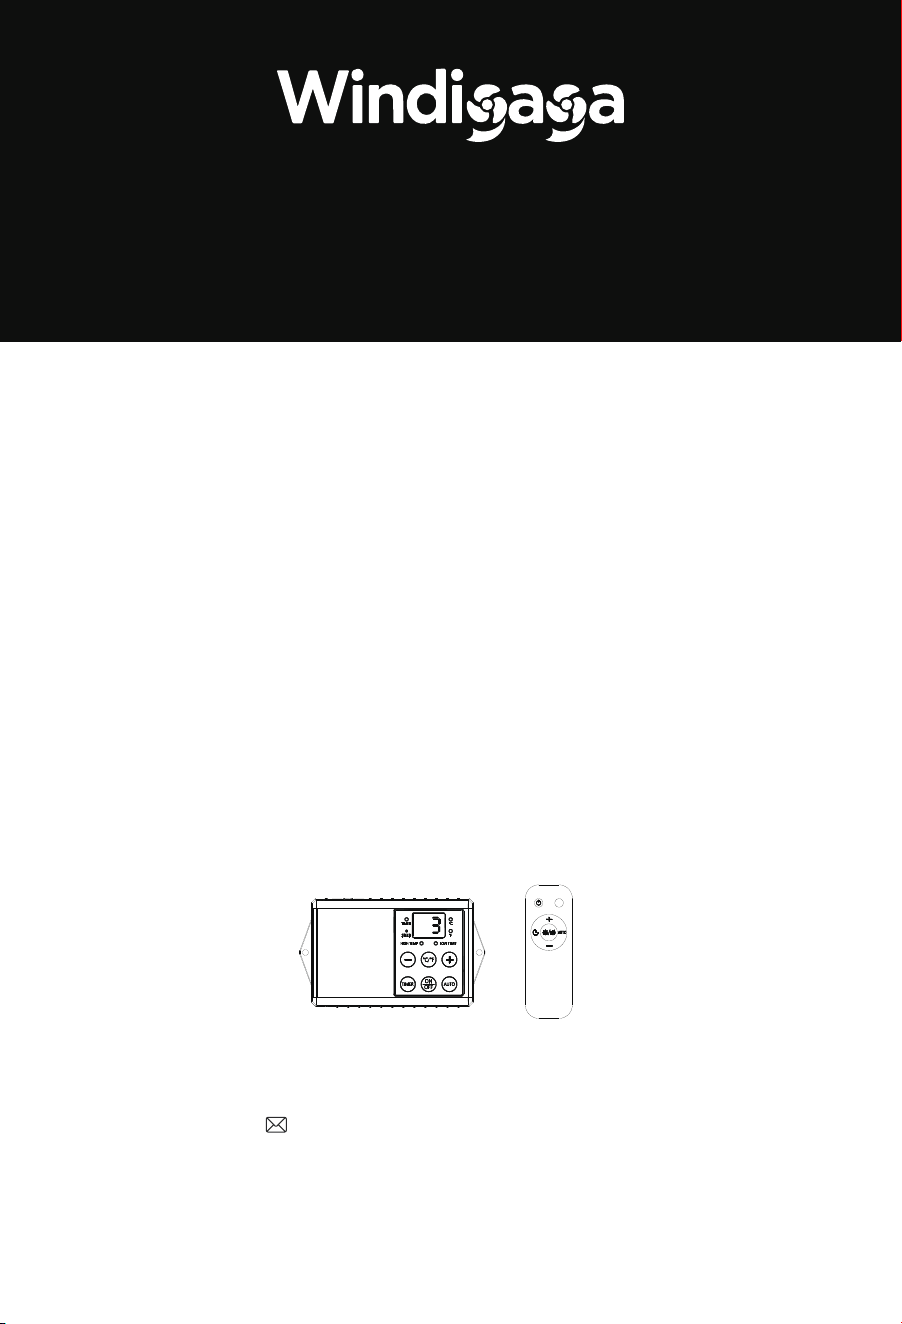
Control Box Panel
BUTTON DESCRIPTION
- 05 -
ON/OFF BUTTON
Press the button to set power ON/OFF.
TIMER BUTTON
Press the button to set the fan's shutdown time. Maximum setting: 18 hours.
Adjust the temperature in Auto mode.
+- BUTTON
Press the button to add or reduce the setting parameters.
Adjust the fan speed in any mode.
Adjust the time in timer mode.
Long press to set the temperature conversion between degrees Celsius and
Fahrenheit.
Press the button to set modes: Speed(Normal) — Environmental Temp — LowTemp
— High Temp — Speed(Normal).
AUTO BUTTON
- 06 -
Press Mode
Normal: Continue running at setting speed Speed display
Speed display
Speed and Environmental
Temp alternate display
Speed and Environmental Temp
alternate display
Speed and Environmental Temp
alternate display
Return to Normal mode
Display
①
②
③
④
⑤
Environmental Temp: Reference for High/Low
TEMP Setting, Running at Normal setting
Low Temp: Set Auto running TEMP, If Environ-
mental Temp≤ Setting Temp, Running
High Temp: Set Auto running TEMP, If Environ-
mental Temp≥Setting Temp, Running
Press to Low/High Temp Setting, Low or High indicator light remains constantly on, and the dis-
play screenfiashes, then press the + or - button to set the desire temperature .
Adjusting timer settings and auto settings will be automatically confirmed after 5 seconds.
Note:
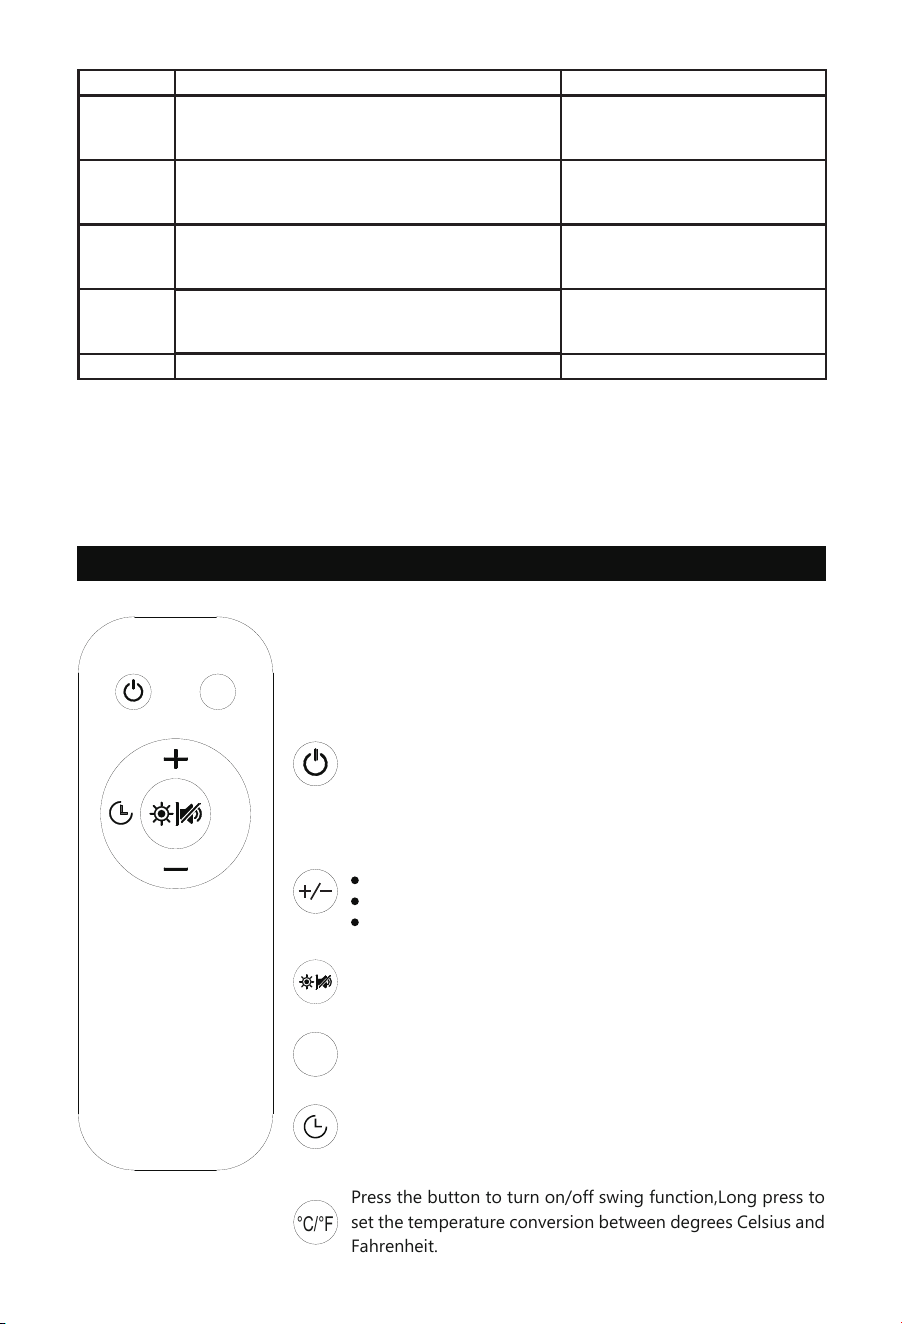
Remote Control Usage Instructions
NOTE
Batteries are not included. Install 2 AAA batteries before
using the remote.
AUTO
°C/°F
Press and hold the power button for 5s to pair (within 15s
of plug in) with control box. If more than 15s after plug
in, unplug the power and restart again to pair,there will
be a ‘Beep’ sound if successfully paired.
Press to turn ON/OFF.
Press the button to add or reduce setting parameters.
Adjust the temperature in Auto mode.
Adjust the fan speed in any mode.
Adjust the time in timer mode.
Press the button to set modes: Speed(Normal)—Environmen-
tal Temp—Low Temp—High Temp-Speed(Normal)
AUTO
°C/°F
Press the button to turn on/off swing function,Long press to
set the temperature conversion between degrees Celsius and
Fahrenheit.
Press the button to set the fan's shutdown time, The timing
range is from 1 to 18 hours.
Press to turn on/off the screen brightness.
Long Press to turn on/off the sound.
- 07 -
Q&A
Questions
Why isn't the remote
control working?
Why does the fan
frequently turn on and
off in AUTO mode?
How to cancel the high
and low temperature
mode?
Does the product
retain settings after
power off?
How do I turn off
the display on the
control box?
How do I perform
maintenance on
this fan?
Answers
a , The remote control may not have been paired.
Press and hold the power button for 5s to pair (within 15s of plug in) with
control box. If more than 15s after plug in, unplug the power and restart again
to pair,there will be a ‘Beep’ sound if successfully paired.
b.The remote requires 2 AAA batteries (not included). Avoid using rechargeable
batteries. It works up to about 65 feet (20 meters), but walls or obstacles may s-
horten the range. For best results, please use the remote within this distance or
closer.
c.Ensure that the device’s plug is securely connected to the outlet. If the issue p-
ersists, try using a different power outlet.
When the set high or low temperature trigger points are close to the actual
room temperature, especially when used together with an air conditioning
system, temperature fluctuations are common. We recommend setting the
AUTO mode triggers at least ±6℉ away from the current room temperature.
Press Auto button until to Speed(Normal) mode.
The power supply box retains its settings as long as it remains powered. If the
power supply box is completely disconnected from power, it will not retain the
settings.
Step 1 Disconnect the power supply before cleaning or servicing the fan.
Step 2 Wipe the exterior with a dry cloth or use a light vacuum to remove dust.
Press the remote control button briefly to turn off.

- 08 -
WARRANTY
Ehiair warrants this product to be free of defects in material and workmanship for the applica-
tions specified in the Owner's Manual for a period of 24 months from date of purchase.This
warranty only applies to the original purchaser of this product.
Email: [email protected]
※ Please have your order ID ready before contacting Customer Support
If you have any questions, you are welcome to contact us ! We will get back to you within
24 hours.
MADE IN CHINA
Swing
Swing
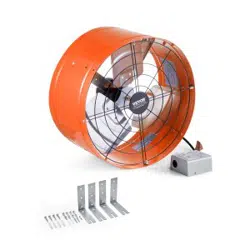
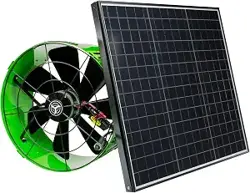
Product Catalog