3
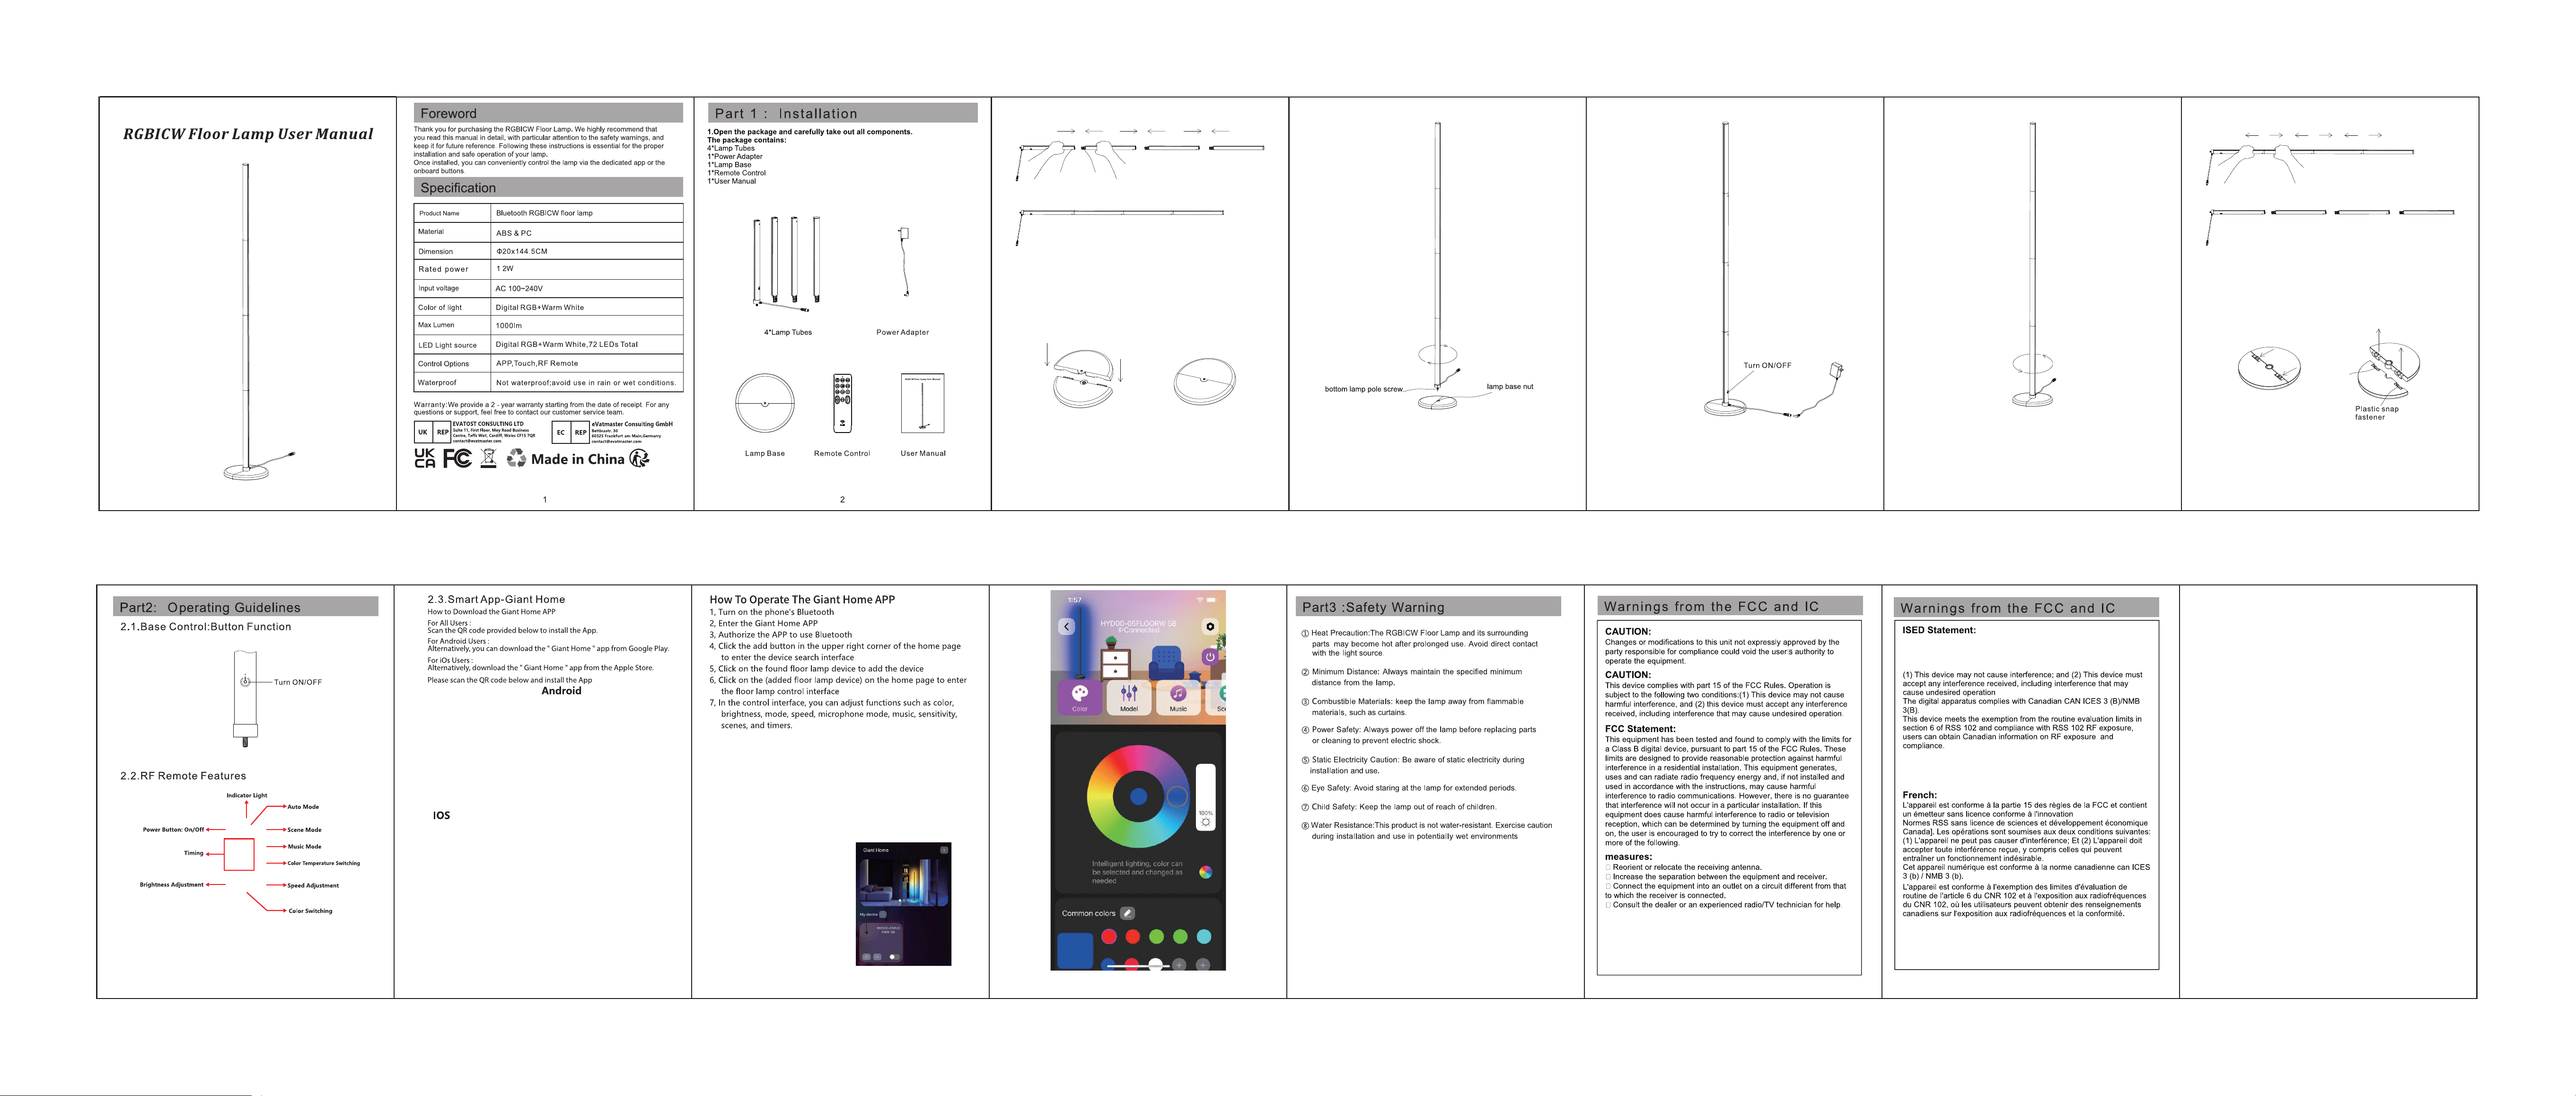
2.The assembly method and sequence of the lamp tube.
(1).Insert the bottom light tube and the middle light tube horizontally, ensuring that
the connecting piece of the middle light tube is fully inserted into the connecting
groove of the bottom light tube. When inserted properly, the elastic protrusion on
the connecting piece will be engaged in the limit hole of the bottom light tube.
(2).After connecting the bottom and middle light tubes, proceed to connect the re-
maining middle light tubes and the top light tube in order. Note that the one with a
top cover is the top light tube.
3.Assemble the Base
(1).Identify the two semicircular base halves.
(2).Align the two halves together, matching the connector tabs.
(3).Press down firmly from top to bottom until both plastic snap fasteners click se-
curely into place.
(4).Confirm the base is firmly assembled — it should not wobble or separate when
lifted.
Plastic snap
button
Positioning
limit hole
4.Installation method of lamp tube and base
Insert the fully assembled and connected light tube by turning the screw at the bot-
tom of the tube clockwise into the nut at the center of the base. Tighten it to com-
plete the base installation.
4
5.Connect Power and Complete Installation
(1).Route the power cable from the base to a nearby wall outlet.
(2).Connect the power adapter plug to the socket on the base.
(3).Plug the adapter into the wall outlet (AC 100–240V).
(4).The lamp will power on automatically upon first connection. Proceed to
Part 2 to configure your preferred control method.
5
6.Dismantling method of lamp tube and base
When disassembling the lamp tube and the base, we hold the base steady with one
hand while gripping the bottom of the lamp tube with the other and rotating it coun-
terclockwise until the lamp tube detaches from the base.
6
7.Dismantling method of lamp tube.
Hold two adjacent fluorescent tubes with both hands horizontally and pull them
outwards to the left and right in parallel, then pull them out with force.
7
8.To disassemble the base.
Gently push the buckle in the direction of the arrow, then you can separate the
base into two halves. Please be careful not to damage the buckle.
8 9 10 11 12 13 14
This equipment complies with FCC radiation exposure limits set forth
for an uncontrolled environment. This equipment should be installed
and operated with minimum distance 20cm between the radiator &
your body
This device contains licence-exempt transmitter(s) / receiver(s) that
comply with Innovation,Science and Economic Development Canada's
licence-exempt RSS(s). Operation is subject to thefollowing two
conditions:
This equipment complies with IC radiation exposure limits set forth for
an uncontrolled environment. This equipment should be installed and
operated with minimum distance 20cm between the radiator & your body
FCC Radiation Exposure Statement
IC Radiation Exposure Statement
Cet équipement respecte les limites d'exposition aux rayonnements IC
établies pour un environnement non contrôlé. L'installation et l'utilisation
de cet équipement doivent s'effectuer avec une distance minimale de 20
cm entre l'émetteur de rayonnement et votre corps.
Déclaration d'exposition aux rayonnements IC
