X10 PRO MAX
Please read this instruction manual carefully
before use and keep it for future reference.
AIR INFLATOR

- 01 -
Contents
1. SAFETY INSTRUCTIONS
2. PRODUCT OVERVIEW
3. PACKAGE CONTENTS
4. TURNING THE INFLATOR ON/OFF
5. BATTERY LEVEL INDICATOR & CHARGING
6. CONNECTING THE AIR TUBE AND VALVE ADAPTER
7. DETECTING THE CURRENT PRESSURE
8. DETERMINING THE RIGHT PRESSURE VALUE
9. PRESET PRESSURE VALUE
10. INFLATING
11. DEFLATING
13. LIGHT
14. SPECIFICATIONS
15. TROUBLESHOOTING
02
04
05
06
08
09
10
10
12
14
15
16
16
17
18
12. DISCONNECTING THE AIR TUBE

- 02 -
1. SAFETY INSTRUCTIONS
•
•
•
•
•
•
•
•
This product is not a toy and should not be used by children. Users should be above 16 years old.
Keep a safe distance between children and the inflator while inflating. There is a built-in lithium
battery inside the product. Don't place the product in fire or dump the battery.
Overheating, damage, or water may increase the risk of fire or explosion. It's best to keep the
product away from heat sources, and not leave it for prolonged periods in a hot car. If the inflator
becomes very hot, there is a chance it could explode.
Please store the product in temperature ranging from -10℃~45℃
. Extremely hot or cold environ-
ments may damage the battery and shorten the lifetime of the inflator.
Long-time storage of the product may decrease the effectiveness of the battery. Charge the
inflator at least once every three months to maintain its performance.
The product has a built-in DC motor which may generate sparks during operation. Do not use it in
an environment with dust or gas that is liable to explode.
If there is an unusual noise or the temperature becomes very high during inflating, please turn off
the inflator immediately.
Before setting the inflation pressure value, make sure the pressure unit is correctly selected.
This product is not a toy and should not be used by children. Users should be above 16 years old.
Keep a safe distance between children and the inflator while inflating. There is a built-in lithium
battery inside the product. Don't place the product in fire or dump the battery.
Overheating, damage, or water may increase the risk of fire or explosion. It's best to keep the
product away from heat sources, and not leave it for prolonged periods in a hot car. If the inflator
becomes very hot, there is a chance it could explode.
Please store the product in temperature ranging from -10
0
C~45
0
C. Extremely hot or cold environ-
ments may damage the battery and shorten the lifetime of the inflator.
Long-time storage of the product may decrease the effectiveness of the battery. Charge the
inflator at least once every three months to maintain its performance.
The product has a built-in DC motor which may generate sparks during operation. Do not use it in
an environment with dust or gas that is liable to explode.
If there is an unusual noise or the temperature becomes very high during inflating, please turn off
the inflator immediately.
Before setting the inflation pressure value, make sure the pressure unit is correctly selected.

Mixing up psi and bar could lead to dangerous over-inflation.
Unit conversion: 1bar = 14.5psi, 1bar = 100kPa
Do not leave the inflator unattended while it is in operation.
Please use the product in a dry and clean environment. The intrusion of sand and dust may cause
damage to the product. Don’t wash the product with water.
Please use a certified 5V/3A adapter and the included charging cable to charge this product.
Malfunction caused by actions not in accordance with the above requirements is not covered by
the warranty.
After running for a long time, the temperature of the junction between the air tube and the main
body can become very high. To avoid burns, avoid touching it.
- 03 -
•
•
•
•
•
Mixing up PSI and BAR could lead to dangerous over-inflation.
Unit conversion: 1BAR= 14.5PSI, 1BAR = 100KPA
Do not leave the inflator unattended while it is in operation.
Please use the product in a dry and clean environment. The intrusion of sand and dust may cause
damage to the product. Don’t wash the product with water.
Please use a charge adapter and the included charging cable to charge this product.
Malfunction caused by actions not in accordance with the above requirements is not covered by
the warranty.
After running for a long time, the temperature of the junction between the air tube and the main
body can become very high. To avoid burns, avoid touching it.
Caution:To reduce the risk of electric shock, do not expose to rain. Store indoors.
"Never put batteries in mouth. If swallowed, contact your physician or local poison control
center."
- 04 -
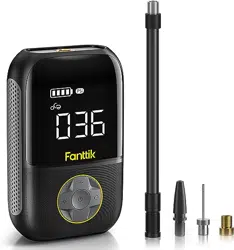
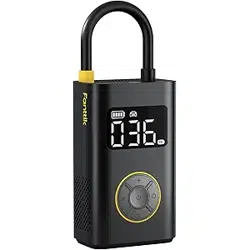
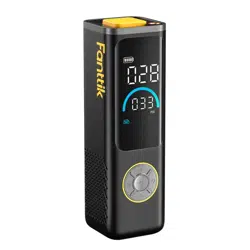
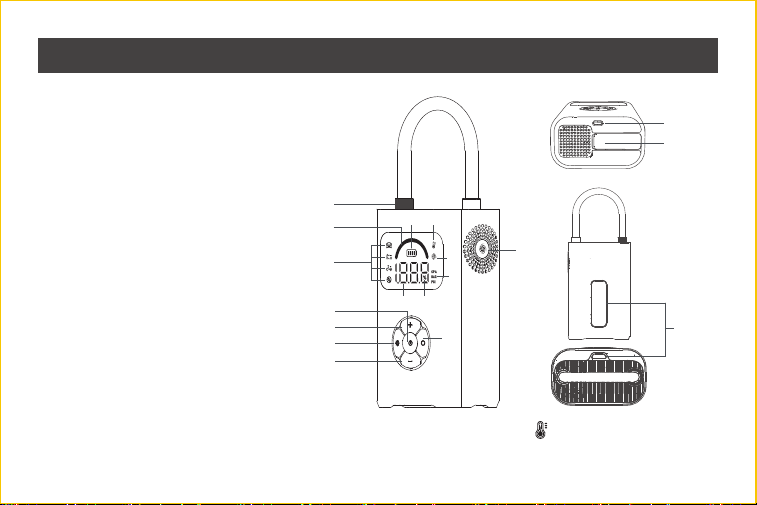
2. PRODUCT OVERVIEW
1. Schrader valve adapter
2. Pumping progress bar
3. Preset mode
4. High temperature indicator
5. Battery indicator
6. Deflation icon
7. Real-time / Target pressure value
8. Pressure unit
9. Charging percentage
10. Power/Start-stop button
11. “+” button
12. Light button
13. Mode button
14. “-” button
15. Work light
16. Storage groove
17. USB-C port (input)
Note:
It is normal for the product to stop working when the temperature protection icon ( ) is on, and it could
continue to be used when the temperature drops while icon disappeared.
1
2
3
10
11
18
12
14
13
7
8
9
4
6
5
18. Deflation button
17
16
15
- 05 -
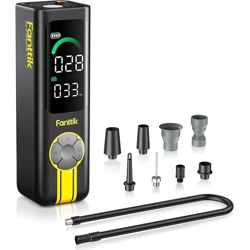
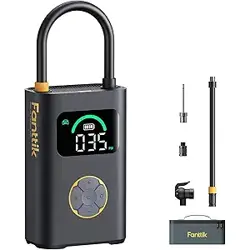
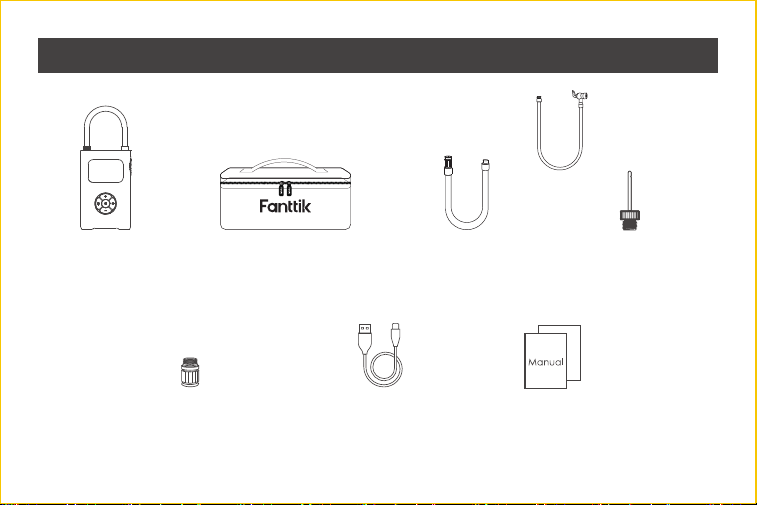
3. PACKAGE CONTENTS
X10 Pro Max
air inflator × 1
USB charging
cable × 1
Needle valve
adapter × 1
User manual × 1
Storage bag × 1
Schrader-Presta
valve adapter × 1
Extension
hose×1
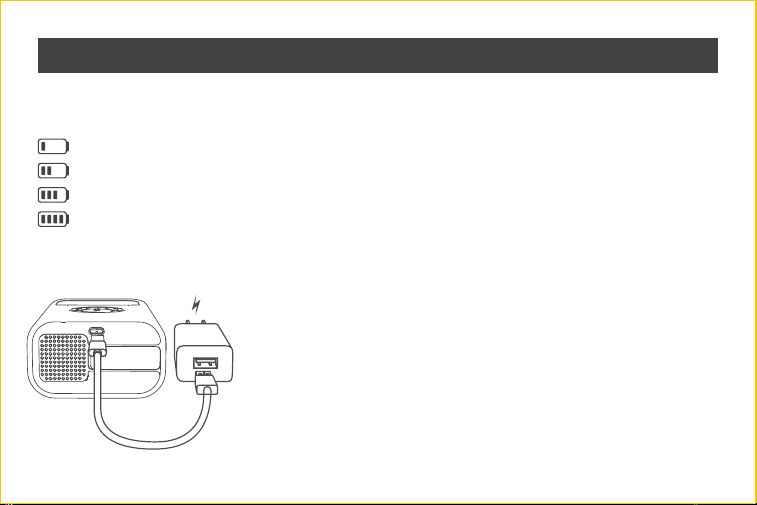
Battery Level Indicator
The battery level is shown by four bars, with each bar representing 25%.
1 bar = under 25%
2 bars = between 25% and 50%
3 bars = between 50% and 75%
4 bars = between 75% and 100%
Note: The battery indicator will flash when the battery level is below 10%.
- 06 -
4. BATTERY LEVEL INDICATOR & CHARGING
Charging
Fully charge the inflator before using it for the first time. To charge,
connect it to a 5V/3A USB charger with the charging cable.(Input:
USB-C)
Battery Level Indicator
The battery level is shown by four bars, with each bar representing 25%.
1 bar = under 25%
2 bars = between 25% and 50%
3 bars = between 50% and 75%
4 bars = between 75% and 100%
Note: The battery indicator will flash when the battery level is below 10%.
Charging
Fully charge the inflator before using it for the first time. To charge,
connect it to a 5V/3A USB charger with the charging cable.(Input:
USB-C)

Note:
• The inflator cannot be used while it is being charged.
• The USB charger is sold separately. Make sure to use a certified charger.
• Charging is automatically disabled when the high temperature icon is on.
Battery Information
The battery lasts about 30 minutes on a full charge, running without a load at an ambient tempera-
ture of 25°C. Using the air compressor under a heavy load or at lower ambient temperatures may
reduce the battery life.
While charging:
1 bar flashing = under 25%
1 bar solid, 2nd bar flashing = between 25% and 50%
2 bars solid, 3rd bar flashing = between 50% and 75%
3 bars solid, 4th bar flashing = 75% and 100%
All 4 bars solid = fully charged
The inflator will automatically switch off if left inactive for 5 minutes after being fully charged.
- 07 -
Note:
• The inflator cannot be used while it is being charged.
• The USB charger is sold separately.
• Charging is automatically disabled when the high temperature icon is on.
-
While charging:
1 bar flashing = under 25%
1 bar solid, 2nd bar flashing = between 25% and 50%
2 bars solid, 3rd bar flashing = between 50% and 75%
3 bars solid, 4th bar flashing = 75% and 100%
All 4 bars solid = fully charged
The inflator will automatically switch off if left inactive for 5 minutes after being fully charged.
- 08 -
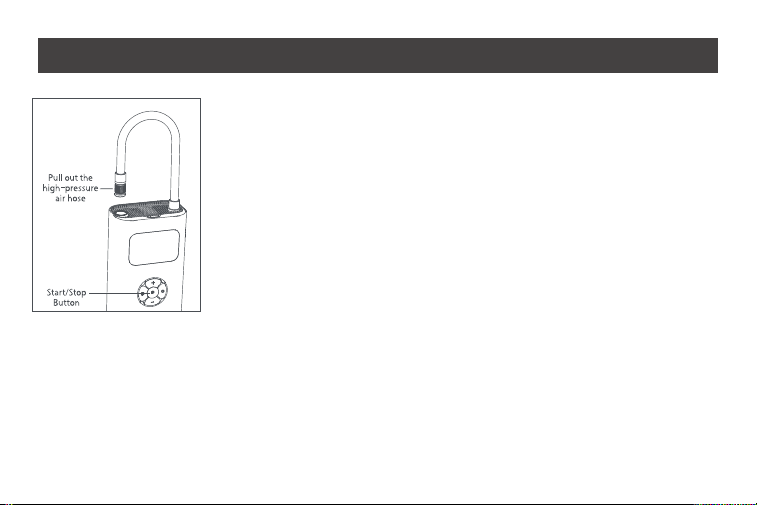
5. TURNING THE INFLATOR ON/OFF
ON
Pull out the air tube and the inflator will automatically turn on. If the
inflator is not used for 3 minutes, it will automatically turn off. And if the
air inflator automatically turns off while the air tube has been pulled out,
press and hold the power button to turn the air inflator on again.
OFF
When the inflator is on, turn it off by inserting the air tube back into the
inflator, or by long pressing the power button for 1.5 seconds.
The inflator will automatically turn off in the cases below:
1. After 3 minutes of inactivity.
2. After 5 minutes of inactivity after being fully charged.
3. Inflate over 5 minutes when the target pressure value is below 5PSI.
4. Inflate over 3 minutes when the target pressure value is above or equates 120PSI.
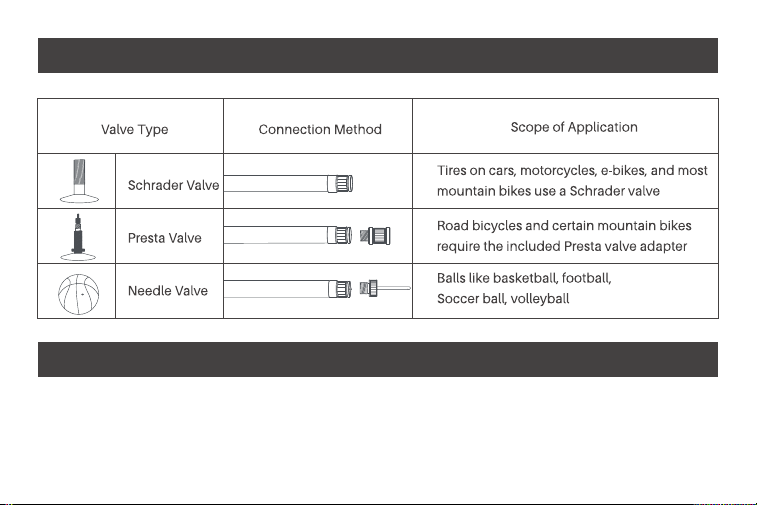
6. CONNECTING THE AIR TUBE AND VALVE ADAPTER
- 09 -
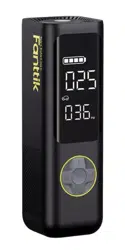
7. DETECTING THE CURRENT PRESSURE
The current actual pressure will automatically be displayed as long as the air tube is connected to
the item while the inflator is turned on.
- 10 -
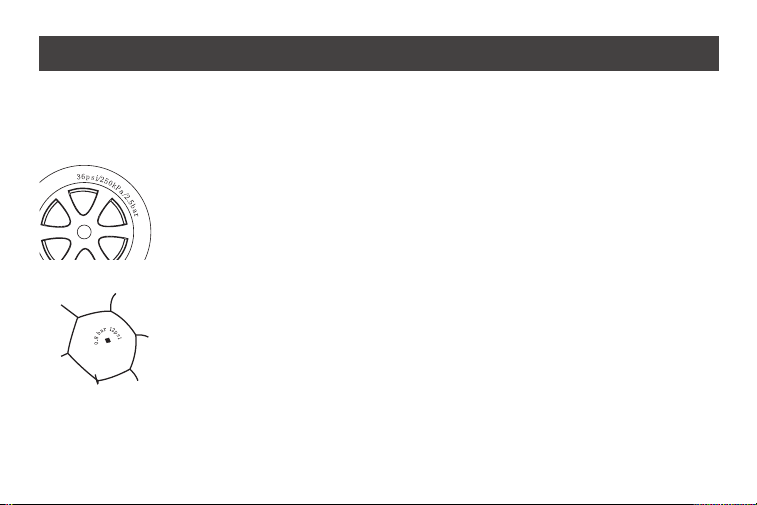
8. DETERMINING THE RIGHT PRESSURE VALUE
To prevent injuries caused by over-inflation, always check the maximum pressures of the items
before inflating.
Tires
The recommended pressures valves of tires for cars, bicycles, and
motorcycles are indicated on the tire's sidewalls. The recommended tire
pressure valve for car is also indicated on the inside of the driver's side
door. For details regarding load carrying capacity and recommended air
pressures, consult your vehicle's instructions or manuals.
Balls
The recommended pressure valves for footballs, basketballs, volleyballs
and other balls are indicated near the ball's air valves.

- 11 -
Note: Pressure range values are for reference only. Always consult the instructions or manuals
of the item being inflated for actual inflation pressure specifications.
Air Pressure Reference Table
Category
Bicycles
Motorcycles
Cars
Balls
Electric Folding Bike tires
12-, 14-, & 16-inch bicycle tires
20-, 22-, & 24-inch bicycle tires
26-, 27.5-, & 29-inch mountain bike tires
700c road bike clincher tires
700c road bike tubular tires
10 - 50PSI
30 - 50PSI
40 - 50PSI
45 - 65PSI
100 - 130PSI
120 - 145PSI
Basketballs
Soccer balls
Volleyballs
Footballs
7 - 9PSI
8 - 16PSI
4 - 5PSI
12 - 14PSI
Motorcycle tires
Car tires
26 - 43PSI
28 - 50PSI
Type
Recommended
Pressure Range
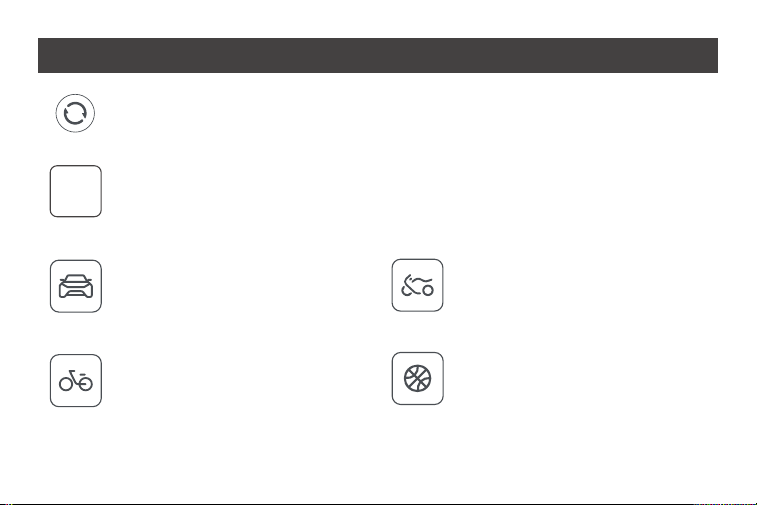
Switch Modes
Press the Mode button to switch among the five inflation modes below.
- 12 -
9. PRESET PRESSURE VALUE
Car Mode: Default 35PSI
Adjustable Range: 28-75PSI
Bicycle Mode: Default 45PSI
Adjustable Range: 30-145PSI
Motorcycle Mode: Default 34PSI
Adjustable Range: 16-43PSI
Ball Mode: Default 8PSI
Adjustable Range: 3-16PSI
Manual Mode: In this mode, no preset mode icons are active. The preset pressure value
is adjustable, and the pressure value and unit will be saved.
Adjustable Range: 3-150PSI / 0.2 - 10.3BAR

- 13 -
After inflation in above modes, the system automatically saves the target pressure as a preset
valve for next use.
For optimal inflation of sports equipments (basketballs, soccer balls, etc.), select Ball Mode to
automatically apply pressure limits and prevent over-inflation.
Note:
1.
2.
Before adjusting the preferred pressure value, press and hold the mode button to toggle
among PSI, BAR, and KPA. And the pressure units in the corresponding modes can be
saved.
Switch the pressure unit
After selecting a mode, press + or - to increase or decrease the target pressure value. Press
and hold the + or - button to quickly adjust the pressure value. When adjusting the target
pressure, the blinking value indicates the target pressure, and a non-blinking value
indicates the real-time pressure.
Adjusting the target pressure value

- 14 -
10. INFLATING
Start Inflating
Press the Power button to start inflating. The inflator and air tube can get very hot after
running for a while. Avoid prolonged skin contact with the tube to prevent injuries.
Stop Inflating
Once the target pressure value has been reached, the inflator will automatically stop
inflating. The inflator can also be manually stopped at any time by pressing the power
button while inflating.
Caution:
Items such as balloons, beach balls, and swim rings cannot be automatically inflated
because they have an air pressure requirements below the inflator's minimum pressure
range. Only inflate these items manually with caution.

- 15 -
12. DISCONNECTING THE AIR TUBE
The inflator's air tube may get very hot after inflating. To prevent injuries, exercise caution when
disconnecting it from a valve. Some air may leak out of the valve when disconnecting the air
compressor. To avoid pressure loss, quickly disconnect the air hose from the valve.
When disconnecting the air tube, the deflation icon will be temporarily displayed on the screen.
Note:
11. DEFLATING
There is a yellow deflation button on the right side of the inflator, which supports free deflation for
tires. Pressing and holding the deflation button will activate deflation, and releasing it will stop
deflation. While deflating, the deflation icon on the screen will be displayed. Once completed,
the
stabilized actual pressure will be displayed.
When hearing the sound of obvious air flow, it means that the inflator is in normal pressure relief,
the deflation is in normal state.
For road bike tires, it is necessary to press the deflation button more vigorously.
Note:
1.
2.

- 16 -
13. LIGHT
The inflator is equipped with dual LED lights (top and rear). The dual-position illumination
system ensures clear visibility in low-light conditions, supporting tasks like valve
connection or nighttime operation with hands-free convenience.
Shortly press the light button to cycle through modes: light on, steady top white, top white
SOS, steady rear white, rear white SOS , flashing rear red and light off. If the light is on,
long press to turn off the light.
Note:
After 30 minutes, the light will automatically turn off.
- 17 -
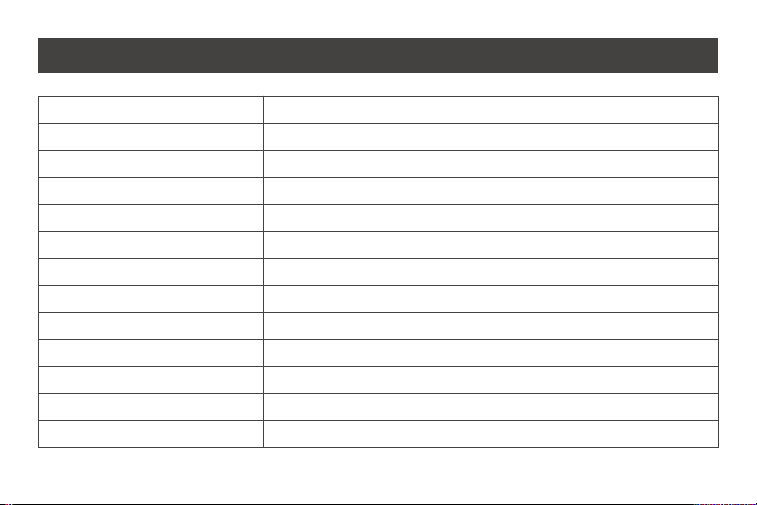
14. SPECIFICATIONS
Name
Model
Dimensions
inflation Pressure Range
Working Temperature
Storage Temperature
Air hose Dimen sions
Battery Capacity
Working Noise
Input
Input Port
Charging Time
Sensor Accuracy
Fanttik X10 Pro Max Portable Electric Air Inflator
X10 Pro Max
157*100*60mm(Excluding air hose)
3-150PSI / 0.2-10.3BAR
Length 300mm
28.86 Wh /11.1V
<85dB within 1 meter
5V/3A
USB -C
<3 hours (5V/3A)
±1PSI
0℃~45℃/32℉~113℉
-10℃~45℃/14℉~113℉
- 18 -
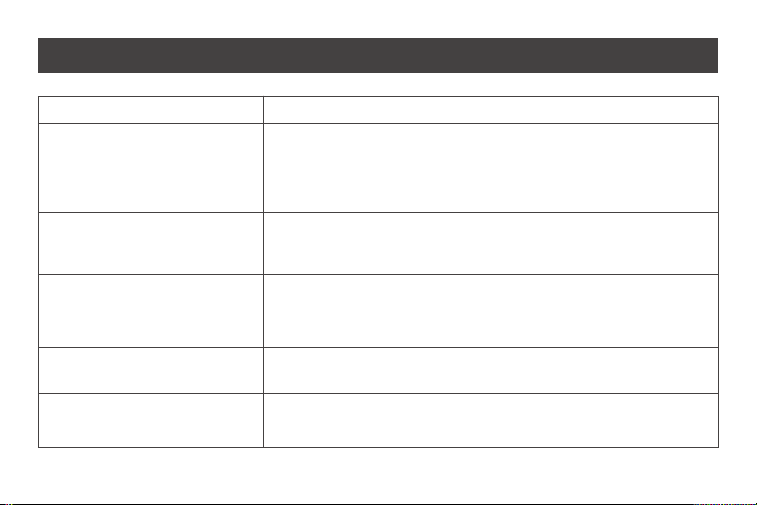
15. TROUBLESHOOTING
Problem Solution
1. Check whether the inflator's battery level is sufficient.
2. Check whether the air tube is leaking.
3. Check whether both ends of the air tube are securely connected.
4. Check whether the item that is being inflated is leaking.
1. Check whether the inflator's battery level is sufficient.
2. Check whether the pressure of the item being inflated exceeds the
preset pressure.
Make sure the inflator is set to the correct mode. Manual mode has a
blank display without any icons and allows you to adjust the preset
value within the range of 3 - 150 PSI.
The pressure of low-pressure inflatables including balloons is too low
to be measured.
Check if you are using a compliant 5V/3A charger and original USB
cable.
Slow inflation speed
The inflator turns on but does
not inflate
The inflator inflates normally but
the displayed pressure is zero
Charging slowly
Unable to increase or decrease
the preset pressure

- 19 -
Problem Solution
Make sure the air tube is securely connected.
The lithium battery's voltage level significantly drops when
discharging power, causing the battery level indicator to have a
different display when inflating compared to standby state. This is
normal.
Use a charge adapter and the included charging cable, and try
charging again.
1. Ensure the adapter matches the tire valve.
2. For presta valve, vertify the presta valve core nut is fully loosened
before inflation.
3. For schrader valve, inspect the valve core to ensure it is clean, free
of debris and undamaged.
Air leakage after connecting the
air tube
The battery level indicator is
different when inflating
compared to standby state
The inflator fail to inflate/detect
pressure
The battery level indicator isn’t
shown on the screen after
charging
This product is covered by a 12-month limited warranty for
manufacturing defects.