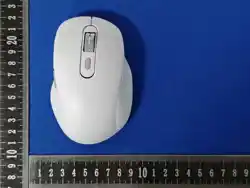
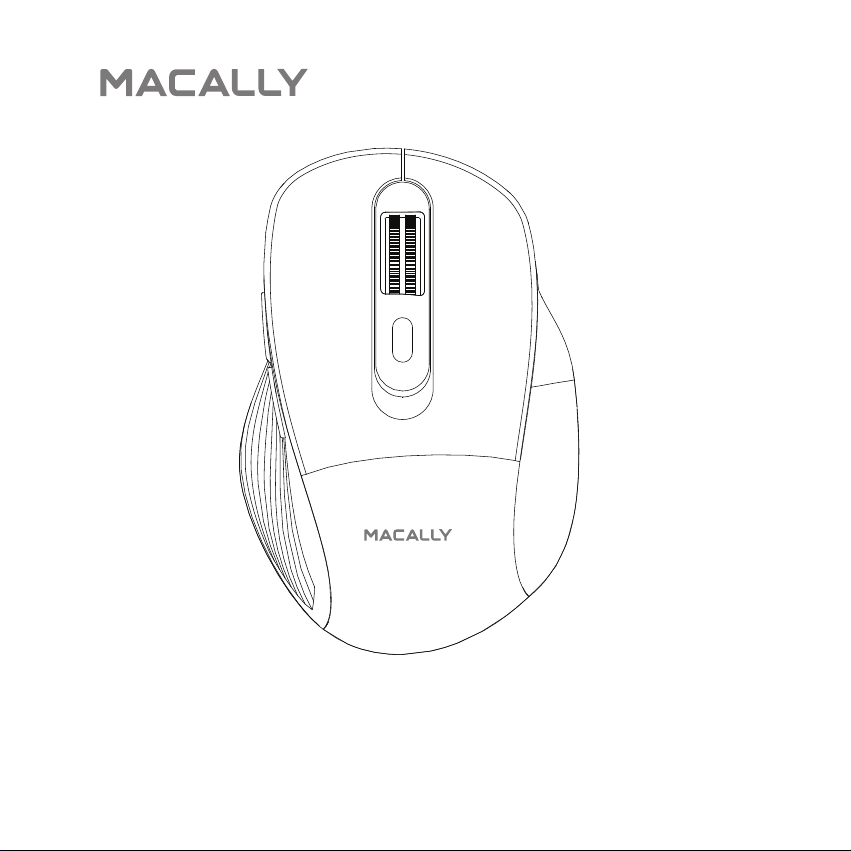
BTM1MOUSE Series
Multi-Device Bluetooth Mouse
For Three Devices: Mac, iPad, and PC
Welcome to the Macally family and thank you for purchasing the BTM1-
MOUSE Series.
Our mission is to deliver aesthetically pleasing, high-quality and affordable
peripherals and accessories to satisfied customers. We do that by creating
products that are both innovative and practical but most important
easy-to-use.
If you have any questions, feedback, or just want to say hi, please reach out
to us at techsupport@macally.com or on any one of our social media chan-
nels.
Don’t forget to share your setup with us using #macally and follow us for to get
exclusive offers.
With Love From Southern California,
Macally
PACKAGE CONTENTS
SYSTEM REQUIREMENTS
HARDWARE BASICS
• Mouse
• USB-C to USB-C charging cable
• User's Guide
• Bluetooth-enabled Apple computer, laptop, iPad, mobile device and Windows
PC.
• Laptop, desktop etc. with an available USB-C port for charging the mouse.
• USB-C wall charger for charging the mouse (alternative if your laptop/desktop
does not have a USB-C port).
2
5
6
7
3
4
8
9
10
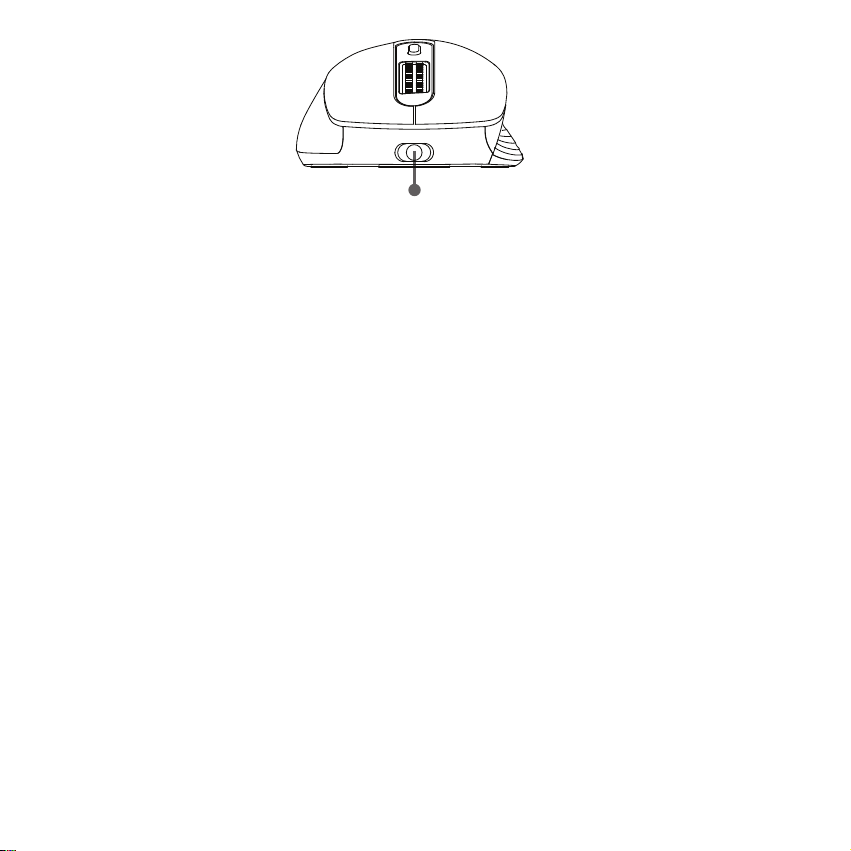
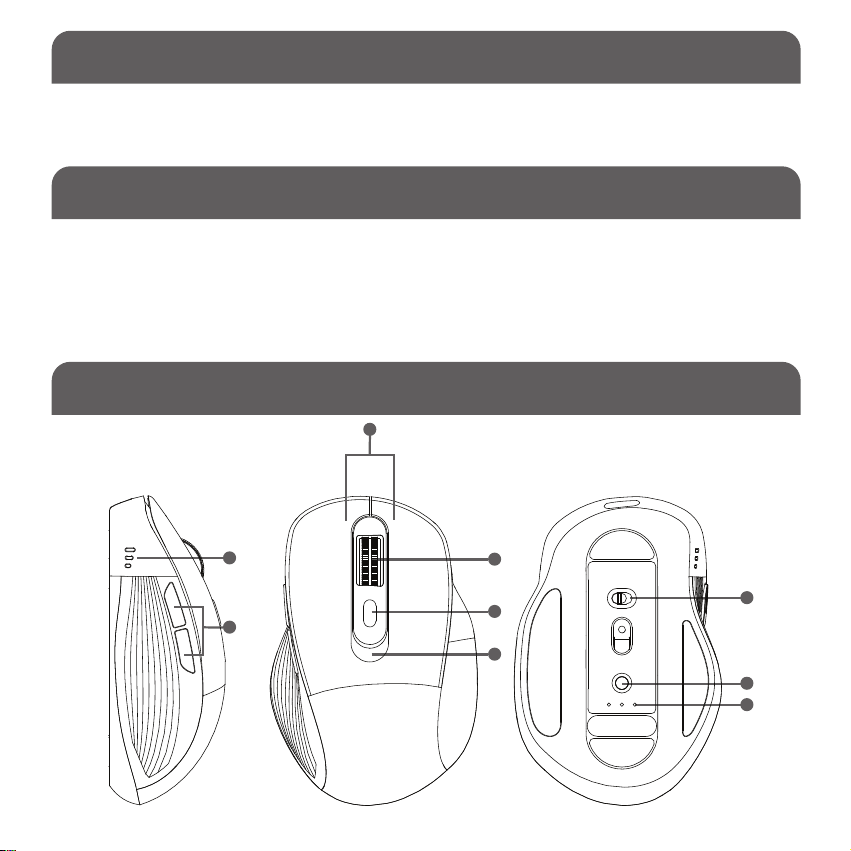
1.USB-C Charging Port
2.Battery LED
(Low battery warning: Top DPI LED indicator 7 will flash, user needs to charge the
mouse)
i.Solid Red – Charging
ii.Green – Fully Charged
iii.Off –
Normal status if mouse works and charging cable isn’t plugged in; Or charging
doesn’t work if charging cable is plugged into a computer or charger)
3.Back and forward buttons
4.Left and right click buttons
5.Scroll Wheel and middle button
6.DPI Button
7.LED indicator lights briefly for DPI
i.Red – 800 DPI
ii.Green – 1600 DPI
iii.Blue – 2400 DPI
iv.Yellow – 3200 DPI
v.Purple – 4000 DPI
8.On/Off Switch
9.BT button – Pairing and channel switch
10. Bluetooth indicators
i.B1 Blue – Bluetooth Channel 1
1.Blinking Blue – Pairing
2.Solid Blue then Off – Paired
ii.B2 Blue – Bluetooth Channel 2
1.Blinking Blue – Pairing
2.Solid Blue then Off – Paired
iii.B3 Blue – Bluetooth Channel 3
1.Blinking Blue – Pairing
2.Solid Blue then Off – Paired
1
BLUETOOTH PAIRING INSTRUCTIONS
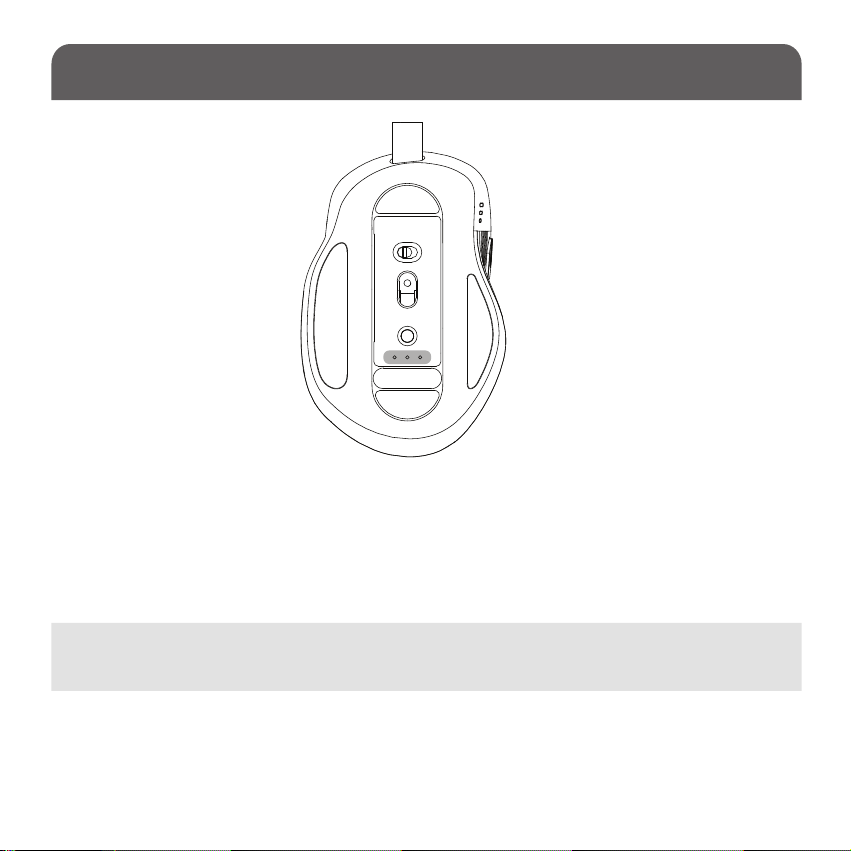
Take a look at the bottom of the mouse. Like what is highlighted grey in above
picture, you should see 3 LEDs labeled B1, B2 and B3. That is the Bluetooth indica-
tor.
To pair your mouse to a Bluetooth-enabled device (Computer, Laptop, Phone,
tablet), make sure the mouse is on and charged, then follow the steps below:
1.Open the Bluetooth settings on the device you are pairing the mouse to (laptop,
desktop, tablet, phone, etc).
NOTE
We will use Bluetooth channel 1 (B1) in these steps.
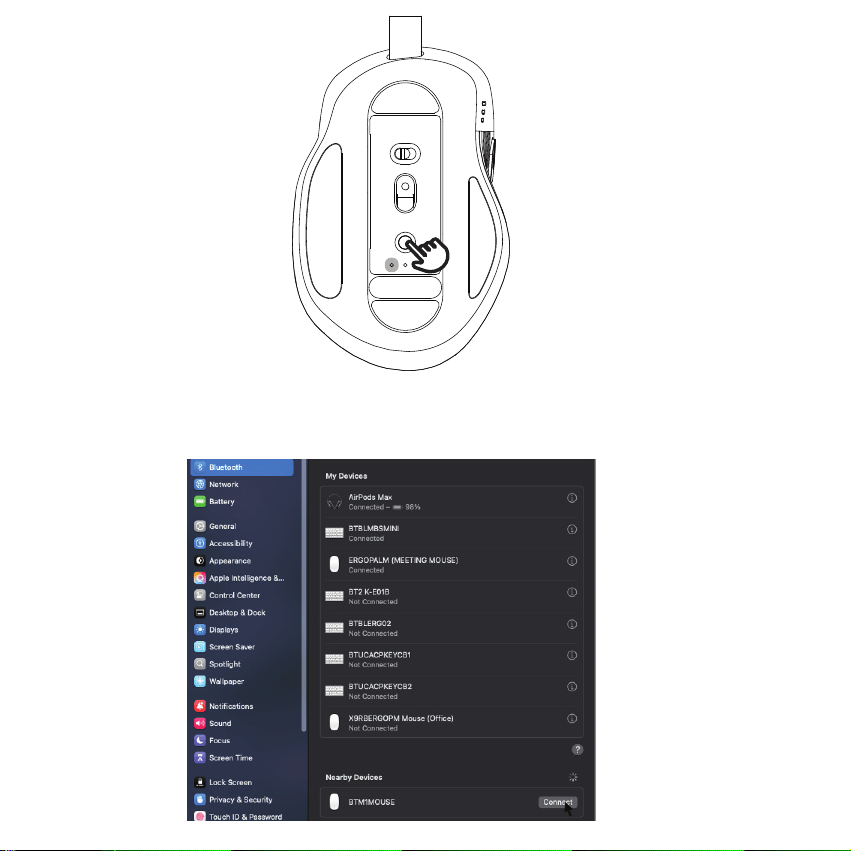
2.Press the BT button briefly to select B1 channel, then hold down BT button until the
LED on the Bluetooth Indicator B1 flashes rapidly.
SWITCHING BETWEEN MULTIPLE DEVICES
3.Click or tap the name BTM1MOUSE on your screen to pair the mouse. Once paired,
the B1 LED should stay solid blue, then shut off.
To pair the mouse to a second device, follow the same steps above for the other two
Bluetooth channels (B2 & B3).
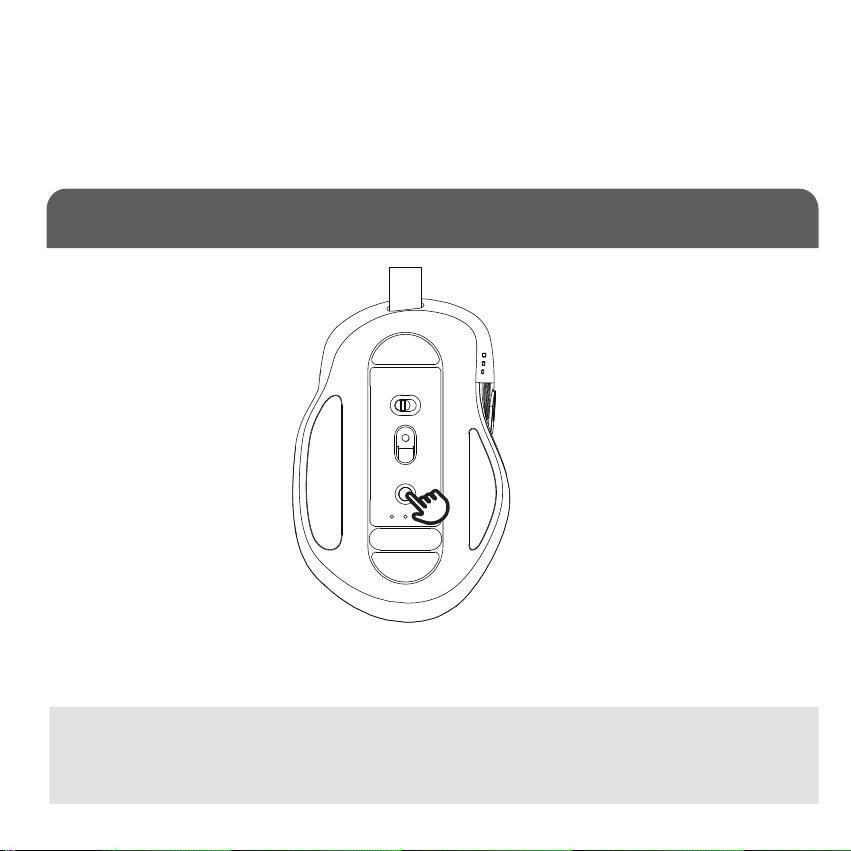
Once you have all your devices paired to the mouse, switching between them is as
simple as pressing the BT button briefly.
NOTE
Reconnect time may vary depending on the Bluetooth version of the connected
devices.
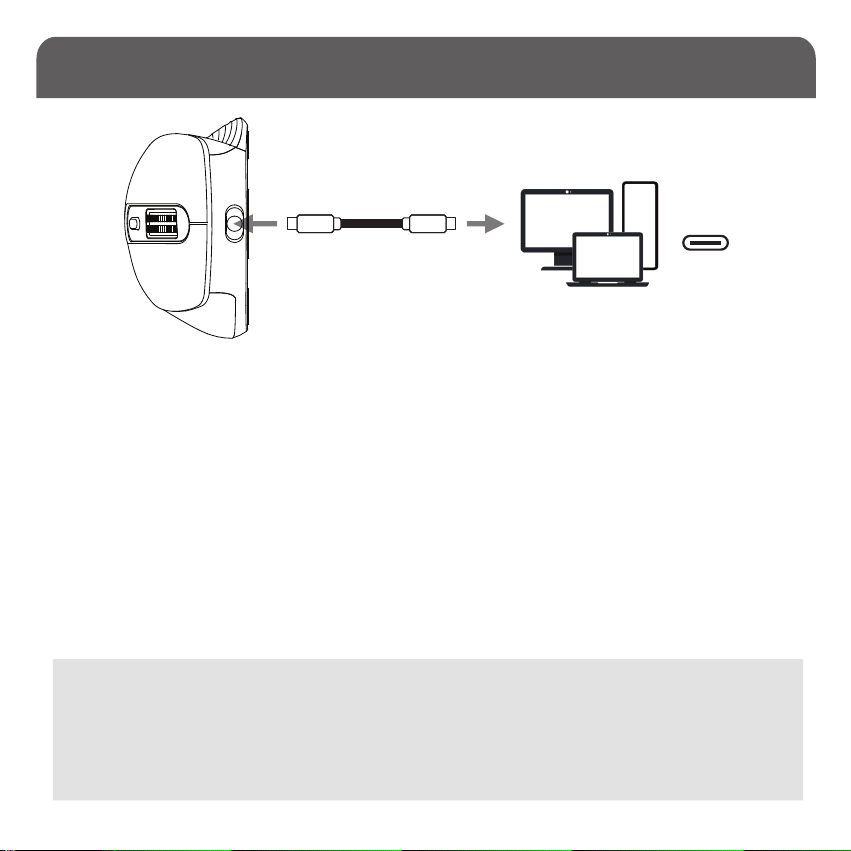
CHARGING THE MOUSE
To charge the mouse, simply plug the USB-C end of the provided cable into any
available USB-C port on your computer, laptop, or USB-C wall charger, and insert the
other USB-C end of the cable into the USB-C port located in the front of the mouse.
NOTE: Using the cable only charges the mouse. It does not convert the mouse into
a “wired” device.
Battery LED:
(Low battery warning: Top DPI LED indicator 7 will flash, user needs to charge the
mouse)
• Solid Red – Charging
• Green – Fully Charged
• Off – Normal status if the mouse works and the charging cable isn’t plugged in; Or
charging doesn’t work if the charging cable is plugged into a computer or charger.
NOTE
1. the mouse cable can be connected to a USB-C port wall charger; 2. if you
have USB-A port in either computer or wall charger, you need to get a female
USB-C to male USB-A adaptor plugged into Macally cable included, or use
your own USB-C to USB-A cable in order to charge.
USB-c
SAFETY INSTRUCTIONS
SPECIFICATIONS
Tech support
Tech support hours are from 9:00 AM to 5:00 PM Monday through Friday (Pacific
Standard Time).
• E-Mail: techsupport@macally.com
• Phone: (909) 230-6888
Please read the following carefully. Incorrect use of this product may result in reduced
performance, permanent damage and void your warranty.
• Keep this device away from liquid, humidity and moisture.
• Operate this device only within the specific temperature range of 0°C (32° F) to 5°C to
40°C (104° F)
• Please refrain from taking the device apart. Doing so will void your warranty.
• Do not dispose this product in the garbage. Take it to your local recycling center.
Buttons
DPI
Battery Size
Charge Time
Work Time
Bluetooth sleep time
Charging Port
Quiet Click
5 Settings
800, 1600, 2400, 3200, 4000
400mAh
2-3 hours
Around 2 months
1 hour (move or click button to wake up)
USB-C

FCC STATEMENT
This device complies with part 15 of the FCC Rules. Operation is subject to the follow-
ing two conditions: (1) This device may not cause harmful interference, and (2) this
device must accept any interference received, including interference that may cause
undesired operation.
Any Changes or modifications not expressly approved by the party responsible for
compliance could void the user's authority to operate the equipment.
Note: This equipment has been tested and found to comply with the limits for a Class
B digital device, pursuant to part 15 of the FCC Rules. These limits are designed to
provide reasonable protection against harmful interference in a residential installa-
tion. This equipment generates uses and can radiate radio frequency energy and, if
not installed and used in accordance with the instructions, may cause harmful
interference to radio communications. However, there is no guarantee that interfer-
ence will not occur in a particular installation. If this equipment does cause harmful
interference to radio or television reception, which can be determined by turning the
equipment off and on, the user is encouraged to try to correct the interference by one
or more of the following measures: .
-Reorient or relocate the receiving antenna.
-Increase the separation between the equipment and receiver.
-Connect the equipment into an outlet on a circuit different from that to which the
receiver is connected.
-Consult the dealer or an experienced radio/TV technician for help.
The device has been evaluated to meet general RF exposure requirement. The
device can be used in portable exposure condition without restriction.

Warranty
Macally Peripherals warrants that this product will be free from defects in title, mate-
rials and manufacturing workmanship for one year in North America from the date of
the purchase. If the product is found to be defective then, as your sole remedy and
as the manufacturer’s only obligation, Macally will repair or replace the product. This
warranty is exclusive and is limited to the product that this user’s guide came with.
This warranty shall not apply to products that have been subjected to abuse,
misuse, abnormal electrical or environmental conditions, or any condition other than
what can be considered normal use. The liability of Macally Peripherals arising from
this warranty and sale shall be limited to a refund of the purchase price. In no event
shall Macally Peripherals be liable for costs of procurement of substitute products or
services, or for any lost profits, or for any consequential, incidental, direct or indirect
damages, however caused and on any theory of liability, arising from this warranty
and sale. These limitations shall apply notwithstanding any failure of essential
purpose of any limited remedy.