Pioneer WYD Series
Remote Controller
Manual
For those who only want the Best!
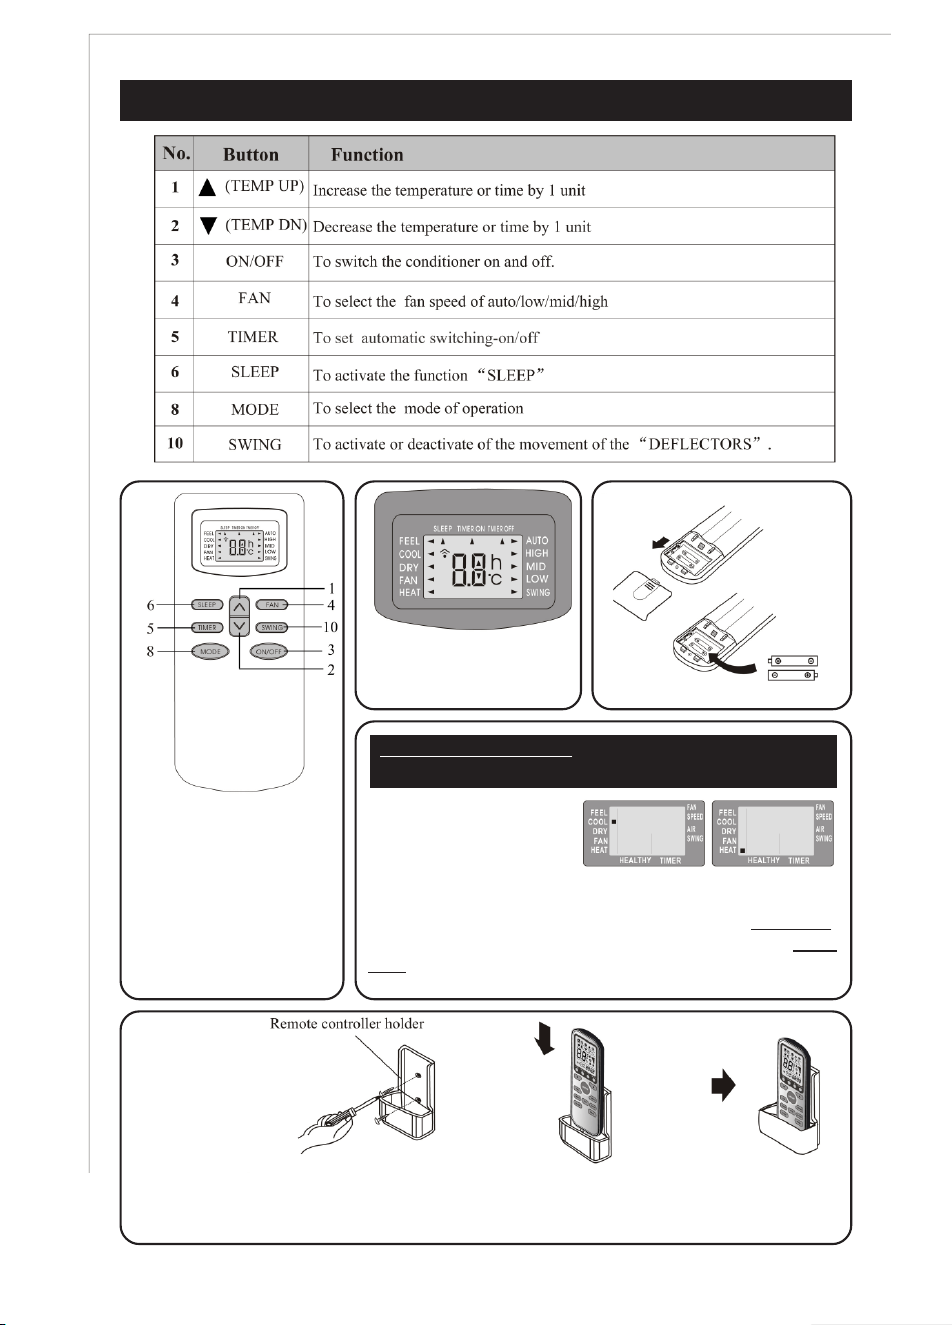
REMOTE CONTROLLER FUNCTIONS AND SETTINGS
5
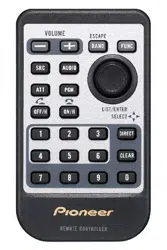
REMOTE CONTROL:
Controls all of the
available functions of your
system with convenience
from a remote distance.
Wall unit beeps each time
to indicate a signal was
received from the remote.
LCD DISPLAY:
Displays current settings
on the remote.
Insert Two AAA Batteries.
IMPORTANT WARNING - SETTING THE REMOTE FOR
INITIAL USE AND AFTER REPLACING BATTERIES.
REMOTE CONTROL
CAN BE SET AS COOL
ONLY OR HEAT-COOL.
When the batteries are inserted, LCD screen will flash signs
next to HEAT and COOL alternately. Pressing any button while
the COOL sign is flashing sets the remote as Cool Only.
Pressing any button while HEAT sign is flashing sets as Heat-
Cool. If you do not press any button, flashing stops and
controller sets up as default to Heat-Cool Function..
Some systems are packed with a plastic wall holder for the remote controller. This part can
be bolted onto a wall to store the remote controller inside at a convenient location.
MODES OF OPERATION
6
System is designed to create comfortable climate
conditions based on the user’s choices for the area it is
installed in. Several modes of operation are available and
can be set as needed. These are:
a. Air Conditioning (Straight Cooling).
b. Heating (Reverse Cycle / Heat Pump).
c. Dehumidifying (Dry Mode for humidity control).
d. Ventilating (Fan Only mode for air circulation).
e. Auto (Automatic switch-over mode)
f. FEEL Mode (Default comfort settings).
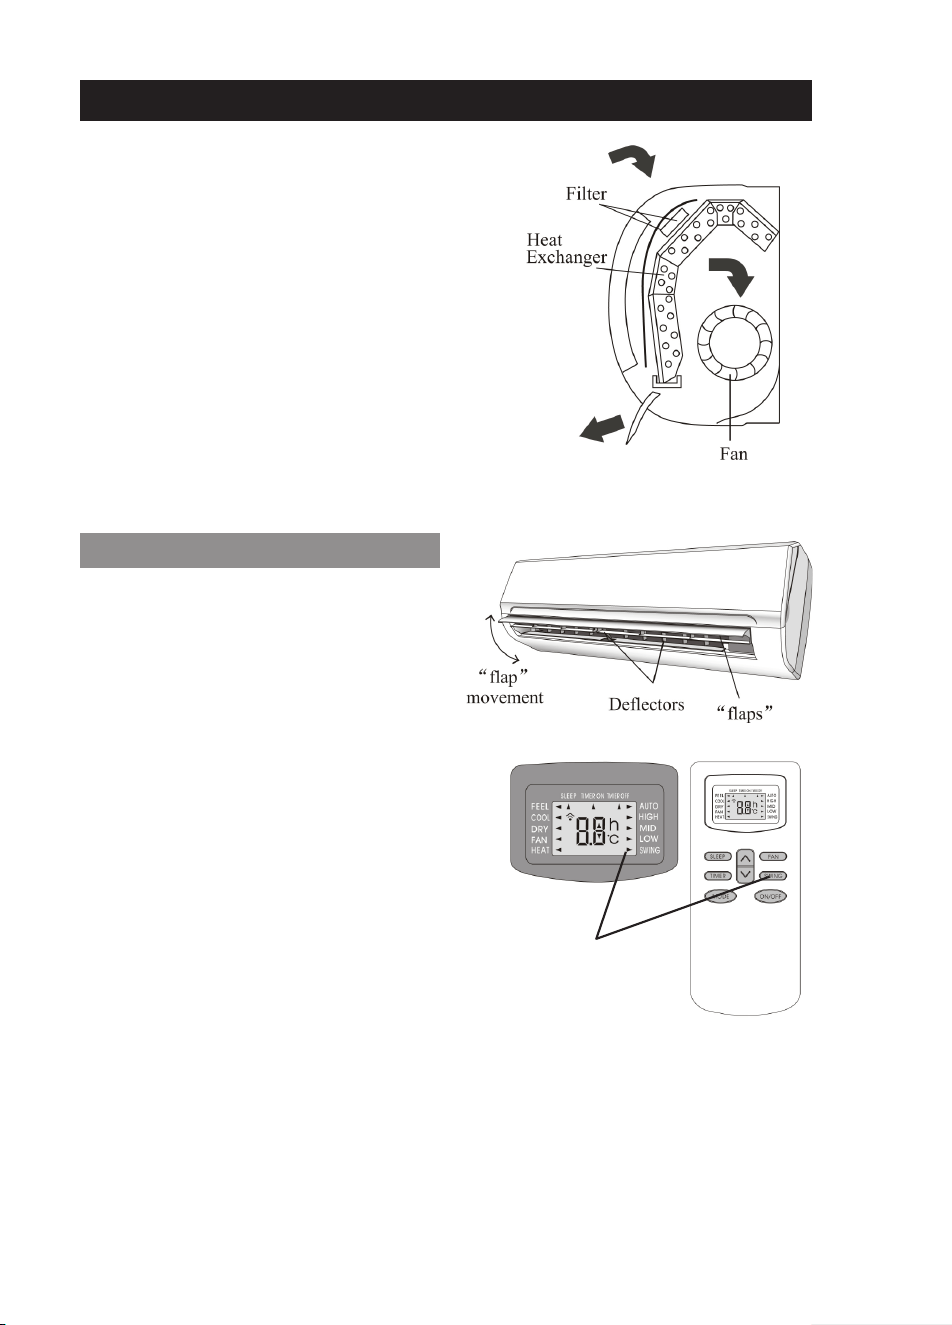
Indoor air is recirculated through filters and the heat
exchanger by a powerful yet quiet cross flow fan.
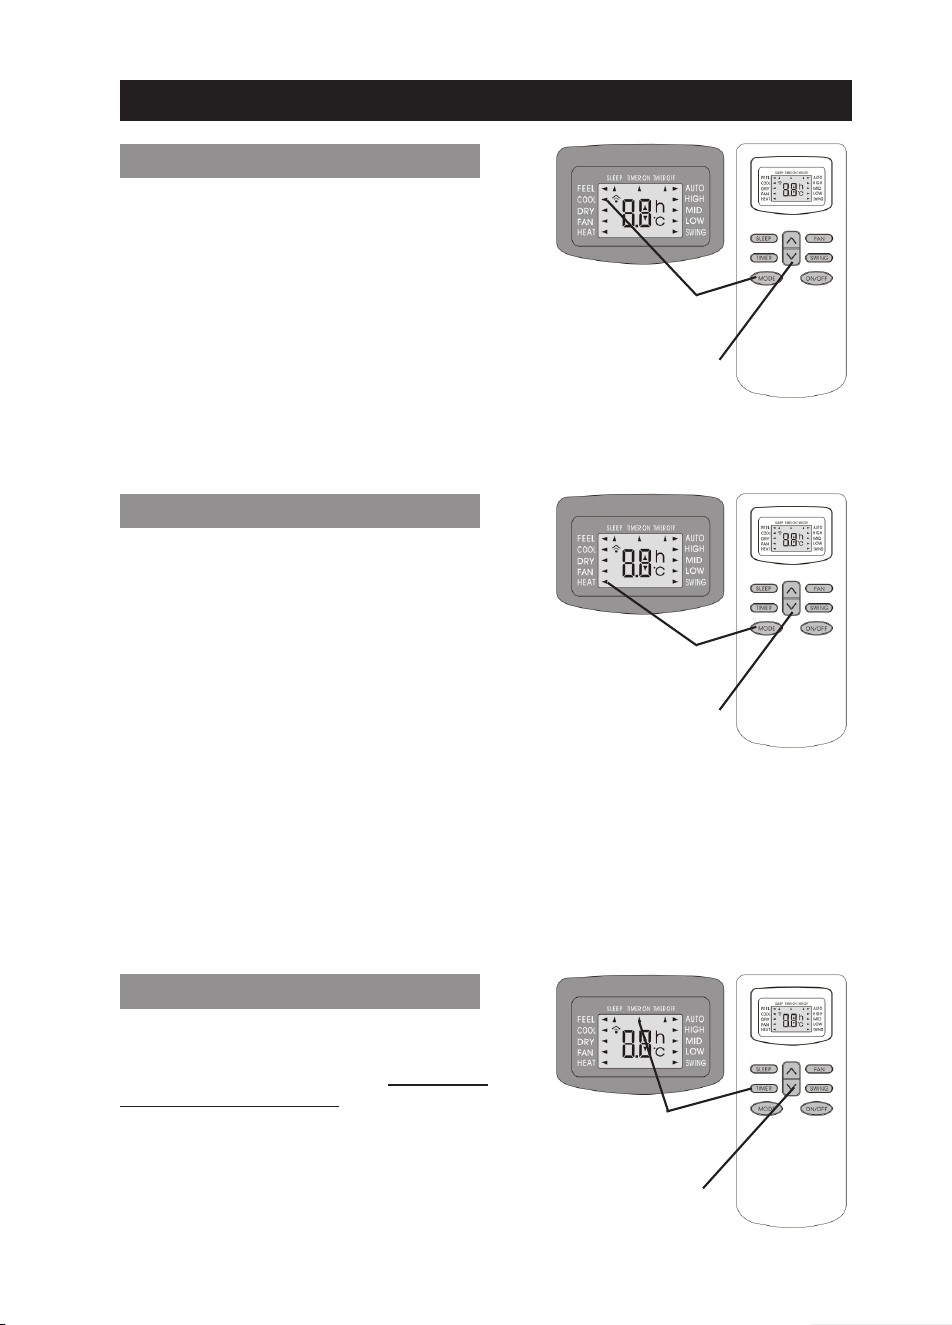
Discharged air can be directed at a specific direction using
the internal deflectors and external motorized flaps.
Air Swing
(Louver Angle Control)
SWING LOUVER OPERATION
Discharged air direction can be remotely
controlled by pressing the SWING button on the
remote. Pressing the SWING button once will
activate Automatic Air Sweep mode, and the
horizontal air deflectors will start moving up and
down to constantly change the direction of the
discharged air in a sweeping action, for optimum
air distribution. An arrow, next to the word SWING
on the LCD screen will illuminate to confirm the
swing mode is ON.
Pressing the SWING button again will cancel the
Automatic Air Sweep mode and the flaps will stop
swinging and stay at their specific position at the
time the button is pressed.
If a fixed discharge position is desired for the
flaps, instead of the sweeping action, flaps can
be stopped at that desired angle using the
SWING button.
Recommended fixed flap angle for the COOL and FAN modes is an high / horizontal angle for
reaching across the room.
Recommended fixed angle for HEAT and DRY modes is a low / downward angle to prevent
creating air draft effect on people.
Never adjust the Auto Swing flaps by hand to prevent damage to the delicate driver motors.
Manually adjust the internal deflectors to direct the air in the right or left direction as desired. Do
not attempt to adjust the deflectors while the system is ON to prevent accidents.
MODES OF OPERATION
7
Set COOL Mode
(Press MODE Button)
COOLING MODE OPERATION
Pressing the MODE button until the arrow next
to the COOL sign on the LCD screen illuminates,
will set the system function to COOLING mode.
In cooling mode the desired room temperature
can be adjusted by pressing the UP and DOWN
arrow buttons. Display will adjust the set
temperature in 1°F increments, each time these
buttons are pressed.
Temperature Adjustment
(UP: Warmer, DOWN: Cooler)
System starts if the set temperature is at least 1°F less then the actual room temperature and
cools the room until set temperature is obtained. During cooling, a significant amount of humidity
is also removed from the air automatically, for obtaining better comfort levels.
Set HEAT Mode
(Press MODE Button)
HEATING MODE OPERATION
Pressing the MODE button until the arrow next
to the HEAT sign on the LCD screen illuminates,
will set the system function to HEATING mode.
In heating mode the desired room temperature
can be adjusted by pressing the UP and DOWN
arrow buttons. Display will adjust the set
temperature in 1°F increments, each time these
buttons are pressed.
Temperature Adjustment
(UP: Warmer, DOWN: Cooler)
System starts if the set temperature is at least 1°F more then the actual room temperature and
heats the room until set temperature is obtained. Hot Start function in the software delays the air
flow from the indoor unit until the indoor unit’s heat exchanger is sufficiently warmed up to
prevent cold air draft. Additionally, the system software, utilizing a self learning logic, will constantly
monitor and automatically activate a suitable defrost cycle when necessary, to melt down any
ice accumulation on the outdoor unit’s heat exchanger. Defrost cycle is entered into automatically
and can not be overridden by the user. During defrost cycle, which can last between 2~10
minutes, the indoor fan stops running automatically. At the end of the defrost cycle, the system
returns to heating mode and continues the normal heating operation.
Set “ON” Time
(Press TIMER Button
WHILE THE SYSTEM IS OFF)
TIMER “ON” SETTINGS
To set the system to automatically start, after a
certain time elapses (between 1/2 hour to 24
hours), press the TIMER button WHILE THE
SYSTEM IS IN OFF MODE. Remember to set
the desired operation mode (COOL or HEAT)
and the fan speed, prior to setting the ON timer,
then turn off the system and set the ON timer.
To cancel ON timer, press TIMER button again.
In case of power failure timer settings cancel out.
Time Adjustment
(UP: Longer, DOWN: Shorter)
MODES OF OPERATION
8
Set “OFF” Time
(Press TIMER Button
WHILE THE SYSTEM IS ON)
TIMER “OFF” SETTINGS
To set the system to automatically stop, after a
certain time elapses (between 1/2 hour to 24
hours), press the TIMER button WHILE THE
SYSTEM IS IN ON MODE. System will run with
current setting and turn itself OFF automatically
after the set time elapses.
To cancel OFF timer, press TIMER button again.
In case of power failure timer settings cancel out.
Time Adjustment
(UP: Longer, DOWN: Shorter)
Set FAN Mode
(Press MODE Button)
FAN ONLY (VENTILATION) MODE
Pressing the MODE button until the arrow next
to the FAN sign on the LCD screen illuminates,
will set the system function to FAN ONLY
(Ventilation) mode.
In FAN mode outdoor unit is entirely deactivated
and only the indoor unit’s fan runs without any
cooling or heating effect. Temperature
adjustment button is also deactivated. However,
fan speed can still be adjusted as desired.
Temperature Adjustment
(Not Available in FAN Mode)
Set FAN Mode
(Press MODE Button)
DRY (DEHUMIDIFICATION) MODE
Pressing the MODE button until the arrow next
to the DRY sign on the LCD screen illuminates,
will set the system function to DRY
(Dehumidification) mode.
In DRY mode, system operates based on its
internally programmed software instructions and
temperature setting and the fan speed buttons
are deactivated. Entire DRY operation is
automatically controlled.
Temperature Adjustment
(Not Available in FAN Mode)
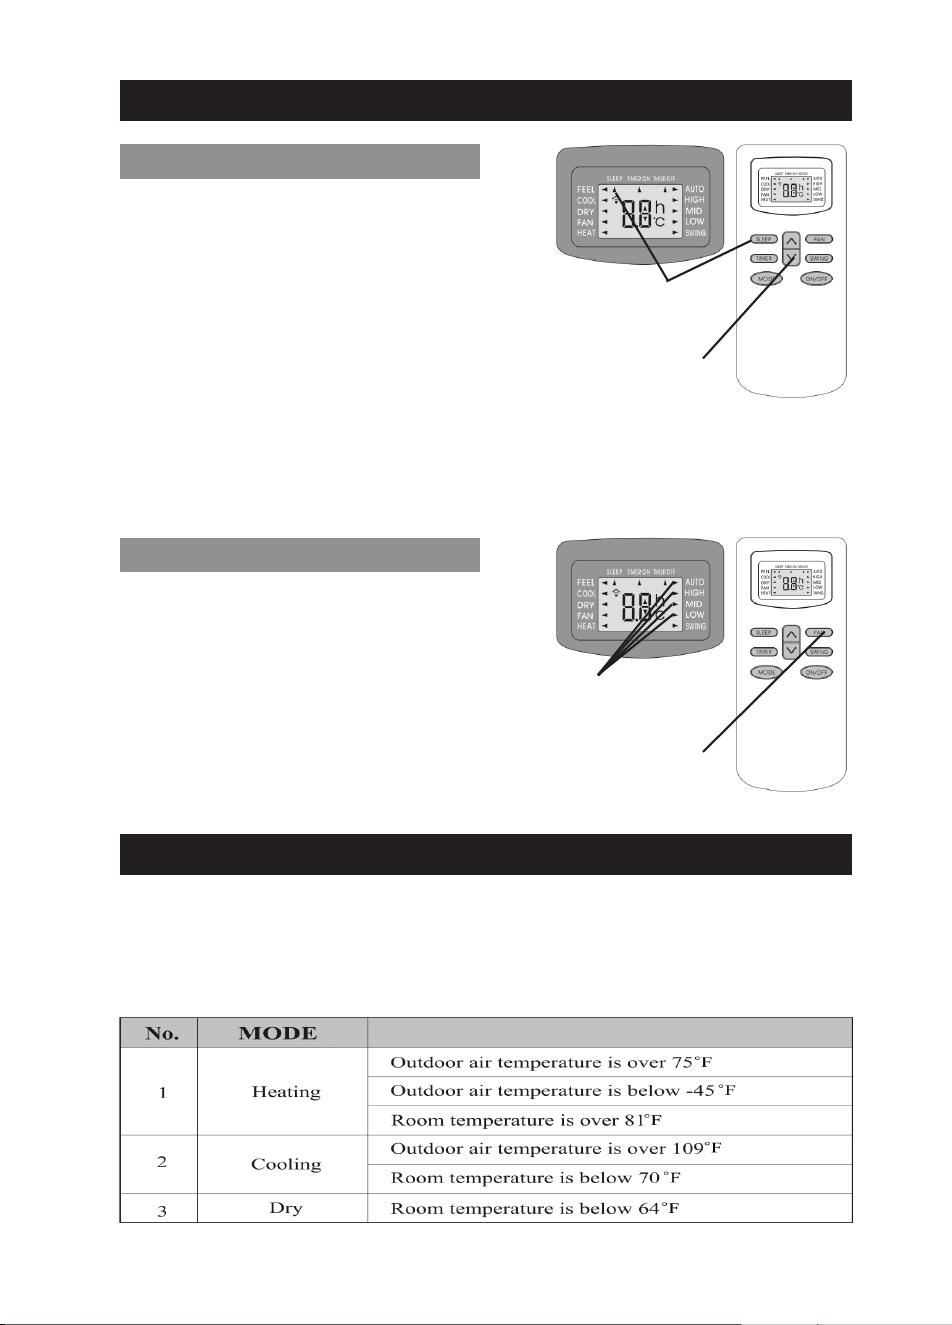
Set FEEL Mode
(Press MODE Button)
FEEL (AUTO CONTROL) MODE
Pressing the MODE button until the arrow next
to the FEEL sign on the LCD screen illuminates,
will set to system function to FEEL (Auto Control
based on below pre-programmed instructions)
mode. Temperature setting button is inactivated.
Temperature Adjustment
(Not Available in FEEL Mode)
Set “OFF” Time
(Press TIMER Button
WHILE THE SYSTEM IS ON)
SLEEP FUNCTION SETTINGS
Time Adjustment
(UP: Longer, DOWN: Shorter)
MODES OF OPERATION
Pressing the SLEEP button will illuminate the
arrow next to the SLEEP sign on the LCD screen
and set the SLEEP function on. Pressing it once
more will cancel the SLEEP mode. SLEEP mode
can be set while running COOL or HEAT Modes.
Sleep mode adjusts the set temperature to cope
with the body’s natural temperature changes
during sleep for comfortable night temperatures.
If the SLEEP mode is activated, while the system is running in COOL mode, the set temperature
will be automatically increased by 2°F within 1 hour and by 4°F within 2 hours. Similarly, if the
SLEEP mode is activated, while the system is running in HEAT mode, the set temperature will
be automatically decreased by 2°F within 1 hour and by 4°F within 2 hours. SLEEP mode will
turn the system OFF automatically after 10 hours of running in sleep mode.
SYSTEM PROTECTIONS
Any time the system is stopped, it will not restart until after a 3 minute safety time delay is
elapsed. Same time delay is also automatically activated after Mode Changes.
Additionally, the system is protected from damage, under certain extreme running conditions as
listed below. If any of these conditions is reached, the protective devices will stop the system.
9
FAN MOTOR SPEED SETTINGS
Fan Speed Adjustment
(Low, Med, High, Auto)
Pressing the FAN button will change the fan
motor’s speed to provide different amount of air
flow, while the system is running Cool, Heat, Feel
or Fan Only Modes. The arrow next to either
AUTO, HIGH, MED, LOW on the LCD screen
will illuminate to correspond with the currently
set fan speed.
Higher fan speed will cause slightly higher noise.
AUTO speed is automatically controlled
depending on the current conditions.
Set Fan Speed
(Press FAN Button)

Pioneer is the world’s renowned ductless air conditioning system
Pioneer products and spare parts are available for sale online through:
www.highseer.com
T: (800) 243-0340
PIONEER is a registered trademark of:
Parker Davis HVAC Systems, Inc.
2260 NW 102 Place
Doral, FL 33172 - USA
T: (305) 513-4488
F: (305) 513-4499
www.pd-hvac.com
Copyrighted material. Unauthorized copying or reproduction is prohibited. All Rights Reserved.
WYD-RCM-V0411