USER MANUAL
HOW-TO
THANK
YOU!
Thank You for Purchasing from
Made in China
NOTE:
modify this information without prior notification.
For any questions regarding assembly, please watch the video on the
product page or contact our customer service. Our customer service will
To continuously improve its products, reserves the right to
Thank you for using products in your home!
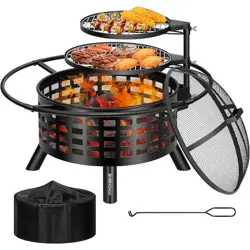
36-Inch Fire Pit with 2 Grills
1
Assembly is EASY!
WE WANT
YOU TO
ENJOY LIFE
AT
GO TO THE PRODUCT LISTING PAGE
FOR AN INSTRUCTIONAL VIDEO!
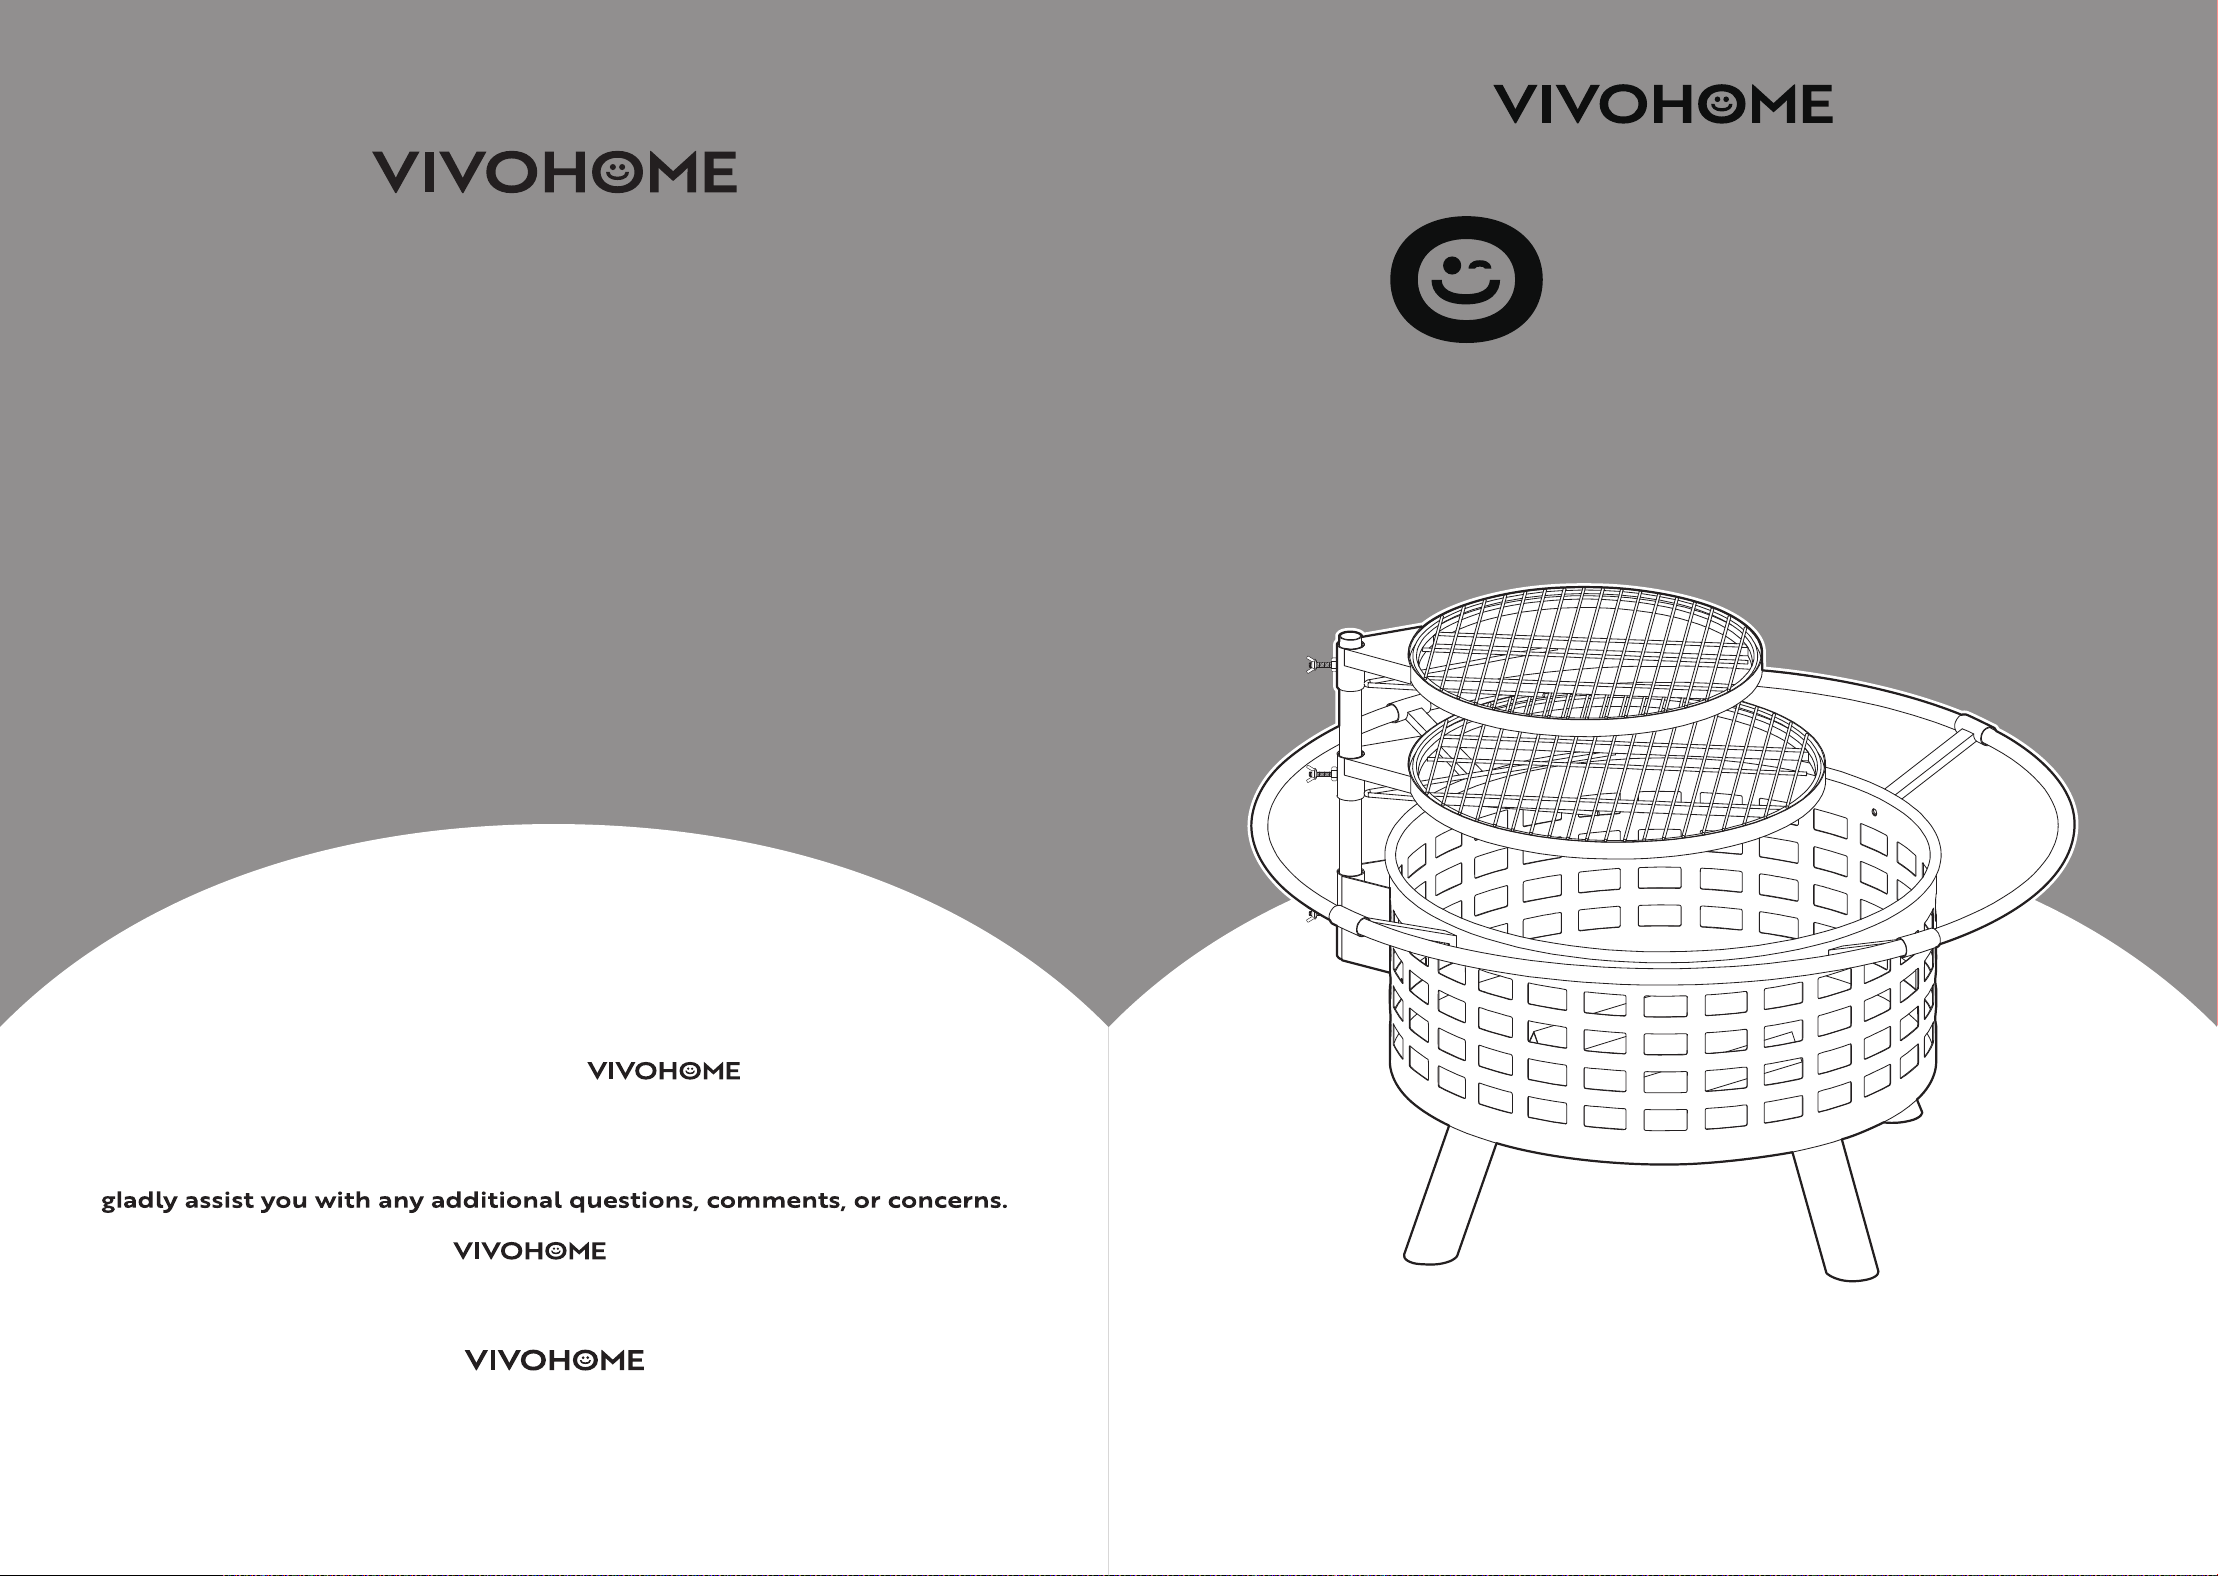
SECTION A
Parts List
x1
Item No. Reference Image Qty. Item No. Reference Image Qty.
A
x1
B
x1
C
x1
D
x1
E
x4
F
x1
G
x4
H
2 3
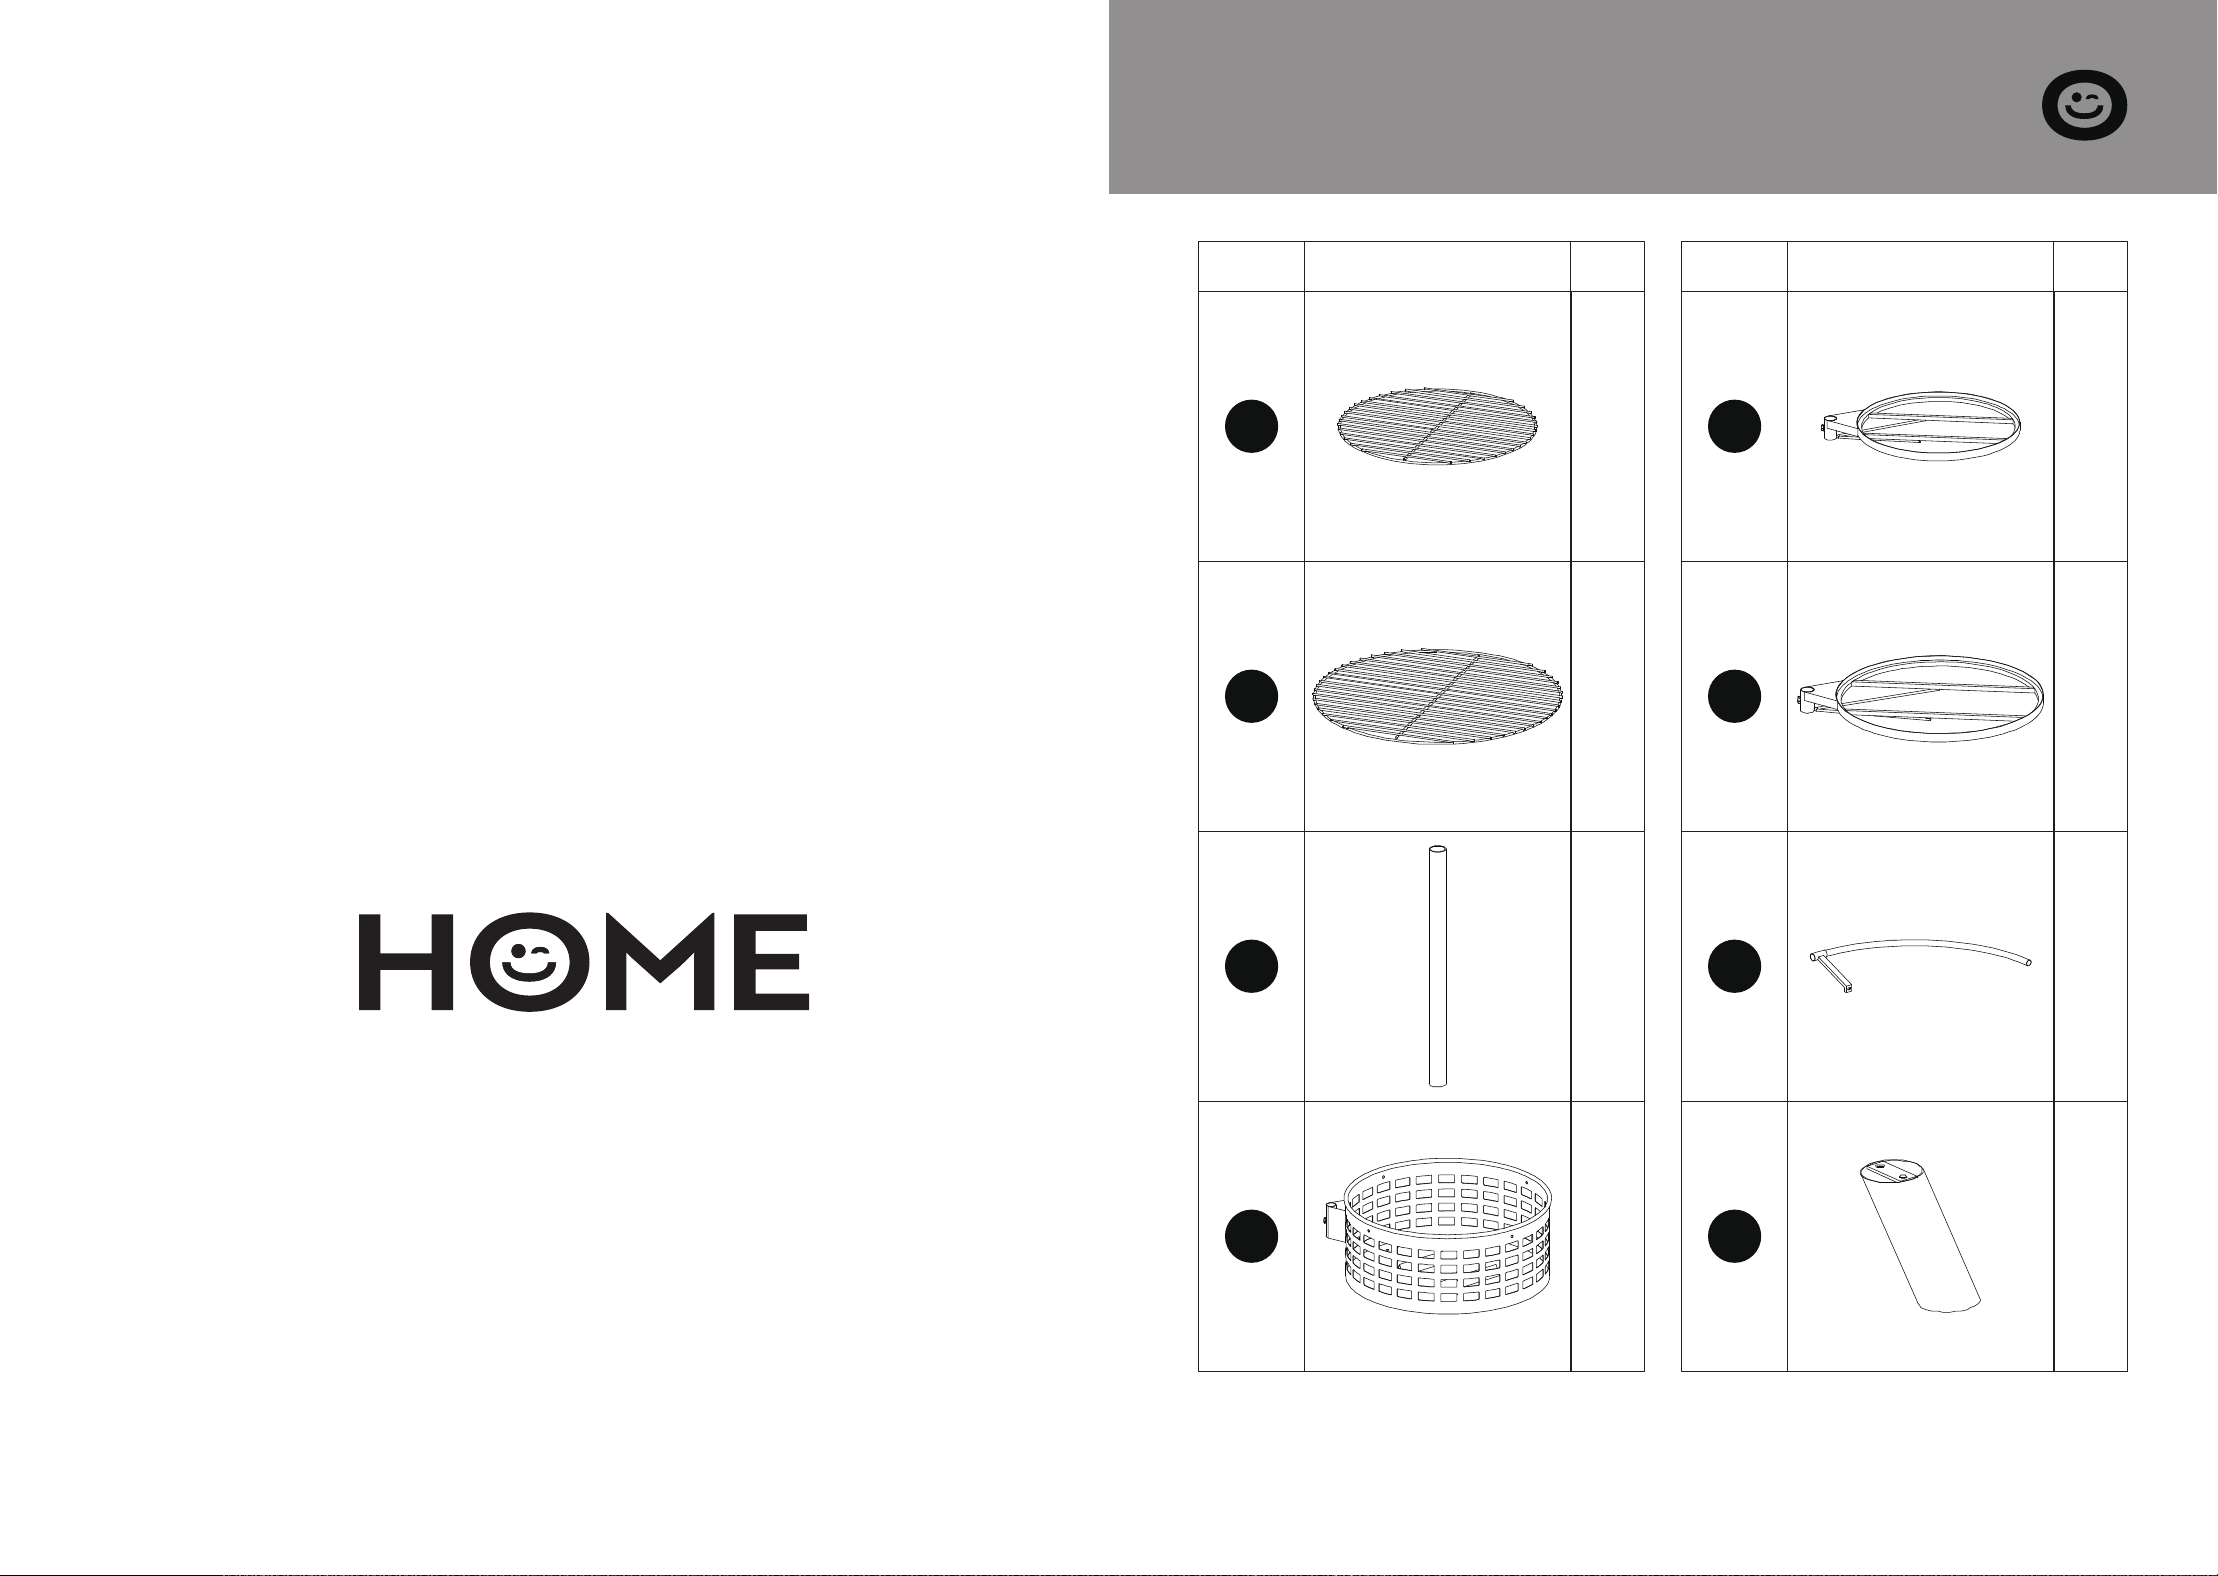
SECTION B
Explosive View
SECTION A
Parts List
x1
Item No. Reference Image Qty. Item No. Reference Image Qty.
I
x1
J
x1
P
x12
S1
x4
S2
x4
S3
x3
S4
x1
S6
x1
S5
A
B
C
D
E
F
J
G
H
I
P
S1
M6*12
S2
M6*35
S3
M6
S4
S5
S6
M8
4 5
SECTION C
Assembly Steps
SECTION C
Assembly Steps
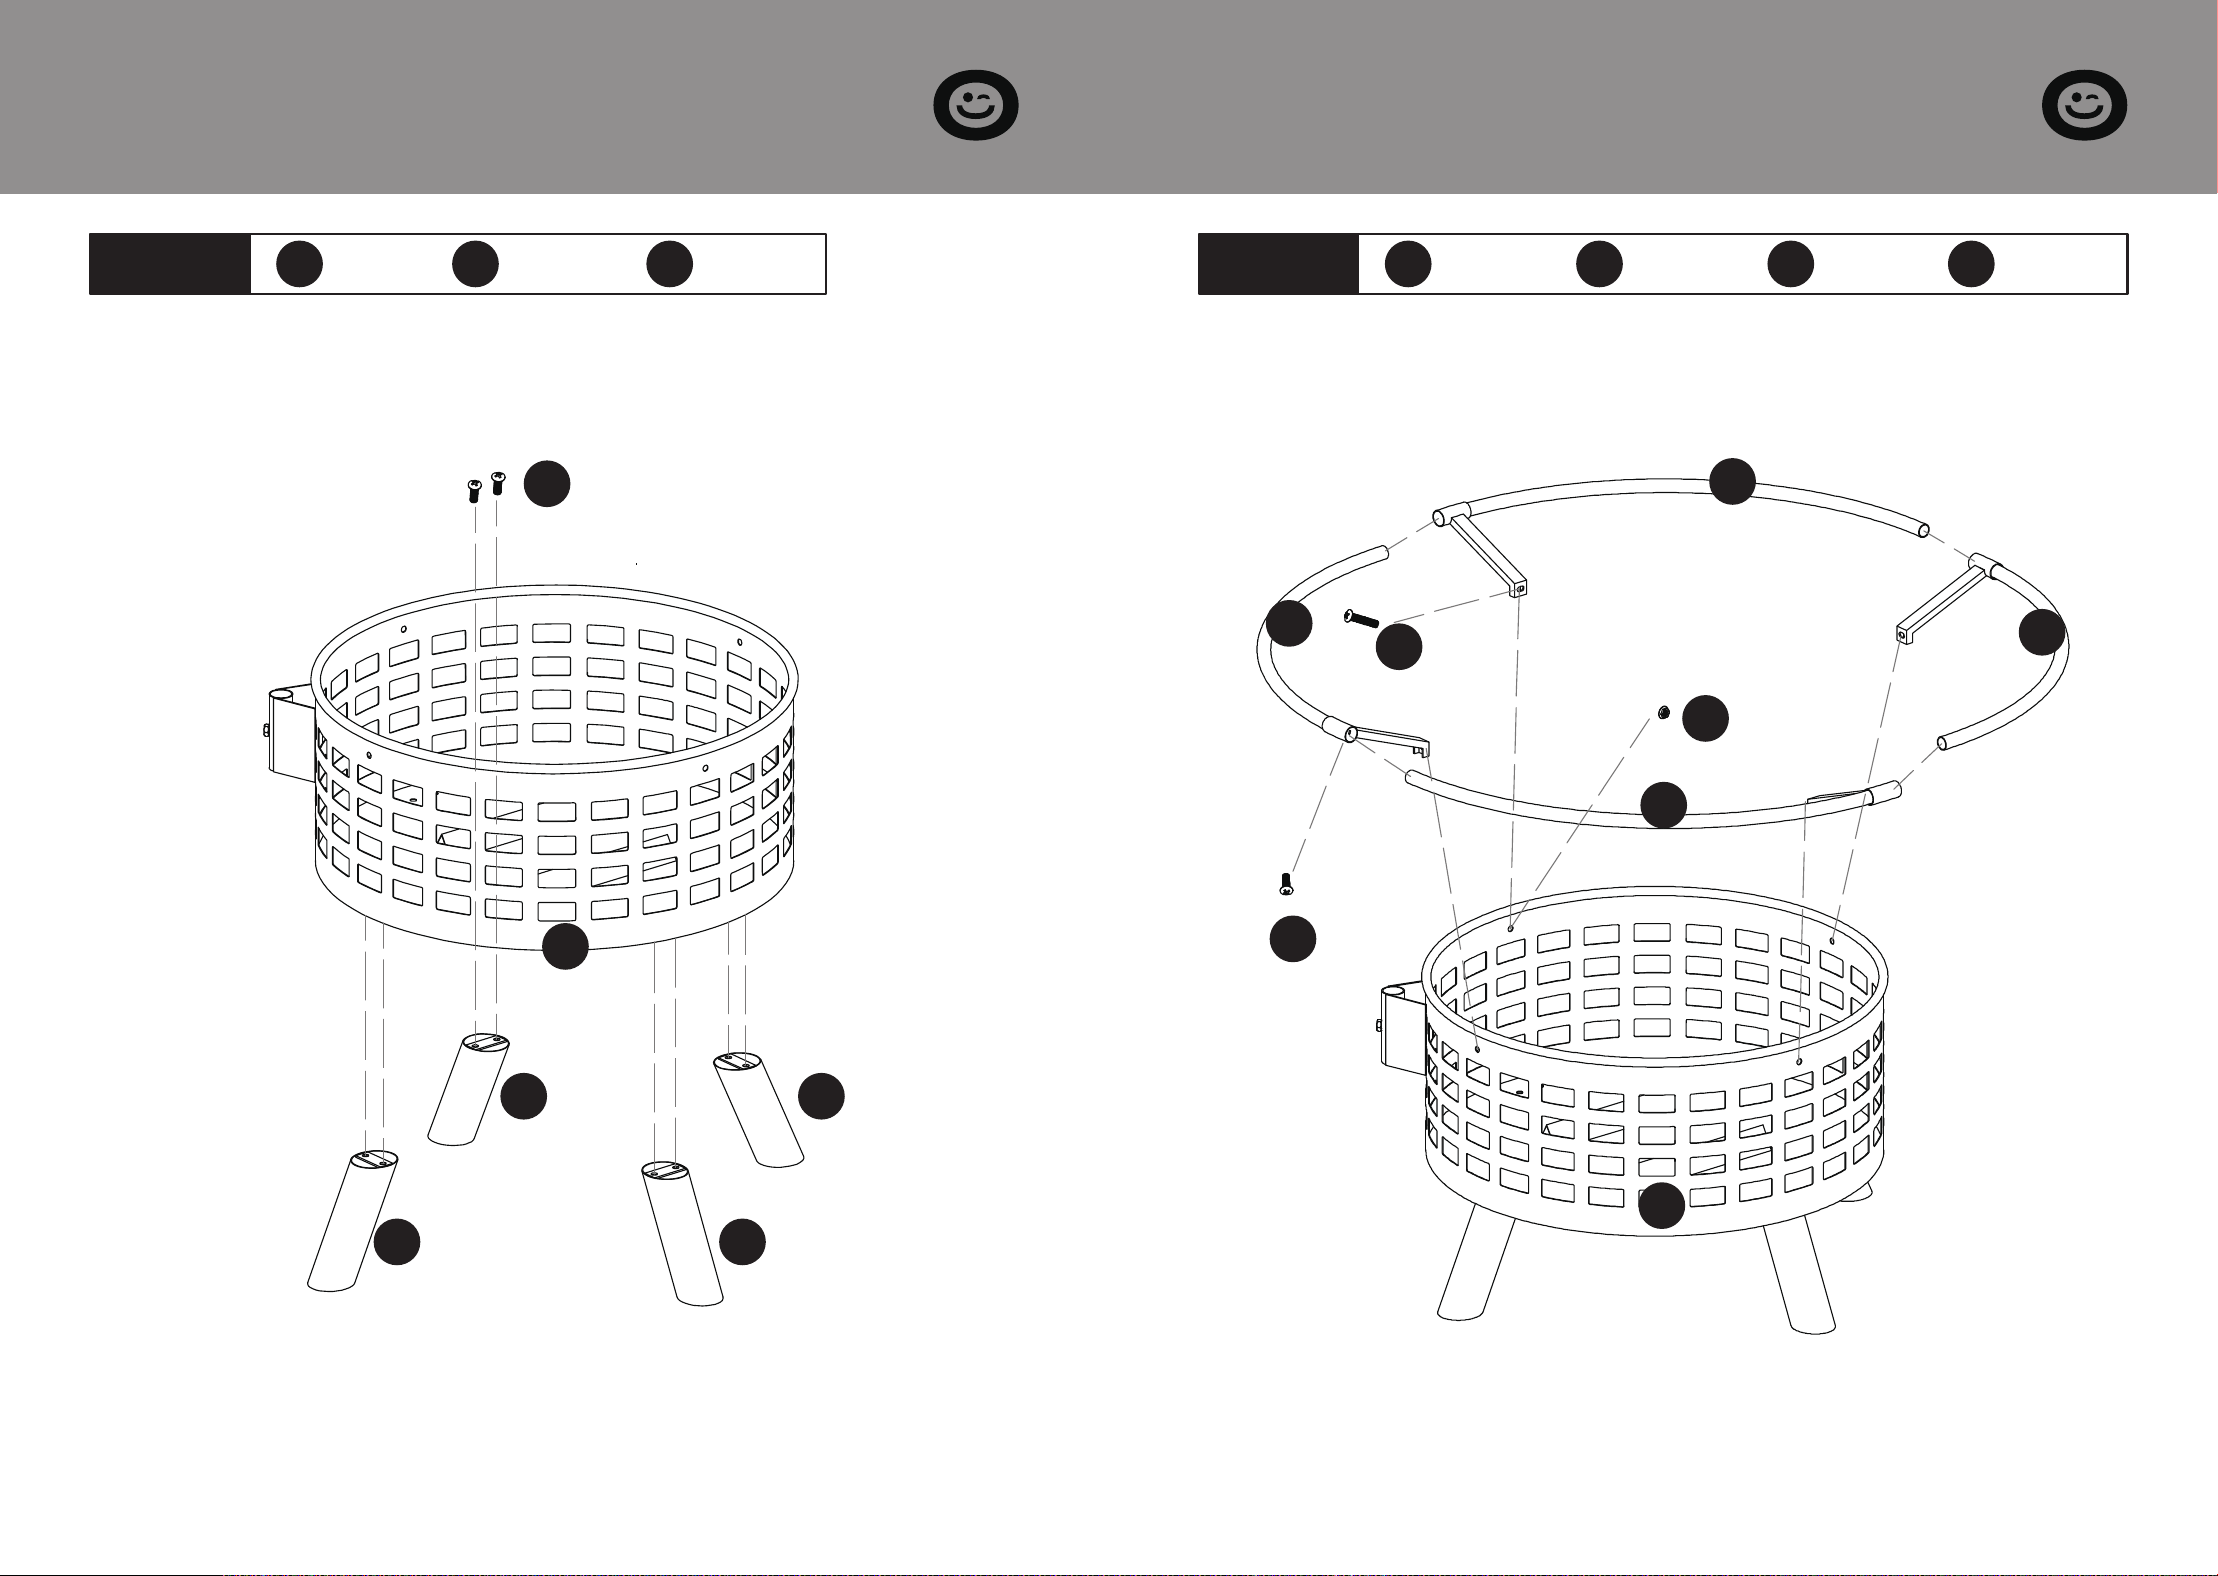
STEP 1
G
x 1 pc.
H
x 4 pcs.
S1
x 8 pcs.
STEP 2
F
x 4 pcs.
S1
x 4 pcs.
S2
x 4 pcs.
S3
x 4 pcs.
Attach the Legs (H) to the Fire Bowl (G) by using M6x12mm
Bolts (S1) and Allen Key (S6). Then tighten all bolts.
Connect 4PCS of Outer Ring (F) to a round ring by using
M6×35mm Bolts (S2), M6 Nuts (S3) and Wrench (S5). Then fix
Outer Ring (F) by using M6×12mm Bolts (S1) and Allen Key (S6).
G
H H
H H
S1
G
F
F
F
F
S1
S3
S2
6 7
SECTION C
Assembly Steps
SECTION C
Assembly Steps
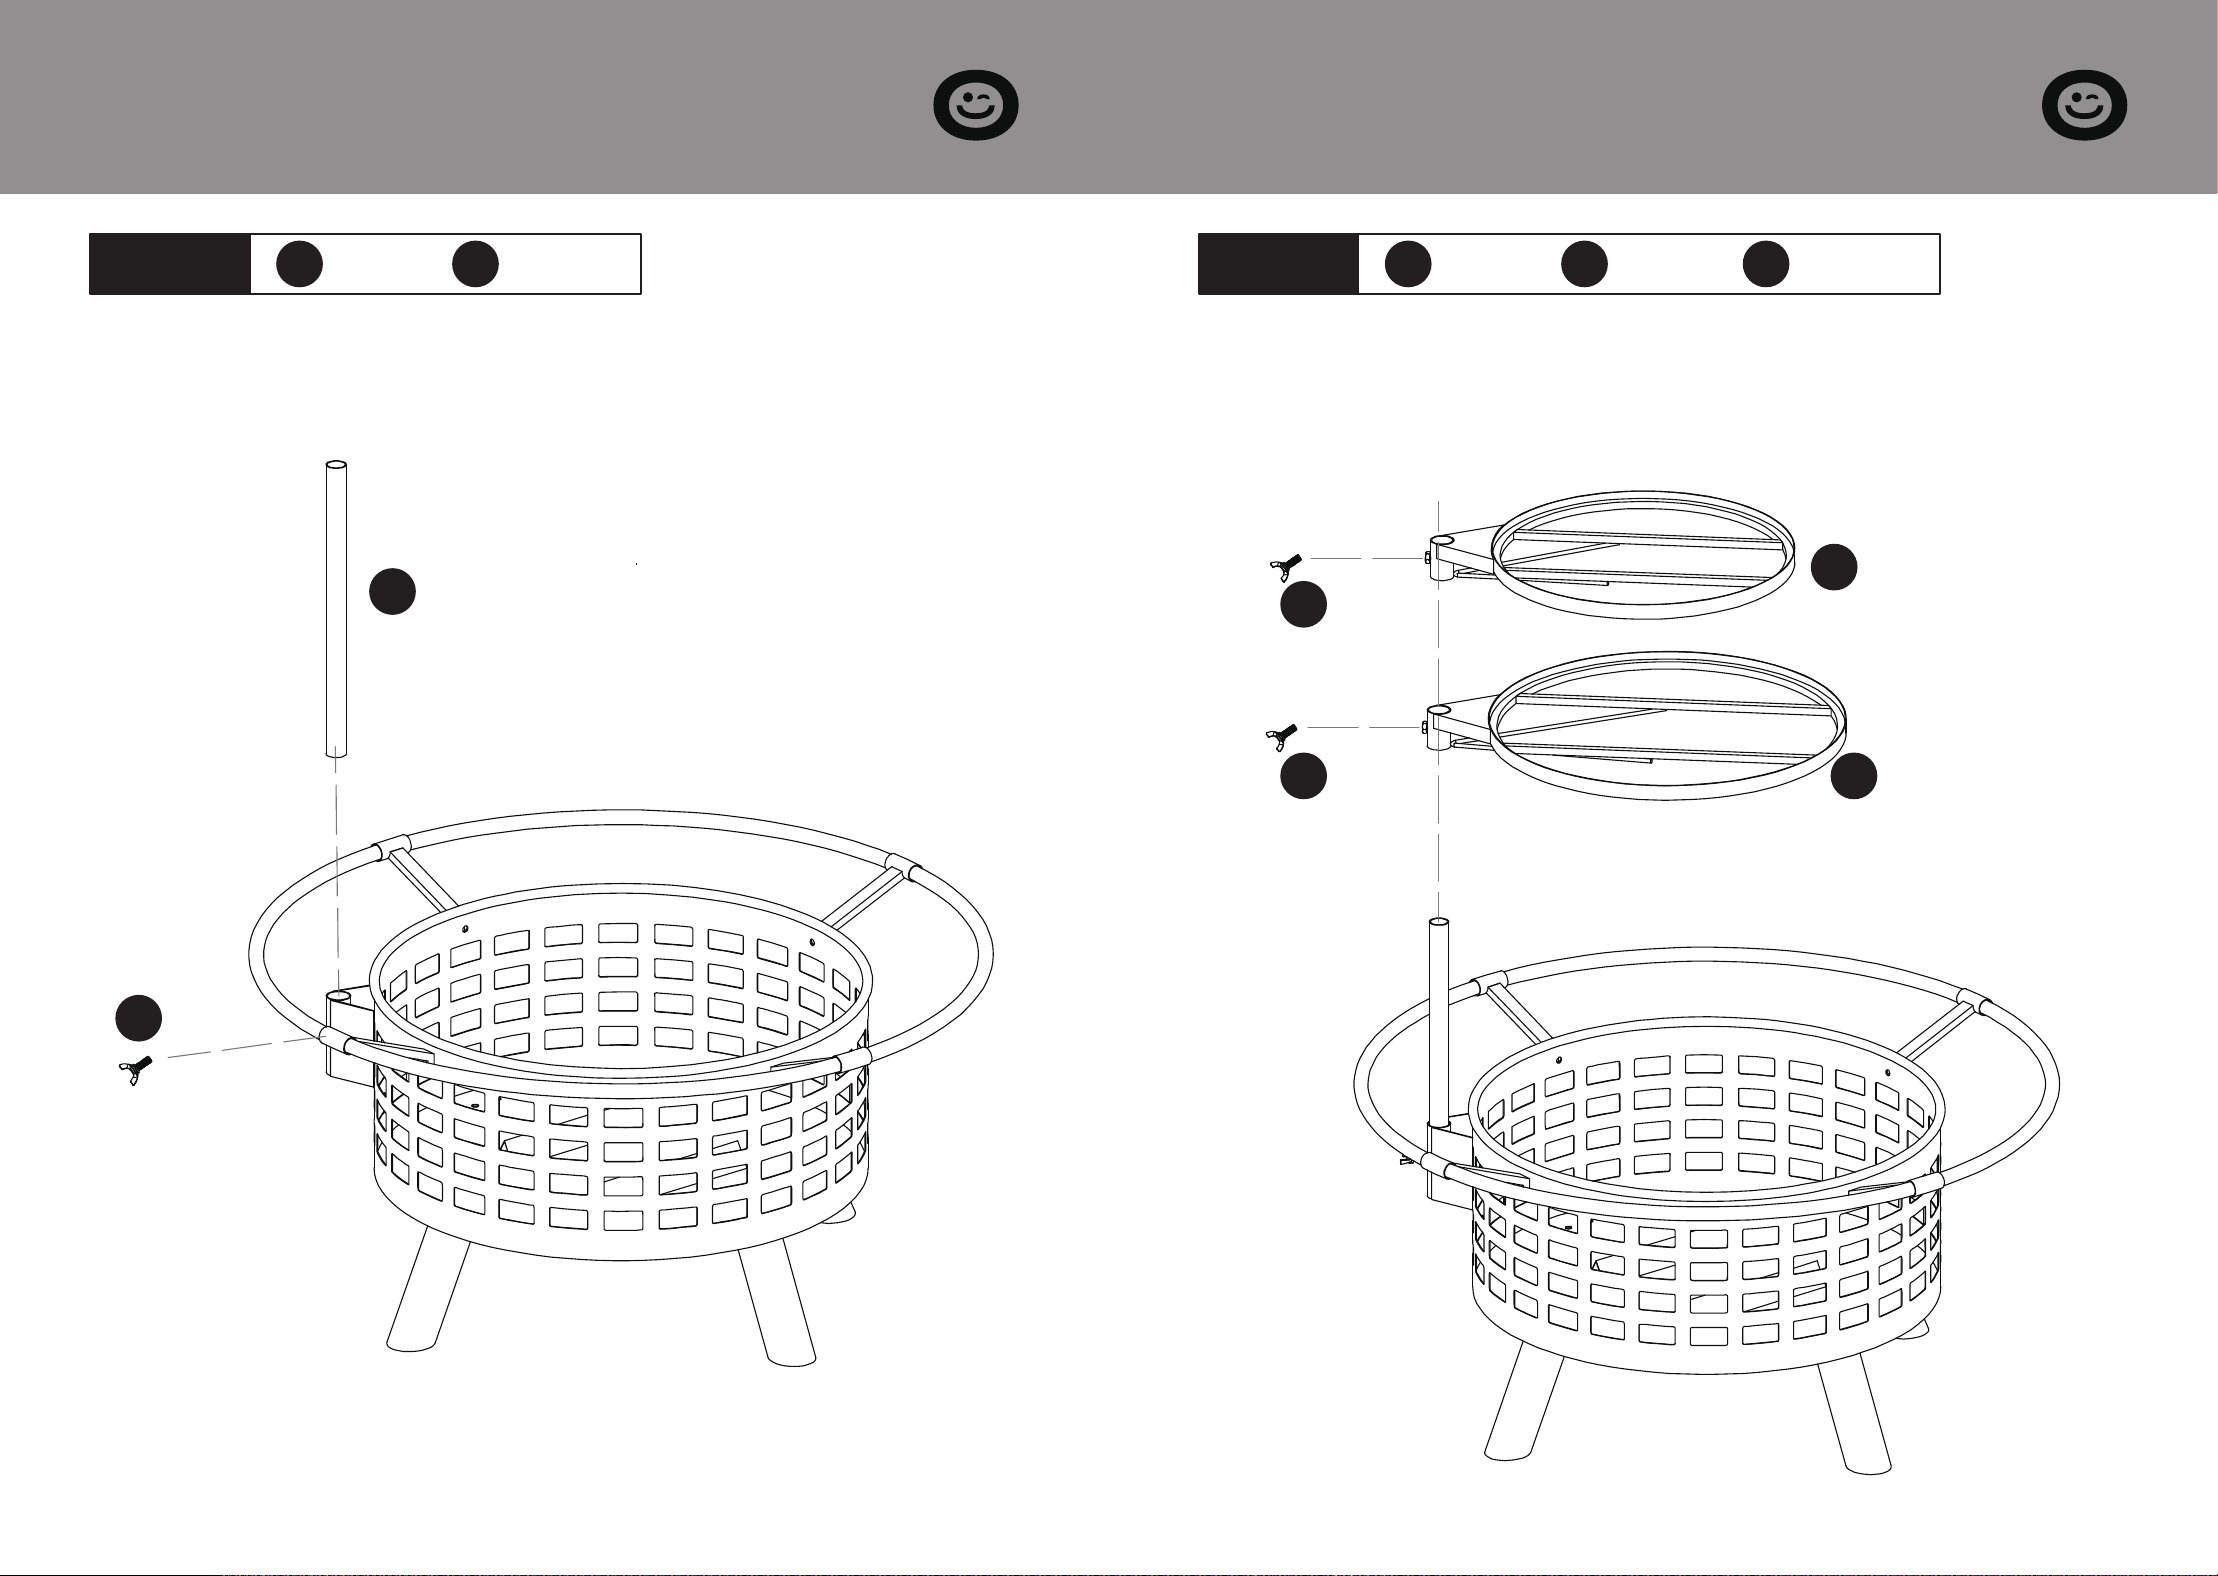
STEP 3
E
x 1 pc.
S4
x 1 pc.
STEP 4
B
x 1 pc.
D
x 1 pc.
S4
x 2 pcs.
Insert the Extension Lever (E) into the hole of bowl, tighten
the Butterfly Screw (S4) to fix the height.
Insert the Small Grill Rack (B) and Large Grill Rack (D) into the
extension lever, and secure them at the desired height using
Butterfly Screw (S4).
E
S4
D
B
S4
S4
8 9
SECTION C
Assembly Steps
SECTION C
Assembly Steps
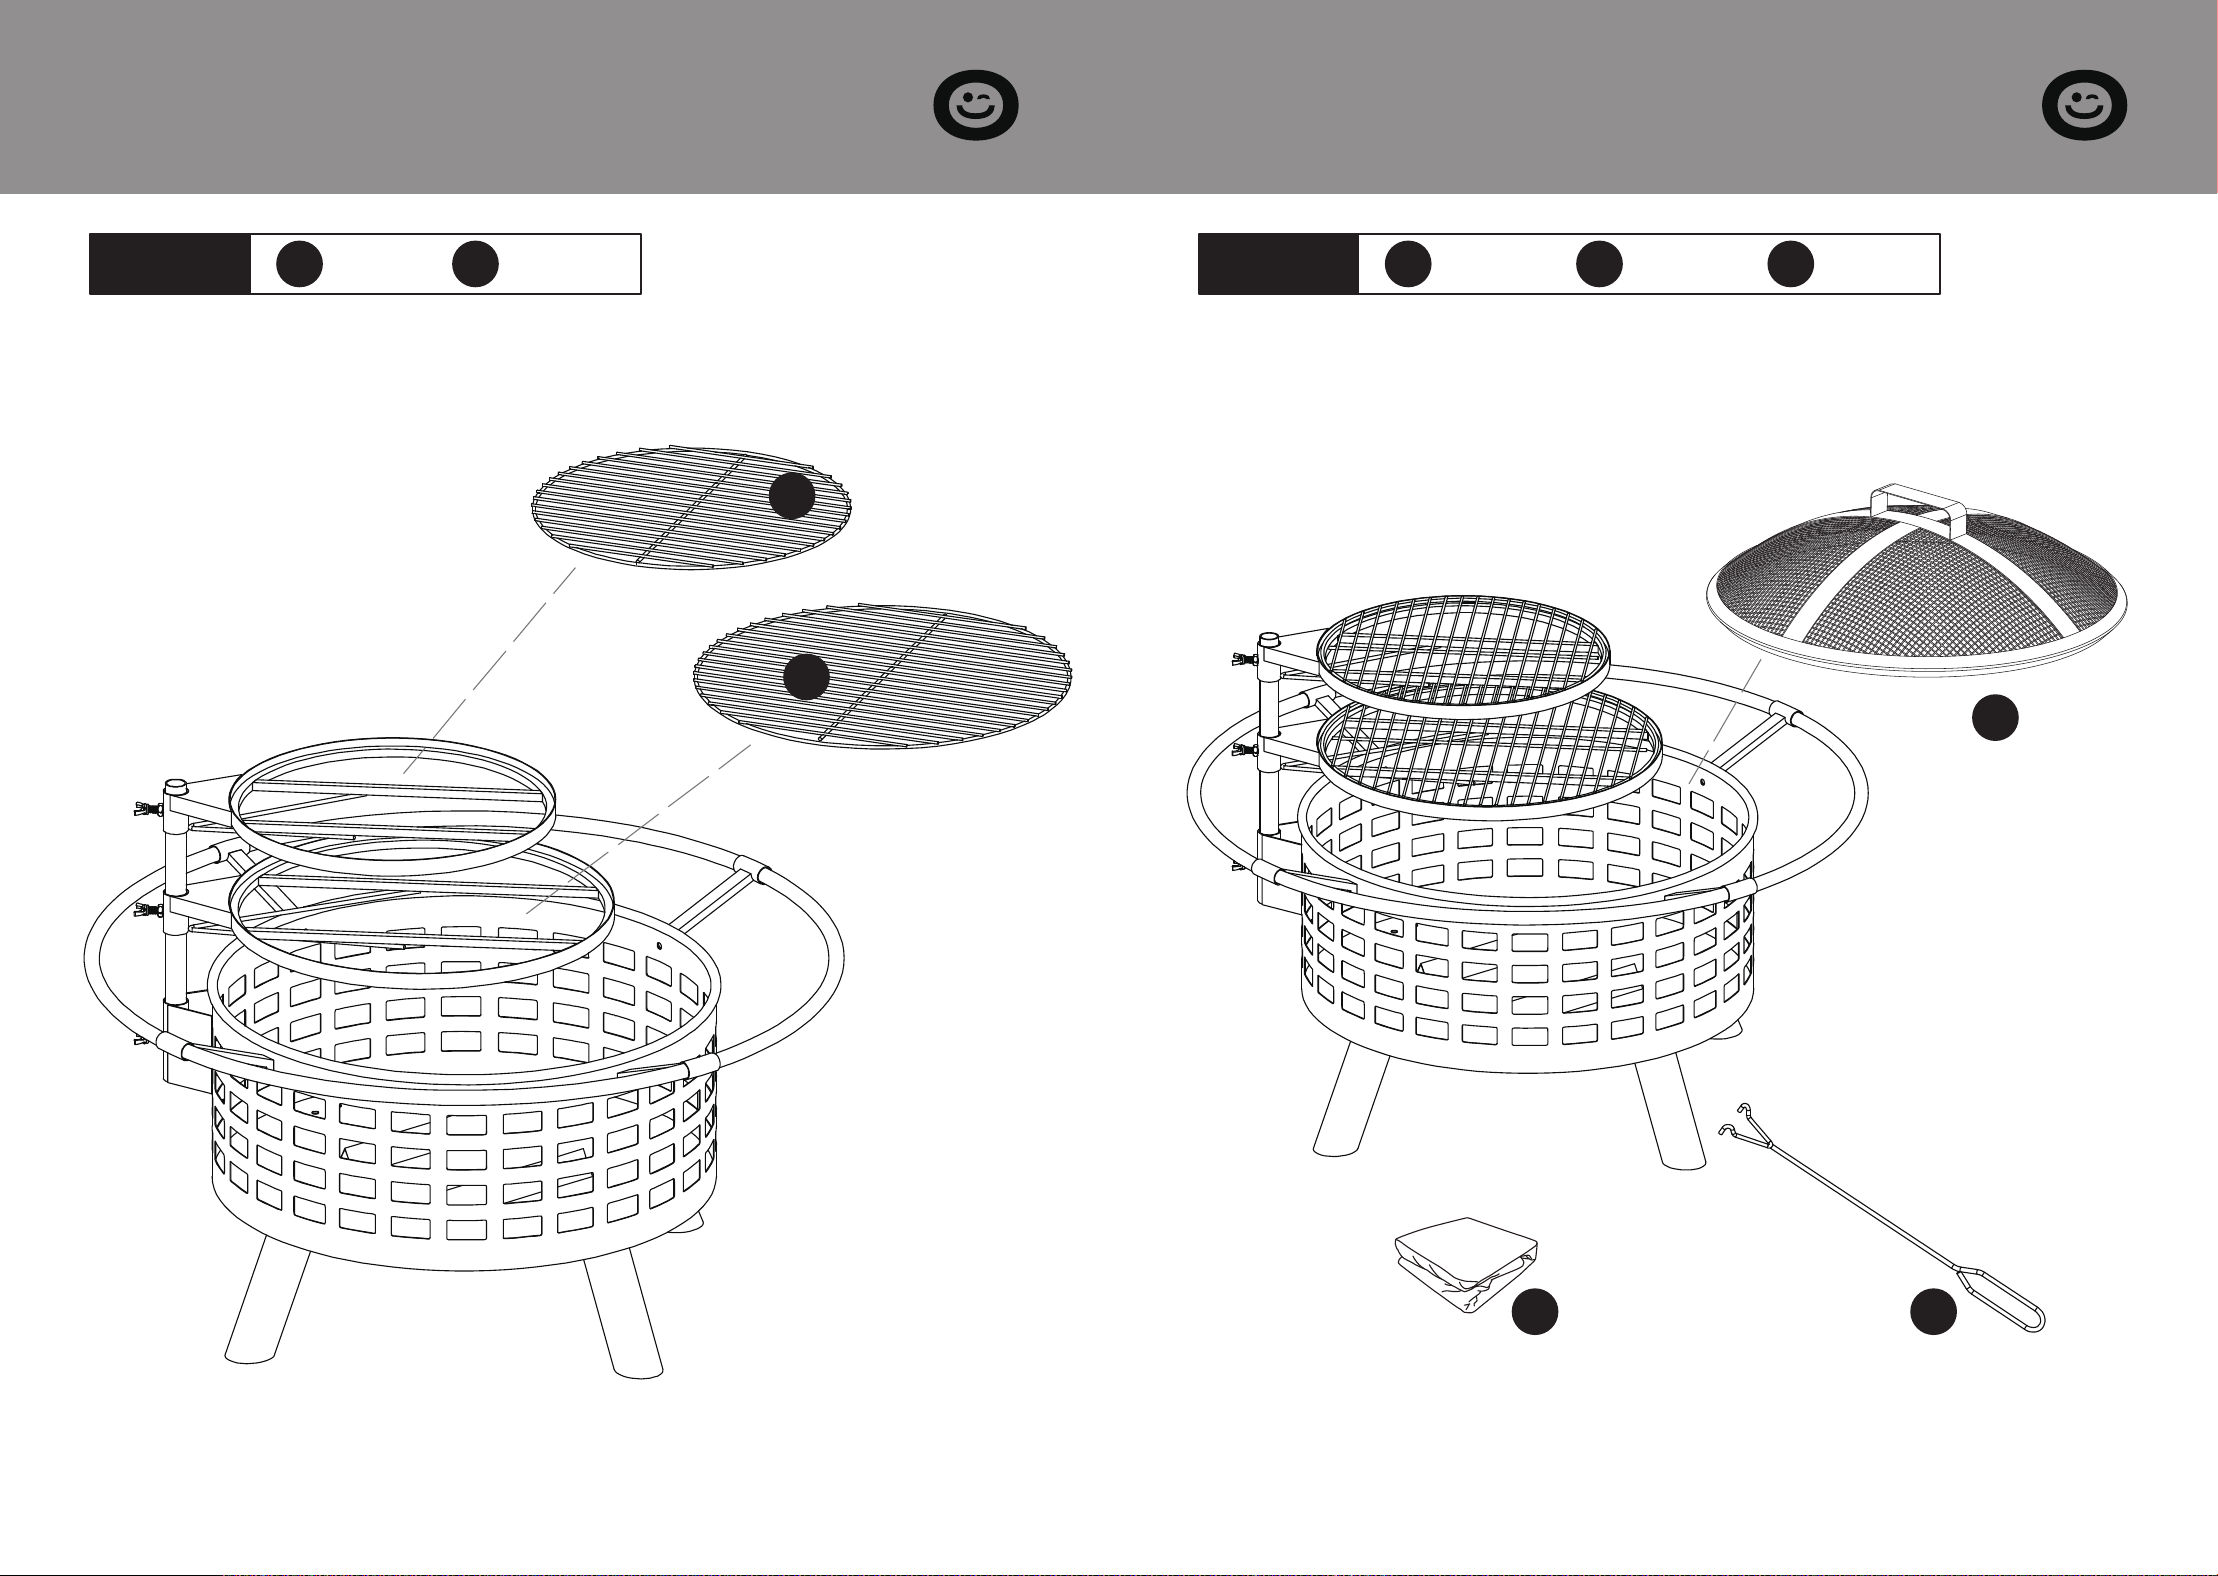
STEP 5
A
x 1 pc.
C
x 1 pc.
STEP 6
J
x 1 pc.
I
x 1 pc.
P
x 1 pc.
Put on a Small Cooking Grill (A) and Large Cooking Grill (C)
for cooking use at any time.
Place Cover (J) on top of fire bowl when burning only firewood.
Place Poker (P) beside fire pit for use as needed.
Place Rain Cover (I) when the fire pit not in use.
A
J
I P
C
10 11
SECTION D
Warranty
The VIVOHOME warranty program is our commitment to you.
We are committed to providing you with a high-quality product that
meets your needs and expectations. To demonstrate our confidence in
the durability and performance of our products, we offer the following
warranty.
This warranty program applies to any orders, purchases, receipts, or use of
any products sold by VIVOHOME and is valid for a period of 1 year from
the date of purchase. However, please note that this warranty period is
only valid for the original order. If you receive a replacement order during
the warranty period, it will not include a separate warranty period.
WARRANTY COVERAGE
This warranty does not cover damage resulting from misuse, accident,
unauthorized modification, or any other circumstances not directly relat-
ed to the manufacturing and design of the product, including but not
limited to:
Parts lost during use.
Normal wear and tear of products or parts.
Incorrect installation (such as using the wrong voltage) or assembly.
Exceeding the bearing capacity of the product.
Use under extremely harsh conditions.
Improper cleaning or maintenance.
Damage caused by any reason other than the intended use of the
product.
Indirect loss or damage caused by the product.
WARRANTY EXCLUSIONS
●
●
●
●
●
●
●
●
SECTION C
Assembly Steps
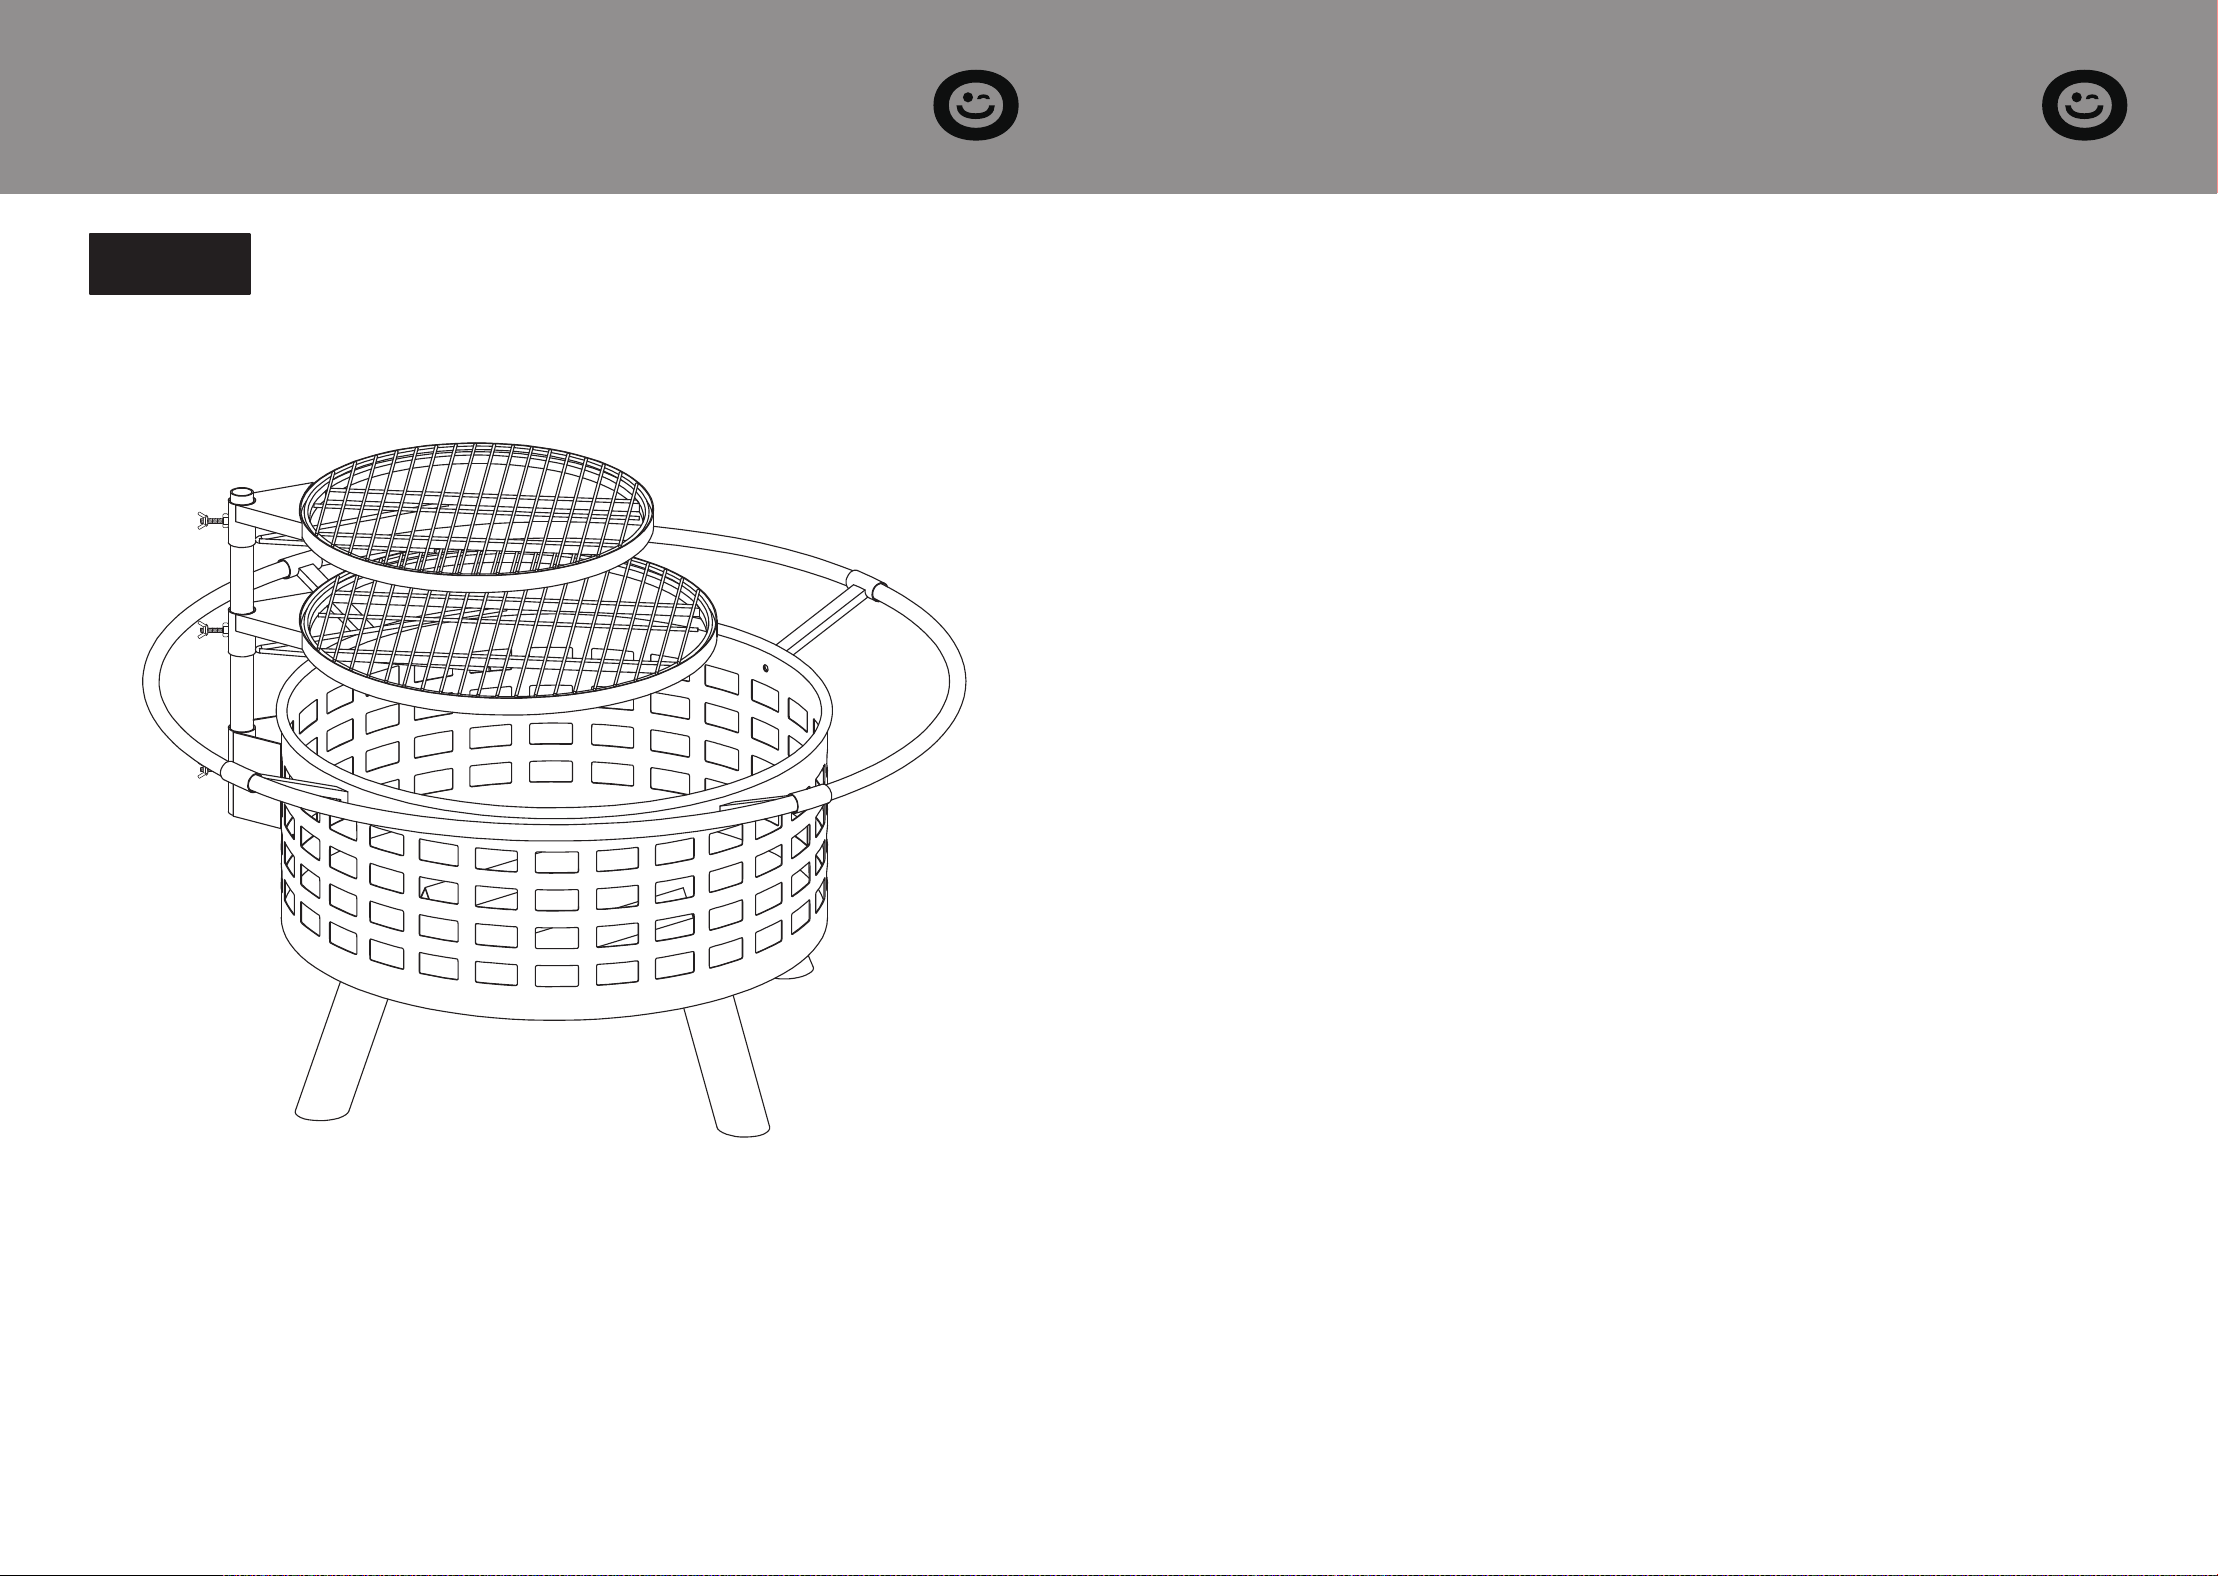
STEP 7
Installation is complete.

12
SECTION D
Warranty
VIVOHOME will provide technical support, replacement, refund, or other
solutions based on the nature of the issue. If you wish to return the origi-
nal package for any reason, please contact us for confirmation before
proceeding. You can expect to receive a response within 48 hours.
Thank you for choosing VIVOHOME. We are committed to ensuring the
quality and satisfaction of your purchase. If you have any questions or
need assistance, please do not hesitate to contact our customer service
team.
If you find any defects that affect the use of the product or if the product
stops working and cannot be repaired during the warranty period, please
contact our customer service team at our email or via Amazon & app’ s
direct messaging service as soon as possible. Provide the following infor-
mation to expedite the process:
HOW TO MAKE A WARRANTY CLAIM
Order number
Images and/or videos illustrating the issue
A detailed description of the problem
●
●
●