HIGH-PRESSURE
AIR COMPRESSOR
USER MANUAL
Read Carefully Before Use
Keep for Future Reference
V20221215

1
SAFETY INFORMATION
• ONLY use this device in accordance with these instructions and all applicable local and
national laws and regulations. Provide these instructions to anyone who will use this device,
including when it is given or sold to a third party. Failure to do so risks serious property
damage and severe personal injury.
• DO NOT allow use of this device by children, persons with compromised physical or mental
capabilities, or persons unfamiliar with these instructions. Store out of the reach of children.
• DO NOT use this device while you are tired or under the influence of drugs, alcohol, or
medication. Stay alert, watch what you are doing, and use common sense when using this
device. Do not overreach and keep proper footing and balance at all times.
• ONLY use this device with a stable and compatible power source. Never use this device with
an extension cord unable to handle its expected load.
• NEVER direct high-pressure air towards any person for any reason. Keep others out of your
work area during use, raising barriers if necessary to protect children and/or pets. Never
disable any valves or other protective parts during use. If highly pressurised air is directed
towards a person, seek IMMEDIATE medical help.
• ALWAYS use with personal protective equipment (PPE) sucient to your task, including eye
protection such as goggles, hearing protection such as ear plugs, and hand protection such
as heavy-duty work gloves.
• ALWAYS ensure all components are intact and all connections are securely tightened before
use. Do not continue operation of this device if it malfunctions or if any damage or wear is
detected. Older hoses and rusted or otherwise weakened compressor tanks may explode
under pressure. Tighten, repair, or replace any damaged components before further use.
• NEVER use this device without an adequate amount of lubricating oil.
• DO NOT continue pressurising if the pressure gauge is about to reach this device's maximum
pressure (310 bars or 4500 psi) OR the maximum pressure of the object being charged,
whichever is LOWER.
• NEVER use this device for SCUBA tanks or other pressurised air used for breathing without
specialised training and equipment to ensure that it is fully safe to do so. Using this device's
pressurised air without adequate ltration can allow dangerous pollutants and chemicals such
as carbon monoxide to build up to potentially lethal levels.
• DO NOT allow the working temperature of this device to exceed 75°C or 167°F. Doing so may
allow the rubber piston seals to overheat and warp, ruining the seals necessary for safe and
eective operation. For best results, use distilled water and keep temperatures below 65°C.
• ALWAYS be careful around extremely heated water. Children and others with sensitive skin
can be badly scalded by temperatures as low as 50°C or 125°F. Once your water reaches
these temperatures, add ice or drain and replace it with extreme care to avoid burns and
scalds.
• NEVER add so much ice to your cooling water that the temperature of the water approaches
freezing temperatures, which can damage heated components of the device.
• DO NOT leave this device unattended during use. Pay attention to the pressure gauge and
ALWAYS turn o the power once your desired pressure has been reached.
• For best results, do not use this device continuously for more than one hour at a time. After
each hour of continuous operation, allow enough time for the device to cool completely before
continuing.
• ALWAYS disconnect this device from its power source and release pressurised air between
uses and before any cleaning, repair, or other maintenance. Never touch the pump or
surrounding water while the pump is still connected to power.
WARNING!
2
SPECIFICATIONS
Model 30QB-SD (EU/UK) 30QB-SD (US)
Input Power 220–240 V~ 50 Hz 110–120 V~ 60 Hz
Rated Power 1.8 kW 2.4 hp
Motor Speed 2800 rpm 2800 rpm
Airow Rate 50 L/min. 1.8 cfm
Max. Pressure 310 Bars 4500 psi
Max. Working Temp. 75°C 167°F
Pressure Gauge Range 0–400 Bars 0–6000 psi
Lubricating Oil ISO VG 46 AW 46
Max. Noise 78 dB 78 dB
Dimensions 36×18×37 cm 14.2×7.1×14.6 in.
Net Weight 16.5 kg 36.4 lb.
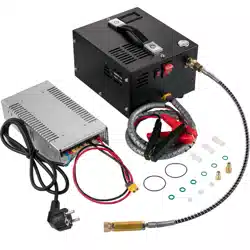
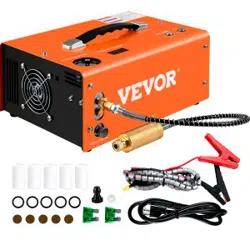
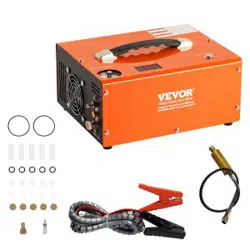
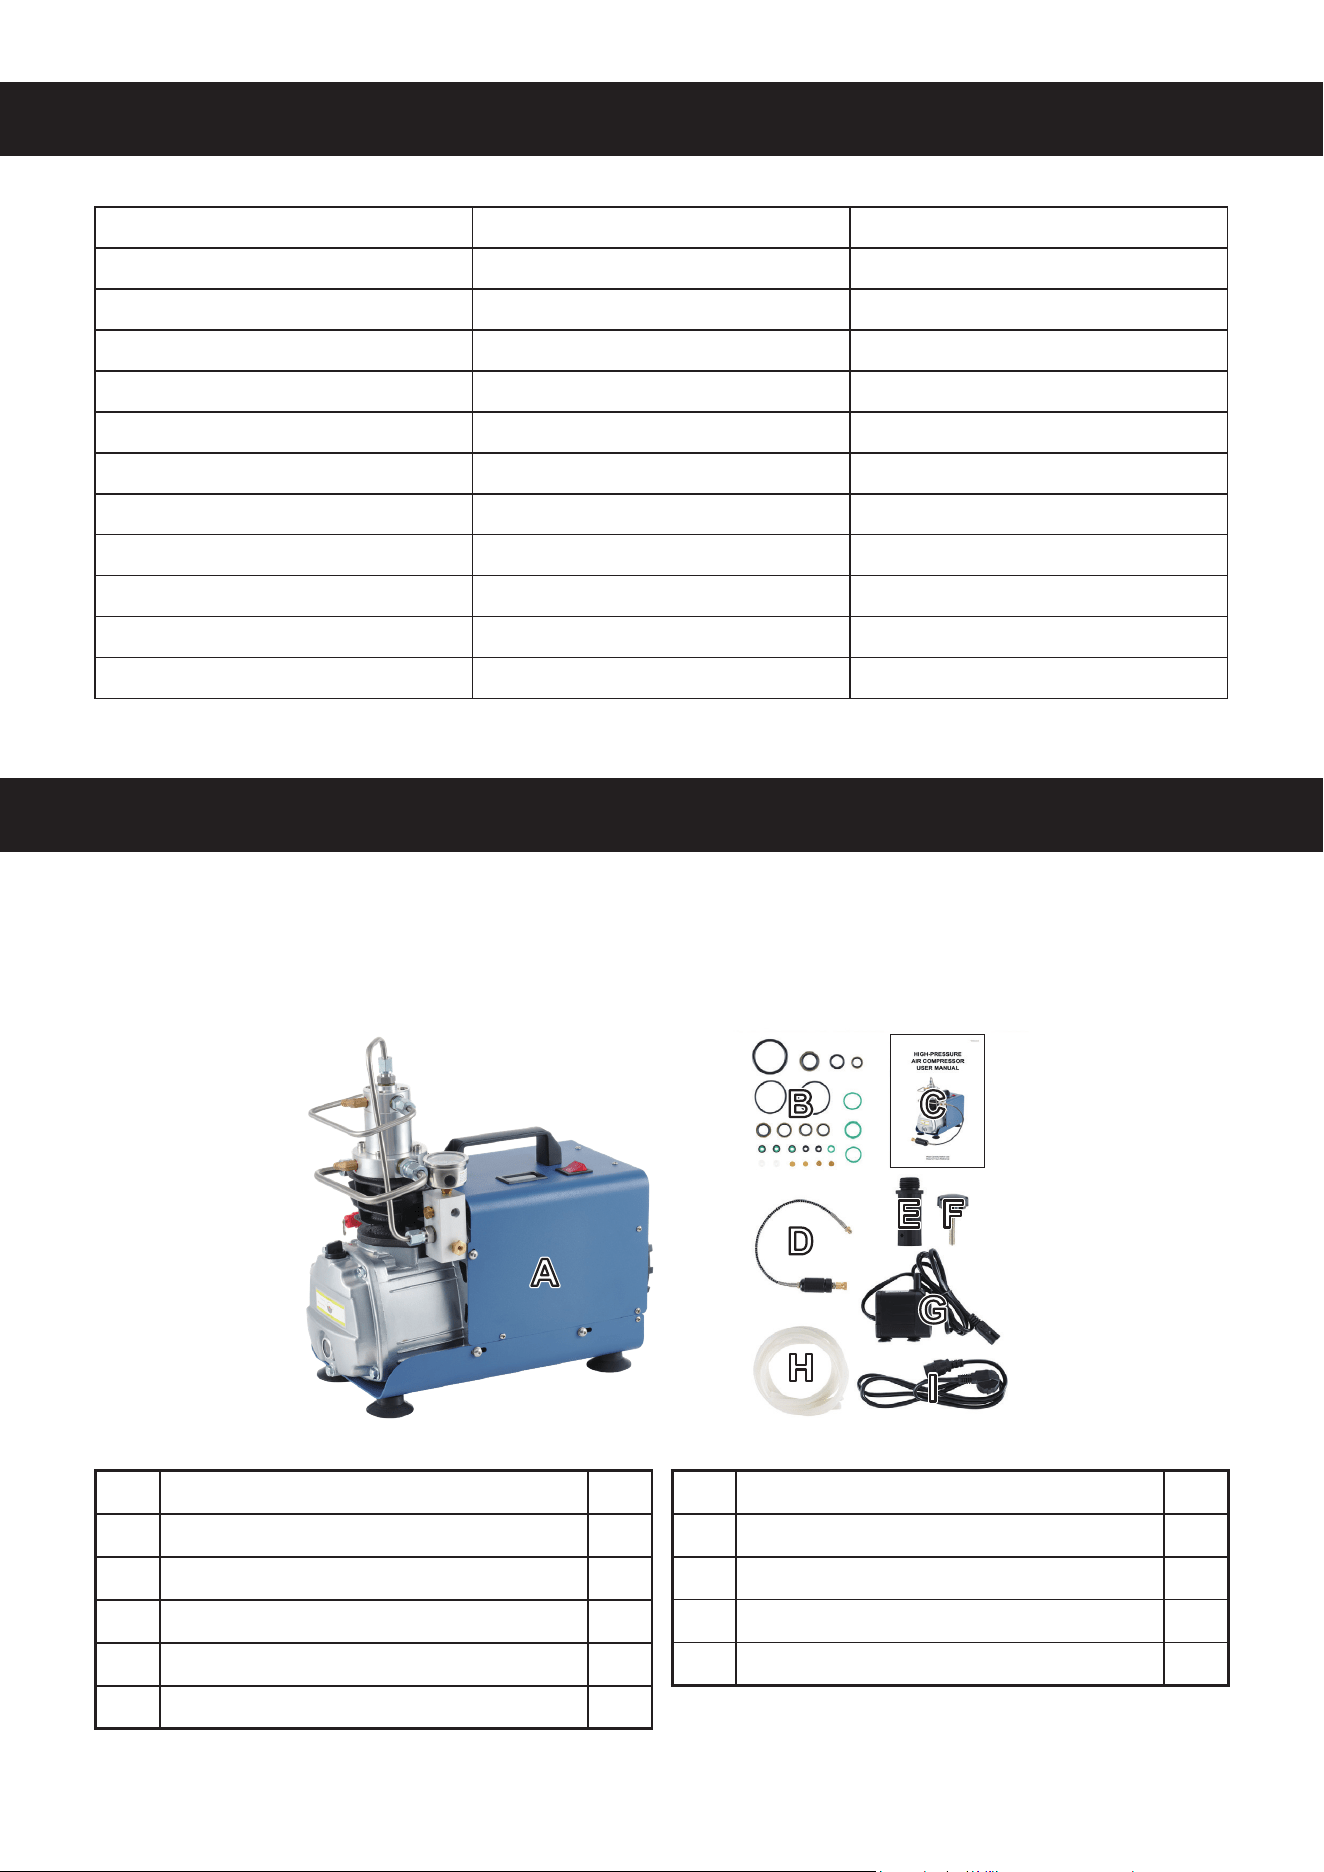
PACKAGE LIST
When you rst get your high-pressure air compressor, check that all of the following are included
and in good order. Be careful with the packaging around children, but keep it through the device's
warranty period in case of any returns.
No. Name Qty.
A Air Compressor 1
B Accessory Kit 1
C Instructions 1
D 8 mm Air Hose 1
E Breather 1
No. Name Qty.
F Valve Knobs 2
G Water Pump 1
H Water Tubes 2
I Power Cord 1
3
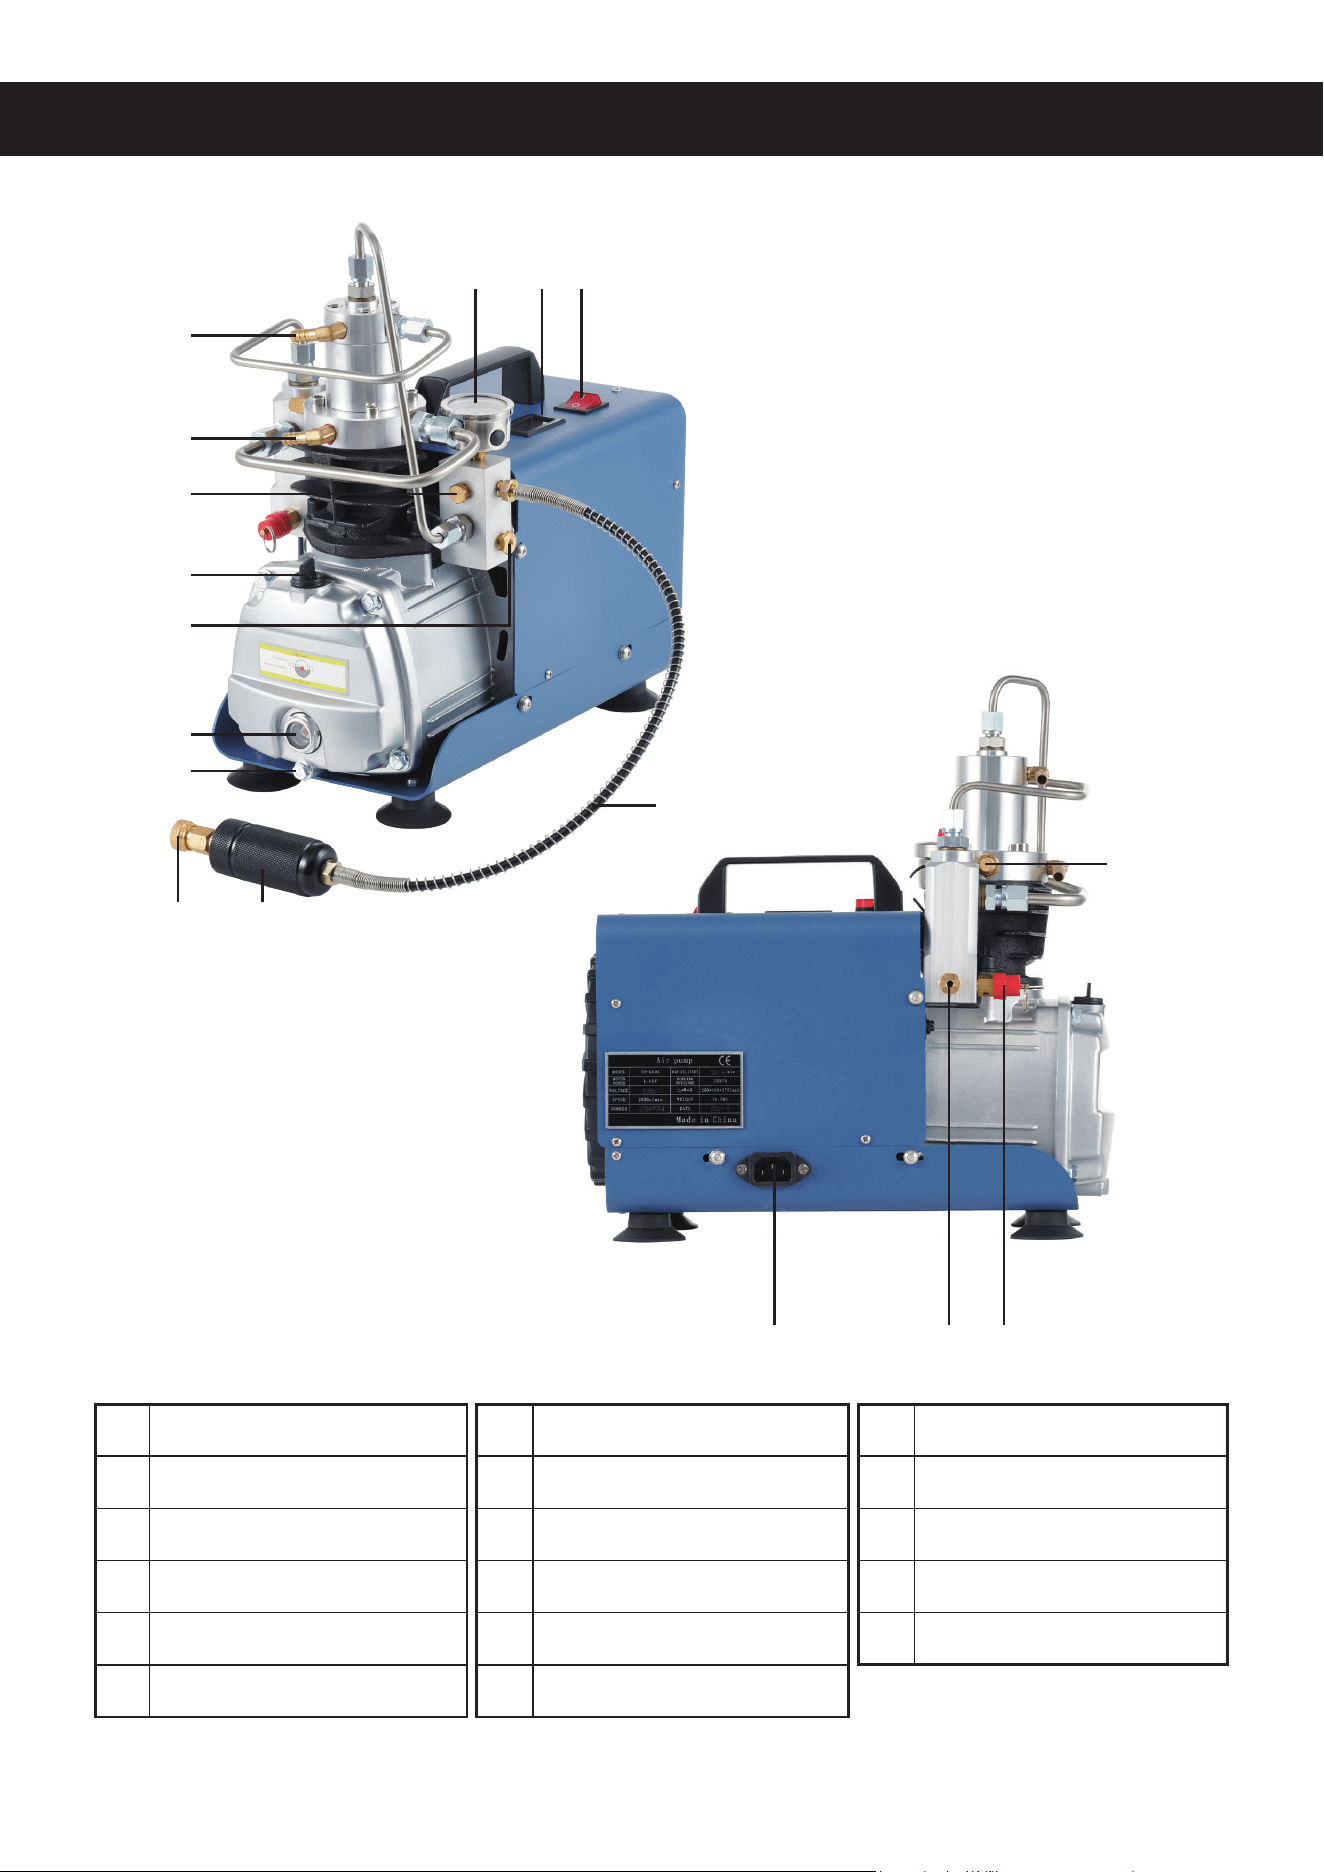
PRODUCT DIAGRAM
1 Power Switch
2 Temperature Gauge
3 Pressure Gauge
4 Water Outlet
5 Water Inlet
6 Explosion-Proof Valve
7 Oil Fill Port / Breather
8 Pressure Relief Valve
9 Oil Level Gauge
10 Oil Drain Port
11 Quick Connector
12 Water/Oil Separator
13 High-Pressure Hose
14 Air Inlet and Filter
15 Power Cord Socket
16 Drain Valve
17 Safety Valve
123
11
15 16 17
12
4
5
6
7
9
13
14
10
8
4
ASSEMBLY
1. Place the air compressor (A) on a rm and at surface able to easily bear its weight.
2. If your device came with its temperature gauge disconnected, place two AG13/LR44 alkaline
coin batteries into it, connect the sensor wire to the back of the cylinder head, and insert the
gauge into its position on the compressor housing.
3. Prepare a basin lled with no less than 20 L or 4½ gallons of clean water. For best results, use
distilled water to minimise mineral buildup and contamination.
4. Use one water tube (H) to connect the pump's water outlet to the compressor's lower water
inlet. Connect the other tube to the compressor's upper water outlet and place the other end
where it will drain water back into the pump's basin. Make sure the pump (G) is completely
covered by the cooling water and then connect it to power.
Never touch the pump or surrounding water while it is connected to power. Always turn o
the compressor and unplug the pump rst before making any adjustment.
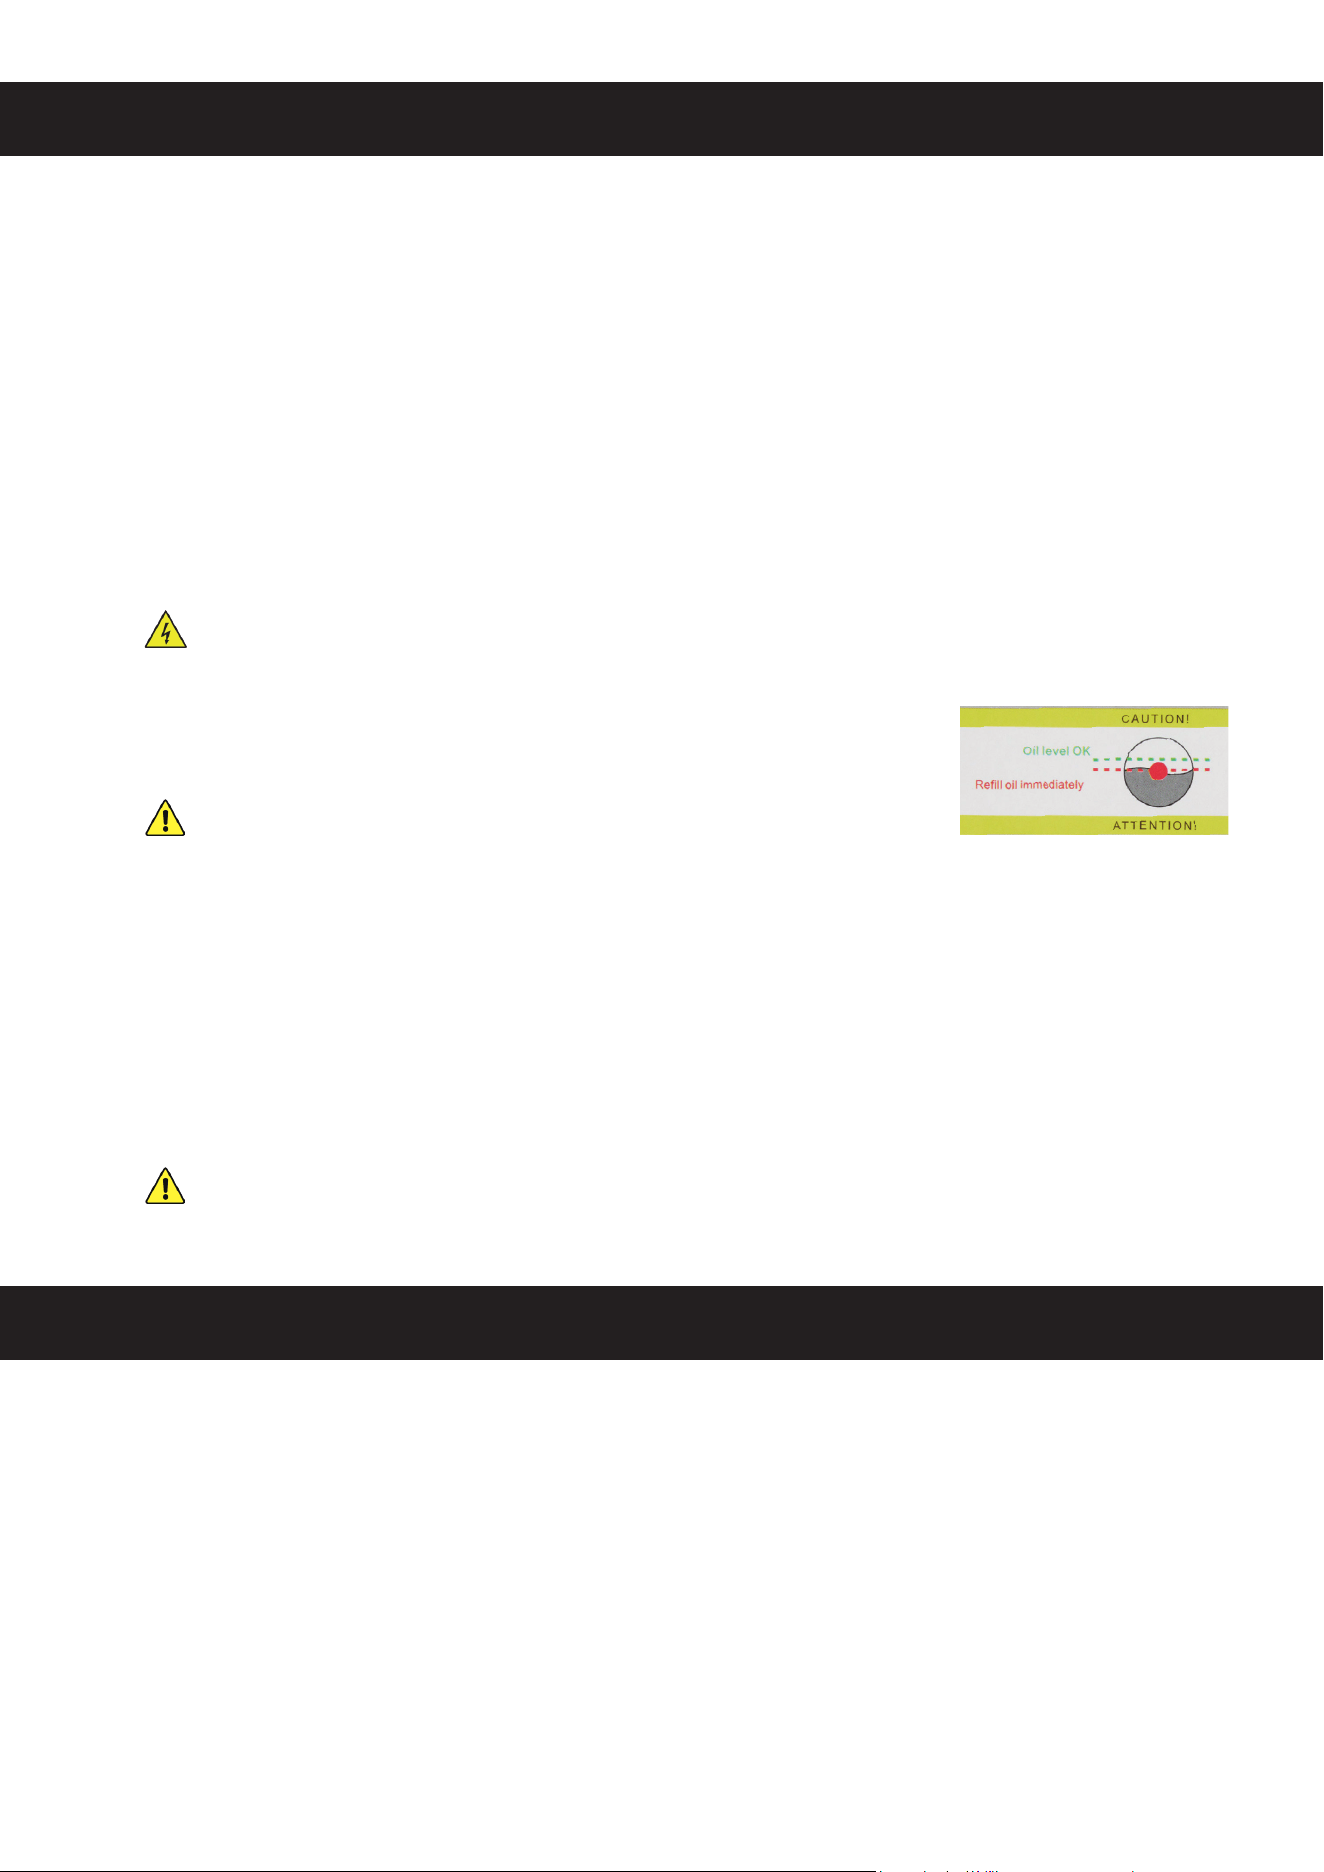
5. Open the oil ll port and slowly add ISO VG 46 or AW 46 oil until it
reaches the appropriate level on the gauge, a little above halfway full.
Never run the compressor without its oil but do not overll. If
you have added too much oil, prepare a suitable basin, open the
drain port above it, and drain the excess.
6. Install the breather (E) in place of the oil ll port cap.
7. Install the knobs (F) onto the pressure relief and drain valves.
8. Connect the air hose (D) to its port just below the pressure valve, carefully aligning its threading
and tightening completely with a spanner.
9. Connect the power cord (I) to its socket on the compressor and then a stable compatible
power source.
It is highly recommended to use a test plug to check for any leaks upon rst use. Use it
to plug the quick connector and check that system pressure reaches over 275 bars or
4000 psi within 30 seconds.
OPERATION
1. Check the oil level gauge. Your ISO VG 46 or AW 46 oil should reach a little above halfway and
look essentially the same as it did coming out of the bottle. Change your oil once it begins to
darken appreciably.
2. Check the air intake lter for any obstruction. Clean or replace the lter as needed.
3. Prepare your basin with at least 20 L or 4½ gallons of cooling water. Connect the water tubes,
fully submerge the pump, and then plug it in. Wait for the water to return into your basin through
the second tube. Note that, during use, you may add ice to your basin to help keep your water
temperature down but never allow the water itself to become ice cold, which could damage
heated components inside your compressor.

5
4. Open the pressure release valve ("bleed valve") and drain valve so that your motor will expel
excess humidity and have time to warm up before beginning full operation.
5. Pull back the outer cover from the quick connector, t it onto the device you wish to ll with
pressurised air, and release the cover to lock it in place.
6. Flip the power switch to begin operation. After about a minute of warmup, close the drain and
pressure release valves to allow pressure to begin building. Keep an eye on the temperature
and, once it begins approaching 65°C or 150°F, cool or change out your cooling water while
being careful to avoid scalding yourself. For best results, allow time for your compressor to cool
after each hour of continuous operation.
7. Pay attention to the pressure gauge. Once your desired pressure is reached, turn o the power,
open the pressure release valve, and wait for the pressure gauge to read 0 psi. For best results,
open the water/oil separator to dry or replace its lter, minimising obstruction and corrosion at
its hose connection.
8. Open the drain valve knob to release any trapped humidity. The released water should be milky
white or slightly brown without appreciable smell. If it ever becomes noticeably dark or oily
smelling, change your device's lubricating oil and have a technician check its seals and O-rings
for leaks or wear.
9. Unplug your pump before removing it from your basin.
MAINTENANCE
• Always release any pressurised air and disconnect the device from power before any cleaning,
repair, or other maintenance.
• Clean the exterior of the device with a soft damp cloth after use. Remove light debris from the
air lter with compressed air. Do not use abrasive cleaners or caustic chemicals. Do not get any
electronic components wet and allow time for all parts to fully dry before further use.
• Check the components of the device periodically for any signs of looseness, wear, or damage.
Tighten, repair, or replace any problematic parts before further use.
• Check the level and quality of the oil before each use, changing as necessary. For best results,
change this device's oil at least once within the rst 50 hours of operation. Change the oil at
least once after every 100 hours of use or year of operation thereafter, whichever comes rst.
• Check the air intake lter for any blockage before each use, cleaning or changing as necessary.
Change the lter at least once after every 100 hours of use or year of operation, whichever
comes rst. More frequent changes may be necessary in dusty or dirty environments.
• Replace this device's safety valve and high-pressure air hose at least once after every 1000
hours of use or year of operation, whichever comes rst.
• If this device will not be used for an extended period of time, disconnect it from power, drain all
uids, and store it in a cool dry place away from direct sunlight and inaccessible to children.
6
TROUBLESHOOTING
DISPOSAL
Electrical products should not be disposed of with household products. In the EU
and UK, according to European directive 2012/19/EU for the disposal of electrical
and electronic equipment and its implementation in national laws, used electrical
products must be collected separately and disposed of at the collection points
provided for this purpose. Locations in Australia, Canada, and the United States
may have similar regulations. Contact your local authorities or dealer for disposal
and recycling advice.
Potential Problems Usual Solution(s)
The item receiving the
pressurised air begins to
shake.
Place it on a towel or on a similarly durable and soft material to
help reduce any noise or damage from vibration as it is lled with
pressurised air.
Pressurisation is weak.
Check the ttings and gaskets for any loose connections.
Replace worn O-rings or a blown safety valve.
The device doesn't start.
Release any remaining pressure from the device.
Check the power cord connections and power source.
Check for damage to the power cord, replacing if necessary.
Reset the circuit breaker beside the drain valve if it has activated.
Smoke appears.
Allow time for the device to cool. Change the oil if it has become
contaminated and avoid running the device for more than one hour
at a time.
The device suddenly stops
working.
Reset the circuit breaker beside the drain valve if it has activated.
Check the automatic pressure relief valve. If it has activated,
shut o and unplug the device IMMEDI ATELY, then replace the
blown valve.
The breather is blown o
during use.
Have a technician check the valves at each stage of pressurization,
repairing or replacing worn and damaged components as needed.

CONTACT US
HPA-ACP7-01 Rev. 15 Dec. 2022
Thank you for choosing our products! If you have any questions or comments,
contact us at help@cs-supportpro.com and we'll resolve your issue ASAP!
For a .pdf copy of the latest version of these instructions, use the appropriate
app on your smartphone to scan the QR code to the right.