D
IS
CL
AIMER
PLEASE READ THE FOLLOWING CAREFULLY
THE MANUFACTURER AND/OR DISTRIBUTOR HAS PROVIDED THE PARTS LIST AND ASSEMBLY
DIAGM IN THIS MANUAL AS A REFERENCE TOOL ONL NEITHER THE MANUFACTURER OR
DISTRIBUTOR MAKES ANY REPRESENION OR RNTY OF ANY KIND TO THE BUYER THAT
HE OR SHE IS QUALIFIED TO MAKE ANY REPAIRS TO THE PRODUCT, OR THAT HE OR SHE IS
QUALIFIED TO REPLACE ANY PARTS OF THE PRODUC IN CT, THE MANUFACTURER AND/OR
DISTRIBUTOR EXPRESSLY SES THAT ALL REPAIRS AND PARTS REPLACEMENTS SHOULD BE
UNDERTAKEN BY CERTIFIED AND LICENSED TECHNICIANS, AND NOT BY THE BUYER. THE BUYER
ASSUMES ALL RISK AND LIABILITY ARISING OUT OF HIS OR HER REPAIRS TO THE ORIGINAL
PRODUCT OR REPCEMENT RTS THERETO, OR ARISING OUT OF HIS OR HER INSTALTION
OF REPLACEMENT RTS THERETO.
Record Product's Serial Number Here:----------------
Note: If product has no serial number, record month and year of purchase
i
nstead.
Note: Some pas are listed and shown for illustration purposes only and are not available individually
as replacement pas.
A SAVE THESE INSTRUCTIONS.
Questions, problems, missing parts?
�tumitour �ir,r =1I �merseceisreh
Call U 98
Email : wsmrrapna1om
Hours of Orion: m - d1y-Fd1
PRODUCT MADE IN CHINA
12
IMPORNT SAFETY INFORMION
GENEL SAFE WARNINGS
Read these instructions for use carefully. Familiarise yourself with the appliance before connecting it to a gas
cylinder. Keep these instructions for future reference. This instruction manual contains important information
necessary for the proper assembly and safe use of the appliance. Follow all warnings and instructions when
using the appliance. If you have questions about assembly, operation, servicing or repair of this product,
please call Cuslamer Service at 909.628.0880.
CARBON MONOXIDE HRD
• This appliance can produce carbon monoxide which has no odor.
• NEVER use this appliance in an enclosed space such as a camper, tent, car or home.
• Keep propane tank(s) below 100'F(37.8'C). Check heater for damage before each use. DO NOT use
a damaged heater.Use only the hose and factory preset regulator provided with the heater. Check hose
before each use of heater. If highly warn or cut,replace with hose specified by manufacturer before using
heater.
• DO NOT alter heater. Keep heater in its original state.Do not use heater if altered.
• FAILURE TO COMPLY WITH THE PRECAUTIONS AND INSTRUCTIONS PROVIDED WITHTHIS
HEATER, CAN RES
U
LT IN DEATH, SERIO
U
S BODI INJURY AND PROPER LOSS,OR DAMAGE
FROM THE HAZARD
S OF FIRE
,
EXPLOSION, BURN, ASPHYXIATION, CARBONMONOXIDE
POIS
O
NING, AND/OR ELECTRICAL SHOCK.
• Carbon Monoxide (CO) poisoning produces u-like symptoms, watery eyes, headaches, dizziness, fatigue
and possibly death. You can't see it and you can't smell it. It's an invisible killer. If these symptoms are
present during operation of this product get fresh air immediately.
• Keep out of reach of children.
EXPLOSION FIRE HARD
•
WARNING: Usi
ng this heater in a residential garage requires that the heater is positioned so that it is
protected aga
i
nst any possible damage by a mov
i
ng veh
i
cl
e.etc.
I
t must be positioned so tha.t the base
of the heater is no less than 18 inch (450mm) above the garage oor or 8 ft (2450mm) In repair garages.
The heater must be placed on a stable suace. Do not place it on a chair, ladder, Etc. Raising the heater
will reduce BUT NOT eliminate the possibility of lighting the vapor of any Flammable liquids which maybe
improperly stored or accidentally spilled. If the smell of gasoline is present, DO NOT operate this heater
until the area has been properly ventilated.
•
NEVER install or remove propane tank while outdoor stove is lighted, near flame, pilot lights, other ignition
sources or while outdoor stove is hot to touch.
• During operation, this product can be a source of ignition. Never use the heater in spaces that contain or
may contain volatile or airborne combustibles, or products such as gasoline, solvents, paint thinner, dust
paicles or unknown chemicals. Minimum clearances from combustible materials: 12 inches from the
sides & 48 inches from the top.
• This produ is fueled by propane gas. Propane gas is invisible, odorless.and flammable. An odorant is
normally added to help detect leaks and can be described as a "rotten egg" smell. The odorant can fade
over lime so leaking gas is not always detectable by smell alone.
IMPORTANT SAFETY INFORMION
• Propane gas is heavier than air and leaking propane will sink to the lowest level possible. It can ignite by
ignition sources including matches, lighters,sparks or open flames of any kind many feet away from the
original leak. Use only propane gas set up for vapor withdrawal.
• Propane gas should be stored or used in compliance with local ordinances and codes or with ANSI/NF
58. Turn o propane when not in use.
• CALIFORNIA PROPOSITION 65:WARNING: Fuels used in gas or oil red appliances and the products of
combustion of such fuels, contain Chemicals known to the State of California to cause cancer, bih defects
or other reproductive Harm.This product contains chemicals,including lead and lead compounds.known
to the State of California to cause cancer, birth defects or other reproductive harm. Wash hands after
• Keep all connections and fiings clean. Inspect propane cylinder and stove propane connections for
damage before aaching.
• Locate heater on stable and level suace if heater is hot or operating. Not intended for use on nished
floors. Never block air inlet(boom of shell) or air outlet(around top of shell) of heater. Do not leave heater
unattended
WARNING: Not for home or recreational vehicle use. WARNING: FIRE, BURN, INHALATION, AND
EXPLOSION HRD, KEEP SOLID COMBUSTIBLES, SUCH AS BUILDING MATERIALS, PER
OR CARDBOARD.A SAFE DISTANCE FROM THE HEATER AS RECOMMENDED BY THE
INSTRUCTIONS.NEVER USE THE HEATER IN SPACES WHICH DO OR M CONTAIN VOLILE OR
AIRBORNE COMBUSTIBLES, OR PRODUCTS SUCH AS GASOLINE, SOLVENTS, INT THINNERS,
DUST PARTICLES OR UNKNOWN CHEMICALS.
• Provide adequate ventilation. Before using heater.provide at least a six-square-foot opening offresh, outside
air. This heater produces carbon monoxide,which is listed by the State of California as a reproductive toxin
under proposition 65.
• Install and use heater with care. Follow all local ordinances and des. In the absence of local ordinances
and codes refer to the standard for storage and the natural gas installation code, CSAB149.1. This instructs
on the safe storage and handling of propane gas.Use only propane gas set up for vapor withdrawal.
• Provide adequate ventilation. Before using heater, provide at least a six-square-foot opening of fresh,
outside air. This heater produces carbon monoxide, which
i
s listed by the State of California as a
reproductive toxin under proposition 65. For indoor or outdoor use. Clearance fm mbustibles MUST be
at least 40 inches. The heater must be located at least 6 ft (1.83m) in the US: or 1 O (3m) in Canada.from
any propane gas container.
• The heater is designed for use as a construction heater in accordance with ANSI 283.7,CSA 2.14.
Other standards govern the use of fuel gases and heating products for specific uses.ur local authority
can advised you about these. Construction healers is lo provide temporary healing of building under
construction, alteration or repair. Properly used.the heater provides safe economical heating. Products
of combustion are vented into the area being heated. We cannot foresee eve use which maybe made
of our heaters. CHECK WITH YOUR LOCAL FIRE SAFETY AUTHORI IF YOU HAVE QUESTIONS
ABOUT HEATER USE.
• Install and use heater with care. Follow all local ordinances and codes.In the absence of local ordinances
and codes refer to the standard for storage and the natural gas installation code,CSA B149.1. This instructs
on the safe storage and handling of propane gas.Use only propane gas set up for vapor withdrawal.
• DO NOT use heater in occupied dwellings or in living or sleeping quarters. DO NOT use heater in a
basement or below ground level. Propane gas is heavier than air. If a leak occurs, propane gas may sink
to the lowest possible level. Keep appliance area clear and free from combustible materials.gasoline,
paint thinner and other ammable vapors and liquids. Dust is combustible. DO NOT use heater in areas
with high dust content.
2
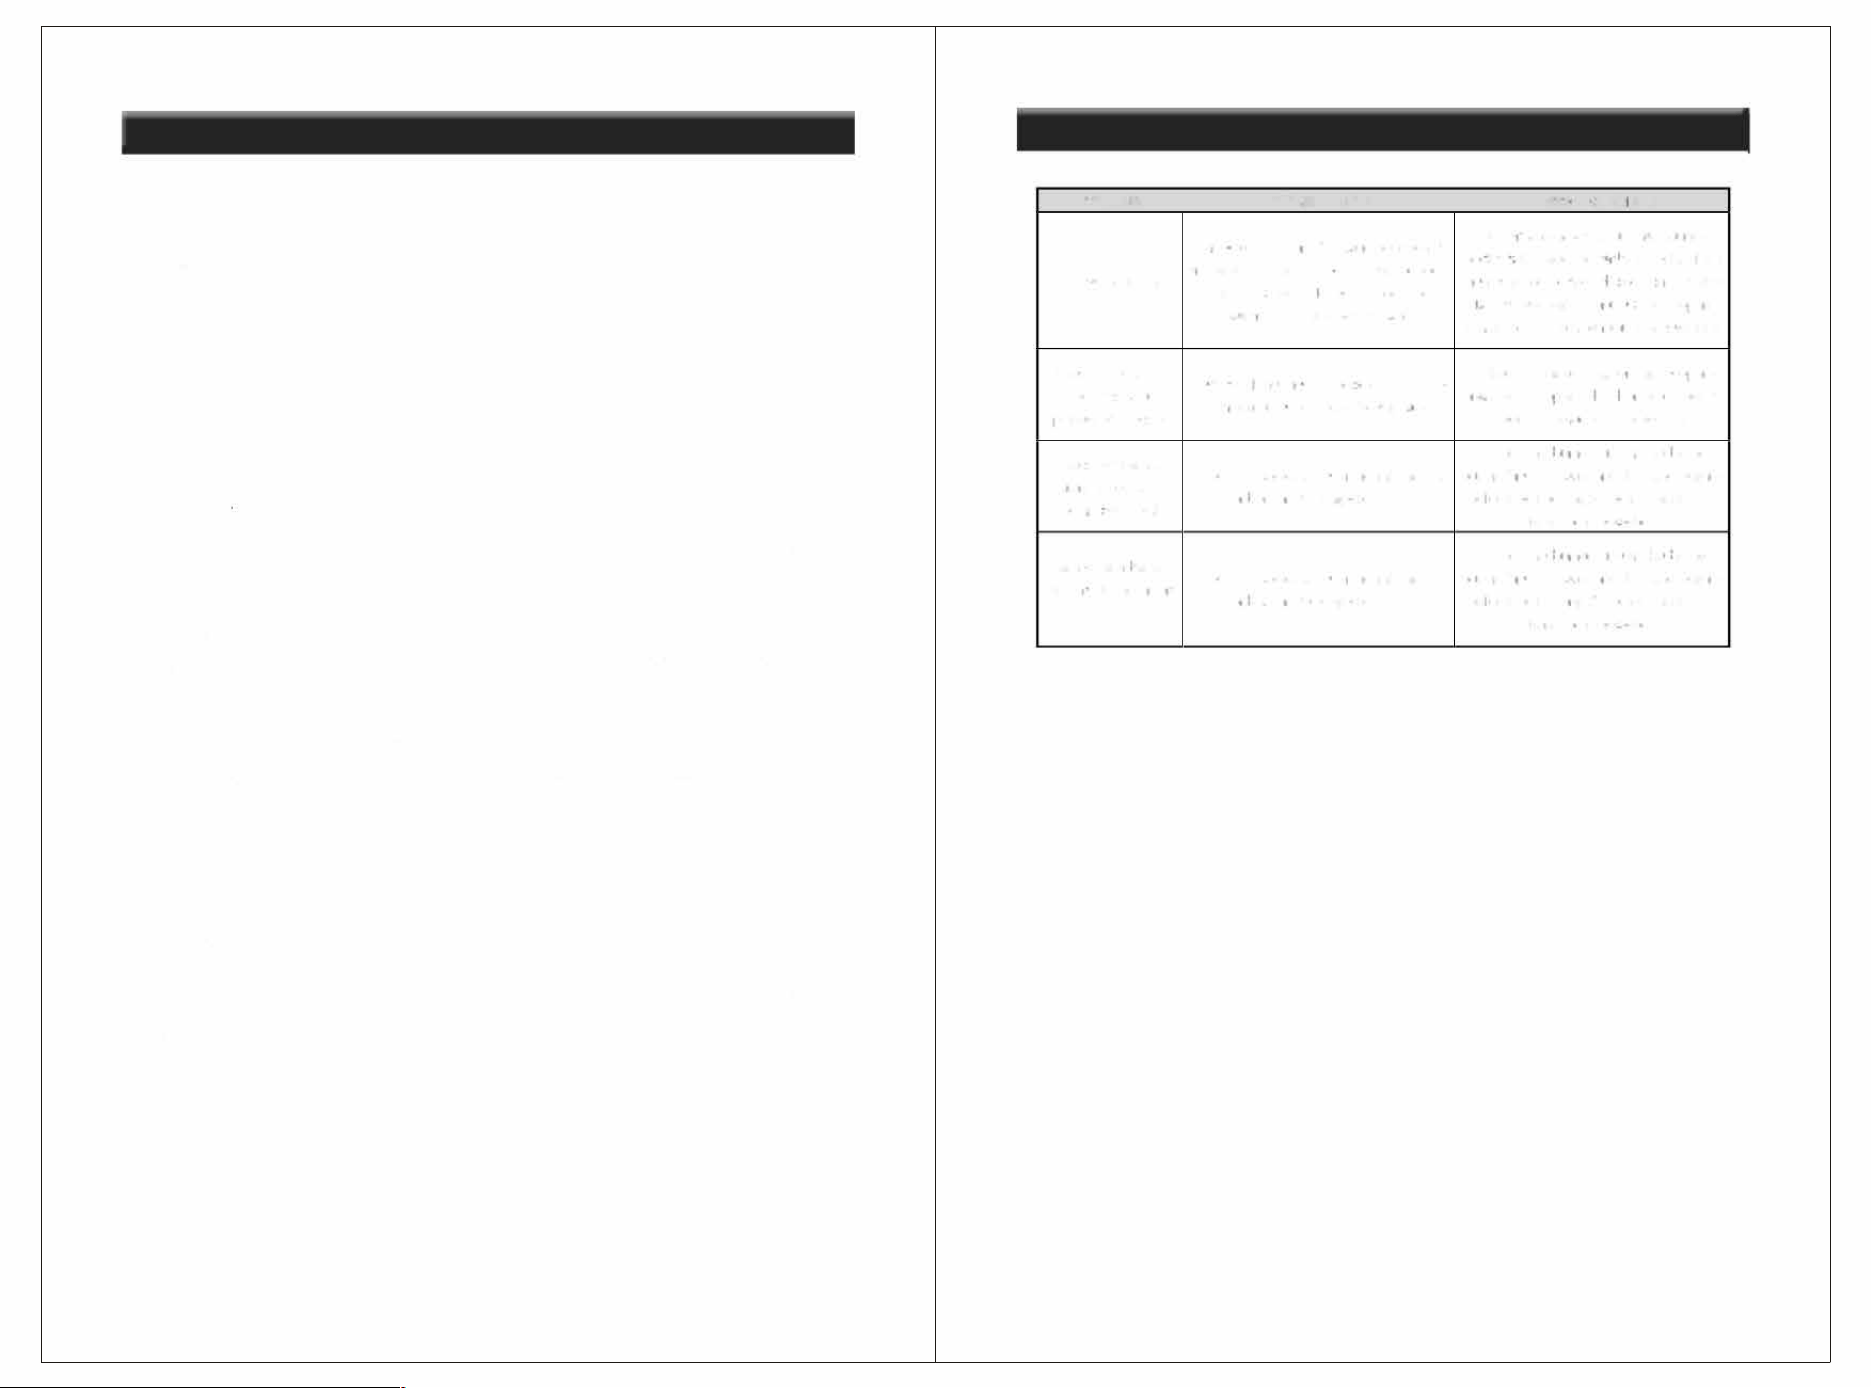
PROBLEM
Unitwill not light
TROUBLESHOOTING
POSSII LE CAUSE CORREVE ACTION
1. Open lank valve by turning counter-
1. Valve on propane [LP) tank not open
l
.
clockwise 2. Have the tank refilled. 3. Turn
Propane jLP} lank emp. 3 Regulator not in
the regulator to the high position. 4. close
high position. 4. Exces flow device
triered. 5. Defective regulator.
unk valve, wait 5 minutes and reopen
slowly. 5. Peplace the regulator assembly.
Burner will not stay lit 1. Check wiring conneions are properly
1. Wiring of the thermocouple, 2. Defeive
when gas value engaged. 2. Replace the thermocoupler. 3.
thermocoupler. 3. Defeive gas valve.
plunger is released Replace the gas valve assembly.
Excessive flames
1. Debris or spiderwebs in the mixing tube rush. Rinse in water and drain thoroughly
coming out of burner,
not glowing red
or burner. 2. Cloed orifice.
1. Clean the burner tube with a bole
before reinstalling. 2. Remove and dean
using compressed air.
Flames flash back or
1. Clean the bmnertube with a bole
1. Debris or spiderwebs in the mixing tube brush. Rinse in water and drain thoroughly
burn inside the mixing
tube
m burner. l. Cloed orifice.
before reinstalling. 2. Remove and dean
using compressed air.
11
OPERION/ MAINTENANCE
LIGHTING UNDER WINDY CONDITIONS
When
using this heater outdoors on a windy day, it will be necessa to use a match or long stem butane
lighter to ignite the burner. It may be dicult to keep the match lit long enough under windy conditions. Follow
the "Lighting instructions' procedure after doing the following:
1. Position the heater and tank such that the burner faces away from the wind.
2. Position your body behind the heater such that your body blocks the wind while you are following the
instructions for lighting.
TURNING OFF THE HEATER
1. Tightly close propane tank valve by turning clockwise
2. Turn the heater regulator knob to the OFF position. Wait at least 30 minutes for the heater to cool before
handling heater.
3. Always remove the heater from the propane tank aer each use. Do not store heater while attached to
propane tank. Do not store propane (LP) tank in a building, garage or any other enclosed area.
VENTILATION
Always be sure to supply proper ventilation while operating this heater. Provide a minimum of 1/2 square
foot (0.047 square meter) opening for fresh air supply for 15,000 BTU's of heat and one square foot (0.1 O
square meter) opening for 30,000 BTU's of heat.
MAINTENANCE
1. Turn unit o, allow heater to fully cool and disconnect propane hose before peorming any maintenance
functions.
2. Keep unit clean and keep the inside of the unit debris free.
3. Have unit checked by a qualied technician at least once a year, preferably prior to the heating season .
STOGE
Never store a propane {LP) gas tank inside a building or in the vicinity of any gas or oil burning appliance.
When the propane (LP) tank is not disconnected from the heater, the gas tank and heater must be stored
outdoors in a well ventilated area, out of the reach of children. If for any reason the heater is to be stored
indoors, the tank must be disconnected and stored outdoors in a well ventilated area out of reach of children,
in accordance with the standard for the Storage and Handling of Liquefied Petroleum Gases, ANSI/NF 58
and CSA 8149.1, Natural Gas and Propane Installation Code. The plastic tank valve plug supplied with your
tank must be tightly installed when the tank is disconnected from the heater.
10
IMPORTANT SAFETY INFORMATION
• The heater is designed and approved for use as a construction heater in accordance with the Standard
for Gas-Fired Construction Heaters ANSI Z83.7 • CSA2.14. CHECK WITH YOUR LOCAL FIRE SAFETY
AUTHORITY IF YOU HE QUESTIONS ABOUT APPLICIONS. Other standards govern the use of
fuel gases and heat producing products in specic applications. Your local authori can advise you about
these.the intended use is the tempora heating of a building or structure under constructian,alteration,
or repair.
• Keep children and animals away from heater. Never move, handle or seice a hot or operating heater.
Severe burns may result. Wait 15 minutes after turning heater o. To prevent inju,wear gloves when
handling heater. Turn o propane supply to heater when not in use. Use only original replacement parts.
This heater must use design-specific parts. Do not substitute or use generic pas.Improper replacement
pas could cause serious or fatal injuries. Installation of this appliance at altitudes above 2000 (610 m)
shall be in accordance with local codes, or in the absence of local codes, the National Fuel Gas Code,
ANSI Z223.1 /NF 54, or National Standard of Canada, Natural Gas and Propane Installation Code, CSA
8149.1..The heater should be inspected before each use, and at least annually by a qualied service
person.
• NEVER refill the heater's fuel tank while heater is operating or still hot. This heater is EXTREMELY HOT
while in operation. Keep all combustble materials away from this heater.
• NEVER use duct work in front or at the rear of the heater.
• NEVER transpo the heater with fuel in its tank.
• Bulk fuel storage should be a minimum of 25 feet away from the heater, torches, portable generators or
other sources of ignition.
•
ALWAYS
l
oca
te t
h
e
h
ea
t
e
r on a s
t
ab
le, l
ev
el
suace
.
• RISK OF ELECTRICAL SHOCK! Use only the electrical power (voltage and equency) specified on the
model plate of the heater. Use only a local, correct plug and a grounded outlet and extension cord.
• AS install the heator so that is is not directly exposed to water spray, rain, dripping water or wind.
• AS unplug the heater when not in use.
0
SAVE THESE RNINGS
3
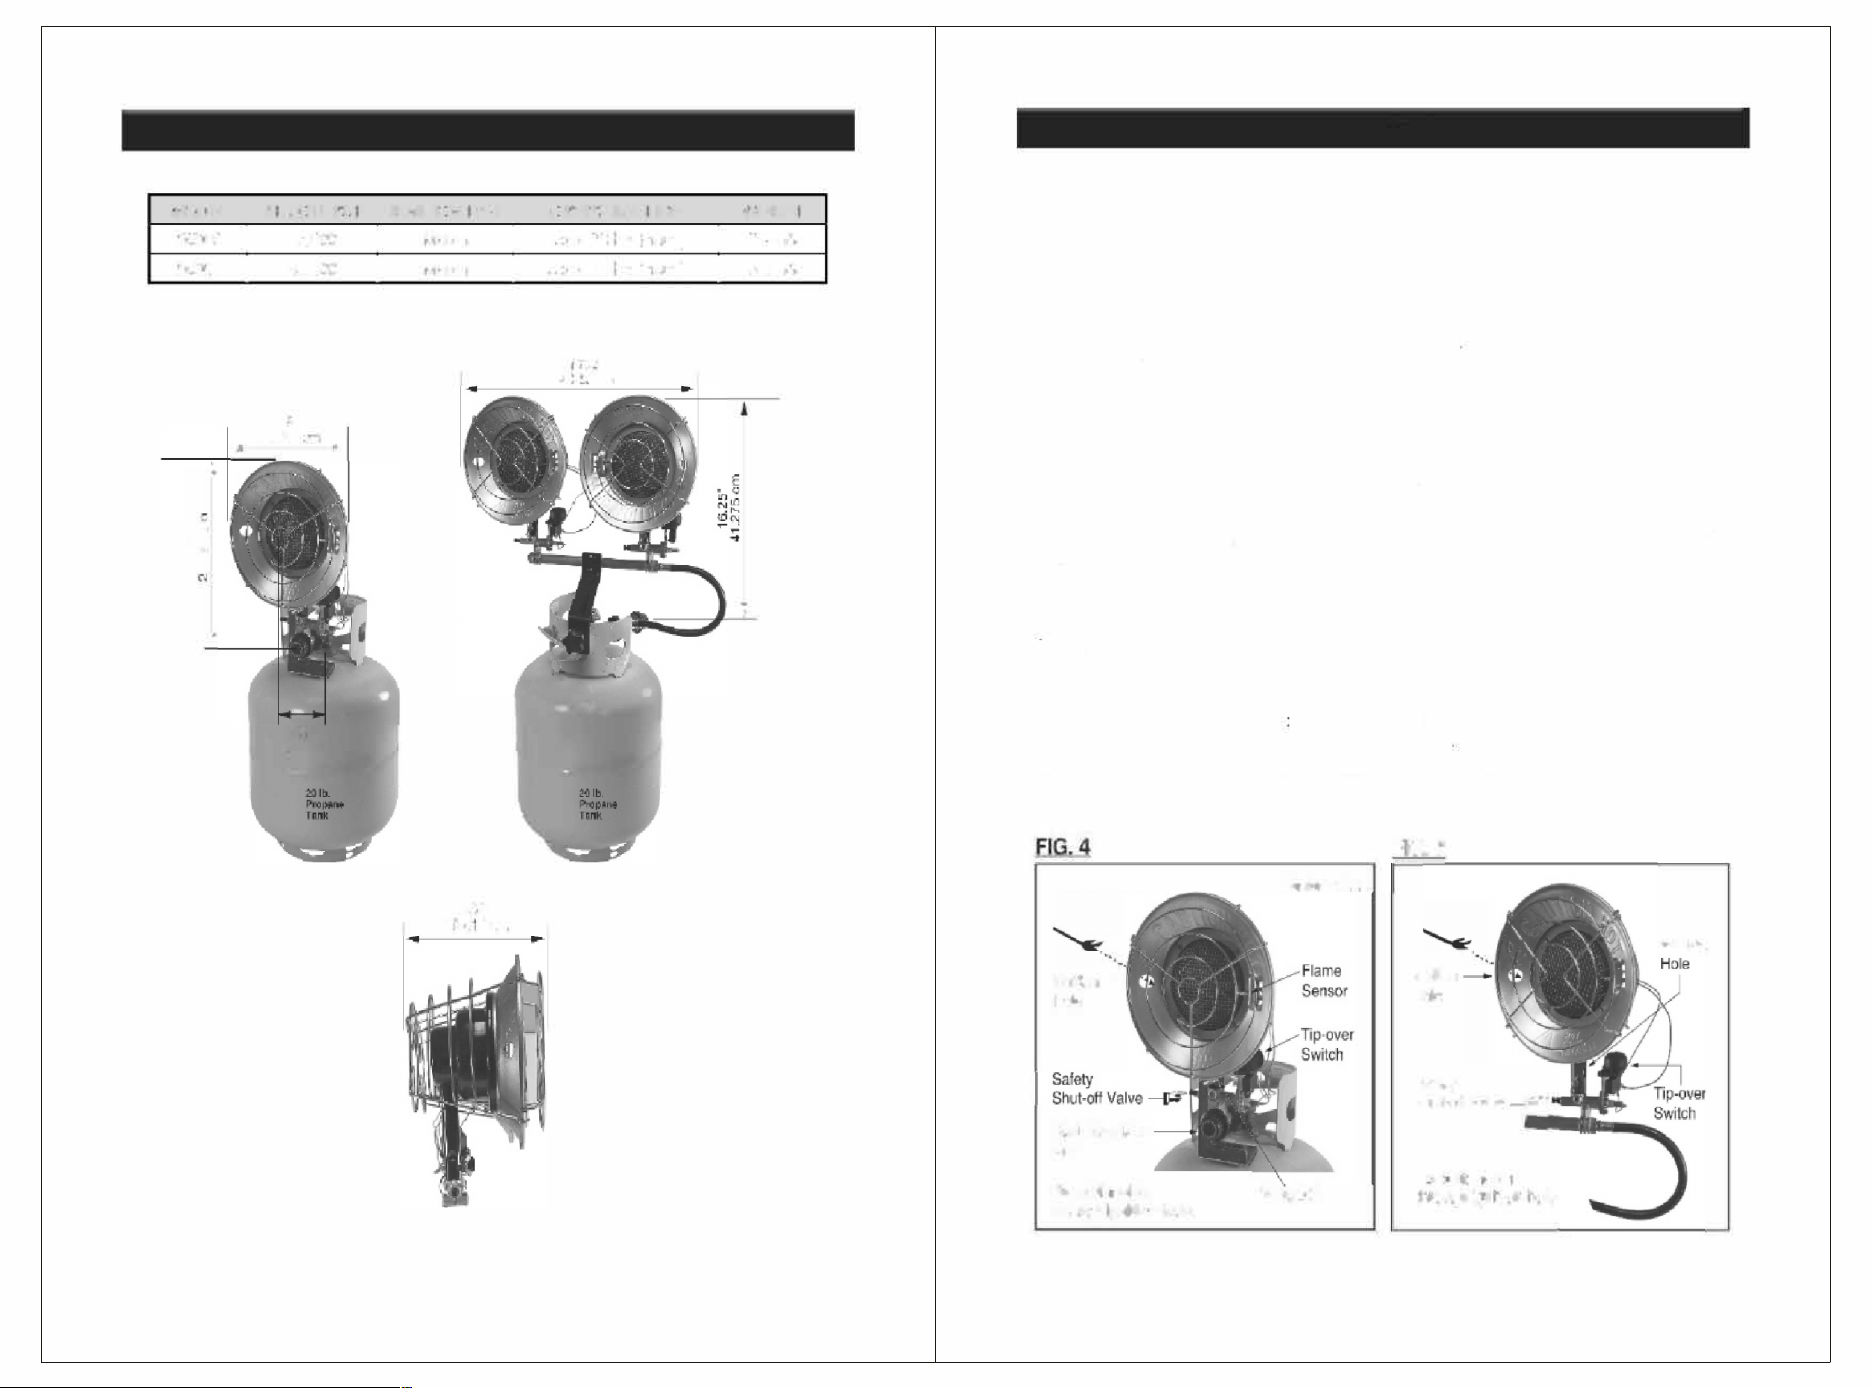
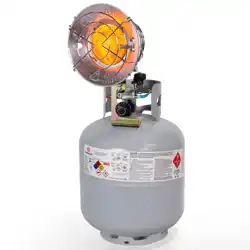
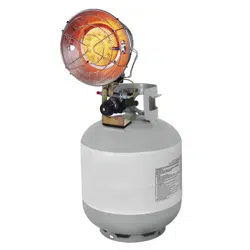
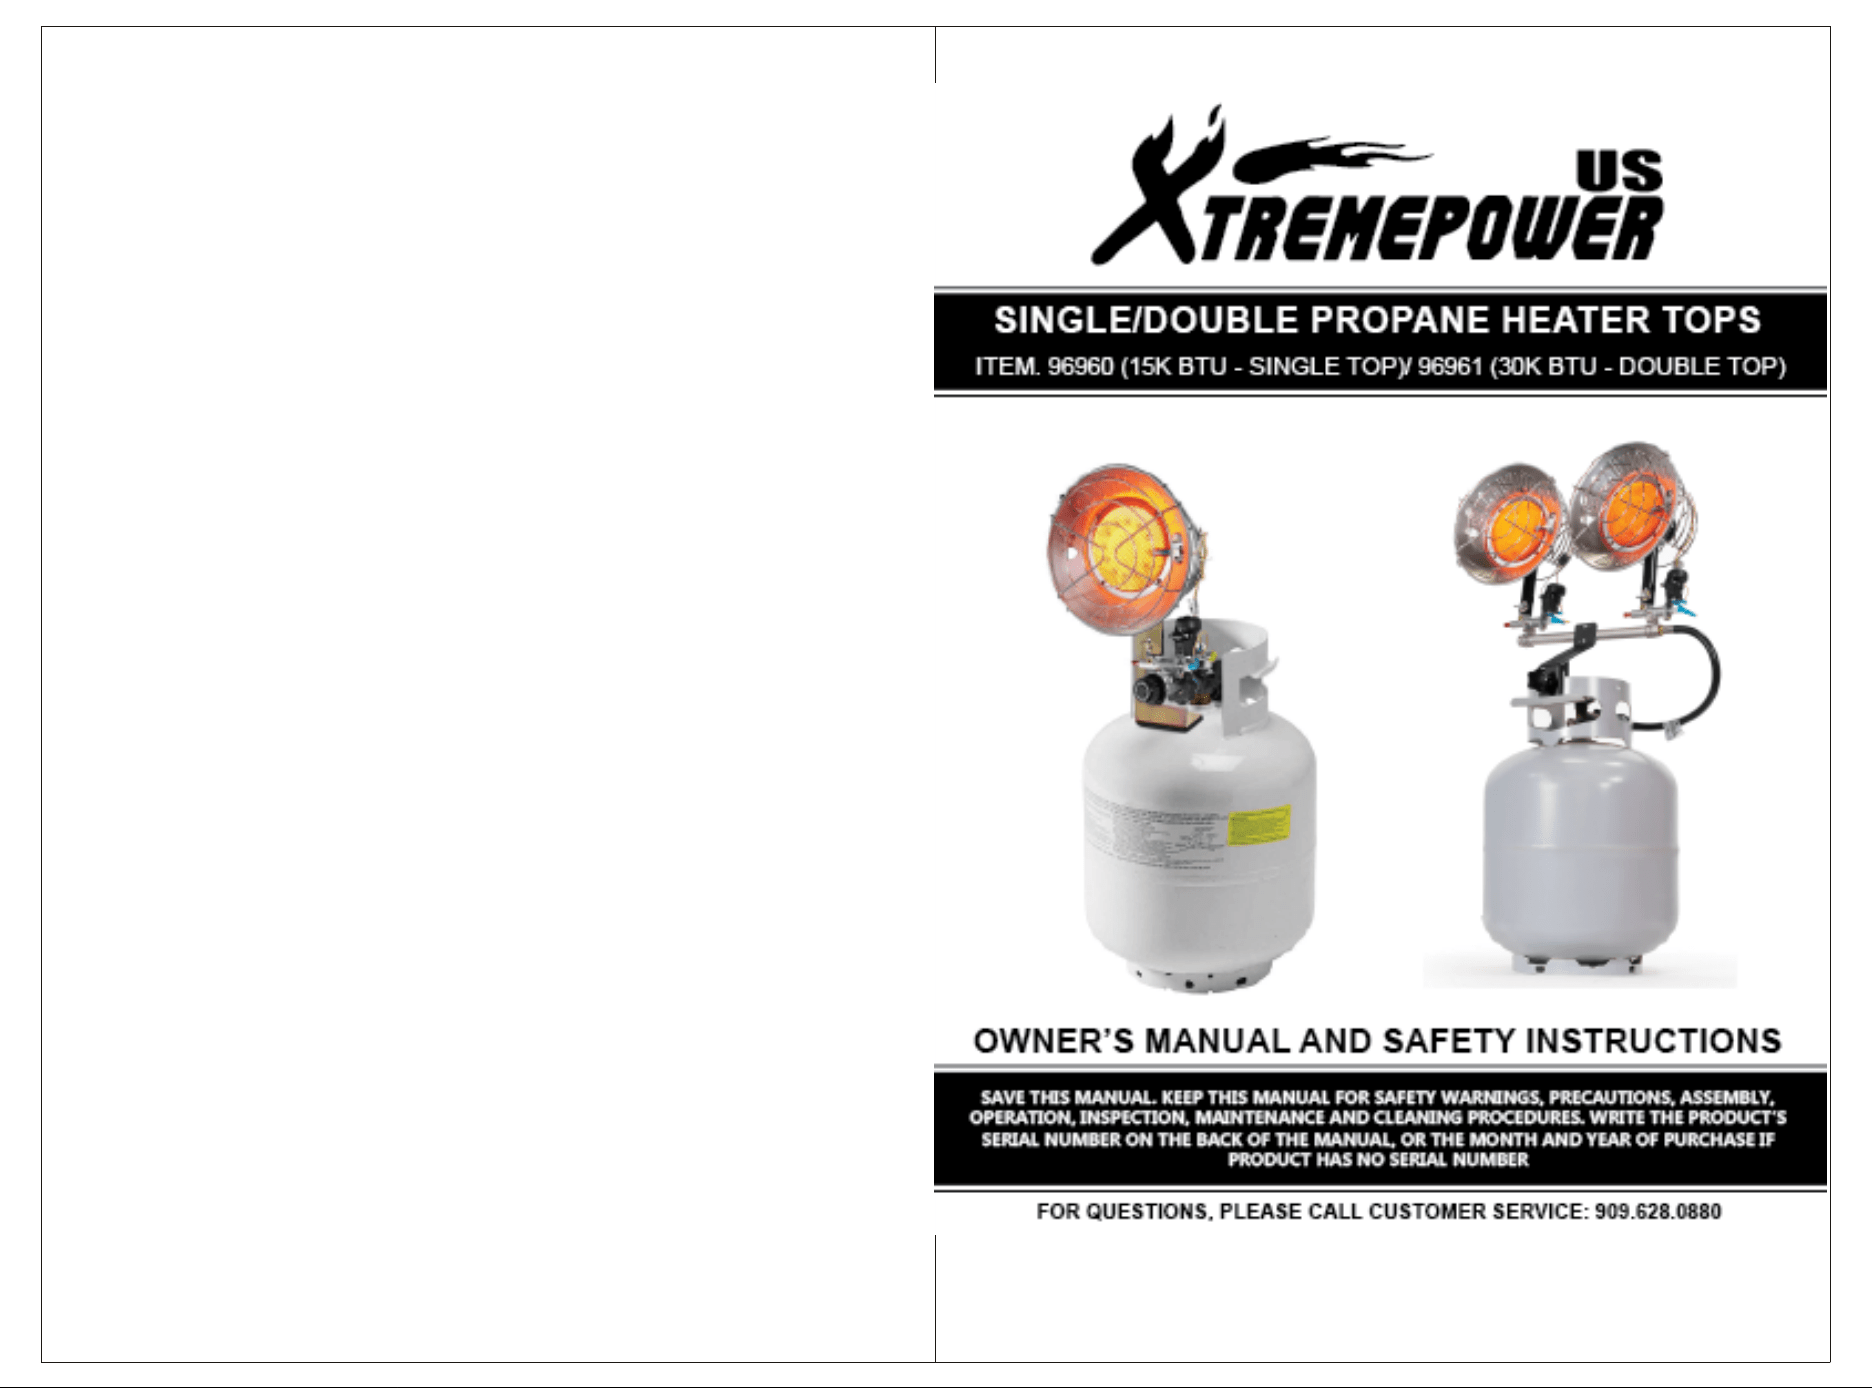
MODEL
96960
96961
-
o
��
�
'
PRODUCT INFORMION
I
I
BIUOUH>UI
15,000
30,000
0
.
5
0
"
'
21.5cm
◄
'
►-
7
2
&'
18 415 cm
I
I
IGNIIION PE
Match
Match
6.50'
16.5 0cm
4
I
I
OPETING IIME
Upto 28 hrs (high)
Upto 14 hrs (high)
17.,2"
,
44.50m
I
I
WEIGHI
2.7LBS
5.3LBS
'
OPERATION
LIGHTING INSTRUCTIONS
1. Open propane tank valve by turning it counterclockwise.
2. Turn heater regulator knob clockwise to the "High" position. (Fig.4)
WARNING: Stand to the side of unit while lighting. Do not stand or have any pa of your body over or in front
of heater while lighting.
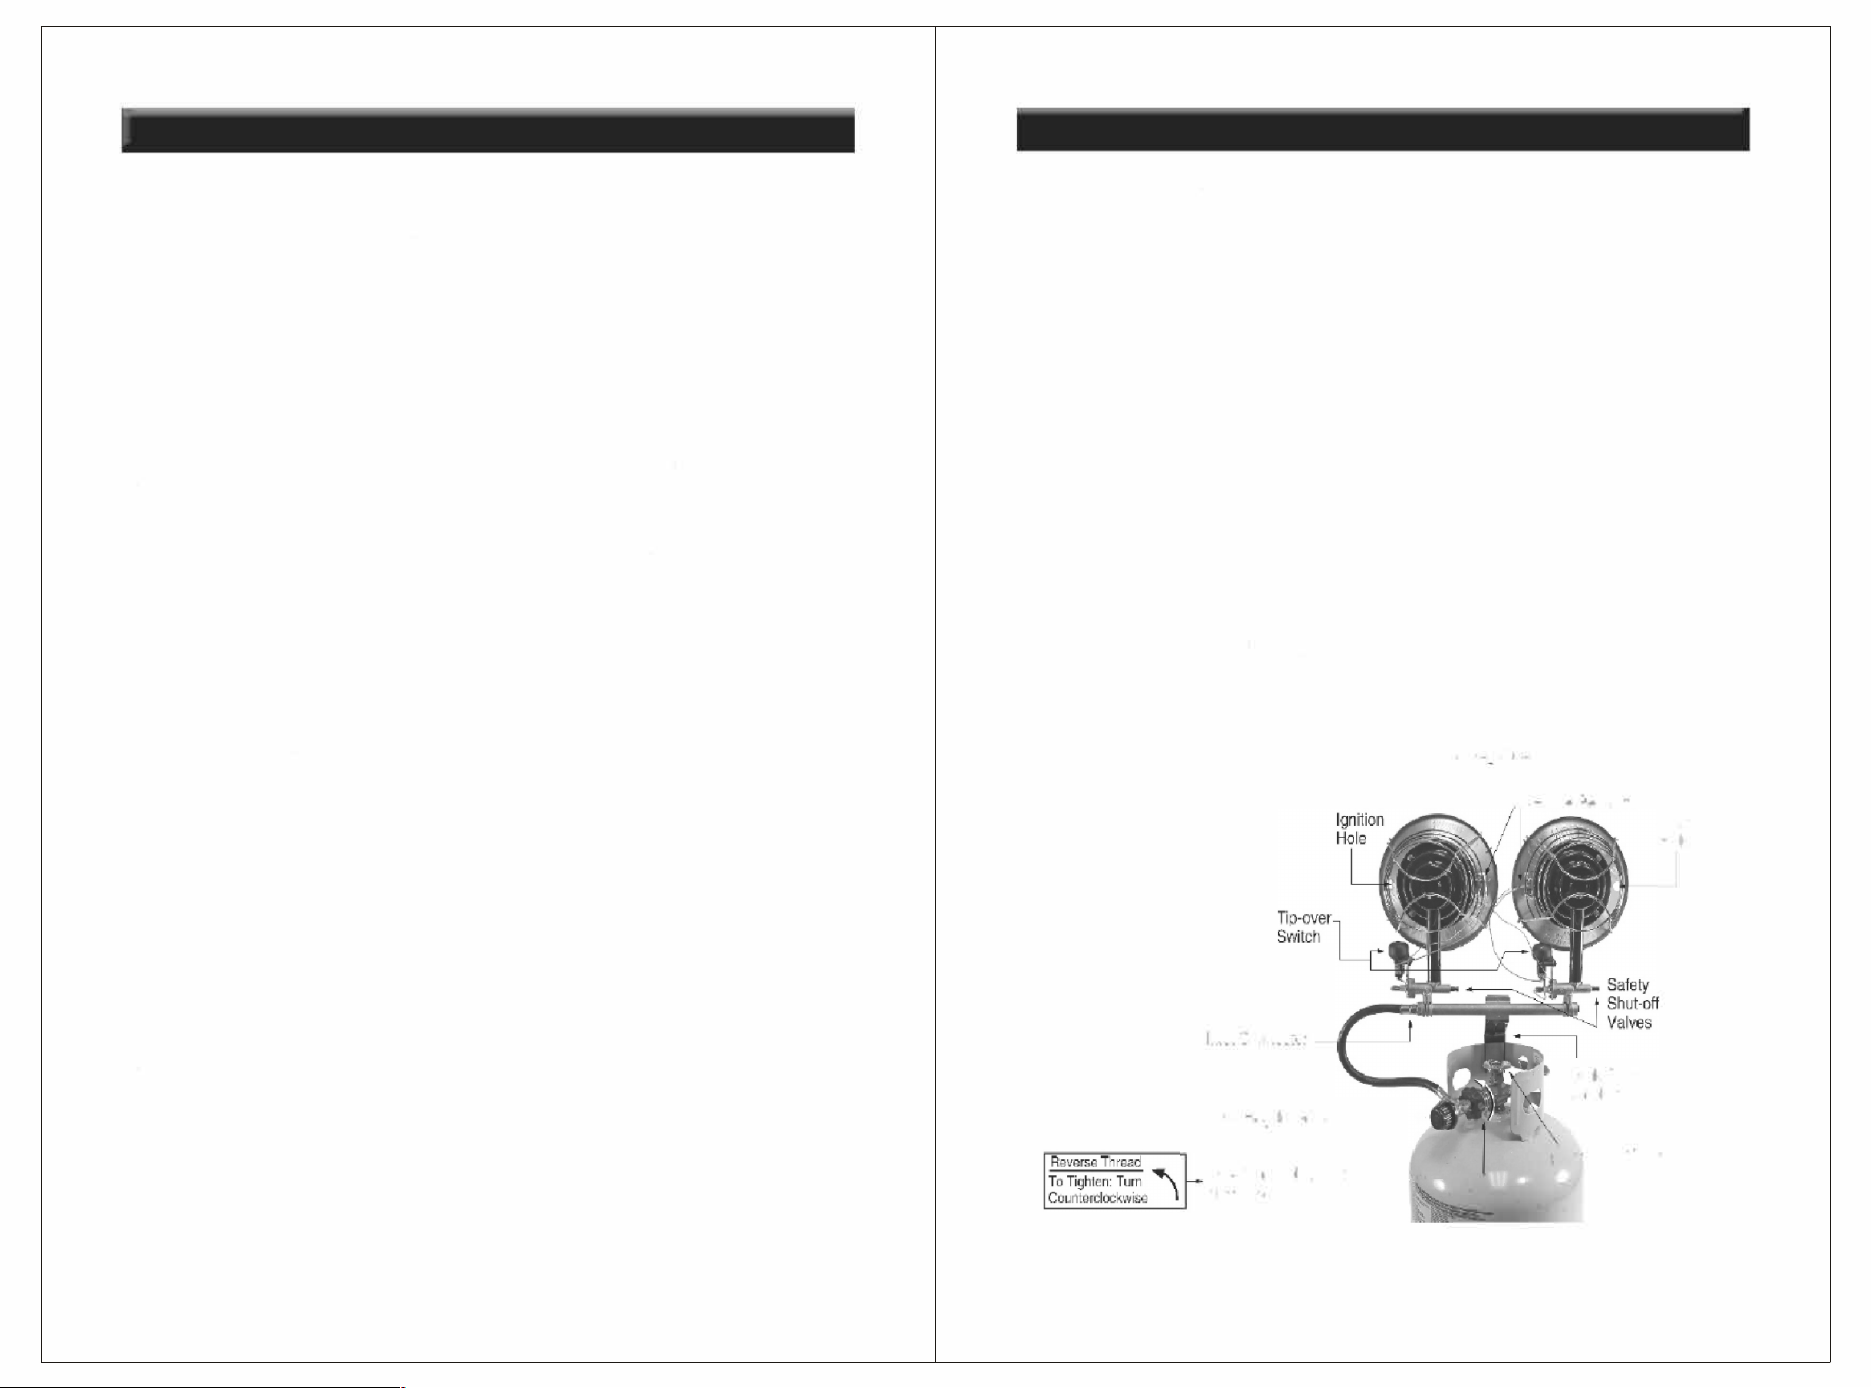
3. one match per burner. Locate ignition hole in side of burner. (Fig 5) Insert a lit match through ignition hole.
Do not light from front of burner.
CAUTION: Do not inse match into the air inlet holes in the mixing tubes.
4. Press safety shut-o valve fully inwards to allow gas to ow. Fig. 4 and 5 .
RNING: Do not push in safety shut-o valve plunger before inserting lit match.
5. Burner should light. Mesh screen on burner glows red when lit. Aer burner is lit, continue holding in safety
shut-o valve plunger ( 30 seconds) until heater stays lit.
6. If the buer does not light within 30 seconds, turn regulator knob to the OFF position. Wait at least ve
(5) minutes for the gas to dissipate before re-lighting.
7 If heater will not light aer repeated tries, do not aempt to repair heater. Ca
ll
Loca
l service
for assistance.
8. Aer burner lights, turn the heater regulator knob to the desired heat setting: LOW, MED, or HI.
9. For dual burner models only light both burners when maximum heat is needed. Use
one burner to consee fuel. Repeat steps to light second burner
WARNING: NEVER LEAVE THE HEATER UNATTENDED WHEN LIT.
lgnilion
Ho!e
Heat R�ulor
Knob
Ple I m
1hrough !gnlon hole.
Htaler Fronl
WmgBo
9
FIG.5
lgli
Hole
Safely
Sh fl Vae
Ple r tch
thrgh lgnon
Air In�!
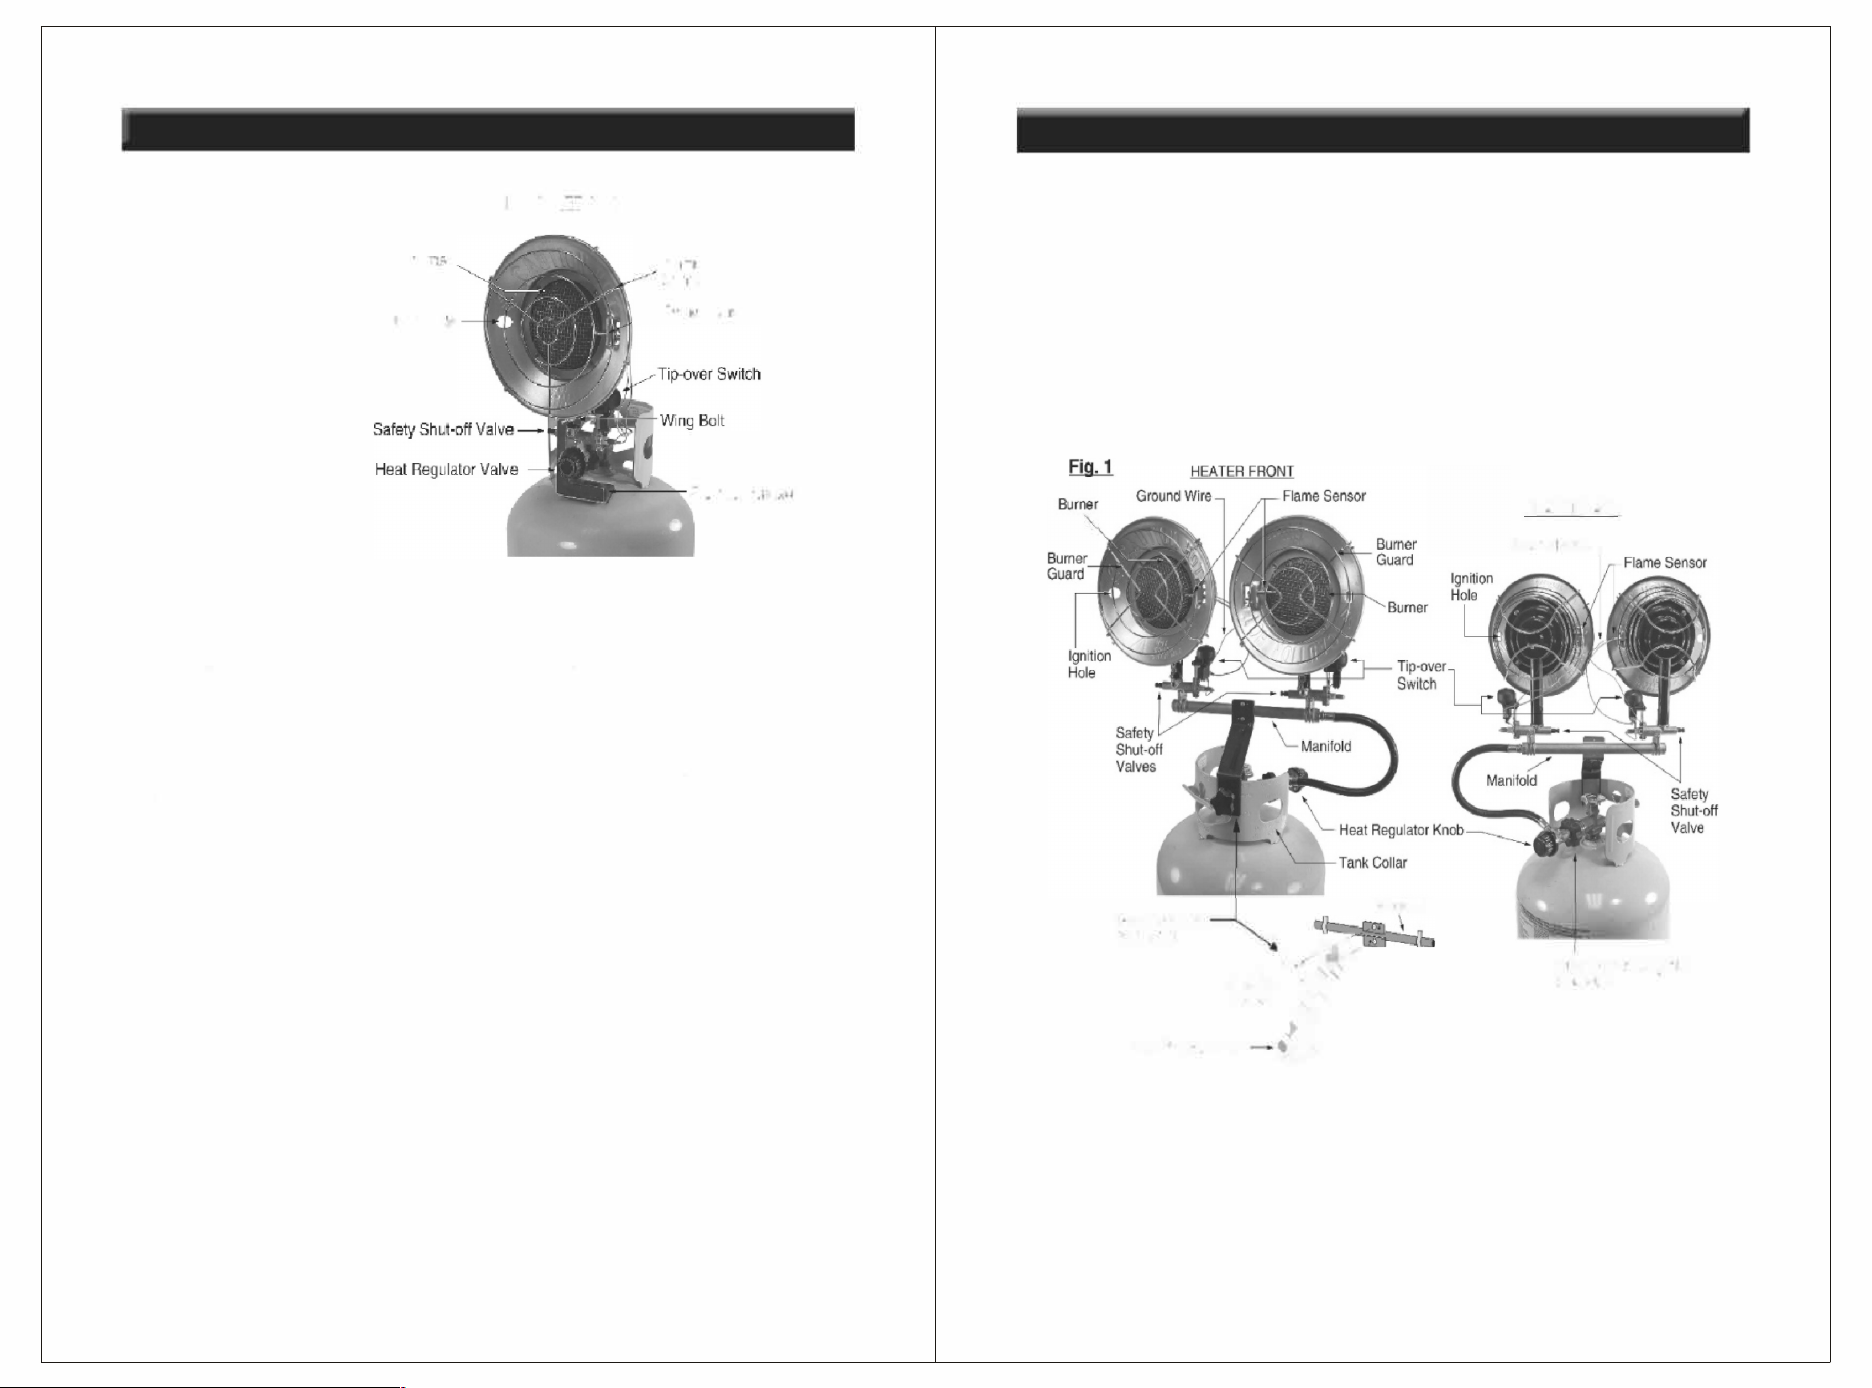
OPERION
HE EBONI
96960
Burner
Buer
Guard
l
gnilion Hole
Flame Sensor
SL1pport racket
CHECKING FOR LEAKS
Check all gas conneclions with a 50150 mix of liquid dish soap and waler solulion lo be sure 1 hey are tight
and leak proof. The formation of bubbles indicates a gas leak. Correct all leaks before using 1 he heater.
• The inslallation of your healer must meet all local codes and/or gas utility requirements or, in 1 he absence
of local codes, the Storage and Handling of Liquefied Petroleum Gases, ANS I/NFPA 58 and the Natural and
Propane lnslallation Code, CSA 8149.1.
• Always maintain proper clearance from combustible materials. Minimum clearance from combustibles: side
& rear: 36" (91 cm); top: 36" (91 cm); ont: 60" (152 cm); floor: O" when installed on 20Ib tank.
• The hose assembly should be visually inspecled prior lo each use of the heater. If i1 is evident that there
is excessive abrasion or wear, or 1 he hose is cut, it must be replaced prior to the heater being put into
operation. The replacement hose assembly must be the exact replacement.
RNING: NEVER USE AN OPEN FLAME TO CHECK FOR LEAKS.
RNING: Burner and Burner Guard s
h
ou
l
d a
l
ways
f
ace away fro
m
propane (LP) tank shut-o and regulator.
RNING: Improper installation, alteration, seice or maintenance can cause prope damage, inju or
death. Read the installation, operating and maintenance instructions thoroughly before installing or seicing
this equipment.
RNING: Do not cover air inlet holes in mixing tube.
RNING: Make sure there is no open flame in the area. Fully open the propane tank valve.
VENTITION: Always be sure to supply proper ventilation while operating this heater.
Provide a minimum of 1/2 square foot (0.047 square meter) opening for fresh air supply for 15,000 BTU's of
heat and one square foot (0.10 square meter) opening for 30,000 BTU's of heat.
8
ASSEMB
PRODUCT FEURES
• Portable & Stable • Safe Shuto System • Wind Resistant
Tools Required: Phillips Head Screwdriver
ASSEMBLY FOR SUAL BURNER
• Match lgn Ilion
The tank collar bracket must be assembled before the heaters can be attached to the propane tank.
1. Align bolt holes in tank collar bracket with bolt holes in center plate on manifold.
2. Drive-in two machine screws (supplied) into the bolt holes aaching tank collar bracket to center plate on
manifold using phillips head screwdriver. (Fig. 1)
NK COLR
BRACKET
.
Mine
ws
Mounting Knob
I,
Man�old
HEATER CK
G u n re-
Fu Connecting N
{Handle)
This heater requires a 20 lb. propane (LP) tank for operation (not included).
Use of this heater with any other propane (LP) tank is not recommended and can be dangerous.
The propane (LP) gas pressure regulator and hose assembly of 30K BTU mode
l
s supplied w
i
th the heater
must be used w
i
thout alteration. T
h
e
h
ose assemb
l
y must be v
i
sua
ll
y inspected prior to each use of the
heater. If it is evident that there is excessive abrasion, wear or the hose is cut, must be replaced prior to the
heater being put into operation.
5
-
PRODUCT INFORMATION/ ASSEMB
The propane (LP) gas tank must also be equipped with the following:
• A collar to protect the propane (LP) gas valve.
•
A shuto valve terminating a propane (LP) gas tank valve outlet as specified in the American National
Standard for Compressed Gas Cylinder Valve Outlet and Inlet Connections
• A safety relief valve having direct communications with the vapor space of the tank.
• An arrangement of vapor withdrawal.
• Do not use this heater for heating human living quarters.
• Do not use in unventilated areas.
• The flow of combustion and ventilation air must not be obstructed.
• Proper ventilation air must be provided to support the combustion air requirements of the heater being used
as listen in this manual.
• Lack of proper ventilation air will lead to improper combustion.
• Improper combustion can lead to carbon monoxide poisoning leading to serious inju or death. Symptoms
of carbon monoxide poisoning can include headache, dizziness, burning eyes and nose, nausea, dry mouth
or sore throat and difficulty in breathing.
Propane (LP) Fuel Gas Odor:
Propane (LP) gas and natural gas have man-made odorants added specifically for detection of fuel gas leaks.
It can be described as a "roen egg" smell. If a gas leak occurs you should be able to smell the fuel gas. Since
propane (LP) is heavier than air you should smell for the gas odor low to the floor.
• Do not take any action that could ignite the fuel gas. Do not operate any electrical switches. Do not pull
any power supply or extension cords. Do not light matches or any other source of flame. Do not use your
telephone.
• Get eveone out of the building and away from the area immediately.
• Close all propane (LP) gas tanks.
• Propane (LP) gas is heavier than air and may sele in low areas. When you have reason to suspect a
propane leak, keep out of all low areas.
• While outside the building call your fuel gas supplier and your fire depament. Do not re-enter the building
or area in question.
•
Stay out of the building and away from the area until declared safe by the firefighters and your fuel gas
supp
li
er.
• Be sure to have the fuel gas service person and the firefighters check for escaped gas. Have them air out
the building and area before you return. Properly trained service people must repair any leaks, check for
fuher leakages, and then have them relight the appliance for you.
• Turn heater gas valve knob and gas tank valve to OFF position.
• Thread POL fiing into interior threads of propane (LP) tank valve. This fiing has LEFT-HANDED THREADS
(reversed). Turn POL fitting COUNTER CLOCKWISE to tighten and CLOCKWISE to loosen. Protect POL
fitting from damage when disconnected from tank.
•
Have tank lled by your local Propane gas supplier.
• Some propane (LP) tanks have a bleed-o valve. This valve should be inspected for leaks aer each lling
of the tank. Turn clockwise to close the valve.
• Fasten full propane (LP) tank and connect POL filling to tank valve by turning COUNTER CLOCKWISE .
• With heater gas valve knob still in the OFF position, turn ON tank valve and check all gas connections with
a 50/50 liquid dish soap and water solution to be sure they are tight and leak proof. The formation of bubbles
indicate a gas leak. Correct all leaks before using the heater. Never use a flame to check for gas leaks.
6
CONNECTION
Read and understand all safety information before connecting heater to propane tank.
1. Make sure heat regulator knob is in the OFF position.
2. (Applies to dual burner model only). Place heater onto tank with tank collar bracket over tank collar
(Fig. 1) Mounting bolt knob should be positioned to the outside of tank collar. (Fig. 1)
3. (Applies to dual burner model only). Firmly secure to tank by hand-tightening mounting bolt knob. Do not
oveighten mounting bolt knob.
For single and double burner models, insert heat regulator valve connector into propane (LP) tank's valve
outlet fitting and turn Fuel Connecting Nut le (reverse thread, turn counterclock-wise) until fully tightened .
No wrench is required.
Applies to single burner model only). Loosen wing bolt and slide support bracket (Fig. 3) down until the base
al the bracket seats lirmly on the tank to support the burner.
6. Open propane (LP) tank valve slowly.
7. Check all fittings for leaks. Apply a 50/50 mixture of liquid dish soap and water to all joints. Bubbles forming
show a leak. Correct all leaks at once.
WARNING: NEVER USE AN OPEN FLAM E TO CHECK FOR LEAKS.
Always remove propane tank from heater after each use following the guidelines in this manual. Do not store
heater while attached to propane (LP) tank.
RNING: Always maintain proper clearance from combustible materials. Mini mum clea ranee from
combustibles: side & rear: 36" (9 1 cm); Top: 36" (91 cm); Front: 60" (1 52 cm); Floor: O" when installed on
201 b. tank.
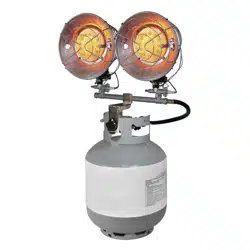
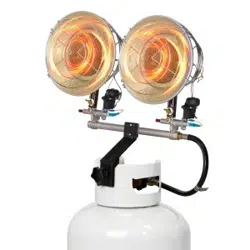
96961
HEATER BACK
Inlet Connelor
Heal Regulator Valve --
Fuel Connecting Nut ------�
(Hdl&)
7
-Flan1e Sensors
Tank Collar
Bracket
lgnilio
Hole
Propane Tank Valve