
1
EN
Service & Support
Product Manual updated to April 2026
Designs and specifications are subject to change without notice.
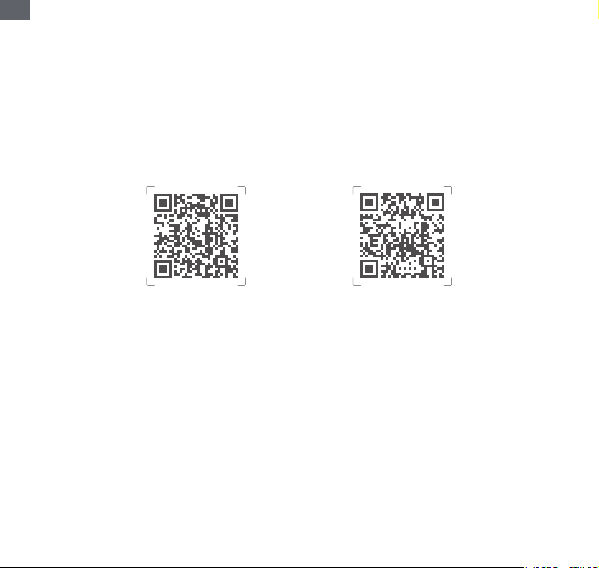
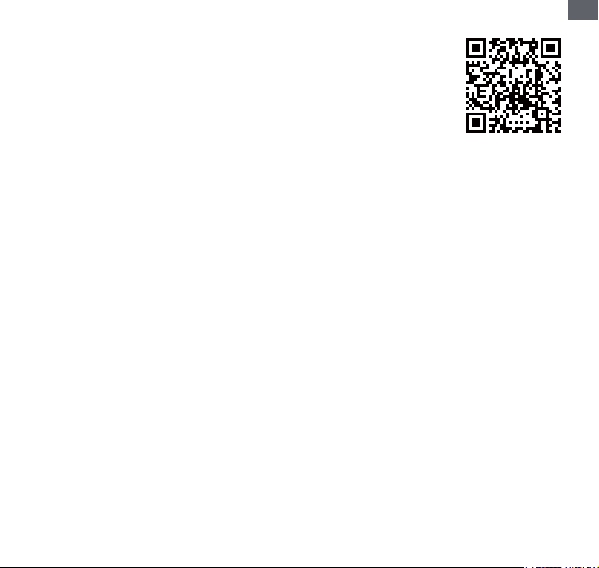
For the latest company and product information, please scan the “Service & Support” QR code.
Download APP
2
EN
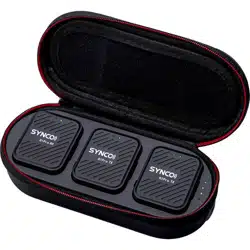
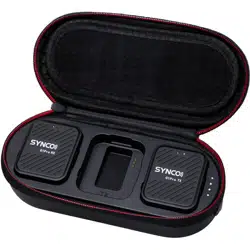
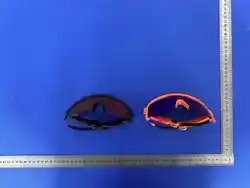
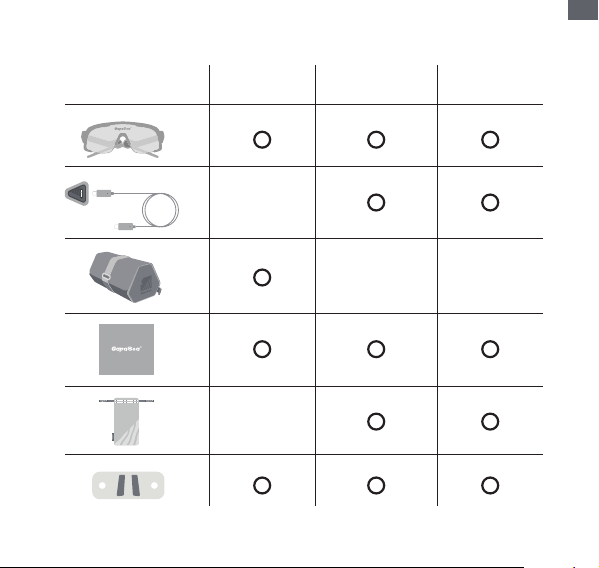
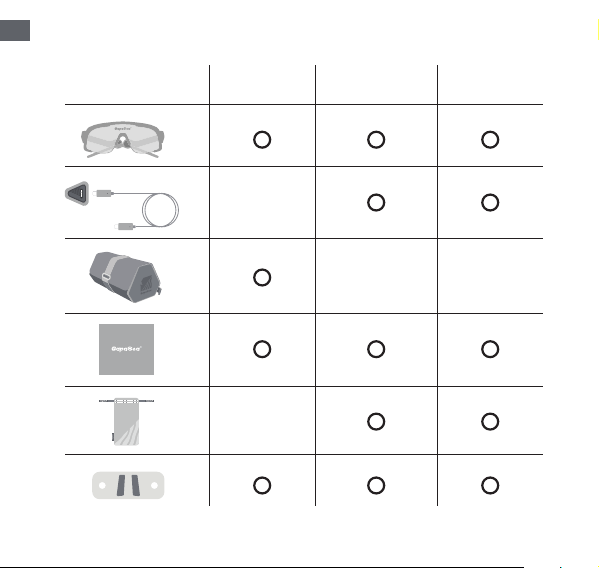
Items Included Flagship ZEISS Classic

3
EN
Operating Instructions
4
EN
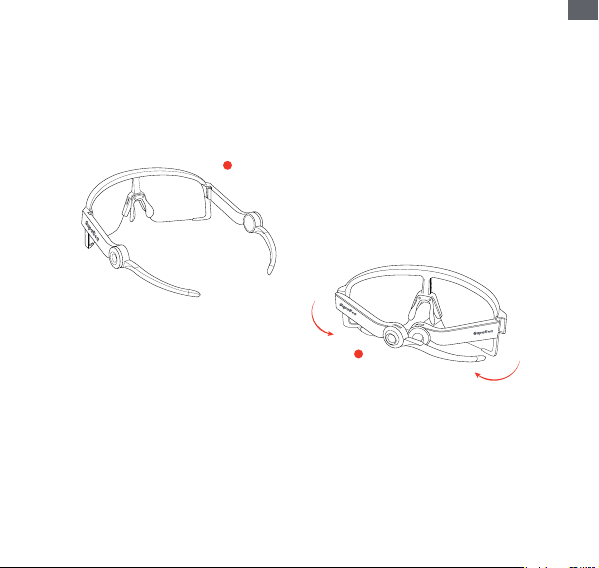
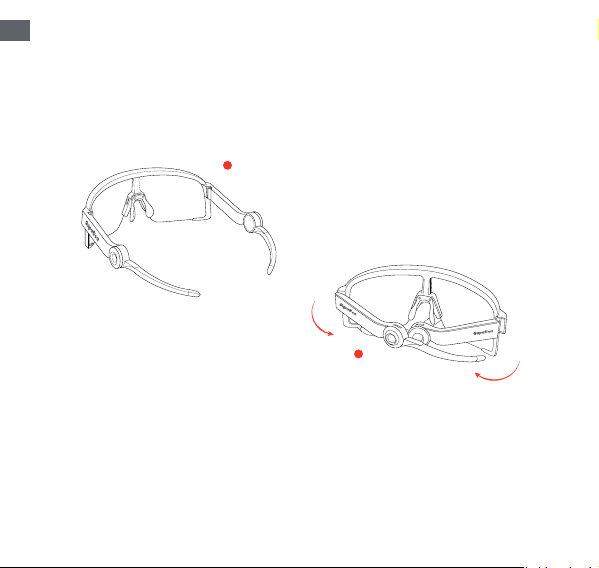
Power On
Fold the Temples to Power Off
Take the glasses out of the case, unfold the temples and put them on, you will hear a
short power-on prompt.
Power On/Off
5
EN
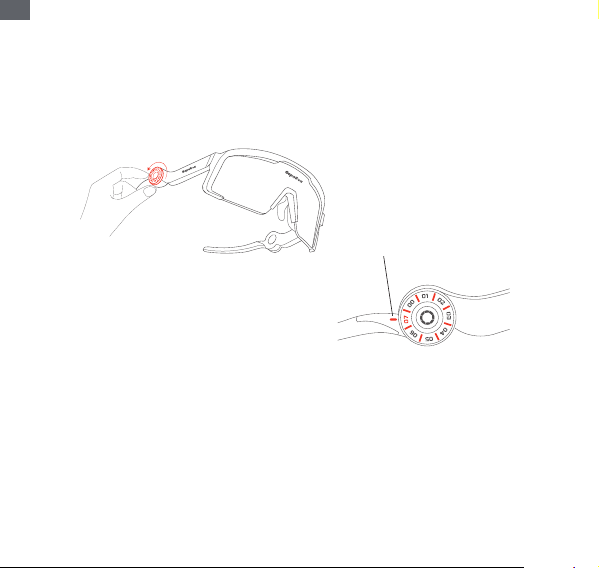
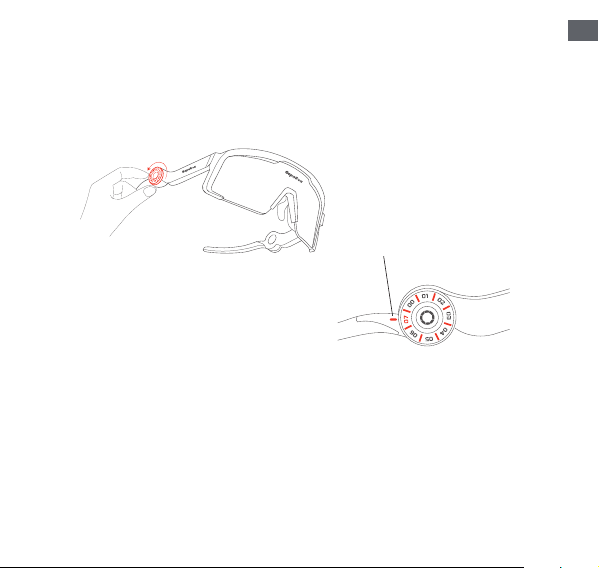
Twist the Knob
One-Twist Pairing: Simply rotate the knob to the same channel number. The glasses will
automatically establish the pairing, allowing instant communication without any setup.
Team Size: Up to 24 members per team. Any additional members will automatically form
a new, independent team.
Communication logic in paired mode: Maintain a link with any teammate’s device and
you can communicate with the entire group. To ensure communication quality, the
number of signal relay times (i.e. forwarding nodes) should not exceed 4.
Knob Pairing
6
EN
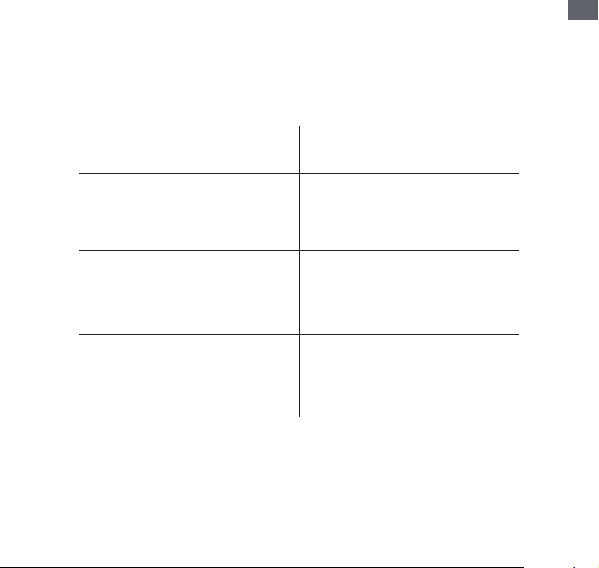
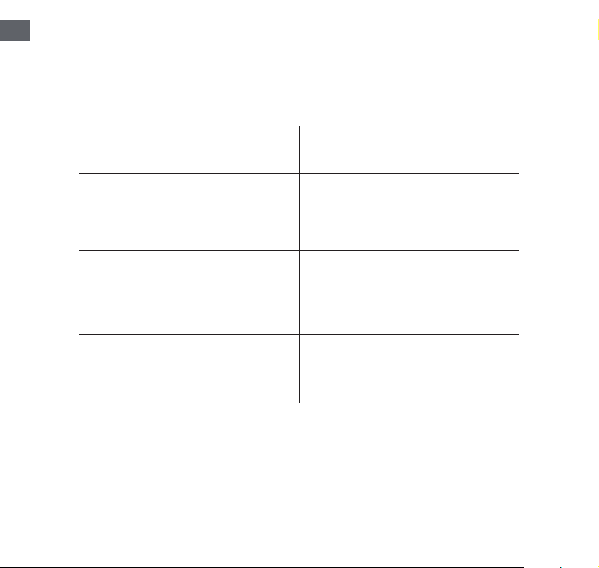
Scenario
Open area without mobile
signal, obstruction, or
interference
Urban roads without mobile
signal (with obstructions)
With mobile signal and
using GapaSea App’s range
extension function
Operational range of 1,000
meters, with a maximum
reach of up to 5,000 meters.
Operational range of 500
meters, with a maximum
reach of up to 2,500 meters
5,000 meters between any
two devices
* Communication Distance
* Communication range may vary depending on environment and terrain. The above
results are based on tests conducted under typical conditions.
7
EN
Setting
Bluetooth
GapaSea XXXX
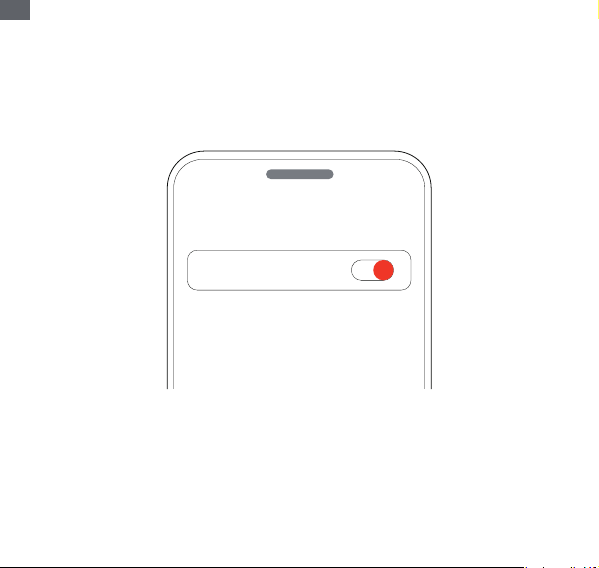
1. Take the glasses out of the case, put them on, and wait for the power-on prompt.
2. Enable Bluetooth on your phone and scan for nearby devices.
3. Default Bluetooth name: GapaSea XXXX (the last four digits refer to the SN code on
the outer package).
4. Select the device and complete the connection.
Bluetooth Connection
8
EN
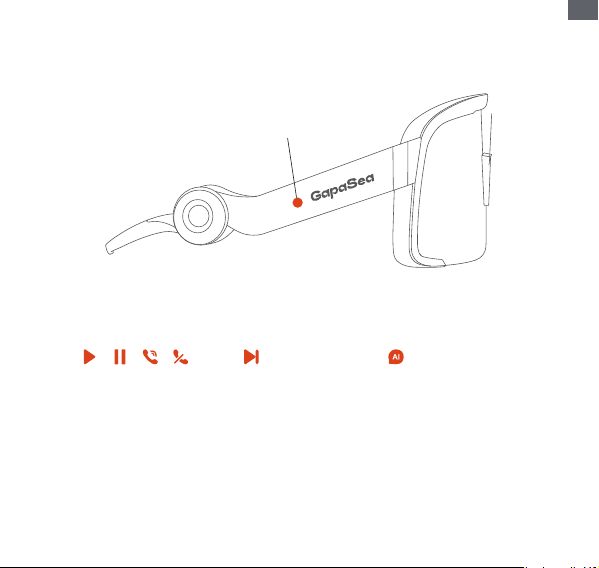
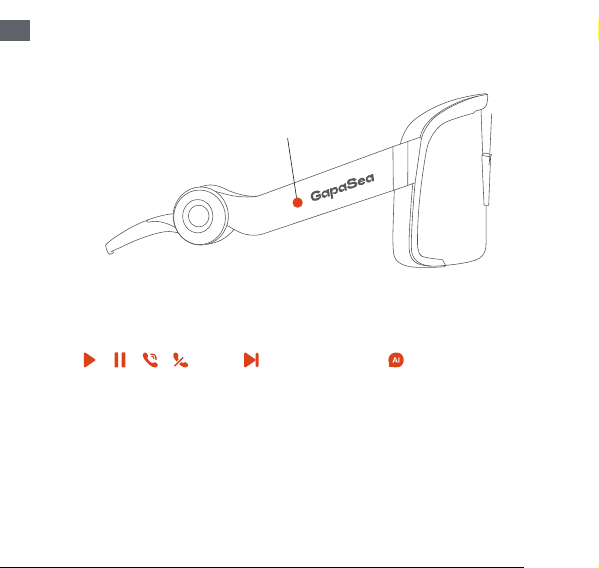
Gesture-Control Touch Button
Double-tap Triple-tap Long Press
Play / Pause Music
/ Answer / End Calls
Play Next Track
/ Decline
Active AI Assistant
(Set to Channel 00)
* Customize gestures or switch the AI assistant in the app settings after connecting.
* Once connected via Bluetooth, adjust music or intercom volume with your phone’s
volume buttons, or tap the touch-sensitive button on the right temple to control.
9
EN
Charging Case
Charging Cable
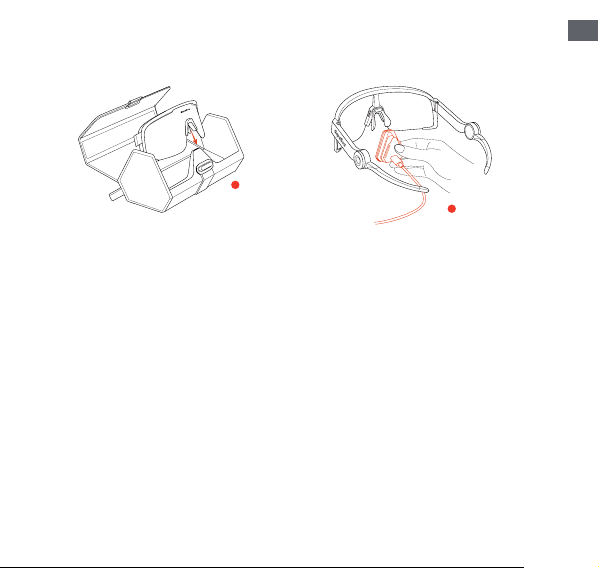
Charging with the Portable Charging Cable
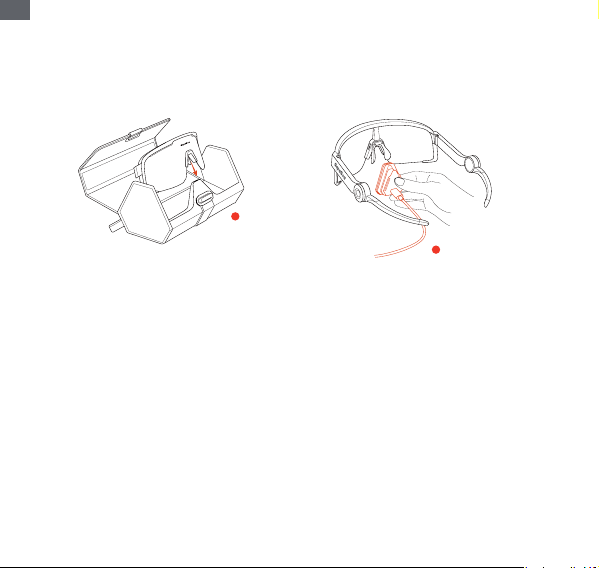
1. Connect to the glasses:
Align the magnetic charging end with the contacts on the underside of the glasses. It will
automatically snap into place.
2. Connect to power:
Plug the cable into a power adapter to begin charging.
3. Charging status indicator:
The indicator on the temple shows orange while charging and turns green when fully
charged.
4. Charging after deep discharge:
If the battery is fully drained after long inactivity, it may take a few minutes before the
indicator lights up.
Charging

10
EN
Charging with the Charging Case
1. Place the glasses:
Place the glasses in the case with lenses facing you. Align the contacts and gently press
down until secured. Charging starts automatically.
2. Glasses battery indicator (in case):
After placing the glasses in the case, the indicator light shows the current battery status
of the glasses:
● Orange: Charging
● Green: Fully charged
3. Charging case battery indicator (after removal):
When the glasses are removed, the indicator light shows the remaining battery level of
the charging case:
● Orange: Charging
● Green: Fully charged
4. Low battery warning for charging case:
If the case battery is too low, it cannot charge the glasses. Please recharge the case in
time.
11
EN
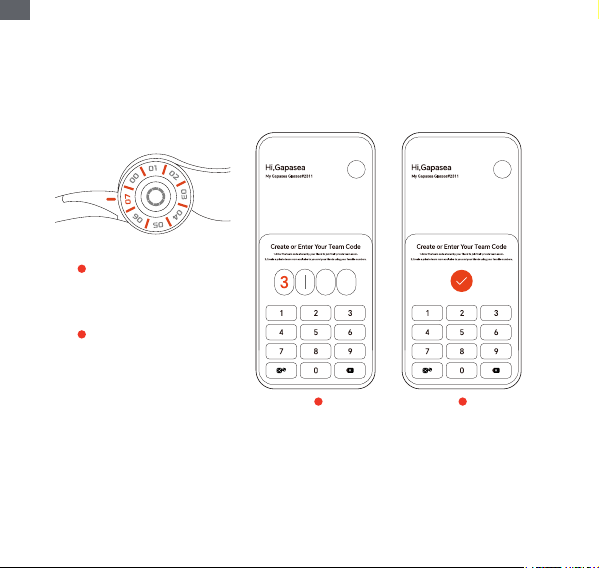
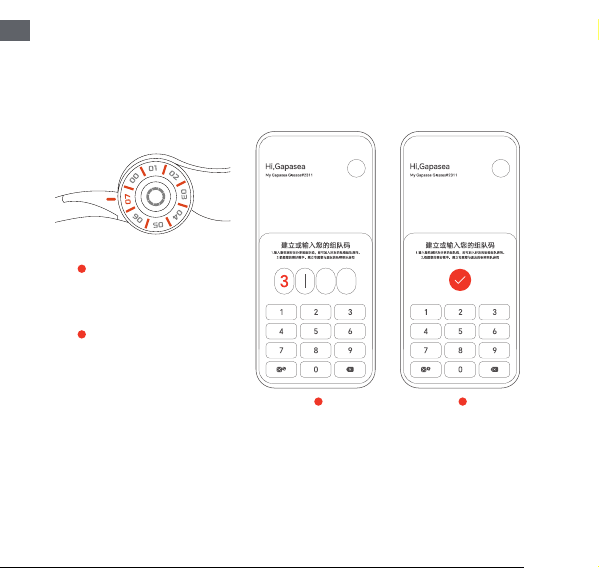
01-06
Public Channels
07
Private Channel
Enter Team Code Team successfully formed
Channel Description:
01–06 are public channels. 07 is a private channel requiring a custom team code via the
app.
Private Pairing

12
EN
Communication Logic:
Devices can form a team only when all are set to 07 and use the same team code.
Devices with different codes cannot communicate.
Setup Procedure:
Connect the glasses to your phone via Bluetooth and open the app.
Set the dial to 07 and enter the “Team” page.
Enter the agreed team code.
Devices on 07 with the same code will auto-connect.
Restoring Public Mode:
Reset the team code to “0000” to communicate with devices using the default code.
When communication is interrupted due to exceeding the range (500 m), signal
interference, or obstruction, the glasses will play a “disconnected” alert tone. In areas
with strong mobile signal, you can enable “Cellular Range Extension” to expand the
communication range up to 5 km.
13
EN
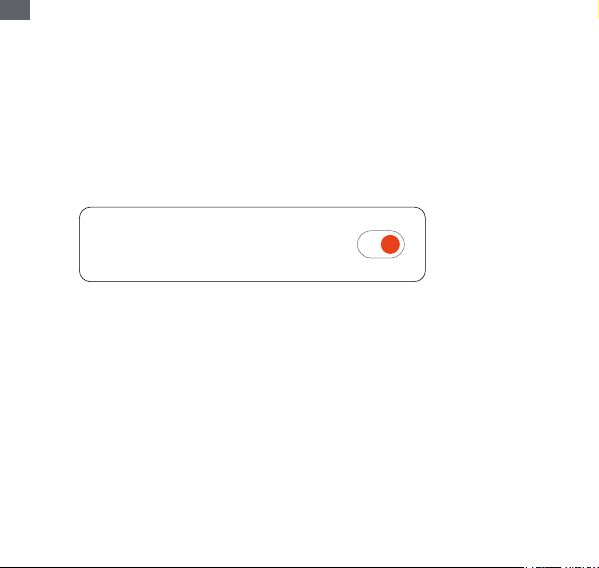
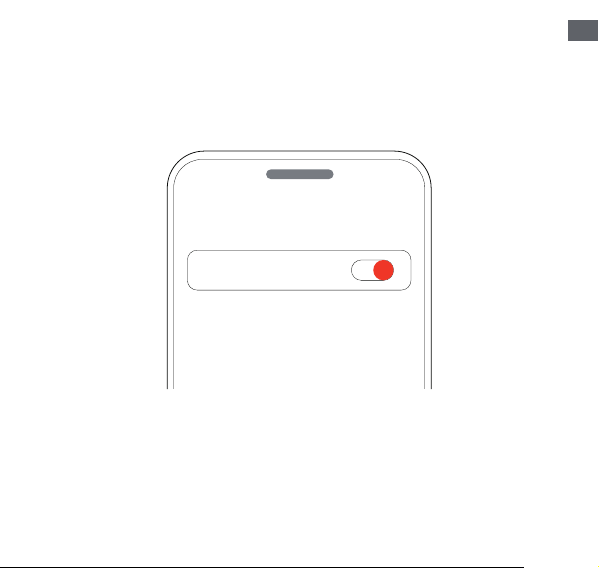
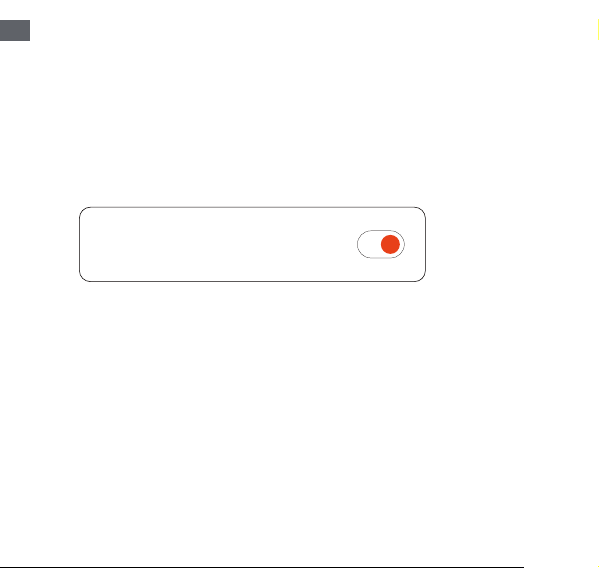
Signal Boost Switch
Communication Interruption and Signal Range
Extension
How to Enable:
1. Ensure the glasses are connected to your phone via Bluetooth and the app is installed.
2. Go to the “Team” page in the app and turn on “Range Extension”.
3. The system will automatically scan for and connect to other teams within 5 km that are
on the same channel (or using the same team code).
14
EN
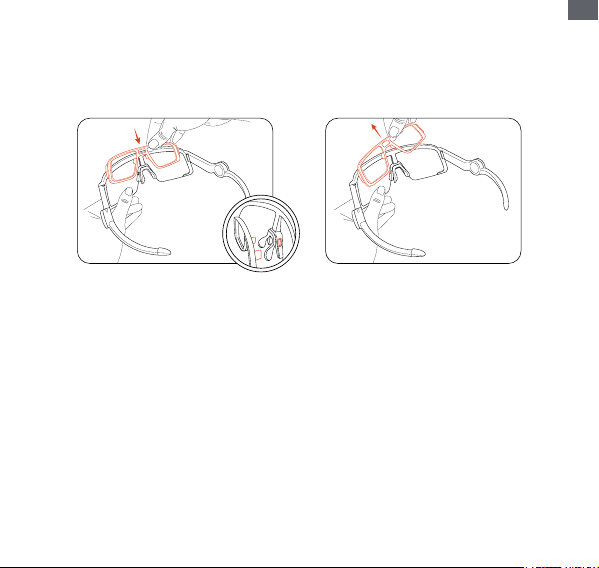
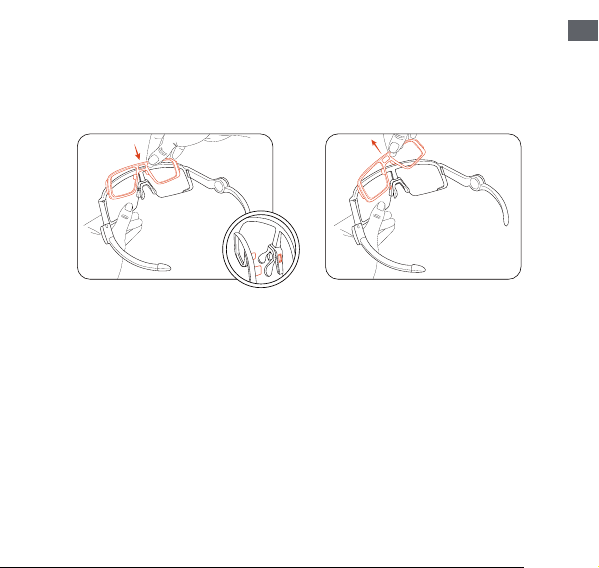
1. Components:
The prescription accessory is optional. The kit includes a prescription lens insert,
dedicated nose pads, screws, and a screwdriver.
2. Lens Instructions:
Please take the lens insert to a professional optical service provider for lens fitting.
3. Nose Pad Replacement:
The dedicated nose pads can be replaced for improved comfort.
Prescription Accessories
15
EN
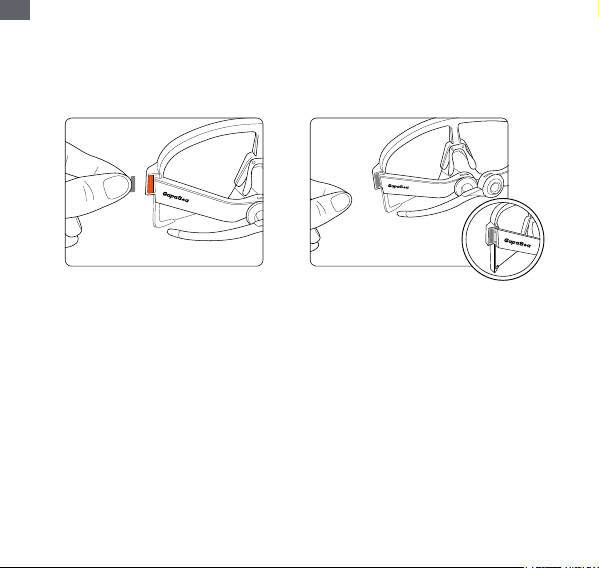
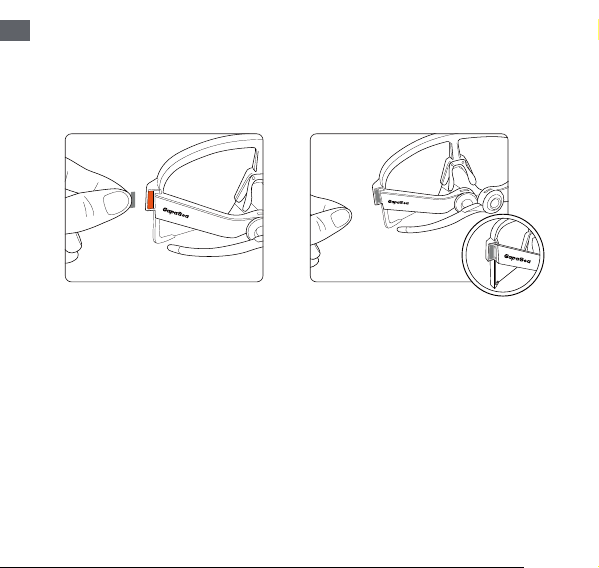
Step 1
Take one fit adjustment pad, and place
the pad between the temple arm and
frame
Step 2
Press firmly to attach
* Select the Appropriate Pad for a Comfortable Fit
Pad I —————— Fits head circumference: 56–57 cm
Pad II —————— Fits head circumference: 54–55 cm
Pad III ——————— Fits head circumference < 53cm
Fits head circumference——58cm+ (no pad required)
Fit Adjustment Pads — Installation
16
EN
Frequently Asked Questions
1. Glasses Won’t Power On
-Cause 1: Battery drained
Please charge the glasses using the included charging cable or a sufficiently charged charging case.
-Cause 2: Battery protection mode
If the device has not been used for a long time, it may enter deep sleep to protect the battery. Charge it
for a few minutes to activate, then power on normally.
2. Device Not Found via Bluetooth
-Suggestion 1: Restart the device
Ensure the glasses have sufficient battery. Fold the temples to power off, then unfold to power on.
After hearing the startup prompt, scan again on your phone.
-Suggestion 2: Disconnect from other devices
The device may already be connected to another phone. Disconnect it from that phone, or select “Forget”
in your Bluetooth settings, then try pairing again.
3. Multiple Devices Found, Unable to Identify
-Suggestion 1: Compare the list differences when turning off and restarting the device, and distinguish by
the suffix number of different Bluetooth names.
-Suggestion 2: The suffix number of the Bluetooth name is the last four digits of the SN code, which can
be found on the outer packaging.
4. How to Check Battery Level
After connecting to the official app, you can view the exact battery percentage of both the glasses and
the charging case on the home page or device management page.
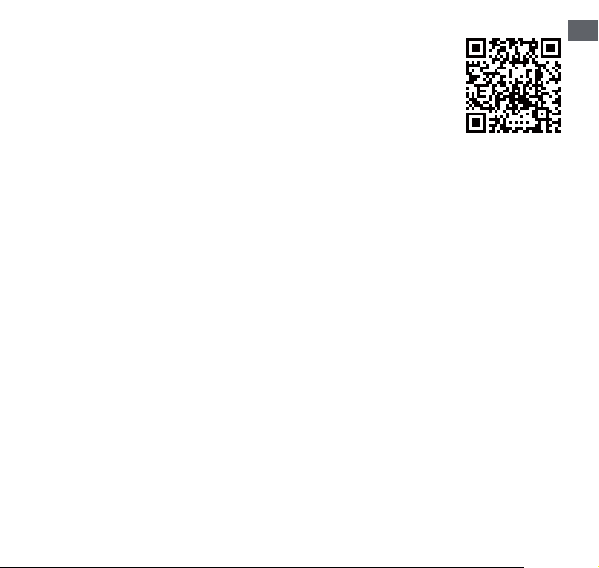
Download the App for More Functions

17
EN
5. Firmware Update Guide & Fault Recovery
During the update process, please avoid closing the glasses temple, not just touching it.
Charging Precautions
1. The device can be used normally in low-temperature environments, but battery power consumption
will accelerate.
2. Charging must be performed within the battery charging temperature range (0℃ ~ 60℃ ).
3. Do not charge the device without the nose pad installed, to avoid damage to the glasses caused by
reversed insertion of the charger.

18
EN
Specification
19
EN
Technical Specifications
Model: GapaSea G1
Glasses Dimensions: 145 0–156
Glasses Battery Type: Lithium-ion battery (160 mAh)
Glasses Charging Time: 15 mins for 0%–50%; fully charged in 60 minutes
Glasses Input Power: 5V 0.5A
Glasses Case Battery Type: Lithium-ion battery (1600 mAh)
Glasses Case Input Power: 5V 1A
Bluetooth Transmitter Frequency Range: 2.4 GHz
Operating Environment: -10℃ ~ 40℃
Hearing Loss [Warning]
1. Do not use the device at high volume for prolonged periods to avoid permanent hearing damage.
2. Turn the volume down before use, put on the device, then gradually adjust to a comfortable listening
level.
3. Do not use the device for calls or any other activities while driving.
4. Turn the volume down in hazardous environments (e.g. roads, construction sites, railway tracks, etc.) to
ensure you can hear surrounding alarms and warnings.
5. Remove the device or lower the noise cancellation volume to ensure you can hear surrounding sounds.
Proper Disposal of the Product (Waste Electrical and Electronic Equipment)
This symbol indicates that this product must not be disposed of as household waste.
It should be taken to a designated collection point.
Proper recycling helps protect natural resources, human health and the environment.
For disposal details, please consult your local municipal authorities, recycling service provider or the store
of purchase.
This product complies with RoHS requirements. This product complies with Directive 2011/65/EU and
its amendments on the restriction of the use of certain hazardous substances in electrical and electronic
equipment.
Battery Safety [Warning]
The battery may explode if exposed to fire, high temperatures, crushing or cutting.
The battery may explode or leak flammable substances if placed in extreme high temperature or extreme
low pressure environments.

20
EN
Warning: FCC and IC User Statements
(i) FCC Caution
This device complies with part 15 of the FCC Rules. Operation is subject to the
following two conditions:
(1) This device may not cause harmful interference, and
(2) this device must accept any interference received, including interference that
may cause undesired operation.
Any Changes or modifications not expressly approved by the party responsible for
compliance could void the user's authority to operate the equipment.
Note: This equipment has been tested and found to comply with the limits for a
Class B digital device, pursuant to part 15 of the FCC Rules. These limits are
designed to provide reasonable protection against harmful interference in a
residential installation. This equipment generates uses and can radiate radio
frequency energy and, if not installed and used in accordance with the instructions,
may cause harmful interference to radio communications. However, there is no
guarantee that interference will not occur in a particular installation. If this equip
ment does cause harmful interference to radio or television reception, which can be
determined by turning the equipment off and on, the user is encouraged to try to
correct the interference by one or more of the following measures:
-Reorient or relocate the receiving antenna.
-Increase the separation between the equipment and receiver.
-Connect the equipment into an outlet on a circuit different from that to which the
receiver is connected.
-Consult the dealer or an experienced radio/TV technician for help. The device has
been evaluated to meet general RF exposure requirement. The device can be used
in portable exposure condition without restriction.
(ii) IC Warning
This device complies with Innovation, Science and Economic Development Canada
licence-exempt RSS standard(s). Operation is subject to the following two condi
tions:
(1) This device may not cause interference, and
(2) This device must accept any interference, including interference that may cause
undesired operation of the device.
Le présent appareil est conforme aux CNR Innovation, Sciences et Développement
économique Canada applicables aux appareils radio exempts de licence. L'exploita
21
EN
tion est autorisée aux deux conditions suivantes:
(1) l'appareil ne doit pas produire de brouillage, et
(2) l'utilisateur de l'appareil doit accepter tout brouillage radioélectrique subi, même
si le brouillage est susceptible d'en compromettre le fonctionnement.
RF Exposure InformationSAR compliance is based on a separation distance of 0mm between the unit and
the
body of the user.
La conformité au SAR est basée sur une distance de séparation de 0 mm entre
l’appareil et le corps de l’utilisateur.
Industry Canada Statement
CAN ICES (B)/NMB (B)
Product Service Policy
From the date of purchase through the Company’s authorized distribution channels (based on the
invoice), in the event of product malfunction, the consumer shall be entitled to 7-day return and refund,
15-day exchange, and 365-day free repair services upon presentation of an inspection certificate issued
by the manufacturer’s authorized service center. This policy applies only to the Chinese mainland.
Notes
For detailed after-sales policies, please visit: https://www.gapasea.com
Customer Service Hotline:
Mainland China: 400-070-0882 Other Regions: +1 (310) 405 9883 (HK)
Glasses Certification
Glasses Case Certification
* Use CCC-certified adapters or manufacturer-provided power/charging accessories.
22
SC
咨询客服 / 服务支持
产品手册更新至 2026 年 4 月
设计和规格若有变动,恕不另行通知
最新公司及产品信息,请扫描“服务支持”二维码查看最新动态
下载 App
23
SC
包装清单 旗舰套装 蔡司限定套装 经典套装

24
SC
操作说明
25
SC
开机
合上镜腿关机
把眼镜从眼镜盒取出,打开镜腿佩戴好,即可听到开机提示音。
开机 / 关机
26
SC
档位旋钮
转动旋钮组队:旋转右镜腿上的频道旋钮,将其调整至相同频道,即可与附近的 GapaSea
Glass 自动组队,建立语音通信。单支队伍人数上限为 24 人。
若附近相同频道的设备数量超过上限,系统将自动创建多支独立队伍。
组队状态下,您只需与队伍中任意一台设备保持连接,即可与全队成员进行通信。为确保
通信质量,信号中转次数(即转发节点数)不超过 4 个。
旋钮组队
27
SC
场景
无手机信号,无遮挡
无干扰的宽阔场地
无手机信号的城市道路
(有遮挡)
有手机信号且使用
GapaSeaApp 增程功能
点对点 1000 米
最大组队首尾距离 5000 米
点对点 500 米,最大组队
首尾距离 2500 米
任意两点距离 5 公里
* 通信距离
* 对讲通信距离受环境和地形影响并不一致,以上为典型场景实测结果
28
SC
设置
蓝牙
GapaSea XXXX
1. 从眼镜盒取出眼镜,佩戴眼镜,稍等即可听到开机提示音
2. 手机打开蓝牙,并扫描附近设备
3. 默认蓝牙名称是 GapaSea XXXX,尾号详见外包装 SN 码的后四位
4. 选择并完成连接
蓝牙连接
29
SC
轻触圆点
双击 三击 长按
播放 / 暂停音乐接听
/ 挂断电话
播放下一首 / 拒接 唤醒 AI 助手(需在 00 档操作)
* 连接 APP 后可在设置页自定义手势或更换 AI 助手
* 连接手机蓝牙后,既可通过手机音量键调节音乐或组队音量,也可轻触右侧镜腿的触摸
按钮进行操作。
30
SC
眼镜盒
充电线
使用便携充电线直接充电
1. 连接眼镜:将充电线带有金属触点的一端,对准眼镜下方相应的充电触点。接触后,磁
吸充电接头将自动吸附并卡紧。
2. 连接电源:连接至电源适配器即可开始充电。
3. 充电状态指示:充电过程中,镜腿上的指示灯将显示为橙色;当电量充满后,指示灯将
转变为绿色。
4. 深度放电后充电:若设备因长时间未使用导致电量完全耗尽,接入电源后需充电数分钟,
指示灯才会正常点亮。
使用充电盒充电
1. 放置眼镜:将眼镜镜片朝向自己,放入充电盒内。确保盒内充电触点与眼镜下方的金属
触点准确对准,并轻轻向下按压直至卡位固定,充电随即开始。
2. 眼镜电量指示(入盒时):放入眼镜后,充电盒指示灯颜色代表眼镜的当前电量状态:
●橙色:正在充电中
●绿色:电量已充满
3. 充电盒电量指示(取出后):当眼镜从盒中取出后,充电盒指示灯颜色代表充电盒自身
的剩余电量:
●橙色:正在充电中
●绿色:电量已充满
4. 充电盒低电量提示:当充电盒自身电量过低时,将无法为眼镜进行充电,请及时为充电
盒补充电量。
充电
31
SC
01-06
公共频道
07
私密频道
输入组队码 组队成功
频道说明:
组队旋钮的 01-06 档为公共频道;07 档为私密频道,需要通过手机 APP 自定义组队码。
私密组队

32
SC
通信逻辑:
仅当两台或多台设备均处于 07 档,且组队码完全一致时,方可成功组队。私密组队不与其
他 07 档设备(组队码不同)互通。
设置流程:
1. 确保眼镜与手机已成功建立蓝牙连接,并打开 APP。
2. 将组队旋钮调整至 07 档,进入 APP 的 “组队” 页面。
3. 在界面中输入您与队友约定的自定义组队码。
4. 附近同样处于 07 档并输入相同组队码的 GapaSea Glass 将自动完成组队。
恢复公共模式:
07 档的默认组队码为 “0000”。若需恢复与所有使用默认组队码(0000)的 07 档设备互通,
请在 APP 中将组队码重置为 “0000”。
当因距离超出通信范围(500 米)或受信号干扰、遮挡导致组队通信中断时,眼镜将发出 “落单”
提示音。在手机信号良好的环境下,您可开启 “手机信号增程” 功能,将组队通信范围扩展
至 5 公里。
33
SC
信号增程开关
通信中断与信号增程
启用方式:
1. 确保眼镜与手机保持蓝牙连接,并已下载安装 APP。
2. 在 APP 的组队页面中,开启 “信号增程” 开关。
3. 系统将自动扫描并连接 5 公里范围内,处于相同频道(或使用相同组队码)的其他队伍。
34
SC
1. 组件内容:近视配件为可选组件,套装内包含:近视镜框夹片、专用鼻托、配套螺丝及
螺丝刀。
2. 镜片说明:请携带镜框夹片至专业机构验配镜片。
3. 鼻托更换:为提升舒适性,支持更换专用鼻托。
近视配件
35
SC
第一步
取出一片垫片 ( 垫片区分左右 ),将垫片
贴在镜腿与镜框的夹缝位置
第二步
按压固定,垫片即可稳固贴合
* 选择合适的垫片,让佩戴更舒适
I 号垫片 —————————— 推荐头围 56–57 cm
II 号垫片 —————————— 推荐头围 54–55 cm
III 号垫片 ——————————— 推荐头围< 53cm
原始镜框适配头围 ————— 58cm+ ( 无需垫片 )
垫片使用指南
36
SC
常见问题
1. 眼镜无法开机
- 原因一:电量耗尽
请使用随附的便携充电线或电量充足的充电盒为眼镜充电。
- 原因二:电池保护模式
若设备长时间未使用,电池将自动进入深度休眠状态以保护电池。请先充电数分钟,待其激活后即可正常开机。
2. 蓝牙无法搜索到设备
- 操作建议一:重启设备
请确保眼镜电量充足,闭合镜腿使其关机,然后重新展开镜腿开机。在听到开机提示音后,于手机端重新扫描。
- 操作建议二:解除占用
设备可能已与其他手机配对。请在该手机上断开蓝牙连接,或于本机蓝牙设置中将其忽略,然后重新尝试配对。
3. 搜索到多个设备,无法分辨自己的设备
- 建议操作一:对比关闭和重开时的列表差异,根据不同的蓝牙名称尾号区分
- 建议操作二:蓝牙名称尾号是 SN 码后四位,SN 码可在外包装处获得
4. 如何查看设备电量
将设备与官方 APP 连接后,可在 APP 首页或设备管理页面查看眼镜及充电盒的精确剩余电量百分比
5. 固件升级指南与故障恢复
升级流程中,请避免“关闭眼镜镜腿”,而不是“触碰”
充电注意事项
1. 在低温环境下可以正常使用,但电池电量消耗会加快
2. 充电需要在电池充电温度范围内进行(0℃ ~60℃)
3. 不要在卸下鼻托的情况下充电,避免因反插充电器导致的眼镜损坏
下载 APP 发现更多功能

37
SC
产品规格说明书
38
SC
技术规格
型号:GapaSea G1
眼镜尺寸:145 0-156
眼镜电池类型:锂离子电池(160 mAh)
眼镜充电时间:15 分钟 0%->50%,总计 60 分钟充满
眼镜输入功率:5V 0.5A
眼镜盒电池类型:锂离子电池(1600 mAh)
眼镜盒输入功率:5 V 1A
蓝牙发射器频率范围:2.4 GHz
使用环境:-10℃ ~ 40℃
听力损伤【警告】
1. 请勿长时间以较高音量使用设备,以免造成永久性听力损伤。
2. 使用前先将音量调低,戴上后再逐渐调至舒适的聆听水平。
3. 驾驶时请勿使用设备进行通话或任何活动。
4. 危险环境下请调低音量(如交通道路、建筑工地、铁路旁等),确保能听到周围警报及警示声。
5. 取下设备或调低降噪音量,确保能听到周围声音。
正确处置本产品 ( 废弃电子电气设备 )
该符号表示产品不能作为生活垃圾丢弃,而是应该送往适当的收集设施进行
回收。
正确的处置和回收利用有助于保护自然资源人类健康和环境。关于本产品处
置和回收的详细信息 , 请与您当地的市政管理机构、处置服务机构或您购买
此产品的商店联系。
电池安全警告【警告】
电池投入火中、高温环境,或挤压、切割,可能爆炸;
电池置于极端高温 / 极端低压环境,可能爆炸或泄漏易燃物。
产品服务政策
自消费者在本公司授权经销渠道购机之日起(以发票为准),如有产品故
障,凭厂商授权服务中心的检测证明,享受 7 日退换货,15 日换货,365 日免
费维修三包服务。仅适用于中国大陆地区。
39
SC
产品保修卡
用户信息
姓名:
电话:
邮箱:
邮编:
地址:
产品信息:
设备型号:
产品序列号:
注意事项
中国大陆地区(适用于 “三包” 政策):
根据国家“三包”规定,您必须完整填写本凭证并与购买发票原件同时出示方可享受售后服务(设备因无机身
编号,需提供完整外包装)。请务必索取合法发票并请经销商在凭证上盖章。凭证内容与实物不符、涂改、
或机身编号缺失 / 非授权渠道销售的产品,均不提供售后服务。非自营渠道购买的退货业务由原销售方承担
“三包”责任。
其他地区(适用于有限保修政策):在中国大陆以外地区购买的产品,其售后与退换货服务受当地法律及授
权经销商政策约束。产品享受为期一年的有限保修服务(非人为损坏)。如需办理退换货,请直接联系您的
原购买渠道或当地经销商。
详细售后政策请参考 : https://www.gapasea.com
客服热线
中国大陆 : 400-070-0882 其他地区 : +1 (310) 405 9883 (HK)
眼镜认证
眼镜盒认证
* 若使用电源适配器,请确保其通过中国强制性产品认证(CCC 认证)并符合相关标准,或使用制造商提供
的电源适配器和 / 或充电线。