Desktop Digital Signage
Product User Manual
1.1
Catalogue
Ⅰ Attention
Ⅱ Component Introduction
Ⅲ Specications
Ⅳ Introduction of Button and Inteaces
V Send programs via LedA
VI Play programs via USB ash drive
1
2
3
4
6
13
1
1. Attention
3.Specications
CPU
RAM
ROM
System Version
Language
Touch screen
Panel
Resolution
Contrast
Screen scale
Video
Audio
Picture
USB
RJ45
Power suppply
Camera
Speaker
Working Temperature
Adapter
User Manual
Inteace
Other parameters
Attachment
System
Display
Multi-Media
A133 quad core 64 bit Coex-A53
2 GB
32 GB
Android 10
Default English,and multiple language suppoed
10-Point capacitive touch
10.1" high-denition full view screen
800×1280
85/85/85/85(L/R/U/D)
1000�1
16:10
MPEG-1, MPEG-2, MPEG-4, H.263, H.264, RV, etc.
MP3, WMA, AAC , etc.
JPEG、JPG
×2
×1
AC 100-240V 50/60Hz
Standard 2.0MP pixel camera
2W*2
0℃---50℃
12V/2A
×1
Viewing angle
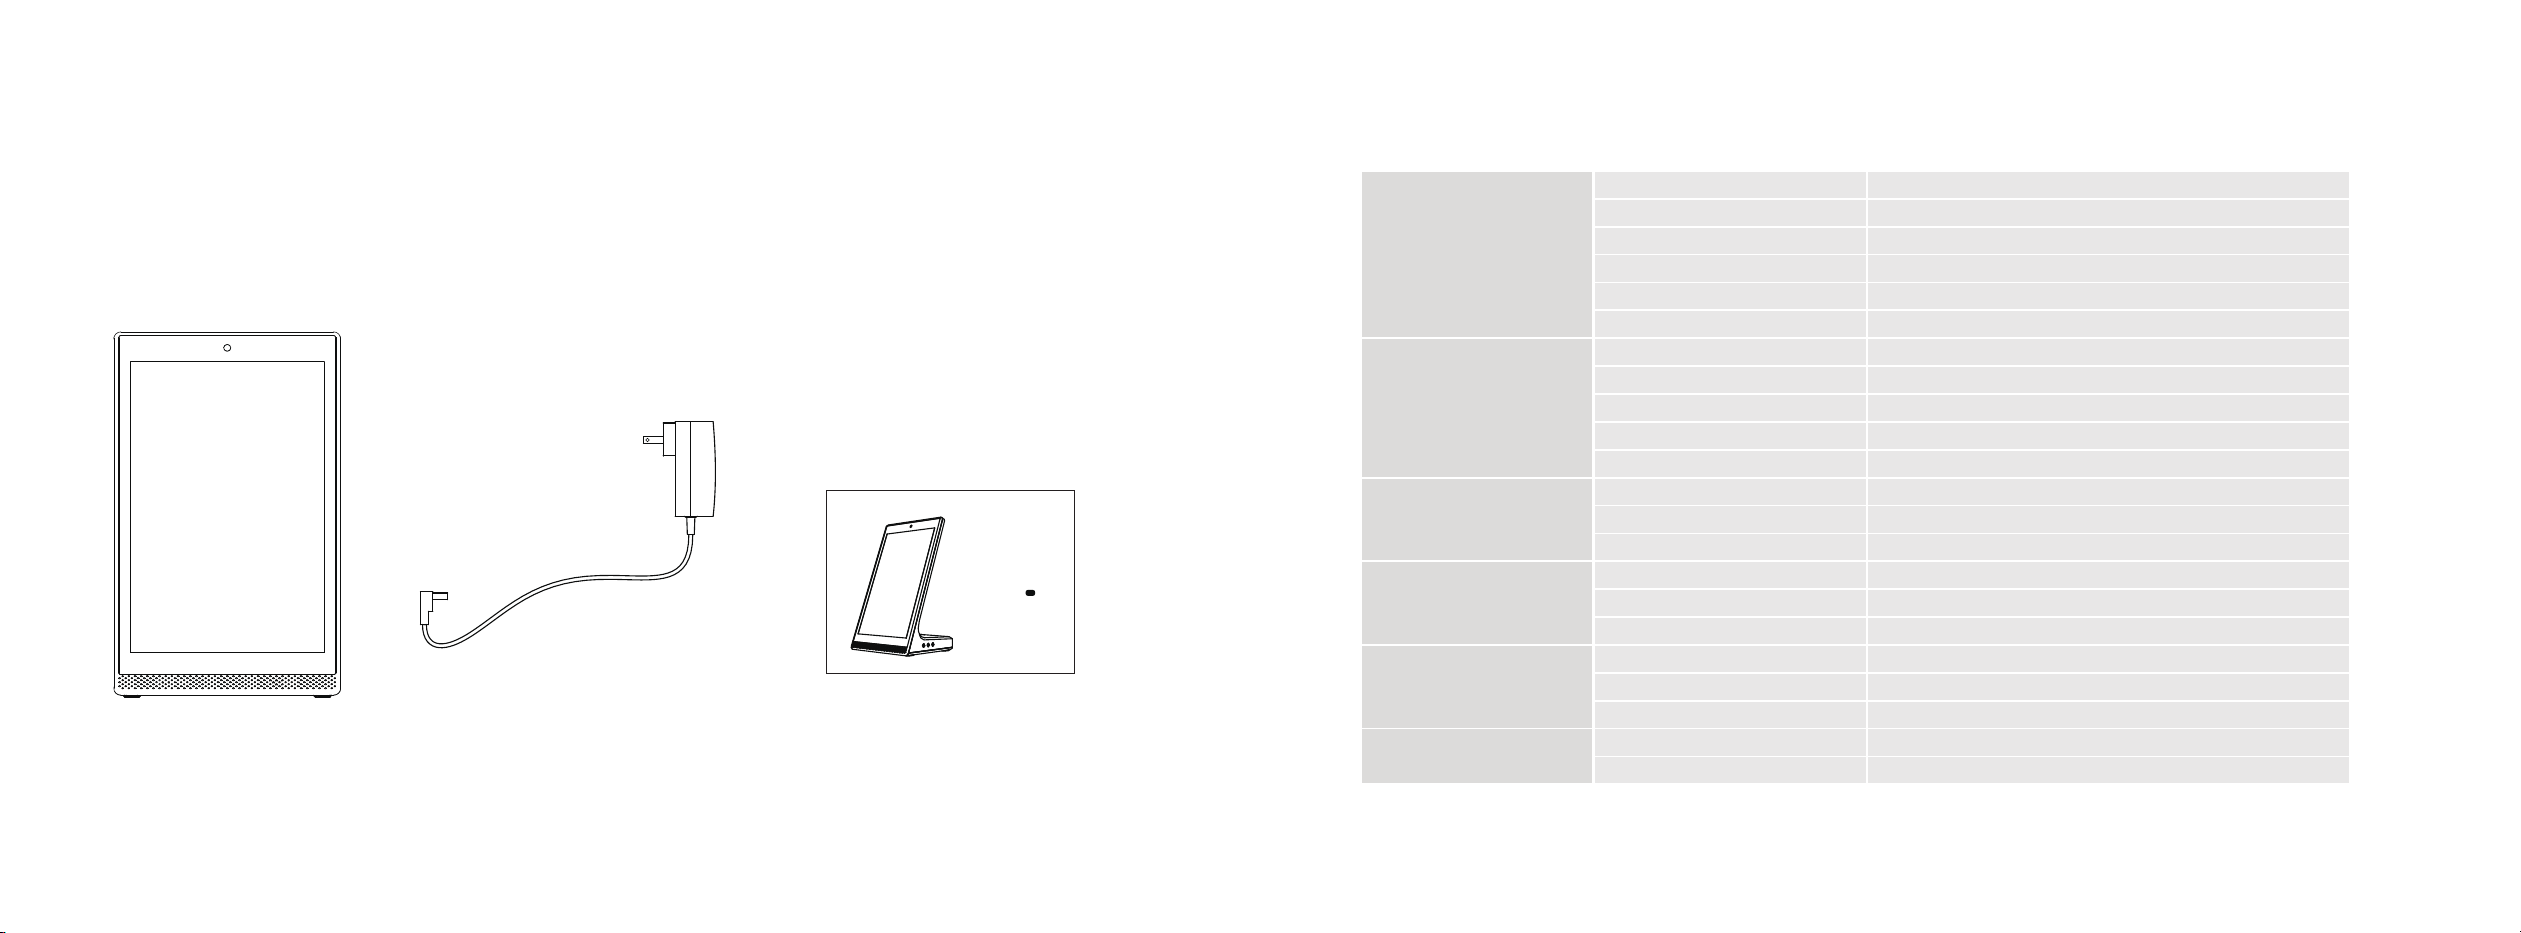
The attachments received are subject to
Digital Signage
Instructions
2.Component Introduction
Power adapter
3
2
Desktop Digital Signage
Product User Manual
1.0
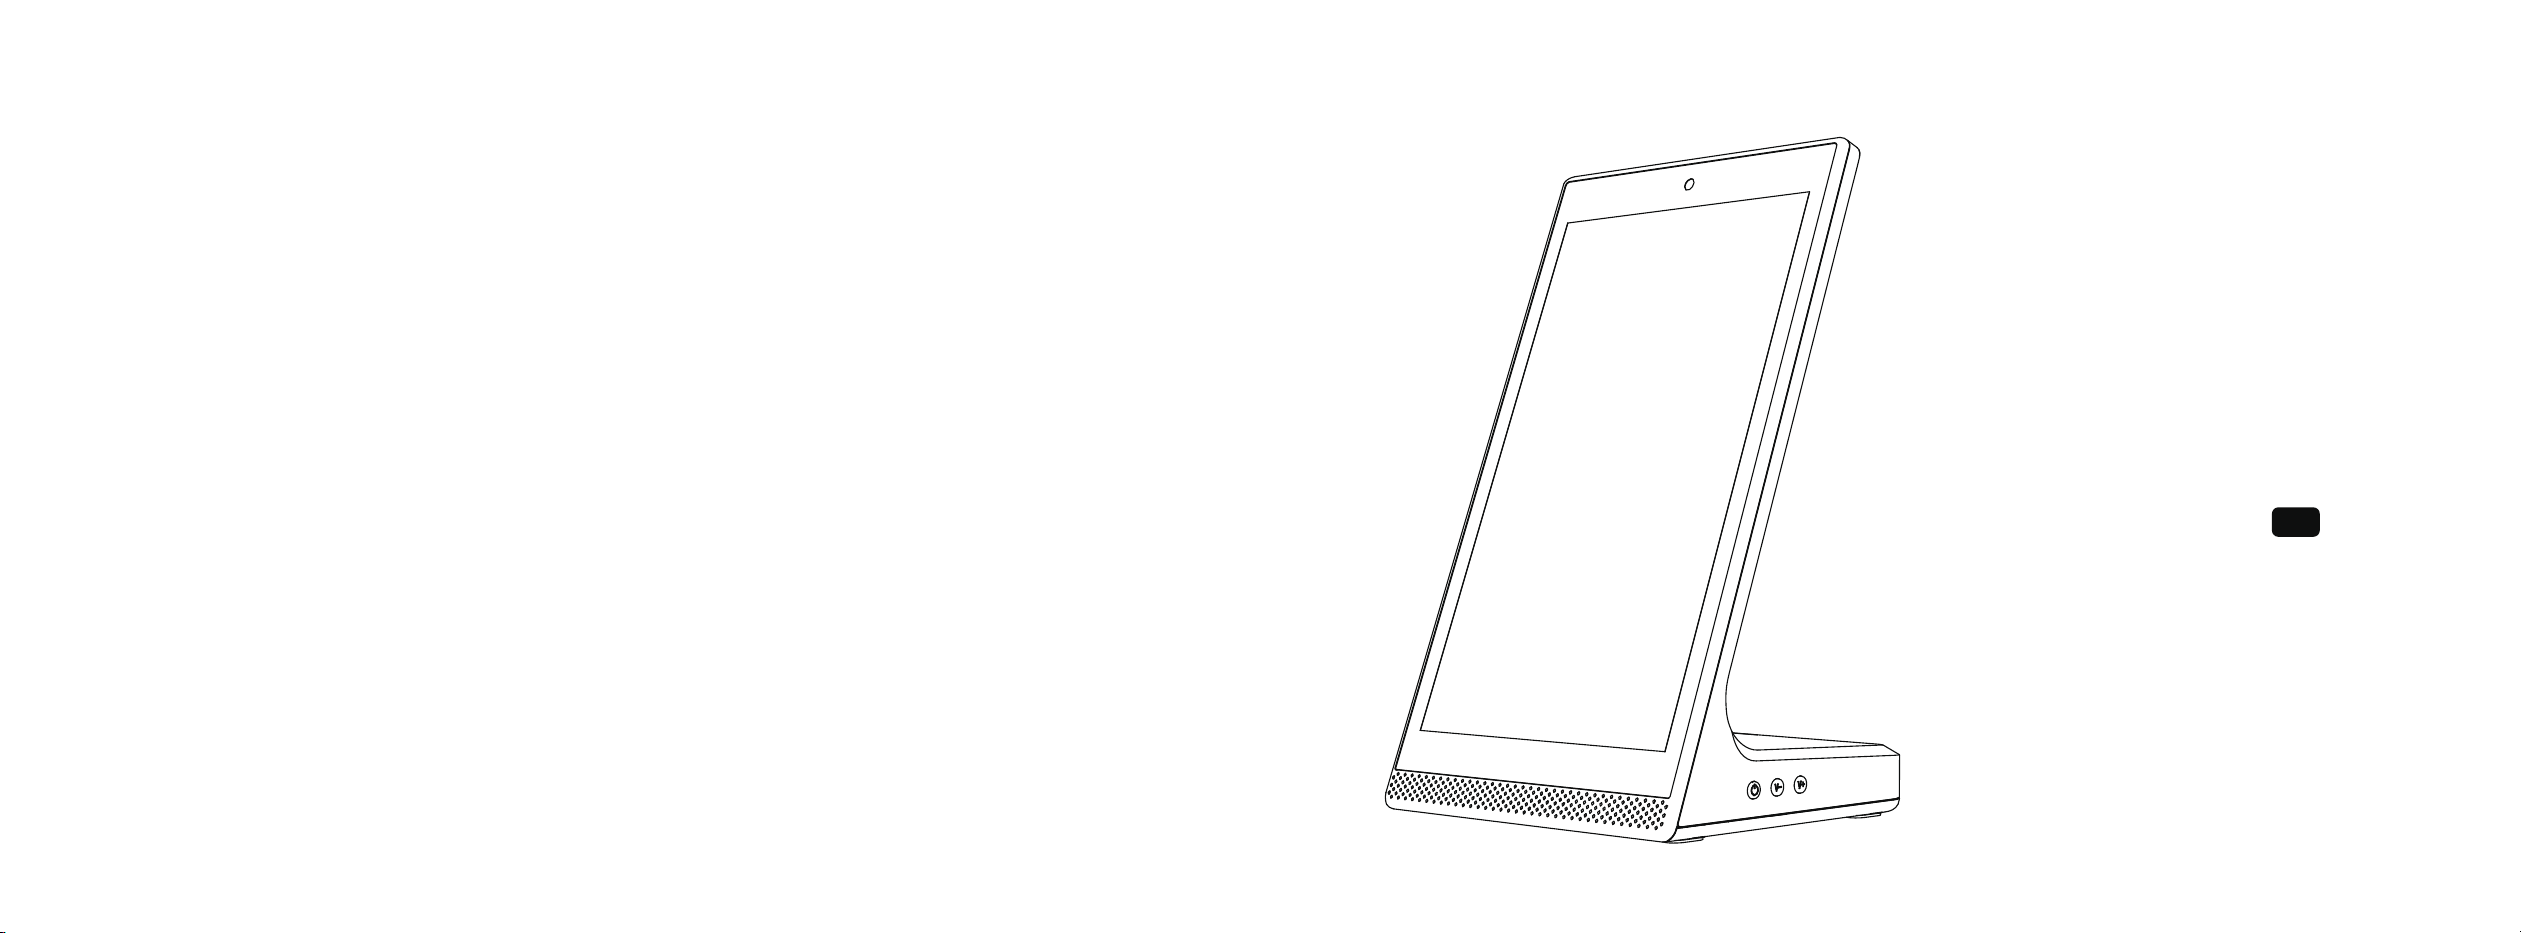
4.Introduction of Buttons and Inteaces
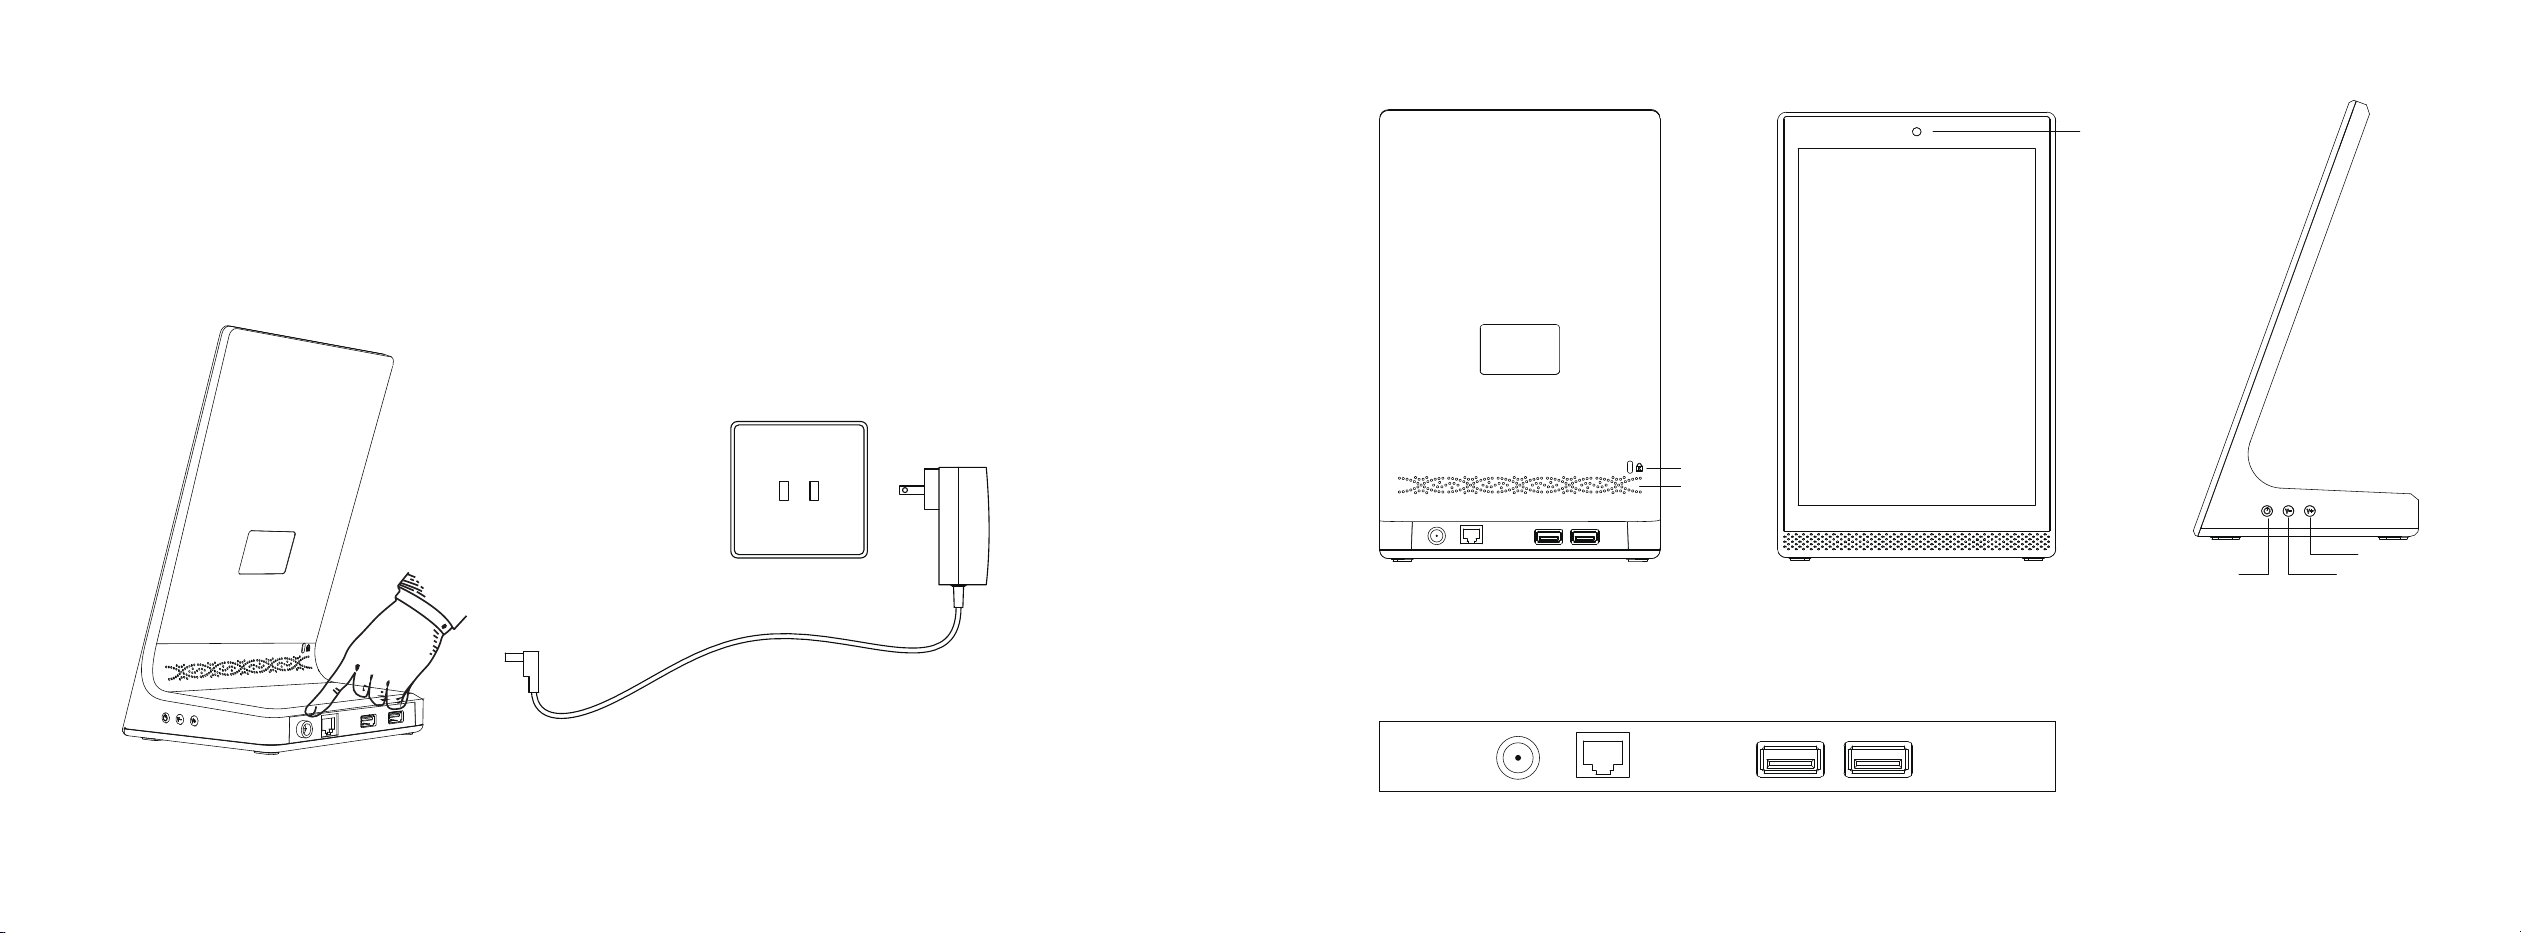
Plug in the power supply to automatically enter the boot inteace. Press and hold the power button for about 1 second to access the shutdown menu,
and a shutdown dialog box will appear. Tap “Power O”.
USB1 USB2
Camera
Speaker grille
Device Lock
RJ45
Power Plug
Power button
Volume Down
Volume Up
5
4
5.Send Programs via Led A
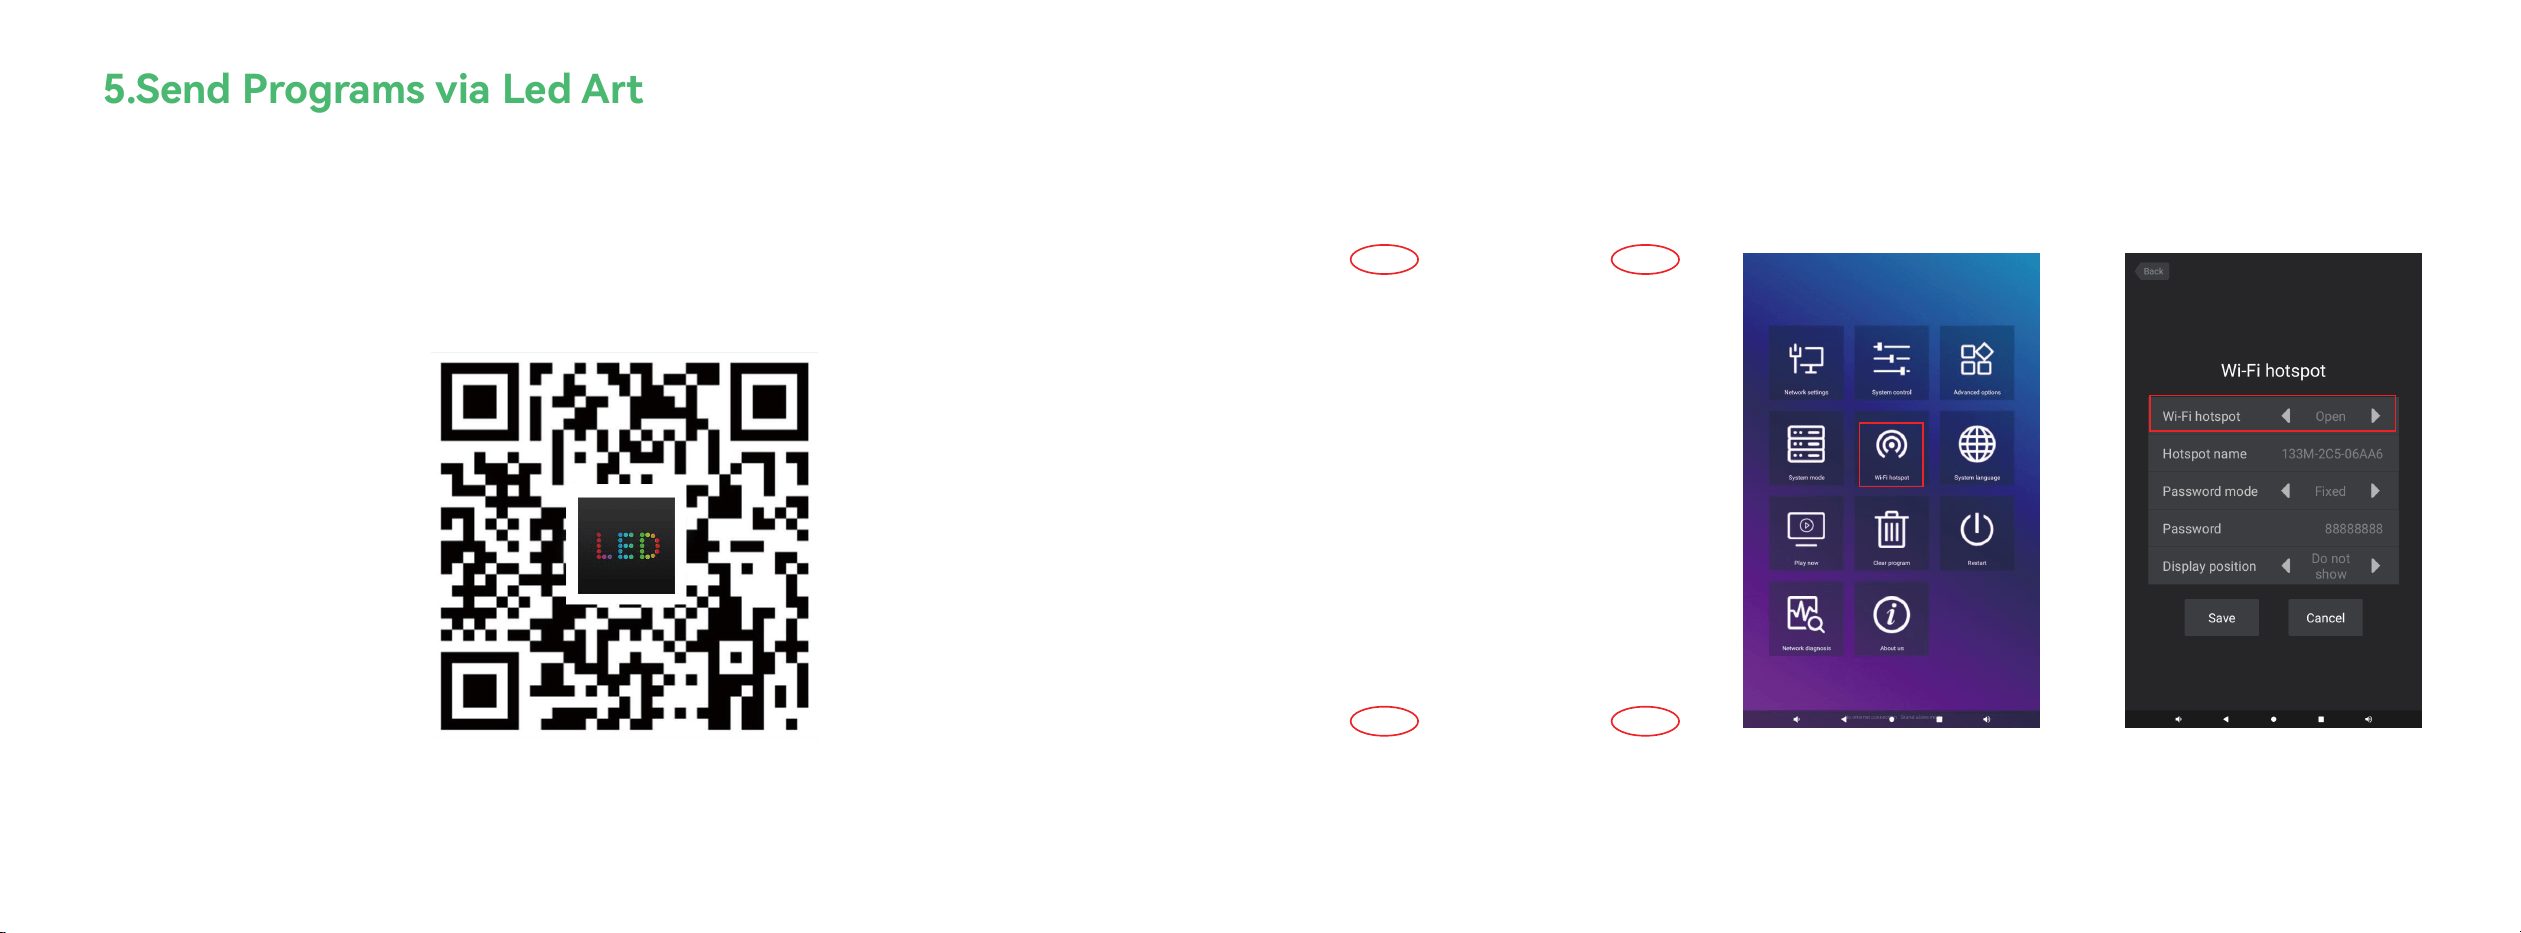
1) Download the cell phone app “Led A”, it can be directly searched and downloaded in Play Store or App Store. Or scan the QR
code below to install.
9
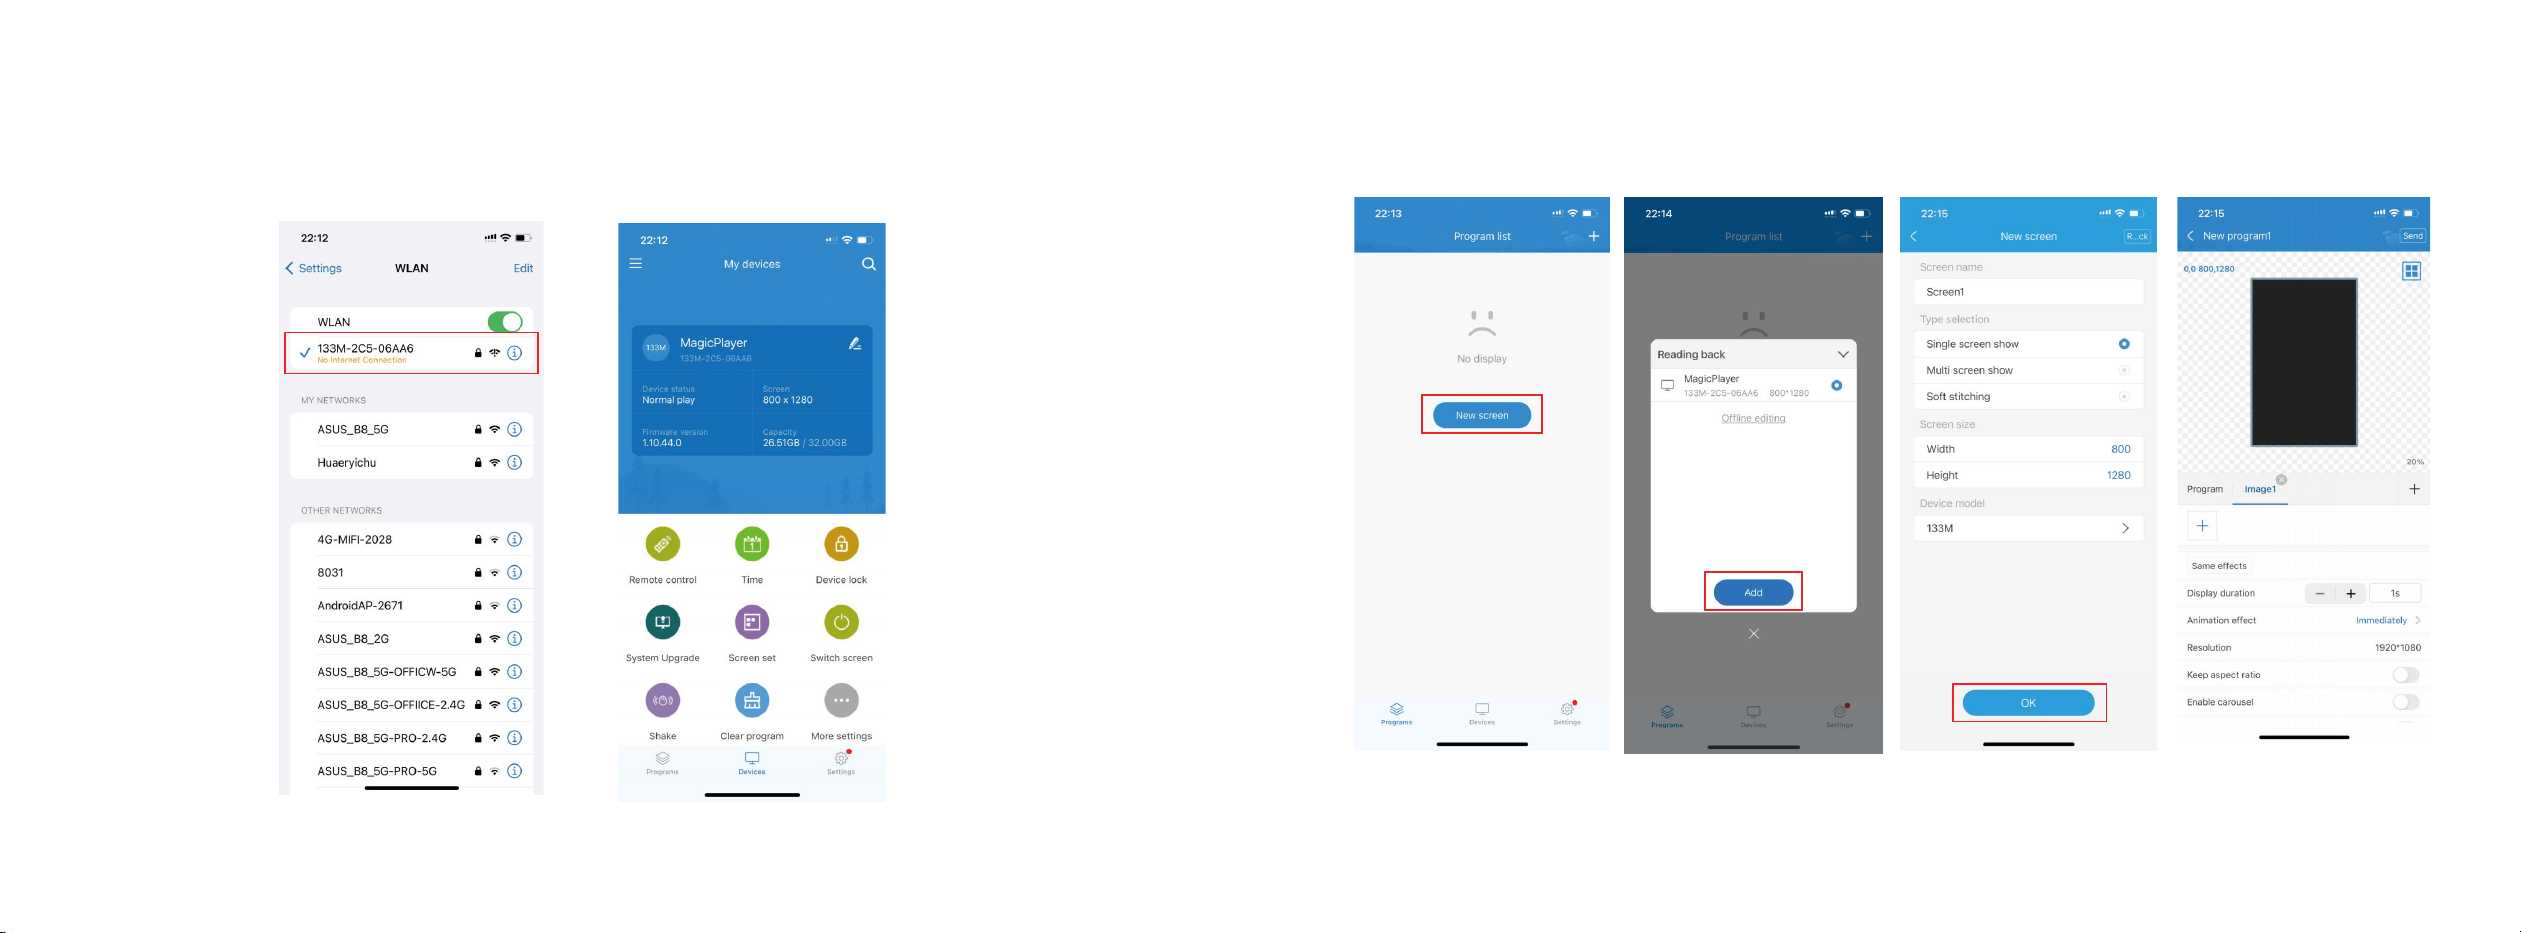
2) We need to turn on the Wi-Fi hotspot of the device. You can quickly tap any corner of the screen three times to open the MagicPlayer
menu. Then tap "Wi-Fi hotspot" and turn it on, the Hotspot name is usually “133M-...”. And you can see the default Wi-Fi password.
Note: If there’s a WiFi or Ethernet available, skip this hotspot setting step. And make sure your phone and the device are connected to the
same Wi-Fi.
76
Ⅰ Attention
Ⅱ Component Introduction
Ⅲ Specications
Ⅳ Introduction of Button and Inteaces
V Send programs via LedA
VI Play programs via USB ash drive
3) Open the Wi-Fi settings on your phone, nd the device's hotspot name, enter the password, and connect. Open the Led A app.
After a successful connection, the Led A can automatically detect the device information.
4) Select the "Programs" module, click "New Screen", it will automatically search for online devices, select a device, read back the device's
screen default size, and then tap "OK".
9
8
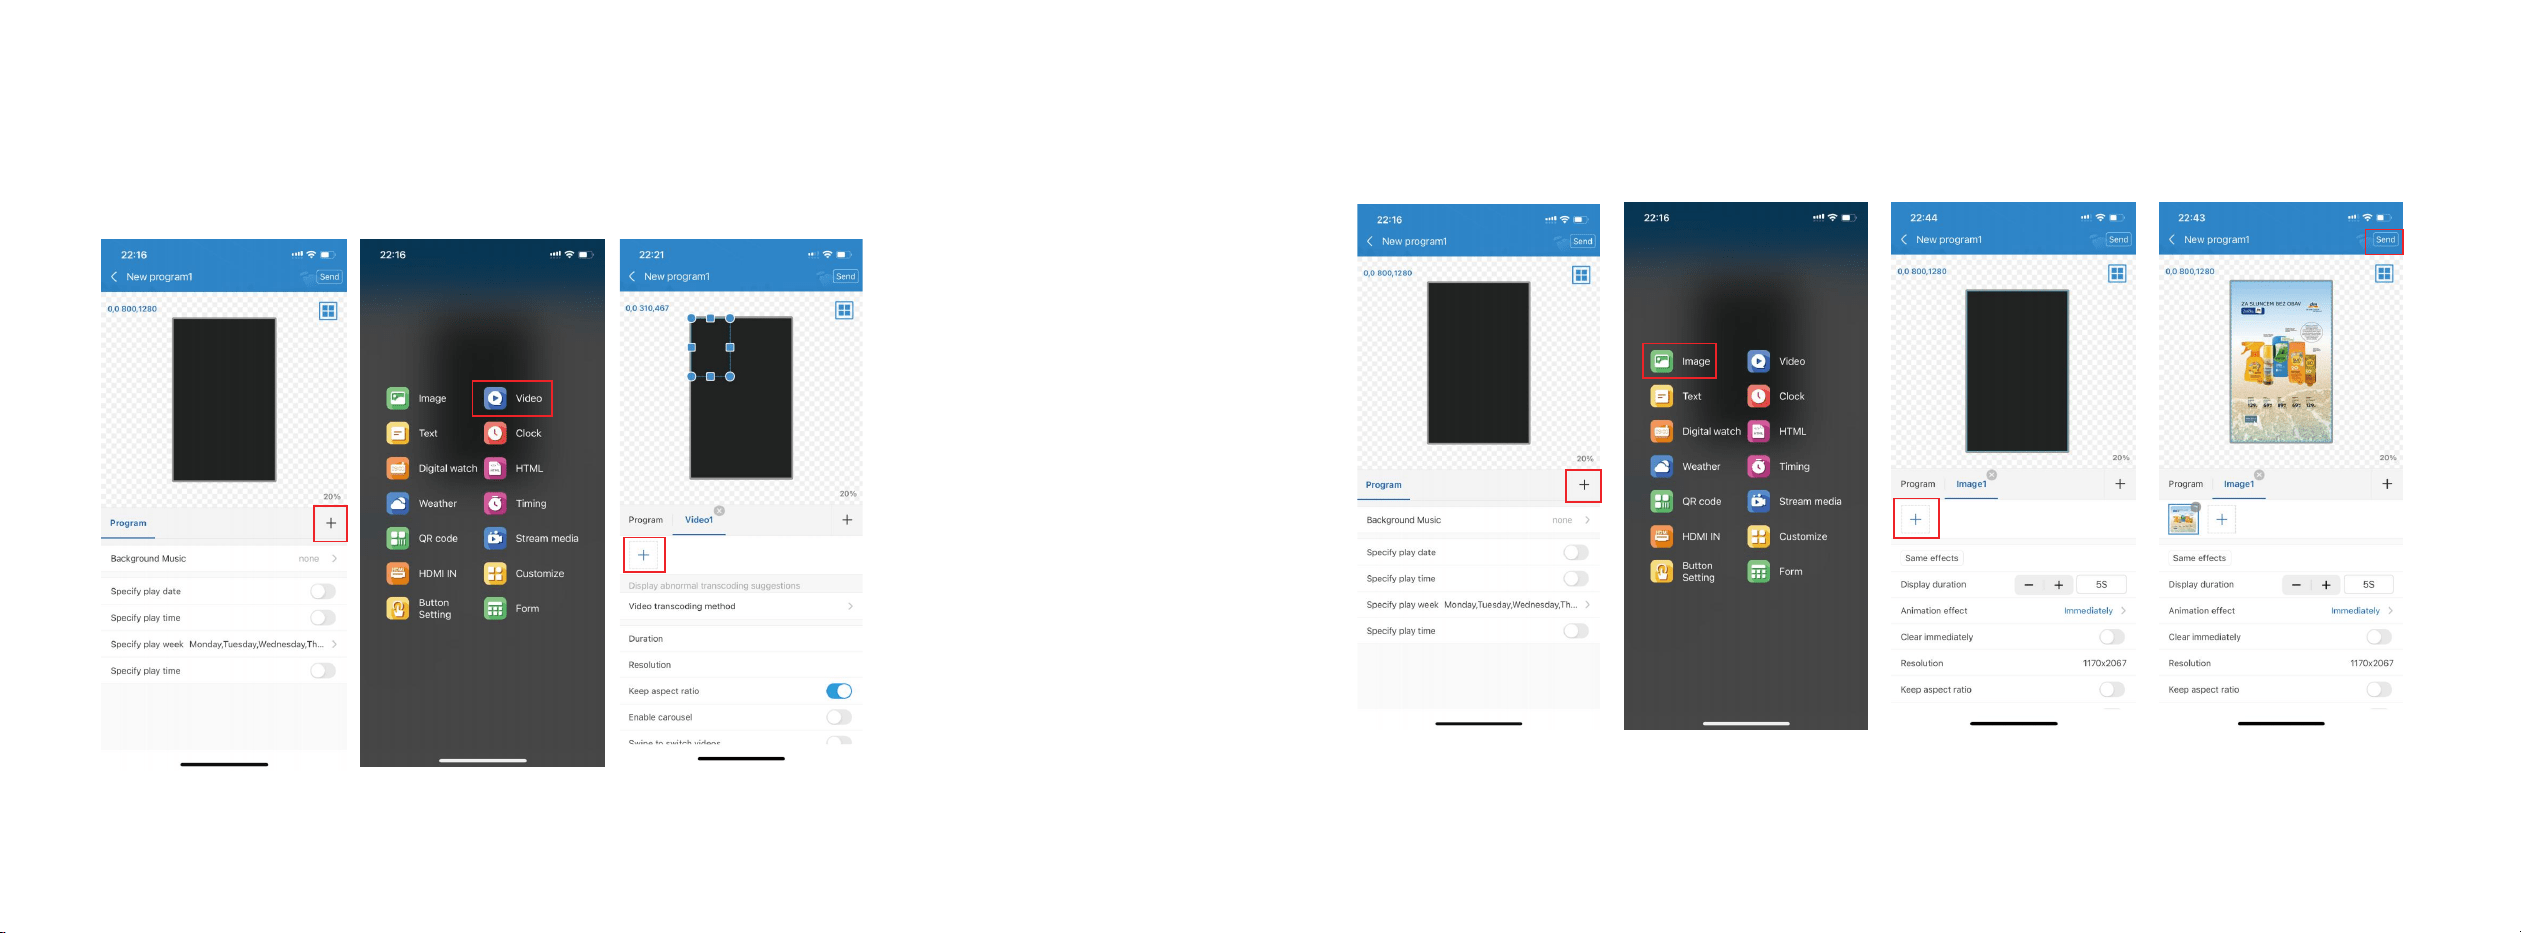
5) Add video
After entering the program editing inteace, tap the "+" on the right to add a video area, then enlarge the video area in the analog
display area, and then tap the "+" below to add multiple videos. The videos will play in a loop.
After adding a picture, you can modify the picture display duration, animation eects, and display eects below the picture list.
6) Add pictures
Similar to video, click the "+" on the right to add a picture area, then enlarge the picture area in the simulation display area, and then
tap the "+" below to add multiple pictures, and the pictures will play in a loop.
11
10
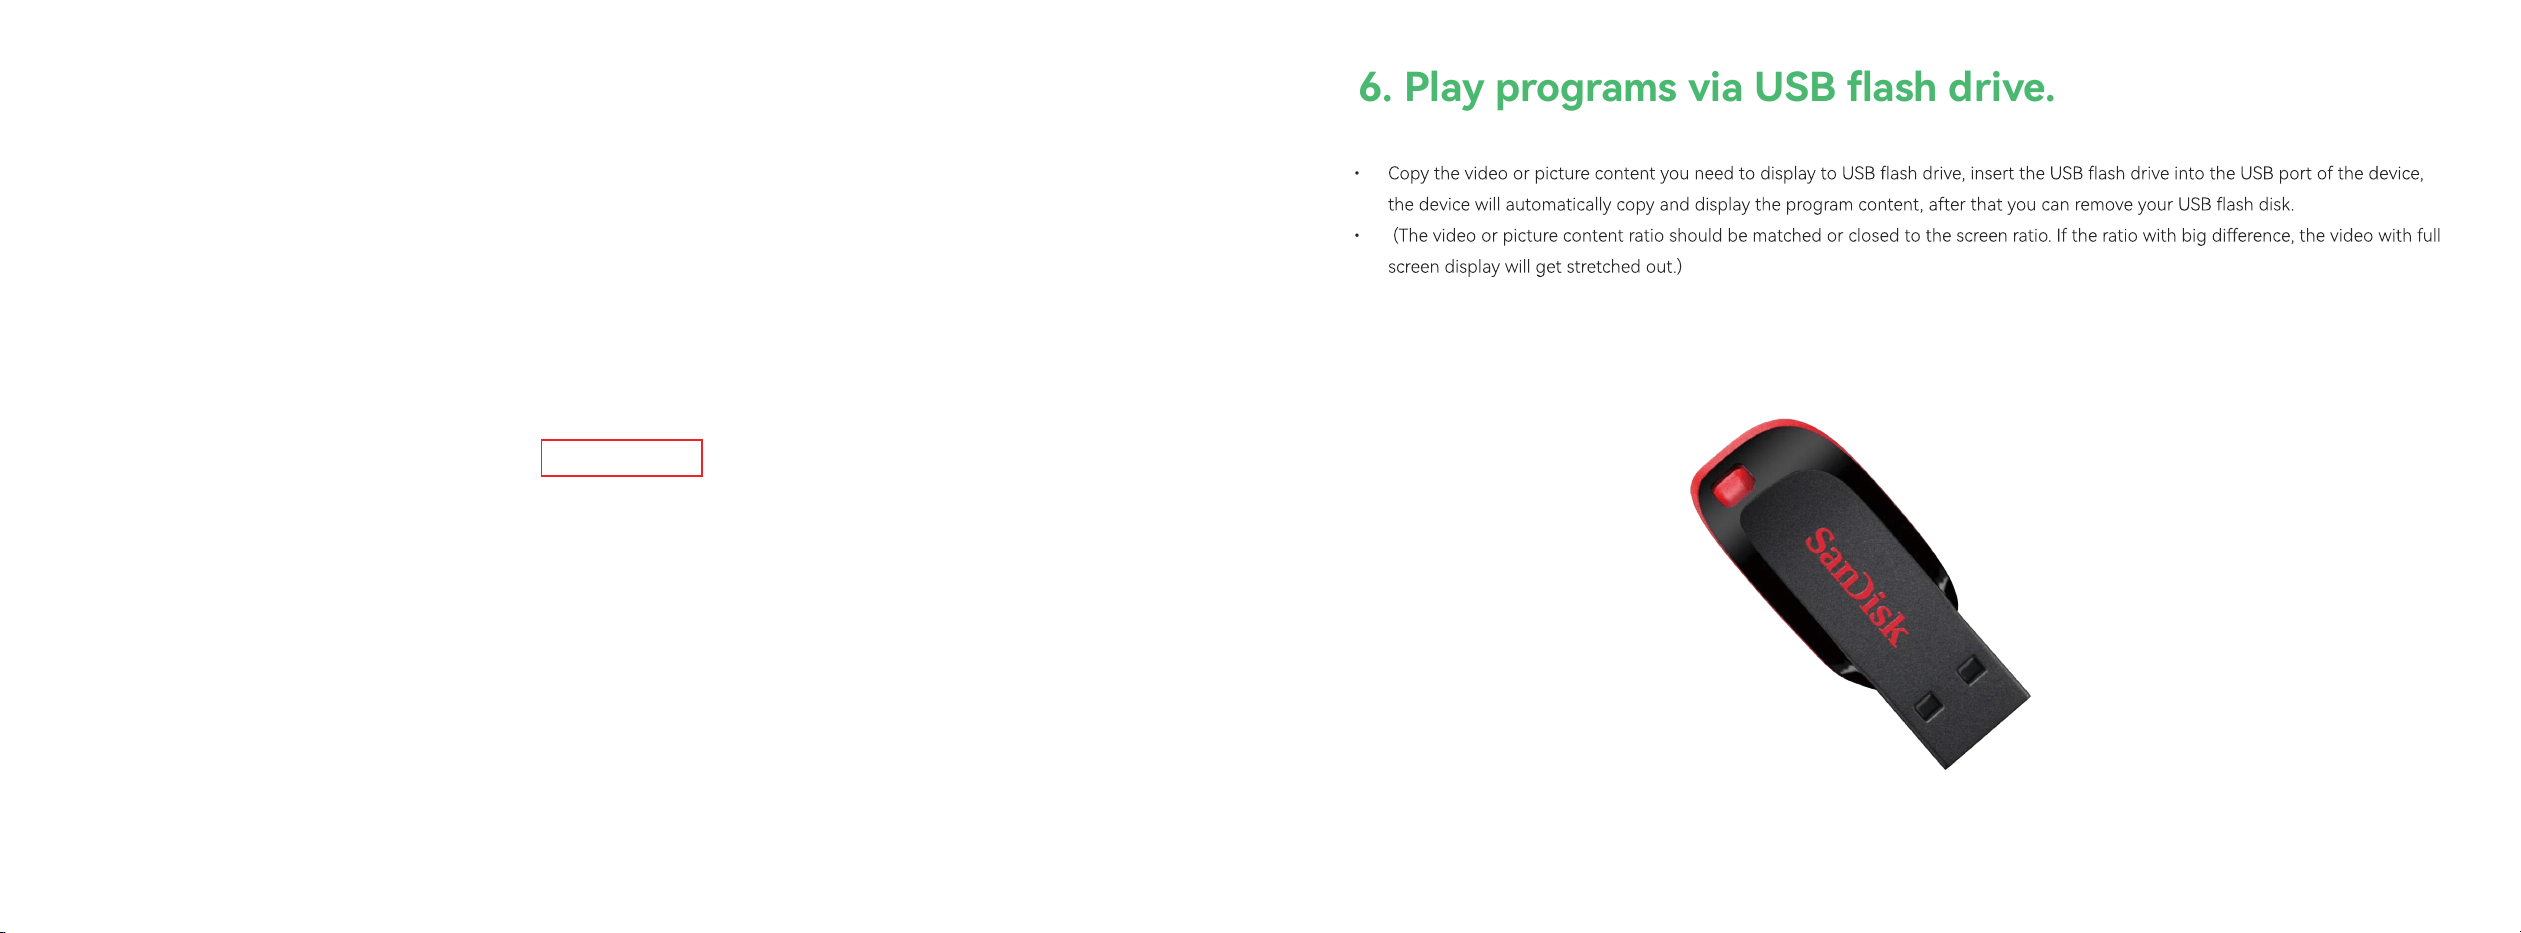
6. Play programs via USB ash drive.
7) Layer overlay
The bottom layer is added rst, and the overlays added later are displayed on top. As shown in the gure below, the picture
area is superimposed on the video area to play, and the text area is superimposed on the video and picture area to play.
Features:
1) Each area can be enlarged and reduced and dragged arbitrarily;
2) The background of text and clock is transparent by default, so you can add video / picture as the background before adding
text / clock rst.
13
12
FCC Statement
This equipment has been tested and found to comply with the limits for a Class B digital device, pursuant to pa 15 of the FCC rules.
These limits are designed to provide reasonable protection against harmful inteerence in a residential installation. This equipment
generates, uses and can radiate radio frequency energy and, if not installed and used in accordance with the instructions, may cause
harmful inteerence to radio communications. However, there is no guarantee that inteerence will not occur in a paicular installation.
If this equipment does cause harmful inteerence to radio or television reception, which can be determined by turning the equipment o
and on, the user is encouraged to t to correct the inteerence by one or more of the following measures:
-Reorient or relocate the receiving antenna.
-Increase the separation between the equipment and receiver.
-Connect the equipment into an outlet on a circuit dierent from that to which the receiver is connected.
-Consult the dealer or an experienced radio/TV technician for help.
To assure continued compliance, any changes or modications not expressly approved by the pay.
Responsible for compliance could void the user’s authority to operate this equipment. (Example- use only shielded inteace cables when
connecting to computer or peripheral devices).
This equipment complies with Pa 15 of the FCC Rules. Operation is subject to the following two conditions:
(1) This device may not cause harmful inteerence, and
(2) This device must accept any inteerence received, including inteerence that
may cause undesired operation.
FCC Radiation Exposure Statement:
The equipment complies with FCC Radiation exposure limits set foh for uncontrolled environment. This equipment should be installed
and operated with minimum distance 20cm between the radiator and your body.